Medela SoftCup Gebrauchsanweisung
Spezial-trinkbecher
Vorschau ausblenden
Andere Handbücher für SoftCup:
- Gebrauchsanweisung (2 Seiten) ,
- Gebrauchsanweisung (21 Seiten)
Quicklinks
EN
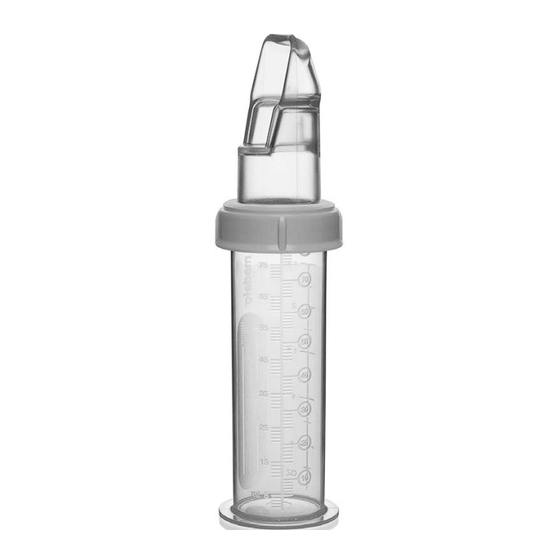
SoftCup™
Advanced Cup Feeder
Instructions for use
The SoftCup Advanced Cup Feeder facilitates
SoftCup™
feeding babies with sucking difficulties. It is an
Advanced Cup Feeder
excellent alternative to cup feeding.
Assembly
Gebrauchsanweisung
Lid
SoftCup™
Spezial-Trink becher
Pad
Silicone reservoir
Mode d'emploi
SoftCup™
Valve membrane
Valve plate
Biberon-tasse spécial
High rim on the upper side
Bottle
1. Press membrane onto valve plate (upper side),
so that the stud goes completely through the
central hole.
2. Pour required amount of milk into the bottle.
The milk should be at room temperature.
3. Put assembled valve across the mouth of the
bottle (make sure that the membrane and high
rim of valve plate are facing upwards).
4. Place the reservoir over the valve plate and
screw all the parts together with the lid.
Filling the Reservoir
Sqeeze
Release
1. Hold the feeder upright and remove some air
from the reservoir by squeezing below the pads.
2. Keep squeezing and tip the feed er upside
down.
After each feeding
3. Release the pads and some milk will enter the
reservoir.
If there is some milk left in the feed er, hold it nearly
horizontal over a sink before unscrewing the lid.
4. Repeat filling steps 1–3 until the reservoir is
The valve should remain in the reservoir, to prevent
al most filled, approx imately up to the bottom of
milk from spilling. Take the feeder apart, making
the pads. As baby is fed, the reservoir will auto-
sure that the valve is separated from the reservoir.
matically refill by squeez ing just below the pads.
Flush cold water through the slit in the pads of the
reservoir to remove as much milk residue as pos-
Feeding the Baby
sible. Wash all parts in warm soapy wa ter. Rinse
thoroughly with cold wa ter. Do not turn the re ser-
1. Hold feeder horizontally, with a slight angle
voir inside out or push bru shes, etc. through the slit
up wards on the bottom of the bottle. Posi tioning
in the reservoir.
is very similar to holding a pencil. Angle the fee-
Helpful Hints
der so the air that remains rises to the end of the
bottle. Angling the bottle in this manner is essen-
Reservoir not filling properly
tial to the auto matic refill feature of the reservoir.
Make sure the slit in the pad is open. Use stron ger
finger pressure to help the flow of milk.
Reservoir not refilling auto ma tically
If thickened supplements are used, check that the
air-groove in the disk has not become blocked.
Feeder leaking
If the feeder leaks, check that the feeder has been
correctly assem bled. The stud of the valve must be
properly inserted through the hole in the disk. The
lid must be firmly screwed onto the bottle. Make
sure the sup plement is not too hot. The feeder is
designed for use with supplement at room tempe-
rature and should not be used with hot liquids.
2. Begin the flow of milk by gently squeezing the
Check to see if either the valve membrane or reser-
two pads on both sides of the reservoir. This will
voir is visibly damaged and needs replacing.
push the milk in the feeding tip of the reservoir.
Material
3. Use the tip of the reservoir to tickle baby's
Reservoir and valve membrane: Silicone
mouth open. Lay the rim of the reservoir on
Other parts: Polypropylene
baby's lower lip.
Disposal
According to local regulations.
4. Tip the feeder so that the milk pooling in the
reservoir is fed to baby.
Medela also offers a Disposable Baby Cup Feeder.
It is available in sets of 10 pieces.
The milk should be lapped by the baby and with
encouragement this will automatically happen.
Please seek consultation when using this product
and follow recommendations from professionals.
This symbol indicates that the packaging contains
products intended to come in contact with food
Important Safeguards
according to regulation 1935/2004.
Plastic bottles and component parts become brittle
Ordering Specifications
when frozen and may break when dropped. Also,
Art. No.
Description
bottles and component parts may become dama-
820.7004
Reservoir
ged if mishandled, e.g. dropped, over-tightened,
820.0014
Valve membrane
or knocked over. Take appropriate care in handling
810.0503
Valve plate
bottles and components. Do not use the breast
810.7066
Lid
milk if bottles or components become damaged.
810.0137
Bottle
Cleaning and Sanitizing
the Feeder
Before first use and once daily
The disassembled parts of the feed er should be
boiled for 5 min., prefer ably in distilled water. When
used in hospitals all disassem bled parts can be
autoclaved to a maximum of 134 °C for 3 (or 18)
min. or 125 °C for 15 min. To avoid dam age dur ing
sterilization, sterilize parts without applying external
pressure on parts.
DE
SoftCup™
3. Das Mundstück loslassen, Milch fliesst jetzt in
das Mundstück.
Spezial-Trink becher
4. Schritte 1 bis 3 wiederholen, bis das Mundstück
ungefähr bis unterhalb der Kammern gefüllt ist.
Der SoftCup Spezial-Trinkbecher erleichtert bei
Wenn dem Baby die Milch verabreicht wird, füllt
grossen Saugproblemen die Nahrungseingabe.
sich das Mundstück durch Zusammendrücken
So mit ist er eine ausgezeichnete Alternative zur
unterhalb der Kammern automatisch nach.
Be cherfütterung.
Dem Baby Milch geben
Zusammensetzen
1. Den Trinkbecher wie einen Bleistift halten,
Schraub-Deckel
Bo den der Flasche leicht aufwärts, so dass die
Restluft im Flaschenboden bleibt. Die richtige
Haltung ist sehr wichtig, damit sich das Mund-
stück durch Zusammendrücken unterhalb der
Kammern automatisch nachfüllt.
Kammer
Löffelförmiges Mundstück
Ventil-Membrane
Ventil-Plättchen mit
erhöhtem Rand auf der Oberseite
2. Den Milchfluss durch leichten Druck auf beide
Kammern einleiten.
Milchflasche
3. Das weiche Ende des Mundstücks benützen,
um den Mund des Babys zu öffnen. Den Rand
des Mundstücks auf die Unterlippe des Babys
legen.
4. Den Trinkbecher so halten, dass die Milch, die
1. Membrane auf das Ventil-Plättchen (Oberseite)
in den löffelförmigen Teil des Mundstücks ge-
drücken, so dass das Zäpfchen vollständig ein-
flos sen ist, dem Baby verabreicht werden kann.
rastet.
Die Milch sollte vom Baby aufgeschleckt werden
2. Gewünschte Menge Milch in die Flasche füllen.
und wenn man es dazu ermuntert, wird das auto-
Die Milch sollte Raumtemperatur haben.
matisch geschehen. Lassen Sie sich bitte in Bezug
3. Zusammengesetztes Ventil auf den Flaschen-
auf die Verwendung dieses Produkts beraten und
befolgen Sie die Empfehlungen der Fachleute.
rand legen (sicherstellen, dass die Membrane
und der erhöhte Rand des Plättchens nach
Wichtige Sicherheitshinweise
oben weisen).
Plastikflaschen und andere Bestandteile können
4. Mundstück auf das Ventil-Plättchen stellen,
durch Einfrieren brüchig werden und zerbre-
Schraub-Deckel darüber stecken und fest
chen, wenn sie fallen. Auch bei unsachgemä-
schrauben.
ßem Gebrauch können Flaschen und andere
Bestandteile beschädigt werden, z. B. wenn sie
Mundstück füllen
fallen gelassen, zu fest zusammengeschraubt oder
umgestoßen werden. Gehen Sie mit den Flaschen
und Bestandteilen entsprechend vorsichtig um.
Verwenden Sie die Muttermilch nicht, wenn die
Drücken
Flasche oder Bestandteile beschädigt wurden.
Loslassen
Reinigen und Auskochen
des Spezial-Trinkbechers
Vor der ersten Anwendung und einmal täglich
Alle zerlegten Teile des Trinkbechers 5 Min. aus-
kochen. Wenn Kalkreste erscheinen, destilliertes
Wasser verwenden oder etwas Speise-Essig ins
1. Flasche aufrecht halten und etwas Luft aus dem
Wasser geben. Im Spital können alle zerlegten Teile
Mundstück lassen, indem unterhalb der Kam-
autoklaviert werden, 134 °C 3 (oder 18) Min. oder
mern zusammengedrückt wird.
125 °C 15 Min. Um Verformungen während des
Sterilisierens zu ver mei den, dürfen die Teile zum
2. Mundstück zusammengedrückt halten und die
Autoklavieren nicht belastet oder gestapelt werden.
Flasche auf den Kopf drehen.
FR
Nach jeder Anwendung
SoftCup™
Es wird empfohlen, den SoftCup un mit tel bar nach
Biberon-tasse spécial
der Anwendung zu reinigen. Falls noch Restmilch
im Trinkbecher ist, diesen beinahe horizontal über
den Ausguss halten, bevor der Schraubverschluss
Le biberon-tasse SoftCup facilite l'alimentation
gelöst wird. Das Ventil sollte im Mundstück bleiben,
des bébés rencontrant des difficultés de succion
um das Herausspritzen der Milch zu vermeiden. Den
ou nécessitant un complément de lait. Il constitue
Trinkbecher auseinandernehmen und die Mem brane
ainsi une excellente alternative à l'alimentation au
vom Ventil-Plättchen trennen. Damit alle Milch reste
gobelet.
entfernt werden, das Mundstück mit Seifen wasser
Montage
füllen und durch Druck auf die Kammern ent leeren.
Diesen Vorgang mit klarem Wasser wie der holen. Alle
Bague filetée
Teile in warmem Seifenwasser reinigen und gründ-
lich mit kaltem Wasser spülen. Das Mund stück
nicht um stülpen und keine Bürsten usw. durch den
Schlitz im Mundstück pressen.
Réservoirs d'admission du liquide
Hinweise
Embout buccal souple en forme de tasse
Mundstück wird nicht richtig gefüllt
Sicherstellen, dass der Schlitz im Mund stück offen
Membrane
ist. Stärkeren Druck auf das Mundstück ausüben,
um den Fluss in Gang zu bringen.
Corps de valve anti-retour
avec rebord
Mundstück füllt sich nicht auto matisch nach
Falls dickliche Flüssigkeit verwendet wird, ist sicher -
zustellen, dass diese den Luftschlitz im Ventil-Plätt-
chen nicht blockiert.
System leckt
Biberon
Wenn das System leckt, kontrollieren, ob der Trink-
becher richtig zusammengesetzt ist. Das Zäpfchen
der Membrane muss vollständig im Loch des Ventil-
Plättchens stecken. Der Schraub-Deckel muss
fest auf die Flasche geschraubt sein. Sicherstellen,
1. Introduire la membrane dans la valve anti-retour
dass die Flüssigkeit nicht zu heiss ist. Kontrollieren,
(face supérieure) de manière à ce que le petit
ob entweder die Membrane oder das Mundstück
ergot soit complètement enclenché.
be schädigt ist und ersetzt werden muss.
2. Verser la quantité de lait voulue dans le biberon.
Material
Le lait doit être à température ambiante.
Mundstück und Ventilmembrane: Silikon
Restliche Teile: Polypropylen
3. Poser la valve (corps + membrane) sur l'ouverture
du biberon en veillant à ce que la membrane et le
Entsorgung
rebord soient orientés vers le haut.
Gemäss den lokalen Vorschriften.
4. Poser ensuite l'embout buccal sur la valve,
Für den Einmalgebrauch eignet sich der Medela
introduire la bague par-dessus et la visser.
Einweg-Trinkbecher her vorragend. Er ist in Sets
à 10 Stück erhältlich.
Remplissage de l'embout
Dieses Symbol zeigt an, dass die Verpackung
gemäss Verordnung 1935/2004 Produkte enthält,
die dazu bestimmt sind, mit Lebensmitteln in
Appuyer
Berührung zu kommen.
Relacher
Bestellangaben
Art.Nr.
Beschreibung
820.7004
Löffelförmiges Mundstück
820.0014
Ventil-Membrane
810.0503
Ventil-Plättchen
810.7066
Schraubdeckel
810.0137
Milchflasche
1. Tenir le biberon vertical et appuyer au-dessous
des 2 réservoirs d'admission du liquide pour
laisser s'échapper un peu d'air de l'embout.
2. Tout en maintenant la pression sur l'embout
buccal, retourner le biberon à l'envers.
3. Relâcher la pression; le lait s'écoule maintenant
Après chaque utilisation
dans l'em bout buccal.
Au cas où il resterait du lait dans le biberon, tenir
celui-ci pratiquement à l'horizontale au-dessus de
4. Recommencer la procédure décrite aux points
l'évier, avant de dévisser la bague. La valve doit,
1 à 3 de manière à remplir l'embout buccal
en effet, rester dans l'embout pour éviter toute
env. jusqu'à la limite inférieure des orifices
éclaboussure. Démonter le biberon et retirer la
d'admission. Lorsque l'enfant boit, l'embout se
membrane de la valve. Introduire de l'eau par la
remplit automatiquement après compression
fente afin de rincer les réservoirs d'admission du
des réservoirs d'admission du liquide.
liquide et évacuer au maximum tout résidu de
lait. Nettoyer tous les com posants dans de l'eau
Administration du lait à l'enfant
chaude savonneuse, puis les rincer soigneusement
1. Tenir le biberon à la manière d'un crayon, en
à l'eau froide. Ne pas retourner l'embout. Ne pas
in clinant légèrement le fond de celui-ci vers le
introduire de goupillon (ou autres brosses) par la
haut afin que l'air résiduel y reste concentré. La
fente de l'em bout.
bonne tenue du biberon-tasse est très impor-
tante, car le remplissage automatique de
Remarques
l'embout en dépend.
L'embout ne se remplit pas correctement
Avant l'utilisation, assurez-vous que la fente de
l'embout est bien décollée. Exercer une plus forte
pression sur l'embout pour activer l'écoulement
du liquide.
L'embout ne se remplit pas automatiquement,
une fois que l'enfant a commencé à boire
En cas d'utilisation d'un liquide épaissi, s'assurer que
celui-ci ne bloque pas la fente d'aération de la valve.
2. Activer l'écoulement du lait en appuyant légère-
Le système fuit
ment sur les deux côtés de l'embout.
Si le système fuit, vérifier que les différents compo-
sants ont été correctement assemblés: en particu-
3. Utiliser le bord souple de ce dernier pour ouvrir
lier, que l'ergot de la membrane est entièrement
la bouche du bébé, puis poser l'embout sur la
enclenché dans le corps de la valve et que la
lèvre infé rieure.
ba gue est bien vissée. Vérifier également que le
4. Tenir le biberon de manière à ce que le lait con-
liquide ne soit pas trop chaud. Contrôler l'état de la
tenu dans le réservoir en forme de tasse puisse
membrane ou de l'embout qui, en cas de détério-
être ad ministré à l'enfant.
ration, doivent être remplacés.
Le lait doit être lapé par le bébé, ce qui a lieu auto-
Matériaux
matiquement avec un peu d'encouragement.
Embout buccal et membrane: Silicone
Veuillez demander conseil avant d'utiliser ce produit
Autres composants: Polypropylène
et suivre les recommandations des professionnels.
Recyclage
Recommandations importantes
Conformément à la réglementation locale.
Les biberons et composants en plastique sont
fragilisés par la congélation et risquent de se
Pour les utilisations ponctuelles, vous pouvez utili-
briser en cas de chute. De même, les biberons et
ser le gobelet à usage unique Medela, disponible
composants peuvent être endommagés à la suite
par sachet de 10.
d'une mauvaise manipulation, par exemple en cas
de chute, de serrage excessif ou de renversement.
Manipuler avec prudence les biberons et compo-
sants. Ne pas utiliser le lait maternel si les biberons
Ce symbole indique que l'emballage contient des
ou composants sont endommagés.
produits destinés à entrer en contact avec des
denrées alimentaires conformément au règlement
Nettoyage et stérilisation du
N° 1935/2004.
biberon-tasse
Références
Avant la première utilisation et une fois
No d'article Description
par jour
820.7004
Embout buccal en forme de tasse
Faire bouillir 5 min. tous les composants du biberon-
820.0014
Membrane
tasse. Si des résidus calcaires apparaissent, utiliser
810.0503
Corps de valve
de l'eau dis tillée ou ajouter un peu de vinaigre à
810.7066
Bague filetée
l'eau. En milieu hospitalier, toutes les pièces peuvent
810.0137
Biberon
être stérilisées à l'autoclave, 3 (ou 18) min. à 134°C
ou 15 min. à 125°C. Pour éviter toute déformation
lors de la stérilisation, ne pas soumettre à charge les
différents éléments, ni les empiler.

Verwandte Anleitungen für Medela SoftCup


Inhaltszusammenfassung für Medela SoftCup
- Seite 1 If there is some milk left in the feed er, hold it nearly das Mundstück. Es wird empfohlen, den SoftCup un mit tel bar nach dans l’em bout buccal. Au cas où il resterait du lait dans le biberon, tenir...
- Seite 2 Il coperchio deve essere saldamente avvita- oda sıcaklığındaki besin ekleriyle kullanılmak üzere serbatoio sul labbro inferiore del bambino. is. De SoftCup is gemaakt voor voeding op kamer- me ucundaki süt itilmiş olacaktır. to alla botti glia. Assicu rarsi che il liquido non sia 2.