Herunterladen Inhalt Inhalt Diese Seite drucken

Werbung

Verfügbare Sprachen
  • DE

Verfügbare Sprachen

  • DEUTSCH, seite 1
ScreenStar
Karaoke System
10029142 10029143 10029357 10029358
www.auna-multimedia.com

Werbung

Inhaltsverzeichnis
loading

Inhaltszusammenfassung für auna 10029142

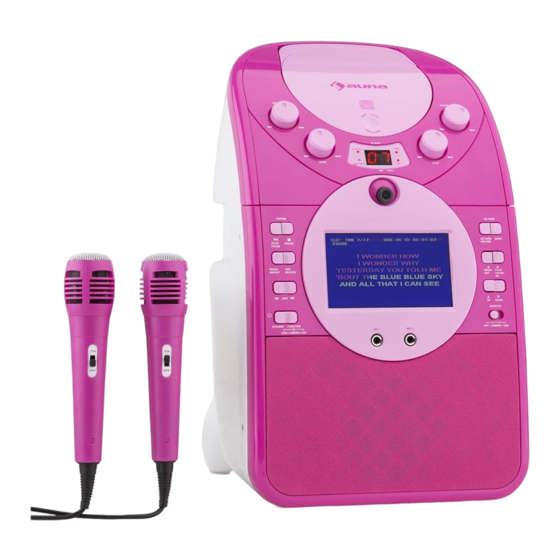
  • Seite 1 ScreenStar Karaoke System 10029142 10029143 10029357 10029358 www.auna-multimedia.com...
  • Seite 2: Sicherheitshinweise

    Sehr geehrter Kunde, zunächst möchten wir Ihnen zum Erwerb Ihres Gerätes gratulieren. Bitte lesen Sie die folgenden Anschluss- und Anwendungshinweise sorgfältig durch und befolgen Sie diese um möglichen technischen Schäden vorzubeugen. Sicherheitshinweise • Diese Bedienungsanleitung dient dazu, Sie mit der Funktionsweise dieses Produktes vertraut zu ma- chen.
  • Seite 3: Technische Daten

    Technische Daten Atrikelnr. 10029142, 10029143, 10029357, 10029358 Schaltnetzteil AC 100-240V ~50/60Hz Stromversorgung -> DC 5,8V 2000mA ( Ausgangsleistung 5W RMS an 3Ω Frequenzgang 100Hz - 20kHz SNR 50dB Dynamisch, -73dB, 600Ω Mikrofon Anschluss: 6,3mm Klinke Lieferumfang Gerät Netzteil AV Kabel...
  • Seite 4 Inbetriebnahme und Anschlusse Netz-Anschluss Verbinden Sie das Gerät mit dem mitge- lieferten Netzteil mit einer gewöhnlichen Haushaltssteckdose. Verbindung mit TV / VCR / Home Theater Diese Karaoke-Anlage kann wie eine Videokamera an Ihre Heimkino-Anlage oder den Fernseher angeschlossen wer- den. Verbinden Sie den Video-Ausgang (Vi- deo Out) des Geräts mit dem Video-Ein- gang (Video In) Ihres TV-Geräts.
  • Seite 5 Mikrofon Schließen Sie das Mikrofon an einer der beiden MIC-Buchsen an. Jedes dynamische Mikrofon mit 6,3mm- Klinkenstecker kann angeschlossen wer- den. Optional: Externe Abspielgeräte Sie können externe Abspielgerät wie Smartphones, MP3-Player etc. 3,5mm-Audiokabel am LINE IN-Eingang an der Rückseite des Geräts anschließen. Achten Sie darauf, die Ausgabelautstärke des externen Geräts hoch genug einzu- stellen.
  • Seite 6 Bedienelemente Front...
  • Seite 7 Display CD-Fach (drücken zum Öffnen) MIC Volume Regler (Mikrofon Lautstärke) Master Vol (Gesamtlautstärke) Play/Pause-LED AVC Regler (Automatic Voice Control) CDG LED (leuchtet bei eingelegter CD-G) Programm-Anzeige (wenn Playliste pro- Display (Details siehe obere Abbildung)) grammiert) Monitor Repeat-Anzeige (zeigt REP Modus an) Integrierter Lautsprecher AUX/Kamera-LED ECHO Regler...
  • Seite 8 Control Panel Kamera MIC 2 Anschluss SD Card: RECORD CDG / CAMERA / AUX FUNCTION Schalter MODE STANDBY / POWER PLAY / PAUSE / RECHTS / OK LINKS / MENU / EXIT NACH UNTEN PROG / REPEAT NACH OBEN USB: RECORD Monitor-Umschalter MIC 1 Anschluss STOP / CD/USB FUNCTION...
  • Seite 9 Rückseite Line In (3.5mm) DC Netzteilanschluss Audio Out (R) USB-Slot Audio Out (L) SD-Slot Video Out...
  • Seite 10: Bedienung

    Bedienung Basisfunktionen • Ein-/Ausschalten: Drücken Sie STANDBY ( ) zum Einschalten und Ausschalten des Geräts. Schalten Sie das Gerät aus, wenn es nicht benutzt wird. Trennen Sie es vom Netzstrom, wenn es für einen län- geren Zeitraum nicht benutzt wird. •...
  • Seite 11 • AVC (Automatic Voice Control): Aktivieren Sie AVC mit dem AVC-Regler. Das System greift bei Multi- plex-Karaoke-CDs in die Wiedergabe ein: Sobald gesungen wird, wird die aufgenommene Pilot-Spur stummgeschaltet. Je höher AVC eingestellt wird, desto sensibler reagiert das System. • Master- und MIC Volume: Die Mikrofon- und die Gesamtlautstärke können in jedem Modus unabhän- gig voneinander eingestellt werden.
  • Seite 12 Sie können Ihre Performance in Verbindung mit einem externen, am LINE IN angeschlossenen Abspielgerät aufzeichnen und digital auf einer eigesteckten SD-Karte speichern: • Entfernen Sie die Kappe von der Kameralinse und stecken Sie eine passende SD-Karte in den SD- Kartenslot ein. •...
  • Seite 13: Troubleshooting

    Trouble Shooting Problem Mögliche Ursache / Mögliche Lösung Überprüfen Sie die Netzverbindung. Lässt sich das Gerät weiterhin nicht Netzteil ist nicht mit der einschlaten, prüfen Sie, ob Strom an Gerät lässt sich nicht einschal- Steckdose oder dem Netz- der genutzten Steckdose anliegt: Ste- ten.
  • Seite 14: Hinweise Zur Entsorgung

    Hinweise zur Entsorgung Elektroaltgeräte Befi ndet sich die diese Abbildung (durchgestrichene Mülltonne auf Rädern) auf dem Pro- dukt, gilt die Europäische Richtlinie 2002/96/EG. Diese Produkte dürfen nicht mit dem normalen Hausmüll entsorgt werden. Informieren Sie sich über die örtlichen Regelungen zur getrennten Sammlung elektrischer und elektronischer Gerätschaften.
  • Seite 15: Important Safety Advice

    Dear Customer, Congratulations on purchasing this product. Please read and follow these instructions, in order to avoid damaging the item. We do not cover any damages that may arise from improper use of the item or the disregard of the safety instructions. Important Safety Advice •...
  • Seite 16: Technical Data

    Technical Data Art No.. 10029142, 10029143, 10029357, 10029358 AC/DC adaptor AC 100-240V ~50/60Hz Power supply -> DC 5.8V 2000mA ( Output 5W RMS @ 3Ω Frequency response 100Hz - 20kHz SNR 50dB Dynamic, -73dB, 600Ω Mikrophone Connector: 6.3mm audio Scope of delivery...
  • Seite 17: Set-Up And Connections

    Set-Up and Connections Connecting AC Power Plug the supplied power adapter small end into DC jack located on the rear pa- nel, plug the adapter into the standard AC wall socket. CAUTION: The karaoke machine is desig- ned for operation with a DC 5.8V power adaptor.
  • Seite 18 Microphone • Plug a microphone into the MIC1 or MIC2 jack at the front of your Kara- oke Machine. Their output is mixed with playback from CD/CD+G. • There is an ON/OFF switch on the microphone. Make sure that it sets to ON before use.
  • Seite 19 Controls Front...
  • Seite 20 Display CD tray (press to open) MIC Volume knob Master Vol Play/Pause LED AVC (Automatic Voice Control) CDG LED (indicates CDG) Display (see above drawing for detalis) Program indicator Monitor Repeat indicator Internal speaker AUX/Camera LED Echo knob STANDBY LED...
  • Seite 21 Control Panel Camera MIC 2 input SD Card: RECORD CDG / CAMERA / AUX FUNCTION switch MODE STANDBY / POWER PLAY / PAUSE / RIGHT / OK LEFT / MENU / EXIT PROG / REPEAT DOWN USB: RECORD MONITOR switch MIC 1 input STOP / CD/ USB FUNCTION...
  • Seite 22 Rear: Line In (3.5mm) DC In Audio Out (R) USB slot Audio Out (L) SD slot Video Out...
  • Seite 23: Operation

    Operation Basic Functions • On/Standby: Press STANDBY ( ) to turn the device on/off . Disconnect from AC power when the device is not in use for a longer time. • Insert CDs: Press gently on the CD tray to open it. Insert CDs/CDGs with the printed side facing up. The CD / CD-G will be read automatically.
  • Seite 24 • ECHO: Rotate to adjust the reverb effect for the mic‘ed voice. • AVC (Automatic Voice Control): Can be activated and adjusted by the AVC control knob. The vocals on the Multiplex recording will be muted when the singer starts to sing through the microphone. When the singer stops singing, the vocals will resume to normal.
  • Seite 25 The Line-in jack allows you to connect external music player or external sound source to your Karaoke Machine speakers • Press the FUNCTION button to go to AUX mode. Aux indicator will light up. • Plug a 3.5mm audio cable (not included) into your external music player and connect the other end (3.5mm jack) into the LINE IN jack on the back of your Karaoke Machine.
  • Seite 26 Trouble Shooting Problem Possible cause / possible solution • adaptor plugged into a wall • Plug the AC adaptor into a wall outlet or the connector outlet and plug the connector is not plugged into the into the supply jack on the unit. No power when POWER is on.
  • Seite 27: Environment Concerns

    Environment Concerns According to the European waste regulation 2002/96/EG this symbol on the product or on its packaging indicates that this product may not be treated as household waste. Instead it should be taken to the appropriate collection point for the recycling of electrical and electronic equipment.
  • Seite 28: Avvertenze Di Sicurezza

    Gentile cliente, La ringraziamo per aver acquistato il nostro dispositivo. La preghiamo di leggere attentamente le se- guenti istruzioni e di seguirle per evitare eventuali danni. Non ci assumiamo alcuna responsabilità per danni derivati da una mancata osservazione delle avvertenze di sicurezza e da un uso improprio del dispositivo.
  • Seite 29: Dati Tecnici

    Dati tecnici Articolo numero 10029142, 10029143, 10029357, 10029358 Alimentatore AC 100-240V ~50/60Hz Alimentazione -> DC 5,8V 2000mA ( Potenza in uscita 5W RMS an 3Ω Risposta in frequenza 100Hz - 20kHz SNR 50dB Dinamico, -73dB, 600Ω Microfono Collegamento: connettore jack 6,3mm...
  • Seite 30 Messa in funzione e collegamento Collegamento alla corrente Collegare il dispositivo alla presa con l’alimentatore incluso nella consegna. Collegamento con TV/VCR/ Home Theater Il Karaoke può essere collegato come una videocamera all’Home Theater o alla TV. Collegare l’uscita video (Video Out) del dispositivo con l’ingresso video (Video In) dell’Home Theater/TV.
  • Seite 31 Microfono Collegare il microfono ad uno dei due attacchi MIC. Può essere collegato qualsiasi microfono dinamico con connettore jack 6,3 mm. Opzionale: dispositivo esterno di riproduzione È possibile collegare all’ingresso LINE IN sul retro un lettore esterno (smartphone, lettore MP3) tramite il cavo audio da 3,5 Assicurarsi che il volume di uscita del dis- positivo esterno sia abbastanza alto.
  • Seite 32 Comandi Parte frontale...
  • Seite 33 Display Vano CD (premere per aprire) Manopola volume MIC (volume microfono) Master Vol (volume totale) LED Play/Pause Manopola AV (Automatic Voice Control) CDG LED (si accende con il CD-G inserito). Display (per i dettagli vedere la figura Spia programma (se è programmata una sopra) playlist) Monitor...
  • Seite 34 Pannello dei comandi Camera Attacco MIC2 Card SD: RECORD Interruttore CDG / CAMERA / AUX FUNCTION MODE STANDBY / POWER PLAY / PAUSE / Destra / OK LINKS / MENU / EXIT PROG / REPEAT GIU’ USB: RECORD Interruttore monitor Attacco MIC1 STOP/CD/USB FUNCTION...
  • Seite 35 Retro Line In (3.5 mm) Alimentatore DC Audio Out (R) Slot USB Audio Out (L) Slot SD Video Out...
  • Seite 36 Utilizzo Funzioni di base Accensione/spegnimento: premere STANDBY ( ) per accendere/spegnere il dispositivo. Spegnere il dispositivo in caso di inutilizzo. Disinserire la spina dalla presa in caso di inutilizzo prolungato. Inserire i CD: premere il coperchio CD per aprire il vano CD. Inserire i CD con il lato stampato rivolto verso l’alto.
  • Seite 37 Volume Master e MIC: il volume del microfono e il volume complessivo possono essere impostati in ogni modalità indipendentemente l’uno dall’altro. Funzioni video e registrazione Fonte Video: Selezionare la fonte video con l’interruttore MONITOR. Passare alla posizione: • CAMERA per inviare al televisore testi di canzoni del CD Karaoke e visualizzare sul monitor integ- rato l’immagine in diretta oppure •...
  • Seite 38 • Rimuovere il tappo dalla lente e inserire una scheda SD nella slot apposita. • Posizionare l’interruttore FUNCTION in posizione AUX. • Posizionare l’interruttore MONITOR in posizione CAMERA. Adesso sul monitor si vede l’immagine live della videocamera. • Premere SD CARD RECORD per iniziare la registrazione. Ora si visualizza un punto rosso sul moni- tor –...
  • Seite 39: Risoluzione Dei Problemi

    Risoluzione dei problemi Problema Causa possibile / soluzione possibile Controllare la connessione di rete. Se L’alimentatore è il dispositivo continua a non accender- collegato alla presa si, verificare se ciò dipende dalla cor- Il dispositivo non si accende. all’apposito attacco. rente: collegare un altro dispositivo e verificare eventualmente i fusibili.
  • Seite 40: Dichiarazione Di Conformità

    Smaltimento Se sul prodotto è presente la fi gura a sinistra (il cassonetto dei rifi uti mobile sbarrato), si applica la direttiva europea 2002/96/CE. Questi prodotti non possono essere smaltiti con i rifi uti normali. Informarsi sulle disposizioni vigenti in merito alla raccolta separata di dispositivi elettrici ed elettronici.
  • Seite 41 Estimado cliente: Le felicitamos por la adquisición de este producto. Lea atentamente el siguiente manual y siga cuidado- samente las instrucciones de uso con el fin de evitar posibles daños. La empresa no se responsabiliza de los daños ocasionados por un uso indebido del producto o por haber desatendido las indicaciones de seguridad.
  • Seite 42: Datos Técnicos

    Datos técnicos Número de artículo 10029142, 10029143, 10029357, 10029358 Cable alimentación CA 100-240V ~50/60Hz Suministro eléctrico -> DC 5,8V 2000mA ( Potencia de salida 5W RMS a 3Ω Banda de frecuencia 100Hz - 20kHz Relación señal-ruido 50dB Dinámico, -73dB, 600 Ω...
  • Seite 43 Puesta en marcha y conexiones Conexión de red Conecte el aparato con el cable de ali- mentación a una toma de corriente do- méstica. Conexión a la TV/VCR/Home cinema Este dispositivo de karaoke puede conec- tarse como una cámara de vídeo a su siste- ma de cine en casa o a su televisor.
  • Seite 44 Micrófono Conecte el micrófono a una de las dos entradas MIC. Cada micrófono dinámico puede conec- tarse con una clavija de 6,3 mm. Opcional: reproductor externo Puede conectar un dispositivo de repro- ducción, como un smartphone, reproduc- tor MP3, etc. a la parte trasera del kara- oke (entrada LINE IN) utilizando un cable de audio de 3,5 mm.
  • Seite 45 Controles Parte delantera...
  • Seite 46 Display Volumen MIC (regulador de volumen del Compartimento para CD (pulse para abrir) micrófono) Master VOL (volumen general) LED Play/Pause LED CDG (se ilumina cuando introduce un Regulador AVC (automatic voice control) CD-G) Indicador de programa (al programar una Display (detalles en la ilustración superior) lista de reproducción) Monitor Indicador repetición (muestra el modo REP)
  • Seite 47 Panel de control Cámara Conexión MIC 2 Tarjeta SD: grabar Interruptor CDG/CÁMARA/FUNCIÓN AUX MODO STANDBY/POWER PLAY/PAUSE/DERECHA/OK IZQUIERDA/MENÚ/SALIR ABAJO PROG/REPEAT ARRIBA USB: GRABAR Interruptor monitor Conexión MIC1 FUNCIÓN STOP/CD/USB...
  • Seite 48 Parte trasera Line In (3,5 mm) Conexión cable de alimentación CC Audio out (derecha) Ranura USB Audio out (izquierda) Ranura SD Video out...
  • Seite 49 Utilización Funciones básicas • Encender/apagar: pulse STANDBY ( ) para encender y apagar el aparato. Apague el aparato si no lo utiliza. Desconecte el aparato de la red eléctrica si no lo utiliza durante un periodo determinado de tiempo. • Introducir CD: pulse el compartimento del CD para abrirlo.
  • Seite 50 • AVC (automatic Voice Control): active el AVC con el regulador correspondiente. El sistema acce- de a la reproducción de los CD con pistas de karaoke: cuando comience a cantar, se silenciarán las vocales de la pista grabada. Cuanto más alto regule el AVC, mayor sensibilidad de reacción tendrá...
  • Seite 51 Puede guardar su actuación conectando un dispositivo externo por medio de LINE IN en una tarjeta • Retire la tapa de la lente de la cámara e introduzca una tarjeta SD en la ranura correspondiente. • Seleccione AUX en el interruptor FUNCTION. •...
  • Seite 52: Resolución De Problemas

    Resolución de problemas Problema Posible causa/ posible solución Compruebe la conexión de red. No encienda el aparato. Compruebe si la El cable de alimentación no electricidad llega a la toma de corri- está conectado a la toma de El aparato no se enciende. ente que ha utilizado: enchufe una corriente.
  • Seite 53: Indicaciones Para La Retirada Del Aparato

    Indicaciones para la retirada del aparato Si el aparato lleva adherida la ilustración de la izquierda (el contenedor de basura tacha- do) entonces rige la normativa europea, directiva 2002/96/CE. Este producto no debe arrojarse a un contenedor de basura común. Infórmese sobre las leyes territoriales que regulan la recogida separada de aparatos eléctricos y electrónicos.
  • Seite 54: Consignes De Sécurité

    Chère cliente, cher client, Toutes nos félicitations pour l’acquisition de ce nouvel appareil. Veuillez lire attentivement et respecter les consignes suivantes de branchements et d’utilisation pour éviter d’éventuels dommages techniques. Consignes de sécurité • Ce mode d’emploi sert à vous familiariser aux fonctions de ce produit. Conservez-le bien afin de pouvoir vous y référer à...
  • Seite 55: Fiche Technique

    Fiche technique Numéro d’article. 10029142, 10029143, 10029357, 10029358 Bloc d’alimentation AC 100-240V ~50/60Hz Alimentation électrique -> DC 5,8V 2000mA ( Puissance de sortie 5W RMS à 3Ω Réponse en fréquence 100Hz - 20kHz SNR 50dB Dynamique, -73 dB, 600 Ω...
  • Seite 56 Mise en marche et branchements Raccordement au réseau Brancher l’appareil à une prise de courant domestique à l’aide du bloc d’alimentation fourni. Raccordement à un téléviseur / VCR / en- semble home cinéma Cette chaîne karaoké peut être branchée comme une caméra vidéo à un système home cinéma ou à...
  • Seite 57 Microphone Brancher le microphone à une des deux prises MIC. Tout microphone dynamique avec un connecteur jack 6,3 mm peut être bran- ché à l’appareil. En option : périphériques de lecture Il est possible de connecter des péri- phériques de lecture tels qu’un smart- phone, un lecteur MP3 etc.
  • Seite 58: Éléments De Commande

    Éléments de commande Avant...
  • Seite 59 Affichage Bouton de réglage du volume MIC (volume Compartiment à CD (appuyer pour ouvrir) du micro) Volume master (volume général) Témoin LED de lecture/pause Témoin LED de CDG (s’allume lorsqu’un Réglage AVC (Automatic Voice Control) CD-G est inséré) Indication de programme (lors de la diffusi- Affichage (détails dans schéma plus haut) on d’une liste de lecture programmée) Indication de répétition (affiche le mode...
  • Seite 60 Panneau de commande Caméra Prise MIC 2 Carte SD : ENREGISTRER CDG / CAMÉRA / FONCTION AUX MODE VEILLE / MARCHE LECTURE / PAUSE / DROITE / OK GAUCHE / MENU / QUITTER PROG / REPEAT HAUT USB : ENREGISTRER Bouton marche/arrêt de l’écran Prise MIC 1 ARRÊT / FONCTION CD/USB...
  • Seite 61 Arrière Line In (3.5 mm) Prise secteur DC pour bloc d’alimentation Sortie audio (D) Port USB Sortie audio (G) Fente SD Sortie vidéo...
  • Seite 62 Utilisation Fonctions de base • Allumer/éteindre : appuyer sur STANDBY pour allumer et éteindre l’appareil. Éteindre l’appareil après utilisation. Le débrancher en cas d’inutilisation prolongée. • Insérer des CD : appuyer sur le couvercle du lecteur CD pour ouvrir le compartiment à CD. In- sérer un CD avec la face imprimée vers le haut.
  • Seite 63 • AVC (Automatic Voice Control) : activer la fonction AVC avec le bouton de réglage AVC. Le système intervient dans la diffusion de CD multiplexe karaoké : dès que quelqu’un chante dans le micro, la piste pilote préenregistrée est désactivée. Plus la fonction AVC est réglée à un haut niveau, plus le système est réactif.
  • Seite 64 Brancher des périphériques de lecture à l’entrée LINE IN avec un câble audio de 3,5 mm. Appuyer sur FUNCTION pour basculer en mode AUX. Commander la lecture de la musique depuis le périphérique Il est possible d’enregistrer une performance réalisée avec un périphérique de lecture branché à LINE IN, puis de la sauvegarder au format numérique sur la carte SD insérée dans l’appareil.
  • Seite 65: Résolution Des Problèmes

    Résolution des problèmes Problème Cause possible / solution possible Vérifier le raccordement au réseau. Si l’appareil ne s’allume toujours Le bloc d’alimentation n’est pas, vérifier que la prise fournit de pas branché à la prise ou à Impossible d’allumer l’appareil l’électricité.
  • Seite 66: Information Sur Le Recyclage

    Information sur le recyclage Appareils électriques et électroniques usagés Vous trouverez sur le produit l’image ci-contre (une poubelle sur roues, barrée d‘une croix), ce qui indique que le produit se trouve soumis à la directive européenne 2002/96/ CE. Renseignez-vous sur les dispositions en vigueur dans votre région concernant la coll- ecte séparée des appareils électriques et électroniques.

Diese Anleitung auch für:

Screenstar100291431002935710029358

Inhaltsverzeichnis