Herunterladen Inhalt Inhalt Diese Seite drucken
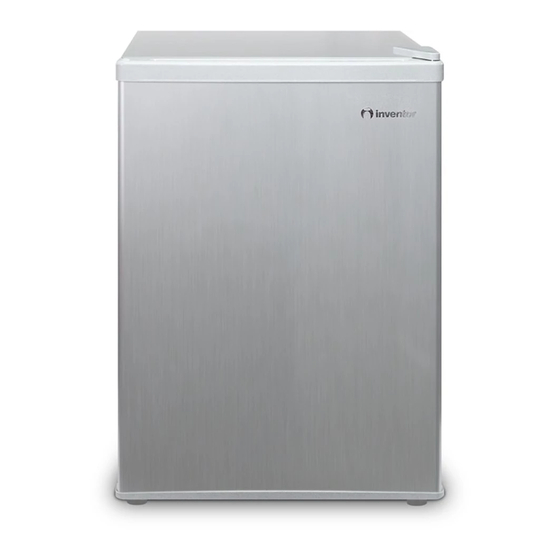
INVENTOR INVMS67A-BS Bedienungsanleitung
Vorschau ausblenden Andere Handbücher für INVMS67A-BS:

Werbung

Verfügbare Sprachen

Verfügbare Sprachen

INVMS67A
INVMS67A-BS
User's Manual
Refrigerator
Εγχειρίδιο Χρήσης
Ψυγείο
Bedienungsanleitung
Kühlschrank
English/Ελληνικά/Deutsch

Werbung

Kapitel

Inhaltsverzeichnis
loading

Inhaltszusammenfassung für INVENTOR INVMS67A-BS

  • Seite 1 INVMS67A INVMS67A-BS User’s Manual Refrigerator Εγχειρίδιο Χρήσης Ψυγείο Bedienungsanleitung Kühlschrank English/Ελληνικά/Deutsch...
  • Seite 2: Inhaltsverzeichnis

    Contents SAFETY WARNINGS ......................1 INSTALLTION ........................1 Location ........................2 Reversing the Door Swing ..................2 Door Space Requirements ..................3 Levelling the Unit ....................... 3 Cleaning Before Use ....................4 Before Using Your Unit ....................4 Interior Accessories ....................4 PRODUCT OVERVIEW ......................
  • Seite 3: Safety Warnings

    1. SAFETY WARNINGS WARNING―Keep ventilation openings, in the appliance enclosure or in the built-in structure, clear of obstruction. WARNING―Do not use mechanical devices or other means to accelerate the defrosting process, other than those recommended by the manufacturer. WARNING―Do not damage the refrigerant circuit. WARNING―Do not use electrical appliances inside the food storage compartments of the appliance, unless they are of the type recommended by the manufacturer.
  • Seite 4: Location

    2.1 Location When selecting a position for your unit you should make sure the floor is fat and firm, and the room is well ventilated. Avoid locating your unit near a heat source, e.g. cooker, boiler or radiator. Also avoid direct sunlight as it may increase the electrical consumption. Extreme cold ambient temperatures may also cause the unit not to perform properly.
  • Seite 5: Door Space Requirements

    4) Slide the Appliance door down about 15cm and off the top hinge pin and lift away from the Appliance. 5) Remove the two screws from top bracket and replace on the otherside.You will need to first remove the plastic caps from the other side.
  • Seite 6: Cleaning Before Use

    Cleaning Before Use Wipe the inside of the unit with a weak solution of bicarbonate soda. Then rinse with warm water using a 'Wrung-out' sponge or cloth. Wash the shelves and salad bin in warm soapy water and dry completely before replacing in the unit. Clean the exterior of the unit with a damp cloth. If you require more information refer to the Cleaning section.
  • Seite 7: Operation

    Small door Thermostat , Pan drain Steel wire shelf Wire steel bar , Leveler leg *All images in this instruction manual are for indication only; please refer to your individual unit for details. 4. OPERATION 4.1 Adjusting the Temperature ◆The temperature selector knob is located on the right hand side wall of the refrigerator interior Setting“Off”...
  • Seite 8: Cleaning

    unit are kept cool. ◆ To prevent transfer of favours and drying out, pack or cover the food separately. Fruit and vegetables do not need to be wrapped. ◆ Always let pre-cooked food cool down before you put in the unit. This will help to maintain the internal temperature of the unit.
  • Seite 9: Switching Of For Long Periods Of Time

    used. Under no circumstances should you attempt to repair the unit yourself. Repairs carried out by inexperienced persons may cause injury or serious malfunction. Contact a qualitatively technician. 6.3 Switching Of for Long Periods of Time When the unit is not in use for a long period of time, disconnect it from the mains supply, empty all food and clean the appliance, leaving the door ajar to prevent unpleasant smells.
  • Seite 10: Disposal

    behind the appliance). In normal temperature conditions, please arrange the thermostat at the middle setting. Before loading the appliance with packages of fresh food, make sure they are cooled to ambient temperature. Ice and frost layer increase energy consumption, so clean the appliance as soon as the layer is 3-5 mm thick.
  • Seite 11 Περιεχόμενα ΟΔΗΓΙΕΣ ΑΣΦΑΛΕΙΑΣ ......................1 ΕΓΚΑΤΑΣΤΑΣΗ ........................1 Τοποθεσία ........................2 Αλλάζοντας την φορά ανοίγματος της πόρτας ............2 Εγκατάσταση ....................... 3 Ευθυγράμμιση της συσκευής ..................3 Καθαρισμός πριν τη χρήση ..................3 Πριν χρησιμοποιήσετε το ψυγείο ................4 Εσωτερικά εξαρτήματα ....................4 ΠΕΡΙΓΡΑΦΗ...
  • Seite 12: Οδηγιεσ Ασφαλειασ

    1. ΟΔΗΓΙΕΣ ΑΣΦΑΛΕΙΑΣ ΠΡΟΕΙΔΟΠΟΙΗ΢Η―Αφιςτε αρκετά ανοίγματα για τον ςωςτό εξαεριςμό τθσ ςυςκευισ. ΠΡΟΕΙΔΟΠΟΙΗ΢Η ―Μθν χρθςιμοποιείτε μθχανικζσ διατάξεισ ι άλλα μζςα για να επιταχφνετε τθν διαδικαςία απόψυξθσ του ψυγείου, εκτόσ αυτϊν που προτείνονται από τον καταςκευαςτι του. ΠΡΟΕΙΔΟΠΟΙΗ΢Η ―Μθν προκαλείτε αλλοιϊςεισ ςτο κφκλωμα ψφξθσ. ΠΡΟΕΙΔΟΠΟΙΗ΢Η...
  • Seite 13 2.1 Σοποκεςία Επιλζξτε ζνα χϊρο καλά αεριηόμενο με ςτακερό και ςκλθρό πάτωμα. Μθν τοποκετείτε τθ ςυςκευι δίπλα ςε πθγζσ κερμότθτασ όπωσ φοφρνουσ, καυςτιρεσ και καλοριφζρ. Μθν εκκζτετε τθ ςυςκευι απευκείασ ςε θλιακό φωσ. Ρολφ χαμθλι εξωτερικι κερμοκραςία μπορεί να προκαλζςει δυςλειτουργία τθσ ςυςκευισ. Η ςυςκευι δεν είναι κατάλλθλθ για χριςθ ςε εξωτερικοφσ...
  • Seite 14 4) Τραβιξτε τθν πόρτα κάτω περίπου 15 εκ και αφαιρζςτε τθν από τον πάνω μεντεςζ. Βγάλτε τθν πόρτα από τθ ςυςκευι. 5) Αφαιρζςτε τισ 2 βίδεσ από τον πάνω βραχίονα και τοποκετιςτε τον ςτθν άλλθ πλευρά. Ρρζπει πρϊτα να αφαιρζςετε τα πλαςτικά καλφματα...
  • Seite 15 2.6 Πριν χρθςιμοποιιςετε το ψυγείο Ρριν τοποκετιςετε τρόφιμα ςτο ψυγείο, ενεργοποιιςτε το και περιμζνετε 24 ϊρεσ για να βεβαιωκείτε ότι λειτουργεί ςωςτά και να του επιτρζψετε να φτάςει ςτθν κατάλλθλθ κερμοκραςία. Δεν πρζπει να βάηετε πολλά τρόφιμα μζςα ςτο ψυγείο. ◆...
  • Seite 16 4. Χ΢ΗΣΗ 4.1 Ρφκμιςθ τθσ κερμοκραςίασ ◆Ο επιλογζασ κερμοκραςίασ βρίςκεται ςτο δεξί μζροσ του εςωτερικου Του ψυγείου. Επιλογι“Off” :Κλείνει τθ ςυςκευι Επιλογι“Min” :Λιγότερο κρφο εςωτερικό Επιλογι“Med” :Κανονικι λειτουργία (φυςιολογικι χριςθ) Επιλογι“Max” :Ρεριςςότερο κρφο εςωτερικό ◆Πταν θ εξωτερικι κερμοκραςία είναι υψθλι (π.χ. τισ ηεςτζσ καλοκαιρινζσ μζρεσ) μπορεί να χρειαςτεί...
  • Seite 17 5. ΚΑΘΑ΢ΙΣΜΟΣ 5.1 Απόψυξθ Μπορεί να ςχθματιςτεί πάγοσ ςτο πίςω μζροσ του εςωτερικου του ψυγείου, ο οποίοσκα λειϊςει αυτόματα κατά τθν περίοδο που ο ςυμπιεςτισ δεν είναι ςε λειτουργία. Το νερό κα μεταφερκεί μζςω τθσ οπισ αποςτράγγιςθσ ςτον δίςκο ςυλλογισ πάνω από τον ςυμπιεςτι και...
  • Seite 18 7. Ρ΢ΟΒΛΗΜΑΤΑ ΚΑΙ ΑΝΤΙΜΕΤΩΡΙΣΗ Τα παρακάτω απλά προβλιματα μποροφν να αντιμετωπιςτοφν από τον χριςτθ. Ραρακαλοφμε όπωσ επικοινωνιςετε με το κζντρο εξυπθρζτθςθσ πελατϊν τθσ εταιρίασ μασ αν τα προβλιματα δεν εξαλειφκοφν. Ελζγξτε αν θ ςυςκευι είναι ςυνδεδεμζνθ ςτο ρεφμα Η ςυςκευι δεν λειτουργεί Μιπωσ...
  • Seite 19 πάγου φτάςει ςε πάχοσ 3-5 χιλ, κακαρίςτε τθ ςυςκευι. Διατθρείτε το πίςω τμιμα του ψυγείου κακαρό από ςκόνθ και βρωμιζσ. Ακολουκείτε πάντα πιςτά τισ οδθγίεσ «Τοποκζτθςθσ» και «Συμβουλζσ εξοικονόμθςθσ ενζργειασ», για να αποφφγετε ςθμαντικά υψθλότερθ κατανάλωςθ ρεφματοσ. ◆ Η ςυςκευι πρζπει να τοποκετθκεί ςτοπιο δροςερό μζροσ του δωματίου, μακρυά από ςυςκευζσ...
  • Seite 20 Inhaltsverzeichnis SICHERHEITSHINWEISE................1 INSTALLATION....................1 Standort......................2 Umkehren des Türanschlags................2 Tür-Platzbedarf....................3 Nivellieren der Einheit..................3 Reinigung vor dem Gebrauch................4 Bevor Sie Ihr Gerät in Betrieb nehmen.............4 Innenausstattungen..................4 PRODUKTÜBERSICHT..................4 BETRIEB......................5 Einstellen der Temperatur.................5 Geräusch im Inneren des Gerätes!..............5 Tipps zum Aufbewahren von Lebensmitteln in der Einheit.......5 REINIGUNG......................6 Abtauen......................6 Reinigen des Inneren und des Äußeren der Einheit..........6...
  • Seite 21: Sicherheitshinweise

    1. SICHERHEITSHINWEISE WARNUNG—Halten Sie Belüftungsöffnung am Gehäuse des Geräts oder in der Einbaustruktur rei von Hindernissen. WARNUNG—Verwenden Sie keine mechanischen Vorrichtungen oder andere als die vom Hersteller empfohlenen Mittel, um den Abtauvorgang zu beschleunigen. WARNUNG-Den Kältemittelkreislauf nicht beschädigen. WARNUNG—Verwenden Sie keine elektrischen Geräte in den Lebensmittelaufbewahrungsfächern, sofern sie nicht von der vom Hersteller empfohlenen Art sind.
  • Seite 22: Standort

    2.1 Standort Wenn Sie eine Position für die Einheit auswählen, sollten Sie sicherstellen, dass der Boden dick und fest, und der Raum gut belüftet ist. Vermeiden Sie das Gerät in der Nähe einer Wärmequelle, wie z.B. Kocher, Kessel oder Heizkörper aufzustellen. Vermeiden Sie auch direkte Sonneneinstrahlung, da sonst der Stromverbrauch erhöht werden könnte.
  • Seite 23: Tür-Platzbedarf

    4) Schieben Sie die Gerätetür ca. 15 cm nach unten, entfernen Sie den oberen Scharnierbolzen und heben Sie ihn weg von dem Gerät ab. 5) Entfernen Sie die beiden Schrauben von der oberen Halterung und ersetzen Sie sie auf der anderen Seite. Sie müssen zuerst die Kunststoffkappen von der anderen Seite entfernen.
  • Seite 24: Bevor Sie Ihr Gerät In Betrieb Nehmen

    2.6 Bevor Sie Ihr Gerät in Betrieb nehmen Bevor Sie Lebensmittel in Ihrem Gerät platzieren, schalten Sie es ein und warten Sie für 24 Stunden, um sicherzustellen, dass es ordnungsgemäß funktioniert, und um es Zeit zu verschaffen, auf die richtige Temperatur zu fallen. Ihr Gerät sollte nicht überfüllt werden. •...
  • Seite 25: Betrieb

    4. BETRIEB Einstellen der Temperatur ◆ Der Temperaturwahlknopf befindet sich auf der inneren rechten Seitenwand des Kühlschranks Einstellung "Off": schaltet das Gerät aus Einstellung "Min": vermindert die Kühlung der Temperatur Einstellung "Med": Normalbetrieb (ausreichend für die meisten Bedingungen) Einstellung "Max": maximale Kühlung der Temperatur ◆...
  • Seite 26: Reinigung

    5. REINIGUNG Abtauen Frost kann sich auf der inneren Rückseite des Gerätes ansammeln, der automatisch während des Zyklus des Kompressors aufgetaut wird. Das Wasser wird über das Ablaufloch in die Auffangwanne über dem Kompressor geleitet, wo es verdunstet wird. Stellen Sie sicher, dass das Ablaufloch regelmäßig überprüft und gereinigt wird, damit das Wasser in das Ablagefach austreten kann.
  • Seite 27: Fehlerbehebung

    7. Fehlerbehebung Die folgenden einfachen Probleme können durch den Benutzer gehandhabt werden. Bitte rufen Sie die Kundendienstabteilung, wenn die Probleme nicht gelöst werden. Prüfen Sie, ob das Gefriergerät angeschlossen ist und mit Strom versorgt wird; Kein Betrieb Niederspannung; Stromausfall oder Auslöseschaltung Riechende Lebensmittel sollten eng eingewickelt sein;...
  • Seite 28: Entsorgung

    Im Falle des äußeren Kondensators sollte der Rückwand immer sauber und frei von Staub oder Verunreinigungen sein. Beachten Sie immer die Anweisungen, die in den Abschnitten zur "Aufstellung und Energiespartipps" angegeben sind, da sonst der Energieverbrauch wesentlich höher sein könnte. ♦...

Diese Anleitung auch für:

Invms67a

Inhaltsverzeichnis