Herunterladen Inhalt Inhalt Diese Seite drucken
Motorola MBP161TIMER Bedienungsanleitung
Vorschau ausblenden Andere Handbücher für MBP161TIMER:
Inhaltsverzeichnis

Werbung

Verfügbare Sprachen
  • DE

Verfügbare Sprachen

  • DEUTSCH, seite 30
User's Guide
Digital Audio Monitor with Baby Care Timer
Models: MBP161TIMER, MBP161TIMER-2
The features described in this User's Guide are subject to modifications without prior notice.

Werbung

Inhaltsverzeichnis
loading

Inhaltszusammenfassung für Motorola MBP161TIMER

  • Seite 1 User’s Guide Digital Audio Monitor with Baby Care Timer Models: MBP161TIMER, MBP161TIMER-2 The features described in this User’s Guide are subject to modifications without prior notice.
  • Seite 2 Please retain your original dated sales receipt for your records. For warranty service of your Motorola product, you will need to provide a copy of your dated sales receipt to confirm warranty status.
  • Seite 3 Overview of the Parent Unit Sound Level Indicator Microphone LCD Display Lullaby Timer Buttons Press to start or stop lullaby playback. Control Key Panel In timer setting: Press to reset timer to 00-00 UP / VOLUME + Press to increase speaker volume. Power jack While in a menu, press to scroll up.
  • Seite 4 Parent Unit display icons Connection status - Displays when the parent unit is linked to the baby unit. - Flashes when the link between the baby unit and the parent unit is lost or the parent unit is out of range of the baby unit. Battery status scrolls when battery is charging.
  • Seite 5 Overview of the Baby Unit Temperature Sensor POWER/ LULLABY Speaker Press and hold to power the baby unit Power jack on or off. Power/Link indicator In idle mode: Press to enter lullaby On steadily when the baby unit is menu. powered on and linked to the parent In lullaby menu: Press to play or select unit.
  • Seite 6: Inhaltsverzeichnis

    Table of contents 1. Safety Instructions ..................7 2. Getting Started..................10 Baby unit power supply................10 Parent unit battery installation and power supply ........11 Desktop stand on parent unit..............12 3. Using Your Digital Audio Baby Monitor..........13 Power on or off ..................
  • Seite 7: Safety Instructions

    1. Safety Instructions WARNING: Strangulation Hazard. Children have STRANGLED in cords. Keep this cord out of the reach of children (more than 1 metre away). Never use extension cords with AC Adapters. Only use the AC Adapters provided. Safety Instructions...
  • Seite 8 BABY MONITOR SET UP & USE: • Choose a location for the digital audio baby monitor that will provide the best audio reception of your baby in his/her cot. • Place the Baby Unit on a flat surface, such as a dresser, bureau or shelf, or mount the Unit on a wall securely using the keyhole slots under the stand.
  • Seite 9 CAUTION There is a risk of explosion if the battery is replaced by an incorrect type. Dispose of used batteries according to the instructions. Use only rechargeable battery pack with rating: 2.4V 400mAh Safety Instructions...
  • Seite 10: Getting Started

    2. Getting Started Baby unit power supply DC JACK DC PLUG 1. Insert the DC plug of the power adapter with the bigger DC plug into the DC jack on the back of the baby unit. 2. Connect the other end of the power adapter to a suitable mains power. NOTE Only use the provided power adapter.
  • Seite 11: Parent Unit Battery Installation And Power Supply

    Parent unit battery installation and power supply A rechargeable battery pack is supplied and should be fitted, so that the parent unit can be carried to another location without losing the link with the baby unit(s). Charge the parent unit before using it for the first time or when the parent unit indicates that battery is low.
  • Seite 12: Desktop Stand On Parent Unit

    Desktop stand on parent unit The parent unit comes with a desktop stand attached to the back of the unit. To place the parent unit on a desk, simply pull out the stand as shown above. NOTE Place the parent unit on a flat, even surface. Getting Started...
  • Seite 13: Using Your Digital Audio Baby Monitor

    3. Using Your Digital Audio Baby Monitor Please read these instructions carefully, and be aware that this digital audio baby monitor is only intended as an aid. It is not a substitute for responsible and proper adult supervision. Power on or off 3.1.1 Power on or off the baby unit •...
  • Seite 14: Night Light

    • Press on the parent unit when it is not in use. The sound level indicator lights up when you adjust the speaker volume. The number of LED lights indicate how loud the volume has been raised. When the speaker volume is set to off, the screen displays Night light Turn on night light so that the room is gently lit and isn’t so dark at night.
  • Seite 15 3. Press to save and start the timer. The screen will display SAVED before returning to idle screen. feeding timer button remains lighted when the timer is running. 3.4.2 Reset feeding timer 1. Press on the parent unit. The timer will display on the screen. 2.
  • Seite 16: Set Sleep Timer

    3.4.4 Reset diaper change timer 1. Press on the parent unit. The timer will display on the screen. 2. Press to reset the timer to 00-00, then press to adjust the timer. Each key press represents an interval of 30 minutes, up to an interval of 24 hours.
  • Seite 17: Lullaby

    2. Press to reset the timer to 00-00, then press to adjust the timer. Each key press represents an interval of 30 minutes, up to an interval of 24 hours. 3. Press to save and start the adjusted timer. The screen will display SAVED before returning to idle screen.
  • Seite 18: Turn Sound Alert On Or Off

    ENGLISH FRANÇAIS ESPAÑOL 3. Press to select 4. Press to confirm your selection. Turn sound alert on or off You can turn on the sound alert so that the parent unit beeps when a loud sound is detected by the baby unit. is displayed when sound alert is enabled.
  • Seite 19: Disposal Of The Device (Environment)

    4. Disposal of the Device (Environment) At the end of the product life cycle, you should not dispose of this product with normal household waste. Take this product to a collection point for the recycling of electrical and electronic equipment. The symbol on the product, user's guide and/or box indicates this.
  • Seite 20: Cleaning

    5. Cleaning Clean your Digital Audio Baby Monitor with a slightly damp cloth or with an anti- static cloth. Never use cleaning agents or abrasive solvents. Cleaning and care • Do not clean any part of the Digital Audio Baby Monitor with thinners or other solvents and chemicals - this may cause permanent damage to the product which is not covered by the warranty.
  • Seite 21: Troubleshooting

    6. Troubleshooting Power/Link Indicator on the parent unit does not come on • Check whether the parent unit is powered on. • Check whether the supplied battery pack is correctly installed and that they are not drained. • Recharge the parent unit by connecting it to the mains power. Power/Link Indicator on the baby unit flashes •...
  • Seite 22: Battery Pack In The Parent Unit Is Running Low Quickly

    The digital audio baby monitor system produces a high- pitched noise • The parent unit and the baby unit are too close to each other. Make sure that the parent unit and baby unit are at least 1 metre away from each other. •...
  • Seite 23: General Information

    To order a replacement battery pack for parent unit, contact customer service. Consumer Products and Accessories Limited Warranty ("Warranty") Thank you for purchasing this Motorola branded product manufactured under license by Binatone Electronics International LTD ("BINATONE") What Does this Warranty Cover? Subject to the exclusions contained below, BINATONE warrants that this Motorola branded product ("Product") or certified accessory ("Accessory") sold...
  • Seite 24 PROVIDED UNDER THIS EXPRESS LIMITED WARRANTY IS THE EXCLUSIVE REMEDY OF THE CONSUMER, AND IS PROVIDED IN LIEU OF ALL OTHER WARRANTIES, EXPRESS OR IMPLIED. IN NO EVENT SHALL MOTOROLA OR BINATONE BE LIABLE, WHETHER IN CONTRACT OR TORT (INCLUDING...
  • Seite 25 (c) use of the Products or Accessories for commercial purposes or subjecting the Product or Accessory to abnormal usage or conditions; or (d) other acts which are not the fault of MOTOROLA or BINATONE., are excluded from coverage.
  • Seite 26 (b) broken seals or that show evidence of tampering; (c) mismatched board serial numbers; or (d) nonconforming or non-Motorola branded housings, or parts, are excluded from coverage. Communication Services. Defects, damages, or the failure of Products or Accessories due to any communication service or signal you may subscribe to or use with the Products or Accessories is excluded from coverage.
  • Seite 27 NW2 7HF, United Kingdom. Declare under our sole responsibility that the following product Type of equipment: Digital Audio Baby Monitor Model Name: MBP160, MBP160-2, MBP161TIMER, MBP161TIMER-2 Country of Origin: China Brand: Motorola complies with the essential protection requirements of R&TTE Directive 1999/5/EC on the...
  • Seite 28: Technical Specifications

    8. Technical Specifications BABY UNIT: Frequency 1881.792 - 1897.344 MHz Channels Operating temperature 5ºC - 45ºC Power supply adapter Input 100 - 240VAC, 50/60Hz, 150mA Rating Output 6VDC, 450mA PARENT UNIT: Frequency 1881.792 - 1897.344 MHz Channels Operating temperature 5ºC - 45ºC Battery rating 2.4V 400mAh Ni-MH battery pack Power supply adapter Input 100 - 240VAC, 50/60Hz, 150mA...
  • Seite 29 Manufactured, distributed or sold by Binatone Electronics International LTD., official licensee for this product. MOTOROLA and the Stylised M Logo, are trademarks or registered trademarks of Motorola Trademark Holdings, LLC. and are used under license. All other trademarks are the property of their respective owners.
  • Seite 30: Digitaler Audio-Monitor Mit Babypflege-Timer

    Bedienungsanleitung Digitaler Audio-Monitor mit Babypflege-Timer Modelle: MBP161TIMER, MBP161TIMER-2 Die in dieser Bedienungsanleitung beschriebenen Funktionen können jederzeit ohne Vorankündigung geändert werden.
  • Seite 31 Herzlichen Glückwunsch zu Ihrem Kauf dieses digitalen Audio-Babyfons! Vielen Dank, dass Sie sich für ein Modell von Motorola entschieden haben. Dieses System gewährleistet, dass Sie Ihr Baby stets ohne ablenkende Geräusche hören können. Außerdem verfügt das digitale Audio-Babyfon über mehrere praktische Timer, die Sie daran erinnern, dass Sie Ihr Baby füttern oder die Windeln wechseln sollten bzw.
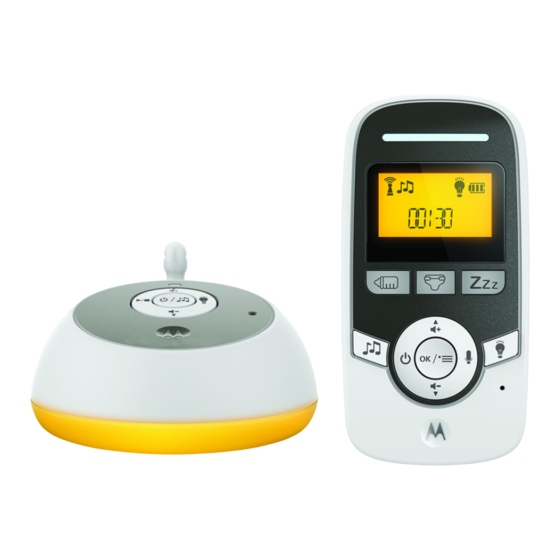
  • Seite 32: Das Elterngerät

    Das Elterngerät Geräuschpegelanzeige Taste MENÜ/AUSWAHL Display (LCD-Anzeige) Drücken Sie diese Taste, um das Menü zu Timer-Tasten öffnen. Tastenfeld In Menüs können Sie mit dieser Taste Nach-oben-Taste/Lautstärke erhöhen eine Option auswählen oder eine Drücken Sie diese Taste, um die Einstellung speichern. Lautstärke des Lautsprechers zu Sprechtaste erhöhen.
  • Seite 33: Display-Symbole (Eltern-Einheit)

    Display-Symbole (Eltern-Einheit) Verbindungsstatus – Wird angezeigt, wenn das Elterngerät mit dem Babygerät verbunden ist. – Blinkt, wenn die Verbindung zwischen Baby- und Elterngerät unterbrochen oder die Entfernung zwischen den Einheiten zu groß ist. Akkustandsanzeige – : Animation bei Ladevorgang – : Akku ist vollständig aufgeladen.
  • Seite 34: Das Babygerät

    Das Babygerät Temperatursensor EIN/AUS- und Schlaflied-Taste Lautsprecher Drücken Sie diese Taste und halten Sie sie Anschlussbuchse Netzteil gedrückt, um die Einheit ein- bzw. Betriebs- und Verbindungsanzeige auszuschalten. Leuchtet konstant, wenn das Babygerät Im Standby-Modus: Drücken Sie diese eingeschaltet und mit dem Elterngerät Taste, um das Schlaflied-Menü...
  • Seite 35 Inhaltsverzeichnis 1. Sicherheitshinweise .................. 7 2. Erste Schritte ..................10 Babygerät an die Stromversorgung anschließen ........10 Akkusatz in das Elterngerät einsetzen und aufladen ....... 11 Standfuß des Elterngeräts verwenden ............ 12 3. Verwendung des digitalen Audio-Babyfons.......... 13 Einheiten ein-/ausschalten ............... 13 Lautsprechereinstellungen vornehmen ..........
  • Seite 36: Sicherheitshinweise

    1. Sicherheitshinweise ACHTUNG: Erstickungsgefahr: Kinder können sich in den Kabeln ERDROSSELN. Halten Sie dieses Kabel außer Reichweite von Kindern (mehr als 1 Meter entfernt). Verwenden Sie niemals Verlängerungskabel zusammen mit den Netzteilen. Verwenden Sie ausschließlich die im Lieferumfang enthaltenen Netzteile. Sicherheitshinweise...
  • Seite 37: Wichtige Hinweise Zur Verwendung

    Wichtige Hinweise zur Verwendung • Positionieren Sie das Babygerät so, dass ein optimaler Empfang zur Überwachung Ihres Babys in seinem Bett gegeben ist. • Platzieren Sie das Babygerät immer nur auf einer festen, ebenen Oberfläche (z. B. auf einer Kommode oder auch auf einem Tisch bzw. Regal), oder befestigen Sie die Einheit sicher an der Wand.
  • Seite 38 • Darauf achten, die Einheiten nur an gut zugänglichen Steckdosen am Stromnetz anzuschließen. VORSICHT Bei Verwendung falscher Batterien besteht Explosionsgefahr. Gebrauchte Batterien sind gemäß EU-Richtlinie umweltfreundlich zu entsorgen. Nur einen Akkusatz mit folgender Nennkapazität verwenden: 2,4 V, 400 mAh Sicherheitshinweise...
  • Seite 39: Erste Schritte

    2. Erste Schritte Babygerät an die Stromversorgung anschließen BUCHSE GERÄTESTECKER 1. Schließen Sie das Netzteil mit dem größeren Gerätestecker an der entsprechenden Buchse an der Rückseite des Babygeräts an. 2. Stecken Sie den Adapter anschließend in eine Steckdose. HINWEIS Nur das im Lieferumfang enthaltene Netzteil (Adapter) verwenden! Erste Schritte...
  • Seite 40: Akkusatz In Das Elterngerät Einsetzen Und Aufladen

    Akkusatz in das Elterngerät einsetzen und aufladen Im Lieferumfang ist ein Akkusatz für das Elterngerät enthalten, sodass die Einheit bewegt werden kann, ohne dass dadurch die Verbindung verloren geht. Laden Sie das Elterngerät vor der ersten Verwendung und immer dann auf, wenn der Akkustand gering ist.
  • Seite 41: Standfuß Des Elterngeräts Verwenden

    Standfuß des Elterngeräts verwenden Das Elterngerät verfügt an der Rückseite auch über einen Standfuß. Dieser kann bei Bedarf einfach ausgeklappt werden, um die Einheit z. B. auf einem Tisch zu positionieren. HINWEIS Platzieren Sie das Elterngerät immer nur auf einer festen, ebenen Oberfläche. Erste Schritte...
  • Seite 42: Verwendung Des Digitalen Audio-Babyfons

    3. Verwendung des digitalen Audio-Babyfons Bitte lesen Sie diese Bedienungsanleitung sorgfältig durch, und denken Sie immer daran, dass ein Babyfon nur ein Hilfsmittel, aber kein Ersatz für die verantwortungsvolle Beaufsichtigung eines Babys durch einen Erwachsenen ist. Einheiten ein-/ausschalten 3.1.1 Babygerät ein-/ausschalten •...
  • Seite 43: Lautstärke Des Elterngeräts Einstellen

    3.2.2 Lautstärke des Elterngeräts einstellen Es stehen insgesamt 4 Einstellungen für den Lautsprecher am Elterngerät zur Lautstärke 1 Lautstärke 3 Verfügung: sowie die Einstellung „Aus“. • Drücken Sie einfach die Taste bzw. am Elterngerät, um die gewünschte Lautstärke einzustellen. Die Geräuschpegelanzeige gibt die jeweilige Einstellung an: Je mehr LEDs aufleuchten, desto höher ist die Lautstärke eingestellt.
  • Seite 44: Fütter-Erinnerung Einstellen

    3.4.1 Fütter-Erinnerung einstellen 1. Drücken Sie zunächst die Taste am Elterngerät. 2. Stellen Sie anschließend mit den Tasten die Funktion ein. Mit jedem Tastendruck erhöht bzw. verringert sich die Einstellung um 30 Minuten (bis zu max. 24 Stunden). Beispiel: Sie wollen Ihr Baby das nächste Mal in vier Stunden füttern. Stellen Sie in dem Fall mit der Taste bzw.
  • Seite 45: Wickel-Erinnerung Einstellen

    3.4.3 Wickel-Erinnerung einstellen 1. Drücken Sie zunächst die Taste am Elterngerät. 2. Stellen Sie anschließend mit den Tasten die Funktion ein. Mit jedem Tastendruck erhöht bzw. verringert sich die Einstellung um 30 Minuten (bis zu max. 24 Stunden). Beispiel: Sie wollen in drei Stunden daran erinnert werden, Ihr Baby zu wickeln. 03-00 Stellen Sie in dem Fall mit der Taste bzw.
  • Seite 46: Schlaf-Erinnerung Einstellen

    3.4.5 Schlaf-Erinnerung einstellen 1. Drücken Sie zunächst die Taste am Elterngerät. 2. Stellen Sie anschließend mit den Tasten die Funktion ein. Mit jedem Tastendruck erhöht bzw. verringert sich die Einstellung um 30 Minuten (bis zu max. 24 Stunden). Beispiel: Sie wollen in zwei Stunden benachrichtigt werden, dass es für Ihr Baby Zeit fürs Bettchen ist.
  • Seite 47: Schlaflied

    Schlaflied Diese Funktion beruhigt Ihr Baby zusätzlich und sorgt dafür, dass es friedlich schlummert. 3.5.1 Schlaflied am Babygerät auswählen 1. Drücken Sie zunächst die Taste an der Babyeinheit, um das Schlaflied- Menü zu öffnen. 2. Wählen Sie anschließend mit der Taste das gewünschte Schlaflied aus.
  • Seite 48: Alarm Aktivieren/Deaktivieren

    Alarm aktivieren/deaktivieren Diese Funktion ermöglicht es Ihnen, einen Alarm einzustellen, der Sie auf laute Geräusche hinweist. wird auf dem Display angezeigt, wenn der Alarm gestellt ist. 1. Drücken Sie im Standby-Modus zunächst die Taste am Elterngerät. SOUND 2. Wählen Sie anschließend mit der Taste bzw.
  • Seite 49: Entsorgung Des Geräts (Umwelt)

    4. Entsorgung des Geräts (Umwelt) Am Ende des Produktlebenszyklus dürfen Sie dieses Gerät nicht mit dem normalen Hausmüll entsorgen. Bringen Sie dieses Produkt für das Recycling der elektrischen und elektronischen Bauteile zu einer Sammelstelle. Dies wird durch das Symbol auf dem Produkt, in der Bedienungsanleitung bzw. auf der Verpackung angegeben.
  • Seite 50: Reinigung

    5. Reinigung Reinigen Sie das digitale Audio-Babyfon mit einem leicht angefeuchteten oder antistatischen Tuch. Keine Reinigungs- oder Scheuermittel verwenden! Reinigung und Pflege • Verwenden Sie zur Reinigung des digitalen Audio-Babyfons niemals Verdünner oder andere chemische bzw. Lösungsmittel. Dies kann dauerhafte Schäden am Produkt verursachen (die nicht von der Garantie gedeckt sind).
  • Seite 51: Hilfe

    6. Hilfe Warum leuchtet die Betriebs- und Verbindungsanzeige am Elterngerät nicht? • Stellen Sie sicher, dass die Einheit auch eingeschaltet ist. • Überprüfen Sie, dass Sie den mitgelieferten Akkusatz richtig eingesetzt und aufgeladen haben. • Laden Sie das Elterngerät auf, indem Sie es an einer Steckdose einstecken. Warum blinkt die Betriebs- und Verbindungsanzeige am Babygerät? •...
  • Seite 52 Warum höre ich kein Geräusch bzw. warum kann ich nicht hören, ob mein Kind weint? • Die Lautstärke ist möglicherweise zu niedrig eingestellt. Erhöhen Sie die Lautstärke am Elterngerät. Weitere Informationen hierzu finden Sie in Abschnitt 3.2. • Die Entfernung zwischen den beiden Einheiten ist möglicherweise zu groß. Verringern Sie den Abstand zwischen Baby- und Elterngerät.
  • Seite 53: Allgemeine Informationen

    Für einen Ersatz-Akkusatz für das Elterngerät wenden Sie sich bitte ebenfalls an unseren Kundenservice. Eingeschränkte Garantie für Konsumgüter und Zubehör („Garantie“) Vielen Dank, dass Sie dieses Produkt der Marke Motorola gekauft haben, das von Binatone Electronics International LTD („BINATONE“) unter Lizenz gefertigt wird. Was deckt diese Garantie ab? Vorbehaltlich der unten angegebenen Ausschlüsse garantiert BINATONE, dass...
  • Seite 54 AUSDRÜCKLICHEN EINGESCHRÄNKTEN GARANTIE ERFOLGEN, DER AUSSCHLIESSLICHE RECHTSBEHELF DES VERBRAUCHERS, UND ES WERDEN DADURCH ALLE ANDEREN GARANTIEN, OB AUSDRÜCKLICH ODER STILLSCHWEIGEND, ERSETZT. MOTOROLA ODER BINATONE ÜBERNEHMEN IN KEINEM FALL EINE HAFTUNG, WEDER AUFGRUND EINES VERTRAGS ODER WEGEN UNERLAUBTER HANDLUNG (EINSCHLIESSLICH FAHRLÄSSIGKEIT), FÜR SCHÄDEN, DIE DEN KAUFPREIS DES PRODUKTS ODER ZUBEHÖRS ÜBERSTEIGEN, ODER FÜR INDIREKTE, BESONDERE,...
  • Seite 55 Verwendung von Produkten und Zubehörteilen, die nicht von Motorola stammen. Defekte oder Schäden, die aus der Verwendung von Produkten oder Zubehörteilen, die nicht von Motorola stammen oder von Motorola zugelassen sind, oder anderer Peripheriegeräte stammen, sind von der Garantie ausgeschlossen.
  • Seite 56 Datumsschildern, die entfernt, geändert oder unleserlich gemacht wurden, (b) gebrochenen Siegeln oder solchen, die Zeichen von Manipulation aufweisen, (c) nicht übereinstimmenden Platinenseriennummern, oder (d) nicht konformen oder nicht von Motorola stammenden Gehäusen oder Teilen sind von der Garantie ausgeschlossen. Kommunikationsdienste. Defekte, Schäden oder der Ausfall von Produkten oder Zubehörteilen aufgrund von Kommunikationsdiensten oder -signalen, die...
  • Seite 57 NW2 7HF, United Kingdom. Declare under our sole responsibility that the following product Type of equipment: Digital Audio Baby Monitor Model Name: MBP160, MBP160-2, MBP161TIMER, MBP161TIMER-2 Country of Origin: China Brand: Motorola complies with the essential protection requirements of R&TTE Directive 1999/5/EC on the...
  • Seite 58: Technische Daten

    8. Technische Daten BABY-EINHEIT: Frequenzbereich 1881,792 bis 1897,344 MHz Kanäle Betriebsumgebung 5 ºC bis 45 ºC Netzteil (Adapter) Eingang: 100–240 VAC, 50/60 Hz, 150 mA Nennleistung Ausgang: 6 VDC, 450 mA ELTERN-EINHEIT: Frequenzbereich 1881,792 bis 1897,344 MHz Kanäle Betriebsumgebung 5 ºC bis 45 ºC Akkukapazität NiMH-Akkusatz: 2,4 V, 400 mAh Netzteil (Adapter)
  • Seite 59 MOTOROLA und das stilisierte M-Logo sind Marken oder eingetragene Marken der Motorola Trademark Holdings, LLC. und werden unter Lizenz verwendet. Alle anderen Marken sind Eigentum ihrer jeweiligen Inhaber. © 2015 Motorola Mobility LLC. Alle Rechte vorbehalten. DE Version 1.0 Gedruckt in China...
  • Seite 60 Guide de l’utilisateur Moniteur bébé audio numérique avec minuteur de soins pour bébé Modèles : MBP161TIMER, MBP161TIMER-2 Les caractéristiques décrites dans ce mode d’emploi peuvent être modifiées sans préavis.
  • Seite 61 Veuillez conserver votre facture originale datée. Une copie de cette facture sera exigée pour bénéficier de la garantie de votre produit Motorola. Aucun enregistrement n’est nécessaire pour bénéficier de la garantie. Pour toute question concernant le produit, veuillez contacter notre service clientèle :...
  • Seite 62 Présentation de l’unité parents Indicateur de niveau sonore PAROLE Écran LCD Maintenez cette touche enfoncée pour Touches des minuteurs parler via l'unité bébé. Touches de commande Veilleuse HAUT / VOLUME + Appuyez pour allumer ou éteindre la Appuyez pour augmenter le volume du veilleuse.
  • Seite 63 Icônes de l’unité parents État de la connexion - S'affiche lorsque l'unité parent est liée à l'unité bébé. - Clignote lorsque la liaison entre l’unité bébé et l’unité parents est perdue, ou lorsque l'unité parents est hors de portée de l'unité bébé. État du bloc-pile s'anime lorsque le bloc-pile se charge.
  • Seite 64 Présentation de l’unité bébé Capteur de température MARCHE/BERCEUSE Haut-parleur Appuyez longuement pour allumer Prise d’alimentation ou éteindre l’appareil. Voyant Marche/Connexion En mode veille : appuyez pour ouvrir Allumé lorsque l’unité bébé est le menu des berceuses. allumée et connectée à l’unité Dans le menu des berceuses : parents.
  • Seite 65 Table des matières 1. Consignes de sécurité ................7 2. Pour commencer ..................10 Alimentation électrique de l'unité bébé ..........10 Installation du bloc-pile et alimentation électrique de l’unité parents ... 11 Support de table de l'unité parents ............12 3.
  • Seite 66: Consignes De Sécurité

    1. Consignes de sécurité ATTENTION : Risque d'étranglement. Les enfants peuvent s'ETRANGLER avec les cordons. Gardez ce cordon d'alimentation hors de portée des enfants (plus de 1 mètre de distance). N'utilisez jamais des cordons d'extension avec des adaptateurs secteur AC. Utilisez uniquement l'adaptateur secteur AC fourni.
  • Seite 67 INSTALLATION ET UTILISATION DU MONITEUR POUR BÉBÉ : • Choisissez pour le moniteur audio numérique pour bébé un emplacement qui fournira la meilleure réception audio de votre bébé dans son berceau. • Posez l’unité bébé sur une surface plane telle que coiffeuse, bureau ou étagère, ou fixez-la solidement au mur à...
  • Seite 68 • Utilisez uniquement les chargeurs et adaptateurs secteur fournis. N’utilisez pas d’autres chargeurs ou adaptateurs secteur : ils pourraient endommager l’appareil et le bloc-piles. • Utilisez uniquement un bloc-piles du même type. • Ne touchez pas les contacts des prises avec des objets pointus ou métalliques.
  • Seite 69: Pour Commencer

    2. Pour commencer Alimentation électrique de l'unité bébé PRISE CC FICHE CC 1. Insérez la fiche CC de l'adaptateur secteur comportant la plus grosse fiche CC dans la prise CC située à l'arrière de l’unité bébé. 2. Branchez l'adaptateur à une prise de courant. REMARQUE Utilisez uniquement l’adaptateur secteur fourni.
  • Seite 70: Installation Du Bloc-Pile Et Alimentation Électrique De L'unité Parents

    Installation du bloc-pile et alimentation électrique de l’unité parents Un bloc-pile rechargeable est fourni et doit être installé, de sorte que l'unité parents puisse être déplacée sans perdre la liaison avec la (les) unité(s) bébé. Chargez le bloc-pile l‘unité parents avant la première utilisation ou lorsque l’unité...
  • Seite 71: Support De Table De L'unité Parents

    Support de table de l'unité parents L'unité parents est livrée avec un support de table au dos de l'appareil. Pour poser l'unité parents sur une table, il suffit de tirer sur le support, comme montré ci-dessus. REMARQUE Posez l'unité parents sur une surface plane et horizontale. Pour commencer...
  • Seite 72: Utilisation De Votre Moniteur Audio Numérique Pour Bébé

    3. Utilisation de votre moniteur audio numérique pour bébé Veuillez lire attentivement ces instructions et rappelez-vous que ce moniteur audio numérique pour bébé est uniquement conçu comme une aide. Il ne remplace pas une supervision adulte responsable et adéquate. Allumer ou éteindre 3.1.1 Allumer ou éteindre l’unité...
  • Seite 73: Veilleuse

    • Appuyez sur sur l'unité parents lorsqu'elle est en veille. L'indicateur de niveau sonore s'allume lorsque vous réglez le volume du haut- parleur. Le nombre de DEL allumées indique le niveau du volume. Lorsque le haut-parleur est désactivé, s'affiche à l'écran. Veilleuse Allumez la veilleuse afin que la chambre soit doucement éclairée et ne soit pas trop sombre la nuit.
  • Seite 74 SAUVEGARDÉ s'affiche à l'écran, avant de revenir au mode veille. La touche du minuteur du biberon reste allumée tant que le minuteur fonctionne. 3.4.2 Régler un nouveau délai pour le minuteur du biberon 1. Appuyez sur sur l'unité parents. Le minuteur s'affiche à l'écran. 00-00 2.
  • Seite 75 3.4.4 Régler un nouveau délai pour le minuteur de changement des couches 1. Appuyez sur sur l'unité parents. Le minuteur s'affiche à l'écran. 00-00 2. Appuyez sur pour remettre le minuteur à , puis sur pour le régler. Chaque appui sur la touche correspond un intervalle de 30 minutes, jusqu'à un intervalle maximal de 24 heures.
  • Seite 76: Berceuse

    3.4.6 Régler un nouveau délai pour le minuteur de sieste 1. Appuyez sur sur l'unité parents. Le minuteur s'affiche à l'écran. 00-00 2. Appuyez sur pour remettre le minuteur à , puis sur pour le régler. Chaque appui sur la touche correspond un intervalle de 30 minutes, jusqu'à un intervalle maximal de 24 heures.
  • Seite 77: Choisir La Langue D'affichage De L'unité Parents

    3.5.3 Démarrer ou arrêter la lecture de la berceuse depuis l'unité parents 1. Pour démarrer la lecture de la berceuse, appuyez sur la touche l'unité parents lorsqu'elle est en veille. 2. Pour arrêter la lecture, appuyez sur Choisir la langue d'affichage de l'unité parents Vous avez le choix entre 3 langues.
  • Seite 78: Restaurer Les Réglages Par Défaut

    Restaurer les réglages par défaut 1. Appuyez longuement sur la touche de l'unité parents lorsqu'elle est en veille. RÉINIT. 2. Appuyez sur pour défiler jusqu'à , puis appuyez sur 3. Appuyez sur pour confirmer. Tous les réglages sont restaurés à leur valeur par défaut. Utilisation de votre moniteur audio numérique pour bébé...
  • Seite 79: Mise Au Rebut De L'appareil (Respect De L'environnement)

    4. Mise au rebut de l'appareil (Respect de l'environnement) À la fin du cycle de vie de ce produit, ne le jetez pas dans les vidanges. Apportez ce produit à un centre de collecte pour le recyclage d’équipements électriques et électroniques. Ceci est indiqué...
  • Seite 80: Nettoyage

    5. Nettoyage Essuyez votre moniteur audio numérique pour bébé avec un linge légèrement humide ou une lingette antistatique. N'utilisez jamais de détergents ou de solvants abrasifs. Nettoyage et soin • Ne nettoyez aucune partie du moniteur audio numérique pour bébé avec des diluants, solvants ou autres produits chimiques : ceci pourrait endommager définitivement le produit et ne serait pas couvert par la garantie.
  • Seite 81: Dépannage

    6. Dépannage L’indicateur d’alimentation/connexion de l’unité parents ne s’allume pas • Vérifiez si l’unité parents est allumée. • Vérifiez si le bloc-pile fourni est correctement installé et chargé. • Rechargez l’unité parents en branchant l’adaptateur secteur. L'indicateur d'alimentation/connexion de l’unité bébé clignote •...
  • Seite 82 • L’unité parents et l’unité bébé sont peut-être hors de portée l’une de l’autre. Rapprochez les deux appareils, mais pas à moins d'un mètre (3 pieds) l’un de l’autre. Le moniteur audio numérique pour bébé émet un sifflement aigu • L’unité parents et l’unité bébé sont trop proches l’une de l’autre. Vérifiez que les deux unités sont distantes d’au moins 1 mètre (3 pieds) l’une de l’autre.
  • Seite 83: Informations Générales

    Que couvre la présente Garantie ? Sous réserve des exclusions indiquées ci-dessous, la société BINATONE garantit que ce produit (« Produit ») de marque Motorola ou cet accessoire certifié et vendu pour être utilisé avec le Produit (« Accessoire ») fabriqué par BINATONE est exempt de défauts de matériaux et de fabrication, sous réserve d’une...
  • Seite 84 RECOURS DU CONSOMMATEUR ET SERONT OFFERTS EN LIEU ET PLACE DE TOUTE AUTRE GARANTIE EXPLICITE OU IMPLICITE. EN AUCUN CAS MOTOROLA OU BINATONE NE POURRONT ÊTRE TENUS RESPONSABLES, QUE CE SOIT PAR CONTRAT OU DÉLIT CIVIL (Y COMPRIS NÉGLIGENCE), DE TOUT DOMMAGE AU-DELÀ DU PRIX D’ACHAT DU PRODUIT OU ACCESSOIRE, OU DE DOMMAGES INDIRECTS, ACCESSOIRES, PARTICULIERS OU CONSÉCUTIFS, OU DE TOUTE AUTRE PERTE DE...
  • Seite 85 à des fins commerciales ou de nature à soumettre le produit ou les accessoire à un usage ou à des conditions anormales ; ou (d) de tout autre acte étranger à MOTOROLA ou à BINATONE, ne sont pas couverts par la présente Garantie.
  • Seite 86 évidents de manipulation ; (c) dont les numéros de série des cartes ne correspondent pas ; ou (d) dont les boîtiers ou certaines pièces ne sont pas conformes ou sont d’une marque autre que Motorola, sont exclus de la présente Garantie.
  • Seite 87 NW2 7HF, United Kingdom. Declare under our sole responsibility that the following product Type of equipment: Digital Audio Baby Monitor Model Name: MBP160, MBP160-2, MBP161TIMER, MBP161TIMER-2 Country of Origin: China Brand: Motorola complies with the essential protection requirements of R&TTE Directive 1999/5/EC on the...
  • Seite 88: Caractéristiques Techniques

    8. Caractéristiques techniques UNITÉ BÉBÉ : Gamme de fréquence 1881,792 à 1897,344 MHz Canaux Température 5°C à 45°C d’utilisation Adaptateur secteur Entrée 100-240 V CA, 50/60 Hz, 150 mA Sortie 6 V CC, 450 mA UNITÉ PARENTS : Gamme de fréquence 1881,792 à 1897,344 MHz Canaux Température 5°C à...
  • Seite 89 Fabriqué, distribué ou vendu par Binatone Electronics International LTD., détenteur officiel de la licence pour ce produit. MOTOROLA et le logo M stylisé sont des marques déposées ou brevetées de Motorola Trademark Holdings, LLC. et sont utilisés sous licence. Toutes les autres marques déposées sont la propriété...
  • Seite 90 Gebruikershandleiding Digitale audiomonitor met Baby care-timer Modellen: MBP161TIMER, MBP161TIMER-2 De functies beschreven in deze handleiding zijn onderhevig aan wijzigingen zonder...
  • Seite 91 Bewaar uw originele aankoopbewijs voor uw administratie. Voor service onder garantie van uw Motorola-product, moet u een kopie van uw aankoopbon met datum overleggen om aanspraak te maken op garantie.
  • Seite 92 Overzicht van het Oudertoestel Geluidsniveau-indicator Nachtverlichting LCD-display Indrukken om de nachtverlichting aan of Timer-toetsen uit te schakelen. Bedieningspaneel Microfoon HOGER / VOLUME + Slaapliedje Indrukken om het luidsprekervolume te Ingedrukt houden om het afspelen van verhogen. een slaapliedje te starten of te stoppen Indrukken om hoger door het menu te In de timer-instelling: Indrukken op de 00-00...
  • Seite 93 Pictogrammen op het Oudertoestel Verbindingsstatus - Verschijnt wanneer het oudertoestel verbinding heeft het het babytoestel. - Knippert wanneer de verbinding tussen het babytoestel en het oudertoestel is verbroken of wanneer het oudertoestel buiten bereik is van het babytoestel. Batterijstatus beweegt terwijl batterij wordt opgeladen. verschijnt wanneer de batterij opgeladen is.
  • Seite 94 Overzicht van het Babytoestel Temperatuursensor VOEDING/ SLAAPLIEDJE Luidspreker Ingedrukt houden om het Voedingsaansluiting babytoestel in en uit te schakelen. Voeding/Verbinding-indicator In de ruststand: Indrukken om het Is aan wanneer het babytoestel slaapliedjemenu te openen. voeding heeft en met het In het slaapliedjemenu: Indrukken oudertoestel is gekoppeld.
  • Seite 95 Inhoud 1. Veiligheidsinstructies ................7 2. In gebruik nemen ..................10 Voeding voor babytoestel ............... 10 Voeding en batterijen in het oudertoestel plaatsen ........ 10 Tafelstandaard voor het oudertoestell ............ 12 3. Gebruik van de Digitale Audio Babyfoon ..........13 Voeding in-/uitschakelen.
  • Seite 96: Veiligheidsinstructies

    1. Veiligheidsinstructies WAARSCHUWING: Verstikkingsgevaar : Er zijn reeds kinderen verstrengeld geraakt in snoeren met VERSTIKKING tot gevolg. Houd dit snoer buiten het bereik van kinderen (meer dan 1 meter). Gebruik nooit verlengsnoeren bij AC-adapters. Gebruik alleen de meegeleverde AC- adapters. Veiligheidsinstructies...
  • Seite 97 INSTELLEN EN GEBRUIK VAN DE CAMERA: • Kies een plaats voor de digitale audio babyfoon die u goed zicht geeft op de baby in de wieg. • Plaats het babytoestel op een vlakke ondergrond, zoals een dressoir, bureau of boekenplank, of monteer het babytoestel op een muur met behulp van de ophanging onder de stand.
  • Seite 98 • De contactpunten niet met scherpe of metalen voorwerpen aanraken. • Sluit de voedingsadapters aan op goed toegankelijke stopcontacten. OPGELET Explosiegevaar als de batterij met een verkeerd type wordt vervangen. Gebruikte batterijen volgens de voorschriften weggooien. Gebruik alleen oplaadbare batterij van het type: 2,4V 400mAh Veiligheidsinstructies...
  • Seite 99: In Gebruik Nemen

    2. In gebruik nemen Voeding voor babytoestel Voedingsaansluiting Voedingstekker 1. Sluit de grote stekker van de voedingsadapter aan op de voedingsaansluiting aan de zijkant van het oudertoestel. 2. Sluit het andere einde van het snoer aan op een stopcontact. OPMERKING Gebruik uitsluitend de meegeleverde adapter.
  • Seite 100 Wij adviseren om het apparaat voor ingebruikname 15 uur op te laden. Voedingstekker THIS SIDE UP Voedingsaansluiting 1. Het kapje van de batterijhouder open schuiven. 2. Steek de stekker van de oplaadbare batterij in de kleine stekkeringang in de batterijhouder. 3.
  • Seite 101: Tafelstandaard Voor Het Oudertoestell

    Tafelstandaard voor het oudertoestel Het oudertoestel wordt geleverd met een tafelstandaard aangesloten aan de achterkant van het apparaat. Om het oudertoestel op een bureau te plaatsen, de stand uittrekken zoals hierboven getoond. OPMERKING Plaats het oudertoestel op een vlakke, stabiele ondergrond. In gebruik nemen...
  • Seite 102: Gebruik Van De Digitale Audio Babyfoon

    3. Gebruik van de Digitale Audio Babyfoon Lees deze instructies aandachtig door en wees ervan bewust dat deze digital audio babyfoon uitsluitend bedoeld is als hulpmiddel. Het apparaat is geen vervanging voor verantwoord toezicht door volwassenen. Voeding in-/uitschakelen. 3.1.1 Het babytoestel in- en uitschakelen •...
  • Seite 103: Nachtverlichting

    • Druk op op het oudertoestel als het apparaat niet in gebruik is. De geluidsniveau-indicator brandt wanneer u het luidsprekervolume aanpast. Het aantal LED-lampjes geven aan hoeveel het volume is verhoogd. Het display toont wanneer het geluid is uitgeschakeld. Nachtverlichting De nachtverlichting inschakelen zodat de kamer zacht verlicht wordt en ‘s nachts niet donker is.
  • Seite 104 3. Druk op om de instelling op te slaan en de timer te starten. Het scherm toont SAVED (OPGESLAGEN) en keert dat terug in de ruststand. toets van de voedingstimer blijft branden terwijl de timer loopt. 3.4.2 De voedingstimer resetten 1.
  • Seite 105: De Slaaptimer Instellen

    toets voor het verwisselen van de luier blijft branden terwijl de timer loopt. 3.4.4 De timer voor verwisselen van luier resetten 1. Druk op op het oudertoestel. De timer verschijnt op het display. 2. Druk op om de timer te resetten op 00-00, en druk kan op de timer in te stellen.
  • Seite 106: Slaapliedje

    3.4.6 De slaaptimer resetten 1. Druk op op het oudertoestel. De timer verschijnt op het display. 2. Druk op om de timer te resetten op 00-00, en druk kan op de timer in te stellen. Elke druk op de toets vertegenwoordigt een interval van 30 minuten, met een maximale interval van 24 uur.
  • Seite 107: Selecteer De Taal Voor Het Oudertoestel

    3.5.3 Het slaapliedje vanaf het oudertoestel afspelen of stoppen 1. Om het slaapliedje af te spelen, op drukken wanneer het oudertoestel niet in gebruik is. 2. Druk op om het afspelen van het slaapliedje te stoppen Selecteer de taal voor het oudertoestel Kies uit 3 talen.
  • Seite 108: Standaardinstellingen Herstellen

    Standaardinstellingen herstellen 1. De toets op het oudertoestel ingedrukt houden wanneer het niet is ingeschakeld. RESET 2. Druk op en blader naar (RESETTEN) en druk op 3. Druk op om te bevestigen. Alle instellingen worden teruggezet in de standaardinstellingen Gebruik van de Digitale Audio Babyfoon...
  • Seite 109: Afvoeren Van Het Apparaat (Milieu)

    4. Afvoeren van het apparaat (Milieu) Geef het product aan het einde van de levensduur niet mee met het normale huisvuil. Lever het product in bij een inzamelplaats voor elektrische en elektrische apparatuur voor recycling. Het product, de gebruikershandleiding en/of de verpakking zijn voorzien van een recyclingsymbool.
  • Seite 110: Reinigen

    5. Reinigen Reinig uw Digitale Audio Babyfoon met een vochtige doek of met een antistatisch doekje. Gebruik nooit reinigingsmiddelen of schurende middelen. Reinigen en onderhoud • Gebruik geen verdunner of andere oplosmiddelen of chemicaliën om de Digitale Audio Babyfoon te reinigen - dit kan het product permanent beschadigen en is niet gedekt door de garantie.
  • Seite 111: Verhelpen Van Storingen

    6. Verhelpen van storingen De voedingsindicator van het oudertoestel brandt niet • Controleer of het oudertoestel is ingeschakeld. • Controleer of de meegeleverde batterij goed is geïnstalleerd en niet leeg is. • Het oudertoestel opladen door de voedingsadapter op een stopcontact aan te sluiten.
  • Seite 112 • Het babytoestel kan buiten bereik van het oudertoestel zijn. Verminder de afstand tussen de toestellen maar op minimaal 1 meter afstand. De digitale audio babyfoon laat een hoge toon horen • Het oudertoestel en het babytoestel staan te dicht bij elkaar. Zorg ervoor dat het oudertoestel en het babytoestel minimaal 1 meter uit elkaar staan.
  • Seite 113: Algemene Informatie

    Beperkte garantie voor consumentenproduct en accessoires ("Garantie") Dank u voor de aankoop van dit onder Motorola-product, dat onder licentie is vervaardigd door Binatone Electronics International LTD ("BINATONE"). Wat wordt gedekt door deze garantie? BINATONE garandeert onder voorbehoud van het navolgende dat dit product, verkocht onder de merknaam van Motorola ("Product"), of de gecertificeerde...
  • Seite 114 VAN DE CONSUMENT, EN WORDT VERLEEND EN IN PLAATS VAN ALLE ANDERE GARANTIES, EXPLICIET OF IMPLICIET. IN GEEN GEVAL IS MOTOROLA OF BINATONE AANSPRAKELIJK OP BASIS VAN ONRECHTMATIGE DAAD OF ANDERSZINS (INCLUSIEF NALATIGHEID) VOOR SCHADE BOVEN DE AANKOOPPRIJS VAN HET PRODUCT OF...
  • Seite 115 Gebruik van producten en accessoires die niet van het merk zijn van Motorola. Defecten of schade als gevolg van gebruik van producten of accessoires of andere randapparatuur die niet van het merk Motorola of door Motorola zijn gecertificeerd, vallen niet onder dekking.
  • Seite 116 Ongeoorloofd onderhouden of wijziging. Defecten of schade als gevolg van service, testen, aanpassing, installatie, onderhoud, wijziging of wijziging op enigerlei wijze door iemand anders dan MOTOROLA, BINATONE of zijn erkende service centers, zijn uitgesloten van dekking. Gemodificeerde producten. Producten of accessoires met (a) serienummers...
  • Seite 117 NW2 7HF, United Kingdom. Declare under our sole responsibility that the following product Type of equipment: Digital Audio Baby Monitor Model Name: MBP160, MBP160-2, MBP161TIMER, MBP161TIMER-2 Country of Origin: China Brand: Motorola complies with the essential protection requirements of R&TTE Directive 1999/5/EC on the...
  • Seite 118: Technische Gegevens

    8. Technische gegevens BABYTOESTEL: Frequentie 1881,792 -1897,344 MHz Kanalen Werkingstemperatuur 5ºC - 45ºC Voedingsadapter Voeding 100-240VAC, 50/60Hz, 150mA Rating Vermogen 6VDC, 450mA OUDERTOESTEL: Frequentie 1881,792 -1897,344 MHz Kanalen Werkingstemperatuur 5ºC - 45ºC Batterij type 2,4V 400mAh Ni-MH batterij Voedingsadapter Voeding 100-240VAC, 50/60Hz, 150mA Rating Vermogen 6VDC, 450mA Specificaties kunnen zonder voorafgaande kennisgeving worden gewijzigd.
  • Seite 119 Vervaardigd, gedistribueerd of verkocht door Binatone Electronics International LTD., officieel licentiehouder voor dit product. MOTOROLA en het gestileerde M-logo zijn handelsmerken of geregistreerde handelsmerken van Motorola Trademark Holdings, LLC. en worden onder licentie gebruikt. Alle andere handelsmerken zijn het eigendom van hun respectieve eigenaars.
  • Seite 120 Guida utente Dispositivo di controllo con audio digitale e timer di pianificazione delle attività del bambino Modelli: MBP161TIMER, MBP161TIMER-2...
  • Seite 121 Conservare la ricevuta di acquisto originale con la data per riferimento. Per l'assistenza in garanzia del prodotto Motorola bisognerà fornire una copia della ricevuta di acquisto con la data per confermare di essere in garanzia.
  • Seite 122 Panoramica dell'unità genitore Indicatore livello audio TALK (PARLA) Display LCD Tenere premuto per trasmettere un Pulsanti timer messaggio vocale all'unità bimbo. Pannello di controllo Luce notturna VOLUME / SU Premere per accendere o spegnere la Premere per aumentare il volume luce notturna.
  • Seite 123 Icone del display unità genitore Stato del collegamento - Viene mostrata quando l'unità genitore è collegata all'unità bimbo. - Lampeggia quando il collegamento tra unità genitore e unità bimbo è assente o quando l'unità genitore si trova fuori dalla portata di trasmissione dell'unità...
  • Seite 124 Panoramica dell'unità bimbo Sensore di temperatura ACCENSIONE/ NINNA NANNA Altoparlante Connettore di alimentazione Tenere premuto per accendere o Spia alimentazione/collegamento spegnere l'unità bimbo. Accesa fissa quando l'unità bimbo è Se l'unità è in standby: Premere per attivata e collegata all'unità genitore. accedere al menu ninna nanna.
  • Seite 125 Sommario 1. Istruzioni di sicurezza ................7 2. Per iniziare ....................10 Alimentazione unità bimbo............... 10 Installazione della batteria e alimentazione dell'unità genitore ....11 Supporto da scrivania dell'unità genitore..........12 3. Come utilizzare il Baby monitor audio digitale ........13 Accensione o spegnimento..............
  • Seite 126: Istruzioni Di Sicurezza

    1. Istruzioni di sicurezza AVVERTENZA: Pericolo di strangolamento: Dei bambini sono stati STRANGOLATI dai cavi. Tenere il cavo fuori dalla portata dei bambini (a una distanza maggiore di 1 metro). Non utilizzare mai prolunghe con adattatori AC. Utilizzare solo gli adattatori CA in dotazione.
  • Seite 127 CONFIGURAZIONE E UTILIZZO DEL BABY MONITOR: • Posizionare il baby monitor audio digitale in un luogo che fornisca la migliore ricezione audio del bimbo nella culla. • Avere cura di posizionare l'unità bimbo su una superficie piana come un cassettone, una scrivania o una mensola, oppure fissarlo in modo sicuro a una parete utilizzando i ganci a occhiello sotto l'appoggio.
  • Seite 128 • Utilizzare solo i caricabatteria e gli adattatori in dotazione. Non utilizzare altri caricabatteria o adattatori perché potrebbero danneggiare il dispositivo e il gruppo batteria. • Utilizzare solo un gruppo batteria dello stesso tipo. • Non toccare i contatti dello spinotto con oggetti appuntiti o metallici. •...
  • Seite 129: Per Iniziare

    2. Per iniziare Alimentazione unità bimbo CONNETTORE CC SPINOTTO 1. Inserire lo spinotto CC dell'adattatore con lo spinotto CC più grande all'interno del connettore CC ubicato sul retro dell'unità bimbo. 2. Collegare l'altra estremità dell'adattatore alla corretta alimentazione di rete. NOTA Utilizzare solo l'adattatore in dotazione.
  • Seite 130: Installazione Della Batteria E Alimentazione Dell'unità Genitore

    Installazione della batteria e alimentazione dell'unità genitore Inserire il gruppo batteria ricaricabile (in dotazione) all'interno dell'unità genitore, in modo che quest'ultima possa spostata in un punto differente senza compromettere il collegamento con l'unità o le unità bimbo. Caricare l'unità genitore prima di utilizzarla per la prima volta o quando compare l'indicatore di batteria bassa.
  • Seite 131: Supporto Da Scrivania Dell'unità Genitore

    Supporto da scrivania dell'unità genitore L'unità genitore è dotata di apposito supporto da scrivania situata sul retro dell'unità stessa. Se si desidera posizionare l'unità genitore su un tavolo, estrarre il supporto come mostrato in figura. NOTA Posizionare l'unità genitore su una superficie piana e uniforme. Per iniziare...
  • Seite 132: Come Utilizzare Il Baby Monitor Audio Digitale

    3. Come utilizzare il Baby monitor audio digitale Leggere attentamente queste istruzioni e ricordare che questo baby monitor è da utilizzarsi esclusivamente come strumento di supporto. Il presente dispositivo non è finalizzato a sostituire una supervisione adeguata e responsabile da parte dei genitori. Accensione o spegnimento 3.1.1 Accensione e spegnimento dell'unità...
  • Seite 133: Luce Notturna

    3.2.2 Regolazione del volume dell'altoparlante dell'unità genitore È possibile regolare il volume dell'altoparlante dell'unità genitore portandolo da Volume 1 Volume 3 , oppure spegnere l'altoparlante. • Premere sull'unità genitore quando non è in uso. L'indicatore del livello audio si accende quando si regola il volume dell'altoparlante.
  • Seite 134 3.4.1 Come impostare il timer per la pappa 1. Premere sull'unità genitore. 2. Premere oppure per impostare il timer. Ogni volta che si preme il tasto, il timer sarà impostato a un intervallo di 30 minuti; è possibile impostare il timer a un intervallo massimo di 24 ore. Se l'ora di allattamento successiva è...
  • Seite 135 interrompere il segnale acustico e reimpostare il timer a 00-00. 3.4.3 Come impostare il timer per il cambio del pannolino 1. Premere sull'unità genitore. 2. Premere oppure per impostare il timer. Ogni volta che si preme il tasto, il timer sarà impostato a un intervallo di 30 minuti;...
  • Seite 136 acustico della durata di 30 secondi. Premere un tasto qualsiasi sull'unità genitore per interrompere il segnale acustico e reimpostare il timer a 00-00. 3.4.5 Come impostare il timer per la nanna 1. Premere sull'unità genitore. 2. Premere oppure per impostare il timer. Ogni volta che si preme il tasto, il timer sarà...
  • Seite 137: Ninna Nanna

    la nanna lampeggerà e l'unità genitore emetterà un segnale acustico della durata di 30 secondi. Premere un tasto qualsiasi sull'unità genitore per interrompere il segnale acustico e reimpostare il timer a 00-00. Ninna nanna È possibile riprodurre una ninna nanna per attenuare eventuali rumori che potrebbero disturbare il sonno del neonato e far sì...
  • Seite 138: Attivazione O Disattivazione Dell'allarme Sonoro

    Attivazione o disattivazione dell'allarme sonoro È possibile attivare un allarme sonoro (Sound Alert) per fare in modo che l'unità genitore emetta un segnale non appena l'unità bimbo rilevi un rumore intenso. viene visualizzato se l'allarme sonoro è attivato. 1. Premere dall'unità...
  • Seite 139: Smaltimento Del Dispositivo (Ambiente)

    4. Smaltimento del dispositivo (ambiente) Non smaltire questo prodotto con i normali rifiuti domestici al termine del ciclo di vita. Portare questo prodotto presso un punto di raccolta per il riciclo di apparecchi elettrici ed elettronici, come indicato dal simbolo riportato sul prodotto, sulla guida utente e/o sulla confezione.
  • Seite 140: Pulizia

    5. Pulizia Pulire il Baby monitor audio digitale un panno leggermente umido o con un panno antistatico. Non usare mai detergenti né solventi abrasivi. Pulizia e cura • Non pulire alcuna componente del Baby monitor audio digitale con diluenti e altri solventi o prodotti chimici, in quanto ciò potrebbe provocare danni permanenti al prodotto non coperti dalla garanzia.
  • Seite 141: Ricerca E Risoluzione Dei Problemi

    6. Ricerca e risoluzione dei problemi La spia di alimentazione/collegamento dell'unità genitore non si accende • Controllare che l'unità genitore sia collegata all'alimentazione. • Controllare che le batterie in dotazione siano correttamente installate e non siano esaurite. • Ricaricare l'unità genitore collegandola alla fonte di alimentazione. La spia di alimentazione/collegamento sull'unità...
  • Seite 142 Non è possibile udire suoni o pianti del bimbo dall'unità genitore • Il livello del volume dell'unità genitore potrebbe essere stato impostato a un livello troppo basso, aumentare il livello del volume dell'unità genitore. Vedere la sezione 3.2 per le impostazioni del livello del volume. •...
  • Seite 143: Informazioni Generali

    Garanzia limitata prodotti di consumo e accessori ("Garanzia") Grazie per aver acquistato questo prodotto a marchio Motorola fabbricato su licenza di Binatone Electronics International LTD ("BINATONE") Cosa copre questa garanzia? Con le esclusioni indicate di seguito, BINATONE garantisce che questo prodotto a marchio Motorola ("Prodotto") o l'accessorio certificato...
  • Seite 144 ASSICURATE AI SENSI DI QUESTA GARANZIA ESPRESSA LIMITATA È IL RIMEDIO ESCLUSIVO DELL'UTENTE ED È DATA AL POSTO DI TUTTE LE ALTRE GARANZIE ESPRESSE O IMPLICITE. IN NESSUN CASO MOTOROLA O BINATONE SARANNO RESPONSABILI, SIA PER CONTRATTO CHE PER ILLECITO (INCLUSA LA NEGLIGENZA) PER DANNI CHE SUPERINO IL PREZZO DI ACQUISTO DEL PRODOTTO O DELL'ACCESSORIO NÉ...
  • Seite 145 (d) altre azioni che non sono colpa di MOTOROLA o BINATONE sono esclusi dalla copertura. Utilizzo di Prodotti o Accessori non a marchio Motorola. Difetti o danni che derivino dall'utilizzo di Prodotti o Accessori o altri apparecchi periferici non a marchio Motorola o non certificati sono esclusi dalla copertura.
  • Seite 146 (c) numeri di serie della scheda che non corrispondono; o (d) alloggiamenti o parti non conformi o non a marchio Motorola sono esclusi dalla copertura. Servizi di comunicazione. Difetti, danni o guasti di Prodotti o Accessori dovuti a servizi di comunicazione o segnali a cui ci si può...
  • Seite 147 NW2 7HF, United Kingdom. Declare under our sole responsibility that the following product Type of equipment: Digital Audio Baby Monitor Model Name: MBP160, MBP160-2, MBP161TIMER, MBP161TIMER-2 Country of Origin: China Brand: Motorola complies with the essential protection requirements of R&TTE Directive 1999/5/EC on the...
  • Seite 148: Dati Tecnici

    8. Dati tecnici UNITÀ BIMBO: Frequenza 1881,792 - 1897,344 MHz Canali Temperatura di 5º C - 45º C esercizio Adattatore di Ingresso 100-240 VCA, 50/60 Hz, 150 mA alimentazione Valore nominale Uscita 6 VCC, 450 mA UNITÀ GENITORE: Frequenza 1881,792 - 1897,344 MHz Canali Temperatura di 5º...
  • Seite 149 Fabbricato, distribuito o venduto da Binatone Electronics International LTD., concessionario ufficiale per questo prodotto. MOTOROLA e il logo della M stilizzata sono marchi commerciali o marchi registrati di Motorola Trademark Holdings, LLC. e sono utilizzati con autorizzazione. Tutti gli altri marchi commerciali appartengono ai rispettivi proprietari.
  • Seite 150 Manual do utilizador Monitor áudio digital com temporizador dos cuidados do bebé Modelos: MBP161TIMER, MBP161TIMER-2 As funções descritas neste manual do utilizador estão sujeitas a alterações sem aviso prévio.
  • Seite 151 Bem-vindo... ao seu monitor áudio digital do bebé da Motorola! Obrigado por comprar o monitor áudio digital do bebé da Motorola. Agora pode ouvir o seu bebé a dormir num outro quarto. O monitor áudio digital do bebé é também fornecido com um temporizador de cuidados do bebé que pode ajudar a recordar as tarefas importantes que tem de realizar para cuidar do seu bebé...
  • Seite 152 Apresentação geral da unidade do progenitor Indicador de nível de som CONVERSAR Ecrã LCD Pressione e mantenha pressionado para Botões do temporizador falar com a unidade do bebé. Painel de teclas de controlo Luz nocturna PARA CIMA/VOLUME + Pressione para ligar ou desligar a luz Pressione para aumentar o volume do nocturna.
  • Seite 153 Ícones do ecrã da unidade do progenitor Estado da ligação – É apresentado quando a unidade do progenitor está ligada à unidade do bebé. – Está intermitente quando se perdeu a ligação entre a unidade do bebé e a unidade do progenitor ou quando a unidade do progenitor se encontra fora de alcance da unidade do bebé.
  • Seite 154 Apresentação geral da unidade do bebé Sensor de temperatura ALIMENTAÇÃO/CANÇÃO DE Altifalante EMBALAR Ficha de alimentação Pressione e mantenha pressionado Indicador de alimentação/ligação para ligar ou desligar a unidade do Aceso de forma contínua quando a bebé. unidade do bebé possui alimentação e No modo inactivo: pressione para está...
  • Seite 155 Índice 1. Instruções de segurança ................7 2. Introdução ....................10 Fonte de alimentação da unidade do bebé ..........10 Fonte de alimentação e instalação da bateria da unidade do progenitor ....................11 Suporte de secretária na unidade do progenitor........12 3.
  • Seite 156: Instruções De Segurança

    1. Instruções de segurança AVISO: Perigo de estrangulamento: as crianças podem sofrer ESTRANGULAMENTO com os fios. Mantenha este fio fora do alcance das crianças (afastado mais de 1 metro). Nunca use cabos de extensão com adaptadores AC. Use apenas os adaptadores AC fornecidos.
  • Seite 157 CONFIGURAÇÃO E UTILIZAÇÃO DO MONITOR DO BEBÉ: • Determine uma localização para colocar o monitor áudio digital do bebé que proporcione a melhor recepção áudio do seu bebé no berço. • Coloque a unidade do bebé sobre uma superfície plana como, por exemplo, uma cómoda, secretária, prateleira ou montada na parede utilizando as ranhuras para encaixe sob o suporte.
  • Seite 158 • Utilize apenas os carregadores e adaptadores de alimentação fornecidos. Não utilize outros carregadores ou adaptadores de alimentação, caso contrário poderá danificar o dispositivo e o conjunto da bateria. • Introduza apenas um conjunto de bateria do mesmo tipo. • Não toque nos contactos da ficha com objectos pontiagudos ou metálicos. •...
  • Seite 159: Introdução

    2. Introdução Fonte de alimentação da unidade do bebé TOMADA FÊMEA CC FICHA CC 1. Introduza a ficha CC do adaptador de alimentação com a ficha CC maior na tomada CC na parte traseira da unidade do bebé. 2. Ligue a outra extremidade do adaptador de alimentação a uma tomada de corrente eléctrica adequada.
  • Seite 160: Fonte De Alimentação E Instalação Da Bateria Da Unidade Do Progenitor

    Fonte de alimentação e instalação da bateria da unidade do progenitor O equipamento é fornecido com uma bateria recarregável que deve ser instalada, de modo a que a unidade do progenitor possa ser movida para outro local sem perder a ligação com a(s) unidade(s) do bebé. Carregue a unidade do progenitor antes de a utilizar pela primeira vez ou quando a unidade do progenitor indicar que a bateria tem pouca carga.
  • Seite 161: Suporte De Secretária Na Unidade Do Progenitor

    Suporte de secretária na unidade do progenitor A unidade do progenitor é fornecida com um suporte para secretária preso na parte traseira da unidade. Para colocar a unidade do progenitor em cima de uma secretária, basta destacar o suporte, conforme apresentado anteriomente. NOTA Coloque a unidade do progenitor sobre uma superfície plana e uniforme.
  • Seite 162: Utilizar O Seu Monitor Áudio Digital Do Bebé

    3. Utilizar o seu monitor áudio digital do bebé Leia atentamente estas instruções e lembre-se de que este monitor áudio digital do bebé destina-se apenas a servir de ajuda. Não substitui uma supervisão adulta responsável e adequada. Ligar ou desligar 3.1.1 Ligar ou desligar a unidade do bebé...
  • Seite 163: Luz Nocturna

    • Pressione na unidade do progenitor quando esta não estiver a ser usada. O indicador de nível sonoro acende-se quando regula o volume do altifalante. O número de luzes LED indica o quanto o volume foi aumentado. Quando o volume do altifalante estiver desligado, o ecrã apresenta Luz nocturna Ligue a luz nocturna de modo a que o quarto tenha uma ligeira iluminação de modo a não estar muito escuro de noite.
  • Seite 164 3. Pressione para guardar e iniciar o temporizador. O ecrã irá apresentar SAVED antes de voltar ao ecrã em espera. botão de temporizador de alimentação mantém-se iluminado quando o temporizador está a funcionar. 3.4.2 Repor o temporizador de alimentação 1. Pressione na unidade do progenitor.
  • Seite 165 botão de temporizador de mudança de fralda mantém-se iluminado quando o temporizador está a funcionar. 3.4.4 Repor o temporizador para mudança de fralda 1. Pressione na unidade do progenitor. O temporizador será apresentado no ecrã. 2. Pressione para repor o temporizador para 00-00 e, em seguida, pressione...
  • Seite 166: Canção De Embalar

    3.4.6 Repor o temporizador para deitar o bebé 1. Pressione na unidade do progenitor. O temporizador será apresentado no ecrã. 2. Pressione para repor o temporizador para 00-00 e, em seguida, pressione para programar o temporizador. Cada tecla representa um intervalo de 30 minutos, até um intervalo máximo de 24 horas.
  • Seite 167: Seleccionar O Idioma De Apresentação Para A Unidade Do Progenitor

    2. Pressione para iniciar a reprodução da última canção de embalar seleccionada. 3. Pressione para terminar a reprodução. 3.5.3 Iniciar ou parar a reprodução da canção de embalar a partir da unidade do progenitor 1. Para iniciar a reprodução da canção de embalar, pressione quando a unidade do progenitor não estiver a ser usada.
  • Seite 168: Falar Para A Unidade Do Bebé

    Falar para a unidade do bebé Pode usar a função TALK da unidade do progenitor para falar e reconfortar o seu bebé. Para falar para a unidade do bebé: 1. Pressione e mantenha pressionado na unidade do progenitor. 2. Fale na direcção do microfone na unidade do progenitor. A sua voz será...
  • Seite 169: Eliminação Do Dispositivo (Ambiente)

    4. Eliminação do dispositivo (ambiente) No final da vida útil do produto não deve eliminá-lo com os resíduos domésticos normais. Coloque este produto num ponto de recolha para reciclagem de equipamento eléctrico e electrónico. O símbolo apresentado no produto, manual do utilizador e/ou embalagem fornece essa indicação.
  • Seite 170: Limpeza

    5. Limpeza Limpe o seu monitor áudio digital do bebé com um pano ligeiramente húmido ou com um pano anti-estático. Nunca utilize agentes de limpeza ou solventes abrasivos. Limpeza e cuidados a ter • Não limpe qualquer parte do monitor áudio digital do bebé com diluentes ou outros solventes e produtos químicos - isto pode provocar danos permanentes ao produto, que não são abrangidos pela garantia.
  • Seite 171: Resolução De Problemas

    6. Resolução de problemas O indicador de alimentação/ligação na unidade do progenitor não se acende • Verifique se a unidade do progenitor está ligada. • Verifique se o conjunto de bateria recarregável fornecido está instalado correctamente e possui carga. • Recarregue a unidade do progenitor ligando-a à fonte de alimentação eléctrica.
  • Seite 172 A unidade de progenitor não transmite som ou o choro do bebé • É possível que o volume na unidade de progenitor esteja definido num nível muito baixo; aumente o volume na referida unidade. Consulte a secção 3.2 para obter mais informações sobre definições do nível de volume. •...
  • Seite 173: Informação Geral

    Garantia limitada para produtos e acessórios de consumo ("Garantia") Obrigado por adquirir este produto da marca Motorola fabricado sob licença pela Binatone Electronics International LTD ("BINATONE") O que é abrangido por esta garantia? Com as exclusões previstas em seguida, a BINATONE garante que este produto da marca Motorola ("Produto") ou acessório certificado ("Acessório") é...
  • Seite 174 PRESENTE GARANTIA LIMITADA EXPRESSA É O ÚNICO RECURSO DO CONSUMIDOR, E É FORNECIDA EM LUGAR DE QUAISQUER OUTRAS GARANTIAS, EXPRESSAS OU IMPLÍCITAS. EM CIRCUNSTÂNCIA ALGUMA A MOTOROLA OU A BINATONE SERÃO RESPONSÁVEIS, QUER POR RESPONSABILIDADE CONTRATUAL OU EXTRACONTRATUAL (INCLUINDO NEGLIGÊNCIA), POR DANOS SUPERIORES AO PREÇO DE COMPRA DO PRODUTO OU ACESSÓRIO, OU POR QUAISQUER DANOS INDIRECTOS,...
  • Seite 175 Utilização de Produtos e Acessórios de outra marca que não a Motorola. Os defeitos ou danos resultantes da utilização de Produtos ou Acessórios de outra marca que não a Motorola ou que não sejam certificados pela mesma ou outros equipamentos periféricos são excluídos desta Garantia.
  • Seite 176 (c) números de série da placa não correspondentes; ou (d) estruturas ou peças não conformes ou que não sejam da marca Motorola são excluídos desta Garantia. Serviços de comunicação. Os defeitos, danos ou avarias de Produtos ou Acessórios resultantes de qualquer sinal ou serviço de comunicação subscrito...
  • Seite 177 NW2 7HF, United Kingdom. Declare under our sole responsibility that the following product Type of equipment: Digital Audio Baby Monitor Model Name: MBP160, MBP160-2, MBP161TIMER, MBP161TIMER-2 Country of Origin: China Brand: Motorola complies with the essential protection requirements of R&TTE Directive 1999/5/EC on the...
  • Seite 178: Especificações Técnicas

    8. Especificações técnicas UNIDADE DO BEBÉ: Frequência 1881,792 - 1897,344 MHz Canais Temperatura de 5 ºC - 45 ºC funcionamento Adaptador de Entrada 100-240 VCA, 50/60 Hz, 150 mA alimentação Classificação Saída 6 VCC, 450 mA UNIDADE DO PROGENITOR: Frequência 1881,792 - 1897,344 MHz Canais Temperatura de...
  • Seite 179 Fabricado, distribuído ou vendido pela Binatone Electronics International LTD., empresa licenciada oficial para este produto. MOTOROLA e o logótipo do M estilizado são marcas comerciais ou marcas comerciais registadas da Motorola Trademark Holdings, LLC. e são utilizados mediante licença da mesma.
  • Seite 180 Manual de usuario Monitor digital de audio con temporizador para cuidado del niño Modelos: MBP161TIMER, MBP161TIMER-2 Las funciones descritas en este manual de usuario están sujetas a modificaciones sin previo aviso.
  • Seite 181 Conserve el comprobante de compra original (con fecha) para sus registros. Para poder disfrutar de la garantía de su producto Motorola tendrá que facilitar una copia de su comprobante de compra (con fecha) para confirmar el estado de la garantía.
  • Seite 182 Descripción general de la unidad para padres Indicador de nivel de sonido Luz nocturna Pantalla LCD Pulsar para activar o desactivar la luz Botones del temporizador nocturna. Panel de teclas de control Micrófono ARRIBA/VOLUMEN + Canción de cuna Pulsar para aumentar el volumen del Pulsar para iniciar o detener la altavoz.
  • Seite 183 Iconos de la pantalla de la unidad para padres Estado de conexión – Se muestra cuando la unidad para padres se encuentra vinculada con la unidad para bebés. – Parpadea cuando se pierde el vínculo existente entre la unidad para bebés y la unidad para padres, y cuando la unidad para padres está...
  • Seite 184 Descripción general de la unidad para bebés Sensor de temperatura ENCENDIDO Y APAGADO/ Altavoz CANCIÓN DE CUNA Conector de alimentación Mantener pulsado para encender y Indicador de Encendido/Vínculo apagar la unidad para bebés. Encendido de forma fija cuando la En el modo en espera: Pulsar para unidad para bebés se encuentra acceder al menú...
  • Seite 185 Índice 1. Instrucciones de seguridad............... 7 2. Primeros pasos ..................10 Fuente de alimentación de la unidad para bebés........10 Instalación de la batería y conexión de la unidad para padres a la alimentación....................11 Soporte de mesa de la unidad para padres ..........12 3.
  • Seite 186: Instrucciones De Seguridad

    1. Instrucciones de seguridad ADVERTENCIA: Riesgo de estrangulamiento: los niños se pueden ESTRANGULAR con los cables. Mantenga el cable fuera del alcance de los niños (alejado más de 1 metro). Nunca utilice cables de extensión con adaptadores de CA. Solo utilice los adaptadores de CA proporcionados.
  • Seite 187 CONFIGURACIÓN Y USO DEL VIGILABEBÉS: • Coloque el vigilabebés con audio digital en la ubicación que proporcione la mejor recepción de audio posible de su bebé en su cuna. • Coloque la unidad para bebés en una superficie plana, como por ejemplo un vestidor, un armario o una estantería, o monte la unidad en una pared de forma segura utilizando las ranuras situadas bajo el soporte.
  • Seite 188 • Utilice únicamente los cargadores y adaptadores de corriente proporcionados. No utilice otros cargadores ni adaptadores de corriente, ya que podría dañar el dispositivo y el pack de baterías. • Inserte únicamente un pack de baterías del mismo tipo. • No toque los contactos de conexión con objetos afilados ni metálicos. •...
  • Seite 189: Primeros Pasos

    2. Primeros pasos Fuente de alimentación de la unidad para bebés ENTRADA DE CC CONECTOR DE CC 1. Inserte el conector de CC del adaptador de corriente con el conector de CC más grande en la entrada de CC situada en la parte trasera de la unidad para bebés.
  • Seite 190: Instalación De La Batería Y Conexión De La Unidad Para Padres A La Alimentación

    Instalación de la batería y conexión de la unidad para padres a la alimentación Se incluye un pack de batería recargable que debe montarse para que la unidad para padres pueda moverse a otra ubicación sin perder el vínculo con la unidad para bebés.
  • Seite 191: Soporte De Mesa De La Unidad Para Padres

    Soporte de mesa de la unidad para padres La unidad para padres incluye un soporte de mesa acoplado a la parte trasera de la unidad. Si desea colocar la unidad para padres sobre una mesa, solo tendrá que extraer el soporte como se muestra anteriormente. NOTA Coloque la unidad para padres sobre una superficie plana y nivelada.
  • Seite 192: Utilización Del Vigilabebés Con Audio Digital

    3. Utilización del vigilabebés con audio digital Lea estas instrucciones detenidamente, y recuerde que este vigilabebés con audio digital está diseñado únicamente como ayuda. No sustituye a una supervisión paterna adecuada y responsable. Encendido y apagado 3.1.1 Encendido y apagado de la unidad para bebés •...
  • Seite 193: Luz Nocturna

    • Pulse en la unidad para padres cuando no esté en uso. El indicador de nivel de sonido se ilumina al realizar el ajuste del volumen del altavoz. El número de luces LED indica hasta qué punto se ha aumentado el volumen. Cuando el volumen del altavoz está...
  • Seite 194 3. Pulse para guardar y poner en marcha el temporizador. GUARDADO En la pantalla se mostrará antes de volver a la pantalla de inactividad. El botón del temporizador de alimentación permanece iluminado mientras el temporizador está en marcha. 3.4.2 Restablecer el temporizador de alimentación 1.
  • Seite 195 Si la siguiente hora de cambio de pañales es dentro de 3 horas, pulse para ajustar el temporizador hasta que se muestre 03-00. 3. Pulse para guardar el temporizador. GUARDADO En la pantalla se mostrará antes de volver a la pantalla de inactividad.
  • Seite 196 3. Pulse para guardar y poner en marcha el temporizador. GUARDADO En la pantalla se mostrará antes de volver a la pantalla de inactividad. El botón del temporizador de sueño permanece iluminado mientras el temporizador está en marcha. 3.4.6 Restablecer el temporizador de sueño 1.
  • Seite 197: Canción De Cuna

    Canción de cuna Puede reproducir una canción de cuna para acallar los ruidos y que el bebé pueda dormir tranquilamente y relajado. 3.5.1 Seleccione la canción de cuna en la unidad para bebés 1. Pulse en la unidad para bebés para acceder al menú de canción de cuna.
  • Seite 198: Hablar A Través De La Unidad Para Bebés

    ¿ACTIVADO? 3. Pulse para seleccionar cuando el ajuste actual sea ¿DESACTIV.? desactivado, u cuando el ajuste actual sea activado. 4. Pulse para confirmar. Hablar a través de la unidad para bebés Puede usar la función HABLAR de la unidad para padres para hablar y relajar a su bebé.
  • Seite 199: Eliminación Del Dispositivo (Información Medioambiental)

    4. Eliminación del dispositivo (información medioambiental) Al final del ciclo de vida del producto, no deberá eliminar este producto junto con los residuos domésticos convencionales. Trasládelo hasta un punto de recogida destinado al reciclaje de dispositivos eléctricos o electrónicos. El símbolo que aparece en el producto, en el manual de usuario y/o en la caja así...
  • Seite 200: Limpieza

    5. Limpieza Limpie el Vigilabebés con audio digital con un paño ligeramente humedecido o con un paño antiestático. No utilice nunca agentes de limpieza ni disolventes abrasivos. Limpieza y cuidados • No limpie ninguna de las piezas del Vigilabebés con audio digital con disolventes ni productos químicos, esto podría provocar daños permanentes al producto, y no cubiertos por la garantía.
  • Seite 201: Solución De Problemas

    6. Solución de problemas El indicador Encendido/Vínculo de la unidad para padres no se enciende • Asegúrese de que la unidad para padres esté encendida. • Asegúrese de que el pack de batería incluido esté correctamente instalado, y de que no esté gastado. •...
  • Seite 202 No es posible escuchar sonido ni el llanto del bebé a través de la unidad para padres • El nivel de volumen de la unidad para padres podría estar ajustado a un nivel demasiado bajo. Aumente el nivel de volumen de la unidad para padres. Consulte el apartado 3.2 para obtener información sobre la configuración del nivel de volumen.
  • Seite 203: Información General

    Sujeto a las exclusiones presentes a continuación, BINATONE garantiza que este producto (el "Producto") o accesorio certificado (el "Accesorio") de marca Motorola vendido con este producto ha sido fabricado libre de fallos en materiales y en la mano de obra con un uso de consumo normal durante el periodo especificado a continuación.
  • Seite 204 CONSUMIDOR, Y SE PROPORCIONA EN LUGAR DEL RESTO DE GARANTÍAS, TANTO EXPRESAS COMO IMPLÍCITAS. BAJO NINGUNA CIRCUNSTANCIA MOTOROLA NI BINATONE SERÁN RESPONSABLES, NI POR CONTRATO NI POR AGRAVIO (INCLUIDA NEGLIGENCIA) DE DAÑOS SUPERIORES AL PRECIO DE COMPRA DEL PRODUCTO O ACCESORIO EN CUESTIÓN, NI DE NINGÚN DAÑO INDIRECTO, ACCIDENTAL, ESPECIAL O...
  • Seite 205 MOTOROLA ni a BINATONE., están excluidos de la cobertura. Uso de Productos y Accesorios de marcas que no sean Motorola. Esta garantía no cubre aquellos defectos o daños derivados del uso de Productos, Accesorios o cualquier equipamiento periférico que no sean de la marca Motorola o no estén...
  • Seite 206 (b) sellos rotos o que presenten evidencia de modificación; (c) no coincidencia de números de serie de placa; o (d) piezas o carcasas no conformes o que no sean de la marca Motorola. Servicios de comunicación. Los defectos, daños o los fallos de Productos o Accesorios derivados de servicios o señales de comunicación a los que puede...
  • Seite 207 NW2 7HF, United Kingdom. Declare under our sole responsibility that the following product Type of equipment: Digital Audio Baby Monitor Model Name: MBP160, MBP160-2, MBP161TIMER, MBP161TIMER-2 Country of Origin: China Brand: Motorola complies with the essential protection requirements of R&TTE Directive 1999/5/EC on the...
  • Seite 208: Especificaciones Técnicas

    8. Especificaciones técnicas UNIDAD PARA BEBÉS: Frecuencia 1881,792 - 1897,344 MHz Canales Temperatura de 5ºC – 45ºC funcionamiento Adaptador de Entrada 100 - 240 V CA, 50/60 Hz, 150 mA suministro de corriente Potencia nominal Salida 6 V CC, 450 mA UNIDAD PARA PADRES: Frecuencia 1881,792 - 1897,344 MHz...
  • Seite 209 Fabricado, distribuido o comercializado por Binatone Electronics International LTD., licenciatario oficial de este producto. MOTOROLA y el logotipo de la M estilizada son marcas comerciales o marcas comerciales registradas de Motorola Trademark Holdings, LLC. y se usan con licencia. El resto de marcas comerciales son propiedad de sus respectivos propietarios.

Diese Anleitung auch für:

Mbp161timer-2

Inhaltsverzeichnis