Herunterladen Inhalt Inhalt Diese Seite drucken
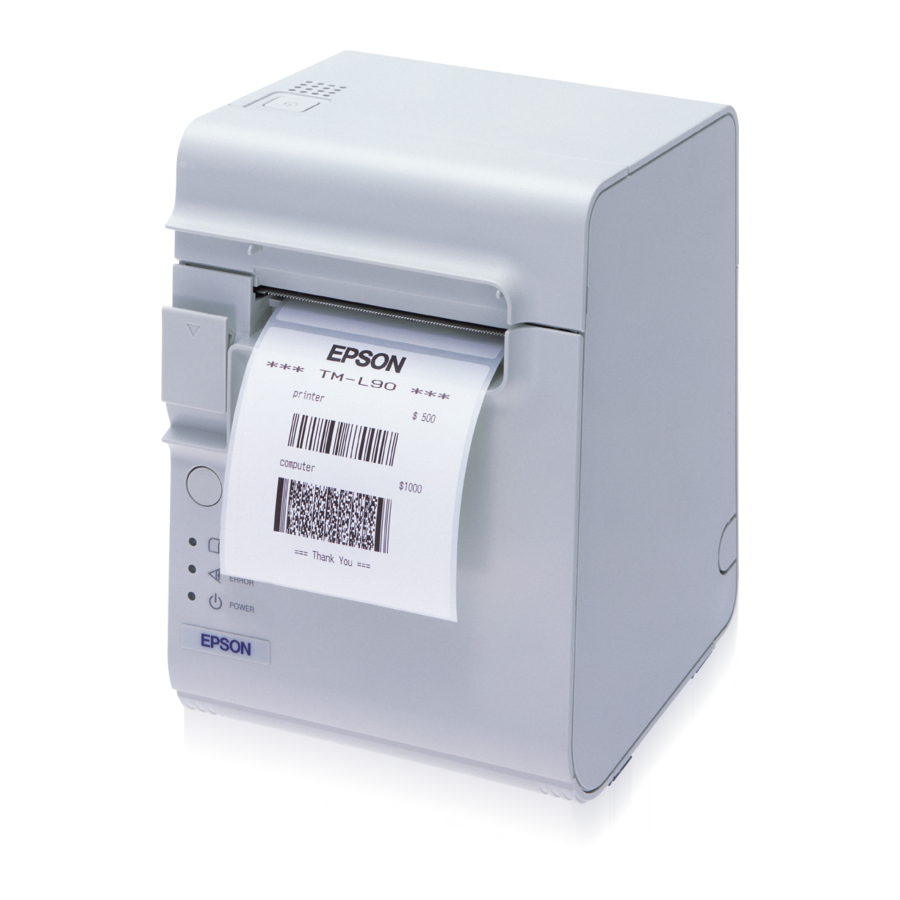
Epson TM-L90 Benutzerhandbuch
Vorschau ausblenden Andere Handbücher für TM-L90:
Inhaltsverzeichnis

Werbung

Verfügbare Sprachen
  • DE

Verfügbare Sprachen

  • DEUTSCH, seite 28
User's Manual / Manuel de l'utilisateur /
Benutzerhandbuch / Gebruikershandleiding /
Manuale dell'utente / Manual del usuario /
Manual do utilizador / Руководство по эксплуатации /
Пайдаланушы нұсқаулықтары
M00071701

Werbung

Inhaltsverzeichnis

Fehlerbehebung

loading

Inhaltszusammenfassung für Epson TM-L90

  • Seite 1 User’s Manual / Manuel de l’utilisateur / Benutzerhandbuch / Gebruikershandleiding / Manuale dell’utente / Manual del usuario / Manual do utilizador / Руководство по эксплуатации / Пайдаланушы нұсқаулықтары M00071701...
  • Seite 2 English Illustrations...
  • Seite 3 English 58 mm 40 mm 58 mm 40 mm...
  • Seite 4 English...
  • Seite 5 Rated output: 24 V/2.0 - 10.0 A or more, Maximum output: 240 VA or less Default Delay Times for Power Management for Epson Products This product will enter low power (sleep) mode after a period of nonuse. The time interval has been set at the factory to ensure that the product meets Energy Star standards of energy efficiency and cannot be modified by the consumer.
  • Seite 6 English Memory switch settings Memory switches can be set with the memory switch setting utility. Paper width 40mm 58mm 80mm ✔ ✔ ✔ ✔ ✔ 65* model 66* model ✔ ✔ ✔ ✔ ✔ ✔ ✔ Characters per Font A line Font B Auto scaling...
  • Seite 7: Restriction Of Use

    Neither Seiko Epson Corporation nor its affiliates shall be liable to the purchaser of this product or third parties for damages, losses, costs, or expenses incurred by purchaser or third parties as a result of: accident, misuse, or abuse of this product or unauthorized modifications, repairs, or alterations to this product, or (excluding the U.S.) failure to strictly comply with Seiko Epson Corporation’s operating and maintenance instructions.
  • Seite 8: Important Safety Information

    If water or other liquid spills into this equipment, unplug the power cord immediately, and then contact your dealer or a Seiko Epson service center for advice. Continued usage may lead to fire. Do not use aerosol sprayers containing flammable gas inside or around this product.
  • Seite 9: Caution Labels

    The latest versions of drivers, utilities, and manuals can be downloaded from one of the following URLs. For customers in North America, go to the following web site: http://www.epsonexpert.com/ For customers in other countries, go to the following web site: https://download.epson-biz.com/?service=pos TM-L90 User’s Manual 9...
  • Seite 10: Printer Parts

    You can install the printer horizontally (with the paper exit on top) or vertically (with the paper exit at the front). When installing the printer vertically, attach the included control panel label to the printer case, and install it on a flat surface. (See illustration 10 TM-L90 User’s Manual...
  • Seite 11 Align 2 holes (Illustration ) in the paper guide with 2 projections of the roll paper holder. Push the lever of the paper guide down until the paper guide clicks into place. (See illustration TM-L90 User’s Manual 11...
  • Seite 12: Connecting Cables

    When print quality is deteriorated, clean the paper path (such as the autocutter blade, platen roller, thermal head, and the roll paper holder). To clean these parts, turn off the printer, unplug the AC cable, open the roll 12 TM-L90 User’s Manual...
  • Seite 13 Wipe off all glue on these edge and ribs. Blow or wipe off the paper dust around the black mark sensor. Autocutter blade Platen roller Wipe off all glue in the touchable area of the autocutter and the platen roller. TM-L90 User’s Manual 13...
  • Seite 14 To start a test print, press the Feed button when the printer is in the self test wait mode. Check that the following has been printed. "*** completed ***" This indicates that the printer has been initialized and made the transition to the normal mode. 14 TM-L90 User’s Manual...
  • Seite 15: Troubleshooting

    ❏ Turn the printer off and back on. If the LED is still flashing, notify your manager. The printer may require servicing. TM-L90 User’s Manual 15...
  • Seite 16 (See illustration Turn the knob in the direction of the arrow, by using a ballpoint pen or tweezers, until you see a triangle mark in the opening. (See illustration 16 TM-L90 User’s Manual...
  • Seite 17: Restrictions D'emploi

    La société décline toute responsabilité relative à l’exploitation des informations contenues dans le présent document. Cet ouvrage a été rédigé avec le plus grand soin ; toutefois, Seiko Epson Corporation décline toute responsabilité pour les erreurs et omissions qu’il pourrait contenir, ainsi que pour tous dommages résultant de l’exploitation des informations qu’il contient.
  • Seite 18: Importantes Précautions De Sécurité

    En cas de pénétration d’eau ou d’un autre liquide renversé dans l’équipement, débranchez immédiatement le cordon d’alimentation et contactez votre distributeur ou un centre de service Seiko Epson pour demander conseil. En persistant à utiliser l’équipement dans ces circonstances, un incendie pourrait se produire.
  • Seite 19 Il est possible de télécharger les dernières versions des pilotes, utilitaires et manuels à partir de l’une des URL suivantes. En Amérique du Nord, accédez au site web suivant : http://www.epsonexpert.com/ Dans les autres pays, accédez au site web suivant : https://download.epson-biz.com/?service=pos TM-L90 Manuel de l’utilisateur 19...
  • Seite 20: Panneau De Commande

    Retrait ou installation du guide de papier Installez ou retirer le guide de papier pour faire correspondre à la largeur du rouleau de papier utilisé. ❏ Pour le modèle 65* Un guide de papier de 40 mm est installé. 20 TM-L90 Manuel de l’utilisateur...
  • Seite 21 Alignez les 2 trous (Illustration du guide de papier avec 2 projections E 5) du support de rouleau de papier. Poussez le levier du guide de papier jusqu'à ce que le guide de papier s'enclenche en position (voir illustration TM-L90 Manuel de l’utilisateur 21...
  • Seite 22: Connexion Des Câbles

    ATTENTION : Ne nettoyez jamais le produit avec de l’alcool, du benzène, du diluant ou tout autre solvant de ce type. Cela pourrait endommager ou casser les éléments composés de plastique ou de caoutchouc. 22 TM-L90 Manuel de l’utilisateur...
  • Seite 23 La tête thermique peut être très chaude après l'impression. Veillez à ne pas la toucher et à la laisser refroidir avant de la nettoyer. Évitez de la manipuler avec vos doigts ou un objet dur afin de ne pas l’endommager. TM-L90 Manuel de l’utilisateur 23...
  • Seite 24 Rouleau de la pouvant être touchée du coupe- glace d'exposition papier automatique et du rouleau de glace d'exposition. <Emplacements de la tête thermique et du support de rouleau de papier> Support de rouleau de papier Tête thermique 24 TM-L90 Manuel de l’utilisateur...
  • Seite 25: Réinitialisation De L'imprimante

    Certaines conditions d’erreur peuvent être réinitialisées en mettant l’imprimante hors tension, puis à nouveau sous tension. Cette méthode ne permet pas de réinitialiser toutes les conditions d’erreur. Pour plus de détails, consultez la section “Dépannage” page 26. TM-L90 Manuel de l’utilisateur 25...
  • Seite 26: Dépannage

    ❏ Mettez l'imprimante hors tension, puis remettez-la sous tension. Si le VOYANT clignote encore, avertissez votre responsable. L'imprimante peut nécessiter une révision. 26 TM-L90 Manuel de l’utilisateur...
  • Seite 27: Bourrage Papier

    (voir illustration Tournez le bouton dans le sens de la flèche en utilisant un stylo ou des pinces, jusqu'à voir un repère triangulaire dans l'ouverture (voir illustration TM-L90 Manuel de l’utilisateur 27...
  • Seite 28: Beschränkung Der Anwendung

    Ausgaben verantwortlich, die dem Käufer dieses Produkts oder dritten Parteien durch: Unfall, Missbrauch oder falschem Gebrauch dieses Produkts entstanden sind oder durch unbefugte Veränderungen oder Reparaturen dieses Produkts oder (mit Ausnahme der USA) weil die Bedien- und Wartungsanweisungen der Seiko Epson Corporation nicht strikt eingehalten wurden.
  • Seite 29: Wichtige Sicherheitsinformationen

    Brand führen. Wenn Wasser oder andere Flüssigkeiten in dieses Gerät geschüttet werden, ziehen Sie sofort den Stecker ab und bitten Sie Ihren Händler oder ein Seiko Epson Servicecenter um Rat. Eine ununterbrochene Benutzung kann zum Brand führen. Verwenden Sie im Inneren dieses Produkts oder seiner Nähe, keine Spraydosen, die brennbares Gas enthalten.
  • Seite 30: Herunterladen Von Treibern, Dienstprogrammen Und Handbüchern

    Herunterladen von Treibern, Dienstprogrammen und Handbüchern Die neuesten Versionen der Treiber, Dienstprogramme und Handbücher können von folgenden Webadressen heruntergeladen werden. Für Kunden in Nordamerika: Besuchen Sie die Website http://www.epsonexpert.com/ Für Kunden in anderen Ländern: Besuchen Sie die Website: https://download.epson-biz.com/?service=pos 30 TM-L90 Benutzerhandbuch...
  • Seite 31: Installation Des Druckers Horizontal Oder Vertikal

    Bedientafeletikett am Druckergehäuse an und stellen ihn auf eine flache Fläche. (Siehe Abbildung Abnehmen oder Anbringen der Papierführung Installieren oder entfernen Sie die Papierführung, so dass sie der Breite des verwendeten Rollenpapiers entspricht. ❏ Für das Modell 65* Es ist eine 40 mm breite Papierführung angebracht. TM-L90 Benutzerhandbuch 31...
  • Seite 32: Abnehmen Der Papierführung

    Richten Sie die Kante der Papierführung auf die Kerbe (Abbildung E 4) Rollenpapierhalter aus. Richten Sie die beiden Löcher (Abbildung in der Papierführung auf E 5) die beiden Vorsprünge des Rollenpapierhalters aus. Drücken Sie den Hebel der Papierführung nach unten, bis die Papierführung einrastet. (Siehe Abbildung 32 TM-L90 Benutzerhandbuch...
  • Seite 33: Einlegen Oder Wechseln Des Rollenpapiers

    Seiten auf die Papierführungen ausrichten. (Siehe Abbildung Schließen Sie die Rollenpapierabdeckung. Wenn der Drucker angeschaltet wird, wird das Papier automatisch eingezogen und abgeschnitten. Anmerkung: Achten Sie darauf, dass die Rollenpapierabdeckung vollkommen geschlossen wird, indem Sie auf die Mitte der Abdeckung drücken. TM-L90 Benutzerhandbuch 33...
  • Seite 34: Reinigung Des Druckerinneren

    Der Thermokopf kann nach dem Drucken sehr heiß werden. Passen Sie auf, dass Sie ihn nicht berühren, und lassen Sie ihn vor der Reinigung abkühlen. Achten Sie darauf, den Thermokopf nicht durch Berühren mit den Fingern oder harten Gegenständen zu beschädigen. 34 TM-L90 Benutzerhandbuch...
  • Seite 35 Blasen oder wischen Sie den Papierstaub um den schwarzen Markierungssensor herum ab. Automatisches Schneidblatt Wischen Sie allen Klebstoff im berührbaren Bereich der Druckwalze automatischen Schneidvorrichtung und der Druckwalze ab. <Orte für den Thermokopf und den Rollenpapierhalter> Rollenpapierhalter Thermokopf TM-L90 Benutzerhandbuch 35...
  • Seite 36: Durchführen Eines Selbsttests

    Übergang zum Normalmodus stattgefunden hat. Zurücksetzen des Druckers Bestimmte Fehlerzustände können zurückgesetzt werden, indem der Drucker aus- und wieder eingeschaltet wird. Mit dieser Methode können nicht alle Fehlerbedingungen zurückgesetzt werden. Weitere Details siehe “Fehlersuche” auf Seite 37. 36 TM-L90 Benutzerhandbuch...
  • Seite 37: Fehlersuche

    Wenn ein Papierstau auftritt oder die Rollenpapierabdeckung nicht geöffnet werden kann, siehe Abschnitt unten. ❏ Schalten Sie den Drucker aus und wieder an. Wenn die LED weiter blinkt, kontaktieren Sie Ihren IT-Verantwortlichen. Es kann sein, dass der Drucker repariert werden muss. TM-L90 Benutzerhandbuch 37...
  • Seite 38 Seiten des Druckers und heben Sie die Abdeckung in Pfeilrichtung an, um sie abzunehmen. (Siehe Abbildung Drehen Sie den Knopf mit einem Kugelschreiber oder einer Pinzette in Pfeilrichtung, bis Sie eine dreieckige Markierung in der Öffnung sehen. (Siehe Abbildung 38 TM-L90 Benutzerhandbuch...
  • Seite 39 Afhankelijk van het gebied kan de interface kabel worden meegeleverd met het product. Gebruik als dit het geval is die kabel. Seiko Epson Corporation is niet aansprakelijk voor schade of problemen die voortvloeien uit gebruik van andere optionele producten of verbruiksgoederen dan die welke door Seiko Epson Corporation zijn aangemerkt als “originele Epson-producten”...
  • Seite 40: Belangrijke Veiligheidsinformatie

    Als er water of andere vloeistoffen in de apparatuur terechtkomen, de stekker onmiddellijk uit het stopcontact trekken en contact opnemen met de leverancier of een Seiko Epson servicecentrum voor advies. Doorgaan met gebruik kan leiden tot brand. Geen spuitbussen met brandgevaarlijk gas in of bij dit product gebruiken. Dit kan brand veroorzaken.
  • Seite 41 De meest recente versies van stuur- en hulpprogramma’s en gebruiksaanwijzingen kunnen van een van de volgende URL’s gedownload worden. Klanten in Noord-Amerika kunnen gebruik maken van de volgende website: http://www.epsonexpert.com/ Klanten in andere landen kunnen gebruik maken van de volgende website: https://download.epson-biz.com/?service=pos TM-L90 Gebruikershandleiding 41...
  • Seite 42 Plaats of verwijder de papiergeleider afhankelijk van de breedte van het gebruikte rolpapier. ❏ Voor het 65* model Is voorzien van een 40 mm papiergeleider. • Wanneer u 40 mm rolpapier gebruikt, gebruik de printer dan als normaal. 42 TM-L90 Gebruikershandleiding...
  • Seite 43: De Kabels Aansluiten

    Breek met de hand willekeurig welke van de drie delen af die met cirkels zijn aangeduid in afbeelding om de kabels door te voeren. Sluit de kabels op de computer aan. Plaats de behuizing terwijl u de kabels door de gaten voert. TM-L90 Gebruikershandleiding 43...
  • Seite 44 Om deze onderdelen te reinigen: schakel de printer uit, verwijder de wisselstroomkabel, open de papierrolkap en verwijder het stof, lijm of andere materie met een wattenstaafje of doekje bevochtigd met een alcoholoplossing (ethanol of IPA). 44 TM-L90 Gebruikershandleiding...
  • Seite 45 Papierbaan Veeg alle lijm van deze randen en ribben. Blaas of veeg al het papierstof rond de zwarte sensor weg. Automatisch snijmes Roller Veeg alle lijm in de aanraakbare plaatsen van de automatische snijder en de roller. TM-L90 Gebruikershandleiding 45...
  • Seite 46 Druk op de FEED-knop om een testafdruk te starten als de printer in de self-test wachtmodus staat. Controleer dat het volgende is afgedrukt. “*** completed ***” Dit betekend dat de printer is geinitialiseerd en is overgeschakeld naar de normale modus. 46 TM-L90 Gebruikershandleiding...
  • Seite 47: Probleemoplossing

    Als er lijm of andere materie op de automatische snijder, roller of papierbaan aanwezig is, dan is vastlopen mogelijk. Zie “Reinigen in de printer” op pagina 44 voor reinigingsinstructies. TM-L90 Gebruikershandleiding 47...
  • Seite 48 (Zie afbeelding Draai de knop in de richting van de pijl, door middel van een pen of een tang, totdat u een driehoeksteken teken ziet in de opening. (Zie afbeelding 48 TM-L90 Gebruikershandleiding...
  • Seite 49: Limitazioni D'impiego

    Né la Seiko Epson Corporation, né alcuna delle sue affiliate, sarà ritenuta responsabile verso l’acquirente di questo prodotto, o terze parti, di eventuali danni, perdite, costi o spese sostenuti dall’acquirente o terze parti risultanti da: incidente, uso improprio o abuso di questo prodotto, o da modifiche non autorizzate, riparazioni, alterazioni a questo prodotto, oppure (esclusi gli Stati Uniti d’America) dalla totale inosservanza delle istruzioni...
  • Seite 50: Precauzioni Di Sicurezza

    Spegnere immediatamente l’unità se produce fumo, un odore strano o un rumore inconsueto. L’uso continuato potrebbe costituire causa d’incendio. Staccare immediatamente la spina dell’unità e rivolgersi al rivenditore o alla Seiko Epson per assistenza in merito. Non riparare mai da soli questa unità. La riparazione impropria potrebbe creare un pericolo.
  • Seite 51: Etichette Di Avvertimento

    Per clienti in Nord America, andare al seguente sito Web: http://www.epsonexpert.com/ Per clienti in altri Paesi, andare al seguente sito Web: https://download.epson-biz.com/?service=pos Parti della stampante Copertura del rotolo di carta Taglierina manuale Pannello di controllo Copertura della taglierina Leva coperchio aperto Interruttore dell'alimentazione TM-L90 Manuale dell’utente 51...
  • Seite 52: Pannello Di Controllo

    Quando si utilizza un rotolo di carta della larghezza di 80 mm, rimuovere la guida installata. • Quando si utilizza un rotolo di carta della larghezza di 40 mm rimuovere la guida installata e installare la guida della carta da 40 mm in dotazione. 52 TM-L90 Manuale dell’utente...
  • Seite 53: Collegamento Dei Cavi

    Rompere con le mani una qualsiasi delle tre parti indicate dai cerchi nella figura per far passare i cavi. Collegare i cavi alla stampante. Fissare la copertura infilando i cavi attraverso i fori. TM-L90 Manuale dell’utente 53...
  • Seite 54 Per pulire queste parti, spegnere la stampante, scollegare il cavo CA, aprire la copertura del rotolo di carta e rimuovere polveri di carta, colla aderente o altre sostanze estranee con un tamponcino di cotone o un panno inumidito con solvente a base di alcol (etanolo o IPA). 54 TM-L90 Manuale dell’utente...
  • Seite 55 Aspirare o rimuovere le polveri di carta attorno al sensore di movimento. Lama della taglierina automatica Rimuovere tutta la colla nella zona Rullo della platina accessibile della taglierina automatica e del rullo della platina. TM-L90 Manuale dell’utente 55...
  • Seite 56 Per avviare una stampa di prova, premere il pulsante Feed quando la stampante si trova nella modalità di attesa di auto-diagnosi. Verificare che quanto segue sia stato stampato. “*** completed ***” Indica che la stampante è stata inizializzata ed è passata alla modalità normale. 56 TM-L90 Manuale dell’utente...
  • Seite 57: Risoluzione Dei Problemi

    Se si verifica un inceppamento della carta o se la copertura del rotolo della carta non si apre, consultare la sezione di seguito. ❏ Spegnere e riaccendere la stampante. Se il LED lampeggia ancora, avvisare il proprio responsabile. La stampante potrebbe necessitare di essere riparata. TM-L90 Manuale dell’utente 57...
  • Seite 58: Inceppamento Della Carta

    (Vedere la figura Girare la manopola nella direzione della freccia, utilizzando una penna a sfera o delle pinzette, finché non si vede un segno a triangolo nell'apertura. (Vedere la figura 58 TM-L90 Manuale dell’utente...
  • Seite 59: Restricciones De Uso

    Seiko Epson Corporation. No se asume responsabilidad de patente con respecto al uso de la información contenida aquí. Si bien se han tomado todas las precauciones en la preparación de este libro, Seiko Epson Corporation no asume ninguna...
  • Seite 60 Apague su equipo de inmediato si éste produce humo, un olor raro, o un ruido inusual. El seguir utilizándolo podría ocasionar un incendio. Desenchufe el equipo de inmediato y comuníquese con su distribuidor o con un servicio técnico Epson. Nunca trate de reparar este producto usted mismo. Una reparación incorrecta puede ser peligrosa.
  • Seite 61 Para los clientes en otros países, visiten el siguiente sitio en la Internet: https://download.epson-biz.com/?service=pos Partes de la impresora Tapa del papel de rollo Cortador manual Panel de control Tapa del cortador Palanca de apertura de cubierta Interruptor de alimentación TM-L90 Manual del usuario 61...
  • Seite 62: Panel De Control

    Para utilizar un rollo de papel de 80 mm de ancho, retire la guía instalada. • Para utilizar un rollo de papel de 40 mm de ancho, retire la guía instalada e instale la guía de papel incluida de 40 mm. 62 TM-L90 Manual del usuario...
  • Seite 63: Conexión De Cables

    Rompa manualmente una de las tres porciones indicadas por los círculos en la ilustración para pasar por ella los cables. Conecte los cables a la impresora. Una la tapa mientras pasa los cables por los orificios. TM-L90 Manual del usuario 63...
  • Seite 64 Para limpiar estas partes, apague la impresora, desenchufe el cable de CA, abra la tapa del papel de rollo y retire la suciedad del papel, el pegamento adherente o cualquier otra sustancia ajena con un paño de algodón humedecido con un solvente de alcohol (etanol o IPA). 64 TM-L90 Manual del usuario...
  • Seite 65 Sople o limpie la suciedad del papel entorno al sensor de la marca negra. Cuchilla del cortador automático Limpie todo el pegamento Rollo de pletina ubicado en la zona táctica del cortador automático y del rollo de pletina. TM-L90 Manual del usuario 65...
  • Seite 66 Para iniciar la impresión de prueba, pulse el botón de alimentación (Feed) cuando la impresora esté en modo de espera de prueba automática. Controle que haya imprimido lo siguiente. “*** completed ***” Esto indica que la impresora se ha inicializado y ha pasado a modo normal. 66 TM-L90 Manual del usuario...
  • Seite 67: Solución De Problemas

    Si se ha registrado un atasco de papel o si la tapa del papel de rollo no se abre, véase la sección indicada más abajo. ❏ Apague y encienda de nuevo la impresora. Si el INDICADOR sigue pestañeando, avise a su superior. La impresora debe ser reparada. TM-L90 Manual del usuario 67...
  • Seite 68 (Véase la ilustración Gire la tuerca en dirección de la flecha, utilizando un lápiz de punta de bola o unas pinzas, hasta que vea una marca triangular en la apertura. (Véase la ilustración 68 TM-L90 Manual del usuario...
  • Seite 69 Nem é assumida também qualquer responsabilidade de danos resultantes da utilização das informações contidas neste manual. De maneira alguma a Seiko Epson Corporation ou as suas filiais deverão assumir qualquer responsabilidade pelo comprador ou terceiros deste produto por danos, perdas, custos, ou despesas incorridos pelo comprador ou terceiros resultantes de: acidente, má...
  • Seite 70: Informações De Segurança Importantes

    Se derramar água ou outro líquido no equipamento, desligue o cabo de corrente imediatamente e contacte o Serviço de Assistência a Clientes Seiko Epson. Se continuar a utilizar o equipamento poderá provocar um incêndio. Não utilize aspersores aerossóis que contenham gás inflamável no interior ou em torno deste produto.
  • Seite 71 Para clientes noutros países, visitar o seguinte sítio Web: https://download.epson-biz.com/?service=pos Peças da impressora Tampa do papel em rolo Cortador manual Painel de Controlo Tampa do cortador Alavanca de abertura da tampa Interruptor de alimentação TM-L90 Manual do utilizador 71...
  • Seite 72: Painel De Controlo

    Se utilizar um papel em rolo com 80 mm de largura, remova a guia instalada. • Se utilizar um papel em rolo com 40 mm de largura, remova a guia instalada e instale a guia de papel de 40 mm incluída. 72 TM-L90 Manual do utilizador...
  • Seite 73: Ligação Dos Cabos

    Parta à mão qualquer uma das três partes indicadas por círculos na ilustração para permitir a passagem dos cabos. Ligue os cabos à impressora. Coloque a tampa à medida que passa os cabos através dos orifícios. TM-L90 Manual do utilizador 73...
  • Seite 74 Para limpar estas peças, desligue a impressora, desligue o cabo CA, abra a tampa do papel em rolo e retire quaisquer restos de papel, cola adesiva ou outra substância com um cotonete ou um pano humedecido com um solvente à base de álcool (etanol ou IPA). 74 TM-L90 Manual do utilizador...
  • Seite 75 Sopre ou limpe quaisquer restos de papel em torno do sensor preto. Lâmina do cortador automático Retire qualquer cola na área de Rolo de platina toque do cortador automático e no rolo de platina. TM-L90 Manual do utilizador 75...
  • Seite 76 Para iniciar uma impressão de teste, prima o botão de alimentação (Feed) quando a impressora estiver no modo de espera de teste automático. Verifique se o seguinte foi impresso. “*** completed ***” Isto indica que a impressora foi inicializada e se mudou para o modo normal. 76 TM-L90 Manual do utilizador...
  • Seite 77: Resolução De Problemas

    ❏ Desligue a impressora e volte a ligá-la. Se o indicador luminoso continuar intermitente, notifique o seu gestor. Pode ser necessário reparar a impressora. TM-L90 Manual do utilizador 77...
  • Seite 78 (Consulte a ilustração Rode o botão na direcção da seta, utilizando uma esferográfica ou pinças, até aparecer uma marca de triângulo na abertura. (Consulte a ilustração 78 TM-L90 Manual do utilizador...
  • Seite 79 или упущения. Кроме того, изготовитель не несет никакой ответственности за убытки, причиненные ни Seiko Epson Corporation, ни её отделения не несут ответственности перед покупателем данного изделия или третьей стороной за ущерб, потери, расходы или затраты, понесённые покупателем или третьей стороной...
  • Seite 80 Его дальнейшее использование может привести к пожару. Сразу же отсоедините оборудование от сети и обратитесь за рекомендациями к торговому представителю изготовителя или в центр технического обслуживания оборудования компании Seiko Epson. Никогда не пытайтесь самостоятельно ремонтировать это оборудование. Неправильное выполнение ремонта может привести к возникновению опасной...
  • Seite 81: Предупреждающие Таблички

    немедленно отсоедините от сети провод электропитания оборудования и обратитесь за рекомендациями к торговому представителю изготовителя или в центр обслуживания оборудования компании Seiko Epson. Продолжение использования оборудования может привести к пожару. Не используйте внутри данного изделия или рядом с ним аэрозольных...
  • Seite 82: Панель Управления

    управления на корпус принтера и установите его на ровную поверхность. (см. рисунок A.) Снятие или установка направляющих для бумаги Установите или снимите направляющую для бумаги для соответствия ширине используемого рулона бумаги. ❏ Для модели 65* Установлена направляющая для бумаги 40 мм. 82 TM-L90 Руководство пользователя...
  • Seite 83 Совместите 2 отверстия (рисунок E 5) в направляющей для бумаги с 2 выступами в держателе рулона бумаги. Нажмите на рычаг направляющих бумаги до щелчка , указывающем на то, что направляющие бумаги установлены на месте. (см. рисунок D.) TM-L90 Руководство пользователя 83...
  • Seite 84: Подключение Кабелей

    Во время ухода за корпусом принтера, убедитесь в том, что принтер выключен и протрите корпус принтера сухой или влажной тканью. ВНИМАНИЕ: Запрещается очищать изделие спиртом, бензолом, разбавителем для краски и другими растворителями. Это может вызвать повреждение частей, сделанных их пластмассы или резины. 84 TM-L90 Руководство пользователя...
  • Seite 85 ВНИМАНИЕ: Термоголовка может сильно нагреваться после печати. Не прикасайтесь к горячей головке и начинайте ее очистку только после того, как она остынет. Прикосновение к термопечатающей головке пальцами или любым твердым предметом может привести к ее повреждению. TM-L90 Руководство пользователя 85...
  • Seite 86 бумаги выступах. Сдуйте или вытрите бумажную пыль вокруг датчика черной метки. Автоматический резак Прижимной валик Сотрите весь клей со всех доступных деталей авторезака и прижимного валика. <Местоположение термоголовки и держателя рулона бумаги> Держатель рулона бумаги Термоголовка 86 TM-L90 Руководство пользователя...
  • Seite 87: Устранение Неполадок

    В этом случае сначала очистите термоголовку, в соответствии с инструкциями, описанными в “Очистка принтера изнутри” на стр. 85. Если качество печати не улучшилось, очистите прижимной валик и путь подачи бумаги согласно инструкциям, описанным в “Очистка принтера изнутри” на стр. 85. TM-L90 Руководство пользователя 87...
  • Seite 88 Вставьте инструмент, например отвертку в пазы по обеим сторонам принтера, и поднимите крышку в направлениии стрелки и снимите ее. (см. рисунок J.) Поверните регулятор в направлении стрелки с помощью шариковой ручки или пинцета, пока не увидите треугольную метку в отверстии. (см. рисунок K.) 88 TM-L90 Руководство пользователя...
  • Seite 89 Прибл. 1,9 кг {4,19 фунта} dpi: точек на 25,4 мм (точек на дюйм) *1: Обязательно использование отвечающего стандартам безопасности источника питания, который соответствует следующим характеристикам. Номинальной выходное питание: 24 В/2.0 - 10.0 A, максимальная выходная мощность: 240 ВА или менее TM-L90 Руководство пользователя 89...
  • Seite 90: Қазақ Тілі

    бермейді. Әрі осында қамтылған ақпаратты пайдалану нәтижесінде орын алған шығындар үшін жауапкершілік көзделмейді. Seiko Epson корпорациясы не еншілес бөлімшелері келеңсіз оқиға, осы өнімді дұрыс пайдаланбау немесе теріс пайдалану немесе өнімге рұқсатсыз өзгерістер енгізу, оны жөндеу немесе өзгерту немесе (АҚШ қоспағанда) Seiko Epson корпорациясының пайдалану және...
  • Seite 91 Егер жабдық ішінен түтін, ретсіз иіс шықса немесе әдеттегіден тыс шу естілсе, оны дереу тоқтатыңыз. Әрі қарай пайдалану өртке әкелуі мүмкін. Дереу жабдықты ажыратыңыз және кеңес алу үшін делдалға немесе Seiko Epson қызмет орталығына хабарласыңыз. Бұл өнімді өз бетіңізбен жөндеуге мүлдем әрекеттенбеңіз. Дұрыс жөндемеу...
  • Seite 92 нұсқаларын мына URL мекенжайларынан жүктеп алуға болады. Солтүстік Америка тұтынушылары үшін мына веб-торабына өтіңіз: http://www.epsonexpert.com/ Басқа елдер тұтынушылары үшін мына веб-торабына өтіңіз: https://download.epson-biz.com/?service=pos Принтер бөліктері Орам қағазының қабы Қолмен кескіш Басқару Кескіш қақпағы Қақпақты ашу тетігі Қуат ажыратқышы 92 TM-L90 Пайдаланушы нұсқаулығы...
  • Seite 93: Басқару Тақтасы

    Пайдаланылып жатқан орам қағаздан кеңірек орам қағазға ауысу басып шығару сапасын төмендетуі мүмкін. Қағаз бағыттауышын алып тастау Қақпақты ашу тетігі арқылы орам қағазының қақпағын ашыңыз. (B- суретін қараңыз). Қағаз бағыттауышын алып тастау үшін қағаз бағыттауышының тетігін тартып C-суретіндегі көрсеткі бағытында тартыңыз. TM-L90 Пайдаланушы нұсқаулығы 93...
  • Seite 94 Қағаз орамын дұрыс бағытта салыңыз. (H-суретін қараңыз). Қағазды екі жағындағы қағаз бағыттауыштарымен туралап, қағаздың азғантай бөлігін тартыңыз. (I-суретін қараңыз). Орам қағазының қақпағын жабыңыз. Принтер қосылған кезде қағаз автоматты түрде беріледі және кесіледі. Ескертпе: Қақпақ ортасын басып, орам қағазының қақпағын толық жабыңыз. 94 TM-L90 Пайдаланушы нұсқаулығы...
  • Seite 95 Тазалаудан кейін принтерді қосу алдында принтердегі алкоголь толық кепкенше күтіңіз. НАЗАР АУДАРЫҢЫЗ: Басып шығарғаннан кейін жылу басы өте ыстық болуы мүмкін. Оны ұстамаңыз және тазалау алдында оны суытыңыз. Жылу басын қолыңызбен немесе қатты затпен ұстап, оны зақымдап алмаңыз. TM-L90 Пайдаланушы нұсқаулығы 95...
  • Seite 96 Қара басылған сенсор айналасындағы қағаз шаңын үріп немесе сүртіп тастаңыз. Автокескіш ұстарасы Автокескіштің және білікшенің Білікше ұстауға келетін аумағындағы барлық желімді сүртіп алып тастаңыз. <Жылу басының және орам қағазы ұстағышының орындары> Орам қағазының ұстағышы Жылу басы 96 TM-L90 Пайдаланушы нұсқаулығы...
  • Seite 97: Ақаулықтарды Жою

    Орам қағазының қақпағы жабылғанын және Paper LED шамын тексеріңіз. ❏ Қақпақты жабыңыз немесе қажет болса, орам қағазын ауыстырыңыз. Егер принтер көп басып шығарса, жылу басы ыстық болуы мүмкін. Басты ❏ суытып алыңыз. Басып шығару автоматты түрде жалғасады. TM-L90 Пайдаланушы нұсқаулығы 97...
  • Seite 98 Орам қағазының қақпағы ашылмаған кезде төмендегі қадамдарды орындаңыз. Принтерді өшіріңіз. Бұрағыш сияқты құралды принтердің екі жағындағы саңылауларға салыңыз және алып тастау үшін қақпақты көрсеткі бағытында көтеріңіз. (J-суретін қараңыз). Қалам немесе қысқыш арқылы саңылауда үшбұрыш белгісі көрінгенше тұтқаны көрсеткі бағытында бұраңыз. (K-суретін қараңыз). 98 TM-L90 Пайдаланушы нұсқаулығы...
  • Seite 99 нүкте/дюйм: әр 25,4 мм нүктелер саны (әр дюймге нүктелер саны) *1: Мына техникалық сипаттарға жауап беретін қауіпсіздік стандарттары бойынша қолданылатын қуат көзін пайдаланыңыз. Номиналды шығыс: 24 V/2.0 - 10.0 A, ең жоғары шығыс: 240 ВА немесе төмен TM-L90 Пайдаланушы нұсқаулығы 99...
  • Seite 100 English WEEE (Waste Electrical and Electronic Equipment) Directive This information only applies to customers in the European Union, according to Directive 2012/19/EU OF THE EUROPEAN PARLIAMENT AND OF THE COUNCIL OF 04 July 2012 on waste electrical and electronic equipment (WEEE) and legislation transposing and implementing it into various national legal systems, and to customers in countries in Europe, Middle East and Africa (EMEA) where they have implemented equivalent regulations.
  • Seite 101 English Magyar Ελληνικά A terméken található, áthúzott szemetest ábrázoló címke azt Η διαγραμμένη ετικέτα του τροχοφόρου κάδου απορριμμάτων jelzi, hogy ezt a terméket nem szabad a rendes háztartási που θα βρείτε πάνω στο προϊόν σας υποδεικνύει ότι αυτό το szeméttel együtt kidobni. Az esetleges környezeti- vagy προϊόν...

Inhaltsverzeichnis