Herunterladen Inhalt Inhalt Diese Seite drucken
DELTA DORE TYDOM 2.0 Installationsanleitung

DELTA DORE TYDOM 2.0 Installationsanleitung

Ip-/gsm-telefonmodem
Vorschau ausblenden Andere Handbücher für TYDOM 2.0:
Inhaltsverzeichnis

Werbung

Verfügbare Sprachen
  • DE

Verfügbare Sprachen

  • DEUTSCH, seite 66
TYDOM 2.0
www.deltadore.com
Combinatore domotico IP/GSM
IT
Guida di installazione
IP/GSM home automation transmitter
EN
Installation guide
IP-/GSM-Telefonmodem
DE
Installationsanleitung
Transmisor domótico IP/GSM
ES
Manual de instalación
IP/GSM domoticazender
NL
Installatiegids
Nadajnik automatyki domowej IP/GSM
PL
Instrukcja instalacji
2
34
66
98
130
162

Werbung

Inhaltsverzeichnis
loading

Inhaltszusammenfassung für DELTA DORE TYDOM 2.0

  • Seite 1 TYDOM 2.0 www.deltadore.com Combinatore domotico IP/GSM Guida di installazione IP/GSM home automation transmitter Installation guide IP-/GSM-Telefonmodem Installationsanleitung Transmisor domótico IP/GSM Manual de instalación IP/GSM domoticazender Installatiegids Nadajnik automatyki domowej IP/GSM Instrukcja instalacji...
  • Seite 2: Contenuto Dell'imballaggio

    Contenuto dell'imballaggio TYDOM 2.0 Antenna Adattatore di Cavo Ethernet alimentazione di rete Guide Documenti Installazione Utilizzo Scheda SIM Informazioni Batteria litio pronta per l'uso importanti sul LSH20 3,6 V prodotto La qualità della connessione del vostro prodotto può essere alterata da diverse modifiche dell'architettura IP sulla quale funziona.
  • Seite 3 Se nessun interlocutore corrispondente ha risposto, - Informatevi sulla copertura della rete del vostro il TYDOM 2.0 riprende il suo ciclo: n. 1, n. 2, n. operatore per il vostro impianto. 3, ecc. Il TYDOM 2.0 procede quindi fino a 16 - Al fine di evitare l'interruzione della rete GSM chiamate consecutive o a 4 cicli al massimo.
  • Seite 4: Inhaltsverzeichnis

    3.5 Fissate il TYDOM 2.0 ......................12 3.6 Messa in funzione ........................13 3.7 Richiudete il TYDOM 2.0 ......................14 4. Associate il TYDOM 2.0 alla centrale di allarme CS 8000 TYXAL+ ...........14 5. Personalizzare il TYDOM 2.0 .....................15 5.1 Denominare il TYDOM 2.0 ....................15 5.2 Attivare / disattivare l'autoprotezione ..................16...
  • Seite 5 9. Esempio di associazione di prodotti con l'applicazione TYDOM ..........25 9.1 Associare dei ricevitori di automatismo ................25 9.2 Associare un gestore di energia della gamma RT 2012 ............25 9.3 Associare altri prodotti della gamma termica ..............26 10. Prova di corretto funzionamento .....................27 11 Modalità...
  • Seite 6: Come Funziona Il Vostro Tydom 2.0

    1. Come funziona il vostro TYDOM 2.0? INFO 1.1 Funzioni APPLICAZIONE Applicazione TYDOM Il TYDOM 2.0 è collegato a una rete telefonica GSM IOS e Android e a Internet attraverso un modem ADSL. È associato via radio a una centrale di allarme. (per smartphone e tablet): Permette: - Comando (in modalità...
  • Seite 7: Principio Di Funzionamento

    1.2 Principio di funzionamento Il TYDOM 2.0 e gli altri prodotti della gamma TYXAL+, sensori di intrusione, sensori tecnici, sirene, tastiere o telecomandi, sono associati alla centrale CS 8000 TYXAL+ (50 prodotti max.). Comandare Avvisare / Segnalare TTRTC TTGSM TYDOM 2.0...
  • Seite 8: Descrizione

    2. Descrizione Tasto associazione Lato anteriore e spia sistema Coperchio superiore Coperchio inferiore Blocco scatola Copri presa Autoprotezione contro Supporto di fissaggio Lato posteriore gli atti di vandalismo murale Passaggio di cavi...
  • Seite 9 S1 S2 1- Vano pila 6- Supporto scheda SIM 10- Microfono 2- Autoprotezione contro 7- Tasto T3 RESET 11- Spie diagnosi sistema l’apertura 8- Altoparlante 12- Presa Ethernet 3- Connessione adattatore di 9- Tasto T1 associazione e spia 13- Tasto T2 (Non utilizzato) alimentazione di rete associazione 4- Passaggio di cavi...
  • Seite 10: Installazione

    - a più di 2 m da ogni altro prodotto radio, - a più di 1 m da ogni elemento metallico. 3.2 Indirizzo MAC del vostro TYDOM 2.0 Prima di fissare il TYDOM 2.0, prendete nota degliultimi 6 caratteri dell'indirizzo MAC del vostro TYDOM 2.0. per poi impostare l’applicazione TYDOM...
  • Seite 11: Fissate Il Supporto

    3.3 Fissate il supporto Verificate la vicinanza di una presa di alimentazione di rete e del modem ADSL. Separate il supporto murale dal TYDOM Contrassegnate i 4 fori A B C. 2.0. Parete divisibile Fissate il supporto murale con 2 viti Ø 4 Sbloccate la scatola.
  • Seite 12: Scheda Sim

    3. Installazione 3.4 Scheda SIM (formato mini SIM + piano tariffario forfait voce e SMS TYDOM 2.0 è collegato a una rete telefonica GSM. In caso di rilevamento, invia un SMS di avviso ai numeri registrati. Rete GSM Le comunicazioni GSM necessitano di un abbonamento sottoscritto presso un operatore.
  • Seite 13: Messa In Funzione

    C. 3.6 Messa in funzione Rispettate scrupolosamente l’ordine delle fasi descritte di seguito. 1- Collegate il TYDOM 2.0 al modem ADSL con l’aiuto del cavo ethernet fornito (connessione IP) 2- Aprite il supporto della scheda SIM, inserite la scheda SIM, poi bloccate il supporto come indicato (figura 1).
  • Seite 14: Richiudete Il Tydom 2.0

    • La centrale di allarme CS 8000 TYXAL+ deve essere obbligatoriamente associata a una tastiera touch CLT 8000 TYXAL+. Il passaggio in modalità Manutenzione attiva automaticamente un breve squillo della sirena interna della centrale e un ciclo di chiamate del TYDOM 2.0 confi gurabile con la CLT8000 TYXAL+).
  • Seite 15: Modalità Manutenzione

    CLT 8000 TYXAL+. 5. Personalizzare il TYDOM 2.0 Approfittate dell'interfaccia della tastiera touch per impostare in modo ancora più semplice il vostro TYDOM 2.0. 5.1 Denominare il TYDOM 2.0 Questo menù permette di scegliere una denominazione specifica per il vostro TYDOM 2.0.
  • Seite 16: Attivare / Disattivare L'autoprotezione

    5. Personalizzare il TYDOM 2.0 5.2 Attivare / disattivare l'autoprotezione Questo menù permette di attivare o di disattivare l'autoprotezione dei prodotti installati. Ê Digitate il codice installatore (123456, predefinito) e confermate premendo OK. Ë Premete su Impostazioni, poi selezionate il menù: Installazione >...
  • Seite 17: Telesorveglianza

    5.4 Telesorveglianza Questo menù permette di impostare le Impostazioni per la telesorveglianza. Una descrizione dettagliata dei parametri di telesorveglianza è disponibile nel § Allegato telesorveglianza Ê Digitate il codice installatore (123456, predefinito) e confermate premendo OK. Ë Premete su Impostazioni, poi selezionate il menù: Installazione >...
  • Seite 18: Avvisi Ai Numeri Predefiniti Sms

    Esempio: vostro fi glio rientra a casa e disattiva il sistema per mezzo del telecomando o del lettore di badge; il TYDOM 2.0 telefonico vi invia un SMS. Ê Digitate il codice installatore (123456, predefi nito) e confermate premendo OK.
  • Seite 19: Aiuto Vocale

    5.7 Aiuto vocale L'aiuto vocale vi permette di ottenere delle indicazioni vocali sullo stato del vostro impianto quando siete in prossimità del vostro TYDOM 2.0 (esempio: "il vostro sistema di allarme è in funzione"). Potete attivarlo o disattivarlo. Ê Digitate il codice installatore (123456, predefinito) e confermate premendo OK.
  • Seite 20: Supervisione Centrale

    5. Personalizzare il TYDOM 2.0 5.10 Supervisione centrale La supervisione permette, se il TYDOM 2.0 non riceve informazioni dalla centrale da più di 4 ore, di attivare una chiamata. Questa funzione, attiva di default, può essere impostata chiamando l’installazione Per disattivare questa funzione: •...
  • Seite 21: Applicazione Tydom

    1. In base al vostro dispositivo: Collegatevi a Google play o App Store 2. Cercate e scaricate l'applicazione gratuita “TYDOM” 3. Attivate la connessione WIFI del vostro smartphone o del vostro tablet. e connettetevi alla stessa rete locale del vostro TYDOM 2.0. 6.2 Configurazione Configurate l'applicazione TYDOM –...
  • Seite 22: Aggiungete Il Vostro Telefono / Tablet Nel Sistema Di Allarme

    6.3 Aggiungete il vostro telefono / tablet nel sistema di allarme Continuare Allarme 1- Premete l'icona “Allarme” 2- Scegliete il tipo di centrale 3- Disponete la centrale in modalità Aggiunta prodotto (Consultare le relative istruzioni) 4- Premete su “Continuare” 5- La centrale emette un Bip 6- L’interfaccia dell'allarme compare sullo schermo 7- Procedete alla sincronizzazione dell'applicazione con la centrale di allarme premendo l'icona...
  • Seite 23 7. Informazioni e assistenza Scheda SIM Spia A Stato del sistema Spenta Scheda SIM OK Accesa SIM assente Lampeggiante Errore codice PIN o PUK Spia B Stato del sistema Spenta Connessione GSM OK Accesa GSM non connesso Lampeggiante Segnale GSM debole Connessione Internet Spia C Stato del sistema...
  • Seite 24: Associazione Delle Funzioni Domotiche

    8. Associazione delle funzioni domotiche Le funzioni domotiche permettono a distanza: - di visualizzare i consumi dettagliati per utilizzo - di modificare la temperatura dell’appartamento (32 (riscaldamento, acqua fredda e calda,gas,prese di ricevitori di riscaldamento, da ripartire su 8 zone) corrente..)e cronologia per giorno/settimana/mese/ - di centralizzare il comando dell’illuminazione, anno...
  • Seite 25: Esempio Di Associazione Di Prodotti Con L'applicazione Tydom

    9. Esempio di associazione di prodotti con l'applicazione TYDOM 9.1 Associare dei ricevitori di automatismo Per associare tutti i ricevitori di automatismo: Tapparelle, illuminazione, cancelli, porte di garage Cominciare Tapparelle Illuminazioni Garage Cancello 1- Selezionate il tipo di ricevitore da associare 2- Scegliete la rete 1 o 2 3- Disponete il o i ricevitori in attesa di associazione (Consultare le relative istruzioni) 4- Avviate la ricerca...
  • Seite 26: Associare Altri Prodotti Della Gamma Termica

    9. Esempio di associazione di prodotti con l'applicazione TYDOM 9.3 Associare altri prodotti della gamma termica Continuare Termico 1- Premete l'icona “Termico” 2- Selezionate il vostro prodotto, ad esempio TYBOX 137 3- Disponete il prodotto in attesa di associazione (Consultare le relative istruzioni) 4- Premete su “Continuare”...
  • Seite 27: Prova Di Corretto Funzionamento

    - propone di ascoltare cosa succede, di parlare con n°4 n°4 n°4 una persona vicina al TYDOM 2.0, di arrestare il ciclo di chiamate e di ottenere il dettaglio delle anomalie se n°5 n°5 una centrale è associata. n°6 n°6...
  • Seite 28: Modalità Di Emergenza

    24 ore la trasmissione degli allarmi attraverso la connessione GSM. Non è più comandabile a distanza. Trascorse 24 ore, il TYDOM 2.0 passa in modalità risparmio di energia; non è disponibile alcuna funzione. Al ripristino dell'alimentazione di rete, un messaggio di fine di anomalia viene inviato alla centrale.
  • Seite 29: Sostituzione Della Pila

    12. Sostituzione della pila L’esaurimento della pila del TYDOM 2.0 viene segnalata da un messaggio sulla tastiera CLT 8000 TYXAL+. La centrale emette dei bip ad ogni attivazione o arresto del sistema (o "anomalia pile" con la sua sintesi vocale (è necessario che l'aiuto vocale sia attivato, vedere istruzioni CLT 8000 TYXAL+).
  • Seite 30: Funzioni Avanzate

    - Premete almeno 15 secondi il tasto T3, fino a che la spia T1 lampeggia rapidamente. - Rilasciate il tasto entro 30 secondi Per effettuare un RESET del TYDOM 2.0 (Utilizzo DHCP, cancellazione della password, cancellazione delle associazioni, ripristino dei parametri di fabbrica) - Premete almeno 30 secondi il tasto T3, il TYDOM emette un Bip lungo.
  • Seite 31: Caratteristiche Tecniche

    15. Caratteristiche tecniche SAFT LSH20 - 3,6V - 13 Ah - Litio Autonomia 10 anni Consumo in standby: 8 µA Consumo: 490 mA 868 MHz (EN 300 220) - da 100 m a 300 m -10°C / +70°C +5°C / +40°C IP 30 - IK 06 205 x 165 x 45 mm 700 g...
  • Seite 32: Aiuto

    16. Aiuto Il TYDOM 2.0 lancia un ciclo di chiama- La comunicazione mediante citofono è te al passaggio in modalità Manuten- di cattiva qualità zione Assicuratevi di non stare utilizzando la modalità Il passaggio in modalità Manutenzione vivavoce del vostro telefono...
  • Seite 34: Package Contents

    Package contents TYDOM 2.0 Mains adaptor Ethernet antenna cable Guides Documents Installation User SIM card Important Lithium battery ready to use Product LSH20 3.6 V Information The connection quality of your product may be affected due to changes on the IP architecture on which it operates. These changes may involve (the list is not exhaustive) a change in hardware, software update or configuration operations, work on your operator's equipment or any other multimedia devices such as tablets, smartphones, etc.' Android™...
  • Seite 35 Advice before taking out your subscription: number, then the 3rd... up to the 6th number. - Enquire about your operator's network coverage If the call is not picked up, TYDOM 2.0 will repeat for your installation. the cycle: 1st, 2nd, 3rd number, etc.
  • Seite 36 3.5 Mount TYDOM 2.0 ......................44 3.6 Activation ..........................45 3.7 Close TYDOM 2.0 ........................46 4. Associate TYDOM 2.0 with the CS 8000 TYXAL+ alarm control unit ........46 5. Personalising TYDOM 2.0 ......................47 5.1 Naming TYDOM 2.0 ......................47 5.2 Activating/deactivating tamper alarm ..................48 5.3 Call numbers........................48...
  • Seite 37 9. Product association example with the TYDOM application ............57 9.1 Associating control system receivers ..................57 9.2 Associating an energy manager of the RT 2012 range ............57 9.3 Associating other products to the heating range ..............58 10. Correct operation test ......................59 11 Backup mode ...........................60 11.1 Mains power failure ......................60 11.2 Internet connection down.
  • Seite 38: How Does Tydom 2.0 Work

    SMS with a video link stored on a protected server. - Make a remote display request from home with the TYDOM application (TYDOM 2.0 has to be connected to the Internet, and a DATA package on smartphone or WIFI access are required).
  • Seite 39: Operation

    1.2 Operation TYDOM 2.0 and other products in the TYXAL+ range, intrusion detectors, technical detectors, sirens, keypads or remote controls will be associated with the CS 8000 TYXAL+ alarm control unit (50 products max.). Control Alert/report TTRTC TTGSM TYDOM 2.0...
  • Seite 40: Description

    2. Description Association button Front panel and system LED Upper cover Lower cover Unit locking Socket cover Tamper alarm on Wall Rear panel opening mount Cable aperture...
  • Seite 41 S1 S2 1- Battery compartment 6- SIM card slot 10- Microphone 2 - Tamper alarm on opening 7- T3 RESET button 11- System diagnostic LEDs 3- Mains adapter connection 8- Loudspeaker 12- Ethernet port 4- Cable aperture 9- T1 button association 13- T2 button (Not applicable) and system LED 5- GSM antenna socket...
  • Seite 42: Installation

    - more than 1 m from any metallic item, 3.2 TYDOM 2.0 MAC address Before mounting TYDOM 2.0, note down the last 6 characters of the MAC address of your TYDOM 2.0. before configuring the TYDOM application. MAC : 001A25xxxxxx...
  • Seite 43: Mount The Wall Mount

    3.3 Mount the wall mount Check that an electrical outlet and the ADSL box are nearby. Separate the wall mount from Mark the 4 holes A B C. TYDOM 2.0. Break- able partition Fix the wall mount with the 2 Ø 4 mm max.
  • Seite 44: Sim Card (Mini Sim Format + Voice And Text Message Package)

    3.4 SIM card (mini SIM format + voice and text message package) TYDOM 2.0 is connected to a GSM telephone network. If a problem is detected, a text message is sent to the numbers in the contact list. GSM network GSM communications require a subscription to be taken out with an operator.
  • Seite 45: Activation

    Ø 4 mm max. using holes C. 3.6 Activation Strictly follow the order of the steps described below. 1- Connect TYDOM 2.0 to the ADSL box using the Ethernet cable supplied (IP connection). 2- Open the SIM card holder, slot the SIM card in then lock the holder as shown on figure 1.
  • Seite 46: Close Tydom 2.0

    CLT 8000 TYXAL+ touch screen keypad. The switch to maintenance mode automatically and briefl y activates the indoor siren of the alarm control unit as well as a TYDOM 2.0 call cycle (confi gurable with CLT 8000 TYXAL+).
  • Seite 47: Maintenance Mode

    CLT 8000 TYXAL+ touch screen keypad. 5. Personalising TYDOM 2.0 Use the touch screen interface to configure your TYDOM 2.0 even more easily. 5.1 Naming TYDOM 2.0 This menu is used to select a specific name for your TYDOM 2.0.
  • Seite 48: Activating/Deactivating Tamper Alarm

    5. Personalising TYDOM 2.0 5.2 Activating/deactivating tamper alarm This menu is used to activate or deactivate the tamper alarm of the products installed. Ê Enter the installer code (123456, by default) and confirm with OK. Ë Press Settings, then select the menu: Installation >...
  • Seite 49: Remote Monitoring

    Ê Enter the installer code (123456, by default) and confirm with OK. Ë Press Settings, then select the menu: Installation > Products > Configure Ì Press the button of TYDOM 2.0 or select it from TY2 0 03 01 Remote monitoring...
  • Seite 50: Sms Alert For Designated Contacts Function

    Ë Press Settings, then select the menu: Installation > Products > Confi gure Ì Press the T1 button (external button) of TYDOM 2.0 or select it from the list of products by clicking on 'Browse'. Í Select the 'SMS alert to relatives' menu.
  • Seite 51: Auto Attendant

    5.7 Auto attendant The auto attendant enables you to obtain voice information on the status of your installation when you are near your TYDOM 2.0 (e.g. "your alarm system is on"). You can activate or deactivate it. Ê Enter the installer code (123456, by default) and confirm with Ë...
  • Seite 52: Alarm Control Unit Monitoring

    5. Personalising TYDOM 2.0 5.10 Alarm control unit monitoring Monitoring is used to trigger a call if TYDOM 2.0 does not receive information from the alarm control unit for more than 4 hours. This function, activated by default is configurable by calling the installation.
  • Seite 53: Tydom Application

    1. Depending on your device: Connect to Google play or App Store 2. Find and download the free 'TYDOM' application 3. Activate the WIFI connection on your smartphone or tablet, and connect to the same local network as your TYDOM 2.0. 6.2 Configuration Configuring the TYDOM application Ê...
  • Seite 54: Add Your Telephone/Tablet To The Alarm System

    6.3 Add your telephone/tablet to the alarm system Continue Alarm 1- Press the 'Alarm' icon 2- Select the alarm control unit type 3- Set the control unit to 'add product' mode (Check the instructions). 4- Press 'continue'. 5- The alarm control unit beeps. 6- The alarm interface comes up on screen.
  • Seite 55 7. Information and assistance SIM card LED A System status SIM card OK SIM card missing Flashing PIN or PUK code error LED B System status GSM connection OK GSM not connected Flashing Weak GSM signal Internet connection LED C System status Internet connection OK Cable not connected...
  • Seite 56: Association Of Home Automation Functions

    8. Association of home automation functions • Detailed daily consumption display (heating, hot The home automation functions remotely enable you to: and cold water, gas, electricity) and history log per - Adjust house temperature (with 32 heat sensors day/week/month/year • Reports for main control settings (house divided over 8 areas) - Centralised lighting control, creating lighting moods temperature, alarm active, etc.)
  • Seite 57: Product Association Example With The Tydom Application

    9. Product association example with the TYDOM application 9.1 Associating control system receivers To associate all control system receivers: Roller shutters, lighting, gates, garage doors Start Roller shutters Lighting Garage Gate 1- Select the type of receiver to associate 2- Select network 1 or 2 3- Set the receiver(s) to association wait mode (refer to their guides).
  • Seite 58: Associating Other Products To The Heating Range

    9. Product association example with the TYDOM application 9.3 Associating other products to the heating range Continue Heating 1- Press the 'Heating' icon 2- Select your product, e.g. TYBOX 137 3- Set the product to association wait mode (refer to the guide). 4- Press 'continue'.
  • Seite 59: Correct Operation Test

    - It asks if you want to listen to what is happening, speak n°4 n°4 n°4 to a person close to TYDOM 2.0, stop the call cycle and obtain the details of the defects if an alarm control unit is n°5 n°5 associated.
  • Seite 60: Backup Mode

    11 Backup mode 11.1 Mains power failure After 5 minutes of power failure, TYDOM 2.0 sends a notification to the alarm control unit. The alarm control unit beeps. TYDOM 2.0 sends you a notification of the power defect and continues sending alarms via the GSM connection for 24 hours.
  • Seite 61: Battery Replacement

    12. Battery replacement A message is sent to the CLT 8000 TYXAL + keypad to alert that the TYDOM 2.0's battery is empty. The alarm control unit beeps each time the system is activated or deactivated, (or “battery defect” with the speech synthesis system (requires the auto attendant to be enabled, see CLT 8000 TYXAL+ guide).
  • Seite 62: Advanced Functions

    13. Advanced functions Switch the alarm control unit to MAINTENANCE mode (see system guide). Open the TYDOM 2.0 unit. To change from DHCP to a fixed IP - Press and hold the T3 button for at least 3 seconds until the T1 LED starts flashing slowly.
  • Seite 63: Technical Characteristics

    14. Technical characteristics SAFT LSH20 - 3.6 V - 13 Ah - Lithium Battery life 10 years Stand-by consumption: 8 µA Consumption: 490 mA 868 MHz (EN 300 220) - 100 m to 300m -10°C/+70°C +5°C/+40°C IP 30 - IK 06 205 x 165 x 45 mm 700 gr.
  • Seite 64: Troubleshooting

    A call cycle in progress Check the 230V power supply of TYDOM 2.0. is interrupted and replaced by another Move TYDOM 2.0 as far away from the antenna call cycle as possible. The technical detectors are classed in order of priority: 1 - Smoke, fire detector...
  • Seite 66: Packungsinhalt

    Packungsinhalt TYDOM 2.0 GSM-Antenne Netzgerät Ethernet- Kabel Anleitungen Dokumente Installation Verwendung SIM-Karte Important Lithium-Batterie gebrauchsfertig Product LSH20 3,6 V Informations Die Verbindungsqualität Ihres Produktes kann durch unterschiedliche Änderungen an der eingesetzten IP-Architektur beeinträchtigt werden. Diese Änderungen beziehen sich - beschränken sich jedoch nicht - auf: Hardwarewechsel, Softwareupdates oder -konfigurationen, in Bezug auf die Ausrüstung Ihres Internetanbieters oder alle sonstigen...
  • Seite 67 2., 3. usw. bis hin zur 6. Rufnummer. Tipps für die Unterzeichnung eines Mobilfunkvertrags: Falls niemand den Anruf entgegen nimmt, beginnt das TYDOM 2.0 mit einem neuen Zyklus: 1., 2., 3., - Informieren Sie sich über die Netzabdeckung der usw. Rufnummer. Anlage durch Ihren Mobilfunkanbieter.
  • Seite 68 3.5 Befestigen des TYDOM 2.0 ....................76 3.6 Inbetriebnahme........................77 3.7 Schließen des TYDOM 2.0 ....................78 4. Zuordnen des TYDOM 2.0 mit einer Alarmzentrale CS 8000 TYXAL+ ........78 5. Individuelle Konfiguration des TYDOM 2.0 ................79 5.1 Benennen des TYDOM 2.0 ....................79 5.2 Aktivieren/Deaktivieren des Sabotageschutzes ..............80 5.3 Rufnummern ........................80...
  • Seite 69 9. Beispiel für die Zuordnung von Produkten mit der TYDOM-App ..........89 9.1 Zuordnen von haustechnischen Empfängern ..............89 9.2 Zuordnen eines Energieverbrauchsteuerungssystem der Produktreihe RT 2012 ....89 9.3 Zuordnen anderer Produkte der Heizproduktreihe ..............90 10. Betriebstest ..........................91 11. Notfallbetrieb ...........................92 11.1 Keine Spannungsversorgung .....................92 11.2 Keine Internetverbindung.
  • Seite 70: Wie Funktioniert Ihr Tydom 2.0

    1. Wie funktioniert ihr TYDOM 2.0? INFO 1.1 Funktionen APPLICAZIONE TYDOM-App Das TYDOM 2.0 ist mit einem GSM-Telefonnetz und IOS und Android mit dem Internet über eine ADSL-Box verbunden. Es kann per Funk einer Alarmzentrale zugeordnet (für Smartphones und Tablets): werden.
  • Seite 71: Funktionsprinzip

    1.2 Funktionsprinzip Das TYDOM 2.0 sowie die anderen Produkte der Reihe TYXAL+, (Einbruchmelder, technische Melder, Sirenen, Bedieneinheiten oder Fernbedienungen) sind der Alarmzentrale CS 8000 TYXAL+ zugeordnet (max. 50 Produkte). Steuern Melden/Signalisieren TTRTC TTGSM TYDOM 2.0 TL 2000 LB 2000 CLS 8000...
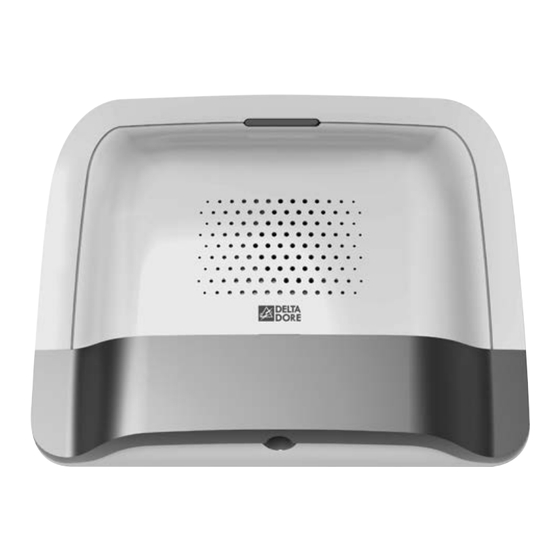
  • Seite 72: Beschreibung

    2. Beschreibung Zuordnungstaste Vorderseite und System-Kontrollleuchte Obere Abdeckung Untere Abdeckung Gehäuseverriegelung Steckdosenabdeckung Sabotageschutz beim Rückseite Wandhalterung gewaltsamen Abreißen Kabeldurchgang...
  • Seite 73 S1 S2 1 - Batteriefach 6 - SIM-Karten-Steckplatz 10 - Mikrofon 2 - Sabotageschutz gegen Öffnen 7 - RESET-Taste T3 11 - Systemzustandsanzeige 3 - Netzgerätanschluss 8 - Lautsprecher 12 - Ethernet-Anschluss 4 - Kabeldurchgang 9 - Zuordnungstaste T1 13 - Taste T2 (Nicht belegt) und Systemanzeige 5 - GSM-Antennenanschluss 14 - Steckdosenabdeckung...
  • Seite 74: Installation

    • Mindestens 1 m von der ADSL-Box entfernt. • In der Nähe einer Steckdose. ADSL-BOX Die Antenne wird wie folgt an das TYDOM 2.0 angeschlossen und wie folgt montiert werden: - nur im Innenraumbereich. - mindestens 2 m von sonstigen Funkgeräten entfernt.
  • Seite 75: Befestigen Der Halterung

    3.3 Befestigen der Halterung Stellen Sie sicher, dass sich das Gerät in der Nähe einer Steckdose und der ADSL-Box befindet. Entfernen Sie das TYDOM 2.0 Machen Sie die 4 Bohrungen A B C von seiner Wandhalterung. ausfindig. Durch- trenn- bare Kabelkanäle...
  • Seite 76: Sim-Karte (Micro-Sim + Sprechzeit Und Sms)

    3. Installation 3.4 SIM-Karte (Micro-SIM + Sprechzeit und SMS) Das TYDOM 2.0 ist mit einem GSM-Telefonnetz verbunden. Bei Meldungen sendet es eine Warnung per SMS an die gespeicherten Rufnummern. GSM-Netz Voraussetzung für Anrufe über das Mobilfunknetz ist ein mit einem Mobilfunkanbieter abgeschlosse- ner Vertrag.
  • Seite 77: Inbetriebnahme

    2 Schrauben (max. Ø 4 mm) und den Bohrungen C. 3.6 Inbetriebnahme Die nachstehend beschriebene Vorgehensweise muss zwingend berücksichtigt werden. 1 - Verbinden Sie das TYDOM 2.0 mit der ADSL-Box über das mitgelieferte Ethernet-Kabel (IP-Verbindung). 2 - Öffnen Sie den SIM-Karten-Steckplatz, legen Sie die SIM-Karte ein und verriegeln Sie den Steckplatz wie abgebildet (Abb.
  • Seite 78: Schließen Des Tydom 2.0

    2 - Bringen Sie die Steckdosenabdeckung wieder an. 3 - Bringen Sie die untere Abdeckung wieder an. 4 - Verriegeln Sie das Gehäuse. 4. Zuordnen des TYDOM 2.0 mit einer Alarmzentrale CS 8000 TYXAL+ Schalten Sie die Alarmzentrale in den CS 8000 TYXAL+...
  • Seite 79: Individuelle Konfiguration Des Tydom 2.0

    über die Tast-Bedieneinheit CLT 8000 TYXAL+ zu konfigurieren. 5. Individuelle Konfiguration des TYDOM 2.0 Nutzen Sie die Tast-Bedieneinheit, um Ihr TYDOM 2.0 noch einfacher zu konfigurieren. 5.1 Benennen des TYDOM 2.0 Dieses Menü ermöglicht es, Ihrem TYDOM 2.0 einen bestimmten Namen zuzuordnen.
  • Seite 80: Aktivieren/Deaktivieren Des Sabotageschutzes

    5. Individuelle Konfiguration des TYDOM 2.0 5.2 Aktivieren/Deaktivieren des Sabotageschutzes Dieses Menü ermöglicht es, den Sabotageschutz der installierten Produkte zu aktivieren bzw. deaktivieren. Ê Geben Sie den Installateurcode (Werkseinstellung: 123456) ein und bestätigen Sie mit OK. Ë Drücken Sie auf Einstellung und wählen Sie folgendes Menü: Installation >...
  • Seite 81: Fernüberwachungseinrichtung

    Protokollauswahl Wachdienst Installation > Produkte > Konfig. Hauptrufnummer Eingehende Anrufe Notrufnummer Sprachführung Ì Drücken Sie die Taste am TYDOM 2.0 oder wählen Zurück Zurück Sie dieses in der Produktliste, indem Sie auf „Durchs.“ Kennung Zyklischer Test klicken. Í Wählen Sie das Menü „Wachdienst“.
  • Seite 82: Familien Sms Info

    Sie mit OK. Ë Drücken Sie auf Einstellung und wählen Sie folgendes Menü: Installation > Produkte > Konfi g. Ì Drücken Sie die Taste T1 (externe Taste) am TYDOM 2.0 oder wählen Sie dieses in der Produktliste, indem Sie auf „Durchs.“ klicken.
  • Seite 83: Sprachführung

    5.7 Sprachführung Die Sprachführung ermöglicht es Ihnen, sprachliche Anweisungen über den Systemzustand zu erhalten, wenn Sie sich in der Nähe Ihres TYDOM 2.0 befinden (z. B.: „Ihre Alarmzentrale ist eingeschaltet“). Sie können diese aktivieren oder deaktivieren. Ê Geben Sie den Installateurcode (Werkseinstellung: 123456) ein und bestätigen Sie mit OK.
  • Seite 84: Zentrale Systemüberwachung

    5. Individuelle Konfiguration des TYDOM 2.0 5.10 Zentrale Systemüberwachung Die Systemüberwachung ermöglicht es, falls das TYDOM 2.0 über 4 Stunden lang keine Information mehr von der Alarmzentrale erhält, einen Anruf zu tätigen. Diese Funktion - die standardmäßig aktiviert ist - kann über einen Anruf der Anlage konfiguriert werden.
  • Seite 85: Tydom-App

    1. Je nach Gerät: Verbinden Sie sich mit Google Play Store oder dem App Store 2. Suchen Sie die kostenlose App „TYDOM“ und laden Sie diese herunter. 3. Aktivieren Sie die WLAN-Verbindung (WIFI) Ihres Smartphones oder Tablets und verbinden Sie sich mit dem lokalen Netzwerk Ihres TYDOM 2.0. 6.2 Konfiguration Konfigurieren Sie die TYDOM-App.
  • Seite 86: Hinzufügen Ihres Telefons/Tablets In Der Alarmzentrale

    6.3 Hinzufügen Ihres Telefons/Tablets in der Alarmzentrale Fortfahren Alarm 1 - Drücken Sie das Symbol „Alarm“. 2 - Wählen Sie den Zentralentyp. 3 - Bringen Sie die Alarmzentrale in den Modus „Produkt hinzufügen“ (siehe Bedienungsanleitung). 4 - Drücken Sie auf „Weiter“. 5 - Die Alarmzentrale piept.
  • Seite 87: Internetverbindung

    7. Informationen und Assistance SIM-Karte Kontrollleuchte A Systemzustand SIM-Karte OK SIM-Karte fehlt Blinkt Fehler PIN- oder PUK-Code Kontrollleuchte B Systemzustand GSM-Verbindung OK GSM-Signal abwesend Blinkt GSM-Signal schwach Internetverbindung Kontrollleuchte C Systemzustand Internetverbindung OK Kabel nicht verbunden Blinkt IP-Konfiguration läuft IP-Konfiguration Kontrollleuchte D Systemzustand feste IP...
  • Seite 88: Zuordnen Der Haustechnischen Einrichtungen

    8. Zuordnen der haustechnischen Einrichtungen Die haustechnischen Einrichtungen bieten folgende Haus: alle Beleuchtungen schalten sich aus, meine Fernsteuerungsmöglichkeiten: Rollläden schließen sich, meine Alarmzentrale - Die Änderung der Innenraumtemperatur schaltet sich scharf). • Die detaillierte Verbrauchsanzeige je nach Verwen- (32 Heizempfänger für insgesamt 8 Zonen). - Die zentrale Steuerung der Beleuchtung, das dung (Heizung, Warm-/Kaltwasser, Gas, Steckdo- Erstellen von Raumatmosphären (32 Empfänger).
  • Seite 89: Beispiel Für Die Zuordnung Von Produkten Mit Der Tydom-App

    9. Beispiel für die Zuordnung von Produkten mit der TYDOM-App 9.1 Zuordnen von haustechnischen Empfängern Zuordnen aller haustechnischen Empfänger: Rollläden, Beleuchtung, Tor, Garagentor oder Beginnen Rollläden Beleuchtungen 1 - Wählen Sie den zuzuordnenden Empfängertyp. Garage 2 - Wählen Sie das Netzwerk 1 oder 2. 3 - Bringen Sie den/die Empfänger in die Wartestellung für die Zuordnung (siehe entsprechende Bedienungsanleitung).
  • Seite 90: Zuordnen Anderer Produkte Der Heizproduktreihe

    9. Beispiel für die Zuordnung von Produkten mit der TYDOM-App 9.3 Zuordnen anderer Produkte der Heizproduktreihe Fortfahren Wärme 1 - Drücken Sie das Symbol „Wärme“. 2 - Wählen Sie Ihr Produkt, Beispiel: TYBOX 137. 3 - Bringen Sie das Produkt in die Wartestellung für die Zuordnung (siehe Bedienungsanleitung).
  • Seite 91: Betriebstest

    Einbruch vor. Warten Sie einen Anrufzyklus ab, ohne auf OFF eines Steuerungsorganes zu drücken. n°1 n°1 n°1 Vergewissern Sie sich, dass das TYDOM 2.0 die gespeicherten Rufnummern (maximal 6) nacheinander anwählt, n°2 n°2 n°2 bis am anderen Ende abgenommen wird: - Das Telefonmodem liest die persönliche Sprachmitteilung vor...
  • Seite 92: Notfallbetrieb

    Alarmmeldungen über die GSM-Verbindung. Es kann nicht mehr aus der Ferne gesteuert werden. Nach Ablauf der 24 Stunden schaltet das TYDOM 2.0 in den Energiesparmodus um. Es ist keine Funktion mehr verfügbar. Sobald die Spannungsversorgung wieder hergestellt wurde, wird eine Meldung „Fehler behoben“...
  • Seite 93: Batteriewechsel

    12. Batteriewechsel Der kritische Batterieladestand des TYDOM 2.0 wird durch eine Meldung auf der Bedieneinheit CLT 8000 TYXAL+ angezeigt. Die Alarmzentrale piept immer beim Ein- bzw. Ausschalten des Systems (oder die Sprachführung sagt „Fehler Batterie“ (diese muss hierfür aktiviert sein, siehe Bedienungsanleitung CLT 8000 TYXAL+)).
  • Seite 94: Erweiterte Funktionen

    RESET des TYDOM 2.0 (DHCP-Nutzung, Löschen des Passwortes, Löschen der Zuordnungen, Quittieren der aktiven Fehler, Reset auf die Werkseinstellungen) - Drücken Sie mindestens 30 Sekunden lang auf die Taste T3, bis das TYDOM 2.0 lange piept. - Lassen Sie die Taste los.
  • Seite 95: Technische Angaben

    14. Technische Angaben SAFT-Lithium-Batterie LSH20 - 3,6V - 13 Ah Lebensdauer 10 Jahre Verbrauch im Standby-Modus: 8 µA Verbrauch: 490 mA 868 MHz (EN 300 220) - 100 m bis 300 m -10 °C / +70 °C +5 °C / +40 °C IP 30 - IK 06 205 x 165 x 45 mm 700 g.
  • Seite 96: Hilfe

    Das Umschalten in den Wartungsmodus führt automatisch zum kurzen Aufheulen der Innen- raumsirene der Alarmzentrale sowie zum Auslö- Die Sprachschnittstelle verfügt über sen eines Anrufzyklus des TYDOM 2.0 (konfigu- keine Gegensprechfunktion rierbar) (Ansprüche der Norm DIN EN-50131). Das TYDOM 2.0 muss zwingend mit der Stromversorgung verbunden sein.
  • Seite 98: Contenido Del Paquete

    Contenido del paquete TYDOM 2.0 Antena Adaptador de Cable Ethernet Guías Documentos Instalación Utilización Tarjeta SIM Importante Pila de litio lista para su información LSH20 3,6 V del producto La calidad de la conexión de este producto puede verse alterada por distintas modificaciones de la arquitectura IP en la que funciona.
  • Seite 99 Léxico GSM: Global System for Mobile communications. Servicio de mensajería (Short Message Service) El TYDOM 2.0 se conecta a una red telefónica Ciclo de llamadas: inalámbrica. El TYDOM 2.0 marca el primer número registrado. Para poder realizar las comunicaciones GSM Si el interlocutor no descuelga o si no valida deberá...
  • Seite 100 3.6 Puesta en servicio ......................109 3.7 Vuelva a cerrar el TYDOM 2.0 .................... 110 4. Asocie el TYDOM 2.0 a la central de alarma CS 8000 TYXAL+ ..........110 5. Personalizar el TYDOM 2.0 ...................... 111 5.1 Nombrar el TYDOM 2.0 ..................... 111 5.2 Activar/desactivar la autoprotección .................
  • Seite 101 9. Ejemplo de asociación de productos con la aplicación TYDOM ..........121 9.1 Asociar receptores de automatismo..................121 9.2 Asociar un gestor de energía de la gama RT 2012 ............121 9.3 Asociar otros productos de la gama térmica ..............122 10. Prueba de funcionamiento correcto ..................123 11 Modo seguro ..........................124 11.1 Ausencia de alimentación de red ..................124 11.2 Ausencia de conexión a Internet ..................124...
  • Seite 102: Cómo Funciona Su Tydom 2.0

    INFO 1.1 Funciones APPLICAZIONE Aplicación TYDOM El TYDOM 2.0 se conecta a una red telefónica GSM IOS y Android y a Internet a través de un router ADSL. Se asocia por radio a una central de alarma. (para smartphone y tablet):...
  • Seite 103: Principio De Funcionamiento

    1.2 Principio de funcionamiento El TYDOM 2.0 y los otros productos de la gama TYXAL+, detectores de intrusión, detectores técnicos, sirenas, teclados o telemandos, se asocian a la central CS 8000 TYXAL+ (50 productos máx.). Controlar Alertar/señalar TTRTC TTGSM TYDOM 2.0...
  • Seite 104: Descripción

    2. Descripción Tecla de asociación Parte frontal y testigo del sistema Tapa superior Tapa inferior Cierre caja Ocultador toma Autoprotección Soporte Parte trasera al arranque de fijación mural Paso de cables...
  • Seite 105 S1 S2 1- Compartimento de la pila 6- Soporte tarjeta SIM 10- Micrófono 2- Autoprotección a la apertura 7- Tecla T3 RESET 11- Testigos diagnósticos del sistema 3- Conexión adaptador de red 8- Altavoz 12- Toma Ethernet 4- Paso de cables 9- Tecla T1 asociación y testigo del sistema 13- Tecla T2 (no utilizada)
  • Seite 106: Instalación

    - a más de 1 m de cualquier elemento metálico 3.2 Dirección MAC de su TYDOM 2.0 Antes de fijar el TYDOM 2.0, anote los 6 últimos caracteres de la dirección MAC de su TYDOM 2.0 para configurar más tarde la aplicación TYDOM.
  • Seite 107: Fije El Soporte

    3.3 Fije el soporte Compruebe la proximidad de un enchufe y el router ADSL. Separe el soporte mural del Localice los 4 agujeros A B C. TYDOM 2.0. Pared divisible Fije el soporte mural con 2 tornillos de 4 mm de Abra la caja.
  • Seite 108: Tarjeta Sim (Formato Mini Sim + Tarifa Voz Y Sms)

    3. Instalación 3.4 Tarjeta SIM (formato mini SIM + tarifa voz y sms) TYDOM 2.0 se conecta a una red telefónica GSM. En caso de detección, envía un SMS de alerta a los números registrados. Red GSM Para poder realizar las comunicaciones GSM deberá haber contratado este servicio con un operador.
  • Seite 109: Puesta En Servicio

    3.6 Puesta en servicio Siga cuidadosamente el orden de los pasos que se describen a continuación. 1- Conecte el TYDOM 2.0 al router ADSL con ayuda del cable Ethernet suministrado (conexión IP). 2- Abra el soporte de la tarjeta SIM, inserte la tarjeta SIM y después cierre el soporte como...
  • Seite 110: Vuelva A Cerrar El Tydom 2.0

    CLT 8000 TYXAL+. El paso a modo mantenimiento activa automáticamente un sonido breve de la sirena interna de la central, así como un ciclo de llamadas del TYDOM 2.0 (confi gurable con el CLT 8000 TYXAL+).
  • Seite 111: Modo Mantenimiento

    CLT 8000 TYXAL +. 5. Personalizar el TYDOM 2.0 Aproveche la interfaz del teclado táctil para configurar de forma todavía más fácil su TYDOM 2.0. 5.1 Nombrar el TYDOM 2.0 Este menú permite seleccionar un texto específico para su TYDOM 2.0.
  • Seite 112: Activar/Desactivar La Autoprotección

    5. Personalizar el TYDOM 2.0 5.2 Activar/desactivar la autoprotección Este menú permite activar o desactivar la autoprotección de los productos instalados. Ê Escriba el código de instalador (123456, por defecto) y valide con OK. Ë Pulse Ajustes y seleccione el menú: Instalación >...
  • Seite 113: Televigilancia

    Ê Escriba el código de instalador (123456, por defecto) y valide con OK. Ë Pulse Ajustes y seleccione el menú: Instalación > Productos > Configurar Ì Pulse la tecla del TYDOM 2.0 o selecciónelo en la lista TY2 0 03 01 Televigilancia de productos haciendo clic en «Examinar».
  • Seite 114: Alerta Familiares Sms

    OK. Ë Pulse Ajustes y seleccione el menú: Instalación > Productos > Confi gurar Ì Pulse la tecla T1 (tecla externa) del TYDOM 2.0 o selecciónelo en la lista de productos haciendo clic en «Examinar». TY2 0 03 01 Alerta próximo SMS...
  • Seite 115: Ayuda De Voz

    5.7 Ayuda de voz La ayuda de voz le permite obtener indicaciones vocales sobre el estado de su instalación cuando está cerca de su TYDOM 2.0 (ejemplo: «su sistema de alarma está en marcha»). Puede activarlo o desactivarlo. Ê Escriba el código de instalador (123456, por defecto) y valide con OK.
  • Seite 116: Supervisión Central

    5. Personalizar el TYDOM 2.0 5.10 Supervisión central La supervisión permite, si el TYDOM 2.0 no recibe información de la central durante más de 4 horas, activar una llamada. Esta función, activada por defecto, se configura llamando a la instalación.
  • Seite 117: Aplicación Tydom

    6.2 Configuración Configure la aplicación TYDOM Ê Conserve los 6 últimos caracteres de la dirección MAC de su TYDOM 2.0 (ver apartado 3.2) Ë Abra la aplicación TYDOM. Ì Introduzca los 6 caracteres (mayúsculas) en el campo «identificador», después introduzca su «contraseña»...
  • Seite 118: Añada Su Teléfono/Tablet En El Sistema De Alarma

    6.3 Añada su teléfono/tablet en el sistema de alarma Continuar Alarma 1- Pulse el icono «Alarma» 2- Elija el tipo de central 3- Ponga la central en modo añadir producto (consultar instrucciones). 4- Pulse «Continuar». 5- La central emite un «bip». 6- La interfaz de la alarma se muestra en la pantalla.
  • Seite 119: Conexión A Internet

    7. Información y asistencia Tarjeta SIM Testigo A Estado del sistema Apagado Tarjeta SIM OK Encendido SIM ausente Parpadeante Error código PIN o PUK Testigo B Estado del sistema Apagado Conexión GSM OK Encendido GSM no conectado Parpadeante Señal GSM débil Conexión a Internet Testigo C Estado del sistema...
  • Seite 120: Asociación De Funciones Domóticas

    8. Asociación de funciones domóticas • visualizar los consumos detallados por uso Las funciones domóticas, a distancia, permiten: - modificar la temperatura de su vivienda (calefacción, agua caliente y fría, gas, tomas de (32 receptores de calefacción, a repartir en 8 zonas) corriente...) e historial por día/semana/mes/año •...
  • Seite 121: Ejemplo De Asociación De Productos Con La Aplicación Tydom

    9. Ejemplo de asociación de productos con la aplicación TYDOM 9.1 Asociar receptores de automatismo Para asociar todos los receptores de automatismo: Persianas enrollables, iluminación, portales, puertas de garaje Empezar Persianas Iluminación Garaje Portal 1- Seleccione el tipo de receptor por asociar 2- Seleccione la red 1 o 2 3- Ponga el(los) receptor(es) en espera de asociación (consultar sus instrucciones).
  • Seite 122: Asociar Otros Productos De La Gama Térmica

    9. Ejemplo de asociación de productos con la aplicación TYDOM 9.3 Asociar otros productos de la gama térmica Continuar Térmica 1- Pulse el icono «Térmica» 2- Seleccione su producto, ejemplo TYBOX 137 3- Ponga el producto en espera de asociación (consultar sus instrucciones). 4- Pulse «Continuar».
  • Seite 123: Prueba De Funcionamiento Correcto

    - emite el anuncio oral e informa del tipo de fallo n°4 n°4 n°4 - ofrece escuchar lo que ocurre, hablar con una persona próxima al TYDOM 2.0, detener el ciclo de llamadas y n°5 n°5 obtener el detalle de los fallos si hay asociada una central. n°6 n°6...
  • Seite 124: Modo Seguro

    La transmisión de los enlaces de vídeo se reanudará tras el restablecimiento de la alimentación de red e Internet. 11.2 Ausencia de conexión a Internet Después de 5 minutos sin conexión a Internet, el TYDOM 2.0 indica el fallo a la central. El TYDOM 2.0 continúa la transmisión de alertas a través de la conexión GSM, ROUTER ADSL pero ya no es controlable por la aplicación.
  • Seite 125: Cambio De La Pila

    12. Cambio de la pila El desgaste de la pila del TYDOM 2.0 se indica por un mensaje en el teclado CLT 8000 TYXAL+. La central emite bips en cada puesta en marcha o parada del sistema, (o «fallo de pilas» con su síntesis vocal, necesita que la ayuda de voz esté...
  • Seite 126: Funciones Avanzadas

    - Pulse durante al menos 15 segundos la tecla T3 hasta que el testigo T1 parpadee rápidamente. - Suelte la tecla antes de 30 segundos Para realizar un RESET del TYDOM 2.0 (Utilización DHCP, borrado de la contraseña, borrado de las asociaciones, borrado de los fallos en curso, vuelta a la configuración de fábrica)
  • Seite 127: Características Técnicas

    14. Características técnicas SAFT LSH20 - 3,6 V - 13 Ah - Litio Autonomía 10 años Consumo en espera: 8 µA Consumo: 490 mA 868 MHz (EN 300 220) - 100 m a 300 m -10°C/+70°C +5°C/+40°C IP 30 - IK 06 205 x 165 x 45 mm 700 g R&TTE 1999/5/CE...
  • Seite 128: Ayuda

    15. Ayuda El TYDOM 2.0 inicia un ciclo de llama- La interfonía es de mala calidad das durante el paso a modo manteni- Compruebe que no está utilizando el modo miento manos libres de su teléfono. El paso a modo mantenimiento activa automáticamente un sonido breve de la sirena...
  • Seite 130: Inhoud Van De Verpakking

    Inhoud van de verpakking TYDOM 2.0 GSM-antenne Netadapter Ethernetkabel Handleidingen Documenten Installatie Gebruik Sim-kaart Belangrijk Lithium batterij klaar voor Productinformatie LSH20 3.6V gebruik De kwaliteit van de verbinding met uw product kan door verschillende wijzigingen van de IP-architectuur worden beïnvloed. Deze wijzigingen zijn onder andere, maar zijn niet beperkt tot, een verandering in hardware, een software-update of configuratie, luidsprekers op de apparatuur of andere multimedia-apparatuur zoals tablet, smartphone, enz ...
  • Seite 131 Lexicon GSM: Global System for Mobile communications. Short Message Service De TYDOM 2.0 wordt aangesloten op een draadloos Oproepcyclus: telefoonnetwerk. De TYDOM 2.0 vormt het eerste geregistreerde Voor GSM-verbindingen is het nodig dat u een nummer. Als de ontvanger niet opneemt of de abonnement neemt bij een telecomaanbieder oproep niet beantwoordt, dan zal TYDOM 2.0 het...
  • Seite 132 3.5 De TYDOM 2.0 bevestigen ....................140 3.6 Ingebruikname ........................141 3.7 De TYDOM 2.0 opnieuw sluiten ..................142 4. De TYDOM 2.0 verbinden met de alarmcentrale CS 8000 TYXAL+ ........142 5. De TYDOM 2.0 personaliseren ....................143 5.1 De TYDOM 2.0 benoemen ....................143 5.2 De zelfbeveiliging in-/uitschakelen ..................144...
  • Seite 133 9. Producten verbinden met de applicatie TYDOM ..............153 9.1 Verbinden van ontvangers automatisering .................153 9.2 Een energiebeheersysteem uit het assortiment RT 2012 verbinden .........153 9.3 Andere producten uit het thermische assortiment verbinden ...........154 10. De goede werking testen .......................155 11 De modus Hulp ........................156 11.1 Geen voeding van sector ....................156 11.2 Geen internetverbinding.
  • Seite 134: Hoe Werkt Uw Tydom 2.0

    1. Hoe werkt uw TYDOM 2.0? INFO 1.1 Functies APPLICAZIONE De applicatie TYDOM De TYDOM 2.0 is verbonden via een GSM- IOS en Android telefoonnetwerk en het Internet via een ADSL-box. Het is draadloos verbonden met een alarmcentrale. (voor smartphone en tablet):...
  • Seite 135: Werkingsprincipe

    1.2 Werkingsprincipe De TYDOM 2.0 en de andere producten van het assortiment TYXAL+ , inbraakdetectoren, technische detectoren, sirenes, toetsenborden of afstandsbedieningen, zijn verbonden met de centrale CS 8000 TYXAL+ (max. 50 producten.). Bedienen Waarschuwen/signaleren TTRTC TTGSM TYDOM 2.0 TL 2000...
  • Seite 136: Omschrijving

    2. Omschrijving Verbindingstoets Voorkant en lampje systeem Behuizing bovenaan Behuizing onderaan Vergrendeling Afscherming behuizing stekker Zelfbescherming Bevestigingssteun Achterkant opstelling muur Kabeldoorvoer...
  • Seite 137 S1 S2 1- Batterijcompartiment 6- Ondersteuning SIM-kaart 10- Microfoon 2- Automatische bescherming 7- De toets T3 RESET 11- Diagnoselampjes systeem tegen opening 8- Luidsprekers 12- Ethernetstekker 3- Aansluiting voedingsadapter 9- De toets T1 koppeling en lamp- 13- De toets T2 (niet gebruikt) 4- Kabeldoorvoer je systeem 5- Aansluiting GSM-antenne...
  • Seite 138: Installatie

    - op meer dan 1m afstand van metalen elementen, 3.2 MAC-adres van uw TYDOM 2.0 Voordat u de TYDOM 2.0 bevestigt, noteert u de laatste 6 cijfers van het MAC-adres van uw TYDOM 2.0. om later de applicatie TYDOM in te stellen.
  • Seite 139: De Drager Bevestigen

    3.3 De drager bevestigen Controleer of er zich in de buurt een stopcontact en de ADSL box bevindt. Scheid de wandhouder van de TYDOM 2.0. Zoek de 4 gaten A B C. Scheid- bare wand Bevestig de muurbeugel met 2 schroeven Open de behuizing.
  • Seite 140: Sim-Kaart (In Het Formaat Minisim + Spraak En Sms-Pakket)

    3. Installatie 3.4 SIM-kaart (in het formaat miniSIM + spraak en sms-pakket) De TYDOM 2.0 wordt aangesloten op een GSM-netwerk. Bij detectie stuurt deze een SMS naar de geregistreerde nummers. GSM-netwerk Voor GSM-verbindingen is het nodig dat u een abonnement neemt bij een telecomaanbieder Voordat u een abonnement neemt: - Laat u informeren over de dekking van het netwerk van uw telecomaanbieder voor uw installatie.
  • Seite 141: Ingebruikname

    C. 3.6 Ingebruikname Volgen de volgorde van de stappen die hieronder worden beschreven. 1- Sluit de TYDOM 2.0 aan op de ADSL box, met behulp van de meegeleverde ethernetkabel (IP-verbinding). 2- Open de houder van de SIM-kaart, plaats de SIM-kaart en vervolgens sluit u de houder zoals afgebeeld op afbeelding 1.
  • Seite 142: De Tydom 2.0 Opnieuw Sluiten

    • De alarmcentrale CS 8000 TYXAL+ moet zijn verbon- den met een touch-toetsenbord CLT 8000 TYXAL+. De overschakeling naar onderhoudsmodus activeert automatisch een korte activering van de binnensirene van de centrale, alsook een oproepcyclus TYDOM 2.0 (instelbaar met de CLT 8000 TYXAL+).
  • Seite 143: De Tydom 2.0 Personaliseren

    5. De TYDOM 2.0 personaliseren Met de interface van het touch-toetsenbord kunt u nog gemakkelijker uw TYDOM 2.0 programmeren. 5.1 De TYDOM 2.0 benoemen Met dit menu kunt u een specifiek label voor uw TYDOM 2.0 kiezen.
  • Seite 144: De Zelfbeveiliging In-/Uitschakelen

    5. De TYDOM 2.0 personaliseren 5.2 De zelfbeveiliging in-/uitschakelen In dit menu kunt u de zelfbeveiliging van de geïnstalleerde producten in of uitschakelen. Ê Voer de installateurscode in (standaard 123456) en bevestig door op OK te drukken. Ë Druk op Instellingen, selecteer het menu: Installatie >...
  • Seite 145: Toezicht Op Afstand

    Ë Druk op Instellingen, selecteer het menu: TY2 0 03 01 Installatie > Producten> Instellen Toezicht op afstand Protocolkeuze Toezicht op afstand Ì Druk op de toets van de TYDOM 2.0 Binnenkomende oproepen Hoofdnummer Noodnummer Stemhulp of selecteer deze in de lijst met producten...
  • Seite 146: Sms-Melding Familie

    OK te drukken. Ë Druk op Instellingen, selecteer het menu: Installatie > Producten> Instellen Ì Druk op de toets T1 (externe toets) van de TYDOM 2.0 of selecteer deze in de lijst met producten door te klikken op "Bladeren"...
  • Seite 147: Stemhulp

    5.7 Stemhulp Met Stemhulp kunt u gesproken aanwijzingen krijgen over de status van uw systeem wanneer u in de buurt bent van uw TYDOM 2.0 (bijvoorbeeld: "uw alarmsysteem is in werking"). U kunt deze functie in- of uitschakelen. Ê Voer de installateurscode in (standaard 123456) en bevestig door op OK te drukken.
  • Seite 148: Bewaking Van Centrale

    5. De TYDOM 2.0 personaliseren 5.10 Bewaking van centrale Met de bewaking kunt u, als de TYDOM 2.0 gedurende 4 uur geen informatie van de centrale ontvangt, een oproep activeren. Deze functie, standaard ingeschakeld, kan worden ingesteld door naar de installatie te bellen.
  • Seite 149: De Applicatie Tydom

    1. Naargelang uw toestel: Maak verbinding met Google play of App Store 2. Zoek en download de gratis applicatie "TYDOM" 3. Schakel de WIFI-verbinding van uw smartphone of tablet in en maak verbinding met hetzelfde lokale netwerk als uw TYDOM 2.0. 6.2 Configuratie De applicatie TYDOM configureren Ê...
  • Seite 150: Uw Telefoon/Tablet Aan Het Alarmsysteem Toevoegen

    6.3 Uw telefoon/tablet aan het alarmsysteem toevoegen Doorgaan Alarm 1- Druk op het pictogram "Alarm" 2- Selecteer het type centrale 3- Zet de centrale op de stand Toevoegen product (zie handleiding) 4- Druk op "doorgaan". 5- De centrale laat een piep horen. 6- De alarminterface wordt op het scherm weergegeven.
  • Seite 151 7. Informatie en ondersteuning Sim-kaart Lampje A Systeemstatus Gedoofd Sim-kaart OK Brandt Sim-kaart ontbreekt Knippert PIN- of PUK-code fout Lampje B Systeemstatus Gedoofd GSM-verbinding OK Brandt GSM niet verbonden Knippert Zwakke GSM-ontvangst Internetverbinding Lampje C Systeemstatus Gedoofd Internetverbinding OK Brandt Kabel niet aangesloten Knippert IP-configuratie wordt uitgevoerd...
  • Seite 152: Domoticafuncties Verbinden

    8. Domoticafuncties verbinden • gedetailleerde verbruiksgegevens weergeven De domoticafuncties maken het mogelijk om op afstand: (verwarming, warm en koud water, gas, stopconta- - de kamertemperatuur te wijzigen (32 ontvangers cen, …) en geschiedenis per dag/week/maand/jaar • Retourstatus van belangrijkste bedieningen voor verwarming, verdeeld in 8 zones) - de bediening van de verlichting te centraliseren, (temperatuur van huis, alarm geactiveerd...)
  • Seite 153: Producten Verbinden Met De Applicatie Tydom

    9. Producten verbinden met de applicatie TYDOM 9.1 Verbinden van ontvangers automatisering Om alle ontvangers van automatiseringen te verbinden: Rolluiken, verlichting, poorten, garagedeuren Start Rolluiken Verlichting Garage Poort 1- Selecteer het type ontvanger dat u wilt verbinden 2- Selecteer netwerk 1 of 2 3- Zet de ontvanger in afwachting voor verbinding (zie handleiding) 4- Start de zoekopdracht 5- De verbonden ontvangers worden op het scherm weergegeven.
  • Seite 154: Andere Producten Uit Het Thermische Assortiment Verbinden

    9. Producten verbinden met de applicatie TYDOM 9.3 Andere producten uit het thermische assortiment verbinden Doorgaan Thermisch 1- Druk op het pictogram "Thermisch" 2- Selecteer uw product, bijvoorbeeld TYBOX 137 3- Zet het product in afwachting voor verbinding (zie handleiding) 4- Druk op "doorgaan".
  • Seite 155: De Goede Werking Testen

    - de overdrager doet een stemaankondiging en geeft de aard n°3 n°3 n°3 van het alarm aan, - de TYDOM 2.0 stelt voor om te luisteren wat er gebeurt, n°4 n°4 n°4 met een persoon in de buurt van de overdrager te spreken, n°5...
  • Seite 156: De Modus Hulp

    11 De modus Hulp 11.1 Geen voeding van sector Als er vijf minuten geen voeding is, dan zal de TYDOM 2.0 deze storing aan de centrale melden. De centrale laat een pieptoon horen. De TYDOM 2.0 waarschuwt u bij stroomuitval en blijft gedurende 24 uur alarmen via de GSM-verbinding doorgeven.
  • Seite 157: Batterij Vervangen

    12. Batterij vervangen Als de batterij van de TYDOM 2.0 bijna leeg is , dan wordt dit meegedeeld op het toetsenbord van de CLT 8000 TYXAL+. De centrale piept elke keer dat het systeem wordt ingeschakeld of uitgeschakeld (of "Storing batterij" met spraaksynthese (stemhulp moet geactiveerd zijn, zie handleiding CLT 8000 TYXAL+).
  • Seite 158: Geavanceerde Functies

    13. Geavanceerde functies Zet de centrale in de modus ONDERHOUD (zie handleiding). Open de behuizing van de TYDOM 2.0 Om te veranderen van DHCP naar een vaste IP - Druk gedurende 3 seconden op de toets T3 totdat het lampje T1 langzaam knippert.
  • Seite 159: Technische Kenmerken

    14. Technische kenmerken SAFT LSH20 - 3,6V - 13 Ah - Lithium Autonomie 10 jaar Stand-by stroomverbruik: 8 µA Verbruik: 490 mA 868 MHz (EN 300 220) - 100 m tot 300m -10°C / +70°C +5°C / +40°C IP 30 - IK 06 205 x 165 x 45 mm 700 gr.
  • Seite 160: Ondersteuning

    (geëist door de norm EN-50131). U kunt niet praten via de spraakinterface De TYDOM 2.0 moet op het elektriciteitsnet zijn aangesloten. Een oproepcyclus wordt onderbroken Controleer de 230V van de TYDOM 2.0.
  • Seite 162: Zawartość Opakowania

    Zawartość opakowania TYDOM 2.0 Antena Zasilacz Kabel sieciowy sieciowy Ethernet Instrukcje Dokumenty Instalacja U¿ytkowanie Karta SIM Uwaga Bateria litowa gotowa do Product LSH20 3.6 V u¿ycia Informations Jakość połączenia urządzenia może ulegać zmianom z powodu różnych zmian architektury IP , w jakiej działa. Zmiany te mogą...
  • Seite 163 Jeśli żaden z numerów nie odbiera, nadajnik - Aby unikn¹æ zak³óceñ w sieci GSM wynikaj¹cych TYDOM 2.0 wznawia cykl: nr 1, 2, 3 itd. z wygaśnięcia ważności opłaconej karty SIM lub Nadajnik TYDOM 2.0 wykonuje w ten sposób z ograniczonego pakietu, nie polecamy tego typu do 16 kolejnych po³¹czeñ...
  • Seite 164 3.5 Mocowanie nadajnika TYDOM 2.0 ................... 172 3.6 Uruchomienie ........................173 3.7 Zamykanie TYDOM 2.0 ...................... 174 4. Przypisaæ nadajnik TYDOM 2.0 do centrali alarmowej CS 8000 TYXAL+ ....... 174 5. Personalizacja nadajnika TYDOM 2.0 ..................175 5.1 Nadawanie nazwy nadajnikowi TYDOM 2.0 ..............175 5.2 Aktywacja / dezaktywacja zabezpieczenia w³asnego ............
  • Seite 165 8. Przypisanie funkcji automatyki domowej ................184 8.1 Zgodne urz¹dzenia ......................184 9. Przyk³ad przypisania urz¹dzenia przy pomocy aplikacji TYDOM ..........185 9.1 Przypisywanie odbiorników automatyki ................185 9.2 Przypisywanie sterownika energii z gamy RT 2012 ............185 9.3 Przypisywanie innych urz¹dzeñ z gamy cieplnej ...............186 10.
  • Seite 166: Jak Dzia³A Nadajnik Tydom 2.0

    1. Jak dzia³a nadajnik TYDOM 2.0? 1.1 Funkcje INFO APPLICAZIONE Aplikacja TYDOM Nadajnik TYDOM 2.0 jest pod³¹czony do sieci telefonicznej GSM i do internetu za pośrednictwem dla systemów iOS i Android (na smartfon i tablet): routera ADSL. Jest przypisany radiowo do centrali alarmowej.
  • Seite 167: Zasada Dzia³Ania

    1.2 Zasada dzia³ania Nadajnik TYDOM 2.0 i inne urz¹dzenia gamy TYXAL+, czujniki w³amaniowe, czujniki techniczne, syreny, klawiatury lub piloty, s¹ przypisane do centrali CS 8000 TYXAL+ (do 50 urz¹dzeñ). Sterowanie Alarm / Sygnalizacja TTRTC TTGSM TYDOM 2.0 TL 2000 LB 2000...
  • Seite 168: Opis

    2. Opis Przycisk przypisywania Przód oraz systemowa lampka sygnalizacyjna Os³ona górna Os³ona dolna Blokada obudowy Maskownica gniazda Zabezpieczenie w³asne Wspornik Ty³ przed zerwaniem do montażu na ścianie Przelotka kabli...
  • Seite 169 S1 S2 1- Komora baterii 6- Gniazdo karty SIM 10- Mikrofon 2- Zabezpieczenie w³asne przed 7- Przycisk T3 RESET 11- Lampki diagnostyczne sys- otwarciem temu 8- Głośnik 3- Gniazdo zasilacza sieciowego 12- Gniazdo Ethernet 9- Przycisk T1 do przypisywania 4- Przelotka kabli i lampka systemowa 13- Przycisk T2 (Nieu¿ywany) 5- Gniazdo anteny GSM...
  • Seite 170: Instalacja

    - w odległości powyżej 1 m od wszelkich elementów metalowych. 3.2 Adres MAC twojego urz¹dzenia TYDOM 2.0 Przed zamocowaniem nadajnika TYDOM 2.0, zanotowaæ 6 ostatnich znaków adresu MAC urz¹dzenia TYDOM 2.0 aby później zmienić ustawienia aplikacji TYDOM. MAC : 001A25xxxxxx...
  • Seite 171: Mocowanie Wspornika

    Sprawdziæ, czy w pobli¿u znajduje siê gniazdko elektryczne i router ADSL. Oddzielić wspornik naścienny od Odnaleźć 4 otwory A B C. nadajnika TYDOM 2.0. Zaślepka ³amliwa Przymocowaæ wspornik za pomoc¹ 2 wkrêtów o maks. Ø 4 mm, wykorzystuj¹c otwory A i B.
  • Seite 172: Karta Sim (Format Mini Sim + Rycza³T Na Po³¹Czenia G³Osowe I Sms)

    3. Instalacja 3.4 Karta SIM (format mini SIM + rycza³t na po³¹czenia g³osowe i sms) TYDOM 2.0 pod³¹czony jest do bezprzewodowej sieci telefonicznej. W przypadku wykrycia wysy³a alarmowy SMS na zarejestrowane numery. Sieæ GSM Komunikacja GSM wymagaj subskrypcji wykupionej od operatora.
  • Seite 173: Uruchomienie

    2 wkrêtów o maks. Ø 4 mm, wykorzystuj¹c otwory C. 3.6 Uruchomienie Należy dokładnie przestrzegać kolejności kroków opisanych poniżej. 1- Pod³¹czyæ nadajnik TYDOM 2.0 do routera ADSL przy pomocy do³¹czonego kabla Ethernet (po³¹czenie IP). 2- Otworzyæ uchwyt karty SIM, w³o¿yæ...
  • Seite 174: Zamykanie Tydom 2.0

    • Centrala alarmowa CS 8000 TYXAL+ musi byæ przypisana do klawiatury dotykowej CLT 8000 TYXAL+. Przejście w tryb konserwacji wyzwala automatycznie krótki ryk syreny wewnętrznej centrali, a także cykl połączeń z nadajnika TYDOM 2.0 (konfi gurowalne przy użyciu CLT 8000 TYXAL+).
  • Seite 175: Personalizacja Nadajnika Tydom 2.0

    CLT 8000 TYXAL+. 5. Personalizacja nadajnika TYDOM 2.0 Użytkownik może skorzystać z interfejsu klawiatury dotykowej , aby jeszcze łatwiej skonfigurować nadajnik TYDOM 2.0. 5.1 Nadawanie nazwy nadajnikowi TYDOM 2.0 To menu pozwala wybraæ konkretn¹ etykietê dla nadajnika TYDOM 2.0.
  • Seite 176: Aktywacja / Dezaktywacja Zabezpieczenia W³Asnego

    5. Personalizacja nadajnika TYDOM 2.0 5.2 Aktywacja / dezaktywacja zabezpieczenia w³asnego To menu pozwala na aktywacjê lub dezaktywacjê zabezpieczeñ w³asnych zainstalowanych urz¹dzeñ. Ê Wprowadzić kod instalatora (domyślnie 123456) i zatwierdziæ przyciskiem OK. Ë Nacisn¹æ przycisk Ustawienia, a nastêpnie wybraæ menu: TY2 0 03 01 Antysabotaż...
  • Seite 177: Nadzór Zdalny

    Ë Nacisn¹æ przycisk Ustawienia, a nastêpnie wybraæ menu: Instalacja > Urządzenia > Konfiguracja TY2 0 03 01 Nadzór zdalny Nadzór zdalny Wybór protokołu Ì Nacisn¹æ przycisk TYDOM 2.0 lub wybraæ go z listy Połączenia przych. Numer główny Numer ratunkowy Pomoc głosowa urz¹dzeñ, klikaj¹c na „Przegl¹daj”.
  • Seite 178: Alarmowanie Sms-Owe Najbli¿Szych

    Ê Wprowadzić kod instalatora (domyślnie 123456) i zatwierdzić przyciskiem OK. Ë Nacisn¹æ przycisk Ustawienia, a nastêpnie wybraæ menu: Instalacja > Urządzenia > Konfi guracja Ì Nacisn¹æ przycisk TYDOM 2.0 lub wybraæ go z listy TY2 0 03 01 Karta SIM Nadzór zdalny...
  • Seite 179: Pomoc G³Osowa

    Ê Wprowadzić kod instalatora (domyślne 123456) i zatwierdzić przyciskiem OK. Ë Nacisn¹æ przycisk Ustawienia, a nastêpnie wybraæ menu: Instalacja > Urządzenia > Konfiguracja Ì Nacisn¹æ przycisk TYDOM 2.0 lub wybraæ go z listy urz¹dzeñ, klikaj¹c na „Przegl¹daj”. TY2 0 03 01 Pomoc głosowa Połączenia przych.
  • Seite 180: Centralny Nadzór

    5. Personalizacja TYDOM 2.0 5.10 Centralny nadzór Nadzór pozwala wywo³aæ po³¹czenie w sytuacji, gdy nadajnik TYDOM 2.0 nie otrzymuje informacji z centrali przez ponad 4 godziny. Ta funkcja jest w³¹czona domyślnie i można ją ustawić poprzez wywołanie instalacji. Aby zdezaktywowaæ tê funkcjê: •...
  • Seite 181: Aplikacja Tydom

    1. W zależności od urządzenia: Połączyć się z Google Play lub z App Store. 2. Wyszukaæ i pobraæ darmow¹ aplikacjê „TYDOM”. 3. W³¹czyæ funkcjê WIFI w smartfonie lub tablecie i pod³¹czyæ siê do tej samej sieci lokalnej co TYDOM 2.0. 6.2 Konfiguracja Konfigurowanie aplikacji TYDOM.
  • Seite 182: Dodawanie Telefonu / Tabletu Do Systemu Alarmowego

    6.3 Dodawanie telefonu / tabletu do systemu alarmowego Dalej Alarm 1- Nacisn¹æ na ikonê „Alarm” 2- Wybraæ typ centrali 3- Ustawiæ centralê w trybie dodawania urz¹dzeñ (Patrz instrukcja centrali). 4- Nacisn¹æ na przycisk „dalej”. 5- Centrala emituje sygna³ bip. 6- Interfejs alarmu wyświetla się na ekranie. 7- Przejść...
  • Seite 183 7. Informacje i pomoc Karta SIM Lampka A Stan systemu Zgaszona Karta SIM OK Zapalona Brak karty SIM Migaj¹ca B³êdny kod PIN lub PUK Lampka B Stan systemu Zgaszona Po³¹czenie GSM OK Zapalona Brak po³¹czenia GSM Migaj¹ca S³aby sygna³ GSM Po³¹czenie internetowe Lampka sygnalizacy- Stan systemu...
  • Seite 184: Przypisanie Funkcji Automatyki Domowej

    8. Przypisanie funkcji automatyki domowej Funkcje automatyki domowej pozwalaj¹ zdalnie: • wyświetlić szczegółowe zużycie w zależności od - zmieniaæ temperaturê w mieszkaniu instalacji (ogrzewanie, ciep³a i zimna wody, gaz, (32 odbiorników ogrzewania do rozdzielenia na 8 stref) pod³¹cza energii elektrycznej) i historiê zu¿ycia z - sterować...
  • Seite 185: Przyk³Ad Przypisania Urz¹Dzenia Przy Pomocy Aplikacji Tydom

    9. Przyk³ad przypisania urz¹dzenia przy pomocy aplikacji TYDOM 9.1 Przypisywanie odbiorników automatyki Aby przypisaæ wszystkie odbiorniki automatyki: Rolety z napędem, oświetlenie, bramy, bramy garażowe Zacznij Rolety Oświetlenie 1- Zaznaczyæ typ urz¹dzenia do przypisania Gara¿ Brama 2- Wybraæ sieæ 1 lub 2 3- Ustawiæ...
  • Seite 186: Przypisywanie Innych Urz¹Dzeñ Z Gamy Cieplnej

    9. Przyk³ad przypisania urz¹dzenia przy pomocy aplikacji TYDOM 9.3 Przypisywanie innych urz¹dzeñ z gamy cieplnej Dalej Instalacja cieplna 1- Nacisn¹æ na ikonê „Instalacja cieplna” 2- Zaznaczyæ swoje urz¹dzenie, na przyk³ad TYBOX 137 3- Ustawiæ urz¹dzenie w pozycji oczekiwania na przypisanie (Sprawdziæ w instrukcji urz¹dzenia).
  • Seite 187: Próba Prawid³Owego Funkcjonowania

    Spowodowaæ wykrycie w celu sprawdzenia prawid³owego funkcjonowania instalacji. W³¹czyæ system i spowodowaæ wykrycie w³amania. Umo¿liwiæ pe³ny cykl po³¹czeñ, bez naciskania na przycisk OFF któregoś z elementów sterujących. Upewniæ siê, ¿e nadajnik TYDOM 2.0 wywo³uje kolejno n°1 n°1 n°1 zaprogramowane numery (do 6 numerów), do czasu, gdy jeden z nich siê...
  • Seite 188: Tryb Ratunkowy

    Po 5 minutach od wyst¹pienia braku zasilania, nadajnik TYDOM 2.0 sygnalizuje uster- kê do centrali. Centrala emituje sygna³ bip. Nadajnik TYDOM 2.0 ostrzega o braku zasilania sieciowego i przez 24 godziny nadal przekazuje alarmy za pośrednictwem połączenia GSM. Nie można już sterować nim zdalnie.
  • Seite 189: Wymiana Baterii

    12. Wymiana baterii Stopieñ zu¿ycia baterii TYDOM 2.0 sygnalizowany jest komunikatem na klawiaturze CLT 8000 TYXAL+. Centrala emituje sygna³y ostrzegawcze bip przy ka¿dym w³¹czeniu lub wy³¹czeniu systemu (lub „b³¹d baterii” z syntezatora mowy (wymaga aktywacji pomocy g³osowej, patrz instrukcja CLT 8000 TYXAL+).
  • Seite 190: Funkcje Zaawansowane

    - Nacisn¹æ na co najmniej 15 sekund przycisk T3 do czasu, gdy lampka T1 zacznie szybko migaæ. - Zwolniæ przycisk przed up³ywem 30 sekund Aby wykonaæ RESET urz¹dzenia TYDOM 2.0 (Zastosowanie DHCP , usuniêcie has³a, usuniêcie przypisañ, usuniêcie bie¿¹cych usterek, powrót do ustawieñ fabrycznych) - Nacisnąć...
  • Seite 191: Dane Techniczne

    14. Dane techniczne SAFT LSH20 - 3,6V - 13 Ah - LitowaCzas pracy 10 lat Pobór mocy w trybie czuwania: 8 µA Zu¿ycie: 490 mA 868 MHz (EN 300 220) - 100 m do 300m -10°C / +70°C +5°C / +40°C IP 30 - IK 06 205 x 165 x 45 mm 700 gr.
  • Seite 192: Pomoc

    TYDOM Interfejs wokalny nie pozwala 2.0 (konfigurowalne) u¿ytkownikowi mówiæ (wymóg normy EN-50131). Nadajnik TYDOM 2.0 musi byæ obowi¹zkowo zasilany z sieci. Bie¿¹cy cykl po³¹czeñ Sprawdziæ zasilanie 230V nadajnika TYDOM 2.0. jest przerwany i zast¹piony innym cyklem Oddaliæ...
  • Seite 196 DELTA DORE Schlüter GmbH - Fichtenstraße 38 a - 76829 Landau (Deutschland) E-Mail: info.techniques@deltadore.com Mediante la presente Delta Dore declara que el equipo cumple con las exigencias fundamentales y con las disposiciones pertinentes de la directiva R&TTE 1999/5/CE. La declaración de conformidad CE de este equipo está disponible, bajo demanda, en: Service “Infos techniques”...

Inhaltsverzeichnis