Inhaltsverzeichnis
Werbung
Verfügbare Sprachen
Verfügbare Sprachen
Quicklinks
Welcome:
Thank you kindly for purchasing this fine product.
Much investment in time and effort has gone into its development, and it is our hope
that it will give you many years of trouble-free service.
Safety Notice:
1. Do not drop, puncture or disassemble the device; otherwise the warranty will be voided.
2. Avoid all contact with water, and dry hands before using.
3. Do not expose the device to high temperature or leave it in direct sunlight. Doing so may
damage the device.
4. Use the device with care. Avoid pressing hard on the device body.
5. For your own safety, avoid using the device when there is a storm or lightning.
6. Do not use batteries of different specifications. Doing so may lead to the potential for serious
damage.
7. Remove the battery during long periods between usage, as a deteriorated battery may affect
the functionality of the device.
8. Remove the battery if it shows signs of leaking or distortion.
9. Use only the accessories supplied by the manufacturer.
10. Keep the device out of the reach of infants.
11. Risk of explosion if battery is replaced by an incorrect type.
12. Dispose of used batteries according to the instructions.
FCC Compliance Statement:
This device complies with Part 15 of the FCC Rules. Operation is
subjected to the following two conditions: (1) this device may not cause
harmful interference, and (2) this device must accept any interference
received, including interference that may cause undesired operation.
This equipment has been tested and found to comply with limits for a
Class B digital device, pursuant to Part 15 of the FCC rules. These limits
are designed to provide reasonable protection against harmful interference in residential
installations. This equipment generates, uses, and can radiate radio frequency energy, and if
not installed and used in accordance with the instructions, may cause harmful interference to
radio communications.
However, there is no guarantee that interference will not occur in a particular installation. If this
equipment does cause interference to radio or television equipment reception, which can be
determined by turning the equipment off and on, the user is encouraged to try to correct the
interference by one or more of the following measures:
-Reorient or relocate the receiving antenna.
-Move the equipment away from the receiver.
-Plug the equipment into an outlet on a circuit different from that to which the receiver is
connected.
-Consult the dealer or an experienced radio/television technician for additional suggestions.
You are cautioned that any change or modifications to the equipment not expressly approved
by the party responsible for compliance could void Your authority to operate such equipment.
If the time arises to throw away your product, please
recycle all the components possible.
Batteries and rechargeable batteries are not to be
disposed in your domestic waste! Please recycle
them at your local recycling point.
Together we can help to protect the environment.
Werbung
Inhaltsverzeichnis

Verwandte Anleitungen für AIPTEK PocketDV AHD H125


Inhaltszusammenfassung für AIPTEK PocketDV AHD H125
- Seite 1 Welcome: Thank you kindly for purchasing this fine product. Much investment in time and effort has gone into its development, and it is our hope that it will give you many years of trouble-free service. Safety Notice: 1. Do not drop, puncture or disassemble the device; otherwise the warranty will be voided. 2.
- Seite 2 Loading the battery (batteries) 1.Slide Latch to open Battery Compartment Cover as shown. 2.Load the battery (batteries) based on the specifica- tions of camcorder. 3.Place the cover back. Inserting SD/MMC card (Optional accessory) The camcorder has built-in internal memory for storage but you can insert additional SD/SDHC/MMC/MMC2.0 memory card to expand your camcorder’s memory capacity.
-
Seite 3: Adjusting The Wrist Strap
Adjusting the wrist strap Follow the procedures to adjust the wrist strap. 1.Adjust the length of the strap according to your hand size. 2.Clothe and affix the wrist strap. Basic Operations ● Turning the power on/ off 1.Open the LCD panel or press the Power button ( ) to turn on the camcorder. - Seite 4 ● Recording a video clip 1.Press and release the Record button ( ) to start recording. 2.Press and release the Record button ( ) again to stop recording. ● Taking a still picture 1.Adjust the Focus Ring to get a clear image according to the real focal distance 2.Press the Shutter button ( to take a still picture.
-
Seite 5: Advanced Settings
Advanced Settings ● Choosing mode 1.Press the Left button ( ) to bring up Mode List. 2.Press the Up/Down button ( ) to highlight the desired item. 3.Press the Right button ( ) to enter and confirm the item. 4.Press the Left button ( ) to exit. -
Seite 6: Specifications
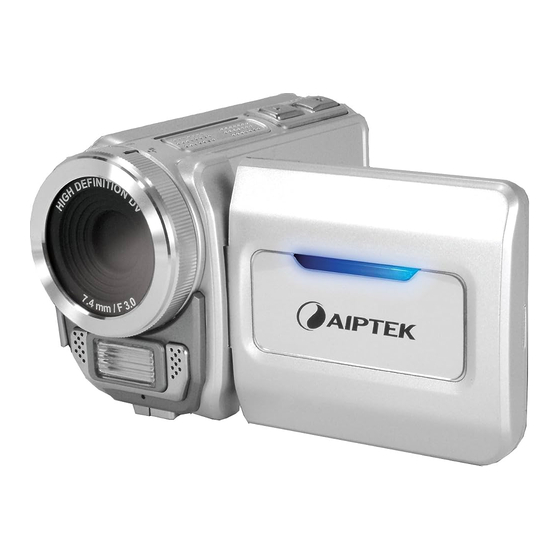
Specifications Item Description Model 5 Mega-pixel camera Resolution Still image: 2M/5M/8M/12M/16M 1280x720 (HD 30f) 640x480 (VGA 30f) 340x240 (QVGA 30f) External memory SD/SDHC/MMC card (up to 32GB SDHC) Digital zoom File format MP4(H.264), WAV, JPEG LCD display 2.4” LCD TV-out Yes(NTSC/PAL system) Bulit-in Microphone Bulit-in Speaker... - Seite 7 Herzlich willkommen! Lieber Benutzer, vielen Dank für den Kauf dieses Produkts. In die Entwicklung dieses Geräts wurde viel Zeit und Mühe investiert, und wir hoffen, es wird Ihnen viele Jahre störungsfreien Betrieb und Freude bescheren. Sicherheitshinweise: 1. Lassen Sie das Gerät nicht fallen und beschädigen und zerlegen Sie das Gerät nicht, andernfalls erlischt die Gewährleistung.
-
Seite 8: Einlegen Des Akkus (Der Batterien)
Einlegen des Akkus (der Batterien) 1. Ziehen Sie die Akkufachabdeckung wie abgebildet auf. 2. Legen Sie den Akku (Batterien) entsprechend der Angaben des Camcorders ein. 3. Bringen Sie die Abdeckung wieder an. Einstecken der SD-/MMC-Karte (optionales Zubehör) Der Camcorder verfügt über einen internen Speicher zum Speichern der Daten. - Seite 9 Anpassen des Trageriemens Gehen Sie wie folgt vor, um den Trageriemen anzupas- sen. 1. Passen Sie die Länge des Riemens nach Ihrer Handgröße an. 2. Kleben Sie den Trageriemen wieder an. Grundfunktionen ● Ein-/Ausschalten des Camcorders 1. Öffnen Sie den LCD-Bildschirm oder drücken den Stromschalter ( ), um den Camcorder einzuschalten.
- Seite 10 ● Aufzeichnen eines Videoclips 1. Drücken Sie kurz auf die Aufnahmetaste ( ), um die Aufzeichnung zu starten. 2. Drücken Sie noch einmal kurz auf die Aufnahmetaste ( ), um die Aufzeichnung zu beenden. ● Aufnehmen eines Fotos 1. Drehen Sie den Fokusring, um ein klares Bild entsprechend dem tatsächlichen Fokusab- stand zu erzielen.
-
Seite 11: Erweiterte Einstellungen
Erweiterte Einstellungen ● Wählen eines Modus 1. Drücken Sie die Links-Taste ( ), um die Modusliste aufzurufen. 2. Drücken Sie die Aufwärts-/Abwärtstaste ( ), um das gewünschte Element zu wählen. 3. Drücken Sie die Rechts-Taste ( ), um Ihre Wahl zu bestätigen und das Element zu aktivieren. -
Seite 12: Technische Daten
Technische Daten Element Beschreibung Modell 5 Megapixel-Kamera Auflösung Still image: 2M/5M/8M/12M/16M 1280x720 (HD 30f) 640x480 (VGA 30f) 340x240 (QVGA 30f) Externer Speicher SD/SDHC/MMC-Karte (bis zu 32 GB SDHC) Digitaler Zoom Dateiformate MP4(H.264), WAV, JPEG LCD-Anzeige 2.4” LCD-Bildschirm TV-Ausgang PAL/NTSC unterstützt Mikrofon BLautsprecher Sprachaufnahmefunktion... - Seite 13 Bienvenue: Cher utilisateur, nous vous remercions pour l’achat de ce produit. Beaucoup d’investissements en temps et en efforts ont été réalisés pour son développement, et nous espérons qu’il vous procurera des années de bons et loyaux services. Notice de sécurité: 1.
- Seite 14 Charger la batterie (les batteries) 1. Faites glisser le loquet afin d’ouvrir le cache du com- partiment de la batterie, comme indiqué. 2. Chargez la batterie (les batteries) surlabase des spécifications du caméscope. 3. Refermez le cache. Insérer une carte SD/MMC (accessoire facul- tatif) Le caméscope possède une mémoire interne intégrée pour le stockage mais vous pouvez insérer une carte...
- Seite 15 Ajuster la dragonne Veuillez suivre les procédures suivantes afin d’ajuster la dragonne. 1. Dénudez la dragonne. 2. Ajustez la longueur de la dragonne en fonction de la taille de votre main. 3. Couvrez et attachez la dragonne. Fonctionnements de base ●...
- Seite 16 ● Enregistrer un clip vidéo 1. Appuyez et relâchez le bouton Enregistrer ( ) pour commencer à enregistrer. 2. Appuyez et relâchez le bouton Enregistrer ( ) à nouveau pour arrêter d’enregistrer. ● Prendre une photo statique 1. Ajustez la bague de mise au point selon la distance focale réelle afin d’obtenir une image nette.
- Seite 17 Configurations avancées ● Choix du mode 1. Appuyez sur le bouton Gauche ( ) afin d’ouvrir le mode liste. 2. Appuyez sur le bouton Haut/Bas ( ) pour sélection- ner l’élément voulu. 3. Appuyez sur le bouton Droite ( ) afin de saisir et confirmer l’élément.
- Seite 18 Spécifications Élément Description Modèle Caméra 5 Méga pixels Résolution Still image: 2M/5M/8M/12M/16M 1280x720 (HD 30f) 640x480 (VGA 30f) 340x240 (QVGA 30f) Mémoire externe Carte SD/SDHC-MMC (jusqu’à 32Go SDHC). Zoom numérique Format fichier MP4(H.264), WAV, JPEG Affichage LCD LCD 2.4” Sortie TV Prise en charge des standards NTSC/PAL Microphone Haut-parleur...
- Seite 19 Bienvenido: Querido usuario, gracias por adquirir este producto. Se ha invertido una gran cantidad de tiempo y mucho esfuerzo en desarrollar este producto, por lo que esperamos que lo pueda disfrutar durante muchos años. Aviso de seguridad: 1. No deje caer, perfore ni desmonte el dispositivo; si lo hace, la garantía quedará invalidada. 2.
-
Seite 20: Cargar La(S) Batería(S)
Cargar la(s) batería(s) 1. Deslice el Cierre para abrir el Compartimento de las Baterías tal y como se indica. 2. Cargue la batería(s) siguiendo las especificaciones de la cámara de vídeo. 3. Vuelva a poner la tapa en su sitio. Insertar la tarjeta SD/MMC (Accesorio opcio- nal) La cámara de vídeo tiene una memoria interna inte-... -
Seite 21: Operaciones Básicas
Ajustar la correa de muñeca Siga los procedimientos indicados para ajustar la correa de muñeca. 1. Afloje la correa de muñeca. 2. Ajuste la longitud de la correa según el tamaño de su mano. 3. Apriete y fije la correa de muñeca. Operaciones Básicas ●... - Seite 22 ● Grabar un clip de vídeo 1. Pulse y suelte el botón Grabar ) para iniciar la grabación. 2. Pulse y suelte el botón Grabar ) para detener la grabación. ● Capturar una imagen fija 1. Ajuste el Anillo de Enfoque para obtener una imagen nítida según la distancia real de enfoque.
-
Seite 23: Opciones Avanzadas
Opciones avanzadas ● Modo de Selección 1. Pulse el botón Izquierda ( ) para abrir la Lista de Modos. 2. Pulse el botón Arriba/Abajo ( ) para resaltar el elemento que desee. 3. Pulse el botón Derecha ( ) para entrar y confirmar el elemento. - Seite 24 Especificaciones Elemento Descripción Modelo Cámara de 5 megapíxeles Resolución Still image: 2M/5M/8M/12M/16M 1280x720 (HD 30f) 640x480 (VGA 30f) 340x240 (QVGA 30f) Memoria externa Tarjeta SD/SDHC-MMC (hasta SDHC de 32 GB) Zoom digital Formato de archivo MP4(H.264), WAV, JPEG Pantalla LCD Pantalla LCD de 2.4 Salida de TV LLos sistemas NTSC y PAL...
- Seite 25 Bem-vindo: Caro utilizador, obrigado por ter comprado este produto. Investimos muito tempo e esforço no seu desenvolvimento e esperamos que o mesmo o sirva durante muitos anos sem problemas. Normas de Segurança: 1. Não deixe cair, não fure e não desmonte o dispositivo, pois caso contrário a garantia perderá...
- Seite 26 Introduzir a bateria (baterias) 1. Faça deslizar a tampa do compartimento da bateria (baterias) para a abrir, tal como ilustrado. 2. Introduza a baterias (baterias) de acordo com as especificações da câmara. 3. Coloque novamente a tampa do compartimento. Inserir um cartão SD/MMC (acessório opcio- nal) A câmara tem uma memória interna para armaze- namento mas pode inserir um cartão de memória...
-
Seite 27: Operações Básicas
Ajustar a pulseira de transporte Siga os procedimentos para ajustar a pulseira de transporte. 1. Ajuste o comprimento da pulseira de acordo com o tamanho da sua mão. 2. Coloque e fixe a pulseira de transporte. Operações básicas ● Ligar e desligar a energia 1. - Seite 28 ● Gravar um clip de vídeo 1. Prima e liberte o botão Gravação ) para iniciar a gravação. 2. Prima e liberte novamente o botão Gravação ( ) para parar a gravação. ● Tirar fotografias 1. Ajuste o Anel de Focagem para obter uma imagem nítida de acordo com a distância real de focagem.
-
Seite 29: Configuração Avançada
Configuração avançada ● Escolher o modo 1. Prima o botão para a Esquerda ( ) para exibir a Lista de Modos. 2. Prima o botão Para Cima/Baixo ( ) para selec- cionar o item desejado. 3. Prima o botão para a Direita ( ) para entrar e confirmar o item. - Seite 30 Especificações Item Descrição Modelo Câmara de 5 Megapíxeis Resolução Still image: 2M/5M/8M/12M/16M 1280x720 (HD 30f) 640x480 (VGA 30f) 340x240 (QVGA 30f) Memória externa Cartão de memória SD/SDHC/MMC (SDHC até 32 GB) Zoom digital Formato de ficheiro MP4(H.264), WAV, JPEG Ecrã LCD LCD de 2.4¨...
- Seite 31 Welkom: Beste gebruiker, bedankt voor de aankoop van dit product. We hebben heel wat tijd en moeite gestopt in de ontwikkeling ervan en we hopen dat u jarenlang zorgeloos zult kunnen genieten van uw nieuwe aankoop. Veiligheidsmaatregelen: 1. Laat het toestel niet vallen. Doorboor en demonteer hem niet. U zou de garantie ermee ongeldig maken.
- Seite 32 IBatterijen/accu plaatsen 1. Schuif de vergrendeling open om het deksel van de batterijhouder te verwijderen. 2. Plaats de batterijen of de accu als volgt, afhankelijk van de specificaties van de camcorder 3. Plaats het deksel terug. SD/MMC-kaart plaatsen (optionele accessoire) De camcorder heeft een ingebouwd intern geheugen voor opslag.
- Seite 33 Polsband bevestigen en verstellen 1. Verstel de lengte van de band voor uw handpalm. 2. Sluit de band en bevestig het beschermkussen van de polsband. Basisbediening ●Voeding in- en uitschakelen 1. Om de camcorder in te schakelen, opent u het LCD- scherm of drukt u op de Voedingsschakelaar.
- Seite 34 ●Video-opname maken 1. Druk op de Opnameknop ( ) om de opname te starten. 2. Druk opnieuw op de Opnameknop ) om de opname te stoppen. . ● Foto maken 1. Stel de scherpstelling in op de gewenste stand. Voor de meeste opnameomstandigheden stelt u de scherp- stelling in op ( ).
-
Seite 35: Geavanceerde Instellingen
Geavanceerde instellingen ●Kies de modus Mode 1. Kies de modus Mode: Druk op de knop Links (◄). 2. Druk op de knoppen Omhoog (▲)en Omlaag(▼) om een ander bestand te kiezen. 3. Een onderdeel bevestigen: Druk op de knop Re- chts(►). - Seite 36 Specificaties Item Beschrijving Model Camera 5 megapixels Resolutie Still image: 2M/5M/8M/12M/16M 1280x720 (HD 30f) 640x480 (VGA 30f) 340x240 (QVGA 30f) Extern geheugen SD/SDHC-MMC-kaart (tot 32GB SDHC) Digitale zoom Bestandsindeling MP4(H.264), WAV, JPEG LCD-scherm 2.4” LCD TV-uitgang NTSC/PAL-systeem ondersteund microfoon Luidspreker Spraakrecorder Web cam Zelfontspanner...