Herunterladen Inhalt Inhalt Diese Seite drucken
Inhaltsverzeichnis

Werbung

Verfügbare Sprachen
  • DE

Verfügbare Sprachen

  • DEUTSCH, seite 13
Welcome:
Dear user, thanks for purchasing this product.
Much investment in time and effort has gone into its development, and it is our hope
that it will give you many years of trouble-free service.
Safety Notice:
1. Do not drop, puncture or disassemble the camera; otherwise the warranty will be voided.
2. Avoid all contact with water, and dry hands before using.
3. Do not expose the camera to high temperature or leave it in direct sunlight. Doing so may
damage the camera.
4. Use the camera with care. Avoid pressing hard on the camera body.
5. For your own safety, avoid using the camera when there is a storm or lightning.
6. Do not use batteries of different specifications. Doing so may lead to the potential for serious
damage.
7. Remove the battery during long periods between usage, as a deteriorated battery may affect
the functionality of the camera.
8. Remove the battery if it shows signs of leaking or distortion.
9. Use only the accessories supplied by the manufacturer.
10. Keep the camera out of the reach of infants.
11. Risk of explosion if battery is replaced by an incorrect type.
12. Dispose of used batteries according to the instructions.
FCC Compliance Statement:
This device complies with Part 15 of the FCC Rules. Operation is
subjected to the following two conditions: (1) this device may not cause
harmful interference, and (2) this device must accept any interference
received, including interference that may cause undesired operation.
This equipment has been tested and found to comply with limits for a
Class B digital device, pursuant to Part 15 of the FCC rules. These limits
are designed to provide reasonable protection against harmful interference in residential
installations. This equipment generates, uses, and can radiate radio frequency energy, and if
not installed and used in accordance with the instructions, may cause harmful interference to
radio communications.
However, there is no guarantee that interference will not occur in a particular installation. If this
equipment does cause interference to radio or television equipment reception, which can be
determined by turning the equipment off and on, the user is encouraged to try to correct the
interference by one or more of the following measures:
-Reorient or relocate the receiving antenna.
-Move the equipment away from the receiver.
-Plug the equipment into an outlet on a circuit different from that to which the receiver is
connected.
-Consult the dealer or an experienced radio/television technician for additional suggestions.
You are cautioned that any change or modifications to the equipment not expressly approved
by the party responsible for compliance could void Your authority to operate such equipment.
If the time arises to throw away your product, please
recycle all the components possible.
Batteries and rechargeable batteries are not to be
disposed in your domestic waste! Please recycle
them at your local recycling point.
Together we can help to protect the environment.

Werbung

Inhaltsverzeichnis
loading

Inhaltszusammenfassung für AIPTEK PocketDV-T220

  • Seite 1 Welcome: Dear user, thanks for purchasing this product. Much investment in time and effort has gone into its development, and it is our hope that it will give you many years of trouble-free service. Safety Notice: 1. Do not drop, puncture or disassemble the camera; otherwise the warranty will be voided. 2.
  • Seite 2 ■ DE: Umweltschutz Geben Sie das Gerät am Ende der Lebensdauer nicht in den normalen Haus- müll. Bringen Sie es zum Recycling zu einer offiziellen Sammelstelle. Auf diese Weise helfen Sie die Umwelt zu schonen. ■ FR: Environnement Ne jetez pas l’appareil en fin de vie avec les ordures ménagères, mais déposez- le à...
  • Seite 3: Loading The Battery

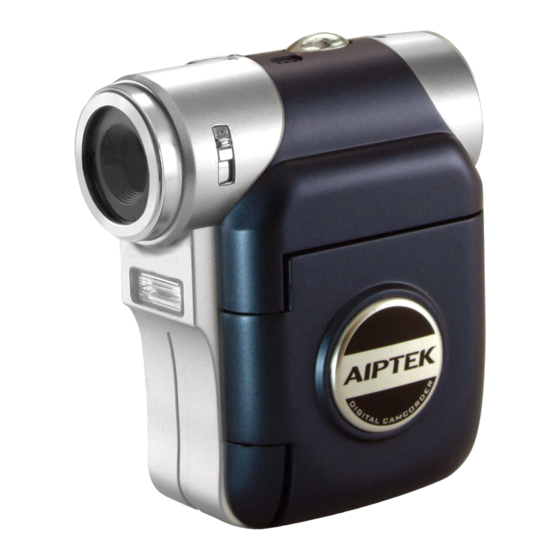
    Camcorder Parts Focus switch Mode/ button Shutter Button ( Microphone USB Port Lens Strap hook TV-out Connector Flash strobe Record button ( SD/MMC Card Slot Battery cover Up button (Zoom in) Power Button ( Tripod Port Down button (Zoom out) LCD Panel Button Speaker...
  • Seite 4: Setting Language

    Inserting the SD/MMC card (optional) 1. Lift the SD card cover. 2. Insert the card in the direction of indication until it reaches the end of the slot. 3. When using a SD card, the built-in memory will become inaccessible. 4.
  • Seite 5: Reading Lcd Indicators

    Reading LCD indicators Digital Camcorder mode: Flash mode Focus mode Photo resolution NightShot 1.1x Zoom ratio SD card inserted Battery life Number of pictures/files Playback thumbnail mode: Current/total recordings Play mode File type Highlight box Playback full mode: Recording time Play mode Volume Video REC mode:...
  • Seite 6: Taking A Still Picture

    Recording a video clip 1. Set the focus to an appropriate setting. Normally, you may set the focus to ( ) for most filming conditions. Select ( ) only for close-ups. 2. Press the Record button ( ) to start recording. 3.
  • Seite 7: Mode Selection

    Connecting the camcorder to a TV Connect your camcorder and TV via the accessory AV cable for real-time display. You can display your video clips, still pictures, and audio recordings directly on your TV, sharing them with your friends and family. AV-Mode Video Audio...
  • Seite 8: Basic Operation

    Basic operation How to... Action Move the highlight bar Zoom buttons ( Use the to move up or down. Confirm an item Press the button. Exit menu/Go back to upper menu Press the Mode button (when in sub-menu). Menu items in Camera mode Power-on →...
  • Seite 9: Menu Items In Playback Mode

    Menu items in Playback mode Power-on → Press the Mode button → Enter the Playback mode → Press the Shutter button Item Option Description Delete One Yes/No Delete current file. Delete all pictures and video/audio files stored in the Delete All Yes/No memory.
  • Seite 10: Battery Life Indicator

    Flicker Settings Area England Germany France Italy Spain Russia Setting 50Hz 50Hz 50Hz 50Hz 50Hz 50Hz Area Portugal America Taiwan China Japan Korea Setting 50Hz 60Hz 60Hz 50Hz 50/60Hz 60Hz Note: The flicker setting is based on the frequency standard of your local power supply. Battery Life Indicator Icon Description...
  • Seite 11: Specifications

    Specifications Item Description Sensor effective resolution 5 Mega (2560x1920) pixels Interpolated resolution 12 Mega (4000x3000) pixels External memory Built-in SD/MMC card slot (maximum: 2GB) JPEG (.JPG) format 4000x3000 (12 Mega) pixels Digital still camera 2560x1920 (5 Mega) pixels 2048x1536 (3 Mega) pixels 1280x960 (1 Mega) pixels VGA (640x480 pixels) / up to 30 fps Digital video camcorder...
  • Seite 13: Camcorder-Teile

    Camcorder-Teile Fokusschalter Modus-/ -Taste Auslöser ( Mikrofon USB-Anschluss Objektiv Riemenöse TV-Ausgang Blitzlicht Aufnahmetaste ( SD-/MMC-Karteneinschub Batteriefachabdeckung Aufwärtstaste (Einzoomen) Ein-/Aus-Taste ( Stativanschluss Abwärtstaste (Auszoomen) LCD-Bildschirm -Taste Lautsprecher Einlegen der Batterie Verwenden Sie zwei AA-Batterien. 1. Ziehen Sie die Batteriefachabdeckung wie abgebildet auf. 2.
  • Seite 14: Einschalten Des Camcorders

    Einlegen der SD-/MMC-Karte (optional) 1. Klappen Sie die SD-Karteneinschubabdeckung hoch. 2. Stecken Sie die Karte in die angegebene Richtung bis zum Anschlag in den Einschub hinein. 3. Bei Verwendung einer SD-Karte ist ein Zugriff auf den integrierten Speicher nicht mehr möglich.
  • Seite 15: Lesen Der Lcd-Anzeigen

    Lesen der LCD-Anzeigen Digitalcamcordermodus: Blitzmodus Fokusmodus Fotoauflösung Nachtaufnahme 1.1x Zoom-Verhältnis SD-Karte eingelegt Batterieladestand Anzahl der Bilder/Dateien Wiedergabeminiaturmodus: Aktuelle Aufnahme / Aufnahmen gesamt Wiedergabemodus Dateityp Markierungsrahmen Wiedergabevollbildmodus: Aufnahmezeit Wiedergabemodus Lautstärke Videoaufnahmemodus: Aufnahmezeit Fokusmodus Videoauflösung Nachtaufnahme Zoom-Verhältnis 1.1x SD-Karte eingelegt Batterieladestand Aufnahme läuft...
  • Seite 16: Wiedergeben Ihrer Aufzeichnungen

    Aufzeichnen von Videos 1. Stellen Sie den Fokus richtig ein. Für die meisten Filmaufnahmen sollten Sie den einstellen. Wählen Sie ( ) nur für Nahaufnahmen ( 2. Drücken Sie die Aufnahme ( ), um mit der Aufzeichnung zu beginnen. 3. Zommen Sie mit den Zoomtasten ( ) den Bildschirm ein oder aus.
  • Seite 17: Anschließen Des Camcorders An Ein Tv-Gerät

    Anschließen des Camcorders an ein TV-Gerät Schließen Sie den Camcorder zur Echtzeitanzeige mit dem mitgelieferten AV-Kabel an ein TV-Gerät an. Sie können Ihre Videos, Fotos und Audiodateien direkt über ein TV-Gerät wiedergeben, um sie so mit Freunden und Familienangehörigen gemeinsam zu betrachten. TV-Gerät AV-Modus Video...
  • Seite 18: Menüpunkte Im Kameramodus

    Grundbetrieb Funktion... Vorgang Navigieren Sie mit den Zoomtasten nach oben Verschieben des Markierungsrahmens oder unten. Bestätigen einer Eingabe Drücken Sie die -Taste. Menü verlassen / zurück zum Drücken Sie die Modus- Taste (vom Untermenü übergeordneten Menü aus). Menüpunkte im Kameramodus Einschalten →...
  • Seite 19: Menüpunkte Im Wiedergabemodus

    Menüpunkte im Wiedergabemodus Einschalten → Modustaste drücken → Wiedergabemodus aufrufen → Drücken Sie den Auslöser ( Menüpunkt Optionen Beschreibung Löschen Ja/Nein Löschen der aktuellen Datei. Alles löschen Ja/Nein Löschen aller Fotos und Video-/Audiodateien im Speicher. Menüpunkte im Einstellungsmodus Einschalten → Modustaste drücken →Einstellungsmodus aufrufen.
  • Seite 20: Batterieladestandsanzeige

    Frequenzeinstellungen Bereich England Deutschland Frankreich Italien Spanien Russland Einstellung 50Hz 50Hz 50Hz 50Hz 50Hz 50Hz Bereich Portugal Amerika Taiwan China Japan Korea Einstellung 50Hz 60Hz 60Hz 50Hz 50/60Hz 60Hz Hinweis: Die Frequenzeinstellung basiert auf der Frequenz Ihrer örtlichen Stromversorgung. Batterieladestandsanzeige Symbol Beschreibung Batterie voll...
  • Seite 21: Installer La Pile

    Composants du caméscope Bouton de mise au point Bouton Haut-parleur Microphone Bouton de mode/ Déclencheur ( Œillet dragonne Port USB Objectif Bouton d’enregistrement Connecteur sortie TV Flash Slot carte SD/MMC Couvercle piles Bouton haut Bouton d’alimentation Support trépied (Zoom plus) Bouton bas Panneau LCD (Zoom moins)
  • Seite 22: Allumer Le Caméscope

    Insérer la carte SD/MMC (facultatif) 1. Soulevez le couvercle de la carte SD. 2. Insérez la carte dans le sens indiqué jusqu’à ce qu’elle atteigne le fond du slot. 3. Lorsque vous utilisez une carte SD, La mémoire intégrée devient inaccessible. 4.
  • Seite 23: Lire Les Indicateurs Lcd

    Lire les indicateurs LCD Mode caméscope numérique: Mode de flash Mode de mise au point Résolution photo Photos nuit 1.1x Taux de zoom Carte SD insérée Autonomie pile Nombre d’images/fichiers Lecture en mode miniatures: Enregistrements actuel/total Mode de lecture Type de fichier Sélecter la case Mode lecture complet: Durée d’enregistrement...
  • Seite 24: Enregistrer Un Clip Vidéo

    Enregistrer un clip vidéo 1. Réglez la mise au point sur une valeur appropriée. Normalement, vous pouvez régler la mise au point sur ( ) pour la plupart des conditions de prise de vue. Sélectionnez ( ) seulement pour les gros plans. 2.
  • Seite 25: Relier Le Caméscope À Un Téléviseur

    Relier le caméscope à un téléviseur Reliez votre caméscope à votre téléviseur via le câble AV accessoire pour un affichage en temps réel. Vous pouvez lire vos clips vidéo, vos photos, et vos enregistrements audio directement sur votre téléviseur pour les partager en famille et avec vos amis. Téléviseur Mode AV Vidéo...
  • Seite 26: Utilisation De Base

    Utilisation de base Comment... Action Utilisez les boutons de Zoom pour vous déplacer Déplacer la barre de sélection vers le haut ou vers le bas. La confirmation d’un élément Appuyez sur le bouton Quitter le menu/ Revenir au menu Appuyez sur le bouton Mode (une fois dans le sous- supérieur menu).
  • Seite 27: Les Éléments De Menu Du Mode Lecture

    Les éléments de menu du mode Lecture Mettez en marche → Appuyez sur le bouton Mode → Entrez dans le mode Lecture → Appuyez sur le bouton déclencheur ( Elément Option Description Supprimer Oui/Non Supprime le fichier en cours. Supprime toutes les images et fichiers vidéo/audio stockés dans Suppr.
  • Seite 28 Réglage de fréquence Secteur Angleterre Allemagne France Italie Espagne Russie Réglage 50Hz 50Hz 50Hz 50Hz 50Hz 50Hz Secteur Portugal Etats-Unis Taiwan Chine Japon Corée Réglage 50Hz 60Hz 60Hz 50Hz 50/60Hz 60Hz Note: Le réglage de fréquence est basé sur le standard de fréquence de votre réseau électrique local.
  • Seite 29: Parti Della Videocamera

    Parti della videocamera Interruttore di messa a fuoco Tasto / modalitàn Tasto otturatore ( Microfono Porta USB Obiettivo Passante cinturino Connettore uscita TV Flash Tasto registrazione Slot scheda SD/MMC Coperchio batteria Tasto alimentazione ( Apertura per treppiede Tasto su (ingrandimento) Pannello LCD Tasto giù...
  • Seite 30: Accensione Della Videocamera

    Inserimento della scheda SD/MMC (opzionale) 1. Sollevare la copertura della scheda SD. 2. Inserire la scheda nella direzione indicata fino in fondo alla slot. 3. L’uso della scheda SD renderà accessibile la memoria integrata. 4. Per rimuovere la scheda SD, spingerla con delicatezza fino a quando non esce. Accensione della videocamera Aprire il pannello LCD.
  • Seite 31: Lettura Degli Indicatori Del Display Lcd

    Lettura degli indicatori del display LCD Modalità Videocamera digitale: Modalità Flash Modalità messa a fuoco Risoluzione foto NightShot (Scatto notturno) 1.1x Rapporto zoom Scheda SD inserita Durata della batteria Numero di foto/file Modalità amteprima riproduzione: Registrazione corrente / totale registrazioni Modalità...
  • Seite 32: Registrazione Di Una Sequenza Video

    Registrazione di una sequenza video 1. Impostare il fuoco in maniera appropriata. Di norma, è possibile impostare il fuoco su ( ) per la maggior parte delle condizioni di ripresa. Selezionare ( ) solo per primi piani. 2. Premere il tasto Registrazione ( ) per avviare la registrazione.
  • Seite 33: Collegamento Della Videocamera Al Televisore

    Collegamento della videocamera al televisore Collegare la videocamera ed il televisore usando il cavo AV fornito in dotazione per ottenere la visualizzazione in tempo reale. Si possono visualizzare sequenze video, fotografie e registrazioni audio direttamente sul televisore e condividerle con amici e famigliari. Modalità...
  • Seite 34: Funzionamento Di Base

    Funzionamento di base Come fare per... Azione Usare i tasti di Zoom per spostarsi verso l’alto o Spostare l’evidenziatore il basso. Confermare una voce Premere il tasto Uscire dal menu / Tornare al menu Premere il tasto Modalità (quando si è in un menu precedente secondario).
  • Seite 35: Voci Del Menu In Modalità Riproduzione

    Voci del menu in modalità Riproduzione Accendere → Premere il tasto Modalità → Accedere alla modalità Riproduzione → Premere il tasto Otturatore Voce Opzione Descrizione Elimina Sì/No Elimina il file corrente. Elimina tutto Sì/No Elimina tutte le immagini e file video/audio archiviati nella memoria. Voci del menu in modalità...
  • Seite 36: Indicatore Di Carica Della Batteria

    Impostazioni della frequenza Zona Inghilterra Germania Francia Italia Spagna Russia Impostazione 50Hz 50Hz 50Hz 50Hz 50Hz 50Hz Zona Portogallo America Taiwan Cina Giappone Corea Impostazione 50Hz 60Hz 60Hz 50Hz 50/60Hz 60Hz Nota: l’impostazione della frequenza si basa sullo standard della frequenza del fornitore locale di energia elettrica.
  • Seite 37: Cargar La Batería

    Partes de la videocámara Selector de enfoque Modo / botón Altavoz Micrófono Puerto USB Botón Disparador ( Gancho para la correa Conector de salida Objetivo de TV Botón Grabar ( Flash Ranura para tarjeta Botón Arriba (Acercar) Tapa de la batería SD/MMC Botón Abajo (Alejar) Puerto para el trípode...
  • Seite 38: Configuración De Idioma

    Insertar una tarjeta de memoria SD/MMC (opcional) 1. Levante la tapa de la tarjeta SD. 2. Inserte la tarjeta en la dirección indicada hasta que llegue al final de la ranura. 3. Si utiliza una tarjeta SD, no se podrá obtener acceso a la memoria integrada. 4.
  • Seite 39: Leer Los Indicadores Lcd

    Leer los indicadores LCD Modo Videocámara digital: Modo de Flash Modo de enfoque Resolución de la foto Escena nocturna 1.1x Relación de zoom Tarjeta SD insertada Vida de la batería Número de imágenes/archivos Modo Reproducir miniaturas: Grabaciones actuales y totales Modo Reproducir Tipo de archivo Cuadro de resalte...
  • Seite 40: Capturar Una Imagen Estática

    Grabar un clip de vídeo 1. Establezca el enfoque en un valor adecuado. Por lo general, el enfoque debe establecerse en ) para la mayoría de las condiciones de grabación. Seleccione la opción ( ) solamente para primeros planos. 2. Pulse el botón Grabar ( ) para iniciar la grabación.
  • Seite 41: Conectar La Videocámara A Un Televisor

    Conectar la videocámara a un televisor Conecte la videocámara y el televisor mediante el cable AV adicional para ver imágenes en tiempo real. Puede mostrar los videos, fotografías y grabaciones de audio directamente en el televisor y compartirlos con sus amigos y familiares. Modo AV Vídeo Audio...
  • Seite 42: Funcionamiento Básico

    Funcionamiento básico Cómo... Acción Utilice el botón Zoom para mover hacia arriba o Mover la barra de resalte hacia abajo. Confirmar un elemento Presione el botón Salir del menú o retroceder al menú de Presione el botón Modo/ (dentro de un submenú). nivel superior Elementos de menú...
  • Seite 43: Elementos De Menú En El Modo Reproducción

    Elementos de menú en el modo Reproducción Encienda la alimentación → Presione el botón Modo → Entre en el modo Reproducción → Presione el botón Disparador ( Elemento Opción Descripción Eliminar Sí/No Elimina el archivo actual. Elimina todas las imágenes y todos los archivos de audio y Borrar todo Sí/No vídeo almacenados en la memoria.
  • Seite 44: Indicador De Carga De La Batería

    Configuración de parpadeo Área Inglaterra Alemania Francia Italia España Rusia Configuración 50Hz 50Hz 50Hz 50Hz 50Hz 50Hz Área Portugal América Taiwán China Japón Korea Configuración 50Hz 60Hz 60Hz 50Hz 50/60Hz 60Hz Nota: la configuración de parpadeo se basa en la norma de frecuencia de la fuente de alimentación eléctrica local.
  • Seite 45: Onderdelen Van De Camcorder

    Onderdelen van de camcorder Scherpstelschakelaar Knop Modus / Ontspanknop ( Microfoon USB-poort Lens Riemhaak Aansluiting TV-uitgang Videolamp Opnameknop ( SD/MMC-kaartsleuf Flitserlamp Knop Omhoog (inzoomen) Voedingsknop ( Batterijklep Knop Omlaag (uitzoomen) LCD-paneel Statiefaansluiting Knop Luidspreker De batterij plaatsen Gebruik twee AA-batterijen. 1.
  • Seite 46 De SD/MMC-kaart plaatsen (optioneel) 1. Til de SD-kaartklep omhoog. 2. Stop de kaart in de richting van de aanwijzing tot deze het einde van de sleuf bereikt. 3. Wanneer u een SD-kaart gebruikt, zal het interne geheugen niet meer toegankelijk zijn. 4.
  • Seite 47: Lcd-Indicators Aflezen

    LCD-indicators aflezen Digitale camcordermodus: Flitsermodus Scherpstelmodus Fotoresolutie Nachtopname 1.1x Zoomverhouding SD-kaart geplaatst Levensduur batterij Aantal foto’s/bestanden Miniatuurweergavemodus: Huidig/totaal aantal opnamen Weergavemodus Bestandstype Selectievenster Modus weergave volledige schermgrootte: Opnameduur Weergavemodus Volume Video-opnamemodus: Opnameduur Scherpstelmodus Videoresolutie Nachtopname Zoomverhouding 1.1x SD-kaart geplaatst Levensduur batterij Opnemen...
  • Seite 48: Een Videoclip Opnemen

    Een videoclip opnemen 1. Stel de scherpstelling in op de gewenste instelling. Voor de meeste opnameomstandigheden stelt u de scherpstelling normaal in op ( Selecteer alleen ( ) voor close-ups. 2. Druk op de Opnameknop ( ) om de opname te starten. 3.
  • Seite 49: De Camcorder Aansluiten Op Een Tv

    De camcorder aansluiten op een tv Sluit uw camcorder aan op de tv met de meegeleverde AV-kabel voor real time-weergave. U kunt uw videoclips, foto’s en geluidsopnamen rechtstreeks op uw tv afspelen en ze delen met uw vrienden en familie. AV-modus Video Audio...
  • Seite 50: Menu-Items In De Cameramodus

    Basisbediening Hoe kan ik... Actie Gebruik de Zoomknoppen om de cursor omhoog of Het selectievenster verplaatsen. omlaag te verplaatsen. Een item bevestigen Druk op de knop Menu Afsluiten/terugkeren naar het Druk op de knop Modus (wanneer u in het submenu bent) bovenliggende menu Menu-items in de cameramodus Schakel de camera in →...
  • Seite 51: Menu-Items In De Weergavemodus

    Menu-items in de weergavemodus Inschakelen → Druk op de knop Modus → Open de Weergavemodus → Druk op de Ontspanknop Item Optie Beschrijving Verwijderen Ja/Nee Huidig bestand wissen. Alle foto’s en video-/audiobestanden die in het geheugen zijn Alles verw Ja/Nee opgeslagen, wissen.
  • Seite 52: Indicator Levensduur Batterij

    Flikkerinstellingen Gebied Engeland Duitsland Frankrijk Italië Spanje Rusland Instelling 50Hz 50Hz 50Hz 50Hz 50Hz 50Hz Gebied Portugal Amerika Taiwan China Japan Korea Instelling 50Hz 60Hz 60Hz 50Hz 50/60Hz 60Hz Opmerking: De Flikkerinstelling is gebaseerd op de frequentiestandaard van uw lokale voeding. Indicator levensduur batterij Pictogram Omschrijving...
  • Seite 53: Colocação Das Pilhas

    Componentes da camcorder Comutador de focagem Botão Altifalante Botão do obturador ( Microfone Botão Mode/ Ilhó para a correia Porta USB Lente Botão de gravação Conector da saída de TV Flash Ranhura para cartões de Tampa do compartimento Botão para cima (mais memória SD/MMC das pilhas zoom)
  • Seite 54: Definição Do Idioma

    Introdução do cartão de memória SD/MMC (opcional) 1. Levante a tampa do compartimento do cartão de memória SD. 2. Introduza o cartão na direcção indicada e até este atingir o fim da ranhura. 3. Ao utilizar um cartão de memória SD, não é possível aceder à memória interna da câmara. 4.
  • Seite 55: Significado Dos Ícones Apresentados No Ecrã Lcd

    Significado dos ícones apresentados no ecrã LCD Modo de camcorder digital: Modo do flash Resolução da foto Modo de focagem Taxa de zoom Nocturno 1.1x Cartão de memória SD introduzido Carga das pilhas Número de fotografias/ficheiros Modo de reprodução de miniaturas: Gravação actual / Total de gravações Tipo de ficheiro Modo de reprodução...
  • Seite 56: Tirar Fotografias

    Gravação de um clip de vídeo 1. Defina a focagem para a definição pretendida. Normalmente, deve definir a focagem para ( ) para a maior parte das condições de gravação. Seleccione a opção ( ) apenas para grandes planos. 2. Prima o botão de gravação ( ) para iniciar a gravação.
  • Seite 57: Ligação Da Camcorder A Um Televisor

    Ligação da camcorder a um televisor Ligue a sua camcorder ao televisor utilizando o cabo AV incluído para visualização em tempo real. Pode desfrutar dos seus clips de vídeo, das fotografias e das gravações de áudio directamente no seu televisor, partilhando-os com os seus amigos e familiares. Modo AV Vídeo Áudio...
  • Seite 58: Operações Básicas

    Operações básicas Como… Acção Utilize os botões de zoom para se deslocar para Deslocar a caixa de selecção cima ou para baixo. Confirmar um item Prima o botão Sair do menu/Voltar ao menu anterior Prima o botão Mode (no sub menu). Itens do menu no modo Câmara Ligue a camcorder →...
  • Seite 59 Itens do menu no modo Reproduzir Ligue a camcorder → Prima o botão Mode → Aceda ao modo Reproduzir → Prima o botão obturador Item Opção Descrição Eliminar Sim/Não Elimina o ficheiro actual. Elimina todos os ficheiros de imagem e de vídeo/áudio Eliminar tudo Sim/Não armazenados na memória.
  • Seite 60 Definições de cintilação Área Inglaterra Alemanha França Itália Espanha Rússia Definição 50Hz 50Hz 50Hz 50Hz 50Hz 50Hz Área Portugal América Taiwan China Japão Coreia Definição 50Hz 60Hz 60Hz 50Hz 50/60Hz 60Hz Nota: A definição de cintilação tem por base a frequência padrão da rede eléctrica local. Indicador de carga das pilhas Ícone Descrição...
  • Seite 61: Ładowanie Baterii

    Części kamery Przełącznik ostrości Przycisk Głośnik Mikrofon Przycisk Tryb/ Przycisk migawki ( Zaczep na pasek Port USB Obiektyw *Przycisk Nagrywaj Złącze wyjścia TV/ Lampa błyskowa Słuchawki Pokrywa baterii Przycisk W górę Gniazdo karty SD/MMC Złącze statywu (Powiększenie) Przycisk zasilania ( Przycisk w dół...
  • Seite 62: Włączanie Kamery

    Wstawianie karty SD/MMC (opcjonalna) 1. Unieś pokrywę karty SD. 2. Wstaw kartę we wskazanym kierunku, aż do końca gniazda. 3. Podczas korzystania z karty SD, nie będzie dostępna wbudowana pamięć. 4. Aby wyjąć kartę SD delikatnie ją naciśnij, aż wyskoczy. Włączanie kamery Otwórz panel LCD.
  • Seite 63: Odczytywanie Wskaźników Lcd

    Odczytywanie wskaźników LCD Tryb kamery cyfrowej: Tryb lampy błyskowej Tryb ostrości Rozdzielczość zdjęcia Nocne zdjęcia 1.1x Współczynnik zoom Inteligentny zoom Wstawiona karta SD Żywotność baterii Liczba obrazów/plików Tryb odtwarzania miniaturek: Bieżąca/łączna liczba nagrań Tryb odtwarzania Typ pliku Ramka zaznaczenia Tryb pełnego odtwarzania: Czas nagrania Tryb odtwarzania Głośność...
  • Seite 64: Nagrywanie Klipu Video

    Nagrywanie klipu video 1. Ustaw właściwą ostrość. Normalnie dla większości warunków kręcenia filmów, można nastawić ostrość na ( ). ( ) należy wybierać wyłącznie dla zbliżeń. 2. Naciśnij przycisk Nagrywaj ( ) w celu rozpoczęcia nagrywania. 3. Użyj przycisków Zoom ( ) do powiększania i zmniejszania ekranu.
  • Seite 65: Podłączanie Kamery Do Telewizora

    Podłączanie kamery do telewizora Podłącz kamerę do telewizora stanowiącym część akcesoriów kablem AV w celu wyświetlenia obrazu w czasie rzeczywistym. Klipy video, zdjęcia i nagrania audio, można wyświetlać bezpośrednio w telewizorze, współdzieląc je z przyjaciółmi i rodziną. Telewizor Tryb AV Video Audio WYJŚCIE...
  • Seite 66: Podstawowe Operacje

    Podstawowe operacje Jak… Akcja Użyj przycisków Zoom do przesunięcia Przesunąć podświetlony pasek w górę lub w dół. Potwierdzić element Naciśnij przycisk Opuści menu/Przejść z powrotem do Naciśnij przycisk Tryb/ (w podmenu). menu górnego Elementy menu w trybie Camera (Aparat) Włącz zasilanie → Naciśnij przycisk Element Opcja Opis...
  • Seite 67: Elementy Menu W Trybie Odtwarzania

    Elementy menu w trybie odtwarzania Włącz zasilanie → Naciśnij przycisk Mode (Tryb) → Przejdź do trybu Playback (Odtwarzanie) → Naciśnij przycisk Migawka Element Opcja Opis Delete One (Usuń Tak/Nie Usuwa bieżący plik. jeden) Delete All Tak/Nie Usuwa wszystkie obrazy i pliki video/audio zapisane w pamięci. (Usuń...
  • Seite 68: Wskaźnik Naładowania Baterii

    Ustawienia migania Kraj Anglia Niemcy Francja Włochy Hiszpania Rosja Ustawienie 50Hz 50Hz 50Hz 50Hz 50Hz 50Hz Kraj Portugalia Ameryka TajwanTajwan: Chiny Japonia Korea Ustawienie 50Hz 60Hz 60Hz 50Hz 50/60Hz 60Hz Uwaga: Ustawienie migania zależy od standardu częstotliwości lokalnego zasilania. Wskaźnik naładowania baterii Ikona Opis Pełne naładowanie baterii...

Inhaltsverzeichnis