AIPTEK AHD H150 Bedienungsanleitung

Verwandte Anleitungen für AIPTEK AHD H150


Inhaltszusammenfassung für AIPTEK AHD H150
- Seite 22 Deutsch HD Camcorder...
-
Seite 23: Sicherheitshinweise
Willkommen Vielen Dank, dass Sie sich für unser Produkt entschieden haben. Lesen Sie sich die folgenden Hinweise sorgfältig durch, bevor Sie das Gerät benutzen. Sicherheitshinweise Lassen Sie den Camcorder nicht herunterfallen, führen Sie keine Fremdkörper ein, und nehmen Sie ihn nicht auseinander, da Ihnen anderenfalls die Garantieansprüche verloren gehen können. Vermeiden Sie, dass das Gerät mit Wasser in Kontakt kommt, und trocknen Sie sich vor dem Benutzen die Hände sorgfältig ab. -
Seite 24: Vorbereiten Des Camcorders
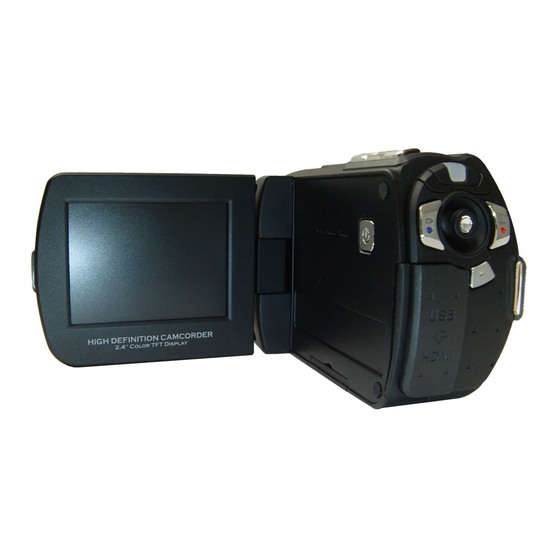
Vorbereiten des Camcorders Der Camcorder im Überblick Ein/Aus-Taste Richtungstasten: Links/Modus/Beenden-Taste Auf-Taste/AF Rechts/Menü/OK-Taste Hotkey für Blitzmodus Ab-Taste/Fokus Statusanzeige-LED Handgelenkbandbefestigung (Rückseite) Wiedergabe-Taste Video Aufnahme-Taste Abdeckung der Anschlussleiste LCD-Bildschirm Lautsprecher 14 15 Vergrößern-/Lautstärke-erhöhen-Taste Verkleinern-/Lautstärke-verringern- Taste Foto Auslöser-Taste HDMI-Ausgang USB-Anschluss TV-Ausgang/Kopfhörer Abdeckung des Speicherkartenfachs/ SD/MMC-Kartensteckplatz Fassung für Dreibeinstativ Objektiv... -
Seite 25: Einsetzen Der Batterie
Nur bei bestimmten Modellen. Detaillierte Angaben fi nden Sie auf der Produktverpackung. Einsetzen der Batterie Öffnen Sie die Akkufachabdeckung wie folgt. Legen Sie die Batterie entsprechend den Camcorder-Spezifi kationen ein: Camcorder mit Lithiumbatterie Setzen Sie die Lithiumbatterie mit dem Anschluss in der angezeigten Pfeilrichtung in das Fach ein, und stellen Sie sicher, dass die Metallkontakte mit den Kontakten im Batteriefach in Berührung kommen. -
Seite 26: Akku Laden
Akku laden Schließen Sie das eine Ende des Adapters an den Camcorder und das andere Ende an eine Netzsteckdose an. Laden Sie den Akku vor dem ersten Gebrauch mindestens 8 Stunden lang auf. Verbinden Sie ein Ende des mitgelieferten Netzteils mit dem USB-Anschluss und das andere Ende mit einer Wandsteckdose. -
Seite 27: Erste Schritte
Erste Schritte Ein-/Ausschalten Um den Camcorder einzuschalten, öffnen Sie entweder den LCD-Bildschirm oder drücken Sie auf die Ein/Aus-Taste. Um den Camcorder auszuschalten, schließen Sie entweder den LCD-Bildschirm oder drücken Sie auf die Ein/Aus-Taste. Wenn sich der Camcorder nicht wie oben beschrieben einschalten lässt, prüfen Sie Folgendes: Ob die Batterien richtig eingelegt wurden. -
Seite 28: Ladestatusanzeige Der Batterie
Ladestatusanzeige der Batterie Symbol Beschreibung Batterie voll Batterie halbvoll Batterie fast leer * Blitz wird deaktiviert. Batterie leer Hinweis: Um einen plötzlichen Ausfall des Geräts zu vermeiden, sollten Sie die Batterie auswechseln, wenn die Batterie fast leer ist. Bedeutung der Symbole Kameramodus: Modussymbol (Kameramodus) 4 5 6 7 8 9... - Seite 29 Wiedergabemodus: Modussymbol (Wiedergabemodus) Aktuelle Aufnahme/Gesamtzahl der Aufnahmen Dateiformat Speicherkarte eingesetzt Batterieladestand Aufnahmedauer Sprachmodus: Modussymbol (Tonmodus) Anzahl der Aufnahmen Speicherkarte eingesetzt Batterieladestand Sprachaufnahme...
-
Seite 30: Bedienungsgrundlagen
Bedienungsgrundlagen Aufnehmen eines Videoclips Wählen Sie eine geeignete Fokuseinstellung. Normalerweise werden Sie für die meisten Filmsituationen die Einstellung ( ) wählen. Die Option ( ) wird nur für Nahaufnahmen verwendet. Drücken Sie auf die Aufnahme-Taste ( ), um die Aufnahme zu starten. Mit den Zoom-Tasten ( ) wird das Bild vergrößert oder verkleinert. - Seite 31 Wiedergabe Rufen Sie den Modus Playback (Wiedergabe) ( ) auf. Die Wiedergabe beginnt mit dem zuletzt aufgenommenen Foto, dem letzten Video- oder Audioclip. Verwenden Sie den Joystick nach oben oder unten, um zwischen den auszuwählen. Die gewählte Datei wird angezeigt oder die Wiedergabe wird automatisch gestartet.
-
Seite 32: Erweiterte Einstellungen
Nur bei bestimmten Modellen. Detaillierte Angaben fi nden Sie auf der Produktverpackung. Erweiterte Einstellungen Einstellen von Menüoptionen Die Menüs bieten verschiedene Optionen, mit denen Sie die Camcorder-Funktionen konfi gurieren können. In der folgenden Tabelle fi nden Sie ausführliche Informationen zu den Menüoptionen: Funktion Aktion Aufrufen des Menüs im Kamera-/... - Seite 33 Eintrag Option Beschreibung Auto Der Blitz wird automatisch ausgelöst, wenn die (Automatisch) Lichtbedingungen für die Aufnahme zu schlecht sind. Flash Strobe (Blitz) Force Der Blitz wird bei jeder Aufnahme ausgelöst. (Ein) Off (Aus) Der Blitz ist immer ausgeschaltet. Beim Drücken des Auslösers wird eine einzelne Single (Einzeln) Aufnahme gemacht.
-
Seite 34: Menüoptionen Im Wiedergabemodus
Menüoptionen im Wiedergabemodus Einschalten → Modus Playback (Wiedergabe) aufrufen → Verwenden Sie den Joystick nach Rechts. Eintrag Option Beschreibung File Info Aufrufen von Dateititel, Aufnahmedatum, Uhrzeit, Größe (Dateiinformationen) und Aufnahmedauer. Slide show On/Off Starten der Diaschau. /Wiederholen der Wiedergabe aller (Diaschau) (Ein/Aus) Videoclips. - Seite 35 Eintrag Option Beschreibung Einstellen der TV-Systemkompatibilität auf NTSC. NTSC Diese Option gilt für Amerika, Taiwan, Japan und (NTSC) Korea. TV System (TV System) Einstellen der TV-Systemkompatibilität auf PAL. PAL (PAL) Diese Option gilt für Deutschland, England, Italien, die Niederlande, China, Japan und Hongkong. Wenn der Camcorder an einen PC angeschlossen PC Cam wird, wechselt er automatisch in den Kameramodus...
-
Seite 36: Erweiterte Funktionen
Erweiterte Funktionen Exportieren zu einem Standard-TV und HDTV-Gerät Schließen Sie den Camcorder mit dem AV-Kabel an das Fernsehgerät an. Sie können Ihre Videoclips, Fotos und Audioaufnahmen direkt auf Ihrem Fernsehgerät abspielen. TV : Herkömmliches CRT-Fernsehgerät Das TV-System unterscheidet sich regional. Wenn Sie die TV-Out- Einstellung ändern müssen, fi... -
Seite 37: Kopieren Von Dateien Auf Den Computer
Kopieren von Dateien auf den Computer Beachten Sie, dass Videoclips im Format MP4 aufgenommen werden. Wenn Sie sich diese Videos auf dem PC ansehen möchten, müssen Sie u. U. spezielle Programme installieren. Für die erste Verwendung installieren Sie die Software der mitgelieferten CD. Schalten Sie den Camcorder ein. -
Seite 38: Systemvoraussetzungen
Anhang Einstellung der Flimmerfrequenz Bereich England Deutschland Frankreich Italien Spanien Russland Einstellung 50 Hz 50 Hz 50 Hz 50 Hz 50 Hz 50 Hz Bereich Portugal Amerika Taiwan China Japan Korea Einstellung 50 Hz 60 Hz 60 Hz 50 Hz 50/60 Hz 60 Hz Hinweis: Die Einstellung der Flimmerfrequenz basiert auf dem Frequenzstandard der... -
Seite 39: Fehlerbehebung
Fehlerbehebung Bei der Verwendung des Camcorders: Problem Ursache Lösungsmöglichkeit Tauschen Sie die Batterie Die Batterie ist leer. aus. Der Camcorder kann nicht eingeschaltet werden. Die Batterie ist falsch herum Legen Sie die Batterie neu eingelegt. ein. Machen Sie Platz auf der SD/ Der Speicher ist voll. - Seite 40 Bei der Verwendung des Camcorders: Problem Ursache Lösungsmöglichkeit Wenn die Batterie zu Der Blitz kann nicht schwach ist, kann der Tauschen Sie die Batterie verwendet werden. Blitz aufgrund zu geringer aus. Spannung deaktiviert sein. Nehmen Sie die Batterie Der Camcorder reagiert Der Camcorder hat ein heraus, und setzen Sie sie während des Betriebs auf...
- Seite 41 Beim Anschließen des Camcorders an einen Computer oder Fernsehgerät: Problem Ursache Lösungsmöglichkeit Installieren Sie Direct X 9.0c oder eine höhere Version und Windows Media 9.0 Codecs, um dieses Problem zu lösen. Installieren Sie die Software Auf dem Computer ist der und den Treiber von der Ich kann keine Videoclips auf Treiber oder die erforderliche...
-
Seite 42: Technische Daten
Technische Daten Modell 5 Megapixel-Kamera Bildsensor 5 Megapixel (2592x1944 Pixel) Foto: 2M(1600x1200); 5M(2560x1920); 8M(3200x2400); 12M(4000x3000);16M(4608x3456) Aufl ösung Video: 1280 x 720 bis zu 30 fps (HD 30f) 640x480 bis zu 30 fps (VGA 30f) 320x240 bis zu 30 fps(QVGA 30f) Objektiv 3X optischen Zoom-Objektiv (7.5 - 22.5mm /F3.6-6.7) Dateiformate... - Seite 127 繁體中文 高解析度攝影機...
- Seite 146 简体中文 高清便携式摄像机...
- Seite 184 한국어 고화질 HD 캠코더...