Inhaltsverzeichnis
Werbung
Verfügbare Sprachen
Verfügbare Sprachen
Quicklinks
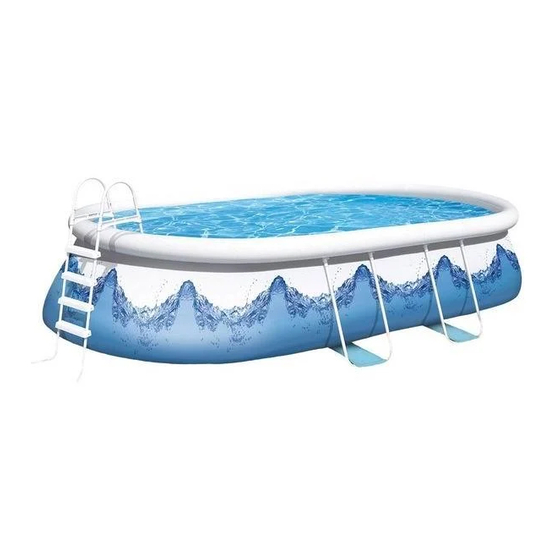
Quick-up-Pool
» Manhattan «
Art. 12305, 12306, 12307
022-09_FRI_12305_Manhattan_GBR_Korrektur.indd 1
D
Bedienungsanleitung
Instruction manual
GB
Mode d'emploi
F
E
Manual de instrucciones
NL
Gebruiksaanwijzing
I
Manuale di istruzioni
PL
Instrukcja obsługi
RUS
Инструкция по эксплуатации
friedola
, Gebr. Holzapfel GmbH
®
Helgoländer Str. 1 + 3
37269 Eschwege · Germany
www.wehncke.de
Tel.: +49 (0) 9001 463648
(info4u) 0,64 €/min.
08.03.2010 14:24:19 Uhr
1
Werbung
Kapitel
Inhaltsverzeichnis
Fehlerbehebung

Verwandte Anleitungen für wehncke Manhattan


Inhaltszusammenfassung für wehncke Manhattan
- Seite 1 Quick-up-Pool » Manhattan « Bedienungsanleitung Instruction manual Mode d’emploi Manual de instrucciones Gebruiksaanwijzing Manuale di istruzioni Instrukcja obsługi Инструкция по эксплуатации friedola , Gebr. Holzapfel GmbH ® Helgoländer Str. 1 + 3 37269 Eschwege · Germany www.wehncke.de Tel.: +49 (0) 9001 463648 Art.
- Seite 2 Deutsch (D) ..........03 English (GB) ..........13 Français (F) ..........23 Español (E) ..........33 Nederlands (NL) ......... 43 Italiano (I) ........... 53 Polski (PL) ............ 63 Русский (RUS) ..........73 022-09_FRI_12305_Manhattan_GBR_Korrektur.indd 2 08.03.2010 14:24:20 Uhr...
-
Seite 3: Inhaltsverzeichnis
Inhalt 1. Sicherheitshinweise ................4 2. Lieferumfang ..................5 3. Vorbereiten ..................6 4. Standort wählen ................6 5. Aufbauen und Befüllen des Pools ..........6 5.1 Aufbauen ....................6 5.2 Wasser einlassen ..................7 5.3 Filterpumpe anschließen ................8 5.4 Poolleiter ....................8 5.5 Abdeckplane ....................8 6. -
Seite 4: Sicherheitshinweise
1. Sicherheitshinweise Vor dem Benutzen… lesen Sie bitte aufmerksam diese Bedienungsanleitung, insbesondere die Sicherheitshinweise. Wenn Sie alles gelesen haben... bewahren Sie die Bedienungsanleitung bitte auf, damit Sie später z. B. bei Problemen nachlesen können. Sollten Sie das Gerät einmal weitergeben, geben Sie bitte die Bedienungsanleitung mit. Bestimmungsgemäße Verwendung •... -
Seite 5: Lieferumfang
Strom LEBENSGEFAHR: • Außer einer Filterpumpe mit geeigneter Schutzart dürfen sich keine elektrischen Geräte in der Nähe des Pools befinden. Es besteht die Gefahr eines Stromschlags. • Filterpumpen oder Tauchpumpen (zum Abpumpen des Wassers) dürfen nur an eine Außensteckdose (230 V ~ 50 Hz) angeschlossen werden, die mit einem FISchutzschalter (Bemessungsfehlerstrom von nicht mehr als 30 mA) abgesichert ist. -
Seite 6: Vorbereiten
3. Vorbereiten • Packen Sie alle Teile vorsichtig aus. • Überprüfen Sie, ob alle Teile des Lieferumfangs vorhanden und unbeschädigt sind. • Wählen Sie einen Standort aus und bringen Sie die Teile dahin. 4. Standort wählen ACHTUNG: Der Standort muss vor dem Aufstellen des Beckens sorgfältig gewählt werden. Ein falscher Standort kann zu Verletzungen, Beschädigungen des Pools und zu eingeschränktem Badevergnügen füh... -
Seite 7: Wasser Einlassen
Löcher der horizontalen Stangen stecken. 11. Füllen Sie den oberen Ring mit Luft. Benutzen Sie hierfür eine Doppelhubpumpe oder eine elektrische Luftpumpe aus dem WehnckePumpenprogramm. Der Ring sollte nur zu 85 % aufgeblasen werden und muss sich innerhalb des Umfangs des Poolbodens befinden. Pumpen Sie den Ring nicht zu stark auf: die Folie oder die Schweißnähte könnten sonst reißen. -
Seite 8: Filterpumpe Anschließen
1. Verschließen Sie die Aus und Einlassöffnungen für die Filterpumpe und die Ablassöffnung am Boden des Pools. 2. Füllen Sie das Becken ca. 2 – 3 cm mit Wasser. 3. Glätten Sie evtl. vorhandene Falten und Knitterflächen am Boden. Steigen Sie direkt in das Becken und streichen sorgfältig mit dem Fuß entlang der Bodenkante, indem Sie einmal am Beckenumfang entlang gehen. -
Seite 9: Abbauen, Reinigen Und Lagern
7. Abbauen, Reinigen und Lagern 7.1 Abbauen 1. Filterpumpe von der Stromquelle trennen. 2. Stöpsel der Ein und Auslassvorrichtungen im Inneren des Beckens schließen und die Filterpumpe kom plett enfernen. 3. Verbinden Sie Ihren Gartenschlauch mit dem Ablassventil und legen Sie das andere Ende des Schlauchs in einen Bereich, in dem das Wasser sicher ablaufen kann, wie z. -
Seite 10: Problemlösungen
9. Problemlösungen Problem mögliche Ursachen Abhilfen Das gefüllte Becken ist nicht oval • Falten am Boden der Beckenhaut • Entleeren Sie das Becken bis zu ei sind vor dem Befüllen nicht ordent ner Wassertiefe von 2 – 3 cm und lich geglälttet worden versuchen Sie, so viele Falten wie •... -
Seite 11: Technische Daten
Problem mögliche Ursachen Abhilfen Beckenwasser ist kalt. • Das Becken wurde in einem über • Stellen Sie das Becken an einem mäßig schattigen Bereich bzw. in offeneren Standort neu auf, wo es • Das Wasser erwärmt sich nicht auf einem Bereich mit starkem Baum die maximale Sonneneinstrahlung eine angenehme Badetempera... - Seite 12 022-09_FRI_12305_Manhattan_GBR_Korrektur.indd 12 08.03.2010 14:24:23 Uhr...
- Seite 13 Content 1. Safety Instructions................ 14 2. Scope of Delivery ................15 3. Preparations ................... 15 4. Selecting Suitable Location ............16 5. Assembly and Filling the Pool ............. 16 5.1 Assembly ....................16 5.2 Filling the pool ..................18 5.3 Connecting the filter pump ..............18 5.4 Pool ladder ....................
-
Seite 14: Safety Instructions
1. Safety instructions Prior to use… Please read this instruction manual carefully, in particular the safety instructions. Once you have read everything... Keep this instruction manual in a safe place for future reference, e.g. if problems occur. The instruction manual must be handed to the new owner if you sell the pool. Intended use •... -
Seite 15: Scope Of Delivery
Water cleanliness CAUTION: • Contaminated water can cause illnesses. • Please contact your local swimming pool supply shop or check regulations to ensure the safe and ef fective use of chlorine, shock disinfection, algae destroyer and other similar chemicals. • A filter pump is intended to remove dirt and other small particles from the water. To guarantee that the water in your pool stays crystal clear, free from algae and protected against hazardous bacteria, it is imperative to regularly use chemical water treatments. -
Seite 16: Selecting Suitable Location
4. Selecting suitable location CAUTION: A suitable location must be selected prior to setting up the pool. An incorrect location can result in injuries, damage to the pool and a lot less fun in the pool. The grass under the pool will suffer dramatic effects due to a lack of light and the pressure. - Seite 17 1 1. Inflate the upper ring. For this task, use a double action pump or an electric air pump from the Wehncke pump range for this task. Only inflate the ring to 85% pressure and ensure it is within the area of the pool floor. Do not over inflate the ring: Otherwise the liner or the seams could be damaged. 12. Enter the pool in your bare feet and carefully smooth out the liner.
-
Seite 18: Filling The Pool
5.2 Filling the pool CAUTION: Filling the pool with water will take quite a while and must be supervised, since the position of the “u-shaped” side supports has to be readjusted during the filling process. 1. Seal the two filter connector holes and the drain valve at the bottom of the pool. 2. Fill the pool with approx. 2 – 3 cm of water. 3. Smooth out any creases all around the bottom of the pool. Enter the pool and use your feet to care fully push all corners of the liner outwards. -
Seite 19: Disassembly, Cleaning And Storage
7. Disassembly, cleaning and storage 7.1 Disassembly 1. Disconnect the filter pump from the power source. 2. Insert the plugs into the inlet and outlet holes inside the pool and remove the filter pump. 3. Connect your hose pipe to the outlet valve and place the end of the hose in a safe place for empty ing the water, e.g. in a drainpipe or drain. NOTE: The end of the hose pipe has to be below the pool to ensure correct and complete drainage. -
Seite 20: Troubleshooting
9. Troubleshooting Problem Possible causes Remedies The filled pool is not oval • The bottom of the pool has not • Drain the pool until the water is been straightened correctly prior to only 2 – 3 cm deep and then try •... -
Seite 21: Technical Data
10. Technical data Model Dimensions Filling level 12305 610 × 366 × 122 cm approx 20.000 l 12306 732 × 366 × 122 cm approx 25.000 l 12307 976 × 366 × 122 cm approx 35.000 l 11. Disposal Parts of the product can be recycled. Dispose of the pool in an environmentally friendly manner at a suita ble recycling centre. - Seite 22 022-09_FRI_12305_Manhattan_GBR_Korrektur.indd 22 08.03.2010 14:24:26 Uhr...
- Seite 23 Sommaire 1. Instructions de sécurité .............. 24 2. Contenu de la livraison ............... 25 3. Préparatifs ..................26 4. Choix de l’emplacement .............. 26 5. Montage et remplissage de la piscine ........26 5.1 Montage ....................26 5.2 Remplir la piscine d’eau ................27 5.3 Raccorder la pompe de filtrage ..............
-
Seite 24: Instructions De Sécurité
1. Instructions de sécurité Avant la première utilisation... lisez attentivement ce mode d’emploi, et tout particulièrement les instructions de sécurité. Lorsque vous avez tout lu… conservez ce mode d‘emploi pour pouvoir le consulter ultérieurement, par exemple en cas de problèmes. Si vous prêtez la piscine, prêtez également le mode d‘emploi. -
Seite 25: Dégâts Matériels
déclenchement ne doit pas dépasser 30 mA). • La prise doit être montée de manière appropriée et toujours être bien accessible après le raccorde ment. Propreté de l’eau ATTENTION : • une eau sale peut vous rendre malade. • Adressezvous à votre vendeur local d’accessoires de piscine pour connaître les réglementations sur l’utilisation efficace et sûre du chlore, du désinfectant pour le traitement choc et d’autres produits chimiques similaires. -
Seite 26: Préparatifs
3. Préparatifs • Déballez toutes les pièces avec précaution. • Vérifiez si toutes les pièces ont été livrées et si elles ne sont pas endommagées. • Sélectionnez un emplacement et portez y les pièces. 4. Choix de l’emplacement ATTENTION : Vous devez choisir l’emplacement soigneusement avant d’installer le bassin. Un emplace ment mal choisi peut entraîner des blessures, endommager la piscine et limiter la joie de la baignade. La pelouse située sous la piscine mourra rapidement. -
Seite 27: Remplir La Piscine D'eau
10. Reliez les barres en U avec les barres horizontales en insérant les bouchons des connecteurs dans les ouvertures des barres horizontales. 1 1. Remplissez le boudin supérieur d’air. Pour ce faire, utilisez un gonfleur à piston double action ou une pompe à air électrique de la gamme Wehncke. Gonflez l’anneau à seulement 85% ; il doit se trouver dans le périmètre du sol de la piscine. Ne gonflez pas l’anneau trop fort : le plastique ou les coutures soudées pourraient se déchirer. 12. Entrez pieds nus dans la piscine et supprimez tous les plis dans le fond. -
Seite 28: Raccorder La Pompe De Filtrage
1. Fermez les ouvertures d’entrée et de sortie de la pompe de filtrage et la valve de vidange au fond de la piscine. 2. Remplissez le bassin d’environ 2 à 3 cm d’eau. 3. Lissez les plis éventuellement existants et les surfaces froissées du fond. Montez directement dans le bassin et lissez soigneusement la zone le long de l’arête avec le pied en longeant une fois le périmètre du bassin. -
Seite 29: Démontage, Nettoyage Et Stockage
7. Démontage, nettoyage et stockage 7.1 Démontage 1. Débranchez la pompe de filtrage de la source de courant. 2. Fermez entièrement le bouchon des dispositifs d’entrée et de sortie à l’intérieur du bassin et enlevez entièrement la pompe de filtrage. 3. Reliez votre tuyau de jardin à la valve de purge et disposez l’autre bout du tuyau dans une zone dans laquelle l’eau peut s’écouler en toute sécurité, comme par exemple dans un tuyau de descente d’eau de pluie ou une bouche d’égout. -
Seite 30: Résolution Des Problèmes
9. Résolution des problèmes Problème Causes possibles Solutions Le bassin rempli n’est pas ovale • Les plis au fond du bassin n’ont pas • Videz le bassin pour atteindre une été correctement lissés avant le profondeur d’eau de 2 à 3 cm et remplissage. -
Seite 31: Données Techniques
Problème Causes possibles Solutions L’eau du bassin est froide. • Le bassin a été placé dans un en • Déplacez le bassin dans un endroit droit trop ombragé entouré de plus ouvert où il profitera au maxi • L’eau ne réchauffe pas et n’atteint nombreux arbres. mum du rayonnement du soleil pas une température de baignade aux heures les plus chaudes de la... - Seite 32 022-09_FRI_12305_Manhattan_GBR_Korrektur.indd 32 08.03.2010 14:24:28 Uhr...
- Seite 33 Índice 1. Indicaciones de seguridad ............34 2. Volumen de suministro ..............35 3. Preparación ..................36 4. Elección de la ubicación ............... 36 5. Montaje de la piscina y proceso de llenado ......36 5.1 Montaje ....................36 5.2 Proceso de llenado ................... 37 5.3 Conexión de la bomba de filtrado ............
-
Seite 34: Indicaciones De Seguridad
1. Indicaciones de seguridad Antes de la utilización… lea atentamente el presente manual de instrucciones, en especial las indicaciones de seguridad. Cuando lo haya leído completamente... conserve el manual de instrucciones para que pueda consultarlo, por ejemplo, en caso de problemas. Si le entrega el aparato a otra persona, entréguele también el manual de instrucciones. -
Seite 35: Daños Materiales
Corriente PELIGRO DE MUERTE: • Cerca de la piscina no se puede encontrar ningún aparato eléctrico, a excepción de la bomba de filtrado con la adecuada protección. Hay riesgo de electrocución. • Las bombas de filtrado o las bombas sumergibles (para extraer el agua) sólo se podrán conectar a en chufes externos (230 V ~ 50 Hz), que esté asegurado mediante un interruptor protección FI (corriente de defecto de cómo máximo 30 mA). El enchufe debe estar instalado de forma adecuada y debe ser fácil de alcanzar, también tras la conexión. -
Seite 36: Preparación
3. Preparación • Desenvuelva todas las piezas con cuidado. • Compruebe si se han entregado todas las piezas y si están en buen estado. • Elija el lugar donde vaya a montar la piscina y lleve las piezas hasta ahí. 4. -
Seite 37: Proceso De Llenado
10. Conecte los tubos en “U” con los tubos horizontales, insertando el vástago de la pieza de unión en los agujeros de los tubos horizontales. 11. Llene el aro superior con aire. Utilice para ello una bomba de carrera doble o una bomba de aire eléctrica del programa de Wehncke. El aro sólo debería inflarse en un 85% y debería quedar dentro del perímetro de la base de la piscina. No infle demasiado el aro, porque de lo contrario, la costura de soldadura podría romperse. -
Seite 38: Conexión De La Bomba De Filtrado
1. Cierre los orificios de entrada y de salida de la bomba de filtrado, así como el orificio de salida del agua en el fondo de la piscina. 2. Llene la piscina hasta que tenga unos 23 cm de agua. 3. Elimine las posibles arrugas del fondo. Entre directamente en la piscina y pase con el pie a lo largo del borde del fondo, dando una vuelta al interior de la piscina. De esta manera alisará la superficie del fondo. -
Seite 39: Desmontaje, Limpieza Y Almacenamiento
7. Desmontaje, limpieza y almacenamiento 7.1 Desmontaje 1. Desconecte la bomba de filtrado de la fuente de alimentación. 2. Cierre los tapones de los orificios de entrada y salida de la piscina y retirar la bomba de filtrado por completo. 3. Conecte su manguera de jardín a la válvula de salida y sitúe el otro extremo de la manguera en un lu gar donde el agua pueda verterse de forma segura, como por ejemplo, en un evacuador de aguas pluviales o en un sumidero. -
Seite 40: Solución De Problemas
9. Solución de problemas Problema Posibles motivos Soluciones La piscina llena no presenta una for- • Las arrugas en el fondo de la pis • Vacíe la piscina hasta que sólo ten ma ovalada cina no se han eliminado adecua ga unos 23 cm de agua e intente damente antes del llenado. -
Seite 41: Datos Técnicos
Problema Posibles motivos Soluciones El agua de la piscina está fría. • Se ha colocado la piscina en una • Vuelva a colocar la piscina en zona con muchas sombras / bajo un lugar abierto, donde tenga la • El agua no alcanza una tempera árboles. - Seite 42 022-09_FRI_12305_Manhattan_GBR_Korrektur.indd 42 08.03.2010 14:24:31 Uhr...
- Seite 43 Inhoud 1. Veiligheidsaanwijzingen ............. 44 2. Lijst van onderdelen ..............45 3. Voorbereiden ................. 46 4. Locatie kiezen ................46 5. Monteren en vullen van het zwembad ........46 5.1 Monteren ....................46 5.2 Zwembad met water vullen..............48 5.3 Filterpomp aansluiten ................48 5.4 Zwembadtrap ..................
-
Seite 44: Veiligheidsaanwijzingen
1. Veiligheidsaanwijzingen Voor gebruik… dient u deze gebruiksaanwijzing zorgvuldig te lezen, in het bijzonder onderhavige veiligheidsaanwijzingen. Wanneer u alles gelezen heeft... dient u de gebruiksaanwijzing goed te bewaren, zodat u deze bij eventuele problemen kunt raadplegen. Mocht het zwembad een nieuwe eigenaar krijgen, geef deze persoon dan ook deze gebruiksaanwijzing mee. -
Seite 45: Materiële Schade
Stroom LEVENSGEVAAR: • Afgezien van een filterpomp met een geschikte beschermingsgraad mogen er zich geen elektrische apparaten in de buurt van het zwembad bevinden. Er bestaat het gevaar van een elektrische schok. • Filterpompen of dompelpompen (voor het wegpompen van het water) mogen enkel op een buiten stopcontact (230 V ~ 50 Hz) aangesloten worden die met een aardlekschakelaar (vastgestelde lek stroom van niet meer dan 30 mA) beveiligd is. -
Seite 46: Voorbereiden
3. Voorbereiden • Pak alle onderdelen voorzichtig uit. • Controleer of alle onderdelen uit de lijst aanwezig en onbeschadigd zijn. • Zoek een geschikte locatie en breng de onderdelen ernaartoe. 4. Locatie kiezen LET OP: De locatie moet, alvorens het zwembad te plaatsen, zorgvuldig gekozen worden. Een verkeerde locatie kan tot verwondingen, beschadigingen van het zwembad en tot minder zwemplezier leiden. - Seite 47 11. Vul de ring aan de bovenkant met lucht. Gebruik hiervoor een dubbelwerkende pomp of een elek trische luchtpomp uit het Wehnckepompenassortiment. De ring moet tot 85 % opgeblazen worden en moet zich binnen de omtrek van de zwembadbodem bevinden. Pomp de ring niet te hard op: de folie of de lasnaden zouden anders kunnen scheuren.
-
Seite 48: Zwembad Met Water Vullen
5.2 Zwembad met water vullen Let op: Het vullen met water zal enige tijd vergen en men dient erbij te blijven, daar de stand van de U vormige stangen tijdens het vullen van het bad gecorrigeerd moet worden. 1. Sluit de in- en uitlaatopeningen voor de filterpomp en de afvoeropening aan de onderkant van het zwembad. -
Seite 49: Demonteren, Reinigen En Opbergen
• Een overmatig chloorgehalte of een lage (zure) pHwaarde kan de zwembadfolie beschadigen. Het water moet onmiddellijk behandeld worden. • Neem de watergids in acht. Bij de zwembadset is een watergids gevoegd. Volg altijd de aanwijzingen in de watergids op. 7. -
Seite 50: Oplossen Van Problemen
9. Oplossen van problemen Probleem Mogelijke oorzaken Oplossing Het gevulde zwembad is niet ovaal • Plooien op de bodem van het • Maak het zwembad leeg tot een zwembad zijn voor het vullen niet waterdiepte van 2 3 cm en pro goed gladgestreken. -
Seite 51: Technische Gegevens
Probleem Mogelijke oorzaken Oplossing Zwemwater is koud • Het zwembad is op een te schadu • Plaats het zwembad op een open wrijke plek of op een plek waar te plek waar het maximale instraling • Het water krijgt geen aangename veel bomen staan geplaatst. - Seite 52 022-09_FRI_12305_Manhattan_GBR_Korrektur.indd 52 08.03.2010 14:24:33 Uhr...
- Seite 53 Sommario 1. Avvertenze per la sicurezza ............54 2. Composizione della fornitura ............. 55 3. Preparativi ..................56 4. Scelta del posto per il montaggio ..........56 5. Montaggio e riempimento della piscina ........56 5.1 Montaggio ....................56 5.2 Immissione dell’acqua ................57 5.3 Allacciamento della pompa a filtro ............
-
Seite 54: Avvertenze Per La Sicurezza
1. Avvertenze per la sicurezza Prima dell’utilizzo… leggere attentamente queste istruzioni per l’uso, in particolare le avvertenze per la sicurezza. Dopo aver letto tutto quanto... conservare le istruzioni in modo da poterle consultare in futuro, per esempio in caso di problemi. Se questo prodotto dovesse essere ceduto a terzi, consegnare anche le presenti istruzioni. -
Seite 55: Danni Materiali
nominale non superiore a 30 mA). La presa deve essere correttamente collegata alla rete e sempre facilmente raggiungibile anche dopo l’allacciamento. Pulizia dell’acqua • ATTENZIONE: l’acqua impura può essere fonte di malattie. • Consultare il proprio rivenditore di accessori per piscina per conoscere le direttive sull’impiego sicuro ed efficace di cloro, sulla disinfezione shock, sugli algicidi e su altre simili sostanze chimiche. -
Seite 56: Preparativi
3. Preparativi • Togliere con attenzione dall’imballaggio tutti i componenti. • Verificare che tutti i componenti in dotazione siano presenti e integri. • Scegliere un posto per il montaggio e portarvi tutti i componenti. 4. Scelta del posto per il montaggio ATTENZIONE: la posizione deve essere scelta con cura prima di procedere al montaggio della piscina. Una posizione sbagliata può... -
Seite 57: Immissione Dell'acqua
11. Immettere aria nell’anello superiore, utilizzando una pompa a doppio effetto o una pompa pneuma tica elettrica del tipo presenti nell’assortimento di pompe Wehncke. L’anello deve essere gonfiato solamente all’85% e deve trovarsi all’interno del perimetro del fondo della piscina. Non pompare l’anello con troppa forza, onde evitare di danneggiare la membrana o i punti di saldatura. -
Seite 58: Allacciamento Della Pompa A Filtro
1. Chiudere le aperture di uscita e di ingresso per la pompa a filtro e l’apertura di scarico sul fondo della piscina. 2. Riempire la piscina con acqua per circa 23 cm. 3. Spianare le pieghe e le grinze eventualmente presenti sul fondo. Entrare direttamente nella piscina e lisciare con cura con il piede il bordo del fondo percorrendo tutto il perimetro della piscina. Fare attenzione a non esercitare un’eccessiva pressione. -
Seite 59: Smontaggio, Pulizia E Deposito
7. Smontaggio, pulizia e deposito 7.1 Smontaggio 1. Staccare la pompa del filtro dalla fonte di corrente. 2. Chiudere i tappi dei dispositivi di ingresso e di scarico all’interno della piscina e staccare completa mente la pompa a filtro. 3. Collegare il proprio tubo da giardino con la valvola di scarico e mettere l’altra estremità del tubo in una zona nella quale l’acqua possa defluire in modo sicuro, per esempio uno scarico dell’acqua piovana o un pozzetto. -
Seite 60: Soluzione Dei Problemi
9. Soluzioni dei problemi Problema Possibili cause Possibili rimedi La piscina piena non è di forma ovale • Le pieghe sul fondo della pisci • Svuotare la piscina fino a lasciare na non sono state correttamente 23 cm di acqua e cercare di spia spianate prima di procedere al ri... -
Seite 61: Dati Tecnici
Problema Possibili cause Possibili rimedi L’acqua della piscina è fredda. • La piscina è stata montata in una • Collocare la piscina in un posto più zona eccessivamente in ombra o aperto, in modo che possa essere • L’acqua non raggiunge una tem con presenza di alberi. - Seite 62 022-09_FRI_12305_Manhattan_GBR_Korrektur.indd 62 08.03.2010 14:24:36 Uhr...
- Seite 63 Spis treści 1. Wskazówki dotyczące bezpieczeństwa ........64 2. Zakres dostawy ................65 3. Czynności przygotowawcze ............66 4. Wybór miejsca ustawienia ............66 5. Montaż basenu i napełnienie go wodą ........66 5.1 Montaż ..................... 66 5.2 Napełnienie basenu wodą ............... 67 5.3 Podłączenie pompy filtracyjnej ...............
-
Seite 64: Wskazówki Dotyczące Bezpieczeństwa
1. Wskazówki dotyczące bezpieczeństwa Przed rozpoczęciem używania produktu... …prosimy dokładnie przeczytać niniejszą instrukcję obsługi, a w szczególności wskazówki dotyczące bezpie- czeństwa. Po przeczytaniu instrukcji obsługi ... • należy ją zachować do wykorzystania w przyszłości np. w sytuacji pojawienia się problemów. W przypadku oddania artykułu innej osobie należy jej również... -
Seite 65: Szkody Materialne
ka zewnętrznego (230 V ~ 50 Hz), które jest zabezpieczone wyłącznikiem różnicowo-prądowym (o nominal- nym prądzie uszkodzeniowym nie przekraczającym 30 mA). Gniazdko musi być zamocowane w sposób profe- sjonalny i po podłączeniu należy zawsze zapewnić do niego łatwy dostęp. Czystość wody •... -
Seite 66: Czynności Przygotowawcze
3. Czynności przygotowawcze • Rozpakuj ostrożnie wszystkie części. • Sprawdź, czy części określone w zakresie dostawy są w komplecie i czy nie są one uszkodzone. • Wybierz miejsce ustawienia basenu i przenieś tam części. 4. Wybór miejsca ustawienia UWAGA! Miejsce ustawienia basenu należy starannie wybrać przed jego montażem. Niewłaściwe miejsce usta- wienia może być... -
Seite 67: Napełnienie Basenu Wodą
11. Napompuj górną obwódkę basenu. W tym celu posłuż się ręczną pompką dwuskokową lub elektryczną pompką z asortymentu firmy Wehncke. Górną obwódkę należy napompować w 85 % i musi ona znajdować się w obrębie dna basenu. Nie należy zbyt mocno pompować obwódki - w przeciwnym razie może dojść do uszkodzenia folii lub spoin zgrzewania. -
Seite 68: Podłączenie Pompy Filtracyjnej
1. Zamknij otwory wlotowe i wylotowe pompy filtracyjnej i otwór spustowy w dnie basenu. 2. Napełnij basen wodą na głębokość ok. 2 – 3 cm. 3. Wyrównaj ewentualnie pozostałe fałdy i zagniecenia na dnie basenu. Wejdź do basenu i dokładnie poprzy- ciskaj stopą... -
Seite 69: Demontaż, Czyszczenie I Przechowywanie
7. Demontaż, czyszczenie i przechowywanie 7.1 Demontaż 1. Odłącz pompę filtracyjną od zasilania prądem. 2. Załóż zatyczki do otworu wlotowego i wylotowego wewnątrz basenu i wyjmij pompę filtracyjną. 3. Do zaworu spustowego podłącz wąż ogrodowy i połóż jego drugi koniec na miejsce, do którego można bezpiecznie spuścić... -
Seite 70: Usuwanie Problemów
9. Usuwanie problemów Problem Potencjalna przyczyna Środki zaradcze Napełniony basen nie ma • Przed napełnieniem basenu wodą • Spuść wodę z basenu aż jej głębo- formy owalnej nie wyrównano dokładnie fałd na kość będzie wynosiła 2 – 3 cm i wy- dnie basenu. -
Seite 71: Parametry Techniczne
Problem Potencjalna przyczyna Środki zaradcze Woda w basenie jest zimna • Basen znajduje się w zbyt zacienio- • Ustaw basen na nowo w miejscu nym miejscu lub wśród drzew. bardziej odkrytym, w którym będzie on wystawiony na działanie promie- • Woda nie ogrzewa się... - Seite 72 022-09_FRI_12305_Manhattan_GBR_Korrektur.indd 72 08.03.2010 14:24:39 Uhr...
- Seite 73 Содержание 1. Указания по технике безопасности ........74 2. Комплект поставки ..............75 3. Подготовка ..................76 4. Выбор места установки ............. 76 5. Сборка и заполнение водой ............ 76 5.1 Сборка ..................... 76 5.2 Заполнение водой ................. 78 5.3 Подключение фильтрующего насоса ..........78 5.4 Приставная...
-
Seite 74: Указания По Технике Безопасности
1. Указания по технике безопасности Перед началом использования… Пожалуйста, внимательно ознакомьтесь с данной инструкцией по эксплуатации, в особенности – с указа- ниями по технике безопасности. После того, как Вы прочитали всю необходимую информацию… • Пожалуйста, сохраните данную инструкцию по эксплуатации, чтобы в дальнейшем иметь возможность заглянуть... -
Seite 75: Комплект Поставки
Электричество • ОПАСНОСТЬ ДЛЯ ЖИЗНИ: запрещается размещение вблизи бассейна электрических приборов за ис- ключением фильтрующего насоса достаточного класса защиты. Существует опасность удара электри- ческим током. • Фильтрующие насосы или погружные насосы (для откачивания воды) разрешается подключать только к внешней розетке (230 В ~ 50 Гц), имеющей автомат защиты от тока утечки (значение тока утечки: не более... -
Seite 76: Подготовка
3. Подготовительные работы • Осторожно распакуйте все компоненты. • Проверьте, не отсутствуют ли какие-либо компоненты в комплекте поставки, и нет ли среди них по- вреждённых деталей. • Выберите подходящее место установки и перенесите туда все компоненты. 4. Выбор места установки ВНИМАНИЕ! Место... - Seite 77 11. Наполните верхний обод воздухом. Воспользуйтесь для этой цели насосом двойного хода или элек- трическим воздушным насосом из ассортимента Wehncke. Обод следует надувать только на 85% его объёма так, чтобы он оставался внутри периметра днища бассейна. Не накачивайте обод слишком...
-
Seite 78: Заполнение Водой
5.2 Заполнение водой Внимание: заполнение водой занимает некоторое время и требует постоянного контроля, поскольку в ходе заполнения требуется постоянно корректировать позицию вилкообразных штанг. 1. Закройте выпускные и впускные отверстия фильтрующего насоса, а также сливное отверстие в днище бассейна. 2. Заполните бассейн водой на 2 – 3 см. 3. -
Seite 79: Всегда Отличное Качество Воды
6. Всегда отличное качество воды ОПАСНОСТЬ: • Учитывайте требования инструкций по эксплуатации фильтрующего насоса и всех химикалий. • В грязной воде могут появиться вредные для здоровья бактерии и водоросли. • Избыточное содержание хлора или низкое (кислое) значение pH могут привести к повреждениям ма- териала... -
Seite 80: Техническое Обслуживание
Техническое обслуживание • Регулярно проверяйте уровень воды. Уровень воды должен достигать нижнего края надувного обода. • Регулярно проверяйте качество воды. • Регулярно добавляйте в воду необходимые химикалии. Соблюдайте рекомендации справочника о воде, прилагаемого к настоящему комплекту. • Регулярно проверяйте днище бассейна на наличие камней и иных твёрдых предметов и немедленно удаляйте... -
Seite 81: Технические Характеристики
Проблема Возможные причины Решение Водоросли • Заметно присутствие водорослей. • Примените метод «шоковой де- зинфекции» (интенсивное хлори- • Вода приобрела зеленоватую рование). Проверьте значение pH окраску. и приведите его в соответствие • На материале бассейна появляют- с данными, предоставленными ся зелёные, коричневые или чёр- местным... - Seite 82 022-09_FRI_12305_Manhattan_GBR_Korrektur.indd 82 08.03.2010 14:24:42 Uhr...
- Seite 83 022-09_FRI_12305_Manhattan_GBR_Korrektur.indd 83 08.03.2010 14:24:42 Uhr...
- Seite 84 022-09_FRI_12305_Manhattan_GBR_Korrektur.indd 84 08.03.2010 14:24:42 Uhr...