Our Generation Awesome Academy Anleitung
Quicklinks
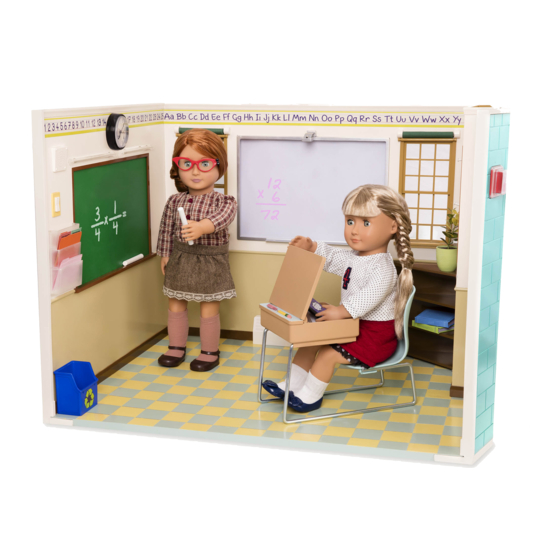
Awesome Academy
™
MC
Instructions • Instructions • Anleitung • Instrucciones • Istruzioni
Important: To align with the arrow
1
first then snap onto floor.
Important: Bien aligner les flèches et
enclencher le mur avant au plancher.
Wichtig: Die Pfeile aneinander ausrichten und
die Vorderwand in den Boden einrasten lassen.
Importante: Alinea los signos de flecha y colocar
en la pared delantera en el piso.
Importante: Allinea le frecce tra loro e
inserisci la parete frontale nel terreno.
(EN: 1. Snap in the front wall into the floor and align the arrow signs.
2. Insert the J-hook to the front wall FIRST.
3. Then slide wall down to snap into floor.
(FR): 1. Enclencher le mur avant au plancher et bien aligner les flèches.
2. En premier, insérer les crochets au mur avant.
3. Faire glisser le mur vers le bas pour l'enclencher au plancher.
(DE): 1. Die Vorderwand in den Boden einrasten lassen und die Pfeile aneinander ausrichten.
2. Zuerst Den Haken in die Vorderwand einstecken.
3. Dann die Wand herunterschieben in den Boden einrasten lassen.
4
Insert hooks
Insérer crochets
Haken einstecken
Insertar los ganchos
Inserire i ganchi
(EN): 4. Repeat step 2 and 3 for right side wall.
5. Check all walls are snapped in properly.
(FR): 4. Répéter l'étape 2 et 3 pour le mur de droite.
5. Vérifiez que tous les murs sont insérés correctement.
(DE): 4. Schritt 2 und 3 mit der rechten Seitenwand wiederholen.
5. Vergewissern Sie sich, dass alle Wände richtig eingesetzt sind.
BD37330Z
2
(ES): 1. Colocar en la pared delantera en el piso y alinea los signos de flecha.
2. Primero, insertar el Gancho-J en la pared delantera.
3. Luego desliza la paredhacia abajo para colocarla en el piso.
(IT): 1. Incastrare il muro anteriore nel pavimento ed allinei i segnali di freccia.
2. Innanzitutto, inserire il gancio-J al muro anteriore.
3. Poi scivoli il muro in giù per incastrarlo nel pavimento.
5
(ES): 4. Repetir el paso 2 y 3 para la pared del lado derecho.
5. Verifique que todas las paredes estén insertadas correctamente.
(IT): 4. Ripetere il passo 2 e 3 per il muro del lato destro.
5. Controlla che tutti i muri siano inseriti correttamente.
This device complies with Part 15 of the FCC Rules. Operation is subject to the
following two conditions: (1) this device may not cause harmful interference, and (2)
3
this device must accept any interference received, including interference that may
cause undesired operation.
Caution: changes or modifications not expressly approved by the party responsible
for compliance could void the user's authority to operate the equipment.
NOTE: This equipment has been tested and found to comply with the limits for
a Class B digital device, pursuant to Part 15 of the FCC Rules. These limits are
designed to provide reasonable protection against harmful interference in a
residential installation. This equipment generates, uses and can radiate radio
frequency energy and, if not installed and used in accordance with the instructions,
may cause harmful interference to radio communications. However, there is no
guarantee that interference will not occur in a particular installation. If this
equipment does cause harmful interference to radio or television reception, which
can be determined by turning the equipment off and on, the user is encouraged to
try to correct the interference by one or more of the following measures:
• Reorient or relocate the receiving antenna.
• Increase the separation between the equipment and receiver.
• Connect the equipment into an outlet on a circuit different from
that to which the receiver is connected.
• Consult the dealer or an experienced radio/TV technician for help.
Ce dispositif est conforme à l'article 15 des règlements du FCC. La manoeuvre est
sujette à ces 2 conditions : (1) ce dispositif ne causerait pas d'interférence et (2) ce
dispositif devrait accepter toute interférence reçue, incluant l'interférence qui
causerait une manoeuvre non voulue.
Mise en garde : les changements ou modifications qui ne sont pas expressément
approuvés par le responsable des conformités pourraient annuler. Le droit de
l'utilisateur de manœuvrer cet appareil
NOTE : Cet appareil a été testé et trouvé conforme aux limites de dispositifs digitaux
de classe B selon l'article 15 des règlements de FCC. Ces limites
sont conçues pour donner une protection raisonnable contre les interférences
nocives dans une demeure résidentielle. Cet appareil génère, utilise et peut émettre
des radiations d'énergie de fréquences radios et, s'il n'est pas installé
et utilisé selon les instructions, pourrait endommager l'interférence des
communications de radio. Il n'est cependant pas garanti de ne pas avoir
d'interférence dans une installation particulière. Si cet appareil cause une
interférence à la réception d'une radio ou télévision et qui peut être déterminé en
allumant out éteignant l'appareil, l'utilisateur peut prendre les mesures suivantes
pour le corriger :
• Orienter ou localiser de nouveau l'antenne réceptrice.
• Augmenter l'espace entre l'appareil et le récepteur.
• Connecter l'appareil à une prise différente de celle du circuit du récepteur.
• Consulter un concessionnaire ou un technicien de radio ou télévision
pour obtenir de l'aide .
6
Close
Open
Play
(EN): Toy is shipped in Try Me mode. Slide the switch to Play mode.
(FR): Ce jouet est livré en mode Essai. Glisser l'interrupteur en position Play.
(DE): Das Spielzeug wird in Probiermodus geliefert.
Den Schalter auf Play (Spiel-) Modus stellen.
(ES): El juguete es despachado con el modo TryMe (Pruébame).
Desliza el interruptor hacia el modo Play (Jugar).
(IT): Il giocattolo è spedito con il modo TryMe (Provami).
Scivola l'interruttore verso il modo Play (Giocare).
(EN): 6. Open the battery cover with a screw driver (not included) and install 3 x 1.5V AAA batteries.
Follow the polarity.
(FR): 6. Ouvrir le compartiment des piles avec un tournevis (non inclus) et installer 3 piles 1.5V AAA.
Bien respecter la polarité.
(DE): 6. Das Batteriefach mit einem Schraubendreher (nicht enthalten) öffnen und 3 x 1.5V AAA Batterien
einlegen. Dabei Polarität beachten.
(ES): 6. Abre la tapa de las pilas con un destornillador (no incluido) e instala 3 pilas x 1.5V AAA.
Sigue la polaridad.
(IT): 6. Apri il coperchio delle pile con un cacciavite (non incluso) ed istalla 3 pile da 1.5V AAA.
Segui la polarità.
®
MD
Off

Verwandte Anleitungen für Our Generation Awesome Academy


Inhaltszusammenfassung für Our Generation Awesome Academy
- Seite 1 Awesome Academy ™ Instructions • Instructions • Anleitung • Instrucciones • Istruzioni ® Important: To align with the arrow first then snap onto floor. Important: Bien aligner les flèches et This device complies with Part 15 of the FCC Rules. Operation is subject to the enclencher le mur avant au plancher.
- Seite 2 REPLACING BATTERIES (EN) Requires 4 x AAA (1.5V) batteries. Included. Batteries should only be replaced by an adult. Do not mix old and new batter- ies. Do not mix alkaline, standard or rechargeable batteries. Do not re-charge non-rechargeable batteries. Rechargeable batteries are only to be charged (EN): Clock and school bell function (ES): Reloj y Función de la campana de la escuela under adult supervision.