Herunterladen Inhalt Inhalt Diese Seite drucken
Inhaltsverzeichnis

Werbung

Verfügbare Sprachen
  • DE

Verfügbare Sprachen

  • DEUTSCH, seite 4
D
Uhrenradio
NL
Wekkerradio
F
Radio réveil
E
Radio reloj
I
Radio réveil
GB
Clock Radio
PL
Radio z budzikiem
H
Rádiós óra
UHRENRADIO
MRC 4157
MRC4157_IM_new2
D
NL
F
E
04
17
28
39
49
59
69
80
I
GB PL
H
09.09.16

Werbung

Inhaltsverzeichnis
loading

Inhaltszusammenfassung für AEG MRC 4157

  • Seite 1: Inhaltsverzeichnis

    Bedienungsanleitung / Garantie Wekkerradio Gebruiksaanwijzing Radio réveil Mode d’emploi Radio reloj Instrucciones de servicio Radio réveil Istruzioni per l’uso Clock Radio Instruction Manual Radio z budzikiem Instrukcja obsługi / Gwarancja Rádiós óra Használati utasítás GB PL UHRENRADIO MRC 4157 MRC4157_IM_new2 09.09.16...
  • Seite 2 Inhalt Deutsch Italiano Inhalt Contenuto Übersicht der Bedienelemente ..Seite 3 Elementi di comando ....Pagina 3 Bedienungsanleitung .......Seite 4 Istruzioni per l’uso......Pagina 49 Technische Daten ......Seite 13 Dati tecnici ........Pagina 58 Garantie ..........Seite 14 Smaltimento ........Pagina 58 Entsorgung .........Seite 16 English Nederlands Inhoud Contents...
  • Seite 3: Übersicht Der Bedienelemente

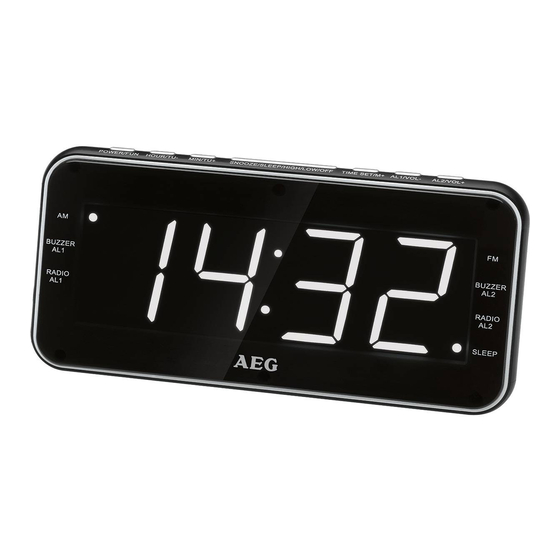
    Übersicht der Bedienelemente Overzicht van de bedieningselementen Overview of the Components Liste des différents éléments de commande Przegląd elementów obsługi Indicación de los elementos de manejo A kezelő elemek áttekintése Elementi di comando MRC4157_IM_new2 09.09.16...
  • Seite 4: Allgemeine Sicherheitshinweise

    Deutsch Bedienungsanleitung Vielen Dank, dass Sie sich für unser Produkt entschieden haben. Wir wünschen Ihnen viel Freude mit dem Gerät. Symbole in dieser Bedienungsanleitung Wichtige Hinweise für Ihre Sicherheit sind besonders gekennzeichnet. Beachten Sie diese Hinweise unbedingt, um Unfälle und Schäden am Gerät zu vermeiden: WARNUNG: Warnt vor Gefahren für Ihre Gesundheit und zeigt mögliche Verletzungsrisiken auf.
  • Seite 5 Deutsch der Steckdose übereinstimmt. Überprüfen Sie außerdem, ob Ausgangsstrom, -spannung und die Polarität des Netzteils mit den Angaben auf dem angeschlos- senem Gerät übereinstimmen. • Batterien stets richtig herum einlegen. • Das Gerät so aufstellen, dass vorhandene Lüftungsöffnungen nicht verdeckt werden.
  • Seite 6 Deutsch mangels Erfahrung und / oder mangels Wissen benutzt zu werden, es sei denn, sie werden durch eine für ihre Sicherheit zuständige Person beaufsichtigt oder erhielten von ihr Anweisungen, wie das Gerät zu benutzen ist. • Kinder sollten beaufsichtigt werden, um sicherzustellen, dass sie nicht mit dem Gerät spielen.
  • Seite 7 Deutsch • Achten Sie darauf, dass das Gerät ausreichend belüftet wird! • Entfernen Sie, falls vorhanden, die Schutzfolie vom Gerät. • In allen Betriebsarten schaltet das Display nach ca. 10 Sekunden automatisch zur Uhrzeitanzeige. Stromversorgung 1. Achten Sie darauf, dass die Netzspannung mit den Angaben auf dem Typenschild übereinstimmt.
  • Seite 8: Einstellen Der Uhrzeit

    Deutsch WARNUNG: Setzen Sie Batterien keiner hohen Wärme, wie z. B. Sonnenschein, Feuer oder ähnlichem aus. Es besteht Explosionsgefahr! ACHTUNG: • Batterien können auslaufen und Batteriesäure verlieren. Wird das Gerät längere Zeit nicht genutzt, entnehmen Sie die Batterie. • Ungleiche Batterietypen oder neue und gebrauchte Batterien dürfen nicht zusammen verwendet werden.
  • Seite 9: Allgemeine Bedienung

    Deutsch HINWEIS: Drücken Sie innerhalb von 4 Sekunden keine Taste, werden die Einstellungen automatisch übernommen. Allgemeine Bedienung Gerät aus- / einschalten • Mit der POWER / FUN Taste können Sie das Gerät zwischen Standby- und Radio- Modus umschalten. Im Radiomodus leuchtet der Punkt bei „FM“ bzw. „AM“. - Einschalten = Taste drücken - Ausschalten = Taste ca.
  • Seite 10: Radiobetrieb

    Deutsch HINWEIS: • Um die noch verbleibende Zeit abzurufen, drücken Sie kurz die SNOOZE / SLEEP / HIGH / LOW / OFF Taste. • Bei aktivierter Funktion leuchtet im Display der Punkt neben „SLEEP“. Radiobetrieb 1. Schalten Sie das Gerät ein. 2.
  • Seite 11 Deutsch • Ist die Weckzeit erreicht, blinkt ein Punkt bei „BUZZER AL 1“ oder „RADIO AL 1“ bzw. „BUZZER AL 2“ oder „RADIO AL 2“. Einstellen der Weckzeit Sie haben die Möglichkeit zwei Weckzeiten einzustellen. Gehen Sie wie folgt vor: 1.
  • Seite 12: Aux-In Buchse

    Deutsch Intervall-Weckautomatik Die automatisch eingestellte Weckfunktion kann mit der SNOOZE / SLEEP / HIGH / LOW / OFF Taste für ca. 9 Minuten ausgeschaltet werden. HINWEIS: Bei aktivierter Funktion blinkt der Punkt bei „BUZZER AL 1 / RADIO AL 1“ bzw. bei „BUZZER AL 2 / RADIO AL 2“.
  • Seite 13: Technische Daten

    SLEEP / HIGH / LOW / OFF Taste gedrückt, um die Beleuchtung wieder einzuschalten. Technische Daten Modell: .........................MRC 4157 Spannungsversorgung: ................DC 5 V, 1 A Leistungsaufnahme: ......................7,5 W Batterie Gangreserve: ................. 2 x 1,5 V, Typ AAA, R 03 Frequenzbereiche: ..................FM 87,5 ~ 108,0 MHz ..................AM 522 ~ 1620 kHz...
  • Seite 14: Garantie

    Deutsch • Ökodesign Richtlinie 2009 / 125 / EG • RoHS-Richtlinie 2011 / 65 / EU Garantie Garantiebedingungen 1. Gegenüber Verbrauchern gewähren wir bei privater Nutzung des Geräts eine Garantie von 24 Monaten ab Kaufdatum. Ist das Gerät zur gewerblichen Nutzung geeignet, gewähren wir beim Kauf durch Unternehmer für das Gerät eine Garantie von 12 Monaten.
  • Seite 15 Deutsch Garantieabwicklung 24 Stunden am Tag, 7 Tage in der Woche Sollte Ihr Gerät innerhalb der Garantiezeit einen Mangel aufweisen, steht Ihnen die schnellste und komfortabelste Möglichkeit der Reklamationsanmeldung über unser SLI - Internet-Serviceportal zur Verfügung. www.sli24.de Bitte melden Sie direkt den Servicevorgang auf unserem Online Serviceportal www.sli24.de an.
  • Seite 16: Entsorgung

    Deutsch Bitte nehmen Sie in keinem Fall eine unfreie Einsendung Ihres Gerätes vor. Unfreie Lieferungen werden von uns nicht angenommen. Es entstehen Ihnen damit erheb- liche Kosten. Stand 06 2012 Entsorgung Bedeutung des Symbols „Mülltonne“ Schonen Sie unsere Umwelt, Elektrogeräte gehören nicht in den Haus- müll.
  • Seite 17: Gebruiksaanwijzing

    Nederlands Gebruiksaanwijzing Dank u voor uw keuze van dit product. We hopen dat u er veel plezier van beleeft. Symbolen in deze gebruiksaanwijzing Belangrijke aanwijzingen voor uw veiligheid zijn speciaal gekenmerkt. Neem deze aanwijzingen strikt in acht om ongevallen en schade aan het apparaat te vermijden: WAARSCHUWING: Waarschuwt voor gevaren voor uw gezondheid en toont mogelijk letselrisico’...
  • Seite 18 Nederlands spanning en polariteit van de voedingseenheid overeenkomen met de informa- tie die staat aangeduid op het apparaat. • Let altijd op de polariteit bij het plaatsen van de batterijen. • Bedek de ventilatieopeningen van het apparaat niet. • Dek nooit de luchtgaten af met objecten, zoals tijdschriften, tafelkleden, gordij- nen enz.
  • Seite 19: Overzicht Van De Bedieningselementen

    Nederlands • Dit product mag niet worden gebruikt door personen (inclusief kinderen) met beperkte fysieke, sensorische of geestelijke vermogens of gebrekkige ervaring en/of kennis, tenzij een voor hun veiligheid verantwoordelijke persoon toezicht houdt of hun vooraf instructies gegeven heeft voor het gebruik van het product. •...
  • Seite 20 Nederlands Eerste gebruik van het apparaat / Inleiding • Kies een goede plek voor het apparaat. Een droog, vlak en slipbestendig opper- vlak is geschikt. • Zorg ervoor dat het apparaat goed geventileerd wordt! • Verwijder de beschermende film van het apparaat, indien aanwezig. •...
  • Seite 21: De Tijd Instellen

    Nederlands WAARSCHUWING: Stel de batterijen niet bloot aan intense warmtebronne, zoals zonlicht, vuur en dergelijke. Er bestaat een risico voor explosie! LET OP: • Batterijen kunnen de accuzuur lekken. Als het apparaat langere tijd niet in gebruik is, verwijder dan de batterijen. •...
  • Seite 22: Algemene Bediening

    Nederlands Algemene bediening Apparaat in / uitschakelen • U kunt het toestel afwisselend in de stand-by- en radio-modus zetten met de POWER / FUN toets. De stip naast “FM” respectievelijk „AM“ licht op in de radio- modus. - Inschakelen = druk op de toets - Uitschakelen = druk op en houd de toets ongeveer 2 seconden ingedrukt •...
  • Seite 23: Radiomodus

    Nederlands OPMERKING: • Wanneer geactiveerd zal de stip in de display naast “SLEEP” branden. Radiomodus 1. Zet het apparaat aan. 2. Selecteer de gewenste frequentieband door herhaaldelijk op de POWER / FUN toets te drukken. Op de display licht een stip op naast FM (frequentiemodulatie) van naast AM (middengolf).
  • Seite 24 Nederlands • Wanneer de alarmtijd is verstreken, knippert er een stip naast “BUZZER AL 1” of “RADIO AL 1” respectievelijk “BUZZER AL 2” of “RADIO AL 2”. De wektijd instellen U kunt het twee alarmtijden instellen. Ga als volgt te werk: 1.
  • Seite 25: Aux-In Aansluiting

    Nederlands Automatische wekinterval De automatisch ingestelde wekfunctie kan door het indrukken van de SNOOZE / SLEEP / HIGH / LOW / OFF toets ca. 9 minuten worden uitgeschakeld. OPMERKING: Als de functie is geactiveerd, gaat de stip naast “BUZZER AL 1 / RADIO AL 1“ resp. “BUZZER AL 2 / RADIO AL 2“...
  • Seite 26: Probleemoplossing

    HIGH / LOW / OFF toets ingedrukt om het beeld te herstellen. Technische gegevens Model: ..........................MRC 4157 Voeding: ......................DC 5 V, 1 A Stroomverbruik: ........................7,5 W Reservevermogen batterij: ..............2 x 1,5 V, Typ AAA, R 03 Frequentiebereik: .................. FM 87,5 ~ 108,0 MHz ..................AM 522 ~ 1620 kHz...
  • Seite 27: Verwijdering

    Nederlands Verwijdering Betekenis van het “vuilnisbak”-symbool Houd rekening met het milieu, gooi elektrische apparaten niet weg bij het huishoudafval. Breng overbodige of defecte elektrische apparaten naar gemeentelijke inzamelpunten. Help potentiële milieu- en gezondheidsgevaren door onverantwoorde- lijk wegwerpen te voorkomen. Draag bij aan hergebruik en ander opnieuw gebruik van oude elektrische en elektro- nische apparaten.
  • Seite 28: Mode D'emploi

    Français Mode d’emploi Merci d’avoir choisi notre produit. Nous espérons que vous saurez profiter votre appareil. Symboles de ce mode d’emploi Les informations importantes pour votre sécurité sont particulièrement indiquées. Veillez à bien respecter ces indications afin d’éviter tout risque d’accident ou d’en- dommagement de l’appareil : AVERTISSEMENT : Prévient des risques pour votre santé...
  • Seite 29 Français murale. Assurez-vous également que le courant de sortie, la tension et la polarité du bloc d’alimentation correspondent aux informations indiquées sur l’appareil branché. • Installez toujours les piles dans le bon sens. • Éviter de couvrir les ouvertures de ventilation de l’appareil. •...
  • Seite 30: Liste Des Différents Éléments De Commande

    Français pas l’expérience et/ou les connaissances requises, à moins d’être sous la surveil- lance d’une personne responsable de leur sécurité ou d’avoir reçu par elle des instructions sur le maniement de l’appareil. • Les enfants doivent être surveillés afin de garantir qu’ils ne jouent pas avec l’appareil.
  • Seite 31: Alimentation Électrique

    Français • Assurer une ventilation suffisante de l’appareil. • Enlevez le film de protection en plastique de l’appareil, s’il est présent. • Dans tous les modes, l’affichage passe automatiquement à l’affichage de l’heure après environ 10 secondes. Alimentation électrique 1. S’assurer que la tension correspond aux indications de l’étiquette de la prise. 2.
  • Seite 32: Réglage De L'heure

    Français ATTENTION : • Différents types de batterie ou batteries neuves et utilisées ne doivent pas être utilisés ensemble. • Ne jetez pas vos piles dans les ordures ménagères. Nous vous prions de les ramener à un centre de recyclage approprié ou chez le fabricant. Prise de charge USB - OUT CHARGE Vous pouvez charger votre Smartphone via ce connecteur.
  • Seite 33: Fonctionnement Général

    Français Fonctionnement général Activation/désactivation de l’appareil • Vous pouvez faire basculer l’appareil entre le mode veille et le mode radio à l’aide du bouton POWER / FUN. Le point à côté de l’indication « FM » ou bien « AM » s’allume en mode radio. - Allumer = Appuyez sur le bouton - Éteindre = Appuyez sur le bouton et maintenez environ 2 secondes •...
  • Seite 34: Mode Radio

    Français Mode radio 1. Allumez l’appareil. 2. Sélectionnez la bande de fréquences requise en appuyant plusieurs fois sur le bouton POWER / FUN. Un point s’allume sur l’affichage à côté de FM (modula- tion de fréquences) ou AM (moyennes fréquences). 3.
  • Seite 35 Français Programmation du réveil Vous pouvez régler deux heures d’alarme. Suivez la procédure ci-dessous : 1. Éteignez l’appareil. 2. Conservez le bouton AL1 / VOL– enfoncé pendant 3 secondes environ. L’indica- tion commence à clignoter. 3. Configurez les heures avec le bouton HOUR / TU – et les minutes avec le bouton MIN / TU +.
  • Seite 36 Français NOTE : Si la fonction est active, le point à côté de « BUZZER AL 1 / RADIO AL 1 » ou « BUZZER AL 2 / RADIO AL 2 » clignotera. Désactiver la fonction alarme (en mode veille) Appuyez su AL1 / VOL – ou AL2 / VOL+ jusqu’à ce que le point à côté de « BUZZER AL 1 / RADIO AL 1 »...
  • Seite 37: Données Techniques

    éteinte SNOOZE / SLEEP / HIGH / LOW / OFF pour rétablir l’affichage. Données techniques Modèle : ........................MRC 4157 Alimentation : ....................CC 5 V, 1 A Consommation : ........................7,5 W Réserve de piles :..................2 x 1,5 V, AAA, R 03 Bande de fréquences : ................FM 87,5 ~ 108,0 MHz...
  • Seite 38 Français luttant contre les déchets sauvages. Vous contribuerez ainsi au recyclage et autres formes de réutilisation des appareils électriques usagés. Votre municipalité vous fournira les informations nécessaires sur les centres de collecte. MRC4157_IM_new2 09.09.16...
  • Seite 39: Instrucciones De Servicio

    Español Instrucciones de servicio Le agradecemos la confianza depositada en este producto y esperamos que disfru- te de su uso. Símbolos en este manual del usuario Advertencias importantes para su seguridad están señaladas en especial. Siga estas advertencias incondicionalmente, para evitar accidentes y daños en el aparato: AVISO: Advierte de riesgos para su salud, e indica riesgo potencial de heridas.
  • Seite 40 Español • Instale siempre las baterías en la dirección correcta. • Evite tapar las ranuras de ventilación del dispositivo. • No cubra nunca las ranuras de ventilación con objetos como revistas, manteles, cortinas, etc. • No exponga la unidad a goteo ni salpicaduras de agua, ni coloque objetos llenos de agua, como jarrones, sobre la unidad.
  • Seite 41: Indicación De Los Elementos De Manejo

    Español Indicación de los elementos de manejo 1 Botón POWER / FUN 2 Botón HOUR / TU − 3 Botón MIN / TU + 4 Botón SNOOZE / SLEEP / HIGH / LOW / OFF 5 Botón TIME SET / M + 6 Botón AL1 / VOL −...
  • Seite 42 Español Alimentación 1. Asegúrese de que la tensión de la corriente coincida con los valores de la etiqueta identificadora. 2. Enchufe la fuente de alimentación en una toma de contacto protectora debida- mente instalada. 3. Conecte el dispositivo a la fuente de alimentación enchufando el conector de la fuente de alimentación al conector “DC 5V“.
  • Seite 43: Ajustar La Hora

    Español ATENCIÓN: • Las baterías no se deben tirar a la basura doméstica. Por favor lleve las baterías usadas a sitios especiales de recogida o a su concesionario. Toma de carga USB - OUT CHARGE Podrá cargar su Smartphone a través de esta toma. Utilice el cable USB de su Smar- tphone para realizar la conexión.
  • Seite 44: Modo Radio

    Español • Para desconectar la unidad por completo de la corriente, desconecte el enchufe de la toma. Volumen Pulsando los botones AL1 / VOL − / AL2 / VOL + puede ajustar el volumen deseado. Selección del modo operativo (FM, AM o AUX) Pulse el botón POWER / FUN hasta que se muestre el modo de funcionamiento deseado en pantalla.
  • Seite 45 Español 3. Búsqueda de emisoras: Pulse brevemente los botones MIN / TU + / HOUR / TU – hasta encontrar la emiso- ra que esté buscando. Presione y mantenga uno de los dos botones para buscar la emisora siguiente o anterior. Emisora en memoria: Mantenga el botón TIME SET / M + pulsado durante aproximadamente 3 segundos.
  • Seite 46 Español • Timbre ( BUZZER AL 1 ): Sonará un timbre cuando se llegue a la hora de alarma. El volumen del timbre no se puede ajustar. • Última frecuencia de radio escuchada ( RADIO AL 1 ): En cuanto se llegue a la hora de alarma, la radio se enciende. Se reproducirá la última emisora FM al volumen establecido por el fabricante.
  • Seite 47: Resolución De Problemas

    Español Clavija de AUX-IN Para conectar reproductores externos, por ejemplo, reproductores de MP3, teléfo- nos inteligentes, tablet PC, etc. 1. Conecte el dispositivo externo a la toma AUX-IN con una conexión estéreo de 3,5 mm. 2. Pulse repetidamente POWER / FUN hasta que se muestre en pantalla “ ”.
  • Seite 48: Datos Técnicos

    Español Datos técnicos Modelo: ........................MRC 4157 Alimentación: ....................CC 5 V, 1 A Consumo: ..........................7,5 W Potencia de reserva: ..................2 x 1,5 V, AAA, R 03 Rango de frecuencia: ................FM 87,5 ~ 108,0 MHz .................AM 522 ~ 1620 kHz Peso neto: ......................aprox. 0,276 kg Adaptador externo de alimentación...
  • Seite 49: Istruzioni Per L'uso

    Italiano Istruzioni per l’uso Grazie per aver scelto il nostro prodotto. Vi auguriamo un buon utilizzo del dispositivo. Simboli per questo manuale di istruzioni per l’uso Le indicazioni importanti per la propria sicurezza sono indicati appropriatamente. Osservare assolutamente queste indicazioni, per evitare incidenti e danni all’appa- recchio: AVVISO: Avvertimenti di pericoli alla salute e indica rischi potenziali di lesioni.
  • Seite 50 Italiano • Non coprire mai i fori di ventilazione con oggetti come giornali, strofinacci, tende, ecc. • Non esporre l’unità a perdite o schizzi d’acqua e non mettere recipiente conte- nenti acqua, come vasi con fiori, sull’unità. • Fonti di fuoco aperte, come candele che bruciano non devono essere messe sull’unità.
  • Seite 51: Elementi Di Comando

    Italiano Elementi di comando 1 Tasto POWER / FUN 2 Tasto HOUR / TU − 3 Tasto MIN / TU + 4 Tasto SNOOZE / SLEEP / HIGH / LOW / OFF 5 Tasto TIME SET / M + 6 Tasto AL1 / VOL − 7 Tasto AL2 / VOL + 8 Indicatore per radio accesa ( FM ) 9 Indicatore per funzione allarme attivata 2 ( BUZZER AL 2 ) ( Cicalino )
  • Seite 52 Italiano Alimentazione 1. Accertarsi che il voltaggio di rete corrisponda con le cifre presenti sulla targhetta del dispositivo. 2. Collegare l’alimentatore in una presa a contatto protettiva correttamente instal- lata. 3. Collegare il dispositivo all’alimentatore inserendo la spina dell’alimentatore nella spina “DC 5V“.
  • Seite 53: Impostazione Dell'ora

    Italiano ATTENZIONE: • Non gettare le batterie nei rifiuti domestici. Buttare le batterie usate negli appositi contenitori o restituirle al negoziante. Presa di ricarica USB - OUT CHARGE È possible caricare lo Smartphone tramite questo spinotto. Utilizzare il cavo USB dello Smartphone per eseguire il collegamento.
  • Seite 54: Modalità Radio

    Italiano Volume Premendo i tasti AL1 / VOL − / AL2 / VOL+ è possibile regolare il volume desiderato. Selezionare il modo di funzionamento (FM, AM o AUX) Premere il tasto POWER / FUN finché la modalità di esercizio desiderata non compa- re sul display.
  • Seite 55: Funzione Sveglia

    Italiano Preimpostare una stazione: Tenere premuto il tasto TIME SET / M + per ca. 3 secondi. Selezionare una posizione preimpostata con i tasti MIN / TU + / HOUR / TU –. Premere di nuovo il tasto TIME SET / M +. La stazione è preimpo- stata.
  • Seite 56 Italiano • Ultima frequenza radio ascoltata ( RADIO AL 1 ): Non appena viene visualizzato l’orario allarme selezionato, la radio si accende. L’ultima stazione FM viene riprodotta al volume impostato dal costruttore. 5. Dopo aver impostato la sveglia, le spie relative alla modalità selezionata lampeg- geranno per circa 3 secondi.
  • Seite 57: Risoluzione Di Problemi

    Italiano Spinotto AUX-IN Per il collegamento a lettori esterni, per es. lettori. MP3, smartphone, tablet PC ecc. 1. Collegare il dispositivo esterno allo spinotto AUX-IN con uno spinotto stereo da 3,5 mm. 2. Premere ripetutamente il tasto POWER / FUN finché il display non visualizza “...
  • Seite 58: Dati Tecnici

    Italiano Dati tecnici Modello: ........................MRC 4157 Alimentazione: .....................DC 5 V, 1 A Consumo di potenza: ......................7,5 W Alimentazione batteria di riserva:..............2 x 1,5 V, AAA, R 03 Gamma di frequenza: ................FM 87,5 ~ 108,0 MHz ................AM 522 ~ 1620 kHz Peso netto: .........................ca.
  • Seite 59: Instruction Manual

    English Instruction Manual Thank you for choosing our product. We hope you will enjoy using the appliance. Symbols in these Instructions for Use Important information for your safety is specially marked. It is essential to comply with these instructions in order to avoid accidents and prevent damage to the machine: WARNING: Warns of dangers for your health and indicates potential risks of injury.
  • Seite 60 English • Avoid covering the device’ s vent openings. • Never cover the vent holes with objects, such as magazines, tablecloths, curtains etc. • This appliance shall not be exposed to dripping or splashing water and that no object filled with liquids such as vases shall be placed on apparatus. •...
  • Seite 61: Overview Of The Components

    English Overview of the Components 1 POWER / FUN button 2 HOUR / TU − button 3 MIN / TU + button 4 SNOOZE / SLEEP / HIGH / LOW / OFF button 5 TIME SET / M + button 6 AL1 / VOL −...
  • Seite 62 English 2. Plug the power supply unit into a properly installed protective contact socket. 3. Connect the device with the power supply unit by plugging the jack of the power supply unit into the “DC 5V“ jack. CAUTION: • This device should only be used with the mains supply unit (included). Do not use it for other devices.
  • Seite 63: Setting The Time

    English USB - OUT CHARGE Charging Socket You can charge your Smart phone through this jack. Use the USB cable of your Smart phone for the connection. NOTE: • Due to the different Smart phone types that are offered today, and their differ- ent charging capacities, the loading duration is dependent on the Smart phone used and its operating condition.
  • Seite 64: Radio Mode

    English Volume By pressing the AL1 / VOL − / AL2 / VOL + buttons you can adjust the desired volume. Select the Operating Mode (FM, AM or AUX) Press the POWER / FUN button until the desired operating mode is shown on the display.
  • Seite 65: Alarm Function

    English Preset Station: Keep the TIME SET / M + button pressed for approx. 3 seconds. Select a preset location with the buttons MIN / TU + / HOUR / TU –. Press the TIME SET / M + button once more. The station is preset. NOTE: •...
  • Seite 66 English 4. After you have made the setting, the selected alarm time flashes for ca. 3 seconds. The alarm time is stored. Then the current time is displayed. To set the second alarm time, repeat the above steps with the AL2 / VOL+ button. NOTE: •...
  • Seite 67: Technical Data

    SLEEP / HIGH / LOW / OFF button to restore the display. Technical Data Model: ..........................MRC 4157 Power supply: ....................DC 5 V, 1 A Power consumption:......................7.5 W Battery power reserve: ................2 x 1.5 V, AAA, R 03 Frequency range: ..................FM 87.5 ~ 108.0 MHz ..................AM 522 ~ 1620 kHz...
  • Seite 68: Disposal

    English This device complies with all current CE directives, such as electromagnetic compat- ibility and low voltage directive and is manufactured according to the latest safety regulations. Disposal Meaning of the “Wheelie Bin” Symbol Take care of our environment, do not dispose of electrical appliances via the household waste.
  • Seite 69: Instrukcja Obsługi / Gwarancja

    Język polski Instrukcja obsługi Dziękujemy za wybór naszego produktu. Mamy nadzieję, że korzystanie z urządzenia sprawi Państwu radość. Symbole użyte w tej instrukcji obsługi Ważne informacje dotyczące bezpieczeństwa użytkownika są specjalnie wyróżnione. Koniecznie stosuj się do tych wskazówek, aby uniknąć wypadków i uszkodzenia urządzenia: OSTRZEŻENIE: Niebezpieczeństwo dla zdrowia oraz potencjalne ryzyko obrażeń...
  • Seite 70 Język polski ciem gniazda elektrycznego. Należy także sprawdzić, czy prąd wyjściowy, napię- cie i biegunowość zasilacza są zgodne z danymi podłączonego urządzenia. • Zawsze instalować baterię we właściwym kierunku. • Nie przykrywać otworów wentylacyjnych urządzenia. • Nie należy nigdy zasłaniać otworów wentylacyjnych przedmiotami, takimi jak czasopisma, obrusy, firanki itp.
  • Seite 71: Przegląd Elementów Obsługi

    Język polski niezbędnego doświadczenia i/lub wiedzy. Użytkowanie urządzenia przez takie osoby jest możliwe wyłącznie pod nadzorem opiekuna lub po otrzymaniu wska- zówek dotyczących używania urządzenia. • Nie pozwalaj dzieciom bawić się urządzeniem. Przegląd elementów obsługi 1 Przycisk POWER / FUN 2 Przycisk HOUR / TU −...
  • Seite 72 Język polski • Zdjąć warstwę ochronną z urządzenia, o ile jest. • We wszystkich trybach, wyświetlacz automatycznie przełącza się wyświetlanie godziny po upływie około 10 sekund. Zasilanie 1. Upewnij się, że napięcie zasilania odpowiada wartościom na tabliczce znamio- nowej. 2. Podłącz zasilacz do odpowiednio zamontowanego i zabezpieczonego gniazda elektrycznego.
  • Seite 73: Ustawianie Godziny

    Język polski UWAGA: • Z baterii może wyciekać kwas. Dlatego należy wyjąć baterie, jeśli urządzenie ma być nieużywane przez dłuższy okres czasu. • Nie wolno łączyć baterii różnych typów lub baterii nowych z używanymi. • Baterii nie należy wrzucać do zwykłych domowych śmieci. Zużyte baterie proszę oddać...
  • Seite 74 Język polski Ogólne funkcjonowanie Włączanie / wyłączanie urządzenia • Przyciskiem POWER / FUN można przełączać urządzenie pomiędzy trybem pogotowia (standy) a trybem radia. W trybie radia zaświeci się kontrolka obok „FM” lub „AM“. - Włącz = Naciśnij przycisk - Wyłącz = Naciśnij przycisk i przytrzymaj go przez około 2 sekundy •...
  • Seite 75: Tryb Radia

    Język polski Tryb radia 1. Włącz urządzenie. 2. Wybierz żądany zakres częstotliwości naciskając kilkakrotnie przycisk POWER / FUN. Obok FM (modulacja częstotliwości) lub AM (fale średnie) zaświeci się kropka. 3. Wyszukiwanie stacji radiowych: Naciśnij na krótko przycisk MIN / TU + / HOUR / TU –, do momentu znalezienia żądanej stacji radiowej.
  • Seite 76 Język polski 2. Naciśnij przycisk AL1 / VOL − i przytrzymaj go przez ok. 3 sekundy. Zaczyna migać kontrolka. 3. Przyciskiem HOUR / TU – ustawić godzinę, a przyciskiem MIN / TU + minuty. 4. Następnie użyj przycisku AL1 / VOL − w celu wybrania funkcji budzenia. Wybrać z: •...
  • Seite 77: Rozwiązywanie Problemów

    Język polski Wyłączenie funkcji alarmu (w trybie gotowości) Naciśnij przycisk AL1 / VOL− lub AL2 / VOL+ do momentu zniknięcia kropki przy „BUZZER AL 1 / RADIO AL1“ lub „BUZZER AL 2 / RADIO AL 2“. Gniazdo AUX-IN Umożliwia podłączenie urządzenia do odtwarzacza zewnętrznego, np. odtwarzacza MP3, smartfona, tabletu itp.
  • Seite 78: Dane Techniczne

    SNOOZE / SLEEP / HIGH / LOW / OFF, aby przywrócić działanie wyświetlacza. Dane techniczne Model: ..........................MRC 4157 Źródło zasilania: ...................DC 5 V, 1 A Zasilanie: ..........................7,5 W Bateria zasilania rezerwowego: ............2 x 1,5 V, Typ AAA, R 03 Zakres częstotliwości: ................FM 87,5 ~ 108,0 MHz...
  • Seite 79: Usuwanie

    Język polski Za uszkodzone urządzenie uważa się takie, które nie spełnia funkcji określonych w instrukcji obsługi, a przyczyną takiego stanu jest wewnętrzna wada fabryczna lub materiałowa. Gwarancją nie są objęte uszkodzenia mechaniczne, chemiczne, termiczne, powstałe w wyniku działania sił zewnętrznych (np. przepięcie w sieci energetycznej czy wyła- dowania atmosferyczne), jak również...
  • Seite 80: Magyarul

    Magyarul Használati utasítás Köszönjük, hogy a termékünket választotta. Reméljük, elégedetten használja majd a készüléket. A használati útmutatóban található szimbólumok Az Ön biztonságára vonatkozó utasítások kifejezetten meg vannak különböztetve. Kérjük, mindenképpen ügyeljen ezekre annak érdekében, hogy elkerülje a balesete- ket és a készülék károsodását: FIGYELMEZTETÉS: Egészségét károsító...
  • Seite 81 Magyarul ellenőrizze, hogy a kimeneti áramerősség, feszültség és a tápegység polaritása megegyezik a csatlakoztatott eszközön lévő adatokkal. • Az elemeket mindig a megfelelő irányban helyezze be. • Ne takarja el a készülék nyílásait. • Ne takarja le a szellőzőnyílásokat különböző tárgyakkal, pl. újságokkal, asztalterí- tővel, függönnyel stb.
  • Seite 82: A Kezelőelemek Áttekintése

    Magyarul • Gyermekeket nem szabad felügyelet nélkül hagyni, nehogy játsszanak a készü- lékkel. A kezelőelemek áttekintése 1 POWER / FUN gomb 2 HOUR / TU − gomb 3 MIN / TU + gomb 4 SNOOZE / SLEEP / HIGH / LOW / OFF gomb 5 TIME SET / M + gomb 6 AL1 / VOL −...
  • Seite 83 Magyarul • A kijelző körülbelül 10 másodperc után minden üzemmódban az idő kijelzésére vált. Áramellátás 1. Ellenőrizze, hogy az áramforrás megfelel a készülék törzslapján előírt követelmé- nyeknek. 2. Dugja be a tápegységet egy megfelelően felszerelt védőérintkezős aljzatba. 3. Csatlakoztassa a készüléket a tápegységhez úgy, hogy bedugja a tápegység csatlakozóját a „DC 5V“...
  • Seite 84: A Pontos Idő Beállítása

    Magyarul VIGYÁZAT: • Eltérő elemtípusokat vagy új és használt elemeket nem szabad egyszerre használni. • A használt elem nem a háztartási szemétbe való! Adja le a használt elemeket az illetékes gyűjtőhelyen vagy a kereskedőnél! USB - OUT CHARGE töltőaljzat A csatlakozón segítségével töltheti okostelefonját. Az okostelefonja USB kábelét használja a csatlakoztatáshoz.
  • Seite 85: Általános Használat

    Magyarul Általános használat A készülék be- / kikapcsolása • A készüléket állíthatja készenléti vagy rádió üzemmódba a POWER / FUN gomb- bal. Az „FM” vagy „AM“ melletti pont kigyullad rádió módban. - Bekapcsolás = gomb megnyomása - Kikapcsolás = gomb megnyomása és körülbelül 2 másodpercig lenyomva tartása •...
  • Seite 86: Rádió Üzemmód

    Magyarul Rádió üzemmód 1. Kapcsolja be a készüléket. 2. Válassza ki a kívánt frekvenciát az POWER / FUN gomb többszöri lenyomásával. Egy pont kigyullad a kijelzőn az FM (frekvencia moduláció) vagy az AM (középhul- lám) mellett. 3. Rádiócsatornák keresése: Röviden nyomja meg a MIN / TU + / HOUR / TU – gombot, amíg meg nem találja a rádióállomást, amelyet keres.
  • Seite 87 Magyarul 1. Kapcsolja ki a készüléket. 2. Tartsa benyomva a AL1 / VOL − gombot kb. 3 másodpercig. A kijelző villogni kezd. 3. Állítsa be az órát a HOUR / TU – gombbal és a percet a MIN / TU + gombbal. 4.
  • Seite 88: Hibaelhárítás

    Magyarul Az ébresztési funkció kikapcsolása (készenléti üzemmódban) Tartsa lenyomva az AL1 / VOL − vagy AL2 / VOL+ gombot, amíg a „BUZZER AL 1 / RADIO AL 1“, vagy a „BUZZER AL 2 / RADIO AL 2“ melletti pont eltűnik. AUX-IN csatlakozó Külső...
  • Seite 89: Műszaki Adatok

    Magyarul Műszaki adatok Modell: .........................MRC 4157 Áramellátás: ....................DC 5 V, 1 A Energiafogyasztás: ......................7,5 W Tartalék elem: ..................2 x 1,5 V, Typ AAA, R 03 Frekvenciatartomány: ................FM 87,5 ~ 108,0 MHz ................AM 522 ~ 1620 kHz Nettó tömeg: ......................kb. 0,276 kg Külső...
  • Seite 90 MRC 4157 Elektro-technische Vertriebsges. mbH AEG is a registered trademark used www.etv.de under license from AB Electrolux (publ) MRC4157_IM_new2 09.09.16...

Inhaltsverzeichnis