TFA 98.1039 Bedienungsanleitung
Quicklinks
TFA Anl. No. 98.1039_06_16
Diese Anleitung oder Auszüge daraus dürfen nur mit Zustimmung von TFA Dost-
mann veröffentlicht werden. Die technischen Daten entsprechen dem Stand bei
Drucklegung und können ohne vorherige Benachrichtigung geändert werden.
Die neuesten technischen Daten und Informationen zu Ihrem Produkt finden Sie
unter Eingabe der Artikel-Nummer auf unserer Homepage.
EU-Konformitätserklärung
Hiermit erklärt TFA Dostmann, dass der Funkanlagentyp 98.1039 der Richtlinie
2014/53/EU entspricht. Der vollständige Text der EU-Konformitätserklärung ist
unter der folgenden Internetadresse verfügbar:
www.tfa-dostmann.de
E-Mail: info@tfa-dostmann.de
TFA Dostmann GmbH & Co. KG
Zum Ottersberg 12, D-97877 Wertheim, Deutschland
Funkwecker
1. Bevor Sie mit dem Gerät arbeiten
• Lesen Sie sich bitte die Bedienungsanleitung genau durch.
• Durch die Beachtung der Bedienungsanleitung vermeiden Sie auch
Beschädigungen des Gerätes und die Gefährdung Ihrer gesetzlichen
Mängelrechte durch Fehlgebrauch.
• Für Schäden, die aus Nichtbeachtung dieser Bedienungsanleitung
verursacht werden, übernehmen wir keine Haftung.
• Beachten Sie besonders die Sicherheitshinweise!
• Bewahren Sie diese Bedienungsanleitung gut auf!
2. Zu Ihrer Sicherheit
• Verwenden Sie das Produkt nicht anders, als in dieser Anleitung darge-
stellt wird.
• Das eigenmächtige Reparieren, Umbauen oder Verändern des Gerätes
ist nicht gestattet.
Vorsicht!
Verletzungsgefahr:
• Bewahren Sie das Gerät und die Batterie außerhalb der Reichweite von
Kindern auf.
• Batterien nicht ins Feuer werfen, kurzschließen, auseinander nehmen
oder aufladen. Explosionsgefahr!
• Batterien enthalten gesundheitsschädliche Säuren. Um ein Auslaufen
der Batterien zu vermeiden, sollten schwache Batterien möglichst
schnell ausgetauscht werden. Beim Hantieren mit ausgelaufenen Batte-
rien chemikalienbeständige Schutzhandschuhe und Schutzbrille tra-
gen!
3. Empfang der Funkzeit
Die Zeitübertragung erfolgt von einer Cäsium Atom-Funkuhr, die von der
Physikalisch Technischen Bundesanstalt in Braunschweig betrieben wird.
Die Abweichung beträgt weniger als 1 Sekunde in einer Million Jahren.
Die Zeit ist kodiert und wird von Mainflingen in der Nähe von Frankfurt am
Main durch ein DCF-77 (77.5 kHz) Frequenzsignal übertragen mit einer
Reichweite von ca. 1.500 km. Ihr Funkwecker empfängt das Signal, wan-
delt es um und zeigt immer die exakte Zeit an. Auch die Umstellung von
Sommer- und Winterzeit erfolgt automatisch. Während der Sommerzeit
erscheint „S" im Display. Der Empfang hängt hauptsächlich von der geo-
graphischen Lage ab. Im Normalfall sollten innerhalb des Radius von
1.500 km ausgehend von Frankfurt bei der Übertragung keine Probleme
auftauchen.
Bitte beachten Sie folgende Hinweise:
• Es wird empfohlen, einen Abstand von mindestens 1,5 – 2 Metern zu
eventuell störenden Geräten wie Computerbildschirmen und Fernseh-
geräten einzuhalten.
• In Stahlbetonbauten (Kellern, Aufbauten) ist das empfangene Signal
natürlicherweise schwächer. In Extremfällen wird empfohlen, das Gerät
in Fensternähe zu platzieren und/oder durch Drehen das Funksignal
besser zu empfangen.
• Nachts sind die atmosphärischen Störungen meist geringer und ein
Empfang ist in den meisten Fällen möglich. Ein einziger Empfang pro
Tag genügt, um die Genauigkeit zu gewährleisten und Abweichungen
unter 1 Sekunde zu halten.
4. Bedienung
• Öffnen Sie das Batteriefach und entfernen Sie den Batterieunter-
brechungsstreifen. Das Gerät ist jetzt betriebsbereit.
• Nach der erstmaligen Inbetriebnahme beginnt das DCF Funksymbol zu
blinken. Die Uhr hat ein Funksignal wahrgenommen und versucht nun,
dieses 2-7 Min. lang zu empfangen. Wenn der Zeitcode empfangen
wurde, erscheint das DCF Funksymbol auf dem Display und die funkge-
steuerte Zeit wird angezeigt.
4.1 Manuelle Zeiteinstellung
• Falls der Funkwecker kein DCF-Signal empfangen kann (z.B. wegen
Störungen, Übertragungsdistanz, etc.), verschwindet das DCF Funk-
symbol und die Zeit kann manuell eingestellt werden. Die Uhr arbeitet
dann wie eine normale Quarz-Uhr.
• Die manuelle Zeiteinstellung funktioniert nur, wenn der Funkwecker
kein DCF-Signal empfangen kann.
• Durch Drücken der MODE-Taste gelangen Sie in den jeweiligen Ein-
stellmodus
und
können
nacheinander
anwählen: Stunden, Minuten, Tag, Monat, Wochentag.
• Wenn die Ziffern blinken, stellen Sie mit der (+) und (–) Taste jeweils
die gewünschte Zeit ein. Für einen Schnelldurchlauf halten Sie die
Taste gedrückt.
• Nach der Ersteinstellung kommen Sie durch 2 x Drücken der MODE-
Taste in den manuellen Einstellmodus.
4.2 Einstellen der Weckzeit
• Durch Drücken der MODE-Taste für 3 Sekunden gelangen Sie in den
Einstellmodus und können nacheinander folgende Einstellungen an-
wählen: Stunden, Minuten
• Wenn die Ziffern blinken, stellen Sie mit der (+) und (–) Taste jeweils
die gewünschte Zeit ein. Für einen Schnelldurchlauf halten Sie die
Taste gedrückt.
• Zum Aktivieren/Deaktivieren des Alarms drücken Sie kurz den ALARM
ON/OFF Knopf. Das Alarm-Symbol erscheint/verschwindet.
• Wenn der Wecker klingelt, lösen Sie die Snooze-Funktion mit der Taste
SNOOZE/LIGHT an der Oberseite aus. Das Snooze-Symbol erscheint im
Display. Der Alarmton wird dann für 4 Minuten unterbrochen.
• Beenden Sie den Alarm mit einer beliebigen Taste.
• Durch Drücken der MODE-Taste erscheint die Alarmzeit für 5 Sekun-
den.
4.3 Datum
• Durch Drücken der CALENDAR Taste erscheint das Datum für 5 Sekun-
den.
4.4 Zeitzone
• Drücken Sie die (+) oder (–) Taste für 2 Sekunden. Das Zeitzone-Sym-
bol T +1 oder -1 erscheint im Display.
4.5 Beleuchtung
• Mit der Taste SNOOZE/LIGHT an der Oberseite können Sie die Anzeige
für 5 Sekunden beleuchten.
5. Pflege und Wartung
• Reinigen Sie das Gerät mit einem weichen, leicht feuchten Tuch. Keine
Scheuer- oder Lösungsmittel verwenden!
• Entfernen Sie die Batterie, wenn Sie das Gerät längere Zeit nicht ver-
wenden.
• Vor Feuchtigkeit schützen.
• Setzen Sie das Gerät keinen extremen Temperaturen, Vibrationen und
Erschütterungen aus.
6. Fehlerbeseitigung
Problem
Lösung
➜
Keine Anzeige/
Batterie polrichtig einlegen
➜
Unkorrekte Anzeige
Batterie wechseln (1x 1,5 V AA)
7. Entsorgung
Dieses Produkt wurde unter Verwendung hochwertiger Materialien und
Bestandteile hergestellt, die recycelt und wiederverwendet werden können.
Batterien und Akkus dürfen keinesfalls in den Hausmüll!
Als Verbraucher sind Sie gesetzlich verpflichtet, ge-
brauchte Batterien und Akkus zur umweltgerechten Ent-
sorgung beim Handel oder entsprechenden Sammel-
stellen gemäß nationaler oder lokaler Bestimmungen
abzugeben.
Die Bezeichnungen für enthaltene Schwermetalle sind:
Cd=Cadmium, Hg=Quecksilber, Pb=Blei
Dieses Gerät ist entsprechend der EU-Richtlinie über die
Entsorgung von Elektro- und Elektronik-Altgeräten
(WEEE) gekennzeichnet.
Dieses Produkt darf nicht mit dem Hausmüll entsorgt
werden. Der Nutzer ist verpflichtet, das Altgerät zur
umweltgerechten Entsorgung bei einer ausgewiesenen
Annahmestelle für die Entsorgung von Elektro- und
Elektronikgeräten abzugeben.
06.07.2016
09:35 Uhr
Seite 1
No part of this manual may be reproduced without written consent of TFA Dost-
mann. The technical data are correct at the time of going to print and may change
without prior notice. The latest technical data and information about your product
can be found by entering your product number on our homepage.
EU declaration of conformity
Hereby, TFA Dostmann declares that the radio equipment type 98.1039 is in
compliance with Directive 2014/53/EU.
The full text of the EU declaration of conformity is available at the following
internet address:
www.tfa-dostmann.de
E-Mail: info@tfa-dostmann.de
TFA Dostmann GmbH & Co. KG
Zum Ottersberg 12, D-97877 Wertheim, Germany
La reproduction, même partielle du présent mode d'emploi est strictement inter-
dite sans l'accord explicite de TFA Dostmann. Les caractéristiques techniques de
ce produit ont été actualisées au moment de l'impression et peuvent être modi-
fiées sans avis préalable. Les dernières données techniques et les informations
concernant votre produit peuvent être consultées en entrant le numéro de l'article
sur notre site.
Déclaration UE de conformité
Le soussigné, TFA Dostmann, déclare que l'équipement radioélectrique du type
98.1039 est conforme à la directive 2014/53/UE. Le texte complet de la déclara-
tion UE de conformité est disponible à l'adresse internet suivante:
RoHS
www.tfa-dostmann.de
E-Mail: info@tfa-dostmann.de
TFA Dostmann GmbH & Co. KG
Zum Ottersberg 12, D-97877 Wertheim, Allemagne
Radio-controlled alarm clock
1. Before you start using it
• Please make sure to read the instruction manual carefully.
• Following and respecting the instructions in your manual will pre-
vent damage to your instrument and loss of your statutory rights
arising from defects due to incorrect use.
• We shall not be liable for any damage occurring as a result of not
following these instructions.
• Please take particular note of the safety advice!
• Please keep this instruction manual for future reference.
2. For your safety
• This product should only be used as described within these instruc-
tions.
• Unauthorised repairs, modifications or changes to the product are pro-
hibited.
• Keep this instrument and the battery out of reach of children.
• Batteries must not be thrown into a fire, short-circuited, taken apart or
recharged. Risk of explosion!
• Batteries contain harmful acids. Low batteries should be changed as
soon as possible to prevent damage caused by leaking. Wear chemical-
resistant protective gloves and safety glasses when handling leaking
batteries.
2. Radio controlled time reception:
The time base for the radio-controlled time is a caesium atomic clock
operated by the Physikalisch Technische Bundesanstalt Braunschweig. It
has a time deviation of less than one second in one million years. The
time is coded and transmitted from Mainflingen near Frankfurt via fre-
quency signal DCF-77 (77.5 kHz) and has a transmitting range of approxi-
mately 1,500 km. Your radio-controlled clock receives this signal and
converts it to show the precise time. Changeover from summer time or
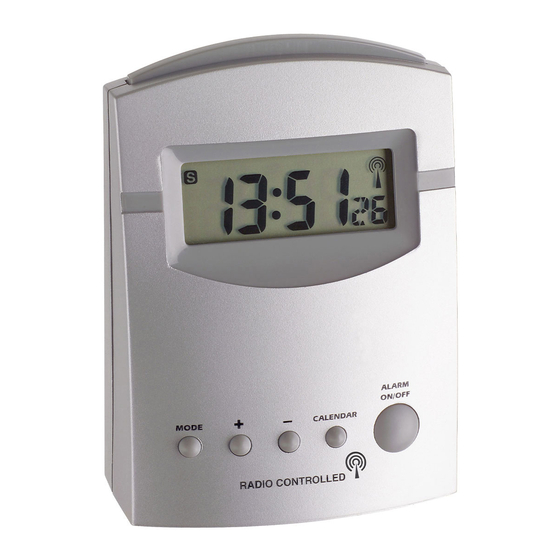
winter time is automatic. In summertime "S" appears on the display. The
quality of the reception depends mainly on the geographic location. Nor-
mally there should be no reception problems within a 1,500 km radius
around Frankfurt.
Please take note of the following:
• The recommended distance to any interfering sources like computer
monitors or TV sets is a minimum of 1.5 - 2 metres.
• Within ferro-concrete rooms (basements, superstructures), the
received signal is naturally weakened. In extreme cases, please place
the unit close to a window and/or point its front or back towards the
Frankfurt transmitter.
• During night-time, the atmospheric disturbances are usually less
severe and reception is possible in most cases. A single daily reception
is adequate to keep the accuracy deviation under 1 second.
4. Operation
• Open the battery compartment and remove the battery safety strip. The
unit is now ready to use.
• After the initial setup the DCF tower icon in the clock display will start
flashing. This indicates that the clock has detected the presence of a
radio signal and is trying to receive it. When the time code is received
after 2-7 minutes, the DCF tower icon stops flashing and the radio-
controlled time will be displayed.
4.1 Manual time setting
• In case the alarm clock cannot detect the DCF-signal (for example due
to disturbances, transmitting distance, etc.), the DCF tower icon disap-
pears and the time can be manually set. The clock will then work as a
normal Quartz clock.
• Manual time setting is only possible in case the alarm clock cannot
detect the DCF-signal.
• Press MODE button to enter setting mode and to select all settings one
after the other: Hours, minutes, day, month and weekday.
• When the digits are flashing set the desired time by pressing (+) and
(–) button. Hold and press the buttons for a fast count.
• After the initial setting press MODE button 2 x to enter setting mode.
4.2 Alarm setting
folgende
Einstellungen
• Press MODE button for 3 seconds to enter setting mode and to select
hours and minutes one after the other. When the digits are flashing set
the desired time by pressing (+) and (–) button. Hold and press the
buttons for a fast count.
• To activate/deactivate the alarm function, press ALARM ON/OFF button.
The alarm symbol appears/disappears on the display.
• Once the alarm starts to ring, you can activate the snooze function by
pressing the top button SNOOZE/LIGHT. The snooze symbol appears on
the display. The alarm will be interrupted for 4 minutes.
• Press any other button to stop the alarm.
• To view the alarm time for 5 seconds, press the MODE button.
4.3 Date
• To view the date for 5 seconds, press the CALENDAR button.
4.4 Time zone
• Press (+) or (–) button for 2 seconds. The time zone symbol T +1 or -1
appears on the display.
4.5 Backlight
• Press the top button SNOOZE/LIGHT to light up the display for 5
seconds.
5. Care and maintenance
• Clean the device with a soft damp cloth. Do not use solvents or
scouring agents.
• Remove the battery if you do not use the device for a long period of
time.
• Protect it from moisture.
• Do not place your device near extreme temperatures, vibrations or
shocks.
6. Troubleshooting
Problems
No indication /
incorrect indication
7. Waste disposal
This product has been manufactured using high-grade materials and com-
ponents which can be recycled and reused.
06/16
Caution!
Risk of injury:
Solutions
➜
Ensure battery polarities are
correct
➜
Change the battery (1x 1.5 V AA)
Never dispose of empty batteries and rechargeable bat-
teries in household waste.
As a consumer, you are legally required to take them to
your retail store or to appropriate collection sites
depending on national or local regulations in order to
protect the environment.
The symbols for the heavy metals contained are:
Cd=cadmium, Hg=mercury, Pb=lead
This instrument is labeled in accordance with the EU
Waste Electrical and Electronic Equipment Directive
(WEEE).
Please do not dispose of this instrument in household
waste. The user is obligated to take end-of-life devices
to a designated collection point for the disposal of elec-
trical and electronic equipment, in order to ensure envi-
ronmentally-compatible disposal.
06/16
Bedienungsanleitung
Instruction manual
Mode d'emploi
Instrucciones de uso
Gebruiksaanwijzing
Istruzioni per l'uso
Kat. Nr. 98.1039
Réveil radio-piloté
1. Avant d'utiliser votre appareil
• Veuillez lire attentivement le mode d'emploi.
• En respectant ce mode d'emploi, vous éviterez d'endommager votre
appareil et de perdre vos droits légaux en cas de défaut si celui-ci
résulte d'une utilisation non-conforme.
• Nous n'assumons aucune responsabilité pour des dommages qui
auraient été causés par le non-respect du présent mode d'emploi.
• Suivez bien toutes les consignes de sécurité!
• Conservez soigneusement le mode d'emploi!
2. Pour votre sécurité
• N'utilisez jamais l'appareil à d'autres fins que celles décrites dans le
présent mode d'emploi.
• Vous ne devez en aucun cas réparer, démonter ou modifier l'appareil
par vous-même.
Attention!
Danger de blessure:
• Gardez l'appareil et la pile hors de la portée des enfants.
• Ne jetez jamais de piles dans le feu, ne les court-circuitez pas, ne les
démontez pas et ne les rechargez pas. Risques d'explosion!
• Les piles contiennent des acides nocifs pour la santé. Une pile faible
doit être remplacée le plus rapidement possible afin d'éviter toute fuite.
Si vous manipulez des piles qui ont coulé, utilisez des gants de protec-
tion chimique spécialement adaptés et portez des lunettes de protec-
tion !
3. Consignes pour la réception de l'heure radio
La transmission de l'heure radio-pilotée s'effectue via une horloge ato-
mique au césium, exploitée par la Physikalisch Technische Bundesanstalt
de Braunschweig (Institut Fédéral Physico-Technique de Braunschweig).
L'écart de précision de cette horloge est d' 1 seconde pour un million
d'années. L'heure est diffusée à partir de Mainflingen, près de Francfort-
sur-le-Main, avec un signal DCF-77 (77,5 kHz) d'une portée d'environ
1500 km. L'horloge radio-pilotée reçoit le signal, le convertit et affiche
l'heure précise. Le passage de l'heure d'hiver à l'heure d'été et vice-versa
s'effectue également en mode automatique. Pendant l'heure d'été « S »
apparaît sur le display. La réception dépend de votre position géogra-
phique. En règle générale, dans un rayon de 1 500 km autour de Francfort,
aucun problème de transmission ne devrait apparaître.
Nous vous prions de respecter les consignes suivantes:
• Nous vous recommandons de respecter une distance de 1,5 - 2 m
entre l'appareil et d'éventuelles sources de signaux parasites, comme
les écrans d'ordinateurs et les postes de télévision.
• Dans les bâtiments en béton armé (caves, greniers aménagés), le
signal reçu est affaibli. Dans les cas extrêmes, nous vous conseillons
de placer l'appareil près d'une fenêtre de manière à améliorer la récep-
tion du signal radio.
• La nuit, les perturbations s'affaiblissent en règle générale et la récep-
tion est possible dans la plupart des cas. Une seule réception par jour
suffit pour garantir la précision de l'affichage de l'heure et pour main-
tenir d'éventuels écarts en dessous d' 1 seconde.
4. Opération
• Ouvrez le compartiment à pile et enlever la bande d´interruption de la
pile. L'instrument est maintenant prêt à fonctionner.
• Après la première mise en service le symbole de transmission radio
DCF commence à clignoter. L'horloge a repéré un signal radio et tente
de le capter. Dès la réception du code horaire après 2-7 minutes, le
symbole de transmission radio DCF arrête à clignoter et l'heure radio
s'affiche.
4.1 Réglage manuel de l'heure
• Si votre réveil radio piloté ne peut pas recevoir le signal DCF (p. ex. en
raison de la présence de perturbations, d'une distance de transmission
excessive etc.), le symbole de transmission radio DCF disparaît et vous
pouvez procéder à un paramétrage manuel. Dans ce cas, l'horloge
fonctionne comme une horloge à quartz normale.
• Vous pouvez procéder à un paramétrage manuel seulement si votre
réveil radio piloté ne peut pas recevoir le signal DCF.
• Appuyez sur la touche MODE pour arriver au mode de réglage et sélec-
tionnez les données que vous voulez régler l'un après l'autre: heure,
minutes, jour, mois, jour de la semaine.
• Dès que les chiffres commencent à clignoter, vous pouvez donner les
valeurs demandées avec les touches (+) et (–). Si vous maintenez la
touche appuyée, vous parviendrez à l'affichage rapide.
• Après le premier paramétrage manuel de l'heure appuyez sur la touche
MODE 2 x pour arriver au mode de réglage.
4.2 Réglage de l'alarme
• Appuyez sur la touche MODE pour 3 sec. pour arriver au mode de
réglage et sélectionnez les données que vous voulez régler l'un après
l'autre: heure, minutes.
• Dès que les chiffres commencent à clignoter, vous pouvez donner les
valeurs demandées avec les touches (+) et (–). Si vous maintenez la
touche appuyée, vous parviendrez à l'affichage rapide.
• Pour activer/désactiver l'alarme appuyer sur la touche ALARM ON/OFF.
Le symbole alarme apparaît/disparaît sur le display.
• Si le réveil sonne, activer la fonction snooze par la touche
SNOOZE/LIGHT en haute. Le son de l'alarme sera interrompu pour
4 minutes.
• Pour arrêter l'alarme appuyez sur une touche quelconque.
• Par la touche MODE vous pouvez appeler l'heure d'alarme pour
5 secondes.
4.3 Date
• Par la touche CALENDAR vous pouvez appeler la date pour 5 secondes.
4.4 Fuseau horaire
• Presser la touche (+) ou (–) pour 2 secondes. Le symbole fuseau
horaire T « +1 » ou « -1 » apparaît sur le display.
4.5 Eclairage de fond
• Touchez la touche SNOOZE/LIGHT en haute pour éclairer l'affichage
pour 5 secondes.
5. Entretien et maintenance
• Pour le nettoyage de l'appareil, utilisez un chiffon doux et humide.
N'utilisez aucun agent solvant abrasif!
• Enlevez la pile, si vous n'utilisez pas votre appareil pendant une durée
prolongée.
• Protégez-le contre l'humidité.
• Évitez d'exposer l'appareil à des températures extrêmes, à des vibra-
tions ou à des chocs.
6. Dépannage
Problème
Solution
➜
Aucun affichage/
Contrôlez la bonne polarité de la
affichage incorrect
pile
➜
Changez la pile (1 x 1,5 V AA)
7. Traitement des déchets
Ce produit a été fabriqué avec des matériaux de haute qualité qui peuvent
être recyclés et réutilisés.
Les piles usagées ne doivent pas être jetées dans les
détritus ménagers.
En tant qu'utilisateur, vous avez l'obligation légale de
rapporter les piles et piles rechargeables usagées à
votre revendeur ou de les déposer dans une déchetterie
proche de votre domicile conformément à la réglemen-
tation nationale et locale.
Les métaux lourds sont désignés comme suit:
Cd=cadmium, Hg=mercure, Pb=plomb.
Cet appareil est conforme aux normes de l'UE relatives
au traitement des déchets électriques et électroniques
(WEEE).
L'appareil usagé ne doit pas être jeté dans les ordures
ménagères. L'utilisateur s'engage pour le respect de
l'environnement, à déposer l'appareil usagé dans un
centre de traitement agréé pour les déchets électriques
et électroniques.
06/16

Verwandte Anleitungen für TFA 98.1039


Inhaltszusammenfassung für TFA 98.1039
- Seite 1 06.07.2016 09:35 Uhr Seite 1 No part of this manual may be reproduced without written consent of TFA Dost- Bedienungsanleitung mann. The technical data are correct at the time of going to print and may change without prior notice. The latest technical data and information about your product Instruction manual can be found by entering your product number on our homepage.
- Seite 2 Declaración UE de conformidad Por la presente, TFA Dostmann declara que el tipo de equipo radioeléctrico 98.1039 es conforme con la Directiva 2014/53/UE. El texto completo de la decla- ración UE de conformidad está disponible en la dirección Internet siguiente: RoHS www.tfa-dostmann.de...