Herunterladen Inhalt Inhalt Diese Seite drucken

Werbung

Verfügbare Sprachen
  • DE

Verfügbare Sprachen

  • DEUTSCH, seite 17
Before using your ARNOVA for the first time, completely charge the battery!
Charging the Battery
1. Connect the supplied power cable to the ARNOVA and to a wall outlet.
The ARNOVA device will start charging.
2. Press the Power button to turn on the device.
installation Wizard
The first time you start up your ARNOVA, the installation wizard will bring you through a few
screens to help you set up the principal settings: language, country, time, etc.
Starting up
1

Werbung

Inhaltsverzeichnis
loading

Inhaltszusammenfassung für Archos ARNOVA 7C G3

  • Seite 1 Starting up Before using your ARNOVA for the first time, completely charge the battery! Charging the Battery 1. Connect the supplied power cable to the ARNOVA and to a wall outlet. The ARNOVA device will start charging. 2. Press the Power button to turn on the device. installation Wizard The first time you start up your ARNOVA, the installation wizard will bring you through a few screens to help you set up the principal settings: language, country, time, etc.
  • Seite 2: Description Of The Tablet

    DeScription of the tablet Webcam Camera On/Off button Volume buttons Reset button Micro-USB port Micro-HDMI output SIM card slot Micro-SD card slot Microphone Headphone jack Loudspeaker * With optional Micro-HDMI to HDMI cable. important: Your device is frozen. You can turn it off. Press the ON/OFF button for 10 seconds or press the reset button.
  • Seite 3: Connecting To A 3G Network

    connecting to a 3g network Your ARNOVA is equipped with a SIM card slot. Any standard SIM card can be inserted. There is no provider restriction. Note that the ARNOVA will only have signal if you are in an area covered by your 3G provider’s 3G or EDGE network.
  • Seite 4 connecting to the wifi network For this procedure to work, you need to be in a WiFi zone that will allow you to connect to it. Every time the ARNOVA is in range of a network that you have already configured once, it will attempt to make a connection. How to configure a WiFi network From the status bar, at the bottom right hand of the screen, you can access the WiFi settings quickly.
  • Seite 5 the anDroiD interface Your ARNOVA device is equipped with a capacitive touchscreen. Use your Touch for text search fingertip to navigate. These are default android™ all apps button applications (Web Browser, Tap on this icon to reveal all EMail, etc.). Tap on an icon the Android™...
  • Seite 6 cuStomizing your tablet the extended home screen Navigate between different home screen panels by swiping left and right. Zoom: In some apps (such as Customizing the home screen panels Browser, and Gallery), - To change your wallpaper, hold your finger on the screen at an empty you can zoom in and location, then choose from the list.
  • Seite 7 cuStomizing your tablet add widgets Use the lock screen Widgets are like windows into your apps. They’re available from an All To protect personal information, you can Apps tab for you to move onto your Home screens. adjust your tablet’s lock settings: To see your widgets: 1.
  • Seite 8 regiSter your tablet on the web at http://arnovatech.com/register We recommend that you take a few minutes to register it (http://arnovatech.com/register). This will allow you to get access to ARNOVA technical support (http://arnovatech.com/support). neeD help? on our Website: see the Frequently Asked Questions section on http://arnovatech.com/faq Contact our technical support team: visit http://arnovatech.com/support for e-mail support.
  • Seite 9: Première Utilisation

    première utiliSation Avant d’utiliser votre ARNOVA pour la première fois, chargez complètement sa batterie ! Charger la batterie 1. Branchez le câble d’alimentation fourni sur le connecteur d’alimentation de l’ARNOVA et sur une prise secteur. Votre ARNOVA commence à se charger. 2.
  • Seite 10: Description De La Tablette

    DeScription De la tablette Webcam Caméra Bouton On/Off Boutons de volume Bouton Reset Port micro-USB Sortie vidéo micro-HDMI* Emplacement pour carte SIM Emplacement pour Microphone carte Micro-SD Prise casque Haut-parleur * Câble vidéo (Micro-HDMI vers HDMI) non-fourni. important: votre produit ne réagit plus. Vous pouvez l’arrêter en actionnant pendant 10 secondes le bouton ON/OFF ou en utilisant le bouton de réinitialisation (reset).
  • Seite 11: Se Connecter À Un Réseau 3G

    Se connecter à un réSeau 3g Votre ARNOVA est équipé d’un emplacement pour carte SIM. Votre appareil est désimlocké et il n’y a aucune restriction liée aux opérateurs téléphoniques. Notez que vous devez vous situer dans une zone couverte par la 3G. insérez votre carte sim important: Avant d’insérer une carte SIM, vous devez éteindre l’appareil.
  • Seite 12: Se Connecter À Un Réseau Wifi

    Se connecter à un réSeau wifi Pour suivre cette procédure, vous devez vous situer dans une zone WiFi vous permettant de vous connecter. Chaque fois que l’ARNOVA détectera un réseau que vous avez déjà configuré, il tentera de s’y connecter. Comment configurer un réseau WiFi A partir de la barre de statut, dans le coin inférieur droit de l’écran, vous pouvez accéder rapidement aux paramètres WiFi.
  • Seite 13: L'interface Android

    l’interface anDroiD Votre ARNOVA est équipé d’un écran tactile capacitif. Utiliser la pulpe de votre Pour saisir vos termes de doigt pour naviguer. recherche Des raccourcis Android™ icone toutes les applications par défaut (navigateur Web, Appuyez sur cet icone E-mail, etc.). Appuyez sur un pour afficher toutes les icone pour ouvrir l’application applications Android™...
  • Seite 14 perSonnaliSation De la tablette l’écran d’accueil étendu Faites glisser votre doigt horizontalement sur l’écran pour aller sur le côté gauche ou droit de l’écran d’accueil étendu. Changer le fond d’écran Zoomer : Dans des applications telles que - Pour changer votre fond d’écran, maintenez votre doigt appuyé sur un les navigateurs, vous emplacement vide de l’écran, puis choisissez parmi la liste d’options.
  • Seite 15 perSonnaliSation De la tablette ajouter des widgets Utiliser le verrouillage écran Les widgets sont comparables à des fenêtres ouvertes sur vos Pour protéger vos informations applications. Vous pouvez les sélectionner dans l’onglet “Toutes les confidentielles, vous pouvez modifier les applications”, puis les déplacer vers vos écrans d’accueil. paramètres de verrouillage de votre tablette Pour afficher vos widgets, procédez comme suit : 1.
  • Seite 16 enregiStrez votre tablette! sur internet : http://arnovatech.com/register Nous vous conseillons de prendre quelques minutes pour l’enregistrer (http://arnovatech.com/register). Cela vous permettra d’avoir accès au support technique ARNOVA (http://arnovatech.com/support). beSoin D’aiDe ? sur notre site Web: Consultez la Foire Aux Questions (FAQ) sur http://arnovatech.com/faq Contactez notre équipe d’assistance technique: Allez sur http://arnovatech.com/support pour une assistance par e-mail.
  • Seite 17 Starten Vor der erstmaligen Verwendung des ARNOVA sollte der Akku vollständig aufgeladen werden! Aufladen des Akkus 1. Verbinden Sie das mitgelieferte Stromkabel mit dem ARNOVA und mit einer Steckdose. Daraufhin startet den Ladevorgang. 2. Drücken Sie die Ein / Aus-Taste, um das Gerät einzuschalten. installationsassistent Wenn Sie Ihren ARNOVA das erste Mal in Betrieb nehmen, leitet Sie der Installationsassistent durch einige Bildschirme, um Ihnen dabei zu helfen, die grundlegenden Einstellungen...
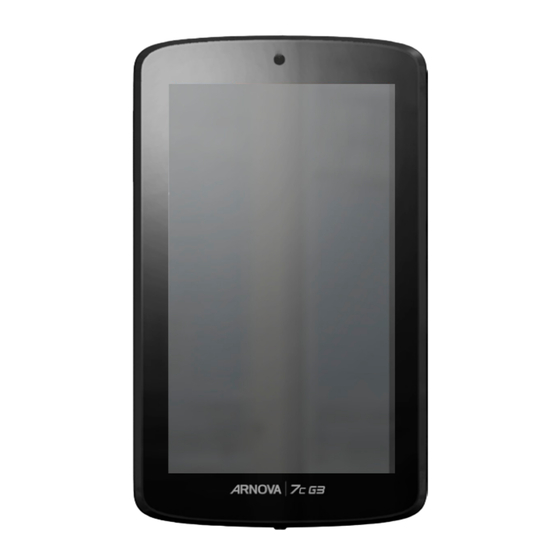
  • Seite 18 beSchreibung DeS arnova Webcam Kamera EIN/AUS-Taste Lautstärke Reset-Schalter Micro USB Port Mikro HDMI Video Ausgang* SIM Karten Steckplatz microSD Karten Eingebautes Mikro Steckplatz Kopfhöreranschluss Lautsprecher *Mit einem optionalen Video Kabel (HDMI / Mikro HDMI). WiChtig: Ihr Gerät ist abgestürzt, bitte schalten Sie es aus. Drücken und halten Sie den Ein-/Aus-Taste für 10 Sekunden oder drücken Sie den Reset-Schalter.
  • Seite 19 verbinDen mit einem 3g-netzwerk Ihr Gerät verfügt über einen Einschub für eine SIM-Karte. Ihr Gerät ist ohne SIM-Lock. Sie können uneingeschränkt jeden Anbieter nutzen. Beachten Sie, dass das Gerät nur dann ein Signal empfängt, wenn Sie sich in einem Bereich aufhalten, der von einem 3G- oder EDGE-Netzwerk Ihres Anbieters abgedeckt wird. Einsetzen der sim-Karte WiChtig: Bevor Sie eine SIM-Karte einlegen, müssen Sie das Gerät ausschalten.
  • Seite 20 wifi-netzwerkverbinDung Dazu müssen Sie sich in Reichweite eines WLAN-Netzwerks befinden. Das ARNOVA Gerät erkennt bereits konfigurierte Netzwerke und wird mit diesen eine Verbindung herstellen. Konfiguration eines WiFi-netzwerks Von der Statusleiste aus können Sie schnell auf die WiFi-Einstellungen zugreifen. 1. Tippen Sie auf die Uhrzeit in der Statusleiste. Das Status-Dashboard wird angezeigt.
  • Seite 21: Die Android Benutzeroberfläche

    Die anDroiD benutzeroberflÄche Ihr ARNOVA-Gerät ist mit einem Kapazitiven touchscreen ausgerüstet. Suchbegriff eintippen Die Bedienung erfolgt durchBerührung des Touchscreens. alle apps symbol Anzeige von Desktop- Verknüpfungen von Android™ Tippen Sie auf dieses Icon, um (WebBrowser, eMail, usw.). alle installierten Android™- Tippen Sie auf ein Icon, um die Anwendungen zu sehen entsprechende Anwendung zu...
  • Seite 22 anpaSSen ihreS proDukteS Der erweiterte Desktop Bewegen Sie Ihren Finger horizontal auf dem Touchscreen, um auf die linke oder rechte Seite des Desktops zu gelangen. Hintergrund ändern Pinch-to-zoom: - Zum Ändern des Wallpaper den Finger auf eine freie Stelle des Einige Anwendungen Bildschirms legen und dann aus der Liste auswählen.
  • Seite 23 anpaSSen ihreS proDukteS Widgets hinzufügen Bildschirmsperre verwenden Widgets sind wie Fenster für Ihre Apps. Sie können sie über den Tab Zum Schutz Ihrer persönlichen Daten “Alle Apps” auf Ihre Startbildschirme verschieben. können Sie die Sperreinstellungen Ihres So zeigen Sie Ihre Widgets an: Tablets anpassen: 1.
  • Seite 24: Sie Benötigen Hilfe

    regiStrieren Sie ihr proDukt! im internet unter http://arnovatech.com/register Wir empfehlen Ihnen, sich ein paar Minuten Zeit zu nehmen, und es zu registrieren (http://arnovatech.com/register). Dadurch erhalten Sie Zugriff auf den technischen Support von ARNOVA (http://arnovatech.com/support). Sie benÖtigen hilfe? auf unserer Website: Für häufig gestellte Fragen (FAQ) siehe http://arnovatech.com/faq Kontaktieren sie unseren technischen Kundendienst: Sie erhalten unter http://arnovatech.com/support Hilfe per E-Mail.
  • Seite 25: Antes De Empezar

    anteS De empezar Antes de utilizar su ARNOVA por primera vez, cargue completamente la batería. Cargado de la batería 1. Conecte el cable de alimentación suministrado al conector de alimentación del ARNOVA y a una toma eléctrica de pared. El ARNOVA empezará a cargarse. 2.
  • Seite 26 DeScripción Del arnova Webcam Camera Botón ON/OFF Botones de volumen Botón de reinicio Puerto micro-USB (reset) Salida de video micro-HDMI* Ranura para tarjeta SIM Ranura para Micrófono tarjetas Micro-SD Toma de auriculares Altavoz * Con un cable de vídeo opcional (HDMI / Micro-HDMI). importantE: Si su producto no responde.
  • Seite 27 conectarSe a una reD 3g Su dispositivo dispone de una ranura para tarjeta SIM. Al ser libre, se puede utilizar con cualquier proveedor. Tenga en cuenta que sólo tendrá señal cuando se encuentre en un área con cobertura por parte de su proveedor de servicios 3G o red EDGE.
  • Seite 28: Conexión A Una Red Wifi

    conexión a una reD wifi Para que este procedimiento funcione, debe encontrarse en una zona WiFi que le permita conectarse. Cuando el ARNOVA se encuentre dentro del alcance de una red que ya haya configurado una vez, intentará realizar una conexión. Cómo configurar una red WiFi Desde la barra del estado, es fácil acceder a la configuración inalámbrica.
  • Seite 29 el interfaz anDroiD El dispositivo ARNOVA está equipado con una pantalla táctil capacitiva. Toca para realizar una búsqueda textual Utilizar la pulpa de los dedos. todas las aplicaciones Estos son los accesos directos Android™ (navegador web, Dé un toque en este Email, etc.).
  • Seite 30 perSonalización Del proDucto la pantalla de inicio ampliada Deslice el dedo horizontalmente en la pantalla para ir al lado izquierdo o derecho de la pantalla de inicio ampliada. personalización de los elementos de la pantalla de inicio Pinzar[Zoom]: En algunas aplicaciones, - Para cambiar el fondo de pantalla, mantenga el dedo en la pantalla en puede ampliar y un punto vacío y elija uno de la lista.
  • Seite 31 perSonalización Del proDucto Cómo añadir widgets Cómo utilizar la pantalla de bloqueo Los widgets son como ventanas de las aplicaciones. Están disponibles Para proteger la información personal, en la pestaña “Todas las aplicaciones” para que puedas moverlos a las puedes modificar los ajustes de bloqueo pantallas del escritorio.
  • Seite 32 ¡regiStre Su proDucto! En internet en http://arnovatech.com/register Dedique unos pocos minutos de su tiempo para registrarlo (http://arnovatech.com/register). De esta forma, podrá acceder al servicio de asistencia técnica de ARNOVA (http://arnovatech.com/support). ¿neceSita ayuDa? En nuestro sitio web: consulte la sección de preguntas más frecuentes en http://arnovatech.com/faq Póngase en contacto con nuestro equipo de Asistencia Técnica: visite http://arnovatech.com/support para la asistencia por e-mail.
  • Seite 33 avvio Prima di utilizzare il dispositivo ARNOVA per la prima volta, caricare completamente la batteria. Caricamento della batteria 1. Collegare il cavo di alimentazione fornito al dispositivo ARNOVA e a una presa a muro. Il dispositivo ARNOVA viene avviata la ricarica. 2.
  • Seite 34 DeScrizione Webcam Camera Pulsante ON/OFF Tasti volume Bottone di Porta micro USB re-nizalizzazione Uscita video (reset) micro HDMI* Slot per scheda SIM Slot per schede Microfono incorporato micro SD Spinotto cuffie Altoparlante * Con cavo video opzionale (HDMI / micro HDMI). importantE: Il vostro prodotto non reagisce più.
  • Seite 35: Connessione A Una Rete 3G

    conneSSione a una rete 3g Il dispositivo è munito di un alloggiamento per scheda SIM. La SIM del dispositivo non è bloccata. Il provider non applica alcuna limitazione. Notare che il dispositivo avrà il segnale solo se ci si trova in una zona coperta dalla rete 3G o EDGE del provider.
  • Seite 36: Connessione A Una Rete Wireless

    conneSSione a una rete wireleSS Per procedere è necessario trovarsi in una zona WIFI che permetta la connessione. Ogni qualvolta ARNOVA si trova in un raggio di rete che avete già configurato una volta, cercherà una connessione. Come configurare una rete WiFi Dalla barra di sistema è...
  • Seite 37: Interfaccia Android

    interfaccia anDroiD Il dispositivo ARNOVA è dotato di uno capacitivo schermo a sfioramento. Selezionare la ricerca di Utilizzando la polpa delle dita. testo Queste sono le scorciatoie tutte le applicazioni Android™ (Web Browser, Sfiorare questa icona per Email, ecc.) - sfiorare un’icona mostrare le applicazioni per aprire l’applicazione Android™...
  • Seite 38 perSonalizza il proDotto schermo intero Fare scivolare il dito in senso orizzontale sullo schermo per posizionarsi sulla parte sinistra o destra dello schermo. avvicinare le Cambiare lo sfondo dita[Zoom]: In Per modificare lo sfondo, posizionare il dito sullo schermo in una posizione alcune applicazioni, vuota, quindi scegliere dall’elenco.
  • Seite 39 perSonalizza il proDotto aggiungere widget Utilizzare il blocco schermo I widget sono come finestre sulle applicazioni. Sono disponibili in Per proteggere le informazioni personali, una scheda Tutte le applicazioni per poterli spostare nelle schermate è possibile modificare le impostazioni di Home.
  • Seite 40: Registrazione Del Prodotto

    regiStrazione Del proDotto su internet all'indirizzo http://arnovatech.com/register Vi suggeriamo di registrarlo; ci vorranno solo pochi minuti (http://arnovatech.com/register). Una volta registrato, potrete accedere al servizio di assistenza tecnica di ARNOVA (http://arnovatech.com/support). Serve aiuto? sul nostro sito Web: consultare la sezione FAQ (Frequently Asked Questions) all'indirizzo http://arnovatech.com/faq Contattare il nostro servizio di assistenza tecnica: visitare il sito Web http://arnovatech.com/support per ricevere assistenza mediante posta elettronica.
  • Seite 41 opStarten Laad de batterij volledig op alvorens de ARNOVA voor de eerste maal te gebruiken. De batterijen laden 1. Sluit het meegeleverde netsnoer aan op de stroomaansluiting van de ARNOVA en op een stopcontact. Uw ARNOVA zal starten met laden. 2.
  • Seite 42 beSchrijving arnova Webcam Camera AAN/UIT-knop Volumeknoppen Reset-knop Micro-USB-poort Micro-HDMI- video-uitgang* SIM-kaartsleuf Micro-SD-kaartsleuf Ingebouwde microfoon Hoofdtelefoonaansluiting Luidspreker * Optionele videokabel (HDMI / micro-HDMI) afzonderlijk te koop. BElangrijKE Uw product niet reageren. U kunt stoppen door op de AAN/UIT-knop gedurende 10 seconden of met behulp van de reset-knop (reset).
  • Seite 43 verbinDing maken met een 3g-netwerk Uw apparaat is voorzien van een sleuf voor een simkaart. Uw apparaat is simlockvrij. U bent niet gebonden aan één bepaalde provider. Houdt er rekening mee dat u alleen bereik hebt wanneer u zich in een gebied bevindt dat wordt gedekt door het 3G- of EDGE-netwerk van uw 3G-provider.
  • Seite 44 wifi-netwerkverbinDing Hiervoor dient u zich in een WiFi-zone te bevinden, zodat u verbinding kunt maken. Telkens dat uw ARNOVA zich in een zone bevindt met een netwerk dat u al geconfigureerd hebt, zal het proberen om hier verbinding mee te maken. Het opzetten van een WiFi-netwerk Vanuit de systeembalk is het mogelijk om de WiFi-instellingen snel te openen.
  • Seite 45 De anDroiD-interface Uw ARNOVA-apparaat is uitgerust met een capacitieve aanraakscherm. Gebruik Toets om tekst te zoeken de vinger pulp. Applicaties knop Dit zijn de standaard Android™- snelkoppelingen (Web Browser, Druk op dit pictogram Email, enz.). Druk op een om al de op uw ARNOVA pictogram om de betreffende geïnstalleerde Android™- applicatie te openen.
  • Seite 46 perSonaliSeer uw proDuct het uitgebreide beginscherm Schuif met uw vinger horizontaal over het scherm om naar de linker- of de rechterkant van uw uitgebreide beginscherm te gaan. De achtergrond wijzigen Knijp[Zoom]: Als u uw achtergrond wilt wijzigen, houdt u een leeg gedeelte van het In bepaalde scherm aangeraakt met uw vinger en kiest u een optie in de lijst.
  • Seite 47 perSonaliSeer uw proDuct Widgets toevoegen Het vergrendelingsscherm gebruiken Met widgets heeft u overal toegang tot uw apps. U kunt ze vanaf het Om uw persoonlijke gegevens tabblad ‘Alle apps’ verplaatsen naar uw startschermen. te beschermen, kunt u de Uw widgets weergeven: vergrendelingsinstellingen van de tablet aanpassen: 1.
  • Seite 48 uw proDuct regiStreren op het internet op http://arnovatech.com/register Wij raden u aan om uw ARNOVA-product te registreren (http://arnovatech.com/register). Na registratie krijgt u toegang tot de technische ondersteuning van ARNOVA (http://arnovatech.com/support). hulp noDig? op onze website: raadpleeg het onderdeel Frequently Asked Questions op http://arnovatech.com/faq neem contact op met onze technisch ondersteuning: surf naar http://arnovatech.com/support voor ondersteuning via e-mail.
  • Seite 49 inicianDo Antes de utilizar o dispositivo ARNOVA pela primeira vez, carregue completamente a bateria! Carregar a bateria 1. Conecte o cabo de alimentação fornecido ao conector de alimentação ARNOVA e para uma tomada de parede. O dispositivo ARNOVA começará a carregar. 2.
  • Seite 50: Descrição Do Aparelho

    DeScriÇÃo Do aparelho Webcam Câmara Botão On/Off Botões de volume Botão Reiniciar Porta Micro-USB Saída de vídeo mini-HDMI* Slot do cartão SIM Slot para cartão Microfone incorporado micro SD Saída para auriculares Colunas * Com Mini-HDMI opcional para cabo HDMI. ImPortAnt: O dispositivo bloqueou.
  • Seite 51 conectanDo a uma reDe 3g Seu ARNOVA é equipado com um slot de cartão SIM. Qualquer cartão SIM padrão pode ser inserido. Não há nenhuma restrição fornecida. Observe que o Arnova 7c G2 somente terá sinal se você estiver em uma área coberta pelos provedores 3G ou rede EDGE.
  • Seite 52 conectanDo a uma reDe wifi Para este procedimento de trabalho, você precisa estar em uma área de WiFi que permitirá que você se conecte a ela. Todas as vezes que ARNOVA estiver no alcance de uma rede que você já configurou uma vez, ela tentará fazer uma conexão.
  • Seite 53: A Interface Android

    a interface anDroiD O dispositivo ARNOVA vem equipado com um ecrã táctil capacitivo. Utilize a Toque para procurar o ponta do dedo para navegar. texto o ícone todas as aplicações Estes são os atalhos Android™ por defeito (Navegador da Toque neste ícone para Web, E-Mail, etc.).
  • Seite 54 perSonalizanDo o Seu proDuto Ecrã inicial ampliado Deslize o dedo na horizontal no ecrã para se deslocar para o lado esquerdo ou direito do ecrã inicial ampliado. alterar a imagem de fundo aperte[Zoom]: Para alterar o seu papel de parede, toque continuamente com o dedo no Em algumas ecrã...
  • Seite 55 perSonalizanDo o Seu proDuto adicionar widgets Utilizar o ecrã de bloqueio Os widgets são como janelas para as suas aplicações. Estão Para proteger as informações pessoais, pode disponíveis num separador Todas as Aplicações para que os possa ajustar as definições de bloqueio do tablet: mover para os Ecrãs Principais.
  • Seite 56 regiStre Seu proDuto! na web em http://arnovatech.com/register Recomendamos que você leve alguns minutos para registrá-lo (http://arnovatech.com/register). Isto lhe permitirá o acesso ao suporte técnico ARNOVA (http://arnovatech.com/support). preciSa De ajuDa? Em nosso site da web: veja a seção de Perguntas Prequentes no http://arnovatech.com/faq Contate nossa Equipe de suporte técnico: visite http://arnovatech.com/support para suporte de email.
  • Seite 57 national restrictions This device is intended for home and office use in all EU countries (and other countries following the EU directive 1999/5/EC) without any limitation except for the countries mentioned below: Country Restriction Reason/remark Bulgaria None General authorization required for outdoor use and public service France Outdoor use limited...
  • Seite 58 open source software offer The software bundled with this product includes software files subject to certain open source license requirements. Such open source software files are subject solely to the terms of the relevant open source software license. Such open source software is provided on an “AS IS” basis to the maximum extent permitted by applicable law. For the open source files contained herein, please access “Open source license”...

Inhaltsverzeichnis