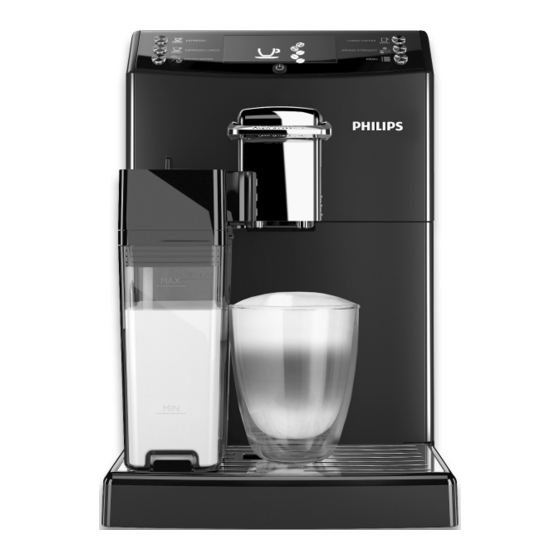
Philips HD8847 Handbuch
Vorschau ausblenden
Andere Handbücher für HD8847:
- Bedienungsanleitung (100 Seiten) ,
- Kurzanleitung (84 Seiten)

Verwandte Anleitungen für Philips HD8847


Inhaltszusammenfassung für Philips HD8847
- Seite 1 Super automatic espresso machine 4000 series HD8847 Quick Instruction Guide HD8848 READ THIS GUIDE CAREFULLY BEFORE USING THE MACHINE. FOR COMPLETE INSTRUCTIONS DOWNLOAD USER MANUAL FROM WWW.PHILIPS.COM/SUPPORT Register your product and get support at www.philips.com/welcome...
- Seite 2 Welcome to Philips! Register on WWW.PHILIPS.COM/WELCOME and you will receive tips and updates on how to take care of your machine. This booklet contains quick instructions on how to operate and descale your machine properly. For complete instructions go to www.philips.com/support to download the latest version of the user manual (refer to the type number listed on the cover page).
- Seite 3 Herzlich Willkommen in der Welt von Philips! Registrieren Sie sich auf der Internetseite WWW.PHILIPS.COM/WELCOME und erhalten Sie Hinweise und Aktualisierungen zur War- tung. In diesem Heft werden die Hinweise für den korrekten Betrieb und das Entkalken des Geräts in Kurzform dargestellt.
-
Seite 4: Inhaltsverzeichnis
EN - CONTENT SAFETY INSTRUCTIONS ......................................6 FIRST INSTALLATION......................................10 MANUAL RINSE CYCLE......................................11 COFFEESWITCH -“ESPRESSO” OR “COFFEE” SELECTION LEVER ..........................13 FIRST ESPRESSO / LONG ESPRESSO..................................13 MY FAVOURITE ESPRESSO ....................................13 FIRST CLASSIC COFFEE .......................................15 MY FAVOURITE CLASSIC COFFEE ..................................15 ADJUSTING THE CERAMIC COFFEE GRINDER ...............................16 FIRST CAPPUCCINO ......................................17 MY FAVOURITE CAPPUCCINO ....................................18 FROTHING MILK ........................................20... - Seite 5 DE - INHALT SICHERHEITSHINWEISE .....................................44 ERSTE INBETRIEBNAHME ....................................48 MANUELLER SPÜLZYKLUS....................................49 COFFEESWITCH - WAHLHEBEL "ESPRESSO" ODER "KAFFEE" ..........................51 ERSTER ESPRESSO / GROSSER ESPRESSO ................................51 MEIN LIEBLINGS-ESPRESSO ....................................52 ERSTER KLASSISCHER KAFFEE (CLASSIC COFFEE) ..............................53 MEIN IDEALER KLASSISCHER KAFFEE (CLASSIC COFFEE) .............................53 EINSTELLUNG KERAMIKMAHLWERK ..................................54 ERSTER CAPPUCCINO ......................................55 MEIN LIEBLINGS-CAPPUCCINO...................................56 AUFGESCHÄUMTE MILCH ....................................58...
-
Seite 6: Safety Instructions
Only have repairs ual for future reference. carried out by a service centre authorised by Philips to avoid any hazard. Warnings • The machine should not be used by children • Connect the machine to a wall socket with younger than 8 years old. - Seite 7 Safety instructions www.philips.com/support Norme di sicurezza Cautions machine is not used over a long period of time. The water can get contaminated. Use • The machine is for household use only. It is fresh water every time you use the machine.
-
Seite 8: Norme Di Sicurezza
Tutte Attenzione le riparazioni devono essere eseguite da un • Collegare la macchina a una presa a muro centro assistenza autorizzato da Philips per adeguata, la cui tensione principale corri- evitare qualsiasi pericolo. sponda ai dati tecnici dell’apparecchio. -
Seite 9: Campi Elettromagnetici
Safety instructions www.philips.com/support Norme di sicurezza pericoli o sotto la supervisione di un adulto. non viene svolta, l’apparecchio smetterà di • I bambini devono essere sorvegliati per assi- funzionare correttamente. In questo caso la curarsi che non giochino con l’apparecchio. -
Seite 10: First Installation
Instructions www.philips.com/support Istruzioni FIRST INSTALLATION PRIMA INSTALLAZIONE Open the water tank lid. Remove the water tank by Rinse the water tank and fi ll it with fresh water up to the Open the coff ee bean hop- using the handle. -
Seite 11: Manual Rinse Cycle
Instructions www.philips.com/support Istruzioni Place a container under the water dispensing spout. The machine reminds you to install the water Press the button to start dispensing spout. Press the button to confi rm. priming the circuit. The machine will start dispensing hot water. - Seite 12 Instructions www.philips.com/support Istruzioni When the dispensing has Repeat steps 1-4 twice, thereafter continue with step 6. Place a container under the water dispensing spout. fi nished, empty the con- tainer. Al termine dell'erogazione, Ripetere le operazioni dal punto 1 al punto 4 per due volte, Posizionare un contenitore sotto l’...
-
Seite 13: Coffeeswitch -"Espresso" Or "Coffee" Selection Lever
Instructions www.philips.com/support Istruzioni Dispense water until the no At the end, fi ll the water tank water icon is displayed. again up to the MAX level. Erogare acqua fi no a visua- Al termine, riempire nuova- lizzare il simbolo di man- mente il serbatoio dell'ac- canza acqua. -
Seite 14: My Favourite Espresso
Instructions www.philips.com/support Istruzioni To brew two cups of espresso or long espresso, press the desired button twice consecutively. Coff ee brewing automatically stops when the preset level is reached; press the button to stop it earlier. Per erogare due espressi o due espressi lunghi, pre- mere il tasto desiderato due volte consecutive. -
Seite 15: First Classic Coffee
Instructions www.philips.com/support Istruzioni FIRST CLASSIC COFFEE PRIMO CAFFÈ LUNGO (CLASSIC COFFEE) COFFEE Adjust the coff ee dispensing Make sure that the lever is in the “COFFEE” position. Press the button to brew a classic coff ee. spout. Regolare l’ e rogatore caff è. -
Seite 16: Adjusting The Ceramic Coffee Grinder
Instructions www.philips.com/support Istruzioni ADJUSTING THE CERAMIC COFFEE GRINDER REGOLAZIONE MACINACAFFÈ IN CERAMICA You can only adjust the grinder settings when the machine is grinding cof- fee beans. È possibile regolare le impostazioni del maci- nacaff è solo mentre la Place a cup under the coff ee dispensing spout. -
Seite 17: First Cappuccino
Instructions www.philips.com/support Istruzioni FIRST CAPPUCCINO PRIMO CAPPUCCINO Danger of scalding! Dis- MILK pensing may be preceded by small jets of milk and steam. Pericolo di scottature! All’inizio dell’ e rogazione possono verifi carsi brevi Remove the water dispens- Lift the carafe lid. -
Seite 18: My Favourite Cappuccino
Instructions www.philips.com/support Istruzioni The machine reminds you to insert the carafe and pull out the milk carafe dispenser by show- Press the button to start dispensing. ing the following icons. La macchina ricorda che è necessario inserire la caraff a ed estrarre l'erogatore della caraf- Premere il tasto per iniziare l’... - Seite 19 Instructions www.philips.com/support Istruzioni The machine reminds you to insert the carafe and pull out The machine is heating up. Press and hold the button until the “MEMO” icon is dis- the milk carafe dispenser by showing the following icons. played.
-
Seite 20: Frothing Milk
Instructions www.philips.com/support Istruzioni Press the button to exit programming. If the machine is in the milk program- ming phase, it will continue with brewing of a coff ee. To stop brewing press the button. In this case, the quantity of cappuccino will not be saved. - Seite 21 Instructions www.philips.com/support Istruzioni Place a cup under the dispensing spout. Pull out the milk carafe dispenser to the right up to the icon. Note: If the milk carafe dispenser is not completely pulled out, milk may not be properly frothed.
-
Seite 22: Adjusting The Frothed Milk Length
Instructions www.philips.com/support Istruzioni Frothed milk dispensing automatically stops when the preset level is reached; press the button to stop it earlier. L’ e rogazione di latte emulsionato si interrompe automaticamente quando viene raggiunto il livel- lo impostato; è tuttavia possibile interromperla in... - Seite 23 Instructions www.philips.com/support Istruzioni Press the button. The machine shows the icon above. Press and hold the button until the “MEMO” icon is displayed. Premere il tasto La macchina visualizza il simbolo in alto. Tenere premuto il tasto fi no a visualizzare il simbolo “MEMO”...
-
Seite 24: Hot Water
Instructions www.philips.com/support Istruzioni HOT WATER ACQUA CALDA Danger of scalding! Dis- pensing may be preceded by small jets of hot water. Pericolo di scottature! All’inizio dell’ e rogazione possono verifi carsi brevi spruzzi di acqua calda. Insert the water dispensing Lock it in place. - Seite 25 Instructions www.philips.com/support Istruzioni Dispense the desired amount To stop the hot water dispensing, press the button. of hot water. Remove the container. Erogare la quantità di acqua Per interrompere l’ e rogazione di acqua calda premere il calda desiderata. tasto...
-
Seite 26: Descaling
Instructions www.philips.com/support Istruzioni DESCALING - 30 min. DECALCIFICAZIONE - 30 min. When the “ START CALC CLEAN” symbol is displayed, you need to descale the machine. The descaling cycle takes approx. 30 minutes. Not doing this will ultimately make your machine stop working properly. In this case repair is NOT covered by your warranty. - Seite 27 Instructions www.philips.com/support Istruzioni 1 - Raise the coff ee dispensing spout; Fill the milk carafe with water up to the MIN level and insert Press the button. 2 - Press the side buttons; it into the machine. 3 - Remove and empty the drip tray and the coff ee grounds drawer;...
- Seite 28 Instructions www.philips.com/support Istruzioni CALC CLEAN Fill the water tank with fresh Place a large container (1.5 l) under both the milk carafe Press the button to start the descaling cycle. water up to the CALC CLEAN dispenser and the coff ee dispensing spout. Pull out the milk...
- Seite 29 Instructions www.philips.com/support Istruzioni Note: If the water tank has not been fi lled up to the CALC CLEAN level, the machine might require another rinse cycle. Refi ll the water tank and place it back into the machine. Repeat from step 16.
-
Seite 30: Interruption Of The Descaling Cycle
Instructions www.philips.com/support Istruzioni The machine is ready for use again. La macchina è pronta all’uso. INTERRUPTION OF THE DESCALING CYCLE INTERRUZIONE DEL CICLO DI DECALCIFICAZIONE Once the descaling cycle has In case you get stuck dur- If this occurs, empty and... -
Seite 31: Brew Group Cleaning
Instructions www.philips.com/support Istruzioni BREW GROUP CLEANING PULIZIA DEL GRUPPO CAFFÈ Open the service door. To remove the brew group, press the «PUSH» button and pull Turn off the machine by pressing the button. Wait until it by the handle. button fl ashes and unplug the power cord. -
Seite 32: Cleaning The Milk Carafe
Instructions www.philips.com/support Istruzioni Insert the coff ee residues drawer in its seat and ensure that it is correctly in place. Insert the brew group in its seat again until it locks into place If the coff ee residues drawer is not correctly positioned, the brew group may not without pressing the “PUSH”... - Seite 33 Instructions www.philips.com/support Istruzioni Put the lid back onto the milk Insert the milk carafe in the machine. Pull out the milk carafe Place a container under the dispensing spout. carafe. dispenser to the right up to the icon. Riposizionare il coperchio Inserire la caraff a del latte nella macchina.
- Seite 34 Instructions www.philips.com/support Istruzioni The machine reminds you to insert the carafe and pull out Once the machine stops dis- Put back the milk carafe dispenser by shifting it up to the the milk carafe dispenser. pensing water, the cleaning icon. Remove the milk carafe and empty it.
- Seite 35 Instructions www.philips.com/support Istruzioni Detach the lid (C) from the milk carafe dispenser by pulling it Disassemble the milk frother Remove the fi tting (F) from the milk frother by pulling it down while slightly pressing on the sides. (D) from its support (E).
- Seite 36 Instructions www.philips.com/support Istruzioni If you cannot reassemble the milk dispenser on the top of the carafe, the pin is in the wrong Put back the lid of the carafe. Insert the top of the carafe, position (B). Before reassembling the milk dispenser, manually shift the pin to the (A) posi- ensuring it is locked into tion.
- Seite 37 Instructions www.philips.com/support Istruzioni Press the button. Press the button. The machine shows the icon above. Press the button. Premere il tasto Premere il tasto . La macchina visualizza il simbolo in alto. Premere il tasto The machine reminds you to insert the carafe and pull out The machine shows the icon above.
- Seite 38 Instructions www.philips.com/support Istruzioni Rinse and fi ll the milk carafe with fresh water up to the MAX Insert the milk carafe into the machine. Pull out the milk carafe dispenser to the right up to level. icon. Place the container under the dispensing spout to activate the rinse cycle.
- Seite 39 Instructions www.philips.com/support Istruzioni The machine reminds you to insert the carafe and pull out Once the machine stops dispensing water, repeat steps 13 - 17 until the carafe is emptied. the milk carafe dispenser. La macchina ricorda che è necessario inserire la caraff a ed Al termine dell’...
-
Seite 40: Warning Signals (Yellow Colour)
Instructions www.philips.com/support Istruzioni WARNING SIGNALS (YELLOW COLOUR) SEGNALI DI AVVISO (GIALLO) The machine is warming up. The machine is performing The “INTENZA+” water fi lter needs to be replaced. The brew group is being reset a rinse cycle. Wait until this due to machine reset. -
Seite 41: Warning Signals (Red Colour)
The machine is out of order. Turn off the machine. After 30 seconds, turn it on again. Repeat the procedure 2 or 3 times. If the machine does not start, contact the Philips hotline in your country (contact details in the warranty booklet) and quote the error code shown on the display. -
Seite 42: Maintenance Products
Maintenance kit Visit Philips online shop to check availability and purchasing product number: CA6706 opportunities in your country. Kit Manutenzione Visita il negozio online Philips per verifi care la disponibilità n. prodotto: CA6706 e le opportunità di acquisto nel tuo Paese. -
Seite 44: Sicherheitshinweise
• Das Gerät oder das Netzkabel dürfen keines- den. Bewahren Sie diese Bedienungsanleitung falls modifi ziert werden. Alle Reparaturen für eine spätere Verwendung auf. müssen durch ein von Philips autorisiertes Achtung Kundendienstzentrum ausgeführt werden, um jede Gefahr zu vermeiden. • Schließen Sie das Gerät an einer geeigneten •... -
Seite 45: Geschäften, Büros, Landwirtschaftlichen
Sicherheitshinweise www.philips.com/support Consignes de sécurité dem Gerät spielen. den. Diese Vorgänge nicht auszuführen, • Führen Sie weder Finger noch andere Ge- führt dazu, dass das Gerät nicht mehr stö- genstände in das Mahlwerk ein. rungsfrei funktioniert. Eine entsprechende Reparatur ist nicht durch die Garantie ge-... -
Seite 46: Consignes De Sécurité
à venir. machine ou le câble d'alimentation. Toutes Attention les réparations doivent être eff ectuées par un centre d’assistance agréé par Philips pour • Brancher la machine à une prise murale ap- éviter tout danger. propriée, dont la tension principale corres- •... -
Seite 47: Avertissements
Sicherheitshinweise www.philips.com/support Consignes de sécurité risques potentiels, ou bien qu'elles soient machine. Si cette opération n'est pas eff ec- sous la supervision d'une personne adulte. tuée, l'appareil cesse de fonctionner correc- • Il faut s'assurer que les enfants n'aient ja- tement. -
Seite 48: Erste Inbetriebnahme
Hinweise www.philips.com/support Instructions ERSTE INBETRIEBNAHME PREMIÈRE INSTALLATION Den Deckel des Wassertanks Den Wassertank am Griff Den Wassertank ausspülen und bis zum Füllstand MAX mit Den Deckel des Kaff eeboh- anheben. entnehmen. frischem Wasser füllen. nenbehälters anheben. Überprüfen, ob dieser vollständig eingesetzt wurde. Den De- ckel schließen. -
Seite 49: Manueller Spülzyklus
Hinweise www.philips.com/support Instructions Einen Behälter unter die Wasserdüse stellen. Das Gerät zeigt an, dass die Wasserdüse installiert werden Die Taste drücken, um muss. die Entlüftung des Systems Zur Bestätigung die Taste drücken. zu starten. Das Gerät beginnt, heißes Wasser auszugeben. - Seite 50 Hinweise www.philips.com/support Instructions Nach der Ausgabe den Be- Die Vorgänge von Punkt 1 bis Punkt 4 insgesamt zwei Mal Einen Behälter unter die Wasserdüse stellen. hälter leeren. wiederholen. Danach zu Punkt 6 übergehen. À la fi n de la distribution, Répéter deux fois les opérations du point 1 au point 4 ;...
-
Seite 51: Coffeeswitch - Wahlhebel "Espresso" Oder "Kaffee
Hinweise www.philips.com/support Instructions Wasser ausgeben, bis das Anschließend den Wasser- Symbol Wasser fehlt ange- tank erneut bis zum Füll- zeigt wird. stand MAX füllen. Distribuer de l'eau jusqu'à À la fi n de cette opération, l'affi chage du symbole de remplir de nouveau le ré-... -
Seite 52: Mein Lieblings-Espresso
Hinweise www.philips.com/support Instructions Für die Ausgabe von zwei Espresso oder zwei großen Espresso wird die gewünschte Taste zwei Mal nacheinander gedrückt. Die Kaff eeausgabe wird automatisch beendet, wenn die eingestellte Menge er- reicht ist. Sie kann jedoch auch durch Druck der Taste vorzeitig abgebrochen werden. -
Seite 53: Erster Klassischer Kaffee (Classic Coffee)
Hinweise www.philips.com/support Instructions ERSTER KLASSISCHER KAFFEE (CLASSIC COFFEE) PREMIER CAFÉ SIMPLE (CLASSIC COFFEE) COFFEE Den Kaff eeauslauf einstel- Überprüfen, ob sich der Hebel in der Position “COFFEE” be- Die Taste für die Ausgabe des klassischen Kaff ees (Classic len. fi ndet. -
Seite 54: Einstellung Keramikmahlwerk
Hinweise www.philips.com/support Instructions EINSTELLUNG KERAMIKMAHLWERK RÉGLAGE DU MOULIN À CAFÉ EN CÉRAMIQUE Das Mahlwerk kann nur dann eingestellt werden, während das Gerät die Kaff eebohnen mahlt. Il est possible de régler les paramètres du mou- Eine Tasse unter den Kaff eeauslauf stellen. -
Seite 55: Erster Cappuccino
Hinweise www.philips.com/support Instructions ERSTER CAPPUCCINO PREMIER CAPPUCCINO Verbrennungsgefahr! MILK Zu Beginn der Ausga- be können Milch- und Dampfspritzer auftreten. Danger de brûlures ! Il peut y avoir quelques Die Wasserdüse abnehmen, Den Deckel der Karaff e an- Milch bis in die Mitte zwischen den Füllstandsanzeigen MIN légères... -
Seite 56: Mein Lieblings-Cappuccino
Hinweise www.philips.com/support Instructions Das Gerät weist darauf hin, dass die Karaff e eingesetzt und der Auslauf der Karaff e heraus- Die Taste drücken, um die Ausgabe zu beginnen. gezogen werden muss, indem folgende Symbole angezeigt werden. La machine rappelle qu'il est nécessaire d'insérer la carafe et d'enlever la buse de distri- Appuyer sur la touche pour démarrer la distribution. - Seite 57 Hinweise www.philips.com/support Instructions Das Gerät weist darauf hin, dass die Karaff e eingesetzt und Das Gerät befi ndet sich in der Die Taste gedrückt halten, bis das Symbol “MEMO” auf der Auslauf der Karaff e herausgezogen werden muss, indem Aufheizphase.
-
Seite 58: Aufgeschäumte Milch
Hinweise www.philips.com/support Instructions Die Programmierung kann verlassen werden, indem die Taste gedrückt wird. Befi ndet sich das Gerät in der Programmierungsphase der Milch, so nimmt sie nun die Ausgabe eines Kaff ees vor, die mit der Taste unterbrochen werden kann. - Seite 59 Hinweise www.philips.com/support Instructions Eine Tasse unter den Auslauf stellen. Den Auslauf der Karaff e nach rechts bis zum Symbol herausziehen. Hinweis: Wird der Auslauf der Karaff e nicht vollständig herausgezogen, wird die Milch eventuell nicht korrekt aufgeschäumt. Placer une tasse sous la buse de distribution.
-
Seite 60: Einstellung Ausgabemenge Aufgeschäumte Milch
Hinweise www.philips.com/support Instructions Die Ausgabe aufgeschäumter Milch wird automatisch beendet, wenn die eingestellte Menge erreicht ist. Sie kann jedoch auch durch Druck der Taste vorzeitig abgebrochen werden. La distribution de lait émulsionné s’interrompt automatiquement lorsque le niveau réglé sera atteint ; il est toutefois possible de l'interrompre Das Gerät weist darauf hin, dass die Karaff e eingesetzt und... - Seite 61 Hinweise www.philips.com/support Instructions Die Taste drücken. Das Gerät zeigt das obige Symbol an. Die Taste gedrückt halten, bis das Symbol “MEMO” auf dem Display angezeigt wird. Appuyer sur la touche La machine affi che le symbole ci-dessus. Garder la touche enfoncée jusqu'à...
-
Seite 62: Heisswasser
Hinweise www.philips.com/support Instructions HEISSWASSER EAU CHAUDE Verbrennungsgefahr! Beim Starten der Ausga- be können heiße Wasser- spritzer austreten. Danger de brûlures ! Il peut y avoir quelques éclaboussures d’ e au chaude au début de la Die Wasserdüse einsetzen. In der Position blockieren. - Seite 63 Hinweise www.philips.com/support Instructions Die gewünschte Menge hei- Um die Ausgabe von heißem Wasser abzubrechen, die Taste ßes Wasser ausgeben. drücken. Den Behälter entfernen. Distribuer la quantité d'eau Pour interrompre la distribution d’ e au chaude, appuyer sur chaude souhaitée. la touche...
-
Seite 64: Entkalken
Hinweise www.philips.com/support Instructions ENTKALKEN - 30 Min. DÉTARTRAGE - 30 min. Wird das Symbol “START CALC CLEAN” angezeigt, so muss das Entkalken vorgenommen werden. Der Entkalkungszyklus dauert ca. 30 Minuten. Diesen Vorgang nicht auszuführen, führt dazu, dass das Gerät nicht mehr ordnungsgemäß funktioniert. - Seite 65 Hinweise www.philips.com/support Instructions 1 - Den Kaff eeauslauf nach oben schieben; Die Milchkaraff e bis zum Füllstand MIN mit Wasser füllen Die Taste drücken. 2 - Die seitlichen Tasten drücken; und wieder in das Gerät einsetzen. 3 - Die Abtropfschale und den Kaff eesatzbehälter abnehmen und leeren, danach wieder einsetzen.
- Seite 66 Hinweise www.philips.com/support Instructions CALC CLEAN Den Wassertank bis zum Einen großen Behälter (1,5 l) unter den Karaff en- und den Die Taste drücken, um den Entkalkungszyklus zu starten. Füllstand CALC CLEAN mit Kaff eeauslauf stellen. Den Auslauf der Karaff e nach rechts frischem Wasser füllen und...
- Seite 67 Hinweise www.philips.com/support Instructions Hinweis: Wird der Wasser- tank nicht bis zum Füll- stand CALC CLEAN gefüllt, besteht die Möglichkeit, dass das Gerät die Aus- führung eines weiteren Spülzyklus fordert. Den Wassertank füllen und wieder in die Maschine einsetzen. Den Vorgang ab Punkt 16 wiederholen.
-
Seite 68: Unterbrechung Des Entkalkungszyklus
Hinweise www.philips.com/support Instructions Das Gerät ist betriebsbereit. La machine est prête à fonctionner. UNTERBRECHUNG DES ENTKALKUNGSZYKLUS INTERRUPTION DU CYCLE DE DÉTARTRAGE Sobald der Entkalkungszy- Sollte das Gerät blockieren, In diesem Fall den Wasser- Die im Kapitel “Manueller Wurde der Zyklus nicht ab-... -
Seite 69: Reinigung Der Brühgruppe
Hinweise www.philips.com/support Instructions REINIGUNG DER BRÜHGRUPPE NETTOYAGE DU GROUPE DE DISTRIBUTION Die Servicetür öff nen. Die Taste «PUSH» drücken und am Handgriff ziehen, um die Die Taste drücken, um das Gerät auszuschalten. Abwar- Brühgruppe herauszunehmen. ten, bis die Taste blinkt und den Stecker des Netzkabels abnehmen. -
Seite 70: Reinigung Der Milchkaraffe
Hinweise www.philips.com/support Instructions Den Kaff eeauff angbehälter in seine Aufnahme einsetzen und sorgfältig überprüfen, ob er Die Brühgruppe wieder in die Aufnahme einsetzen, bis sie korrekt positioniert wurde. einrastet. Dabei nicht die Taste “PUSH” drücken. Wird der Kaff eeauff angbehälter nicht korrekt positioniert, kann die Brühgruppe eventuell nicht in das Gerät eingesetzt werden. - Seite 71 Hinweise www.philips.com/support Instructions Den Deckel wieder auf der Die Milchkaraff e in das Gerät einsetzen. Den Auslauf der Einen Behälter unter den Auslauf stellen. Milchkaraff e anbringen. Karaff e nach rechts bis zum Symbol herausziehen. Replacer le couvercle sur la Insérer la carafe à...
- Seite 72 Hinweise www.philips.com/support Instructions Das Gerät weist darauf hin, dass die Karaff e eingesetzt und Wenn das Gerät die Wasse- Den Auslauf der Karaff e bis zum Symbol zurück schieben. der Auslauf der Karaff e herausgezogen werden muss. rausgabe abschließt, ist die Die Milchkaraff e entfernen und leeren.
- Seite 73 Hinweise www.philips.com/support Instructions Den Deckel (C) vom Auslauf der Milchkaraff e abnehmen, in- Den Milchaufschäumer (D) Den Anschluss (F) vom Milchaufschäumer nach außen ab- dem dieser nach unten gedrückt wird, gleichzeitig wird ein vom Flansch (E) abnehmen. ziehen. leichter Druck auf die Seiten ausgeübt.
- Seite 74 Hinweise www.philips.com/support Instructions Wenn sich der Auslauf nicht im oberen Bereich der Karaff e montieren lässt, bedeutet dies, Die Abdeckung einsetzen. Den oberen Teil der Milch- dass sich der Bolzen in einer falschen Position (B) befi ndet. Vor der Anbringung des Auslaufs karaff e montieren und si- den Bolzen in Position (A) bringen, indem er manuell verschoben wird.
- Seite 75 Hinweise www.philips.com/support Instructions Die Taste drücken. Die Taste drücken. Das Gerät zeigt das obige Symbol an. Die Taste drücken. Appuyer sur la touche . La machine affi che le symbole ci-dessus. Appuyer sur la Appuyer sur la touche touche Das Gerät weist darauf hin, dass die Karaff e eingesetzt und Das Gerät zeigt das obige Symbol an.
- Seite 76 Hinweise www.philips.com/support Instructions Die Milchkaraff e spülen und mit frischem Wasser bis zum Die Milchkaraff e in das Gerät einsetzen. Den Auslauf der Karaff e nach rechts bis zum Sym- Füllstand MAX füllen. herausziehen. Einen Behälter unter den Auslauf stellen, um den Spülzyklus zu starten.
- Seite 77 Hinweise www.philips.com/support Instructions Das Gerät weist darauf hin, dass die Karaff e eingesetzt und Bei Beendigung der Wasserausgabe die Vorgänge ab Punkt 13 bis Punkt 17 wiederholen, bis der Auslauf der Karaff e herausgezogen werden muss. die Karaff e vollständig leer ist.
-
Seite 78: Hinweissignale (Gelb)
Hinweise www.philips.com/support Instructions HINWEISSIGNALE (GELB) SIGNAUX D'AVERTISSEMENT (JAUNE) Gerät in Aufheizphase. Das Gerät führt einen Spül- Der Wasserfi lter “INTENZA+” muss ausgetauscht werden. Brühgruppe in der Rückstel- zyklus aus. Warten bis die lungsphase nach einem Ge- Phase beendet ist. rätereset. -
Seite 79: Alarmsignale (Rot)
La machine ne fonctionne pas. Éteindre la machine. La rallumer après 30 secondes. Répéter la procédure 2 ou 3 fois. Si la machine ne démarre pas, contacter le centre d’assistance Philips de votre Pays (numéros de contact indiqués dans la notice de la garantie) et communiquer le code d'erreur indiqué sur l'affi cheur. -
Seite 80: Pflege-Produkte
Besuchen Sie den Online-Shop Philips für die Verfügbarkeit Produktnr.: CA6706 und die Kaufmöglichkeiten in Ihrem Land. Kit d'entretien Visitez le magasin en ligne Philips pour vérifi er la disponi- n° produit : CA6706 bilité et les opportunités d'achat dans votre Pays. - Seite 84 Il produttore si riserva il diritto d`apportare qualsiasi modifica senza preavviso. The manufacturer reserves the right to change the features of the product without prior notice. Der Hersteller behält sich das Recht vor, Änderungen am Produkt ohne Vorankündigung vorzunehmen. Le producteur se réserve le droit d‘apporter des modifi cations au produit sans aucun préavis.