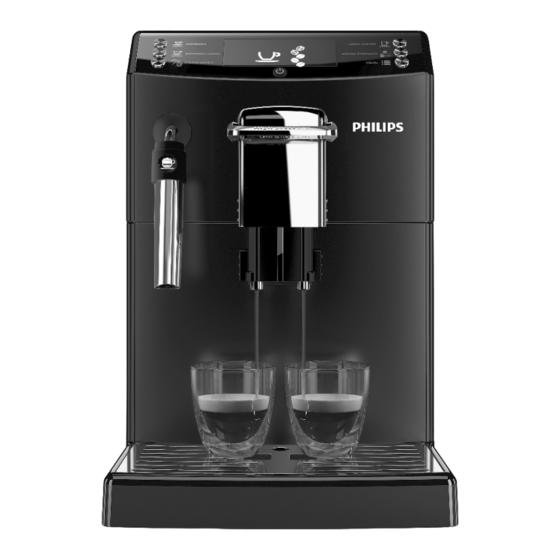
Philips HD8841 Kurzanleitung
Super automatic espresso machine 4000 series
Vorschau ausblenden
Andere Handbücher für HD8841:
- Bedienungsanleitung (72 Seiten) ,
- Schnellinstallationsanleitung (72 Seiten) ,
- Schnellanleitung (72 Seiten)

Verwandte Anleitungen für Philips HD8841


Inhaltszusammenfassung für Philips HD8841
- Seite 1 Super automatic espresso machine 4000 series HD8841 Quick Instruction Guide HD8842 READ THIS GUIDE CAREFULLY BEFORE USING THE MACHINE. FOR COMPLETE INSTRUCTIONS DOWNLOAD USER MANUAL FROM WWW.PHILIPS.COM/SUPPORT Register your product and get support at www.philips.com/welcome...
- Seite 2 Consultate il sito www.philips.com/support per scaricare l’ultima versione del manuale d’uso (fare riferimento al numero di modello indicato sulla copertina). Herzlich Willkommen in der Welt von Philips! Registrieren Sie sich auf der Internetseite WWW. PHILIPS.COM/WELCOME und erhalten Sie Hinweise und Aktualisierungen zur Wartung. In die- sem Heft werden die Hinweise für den korrekten Betrieb und das Entkalken des Geräts in Kurzform darge-...
- Seite 3 à manutenção. Neste livrete estão indicadas, de forma reduzi- da, as instruções para o funcionamento correcto e para a descalcifi cação da máquina. Consulte o site www.philips.com/support para descarregar a última versão do manual de utili- zação (consulte o número do modelo indicado na capa).
-
Seite 4: Inhaltsverzeichnis
EN - CONTENT SAFETY INSTRUCTIONS ......................................6 FIRST INSTALLATION......................................10 MANUAL RINSE CYCLE......................................11 COFFEESWITCH -“ESPRESSO” OR “COFFEE” SELECTION LEVER ..........................12 FIRST ESPRESSO / ESPRESSO LUNGO ..................................13 MY FAVORITE ESPRESSO ....................................13 PRIMO CAFFÈ LUNGO (CLASSIC COFFEE) ................................14 IL MIO CAFFE’ LUNGO (CLASSIC COFFEE) IDEALE” ..............................14 ADJUSTING THE CERAMIC COFFEE GRINDER ...............................15 FROTHING MILK ........................................16 HOT WATER........................................17... - Seite 5 FR - TABLE DES MATIÈRES CONSIGNES DE SÉCURITÉ ....................................30 PREMIÈRE INSTALLATION ....................................32 CYCLE DE RINÇAGE MANUEL ....................................33 LEVIER DE SÉLECTION « ESPRESSO » OU « COFFEE » ............................34 PREMIER CAFÉ EXPRESSO / EXPRESSO ALLONGÉ ..............................35 MON CAFÉ EXPRESSO IDÉAL ....................................35 PREMIER CAFÉ SIMPLE (CLASSIC COFFEE) ................................36 MON CAFÉ...
-
Seite 6: Safety Instructions
Only have repairs ual for future reference. carried out by a service centre authorised by Philips to avoid any hazard. Warnings • The machine should not be used by children • Connect the machine to a wall socket with younger than 8 years old. - Seite 7 Safety instructions www.philips.com/support Norme di sicurezza Cautions time. The water can get contaminated. Use fresh water every time you use the machine. • The machine is for household use only. It is not intended for use in environments such Electromagnetic Fields...
-
Seite 8: Norme Di Sicurezza
Tutte Attenzione le riparazioni devono essere eseguite da un • Collegare la macchina a una presa a muro centro assistenza autorizzato da Philips per adeguata, la cui tensione principale corri- evitare qualsiasi pericolo. sponda ai dati tecnici dell’apparecchio. -
Seite 9: Campi Elettromagnetici
Safety instructions www.philips.com/support Norme di sicurezza • I bambini devono essere sorvegliati per assi- riparazione non è coperta da garanzia! curarsi che non giochino con l’apparecchio. • Non tenere la macchina a una temperatura • Non inserire le dita o altri oggetti nel maci- inferiore a 0 ... -
Seite 10: First Installation
Instructions www.philips.com/support Istruzioni FIRST INSTALLATION PRIMA INSTALLAZIONE Open the water tank lid. Remove the water tank by Rinse and fi ll the water tank with fresh water up to the MAX Open the coff ee bean hop- using the handle. -
Seite 11: Manual Rinse Cycle
Instructions www.philips.com/support Istruzioni Place a container under the When the process is complete the machine starts warming Press the button to start priming the circuit. Classic Milk Frother. Posizionare un contenitore Al termine del processo la macchina inizia la fase di riscal-... -
Seite 12: Coffeeswitch -"Espresso" Or "Coffee" Selection Lever
Instructions www.philips.com/support Istruzioni When the dispensing has Repeat steps 1-4 twice, thereafter continue with step 6. Place a container under the Classic Milk Frother. fi nished, empty the con- tainer. Al termine dell'erogazione, Ripetere le operazioni dal punto 1 al punto 4 per due volte, Posizionare un contenitore sotto il Montalatte Classico. -
Seite 13: First Espresso / Espresso Lungo
Instructions www.philips.com/support Istruzioni FIRST ESPRESSO / ESPRESSO LUNGO PRIMO ESPRESSO / ESPRESSO LUNGO ESPRESSO Adjust the coff ee dispensing Make sure that the lever is in the “ESPRESSO” position. Press the button to brew an espresso, or... spout. Regolare l’ e rogatore caff è. -
Seite 14: Primo Caffè Lungo (Classic Coffee)
Instructions www.philips.com/support Istruzioni Press the button to exit programming. In this case, the product length will not be saved. E’ possibile uscire dalla programmazione pre- The quantity can be saved Wait until the desired quan- ... press to stop the process. Saved! mendo il tasto . -
Seite 15: Adjusting The Ceramic Coffee Grinder
Instructions www.philips.com/support Istruzioni Press the button to exit programming. In this case, the product length will not be saved. E’ possibile uscire dalla programmazione pre- The quantity can be saved Wait until the desired quan- ... press to stop the process. Saved! mendo il tasto . -
Seite 16: Frothing Milk
Instructions www.philips.com/support Istruzioni FROTHING MILK COME EMULSIONARE IL LATTE Danger of scalding! Dis- pensing may be preceded by small jets of hot water. Use the appropriate pro- tective handle only. Pericolo di scottature! All’inizio dell’ e rogazione possono verifi carsi brevi spruzzi di acqua calda. -
Seite 17: Hot Water
Instructions www.philips.com/support Istruzioni HOT WATER ACQUA CALDA Danger of scalding! Dis- pensing may be preceded by small jets of hot water. Use the appropriate pro- tective handle only. Pericolo di scottature! All’inizio dell’ e rogazione possono verifi carsi brevi Place a container under the Press the button. -
Seite 18: Descaling
Instructions www.philips.com/support Istruzioni DESCALING - 30 MIN. DECALCIFICAZIONE - 30 MIN. When the “START CALC CLEAN” symbol is displayed, you need to descale the machine. The descaling cycle takes approx. 30 minutes. Not doing this will ultimately make your machine stop working properly. In this case repair is NOT covered by your warranty. - Seite 19 Instructions www.philips.com/support Istruzioni Empty the drip tray and the Remove the Classic Milk Frother from the hot water/steam Press the button. coff ee grounds drawer. wand. Vuotare la vasca raccogli- Sfi lare il Montalatte Classico dal tubo vapore/acqua calda. Premere il tasto gocce ed il cassetto racco- glifondi.
- Seite 20 Instructions www.philips.com/support Istruzioni Place a large container (1,5 l) under both the steam/hot wa- The descaling solution will Press the button to start the descaling cycle. ter wand and the dispensing spout. be dispensed at intervals (this takes about 20 min).
-
Seite 21: Interruption Of The Descaling Cycle
Instructions www.philips.com/support Istruzioni The machine warms up and performs an automatic rinse cy- Remove the small white water fi lter and place back the “INTENZA+” water fi lter into the cle. Empty the drip tray and place it back. water tank if it was installed. Put back the Classic Milk Frother. -
Seite 22: Brew Group Cleaning
Instructions www.philips.com/support Istruzioni BREW GROUP CLEANING PULIZIA DEL GRUPPO CAFFÈ Open the service door. To remove the brew group, press the «PUSH» button and pull Turn off the machine by pressing the button. Wait until it by the handle. button fl ashes and unplug the power cord. -
Seite 23: Classic Milk Frother Cleaning
Instructions www.philips.com/support Istruzioni Insert the coff ee residues drawer in its seat and ensure that it is correctly in place. Insert the brew group in its seat again until it locks into place If the coff ee residues drawer is not correctly positioned, the brew group may not without pressing the “PUSH”... -
Seite 24: Warning Signals (Yellow Colour)
Instructions www.philips.com/support Istruzioni WARNING SIGNALS (YELLOW COLOUR) SEGNALI DI AVVISO (GIALLO) The machine is warming up. The machine is performing You need to replace the “INTENZA+” fi lter. The brew group is being reset the rinse cycle. Wait until this due to machine reset. -
Seite 25: Warning Signals (Red Colour)
The machine is out of order. Turn off the machine. After 30 seconds, turn it on again. Repeat the procedure 2 or 3 times. If the machine does not start, contact the Philips hotline in your country (contact details in the warranty booklet) and quote the error code shown on the display. -
Seite 26: Maintenance Products
CA6700 product number: HD5061 availability and purchasing oppor- tunities in your country. Soluzione decalcifi cante Visita il negozio online Philips per Grasso numero prodotto: CA6700 verifi care la disponibilità e le op- numero prodotto: HD5061 portunità di acquisto nel tuo Paese. -
Seite 28: Sicherheitshinweise
• Das Gerät oder das Netzkabel dürfen keines- den. Bewahren Sie diese Bedienungsanleitung falls modifi ziert werden. Alle Reparaturen für eine spätere Verwendung auf. müssen durch ein von Philips autorisiertes Achtung Kundendienstzentrum ausgeführt werden, um jede Gefahr zu vermeiden. • Schließen Sie das Gerät an einer geeigneten •... -
Seite 29: Geschäften, Büros, Landwirtschaftlichen
Sicherheitshinweise www.philips.com/support Consignes de sécurité dem Gerät spielen. den. Diese Vorgänge nicht auszuführen, • Führen Sie weder Finger noch andere Ge- führt dazu, dass das Gerät nicht mehr stö- genstände in das Mahlwerk ein. rungsfrei funktioniert. Eine entsprechende Reparatur ist nicht durch die Garantie ge-... -
Seite 30: Consignes De Sécurité
à venir. machine ou le câble d'alimentation. Toutes Attention les réparations doivent être eff ectuées par un centre d’assistance agréé par Philips pour • Brancher la machine à une prise murale ap- éviter tout danger. propriée, dont la tension principale corres- •... -
Seite 31: Avertissements
Sicherheitshinweise www.philips.com/support Consignes de sécurité risques potentiels, ou bien qu'elles soient machine. Si cette opération n'est pas eff ec- sous la supervision d'une personne adulte. tuée, l'appareil cesse de fonctionner correc- • Il faut s'assurer que les enfants n'aient ja- tement. -
Seite 32: Erste Inbetriebnahme
Hinweise www.philips.com/support Instructions ERSTE INBETRIEBNAHME PREMIÈRE INSTALLATION Den Deckel des Wassertanks Den Wassertank am Griff Den Wassertank ausspülen und bis zum Füllstand MAX mit Den Deckel des Kaff eeboh- anheben. entnehmen. frischem Wasser füllen. nenbehälters anheben. Soulever le couvercle du Retirer le réservoir à... -
Seite 33: Manueller Spülzyklus
Hinweise www.philips.com/support Instructions Einen Behälter unter den Nach Beendigung des Vorgangs beginnt das Gerät die Auf- Die Taste drücken, um die Entlüftung des Systems zu klassischen Milchaufschäu- heizphase. starten. mer stellen. Positionner un récipient À la fi n du processus, la machine démarre la phase de Appuyer sur la touche pour démarrer le cycle d’amor-... -
Seite 34: Coffeeswitch - Wahlhebel "Espresso" Oder "Kaffee
Hinweise www.philips.com/support Instructions Nach der Ausgabe den Be- Die Vorgänge von Punkt 1 bis Punkt 4 insgesamt zwei Mal Einen Behälter unter den klassischen Milchaufschäumer hälter leeren. wiederholen. Danach zu Punkt 6 übergehen. stellen. À la fi n de la distribution, Répéter deux fois les opérations du point 1 au point 4 ;... -
Seite 35: Erster Espresso / Grosser Espresso
Hinweise www.philips.com/support Instructions ERSTER ESPRESSO / GROSSER ESPRESSO PREMIER CAFÉ EXPRESSO / EXPRESSO ALLONGÉ ESPRESSO Den Kaff eeauslauf einstel- Überprüfen, ob sich der Hebel in der Position “ESPRESSO” Die Taste für die Ausgabe eines Espresso drücken oder... len. befi ndet. Régler la buse de distribu- S'assurer que le levier est sur la position « ESPRESSO ». -
Seite 36: Erster Klassischer Kaffee (Classic Coffee)
Hinweise www.philips.com/support Instructions Programmierung kann verlassen werden, indem die Taste drückt wird. Die Produkt- menge wird in diesem Fall nicht gespeichert. Il est possible d'arrêter Das Produkt kann ab dem Abwarten, bis die ge- ...die Taste drücken, um den Vorgang abzubrechen. Ge-... -
Seite 37: Einstellung Keramikmahlwerk
Hinweise www.philips.com/support Instructions Programmierung kann verlassen werden, indem die Taste drückt wird. Die Produkt- menge wird in diesem Fall nicht gespeichert. Il est possible d'arrêter Das Produkt kann ab dem Abwarten, bis die ge- ...die Taste drücken, um den Vorgang abzubrechen. Ge-... -
Seite 38: Milch Aufschäumen
Hinweise www.philips.com/support Instructions MILCH AUFSCHÄUMEN COMMENT ÉMULSIONNER LE LAIT Verbrennungsgefahr! Beim Starten der Ausga- be können heiße Wasser- spritzer austreten. Ausschließlich den speziel- len Schutzgriff benutzen. Danger de brûlures ! Il peut y avoir quelques éclaboussures d’ e au chaude au début de la Einen Behälter zu 1/3 mit... -
Seite 39: Heisswasser
Hinweise www.philips.com/support Instructions HEISSWASSER EAU CHAUDE Verbrennungsgefahr! Beim Starten der Ausga- be können heiße Wasser- spritzer austreten. Ausschließlich den spezi- ellen Schutzgriff benut- zen. Danger de brûlures ! Il peut y avoir quelques éclaboussures d’ e au Einen Behälter unter den Die Taste drücken. -
Seite 40: Entkalken
Hinweise www.philips.com/support Instructions ENTKALKEN - 30 MIN. DÉTARTRAGE - 30 MIN. Wird das Symbol “START CALC CLEAN” angezeigt, so muss das Entkalken vorgenommen werden. Der Entkalkungszyklus dauert ca. 30 Minuten. Diesen Vorgang nicht auszuführen, führt dazu, dass das Gerät nicht mehr ordnungsgemäß funktioniert. - Seite 41 Hinweise www.philips.com/support Instructions Die Abtropfschale und den Den klassischen Milchaufschäumer von der Dampf-/Heiß- Die Taste drücken. Kaff eesatzbehälter leeren. wasserdüse abziehen. Vider le bac d'égouttement Enlever le Mousseur à lait Classique de la buse de va- Appuyer sur la touche et le tiroir à...
- Seite 42 Hinweise www.philips.com/support Instructions Einen großen Behälter (1,5 l) unter die Dampf-/Heißwasser- drücken, um den Entkalkungszyklus zu starten. Das Entkalkungsmittel wird Die Taste düse und unter den Auslauf stellen. in regelmäßigen Intervallen ausgegeben (Dauer: ca. 20 Min.). Placer un récipient suffi samment grand (1,5 l) sous la buse La solution détartrante...
-
Seite 43: Unterbrechung Des Entkalkungszyklus
Hinweise www.philips.com/support Instructions Die Maschine führt das Aufheizen und die automatische Den kleinen weißen Filter entfernen, den Wasserfi lter “INTENZA+” (soweit vorhanden) wie- Spülung aus. Die Abtropfschale leeren und wieder einsetzen. der im Wassertank installieren. Den klassischen Milchaufschäumer wieder einsetzen. -
Seite 44: Reinigung Der Brühgruppe
Hinweise www.philips.com/support Instructions REINIGUNG DER BRÜHGRUPPE NETTOYAGE DU GROUPE DE DISTRIBUTION Die Servicetür öff nen. Die Taste «PUSH» drücken und am Handgriff ziehen, um die Das Gerät durch Druck der Taste ausschalten. Abwar- Brühgruppe herauszunehmen. ten, bis die Taste blinkt und den Stecker des Netzkabels Waagrecht herausziehen, ohne diese zu drehen. -
Seite 45: Reinigung Des Klassischen Milchaufschäumers
Hinweise www.philips.com/support Instructions Den Kaff eeauff angbehälter in seine Aufnahme einsetzen und sorgfältig überprüfen, ob er Die Brühgruppe wieder in die Aufnahme einsetzen, bis sie korrekt positioniert wurde. einrastet. Dabei nicht die Taste “PUSH” drücken. Wird der Kaff eeauff angbehälter nicht korrekt positioniert, kann die Brühgruppe eventuell nicht in das Gerät eingesetzt werden. -
Seite 46: Hinweissignale (Gelb)
Hinweise www.philips.com/support Instructions HINWEISSIGNALE (GELB) SIGNAUX D'AVERTISSEMENT (JAUNE) Gerät in Aufheizphase. Das Gerät führt einen Spül- Der Wasserfi lter “INTENZA+” muss ausgetauscht werden. Brühgruppe in der Rückstel- zyklus aus. Warten bis die lungsphase nach einem Ge- Phase beendet ist. rätereset. -
Seite 47: Alarmsignale (Rot)
La machine ne fonctionne pas. Éteindre la machine. La rallumer après 30 secondes. Répéter la procédure 2 ou 3 fois. Si la machine ne démarre pas, contacter le centre d’assistance Philips de votre Pays (numéros de contact indiqués dans la notice de la garantie) et communiquer le code d'erreur indiqué sur l'affi cheur. -
Seite 48: Pflege-Produkte
Produktnummer: CA6700 Produktnummer: HD5061 lips für die Verfügbarkeit und die Kaufmöglichkeiten in Ihrem Land. Solution détartrante Graisse Visitez le magasin en ligne Philips numéro produit : CA6700 numéro produit : HD5061 pour vérifi er la disponibilité et les opportunités d'achat dans votre Pays. -
Seite 50: Normas De Seguridad
Conservar este manual para posi- rán ser efectuadas por un centro de asisten- bles referencias en el futuro. cia técnica autorizado por Philips. • La máquina no está destinada a ser utilizada Atención por niños de edad inferior a 8 años. - Seite 51 Normas de seguridad www.philips.com/support Normas de segurança Advertencias no va a utilizarse durante un largo período. El agua podría sufrir contaminaciones. Uti- • La máquina está exclusivamente destinada lizar agua fresca cada vez que se utilice la al uso doméstico y no está indicada para ser máquina.
-
Seite 52: Normas De Segurança
Todas as reparações evitar danos acidentais a pessoas ou coisas, devem ser realizadas por um centro de as- devido a uma utilização incorrecta da máquina. sistência autorizado pela Philips, para evitar Guarde este manual para eventuais consultas qualquer perigo. futuras. - Seite 53 Normas de seguridad www.philips.com/support Normas de segurança Advertências água poderá sofrer contaminações. Sempre que utilizar a máquina, use água fresca. • A máquina destina-se apenas à utilização doméstica e não está indicada para uso em Campos electromagnéticos ambientes como cafés ou cozinhas de lojas, escritórios, fábricas ou outros ambientes de...
-
Seite 54: Primera Instalación
Instrucciones www.philips.com/support Instruções PRIMERA INSTALACIÓN PRIMEIRA INSTALAÇÃO Levantar la tapa del depósito Extraer el depósito de agua Enjuagar y llenar el depósito de agua con agua fresca hasta Levantar la tapa del conte- de agua. por la empuñadura. el nivel MAX. -
Seite 55: Ciclo De Enjuague Manual
Instrucciones www.philips.com/support Instruções Colocar un recipiente bajo el Una vez terminado el proceso, la máquina da inicio a la fase Pulsar el botón para poner en marcha el ciclo de carga Montador de leche Clásico. de calentamiento. del circuito. Coloque um recipiente de- No fi nal do processo, a máquina inicia a fase de aqueci-... -
Seite 56: Palanca De Selección "Espresso" O "Coffee
Instrucciones www.philips.com/support Instruções Una vez fi nalizado el sumi- Repetir dos veces las operaciones del punto 1 al 4; a conti- Colocar un recipiente bajo el Montador de leche Clásico. nistro, vaciar el recipiente. nuación, pasar al punto 6. No fi nal da distribuição, es- Repita as operações do ponto 1 ao ponto 4 duas vezes con-... -
Seite 57: Primer Café Exprés / Café Exprés Largo
Instrucciones www.philips.com/support Instruções PRIMER CAFÉ EXPRÉS / CAFÉ EXPRÉS LARGO PRIMEIRO EXPRESSO / EXPRESSO LONGO ESPRESSO Ajustar la salida de café. Comprobar que la palanca esté posicionada en “ESPRE- Pulsar el botón para suministrar un café exprés o... SSO”. Ajuste o distribuidor de Certifi que-se de que a alavanca está... -
Seite 58: Primer Café Largo (Classic Coffee)
Instrucciones www.philips.com/support Instruções Es posible salir de la pro- gramación pulsando el botón . En este caso la cantidad del producto no se será memorizada. É possível sair da distri- El producto puede ser me- Esperar a que se alcance la ...pulsar... -
Seite 59: Regulación Del Molinillo De Café De Cerámica
Instrucciones www.philips.com/support Instruções Es posible salir de la pro- gramación pulsando el botón . En este caso la cantidad del producto no se será memorizada. É possível sair da distri- El producto puede ser me- Esperar a que se alcance la ...pulsar... -
Seite 60: Cómo Espumar Leche
Instrucciones www.philips.com/support Instruções CÓMO ESPUMAR LECHE COMO EMULSIONAR O LEITE ¡Riesgo de quemaduras! Al principio del suminis- tro se pueden producir pequeñas salpicaduras de agua caliente. Utilizar sólo la empuñadura de protección específi ca. Perigo de queimaduras! Durante o início da dis- tribuição podem verifi -... -
Seite 61: Agua Caliente
Instrucciones www.philips.com/support Instruções AGUA CALIENTE ÁGUA QUENTE ¡Riesgo de quemaduras! Al principio del suminis- tro se pueden producir pequeñas salpicaduras de agua caliente. Utilizar sólo la empuñadura de protección específi ca. Perigo de queimaduras! Durante o início da dis- tribuição podem verifi - Colocar un recipiente bajo el Pulsar el botón... -
Seite 62: Descalcificación
Instrucciones www.philips.com/support Instruções DESCALCIFICACIÓN - 30 MIN. DESCALCIFICAÇÃO - 30 MIN. El símbolo “START CALC CLEAN” visualizado indica que es necesario proceder a la descalcifi cación. El ciclo de descalcifi cación requiere unos 30 minutos. Si esta operación no se lleva a cabo, la máquina dejará de funcionar correctamente, en cuyo caso la repara- ción NO está... - Seite 63 Instrucciones www.philips.com/support Instruções Vaciar la bandeja de goteo Sacar el Montador de leche Clásico del tubo de vapor/agua Pulsar el botón y el cajón de recogida de caliente. posos. Esvazie a bandeja de limpe- Retire o Batedor de leite clássico do tubo de vapor/água...
- Seite 64 Instrucciones www.philips.com/support Instruções Colocar un recipiente grande (1,5 l) bajo el tubo de vapor/ La solución descalcifi cante Pulsar el botón para dar inicio al ciclo de descalcifi ca- agua caliente y bajo la salida de café. será suministrada a interva- ción.
-
Seite 65: Interrupción Del Ciclo De Descalcificación
Instrucciones www.philips.com/support Instruções La máquina realiza el calentamiento y el enjuague auto- Quitar el fi ltro blanco y volver a colocar el fi ltro de agua “INTENZA+” (en su caso) en el depó- mático. Vaciar la bandeja de goteo y volver a colocarla en sito de agua. -
Seite 66: Limpieza Del Grupo De Café
Instrucciones www.philips.com/support Instruções LIMPIEZA DEL GRUPO DE CAFÉ LIMPEZA DO GRUPO CAFÉ Abrir la puerta de servicio. Para extraer el grupo de café, presionar el pulsador “PUSH” y Apagar la máquina pulsando el botón . Esperar a que el tirar al mismo tiempo de la empuñadura. -
Seite 67: Limpieza Del Montador De Leche Clásico
Instrucciones www.philips.com/support Instruções Introducir el cajón de recogida de café en su alojamiento y comprobar que quede bien po- Volver a introducir el grupo de café en su alojamiento hasta sicionado. que quede enganchado sin presionar el pulsador “PUSH”. Si el cajón de recogida de café se posiciona de forma incorrecta, el grupo de café... -
Seite 68: Señales De Aviso (Amarillo)
Instrucciones www.philips.com/support Instruções SEÑALES DE AVISO (AMARILLO) SINAIS DE AVISO (AMARELO) Máquina en fase de calenta- La máquina está realizando Es necesario sustituir el fi ltro de agua “INTENZA+”. Grupo de café en fase de res- miento. un ciclo de enjuague. Esperar tablecimiento tras reinicio de a que termine. -
Seite 69: Señales De Alarma (Rojo)
La máquina no funciona. Apagar la máquina. Volver a encenderla tras 30 segundos. Repetir el procedimiento 2 o 3 veces. Si la máquina no se pone en marcha, contactar con la línea de atención al cliente de Philips del país (números en el libro de garantía) y comunicar el código de error indicado en la pantalla. -
Seite 70: Productos Para El Mantenimiento
CA6702 número do produto: CA6706 número do produto: CA6704 Solución descalcifi cante Grasa Visite la tienda en línea de Philips número de producto: CA6700 número de producto: HD5061 para comprobar la disponibilidad y las ofertas de compra en su país. - Seite 72 Il produttore si riserva il diritto d`apportare qualsiasi modifica senza preavviso. The manufacturer reserves the right to change the features of the product without prior notice. Der Hersteller behält sich das Recht vor, Änderungen am Produkt ohne Vorankündigung vorzunehmen. Le producteur se réserve le droit d‘apporter des modifi cations au produit sans aucun préavis. El fabricante se reserva el derecho a realizar modifi...