FlammEx K-SD3AC Bedienungsanleitung
RAUCHMELDER
K-SD3AC
Art.-Nr.:RA43100004711
D
RAUCHMELDER
1 HINWEISE
Das Produkt ist nur für den sachgemäßen Gebrauch (wie in der Bedienungs anleitung
beschrieben) bestimmt. Änderungen, Modifikationen oder Lackierungen dürfen nicht
vorgenommen werden, da ansonsten jeglicher Gewährleistungs anspruch entfällt.
ACHTUNG: Arbeiten am 230 V Netz dürfen nur von autorisiertem Fachpersonal unter
Berücksichtigung der landesüblichen Installationsvorschriften/-normen ausgeführt werden.
Vor der Montage des Produktes ist die Netzspannung freizuschalten.
2 BESCHREIBUNG
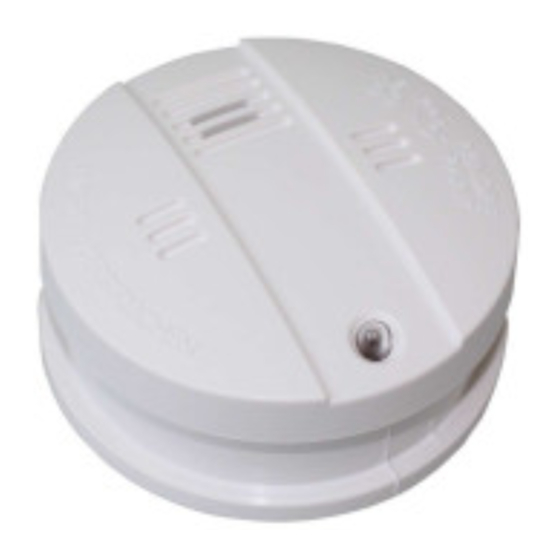
Der FlammEx profi K-SD3AC ist ein fotoelektronischer Rauchmelder zur frühzeitigen und
zuverlässigen Branderkennung in privaten Wohnhäusern, Wohnungen und Räumen mit
wohnungsähnlicher Nutzung.
Alarm wird ausgelöst sobald Rauch in das Innere des Gerätes eindringt. Flammen werden
vom Gerät nicht wahrgenommen. Ein Großteil der Brände findet nachts statt. Da der
Mensch während des Schlafes nichts riecht, jedoch bei Geräuschen erwacht, schützen
Rauchmelder wirksam und frühzeitig vor der drohenden Gefahr.
Einsatzmöglichkeiten:
• Einzelbetrieb
• Vernetzung per Draht mit insgesamt bis zu 30 FlammEx profi Meldern
Für eine optimale Absicherung von Haushalten sollten Rauchmelder in allen Räumen,
Fluren, Keller- und Speicherräumen installiert werden. Eine Grundabsicherung wird
schon durch den Einsatz von FlammEx profi Rauchmeldern in allen Schlafräumen,
Kinderzimmern und auf den Fluren sämtlicher Etagen erreicht (Abb. 1 + 2).
3 INSTALLATION/MONTAGE/ANSCHLUSS
• Beachten Sie die national gültigen Montagerichtlinien und Anwendungsnormen für
Rauchwarnmelder (in Deutschland: DIN 14676)
• Montieren Sie zuerst eine FlammEx profi K Aufputz-Dose (Zubehör) möglichst mittig an
der Decke (Abb. 3.1) oder verwenden Sie eine Unterputz-Dose (Abb. 3.2). Sollten Sie
ein FlammEx profi K Systemrelais (Zubehör) (Abb. 3.3) benötigen, können Sie dieses in
der Aufputzdose oder in der Unterputz-Dose plazieren.
• Schützen Sie die Geräte vor Bohrstaub.
• Sie können insgesamt bis zu 30 Rauchmelder per Draht miteinander vernetzen.
• Verdrahtung/Adernbelegung (Abb. 4)
1 blau
= N
Nullleiter / – Schaltrelais / – Vernetzung
= I
2 orange
+ Vernetzung
3 rot
= R
+ Schaltrelais
4 braun
= L
Phase 230 V ~
• Achten Sie auf den richtigen Anschluss (Polung), sonst erfolgt im Alarmfall keine
Weitergabe des Alarms an alle vernetzten Rauchmelder (Abb. 4).
Bei Missachtung können alle Melder zerstört werden!
• Die Gesamtleitungslänge darf 300 m nicht überschreiten.
Verwenden Sie Leitungen vom Typ NYM 1,5 mm
.
2
• Montieren Sie gegebenenfalls die Montageplatte (Abb. 3.4) des Rauchmelders
auf der Unterputz-Dose.
• Dann bitte die Batterie anschließen und in das Gerät einsetzen (Abb. 5.1).
Ist die Batterie richtig angeschlossen, blinkt die rote LED ca. alle 45 Sek. kurz auf
(Abb. 7.1). Der Rauchmelder besitzt eine Montagesperre (Abb. 5.2), die verhindert,
dass der Melder ohne eingelegte Batterie montiert werden kann.
• Stecken Sie das Anschlusskabel auf den Melder (Abb. 6).
• Setzen Sie den Rauchmelder auf die Aufputz-Dose (Abb. 3.1) bzw. auf die
Montageplatte (Abb. 3.4) und drehen ihn bis er einrastet (Abb. 7.2).
ACHTUNG: Nur im spannungslosen Zustand das Anschlusskabel aufstecken oder entfernen.
Bei Missachtung können alle Melder zerstört werden!
• Ist der Rauch melder montiert und liegt Netzspannung an, leuchtet die grüne LED
(Abb. 6.1) permanent.
• Führen Sie einen Funktionstest durch (siehe 5, Test/Wartung). Bei technischen
Problemen wenden Sie sich bitte an den Hersteller oder Distributer in Ihrem Land.
HINWEIS:
• Melder mittig an der Decke montieren
• Nicht montieren in Badezimmern (hohe Luftfeuchtigkeit), Garagen (Abgase), in
stark zugluftgefährdeter Umgebung und in Spitzecken auf dem Dachboden (Abb. 2)
• Bei einer Dachneigung < 45° kann der Melder an der Dachschrägen
montiert werden.
• 50 cm Abstand halten von Wänden, Deckenbalken (Unterzügen) und Leuchten
• Räume über 60 m
und Flure länger als 10 m benötigen mehrere Melder
2
• 4 m Abstand halten von offenen Kaminen und Herden etc.
4 FUNKTIONSTABELLE
Alarmton/Piezo
Erläuterung
Rote LED
Pulsierender Alarmton
Parallel blitzend zum Alarmton
Einzelauslösung des Melders
bei Rauchalarm
Pulsierender Alarmton
Keine LED-Anzeige
Auslösung durch einen
vernetzten Melder.
Der auslösende Melder
kann durch die parallel zum
Alarmton blitzende LED
identifiziert werden.
Kurzer Piepton
Parallel blitzend
Signalisiert einen
ca. alle 45 Sekunden
fälligen Batteriewechsel
Blitzend im
Kein Ton
Betriebsbereitschaft
45 Sekunden Abstand
Kurzer Piepton
Abwechselnd zum Pieton
Signalisiert Verschmutzung und/
oder Defekt
ca. alle 45 Sekunden
blitzend
Melder austauschen
5 TEST/WARTUNG
Mit dem LED-Testknopf (Abb. 7.1) wird der Melder komplett geprüft: Funktionsprüfung der
Batterie, elektronischer Rauchkammertest und eine Prüfung der Auswerteelektronik.
Ein Test sollte mindestens 1x jährlich und nach jedem Batterietausch durchgeführt werden.
Drücken Sie den Testknopf solange (bis zu 20 Sek.) bis ein lauter und pulsierender
Alarmton ertönt (ca. 85 dB). Das Gerät sollte bei Bedarf etwa 1 x jährlich trocken
abgewischt und von außen mit dem Staubsauger abgesaugt werden. Der Melder führt
einen automatischen Selbsttest durch. Dabei werden sowohl die Auswerteelektronik als
auch die Spannung und der Innenwiderstand der Batterie ca. alle 45 Sek. überprüft.
Diese Prüfung wird mit einem kurzen Blinkzeichen der roten LED (Abb. 7.1) signalisiert.
Sollte die Betriebsspannung der 9 V - Batterie unter einen bestimmten Wert fallen,
signalisiert der Melder durch einen Piepton (ca. alle 45 Sek.), ca. 30 Tage im Voraus,
einen notwendigen Batteriewechsel (siehe 3. Installation/Montage/Anschluss).
Bei Verschmutzung und/oder Defekt der Sende- und/oder Empfangsdiode in der
Rauchkammer blinkt die rote LED bis zu ca. alle 45 Sek. abwechselnd zum Piepton.
In diesem Fall muss der Melder ausgetauscht werden.
HINWEIS:
• Bitte entsorgen Sie die Batterie über den Handel,
der sie einem Recycling-Verfahren zuführt
• Bei Vernetzung: Das Batterieleersignal eines Melders wird nicht über die
Vernetzung an die anderen vernetzten Melder weitergegeben, es wird nur
am Gerät selbst angezeigt.
• Bei Vernetzung: Bei Prüfung des Melders über die Testfunktion am LED-Testknopf
(Abb. 7.1) werden automatisch alle vernetzten Melder mit angesteuert,
dass heißt genau wie im Alarmfall ertönt ein pulsierender Alarmton
(zeitbegrenzt) und am getesteten Melder blitzt parallel zum Alarmton die
rote LED (Abb. 7.1). Bei den anderen vernetzten Meldern ertönt nur ein
pulsierender Alarmton ohne LED-Anzeige.
• Sollte der Melder über längere Zeit einer zu großen Staubmenge oder z. B.
Wasserdampf ausgesetzt sein, kann dies zur Alarmauslösung führen.
RECYCLING-HINWEISE:
Dieses Gerät darf nicht mit dem unsortierten Hausmüll entsorgt werden. Besitzer von
Altgeräten sind gesetzlich dazu verpflichtet, dieses Gerät
fachgerecht zu entsorgen.
Informationen erhalten Sie von Ihrer Stadt- bzw. Gemeindeverwaltung.
6 RICHTIGES VERHALTEN IM BRANDFALL
Ruhe bewahren! Alarmieren Sie die Feuerwehr.
Folgende Hinweise sind für die Feuerwehr wichtig:
• Wie ist Ihr Name? (Name, Telefonnummer)
• Wo brennt es? (Adresse)
• Was ist passiert? (Ausmaß)
• Wie viele Verletzte gibt es?
• Warten Sie auf Rückfragen des Gesprächpartners.
Warnen Sie alle Mitbewohner.
Helfen Sie älteren, kranken und behinderten Personen.
Schließen Sie alle Fenster und Türen.
Benutzen Sie keinen Aufzug.
Sollten Sie Zweifel haben, ob es sich um einen echten Alarm oder um einen Fehlalarm
handelt, verhalten Sie sich so, als ob es wirklich brennt.
7 ZUBEHÖR
• FlammEx profi K AP-Dose
• FlammEx profi K Systemrelais
8 IEH-GARANTIE
IEH Produkte sind nach geltenden Vorschriften geprüft und mit größter Sorgfalt hergestellt.
Der Garantiegeber, die IEH Industrie Elektronik GmbH, (für Deutschland, Adresse siehe
unten) bzw. der entsprechenden IEH Distributor in Ihrem Land (die Adresse teilen wir
Ihnen gerne bei Bedarf mit) übernimmt für die Dauer von 3 Jahren ab Herstelldatum (oder
ab Kauf des Gerätes durch den ersten Endverbraucher) eine Garantie auf Herstellungs- /
Materialfehler der IEH Geräte.
Diese Garantie besteht unabhängig von Ihren gesetzlichen Rechten gegenüber dem
Verkäufer des Geräts.
Die Garantie bezieht sich nicht auf die natürliche Abnutzung, Veränderung/Störung
durch Umwelteinflüsse oder auf Transportschäden sowie nicht auf Schäden, die
infolge Nichtbeachtung der Bedienungsanleitung, der Wartungsanweisung und/oder
unsachgemäßer Installation sowie Verschmutzung entstanden sind. Mitgelieferte Batterien,
Leuchtmittel und Akkus sind von der Garantie ausgeschlossen. IEH haftet nicht für
indirekte-, Folge- sowie Vermögensschäden.
Die Garantie kann nur gewährt werden, wenn das unveränderte Gerät unverzüglich
nach Feststellung des Mangels mit Rechnung/Kassenbon sowie einer kurzen schriftlichen
Fehlerbeschreibung, ausreichend frankiert und verpackt an den Garantiegeber eingesandt
wird.
Bei berechtigtem Garantieanspruch wird der Garantiegeber nach eigener Wahl das
Gerät ausbessern oder austauschen. Weitergehende Ansprüche umfasst die Garantie
nicht, insbesondere haftet der Garantiegeber nicht für aus der Fehlerhaftigkeit des Geräts
entstehende Schäden.
Sollte der Garantieanspruch nicht gerechtfertigt sein (z.B. nach Ablauf der Garantiezeit,
oder bei Mängeln außerhalb des Garantieanspruchs), und das Gerät kann kostengünstig
repariert werden, erhalten Sie ein Angebot über die Reparaturkosten.
ABB. • FIG. 1
ABB. • FIG. 3
3.1
ABB. • FIG. 2
30 - 50 cm
6 m
> 30°
F
DÉTECTOR DE FUMÉE
1 REMARQUES
Ce produit ne doit être utilisé que dans les conditions prévues par le présent mode d'emploi.
Toute modification du produit (ajout, peinture, etc.) entraîne l'annulation de la garantie.
ATTENTION : seules des personnes autorisées et qualifiées pour effectuer une installation
conforme aux normes et prescriptions en vigueur peuvent intervenir sur le réseau 230 V.
Coupez le courant avant d'installer le produit.
2 DESCRIPTION
Le détecteur de fumée FlammEx profi K-SD3AC est un appareil fonctionnant selon un
principe photoélectronique.
Une alarme se déclenche dès que de la fumée s'introduit dans l'appareil (celui-ci ne
détecte pas les flammes). La plupart des incendies ont lieu la nuit. Or, notre odorat est
particulièrement limité lorsque nous dormons. En revanche, les bruits nous réveillent, c'est
pourquoi les détecteurs de fumée s'avèrent efficaces en cas de danger.
Applications possibles :
• Utilisation indépendante
• Mise en réseau filaire de 30 détecteurs FlammEx profi max.
Pour une protection optimale de votre foyer, placez des détecteurs de fumée dans toutes les
pièces, couloirs, caves et greniers. Pour une protection de base, installez des détecteurs de
fumée FlammEx profi dans votre chambre, dans celles de vos enfants et dans les couloirs de
tous les étages (fig. 1 + 2).
3 INSTALLATION/MONTAGE/RACCORDEMENT
• Reportez-vous aux instructions de montage et aux normes d'utilisation en vigueur pour
les détecteurs de fumée dans votre pays (ex. Allemagne : DIN 14676).
• Installez un boîtier apparent FlammEx profi K (accessoire), si possible au centre du
plafond (fig. 3.1), ou utilisez un boîtier encastré (fig. 3.2). Si un relais tout-ou-rien FlammEx
profi K (accessoire) (fig. 3.3) est nécessaire, placez-le dans le boîtier encastré.
• Protégez les appareils de la poussière dégagée lors du perçage.
• Vous pouvez établir un réseau filaire comportant jusqu'à 30 détecteurs de fumée.
• Câblage/Branchement des fils (fig. 4)
1 bleu
= N
fil neutre / – relais tout-ou-rien / – réseau
= I
2 orange
+ réseau
3 rouge
= R
+ relais tout-ou-rien
4 marron
= L
phase 230 V AC
• Attention au branchement (polarité) : en cas d'erreur, l'alarme ne serait pas retransmise
à tous les détecteurs de fumée raccordés (fig. 4).
Si vous ne respectez pas ces indications, vous risquez de détériorer tous les détecteurs !
• La longueur totale du câblage ne doit pas dépasser 300 m.
Utilisez des câbles de type NYM 1,5 mm
.
2
• Si nécessaire, fixez la plaquette de montage (fig. 3.4) du détecteur de fumée sur le
boîtier encastré.
• Ensuite, raccordez la pile et positionnez-la dans l'appareil (fig. 5.1).
Une fois la pile correctement reliée, la LED rouge s'allume toutes les 45 secondes
environ (fig. 7.1). Le détecteur de fumée est doté d'un dispositif de verrouillage
(fig. 5.2) empêchant le montage du détecteur en l'absence de pile.
• Branchez le câble de raccordement sur le détecteur (fig. 6).
• Placez le détecteur de fumée sur le boîtier apparent (fig. 3.1) ou sur la plaquette de
montage (fig. 3.4) et faites-le tourner jusqu'à ce qu'il s'y emboîte (fig. 7.2).
ATTENTION : avant de brancher ou de débrancher le câble de raccordement, assurez-vous
toujours que le système est hors tension. Si vous ne respectez pas ces indications, vous
risquez de détériorer tous les détecteurs !
• Lorsque le détecteur est correctement installé et raccordé à l'alimentation électrique,
la LED verte brille en permanence (fig. 6.1).
• Procédez à un test de fonctionnement (cf. point 5, Tests/Maintenance). Pour toute question
d'ordre technique, merci de vous adresser soit au fabricant, soit à votre revendeur.
REMARQUE :
• Montez le détecteur au centre du plafond.
• N'installez pas cet appareil dans les salles de bain (humidité élevée), garages
(gaz d'échappement) et espaces soumis à des courants d'air. En outre, évitez de
le monter dans un angle trop fermé des combles (fig. 2).
• Le détecteur peut être monté sur un pan du toit dès lors que l'inclinaison de
celui-ci ne dépasse pas 45°.
• Une distance minimale de 50 cm doit séparer l'appareil des parois, solives
(sommiers) et luminaires.
• Les pièces de plus de 60 m
2
et les couloirs de plus de 10 m de long exigent
la pose de plusieurs détecteurs.
• Une distance minimale de 4 m doit être respectée entre l'appareil et les fours et
cheminées.
4 FONCTIONS
Signal sonore
LED rouge
Explication
Sirène répétitive
Clignotement en concomitance
Déclenchement d'un détecteur
avec le signal sonore
indépendant suite à la détection
de fumée.
Sirène répétitive
Pas de signal
Déclenchement de l'alarme par
l'un des détecteurs mis en réseau.
Celui-ci peut-être identifié au
moyen de sa LED, qui clignote
en concomitance avec le
signal sonore.
Signal court environ
La pile doit être changée.
Clignotement en concomitance
avec le signal sonore toutes les
45 secondes
Clignotement toutes les
Pas de signal
Appareil en service
45 secondes
Signal court
Clignotement en alternance
Indique que le dispositif est
toutes les 45 secondes environ
encrassé ou défectueux.
avec le signal sonore
Remplacez le détecteur.
5 TESTS/MAINTENANCE
Le bouton de test LED (fig. 7.1) permet de contrôler le détecteur dans son intégralité : état de
la pile, chambre de détection et système de surveillance électronique. Il est recommandé de
procéder au test au moins une fois par an et après chaque changement de pile. Maintenez
le bouton de test enfoncé pendant une vingtaine de secondes, jusqu'à ce qu'un signal sonore
puissant et répétitif retentisse (environ 85 dB). Lorsque cela s'avère nécessaire, essuyez
l'appareil et aspirez les poussières depuis l'extérieur (deux fois par an environ). Le détecteur
procède à un test automatique. Le système de surveillance électronique ainsi que la tension
et la résistance interne de la pile sont contrôlés toutes les 45 secondes environ. Ce test se
manifeste par un court clignotement de la LED rouge (fig. 7.1). Lorsque la tension de la pile
9 V descend au-dessous d'une certaine valeur, le détecteur commence à émettre un signal
sonore (toutes les 45 secondes environ). Il vous reste alors environ 30 jours pour changer
la pile (cf. point 3, Installation/Montage/Raccordement). En cas de dysfonctionnement,
la LED rouge clignote toutes les 45 secondes environ, en alternance avec le signal sonore.
Si cela se produit, remplacez le détecteur.
Lorsque la diode d'émission et/ou de réception située dans la chambre de détection est
encrassée ou défectueuse, la LED rouge clignote toutes les 45 secondes environ,
en alternance avec le signal sonore. Si cela se produit, remplacez le détecteur.
REMARQUE :
• Mettre les piles usagées au rebut par l'intermédiaire d'un commerçant qui
les fera suivre à une entreprise de recyclage.
• En cas de mise en réseau : le signal d'épuisement de la pile n'est pas
retransmis aux autres détecteurs du réseau. Il est uniquement signalé sur
l'appareil concerné.
• En cas de mise en réseau: lors du contrôle du détecteur à l'aide de la
fonction de test sur le bouton de la LED (fig. 7.1), tous les détecteurs du réseau sont
également commandés, cela signifie qu'un signal d'alarme à impulsion
retentir (pour une durée limitée) comme en cas d'une véritable alarme et que
sur le détecteur testé, la LED rouge (fig. 7.1) clignote parallèlement au signal
d'alarme, tandis que sur les autres détecteurs du réseau retentit uniquement un
signal d'alarme à impulsion sans signal LED.
• Un excès de poussière, vapeur d'eau ou autres particules nocives peut entraîner
le déclenchement de l'alarme.
REMARQUES CONCERNANT LE RECYCLAGE :
Cet appareil ne doit en aucun cas être jeté avec les ordures ménagères.
Les propriétaires d'équipements électriques ou électroniques usagés ont en effet
l'obligation légale de les déposer dans un centre de collecte sélective.
Informez-vous auprès de votre municipalité sur les possibilités de recyclage.
6 COMPORTEMENT À ADOPTER EN CAS D'INCENDIE
Restez calme ! Appelez les pompiers.
Informations utiles pour les pompiers :
• Votre nom et votre numéro de téléphone
• Lieu de l'incendie (adresse)
• Description du sinistre
• Nombre de blessés
• Répondez aux questions de votre interlocuteur.
Prévenez tous les habitants du logement.
Aidez les personnes âgées, malades ou handicapées.
Fermez toutes les portes et fenêtres.
N'empruntez pas l'ascenseur.
Lorsque vous ignorez s'il s'agit ou non d'une fausse alerte, procédez comme si un
incendie avait bien lieu.
7 ACCESSOIRES
• Boîtier apparent FlammEx profi K
• Relais tout-ou-rien FlammEx profi K
8 GARANTIE IEH
Les produits IEH sont fabriqués avec le plus grand soin et testés selon les prescriptions en
vigueur.
Le garant, IEH Industrie Elektronik GmbH (voir l'adresse ci-dessous pour l'Allemagne) ou le
distributeur IEH dans votre pays (adresse sur simple demande), garantit les appareils IEH
contre les défauts de fabrication et de matériaux pour une durée de 3 ans à partir de la
date de fabrication (ou à partir de la date d'achat par l'utilisateur final).
Cette garantie est indépendante de vos droits légaux vis-à-vis du vendeur de l'appareil.
L'usure naturelle, les modifications de l'appareil dues à son milieu d'installation et les
dommages résultant de son transport n'entrent pas dans le cadre de la garantie. De
même, ne sont pas couverts les défauts dus au non-respect des instructions de montage et
d'entretien et/ou à une installation inappropriée ou un manque d'entretien (encrassement).
Sont également exclues de la garantie les batteries, sources lumineuses et piles fournies
avec l'appareil. IEH décline toute responsabilité en cas de dommages indirects, consécutifs
et matériels.
La procédure de garantie ne pourra être enclenchée que sur présentation d'un appareil non
modifié après constatation du défaut, ainsi que d'un ticket de caisse valable, accompagnés
d'une courte description de l'anomalie constatée et expédiés au garant dans un emballage
approprié et suffisamment affranchi.
Si le recours en garantie s'avère justifié, le garant peut décider soit de réparer, soit
de remplacer l'appareil. La garantie ne comprend aucun autre recours. Le garant n'est
notamment pas responsable de tout dommage causé par un défaut de l'appareil.
Si le recours en garantie s'avère injustifié (par exemple, si la garantie a expiré ou si le
défaut constaté n'est pas couvert par celle-ci), vous recevrez un devis détaillant les coûts de
réparation.
L
ABB. • FIG. 4
N
3.3
3.2
FlammEx profi K-SD3AC
1
30
L
L
N
N
3.4
NYM 1,5 mm
NYM 1,5 mm
2
< 300 m
ABB. • FIG. 5
ABB. • FIG. 6
L
L
5.2
N
5.1
N
L
N
GB
SMOKE DETECTOR
1 NOTES
Use this product only as intended (as described in the user instructions).
Changes or modifications to the product or painting it will result in loss of warranty.
CAUTION: Work on the 230 V power system must be carried out by authorised
personnel only with due regard to the applicable installation regulations.
Switch off the power supply before installing the system.
2 DESCRIPTION
The FlammEx profi K-SD3AC is a reliable photoelectric smoke detector designed for use
in residential buildings.
An alarm is triggered as soon as smoke enters the device. The device does not detect
flames. Many fires occur at night. As we have no sense of smell while sleeping but wake up
when we hear a noise, smoke detectors are an effective way of providing an early warning
of the danger.
Application possibilities:
• Stand-alone mode
• Up to 30 FlammEx profi signalling devices can be networked together
For optimum protection of your home, install smoke detectors in all rooms, corridors,
basements and store rooms. Ensure basic protection by installing FlammEx profi smoke
detectors in all bedrooms, playrooms and in the corridors on all floors (fig. 1 + 2).
3 INSTALLATION/ASSEMBLY/CONNECTION
• Refer to the current national guidelines on installation and standards for smoke alarms
(in Germany: DIN 14676).
• First, install a FlammEx profi K surface-mounted box (accessory) as close as possible to
the middle of the ceiling (fig. 3.1) or use a flush-mounted box (fig. 3.2). If you require a
FlammEx profi K switching relay (accessory) (fig. 3.3)), install it in the surface-mounted box
or in the flush-mounted box.
• Protect the device from dust when drilling holes.
• Up to 30 smoke detectors can be networked together.
• Wiring (fig. 4)
1 blue
= N
Neutral wire / – Switching relay / – Networking
= I
2 orange
+ Networking
3 red
= R
+ Switching relay
4 brown
= L
Phase 230 V AC
• Check the wiring to ensure that the alarm signal will be relayed to all networked
detectors in the event of fire (fig. 4).
Careless wiring could destroy all the detectors.
• The total wire length must not exceed 300 m.
-type wiring
Use NYM 1.5 mm
2
• If necessary, install the smoke detector mounting plate (fig. 3.4) on the flush-mounted box.
• Fit the battery into the device (fig. 5.1).
The red LED will flash every 45 seconds to indicate that the battery is fitted correctly
(fig. 7.1). The smoke detector features a mounting lock (fig. 5.2), which prevents the
detector from being mounted if the battery is not fitted correctly.
• Plug the connection cable into the detector (fig. 6).
• Mount the smoke detector on the surface-mounted box (fig. 3.1) or mounting plate (fig. 3.4)
and turn it until it clicks into place (fig. 7.2).
CAUTION: Do not connect or disconnect the cable when the power is switched on.
Careless wiring could destroy all the detectors.
• Once the smoke detector is installed and the power switched on, the green LED (fig. 6.1)
will permanently light up.
• Test the device (see 5, Test/Maintenance). In the event of any technical problems,
contact the manufacturer or your local distributor.
NOTE:
• Mount the detector in the centre of the ceiling.
• Do not install smoke detectors in bathrooms (high ambient humidity),
garages (exhaust fumes), drafty environments or lofts (fig. 2).
• On roofs which slope by less than 45° the detector can be mounted
on the pitched roof area.
• Maintain a distance of 50 cm from walls, ceiling joints (beams) and lights.
• Rooms of over 60 m
2
and corridors longer than 10 m require several detectors.
• Maintain a distance of 4 m from open fireplaces and cookers.
4 FUNCTION TABLE
Alarm signal
Description
Red LED
Intermittent alarm signal
Flashes at the same time as the
Alarm triggered on individual
audible alarm signal
detector if smoke is detected.
Intermittent alarm signal
No LED
Alarm triggered by networked
detector. The triggered detector
can be identified by the
intermittent alarm signal and
flashing LED.
Short signal emitted
Battery needs to be replaced
Flashes at the same time as the
audible signal every 45 seconds
Flashes every 45 seconds
Device is ready for use
No signal
Short signal emitted
Flashes alternately with the
Signals soiling and/or defect.
Detector needs to be replaced.
every 45 seconds
audible signal
5 TESTING/MAINTENANCE
The detector can be fully tested using the LED test button (fig 7.1): (battery test, electronic
smoke chamber test and pulsating electronics test). We suggest that you test the device at
least once a year and each time you replace the batteries. Press the test button
(for up to 20 seconds) until a loud, pulsating alarm signal (c. 85 dB) can be heard.
When necessary (usually about twice a year), wipe the device with a clean, dry cloth and
clean the outside with a vacuum cleaner. The device automatically performs a test (approx.
every 45 seconds) to check the pulsating electronics, voltage and battery internal resistance.
The red LED flashes briefly (fig. 7.1) to indicate that this test is being performed. If the 9 V
battery supply falls beneath a certain value, the detector will emit an audible signal (approx.
every 45 seconds), approx. 30 days before the battery needs to be replaced
(see 3, Installation/Assembly/Connection). If the device is faulty, the red LED will flash
approx. every 45 seconds alternately with the audible signal. This indicates that the
detector needs to be replaced.
Should the transmitter diode and/or receiver diode in the smoke chamber be soiled and/or
defective, the red LED will flash approx. every 45 seconds alternately with the audible
signal. This indicates that the detector needs to be replaced.
NOTE:
• Please dispose of the battery via your local retailer, who will have it recycled.
• Where detectors are linked together, a low battery signal from one detector does
not get relayed via the network to the others. It is displayed only on the one unit.
• Where detector are linked together, when one detector is checked using the test
feature run via the LED test button (fig. 7.1), all of the networked alarms are
automatically triggered, i.e. just as in the event of a real alarm, a pulsating
alarm sound (of limited duration) is emitted and on the tested detector the
red LED (fig. 7.1) flashes in tandem with this sound, while the others emit only
the sound without the LED coming on.
• If the detector is subjected to excessive dust, steam or other particles over a
prolonged period, this may trigger the alarm.
RECYCLING INSTRUCTIONS:
This device must not be disposed of with unsorted house hold waste.
Owners of old devices are required by law todispose of this device correctly.
Contact your town council for further information.
6 CORRECT ACTION IN THE EVENT OF A FIRE
Keep calm! Alert the fire service.
It is important that the fire service is told the following information:
• Your name (name, phone number)
• The location of the fire (address)
• What has happened (extent of fire)
• How many people are injured
• Then wait to see if the operator has any questions.
Alert all the people who live with you.
Help aged, sick and disabled persons.
Close all windows and doors.
Do not use lifts.
If you have any doubts as to whether or not it is a genuine alarm, still act as if
there is a real fire.
7 ACCESSORIES
• FlammEx profi K surface-mounted socket
• FlammEx profi K switching relay
8 IEH GUARANTEE
IEH products are tested in accordance with applicable regulations and manufactured with
the utmost care.
The guarantor, IEH Industrie Elektronik GmbH (for Germany, see address below) or the
relevant IEH distributor in your country (we will inform you of the relevant address on
request) provides a guarantee against manufacturing/material defects in IEH devices for a
period of 3 years from the date of manufacture (or from the date of purchase of the device
by the initial end user).
This guarantee is independent of your legal rights with respect to the seller of the device.
The guarantee does not apply to natural wear and tear, changes/interference caused by
environmental factors or damage in transit, or to damages caused as a result of failure
to follow the user or maintenance instructions and/or as a result of improper installation
or soiling. Any illuminants or batteries supplied with the device are not covered by the
guarantee. IEH shall not be liable for any indirect, consequential or financial losses.
The guarantee can only be honoured if the device is sent back with the invoice/receipt,
unchanged, packed and with sufficient postage to the guarantor, along with a brief
description of the fault, as soon as a defect is identified.
If the guarantee claim proves justified, the guarantor will either repair the device or replace
it. The guarantee does not cover further claims; in particular, the guarantor will not be liable
for damages resulting from the device's defectiveness.
If the claim is unfounded (e.g. because the guarantee has expired or the fault is not covered
by the guarantee), and it is possible to repair the device while keeping costs to a minimum,
you will receive a quote for the repair costs.
L
TECHNISCHE DATEN • DONNÉES TECHNIQUES • TECHNICAL DATA • DATI TECNICI • TECHNICKÁ DATA
N
FlammEx profi K-SD3AC
FlammEx profi K-SD3AC
NETZSPANNUNG
1
30
1
30
TENSION SECTEUR
MAINS VOLTAGE
BACK-UP BATTERIE
PILE DE SECOURS
BACK-UP BATTERY
L
Interconnection
EMPFOHLENE BATTERIEN
MODÈLES DE PILES RECOMMANDÉS
Interconnection
RECOMMENDED BATTERIES
N
NYM 1,5 mm
VDS ANERKENNUNGS-NR.:
2
2
< 300 m
N° D'HOMOLOGATION VDS :
VDS APPROVAL NO.:
GEPRÜFT NACH
ABB. • FIG. 7
CONFORME À
TESTED TO
PRÜFZEICHEN
7.2
MARQUE DE CONFORMITÉ
SYMBOL OF TEST APPROVAL
LUFTFEUCHTIGKEIT
TAUX D'HUMIDITÉ DE L'AIR
HUMIDITY
SIGNALLAUTSTÄRKE
VOLUME DU SIGNAL
SIGNAL VOLUME
BETRIEBSTEMPERATURBEREICH
PLAGE DE TEMP. TOLÉRÉE
OPERATING TEMPERATURE RANGE
Technische und optische Änderungen ohne Ankündigung vorbehalten • Des modifications techniques et esthétiques peuvent être apportées
6.1
7.1
sans préavis • Technical and design features may be subject to change • Con riserva di modifiche tecniche ed estetiche senza preavviso
• Technické a optické změny bez oznámení vyhrazeny.
I
RILEVATORE DI FUMO
1 INDICAZIONI
Il prodotto è destinato solo a un utilizzo adeguato (come descritto nelle istruzioni per l'uso).
Non è consentito eseguire variazioni, modifiche o verniciature; in caso contrario la
garanzia verrà annullata.
ATTENZIONE: le operazioni su rete elettrica da 230 V devono essere eseguite solo da personale
autorizzato nel rispetto delle disposizioni e delle norme di installazione locali. Prima dell'installazione
del prodotto interrompere l'alimentazione.
2 DESCRIZIONE
Le FlammEx profi K-SD3AC è un rilevatore di fumo fotoelettrico per l'individuazione
tempestiva e affidabile dell'incendio in abitazioni private, appartamenti e locali ad uso
domestico.
L'allarme scatta non appena il fumo raggiunge l'interno del dispositivo. Il dispositivo non
rileva la presenza di fiamme. La maggior parte degli incendi si sviluppa di notte. L'uomo
non può percepire odori durante il sonno, ma può essere svegliato da rumori: i rilevatori di
fumo scattano tempestivamente e rappresentano un'arma di difesa efficace contro questo
tipo di pericolo.
Possibilità di utilizzo:
• Funzionamento singolo
• Collegamento in rete cablata con un massimo di 30 rilevatori FlammEx profi
Per una protezione ottimale della casa installare i rilevatori di fumo in tutte le stanze,
i corridoi e nei locali adibiti a cantina o deposito. Una protezione di base viene comunque
raggiunta con l'impiego dei rilevatori di fumo FlammEx profi in tutte le camere da letto,
nelle camerette dei bambini e nei corridoi di tutti i piani (fig. 1 + 2).
3 INSTALLAZIONE/MONTAGGIO/ALLACCIAMENTI ELETTRICI
• Attenersi alle direttive di montaggio e alle norme di utilizzo vigenti a livello nazionale
per i rilevatori di fumo (in Germania: DIN 14676).
• Montare prima una scatola sporgente FlammEx profi K (accessorio) possibilmente al
centro del soffitto (fig. 3.1) o utilizzare una scatola da incasso (fig. 3.2). Se è necessario
un relé di commutazione FlammEx profi K (accessorio) (fig. 3.3), è possibile collocarlo
nella scatola da incasso.
• Proteggere i dispositivi dalla polvere causata dalla perforazione del muro.
• È possibile collegare in rete cablata fino a 30 rilevatori di fumo.
• Cablaggio/Rivestimento fili (fig. 4)
1 blu
= N
Conduttore neutro / – Relè di commutazione /
– Collegamento in rete
= I
2 arancione
+ Collegamento in rete
3 rosso
= R
+ Relè di commutazione
4 marrone
= L
Fase 230 V ~
• Prestare attenzione al corretto allacciamento (polarizzazione); in caso di allarme il
segnale potrebbe altrimenti non venir trasmesso a tutti i rilevatori di fumo collegati (fig. 4).
Il mancato rispetto di queste precauzioni potrebbe provocare il danneggiamento di tutti i rilevatori!
• La lunghezza complessiva della linea non deve superare i 300 m.
Utilizzare cavi di tipo NYM 1,5 mm
.
2
• Installare all'occorrenza la piastra di montaggio (fig. 3.4) del rilevatore di fumo sulla
scatola da incasso.
• Collegare la batteria e inserirla nel dispositivo (fig. 5.1).
Se la batteria è correttamente installata, il LED rosso lampeggia brevemente ogni
45 secondi (fig. 7.1). Il rilevatore di fumo ha un dispositivo di blocco del montaggio
(fig. 5.2) che impedisce l'installazione del segnalatore senza batteria.
• Posizionare il cavo di collegamento sul rilevatore (fig. 6).
• Posizionare il rilevatore di fumo sulla scatola sporgente (fig. 3.1) o sulla piastra di
montaggio (fig. 3.4) e ruotarlo fino a farlo scattare in posizione (fig. 7.2).
ATTENZIONE: Inserire o estrarre il cavo di collegamento solo se non è presente tensione. Il mancato
rispetto di queste precauzioni potrebbe provocare il danneggiamento di tutti i rilevatori!
• Se il rilevatore di fumo è installato ed è presente tensione di rete, il LED verde è
acceso fisso (fig. 6.1).
• Eseguire un test funzionale (ved. Capitolo 5, Test/Manutenzione). In caso di problemi
di carattere tecnico rivolgersi al costruttore o a un rivenditore autorizzato.
NOTA:
• Installare il rilevatore al centro del soffitto
• Non installare in bagno (elevata umidità), in garage (gas di scarico), in ambienti
soggetti a forti correnti d'aria e negli angoli della soffitta (fig. 2)
• Con una inclinazione del tetto inferiore ai 45° è possibile installare il rilevatore
sulle pareti pendenti del tetto.
• Mantenere una distanza di 50 cm da pareti, travi del soffitto e lampade
• Stanze con una superficie superiore agli 60 m
e corridoi più lunghi di 10 m
2
necessitano di più rilevatori
• Mantenere una distanza di 4 m da camini aperti e fornelli
4 TABELLA FUNZIONI
Tono d'allarme/piezoelettrico
LED rosso
Spiegazione
Tono pulsante
Lampeggiante parallelamente
Azionamento singolo del
rilevatore con allarme fumo
al tono
Nessuna indicazione LED
Tono pulsante
Azionamento tramite un
rilevatore collegato. Il rilevatore
attivatore può essere
identificato dal LED
lampeggiante in parallelo al
tono di allarme.
Breve bip a intervalli
Lampeggiante in parallelo
Segnala la sostituzione
a intervalli di 45 secondi
necessaria della batteria
Pronto al funzionamento
Lampeggiante a intervalli di
Nessun tono
45 secondi
Breve bip a intervalli di
Lampeggiante in alternanza
Segnala sporcizia e/o guasto.
al bip
Sostituire il rilevatore.
circa 45 secondi
5 TEST/MANUTENZIONE
Con il pulsante di prova LED (fig. 7.1) è possibile controllare il rilevatore: verifica del
funzionamento della batteria, prova della camera a fumo elettronica e verifica
dell'elettronica di analisi. Il test dovrebbe essere effettuato una volta all'anno e dopo
ogni sostituzione della batteria. Premere il pulsante di prova (fino a 20 secondi) fino a
quando non viene emesso un forte tono di allarme pulsante (circa 85 dB).
All'occorrenza pulire il dispositivo 2 volte l'anno con un panno asciutto ed esternamente
con l'aspirapolvere. Il rilevatore effettua un test automatico. Ogni 45 secondi vengono
controllate l'elettronica di analisi, la tensione e la resistenza interna della batteria.
Questo controllo viene indicato da un segnale lampeggiante del LED rosso (fig. 7.1).
Se la tensione di esercizio della batteria da 9V dovesse scendere al di sotto di un
determinato valore, il rilevatore segnala tramite un bip (ogni 45 secondi) con circa
30 giorni di anticipo la sostituzione necessaria della batteria (v. Capitolo 3 Installazione/
Montaggio/Allacciamenti elettrici). In caso di malfunzionamento il LED rosso lampeggia
ogni 45 secondi alternandosi al segnale bip. In questo caso il rilevatore deve essere sostituito.
In caso di sporcizia e/o guasto del diodo di emissione e/o ricezione nella camera di fumo,
il LED rosso lampeggia ogni 45 secondi circa alternandosi al bip. In questo caso il
rilevatore deve essere sostituito.
SUGGERIMENTO:
• Smaltire la batteria attenendosi alle disposizioni per il procedimento di riciclo.
• In presenza di collegamento in rete: il segnale di batteria scarica di un rilevatore
non viene trasmesso tramite la rete agli altri rilevatori collegati; esso viene
segnalato solo sull'apparecchiatura stessa.
• In presenza di collegamento in rete: durante il controllo del rilevatore tramite la
funzione di test con il pulsante di test a LED (fig. 7.1) tutti i rilevatori collegati in
rete vengono comandati automaticamente; ciò significa che, come nel caso
dell´allarme, viene emesso un segnale di allarme a impulsi (temporizzato) e nel
rilevatore sottoposto a test lampeggia il LED (fig. 7.1) rosso parallelamente al
segnale di allarme. Per gli altri rilevatori collegati in rete viene emesso solo un
segnale di allarme a impulsi senza indicazione tramite LED.
• Un deposito eccessivo e prolungato di polvere, vapore o altri copri estranei può
attivare l'allarme.
INDICAZIONI PER IL RICICLAGGIO:
Questo dispositivo non deve essere smaltito come rifiuto indifferenziato. Chi possiede
un vecchio dispositivo è vincolato per legge allo smaltimento conformemente alle
normative in vigore. Per ulteriori informazioni rivolgersi all'amministrazione comunale.
6 COMPORTAMENTO CORRETTO IN CASO DI INCENDIO
Mantenere la calma. Avvertire i vigili del fuoco.
Le seguenti indicazioni sono importanti per i vigili del fuoco:
• Il vostro nome (Nome, numero di telefono)
• Luogo dell'incendio (Indirizzo)
• Dinamica dell'incendio (entità)
• Numero di eventuali feriti
• Attendere le domande dell'interlocutore
Avvertire tutti coloro che vivono con voi.
Aiutare le persone più anziane, malate e disabili.
Chiudere tutte le finestre e le porte.
Non utilizzare l'ascensore.
Nel dubbio che si possa trattare di un falso allarme, comportarsi come se la presenza
dell'incendio fosse confermata.
7 ACCESSORI
• Presa esterna FlammEx profi K
• Relé di commutazione FlammEx profi K
8 GARANZIA IEH
I prodotti IEH sono omologati secondo le norme vigenti e realizzati con la massima cura.
Il produttore, IEH Industrie Elektronik GmbH (in Germania; per l'indirizzo vedere di
seguito), oppure il relativo distributore IEH locale (indirizzo disponibile su richiesta) stipula
un contratto di garanzia della durata di 3 anni a partire dalla data di produzione (o
dall'acquisto del dispositivo da parte del primo utente finale) contro difetti di produzione o
di materiale dei dispositivi IEH.
La presente garanzia sussiste indipendentemente dai diritti legali del cliente nei confronti del
rivenditore del dispositivo.
La garanzia non è valida in caso di usura naturale, alterazioni/guasti causati da fattori
ambientali oppure danni di trasporto o provocati dalla mancata osservanza delle istruzioni
per l'uso o delle istruzioni per la manutenzione e/o da un'installazione non corretta, nonché
da sporcizia. Le batterie, le lampadine e la batteria ricaricabile fornite sono escluse dalla
garanzia. IEH non si assume alcuna responsabilità per danni indiretti, consequenziali e
patrimoniali.
La garanzia è valida solo nel caso in cui il dispositivo, non modificato, venga
immediatamente spedito al produttore, correttamente affrancato e imballato, accompagnato
dalla fattura o dallo scontrino fiscale e da una breve descrizione del difetto.
In caso di richiesta giustificata di intervento in garanzia, il produttore dovrà, a propria
discrezione, provvedere alla riparazione o sostituzione del dispositivo. La copertura non
prevede altri tipi di garanzia o estensione dei diritti; in particolare, il produttore non potrà
essere ritenuto responsabile per danni derivanti da difetti del dispositivo.
Se la richiesta di intervento in garanzia non è giustificata (ad esempio dopo la decorrenza
del periodo di validità della garanzia o per danni non coperti da quest'ultima) e il
dispositivo può essere riparato a costi contenuti, il cliente ha diritto a uno sconto sulle spese
di riparazione.
TENSIONE DI RETE
SÍŤOVÉ NAPĚTÍ
230 V ~ 50 Hz
BATTERIA DI BACK-UP
ZÁLOŽNÍ BATERIE
9 V
BATTERIE CONSIGLIATE
Energizer 6LR61, Power Line 6LR61,
DOPORUČENÉ BATERIE
Duracell MN1604, Ultralife U9VL
NR. DI IDENTIFICAZIONE DI SICUREZZA:
VDS REGISTRAČNÍ Č.:
G208090
COLLAUDATO AI SENSI DELLE
ZKOUŠENO PODLE
DIN EN 14604:2009-02
MARCHIO DI CONTROLLO
KONTROLNÍ ZNAČKA
VdS
UMIDITÀ DELL'ARIA
VLHKOST VZDUCHU
10 % - 95 %
INTENSITÀ LED SEGNALE
HLASITOST SIGNÁLU
ca. 85 dB/3 m
INTERVAL. DI TEMP. D'ESERCIZIO
PROVOZNÍ TEPLOTA
0 °C...+55° C
CZ
KOUŘOVÝ HLÁSIČ
1
UPOZORNĚNÍ
Výrobek je určen pouze k použití v souladu s určeným účelem (dle popisu v návodu
k obsluze). V případě provedení změn, modifikací nebo nátěrů zanikají veškeré nároky
na záruku.
POZOR: Práce na síti 230 V smí provádět pouze autorizovaný odborný
personál s ohledem na předpisy/normy pro instalaci platné v dané zemi.
Před montáží výrobku odpojte napětí.
2
POPIS
FlammEx profi K-SD3AC je fotoelektronický kouřový hlásič pro včasnou a spolehlivou
detekci požáru v soukromých obytných domech, bytech a prostorách využívaných
pro bydlení.
Alarm se spustí, jakmile kouř vnikne do přístroje. Přístroj nereaguje na plameny.
Většina požárů propukne v noci. Jelikož lidé během spánku nic necítí, avšak probudí
se při zvuku, chrání kouřové hlásiče před hrozícím nebezpečím účinně a včas.
Možnosti použití:
• samostatný provoz
• drátové propojení s celkem max. 30 hlásiči FlammEx profi
Pro optimální zajištění domácností by měly být kouřové hlásiče nainstalovány ve všech
místnostech, chodbách, sklepních a skladovacích prostorách. Základního zajištění lze
dosáhnout již použitím kouřových hlásičů FlammEx profi ve všech ložnicích, dětských
pokojích a na chodbách ve všech patrech
.
(obr. 1 + 2)
3
INSTALACE/MONTÁŽ/PŘIPOJENÍ
• Dodržujte národní platné směrnice pro montáž a aplikační normy pro výstražné
kouřové hlásiče (v Německu: DIN 14676).
• Nejprve namontujte krabici na omítku FlammEx profi K (příslušenství) pokud možno
uprostřed na strop
nebo použijte krabici pod omítku
. Pokud
(obr. 3.1)
(obr. 3.2)
použijete systémové relé FlammEx profi K (příslušenství)
, můžete jej
(obr. 3.3)
umístit v krabici pod omítku.
• Chraňte přístroje před prachem při vrtání.
• Drátem lze propojit až 30 kouřových hlásičů.
• Zapojení/osazení vodičů
(obr. 4)
1 modrý
= N
nulový vodič / – spínací relé / – připojení
2 oranžový
= I
+ připojení
3 červený
= R
+ spínací relé
4 hnědý
= L
fáze 230 V ~
• Dbejte na správné připojení (polaritu), alarm jinak nebude v případě spuštění
přenášen do ostatních připojených kouřových hlásičů
.
(obr. 4)
V případě nedodržení mohou být všechny hlásiče zničeny!
• Celková délka vodičů nesmí překročit 300 m.
Používejte vodiče typu NYM 1,5 mm
.
2
• Montážní desku
kouřového hlásiče případně namontujte na krabici
(obr. 3.4)
pod omítku.
• Poté laskavě připojte baterii a vložte ji do přístroje
.
(obr. 5.1)
Je-li baterie správně připojena, červená LED dioda krátce blikne každých cca
45 vteřin
. Kouřový hlásič je vybaven montážní zarážkou
,
(obr. 7.1)
(obr. 5.2)
která znemožňuje montáž hlásiče bez vložené baterie.
• Připojte k hlásiči připojovací kabel
.
(obr. 6)
• Nasaďte kouřový hlásič na krabici na omítku
, resp. na montážní desku
(obr. 3.1)
a otočte jím, tak aby zaskočil
.
(obr. 3.4)
(obr. 7.2)
POZOR: Připojovací kabel připojujte nebo odpojujte pouze odpojený
od napětí. V případě nedodržení mohou být všechny hlásiče zničeny!
• Když je kouřový hlásič namontován a připojen k napětí, svítí trvale zelená LED
dioda
.
(obr. 6.1)
• Proveďte test funkčnosti (viz 5, Test/údržba). V případě technických problémů se
laskavě obraťte na výrobce nebo distributora ve své zemi.
UPOZORNĚNÍ:
• Hlásič namontujte doprostřed stropu
• Neinstalujte v koupelnách (vysoká vlhkost vzduchu), garážích (výfukové
plyny), v prostředí s se silným průvanem a v rozích s ostrým úhlem v
podkroví
(obr. 2)
• Při sklonu střechy < 45° smí být hlásič montován na šikmé střešní stropy.
• Dodržujte vzdálenost 50 cm od stěn, stropních trámů (výztuh) a svítidel
• Pro místnosti větší než 60 m
a chodby delší než 10 m je zapotřebí
2
více hlásičů
• Dodržujte vzdálenost 4 m od otevřených krbů a ohnišť atd.
4
TABULKA FUNKCÍ
Zvuk alarmu
Červená LED dioda
Vysvětlení
Pulzující zvuk alarmu
Paralelní blikání ke
Aktivace samostatného hlásiče
zvuku alarmu
při kouřovém poplachu.
Pulzující zvuk alarmu
Žádná LED indikace
Aktivace propojeného hlásiče.
Hlásič, který spustil poplach,
lze identifikovat podle LED
diody paralelně blikající ke
zvuku alarmu.
Krátké pípání
Paralelní blikání každých
Signalizuje blížící se
cca 45 vteřin
výměnu baterie.
Blikání v intervalu 45 vteřin
Provozní připravenost.
Žádný zvuk
Krátké pípání > každých
Blikání střídavě k pípání
Signalizuje znečištění
cca 45 vteřin
a/nebo vadu.
Vyměňte hlásič.
5
TEST/ÚDRŽBA
Hlásič provede kompletní test po stisknutí testovacího LED tlačítka
: Kontrola
(obr 7.1)
funkce baterie, elektronický test kouřové komory a kontrola vyhodnocovací elektroniky.
Test by měl být prováděn nejméně 1x ročně a po každé výměně baterie. Stiskněte
tlačítko a držte (až 20 vteřin), dokud nezazní hlasitý a pulzující zvuk alarmu
(cca 85 dB).
Přístroj by měl být v případě potřeby cca 1x ročně vyčištěn suchým hadříkem
a zvenčí vysavačem.
Hlásič provádí automatický samotest. Při něm se cca každých 45 vteřin zkontroluje
vyhodnocovací elektronika, napětí a vnitřní odpor baterie. Tato kontrola je signalizována
krátkým bliknutím červené LED diody
. Klesne-li napětí 9V baterie pod určitou
(obr 7.1)
hodnotu, signalizuje hlásič pípáním (cca každých 45 vteřin) cca 30 dní předem nutnou
výměnu baterie (viz 3. Instalace / Montáž / Připojení). Při znečištění a/nebo vadě
vysílací a/nebo přijímací diody v kouřové komoře bliká červená LED dioda cca každých
45 vteřin střídavě s pípáním. V tomto případě musí být hlásič vyměněn.
UPOZORNĚNÍ:
• Baterii laskavě zlikvidujte prostřednictvím obchodu, který ji dopraví
k recyklaci.
• Při propojení více hlásičů: Signál vybité baterie jednoho hlásiče není
předáván do dalších propojených hlásičů, výměna baterie je indikována
pouze na daném přístroji.
• Při propojení více hlásičů: Při kontrole čidla pomocí testovací funkce LED
tlačítka
se automaticky přidají všechny propojené hlásiče, což
(obr. 7.1)
znamená, že přesně jako v případě poplachu zazní pulzující zvuk alarmu
(časově omezený) a na testovaném hlásiči bliká paralelně ke zvuku alarmu
červená LED dioda
. U ostatních propojených hlásičů zazní pouze
(obr. 7.1)
pulzující zvuk alarmu bez LED indikace.
• V případě, že bude hlásič delší dobu vystaven velkému množství prachu,
nebo např.: vodní páře, může to vést ke spuštění alarmu.
POKYNY K RECYKLACI:
Tento přístroj nesmí být likvidován v rámci netříděného komunálního odpadu.
Vlastníci starého zařízení jsou ze zákona povinni s tímto přístrojem řádně
nakládat. Další informace získáte od zástupců města nebo obce.
6
SPRÁVNÝ POSTUP V PŘÍPADĚ POŽÁRU
Zachovejte klid! Zalarmujte hasiče.
Pro hasiče jsou důležité následující informace:
• Jak se jmenujete? (jméno, telefonní číslo)
• Kde hoří? (adresa)
• Co se stalo? (rozsah)
• Kolik osob je zraněno?
• Vyčkejte, zda má volaný nějaké dotazy.
Varujte všechny spolubydlící.
Pomozte starším, nemocným a postiženým osobám.
Zavřete všechna okna a dveře.
Nepoužívejte výtah.
Pokud máte pochybnosti, zda se jedná o opravdový alarm nebo jen o zkušební
alarm, postupujte tak, jako by skutečně hořelo.
7
PŘÍSLUŠENSTVÍ
• Zásuvka na omítku FlammEx profi K
• Systémové relé FlammEx profi K
8
ZÁRUKA IEH
Výrobky IEH jsou testovány podle platných předpisů a vyráběny s velkou pečlivostí.
Poskytovatel záruky, společnost IEH Industrie Elektronik GmbH (pro Německo, adresa
viz níže) nebo příslušný distributor IEH ve Vaší zemi (adresu Vám v případě potřeby
rádi sdělíme) přebírá na dobu 3 let od data výroby (nebo od zakoupení přístroje prvním
konečným spotřebitelem) záruku na výrobní/materiálové vady přístrojů IEH.
Tato záruka platí nezávisle na Vašich zákonných právech vůči prodejci přístroje.
Záruka se nevztahuje na přirozené opotřebení, změnu/poruchu v důsledku působení
vnějších vlivů nebo na škody vzniklé při přepravě, ani na škody, které vznikly v
důsledku nedodržení návodu k obsluze, návodu k údržbě a/nebo při neodborné instalaci
a znečištění. Přiložené baterie, světelné prvky a akumulátory jsou ze záruky vyloučeny.
IEH neručí za nepřímé, následné a majetkové škody.
Záruku lze poskytnout pouze v případě, že ihned po zjištění závady zašlete
poskytovateli záruky dostatečně ofrankovaný a zabalený nezměněný přístroj s fakturou/
pokladní stvrzenkou a stručným písemným popisem vady.
Při oprávněném nároku na záruku poskytovatel záruky přístroj dle vlastní volby opraví
nebo vymění. Záruka nezahrnuje dalekosáhlé nároky, poskytovatel záruky neručí
zejména za vzniklé škody vyplývající ze závadnosti přístroje.
Pokud nebude nárok na záruku odůvodněný (např. po uplynutí záruční doby nebo
v případě vad mimo rozsah nároku na záruku) a přístroj bude možné levně opravit,
obdržíte nabídku nákladů na opravu.

Verwandte Anleitungen für FlammEx K-SD3AC


Inhaltszusammenfassung für FlammEx K-SD3AC
- Seite 1 Fluren, Keller- und Speicherräumen installiert werden. Eine Grundabsicherung wird fumée FlammEx profi dans votre chambre, dans celles de vos enfants et dans les couloirs de detectors in all bedrooms, playrooms and in the corridors on all floors (fig. 1 + 2).
- Seite 2 (i Tyskland: DIN 14676). detectores de humo (en Alemania: DIN 14676). • Start med at montere en FlammEx profi K loftsdåse (tilbehør) så tæt på midten af loftet plafond (fig. 3.1) of gebruik een inbouwdoos (fig. 3.2). Indien nodig kunt u een •...