Herunterladen Inhalt Inhalt Diese Seite drucken

Werbung

Verfügbare Sprachen

Verfügbare Sprachen

Libretto istruzioni uso ed installazione
Operating instructions and installation
Gebrauchsanleitung
IT
EN
DE

Werbung

Inhaltsverzeichnis
loading

Inhaltszusammenfassung für Cime CO-04

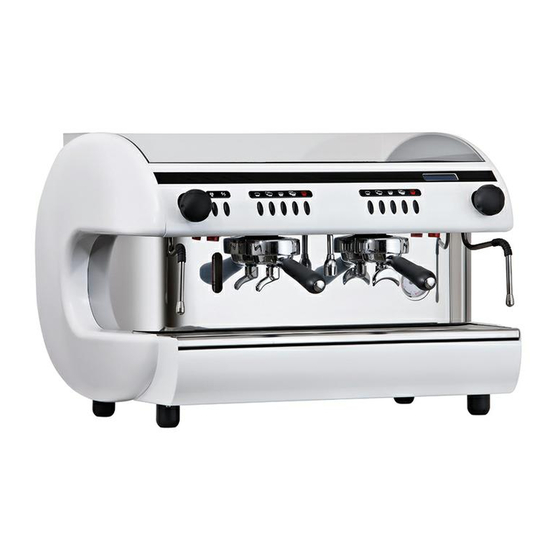
  • Seite 1 Libretto istruzioni uso ed installazione Operating instructions and installation Gebrauchsanleitung...
  • Seite 2: Inhaltsverzeichnis

    INDICE Introduzione ................pag. 3 Avvertenze generali ..............pag. 3 Importanti precauzioni per la sicurezza ........pag. 4 Caratteristiche tecniche ............pag. 5 Installazione .................pag. 5 Messa in funzione ..............pag. 6 Preparazione del caffè ............pag. 7 Pulizia giornaliera ..............pag. 7 Elenco accessori ..............pag. 7 Emissioni acustiche .............pag.
  • Seite 3: Introduzione

    INTRODUZIONE Prima di utilizzare la macchina per caffè espresso, leggere attenta- mente questo manuale di istruzioni. Esso vi fornisce notizie su come utilizzare in modo ottimale le potenzialità della macchina, su come mantenerla efficiente e come comportarsi in caso di difficoltà. La macchina per caffè...
  • Seite 4: Importanti Precauzioni Per La Sicurezza

    essere destinato esclusivamente per l’uso suddetto. Ogni altro uti- lizzo è da considerasi improprio e pertanto pericoloso. L’apparecchio non è destinato a essere usato da persone le cui ca- pacità fisiche, sensoriali o mentali siano ridotte, oppure con man- canza di esperienza o di conoscenza, a meno che esse abbiano potuto beneficiare, attraverso l’intermediazione di una persona re- sponsabile della loro sicurezza, di una sorveglianza o di istruzione riguardanti l’uso dell’apparecchio.
  • Seite 5: Caratteristiche Tecniche

    da o sotto il gruppo, durante l’erogazione di acqua o vapore, per evitare ustioni. - In condizioni di funzionamento, le lance a vapore, le lance acqua e le coppette portafiltro sono surriscaldate, vanno maneggiate con attenzione ed impugnate nei punti previsti. - Tazze e tazzine devono essere appoggiate sull’apposito piano scaldatazze solo dopo essere state accuratamente asciugate.
  • Seite 6: Messa In Funzione

    La pressione di rete non deve superare 0,6 Mpa. La macchina è fornita di tubo di connessione alla rete idrica già col- legato all’apparecchio (filtro pompa). Si raccomanda di non utilizzare tubi già usati. L’alimentazione elettrica deve essere fatta tramite un interruttore au- tomatico di portata adeguata alla potenza della macchina e prov- visto di protezione termica e di massa a terra (questi lavori devono essere eseguiti da personale qualificato).
  • Seite 7: Preparazione Del Caffè

    l’eventuale aria presente nel circuito, permettendo il completo riscal- damento dei gruppi erogatori. Regolare la pressione di caldaia tra 0.9/1.2 BAR.(vedi manometro) Regolare la pressione della pompa tra 8.5/9.5 BAR.(vedi manometro) PREPARAZIONE DEL CAFFÈ Sganciare il portafiltro dal gruppo. Riempire il filtro di caffè macinato in quantità...
  • Seite 8: Schema Elettrico Di Collegamento

    SCHEMA ELETTRICO DI COLLEGAMENTO NERO MARRONE GRIGIO GIALLO/VERDE NERO MARRONE GRIGIO GIALLO/VERDE...
  • Seite 9: Circuito Idraulico

    CIRCUITO IDRAULICO MANOMETRO RETE/POMPA/CALDAIA 15 VALVOLA NON RITORNO CALDAIA FILTRO PER POMPA 16 MISCELATORE ACQUA CALDA POMPA 17 ELETTROVALVOLA ACQUA REGOLAZIONE PRESSIONE POMPA 18 LANCIA ACQUA VALVOLA NON RITORNO SCAMBIATORI 19 VALVOLA CARICO MANUALE VALVOLA ESPANSIONE 21 ELETTROVALVOLA LIVELLO TURBINETTA 23 RUBINETTO VAPORE CALDAIA 26 PRESSOSTATO...
  • Seite 10: Descrizione Componenti Funzionale

    DESCRIZIONE COMPONENTI FUNZIONALI E DI CONTROLLO 1. Manopola vapore 2. Lancia vapore 3. Erogazione acqua calda 4. Interruttore generale 5. Pulsantiera 6. Gruppo erogatore 7. Portafltro 8. Pulsante emergenza 9. Display 10. Manometro doppia scala 11. Livello – lampada spia controllo ON-OFF 12.
  • Seite 11: Automatica

    AUTOMATICA PROGRAMMAZIONE DOSI Attivazione Programmazione È possibile programmare contemporaneamente tutte le pulsantiere della macchina operando con la pulsantiera di sinistra. Premere e mantenere premuto per oltre 5 secondi il tasto a destra della pulsantiera (E/STOP) (18) del gruppo. Verificare l’accensione contem- poranea di tutti i led di programmazione presenti sulle pulsantiere che ci confermeranno il corretto ingresso nella programmazione.
  • Seite 12: Lavaggio Dei Gruppi

    LAVAGGIO DEI GRUPPI Premere contemporaneamente i tasti (14) e (18), (vedi foto detta- glio), la macchina eseguirà 5 lavaggi per ciascun gruppo. Nel caso in cui si voglia interrompere il lavaggio, premere il (E/STOP) (18) REGOLAZIONE ORARIO – GIORNO Le impostazioni e le letture regolazione orario giorno ecc., si fanno con la pulsantiera di SX in questa seguenza: Premere e tenere premuto ( E/Stop) (18) circa 10 secondi, all’ap- parire sul display della scritta “set orologio “...
  • Seite 13 CONTENTS Introduction .................p. General instructions .............p. Important safety precautions ..........p. Technical features ...............p. Installation ................p. Set up ................p. Preparation of coffee ............p. Daily cleaning ..............p. Electric connection system ..........p. Plumbing circuit ..............p. Description of functional and control units......p. Semi-automatic ..............p. Automatic ................p.
  • Seite 14: Introduction

    INTRODUCTION Please carefully read this instruction manual before using the espresso machine. It will advise how to optimally use the machine’s potentialities, how to keep it in working order and how to behave in case of problems. The espresso machine is for professional use only. It is designed for the preparation of hot drinks such as: Tea, cappuccino, espresso in the versions regular, weak, short, etc.
  • Seite 15: Important Safety Precautions

    As for cleaning, please specifically follow what is mentioned in this manual. In case of breakdown or malfunction, turn off the device; do not try do make any repair, but call an expert technician. Repairs should be done by technicians that have been authorized by the manufacturer, using uniquely original spare parts.
  • Seite 16: Installation

    On all models, there is standard self-levelling boiler installed. On all models, it is possible to drain all water of the boiler through apposite tap. All models have emergency buttons installed, in order to let the groups work in case the card or button-panel break down. All models are prearranged for the installation of electric cup heater (on some models it is standard).
  • Seite 17: Preparation Of Coffee

    Before using the machine, let water flow without coffee for a couple of seconds with filter holders hooked, in order that the air, that prob- ably is in the circuit, can come out and allows the total heating of the distribution groups.
  • Seite 18: Electric Connection System

    ELECTRIC CONNECTION SYSTEM BLACK BROWN BLUE GREY YELLOW/GREEN BLACK BROWN BLUE GREY YELLOW/GREEN...
  • Seite 19: Plumbing Circuit

    PLUMBING CIRCUIT NET/PUMP/BOILER PRESSURE GAUGE 15 BOILER NON RETURN VALVE PUMP FILTER 16 HOT WATER MIXER PUMP 17 HOT WATER SOLENOID VALVE PUMP PRESSURE REGULATION 18 HOT WATER SPOUT NON RETURN VALVE (HEAT EXCH) 19 WATER FILLING MANUAL VALVE EXPANSION VALVE 21 AUTOMATIC FILLING SOLENOID VALVE TURBINE 23 STEAM TAP...
  • Seite 20: Description Of Functional And Control Units

    DESCRIPTION OF FUNCTIONAL AND CONTROL UNITS 1. Steam grip 2. Steam nozzle 3. Hot water supply 4. Master switch 5. Button panel 6. Distribution group 7. Filter holder 8. Emergency button 9. Display 10. Double scale pressure gauge 11. Level – check light switch ON-OFF 12.
  • Seite 21: Automatic

    AUTOMATIC PRESETTING OF DOSES Activation of presetting It is possible to set all panels of the machine at the same time, by using only the left hand panel. Push and hold button (E/STOP) (18) on the right side of the panel (18) of the group, for more than 5 seconds.
  • Seite 22: Cleaning The Groups

    CLEANING THE GROUPS Press button (14) and (18), (see photo detail), the machine will per- form 5 cleaning processes for each group. In case you want to inter- rupt the cleaning process, press the (E / STOP) (18) TIME - DAY SETTING Time / Day setting, reading, etc.., set up through left push buttons in following sequence: Press and hold (E / Stop) (18) about 10 seconds, once “set clock”...
  • Seite 23 INHALTSVERZEICHNIS Einleitung ................S. Allgemeine Hinweise ............S. Wichtige Sicherheitsmaßnahmen .........S. Technische Eigenschaften ...........S. Installierung .................S. Inbetriebnahme ..............S. Kaffee Zubereitung ..............S. Tägliche Reinigung ..............S. Stromlaufplan ..............S. Wasserschaltung ..............S. Darstellung der Funktions- und Kontrollelemente ....S. Halbautomatik ..............S. Automatik ................S. Programmierungsaktivierung ..........S. Reinigung der dispensiereinheit ...........S. Tag -uhrzeit einstellen ............S.
  • Seite 24: Einleitung

    EINLEITUNG Bitte diese Bedienungsanleitung eingehend lesen, bevor man die Es- pressomaschine benutzt. Die Anleitung weist darauf hin, wie man die Leistungsfähigkeit der Maschine optimal benutzen kann, die Leistungs- fähigkeit beibehält und wie man sich bei Schwierigkeiten verhalten sollte. Die Kaffeemaschine ist ausschließlich zu professionellem Gebrauch bestimmt.
  • Seite 25: Wichtige Sicherheitsmaßnahmen

    oben genannten Anwendung dienen. Jede andere Anwendung wird als unsachgemäß und daher als gefährlich angesehen. Der Konstrukteur kann sich für eventuelle Schäden aufgrund fal- schen Gebrauchs nicht verantwortlich halten. Bevor irgendwelche Wartungsarbeiten vorgenommen werden, soll das Gerät vom Stromnetz durch den Hauptschalter abgeschaltet werden. Bei den täglichen Reinigungsarbeiten, soll man sich genau an die Angaben des vorliegenden Handbuchs halten.
  • Seite 26: Tecnische Eigenschaften

    senwärmebereich nur dann abgestellt werden, wenn sie vorher gründlich abgetrocknet worden sind. ACHTUNG BEI BETRIEB ENTHÄLT DER BOILER DAMPF UND HEISSES WASSER UNTER DRUCK TECNISCHE EIGENSCHAFTEN Die Espresso Kaffeemaschinen sind in den folgenden Versionen erhältlich: KONTINUIERLICHER AUSLAUF oder AUTOMATIKAUSLAUF mit 1/2/3 GRUPPEN und in der Version 2GRUPPEN KOMPAKT. Alle Modelle sind mit angebauter elektrischer Verdränger-pumpe ausgestattet.
  • Seite 27: Inbetriebnahme

    INBETRIEBNAHME Sobald man mit dem Wasser- und Elektroanschluss fertig ist, kann die Maschine in Betrieb gesetzt werden. Es ist empfehlenswert zu überprüfen, dass genug Wasser in den Boiler eingegeben wurde. Schließlich per Hand den Anschaltknopf auf Position 1 schalten und abwarten, bis der Boiler vollkommen gefüllt ist;...
  • Seite 28: Stromlaufplan

    Danach di Auslaufgruppe putzen, in dem man den Universalfilter benutzt. Man empfiehlt, jeden Abend die Abflussschüssel zu waschen. Die Dampflanzen sollten nach dem Gebrauch so geputzt werden, dass Milchverkrustungen oder Verstopfungen an den Öffnungen der Dampflanze verhindert werden. STROMLAUFPLAN SCHWARZ BRAUN BLAU GRAU...
  • Seite 29: Wasserschaltung

    WASSERSCHALTUNG DRUCKMESSGERÄT NETZ/PUMPE/BOILER 15 VENTIL GEGEN UNTERDRUCK BOILER PUMPE FÜR FILTER 16 WARMWASSERMISCHER PUMPE 17 EKETROVENTIL WASSER PUMPDRUCK EINSTELLUNG 18 WASSERAUSLAUFLANZE NICHT RÜCKBEWEGENDES VENTIL AUSTAUSCHER 19 VENTIL MANUELLE LADUNG EXPANSIONSVENTIL 21 ELEKTROVENTIL WASSERSTAND TURBINE 23 DAMPFHAHN BOILER 26 DRUCKSCHALTER 10 SICHERHEITSVENTIL 27 OPTISCHER STAND 11 VENTIL GEGEN UNTERDRUCK 28 TEMPERATURSENSOR...
  • Seite 30: Darstellung Der Funktions- Und Kontrollelemente

    DARSTELLUNG DER FUNKTIONS- UND KONTROLLELEMENTE 1. Einstellknopf Dampf 2. Dampflanze 3. Auslauf warmes Wasser 4. Hauptschalter 5. Druckknopftafel 6. Auslauf Gruppe 7. Filterhalter 8. Notfallknopf 9. Display 10. Druckmessgerät doppelte Skala 11. Stand – Warnlicht Kontrolle ON-OFF 12. Taste Auslauf warmes Wasser dosiert und gemischt 13.
  • Seite 31: Automatik

    AUTOMATIK PROGRAMMIERUNG DER DOSEN Programmierungsaktivierung Es ist durchaus möglich, gleichzeitig alle Druckknopftafeln der Maschi- ne zu programmieren, indem man nur die linke Druckknopftafel betätigt. Die Taste (18) (E/STOP) auf der rechten Seite der Druckknopfta- fel der Gruppe drücken und für über 5 Sekunden gedrückt halten. Überprüfen, dass alle Programmierungs-LEDs auf den Druckknopf- tafeln gleichzeitig angehen, da diese die korrekte Eingabe der Pro- grammierung bestätigen.
  • Seite 32: Reinigung Der Dispensiereinheit

    REINIGUNG DER DISPENSIEREINHEIT Zur Reinigung der Dispensiereinheit die Tasten (14) und (18) gleichzeitig drücken (siehe Foto Detail), die Maschine führt 5 Reinigungsgänge pro Gruppe aus. Um die Reinigung zu unterbrechen, (E/STOP) (18) drücken TAG -UHRZEIT EINSTELLEN Einstellungen und Ablesungen erfolgen über die linke Tasta- tur in folgender Reihenfolge: (E/Stop) (18) etwa 10 Sekun- den drücken, bei Erscheinung von “set clock”...

Inhaltsverzeichnis