LuxaFlex PowerView Bedienungs- Und Programmieranleitung
Vorschau ausblenden
Andere Handbücher für PowerView:
- Kurzanleitung (32 Seiten) ,
- Anleitung (20 Seiten) ,
- Kurzanleitung (2 Seiten)

Verwandte Anleitungen für LuxaFlex PowerView


Inhaltszusammenfassung für LuxaFlex PowerView
- Seite 1 PowerView Motorisierung ® Steuert Licht mit Leichtigkeit Bedienungs- und Programmieranleitung...
- Seite 2 Ein revolutionäres System das Ihren Sonnenschutz automatisch bewegt.
- Seite 3 Herzlichen Glückwunsch zum Kauf Ihres PowerView® Systems ! Die PowerView® Motorisierung macht aus den schönsten Fensterbehängen der Welt nun auch die Intelligentesten. Dieses innovative, kabellose System kontrolliert Ihren Luxaflex® Sonnenschutz. Das erlaubt Ihnen, angeschlossene Anlagen – einzeln oder im ganzen Zuhause – in perfekter Synchronität zu steuern.
-
Seite 5: Inhaltsverzeichnis
Fernbedienung hinzufügen DUETTE® TOP-DOWN / BOTTOM-UP ........... Repeater installieren ..................... Bedienung mit Fernbedienung Den Hub verbinden ............Bedienung ohne Fernbedienung Verbinden der PowerView® App mit dem Hub ............Weitere Aktionen JALOUSIE ........Bedienung mit Fernbedienung ........Bedienung ohne Fernbedienung... - Seite 6 INHALTSVERZEICHNIS PROGRAMMIERANLEITUNG JALOUSIE ROLLO 230 V ........................ Werkseinstellung Werkseinstellung Eine Fernbedienung mit einer Eine Fernbedienung mit einer ..............Sonnenschutzanlage verbinden Sonnenschutzanlage verbinden ................Laufrichtung überprüfen Laufrichtung überprüfen und ändern ......................Endlagen einstellen Endlagen einstellen ..............Einstellen der Lamellenposition auf „Offen“...
- Seite 7 DUETTE® TOP-DOWN / BOTTOM-UP SILHOUETTE® Eine Fernbedienung mit einer Eine Fernbedienung mit einer ..............Sonnenschutzanlage verbinden Sonnenschutzanlage verbinden ......................Kalibrierung Endlagen zurücksetzen ..................Bewegen / Prüfen der Anlage Netzwerk zurücksetzen VERTIKAL ............Werkseinstellung Eine Fernbedienung mit einer ........
-
Seite 8: Rollo 18 V Und
ROLLO 18 V UND 230 V BEDIENUNG MIT FERNBEDIENUNG BEDIENUNG OHNE FERNBEDIENUNG Wählen Sie einen einzelnen Kanal oder alle Kanäle auf einmal (Tasten 1 – 6 oder ALL-Taste). Die ausgewählte Kanaltaste leuchtet dann auf. Drücken Sie die CLOSE-Taste, um das Rollo zu senken Drücken Sie OPEN, um das Rollo hochzufahren. -
Seite 9: Doppelrollo
DOPPELROLLO DURCHSICHTFUNKTION Wenn Ihr Doppelrollo ganz geschlossen ist, können Sie mit der rechten Pfeil-Taste das Rollo in die Durchsicht-Position bringen (Seite 57). BEDIENUNG MIT FERNBEDIENUNG BEDIENUNG OHNE FERNBEDIENUNG Wählen Sie einen einzelnen Kanal oder alle Kanäle auf einmal (Tasten 1 – 6 oder ALL-Taste). Die ausgewählte Kanaltaste leuchtet dann auf. -
Seite 10: Plissee / Duette
PLISSEE / DUETTE® BEDIENUNG MIT FERNBEDIENUNG BEDIENUNG OHNE FERNBEDIENUNG Wählen Sie einen einzelnen Kanal oder alle Kanäle auf einmal (Tasten 1 – 6 oder ALL-Taste). Die ausgewählte Motortaste Kanaltaste leuchtet dann auf. Drücken Sie die CLOSE-Taste, um das Plissee zu senken. Mit erneutem Drücken, erhöhen Sie die Geschwindigkeit. -
Seite 11: Duette® Top-Down / Bottom-Up
DUETTE® TOP-DOWN / BOTTOM-UP BEDIENUNG MIT FERNBEDIENUNG BEDIENUNG OHNE FERNBEDIENUNG Wählen Sie einen einzelnen Kanal oder alle Kanäle auf einmal (Tasten 1 – 6 oder ALL-Taste). Die ausgewählte Motortaste Kanaltaste leuchtet dann auf. Drücken Sie die CLOSE-Taste, um die Unterschiene zu senken. -
Seite 12: Bedienung Mit Fernbedienung
JALOUSIE BEDIENUNG MIT FERNBEDIENUNG BEDIENUNG OHNE FERNBEDIENUNG Wählen Sie einen einzelnen Kanal oder alle Kanäle auf einmal (Tasten 1 – 6 oder ALL-Taste). Die ausgewählte Motortaste Kanaltaste leuchtet dann auf. Drücken Sie die CLOSE-Taste, um die Jalousie zu senken. Durch erneutes Drücken erhöhen Sie die Geschwindigkeit. Drücken Sie OPEN, um das Rollo hochzufahren. - Seite 13 VERTIKAL BEDIENUNG MIT FERNBEDIENUNG BEDIENUNG OHNE FERNBEDIENUNG Wählen Sie einen einzelnen Kanal oder alle Kanäle auf einmal (Tasten 1 – 6 oder ALL-Taste). Die ausgewählte Kanaltaste leuchtet dann auf. Drücken Sie CLOSE, um die Vertikal-Anlage zu schließen. Drücken Sie OPEN, um die Vertikal-Anlage zu öffnen. Mit den geschwungenen Pfeil-Tasten drehen Sie die Lamellen in den gewünschten Neigungswinkel.
- Seite 14 SILHOUETTE® BEDIENUNG MIT FERNBEDIENUNG BEDIENUNG OHNE FERNBEDIENUNG Wählen Sie einen einzelnen Kanal oder alle Kanäle auf einmal (Tasten 1 – 6 oder ALL-Taste). Die ausgewählte Kanaltaste leuchtet dann auf. Drücken Sie die CLOSE-Taste, um die Silhouette®-Anlage herunterzufahren. Drücken Sie die OPEN-Taste, um die Silhouette®-Anlage hochzufahren.
-
Seite 15: Ein Revolutionäres System
Ein revolutionäres System das Ihren Sonnenschutz automatisch bewegt. -
Seite 16: Schritt Für Schritt
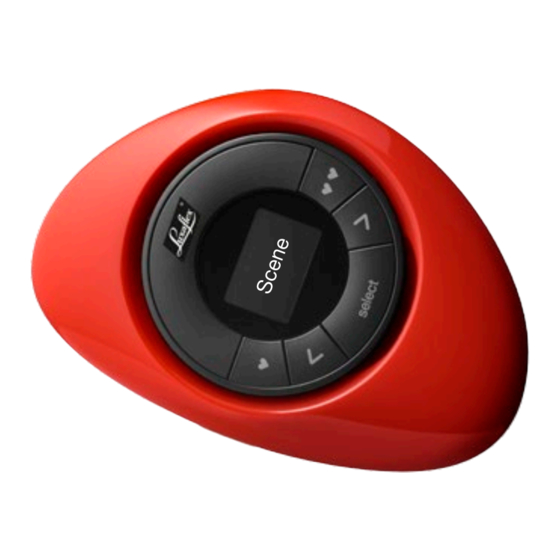
Abends Nachts SCHRITT 2 Wandhalterung mit Szenario Controller DIE POWERVIEW® KOMPONENTEN Pebble® Szenario Controller Je nach Lieferumfang enthält dieses Paket eine oder mehrere Fernbedienungen (mit Pebble® oder Wandhalter), einen Repeater und optional einen Hub. Dieser ist nur notwendig, wenn Sie Ihren Sonnenschutz per Smartphone oder Tablet steuern möchten. -
Seite 17: Fernbedienungen Verbinden
Sollten Sie nur eine Fernbedienung haben, gehen Sie bitte direkt zu Schritt 4. Durch das Verbinden der PowerView® Fernbedienungen stellen Sie sicher, dass alle Fernbedienungen Teil desselben PowerView® Netzwerkes sind. Dies ist wichtig, um eine nahtlose Installation des PowerView® Systems zu gewährleisten. -
Seite 18: Entfernen Sie Die Hintere Abdeckung
FERNBEDIENUNG 2: ENTFERNEN SIE DIE HINTERE ABDECKUNG Belassen Sie die Batterien an Ort und Stelle. FERNBEDIENUNG 2: HALTEN SIE DIE RESET-TASTE FÜR SECHS SEKUNDEN GEDRÜCKT Reset-Taste Die Kanaltasten auf der Vorderseite leuchten beim Drücken auf und ein zweites Mal nach sechs Sekunden. -
Seite 19: Schliessen Sie Die Hintere Abdeckung
FERNBEDIENUNG 2: SCHLIESSEN SIE DIE HINTERE ABDECKUNG FERNBEDIENUNG 1: DRÜCKEN SIE DIE STOP-TASTE FÜR SECHS SEKUNDEN Halten Sie die Taste gedrückt, bis das Licht der Fernbedienung anfängt zu blinken FERNBEDIENUNG 2: DRÜCKEN UND HALTEN SIE DIE STOP-TASTE FERNBEDIENUNG 1: DRÜCKEN UND HALTEN SIE DIE STOP-TASTE LASSEN SIE DIE STOP-TASTE AN BEIDEN FERNBEDIENUNGEN LOS... -
Seite 20: Eine Sonnenschutzanlage Der Fernbedienung Hinzufügen
SCHRITT 4 EINE SONNENSCHUTZANLAGE DER FERNBEDIENUNG HINZUFÜGEN Öffnen Kanal 1 Eine Fernbedienung kann bis zu sechs verschiedene Gruppen Stop von Anlagen steuern (Kanaltasten 1 – 6). Mit der folgenden Anleitung weisen Sie eine Anlage dem Kanal 1 zu. Sollten Sie hier eine andere Kanalnummer wünschen, können Sie natürlich auch diese verwenden. -
Seite 21: Stop-Taste Für Sechs Sekunden Gedrückt
HALTEN SIE DIE STOP-TASTE FÜR SECHS SEKUNDEN GEDRÜCKT Das Licht der Fernbedienung beginnt dann zu blinken. DRÜCKEN SIE DIE KANALTASTE 1 ODER DIE GEWÜNSCHTE KANALTASTE (1 – 6) Der gewünschte Kanal wird auf Ihrer Fernbedienung aktiviert. Diese Tastenkombination HALTEN SIE DIE MOTORTASTE GEDRÜCKT muss innerhalb von drei Sekunden ausgeführt DRÜCKEN SIE GLEICHZEITIG DIE... -
Seite 22: Repeater Installieren
Fernbedienung anfängt zu blinken. HALTEN SIE DIE FERNBEDIENUNG IN DIE NÄHE DES REPEATERS Wir empfehlen eine Entfernung von maximal 20 cm. DRÜCKEN SIE DIE STOP-TASTE Repeater-Taste, Licht Das Licht am Repeater erlischt. Der Repeater ist nun Teil Ihres persönlichen PowerView® Netzwerks. -
Seite 23: Den Hub Verbinden
SCHRITT 6 DEN HUB VERBINDEN Der Hub ist beim Kauf optional. Sollte Ihr PowerView®-Paket also keinen Hub enthalten, können Sie direkt zum Abschnit „Weitere Aktionen“ ab Seite 27 gehen. VERBINDEN SIE DEN HUB MIT IHREM NETZWERK-ROUTER. ERMITTELN SIE DIE REICHWEITE DES HUBS Ihr Hub sollte alle Anlagen Ihres Hauses erreichen können. - Seite 24 BEOBACHTEN SIE DAS LICHT AM HUB. In den nächsten zwei Minuten können Sie an der Leuchtabfolge den Gerätestatus ablesen: Es blinkt blau und rot: Alles in Ordnung, fahren Sie mit der Installation fort. Es blinkt rot: Der Hub lädt Updates herunter. Bitte haben Sie Geduld, dies kann zwischen 5 und 15 Minuten dauern.
-
Seite 25: Verbinden Der Powerview® App Mit Dem Hub
MIT DEM HUB Nehmen Sie Ihre Fernbedienung und Ihr PowerView Smartphone / Tablet zur Hand. ™ MOTORISATION LADEN SIE DIE POWERVIEW® APP AUS DEM APP STORE ODER PLAY STORE HERUNTER New Hub found STARTEN SIE DIE APP SET UP Die App wird automatisch anfangen, nach Ihrem Hub zu suchen. - Seite 26 SIE KÖNNEN NUN MIT DER APP STARTEN. PowerView ™ PowerView Network ™ MOTORISATION Please locate the PowerView Remote that has been paired with your window treatments and place it next to the Hub. I don’t have a remote Next Step...
-
Seite 27: Weitere Aktionen
WEITERE AKTIONEN Ihr PowerView®-Netzwerk ist nun eingerichtet und kann nach Ihren Wünschen weiter angepasst werden. Folgen Sie den öffnen Schritten in diesem Kapitel. Kanal 1 EINE ANLAGE BEDIENEN Stop alle Für die folgende Anleitung suchen Sie auf Ihrer Fernbedienung OPEN-Taste, die Kanaltaste 1-, STOP-, ALL- und schließen... -
Seite 28: Einstellen Einer Lieblingsposition
EINSTELLEN EINER LIEBLINGSPOSITION Für die folgende Anleitung suchen Sie auf Ihrer Fernbedienung die STOP-Taste und die FAVORIT-Taste. Benutzen Sie die Motortaste an Ihrer Anlage. Stop Die Lage der Motortaste an den Anlagen variiert Favorit je nach Modell. Beispiel: Motortaste am Plissee... -
Seite 29: Bringen Sie Ihre Sonnenschutzanlage In Ihre Lieblingsposition
BRINGEN SIE IHRE SONNENSCHUTZANLAGE IN IHRE LIEBLINGSPOSITION Benutzen Sie hierfür die OPEN-, CLOSE- und die STOP-Taste, um die Anlage zu bewegen. HALTEN SIE DIE STOP-TASTE FÜR SECHS SEKUNDEN GEDRÜCKT Das Licht der Fernbedienung beginnt dann zu blinken. Diese Tastenkombination HALTEN SIE DIE MOTORTASTE GEDRÜCKT muss innerhalb von drei Sekunden ausgeführt DRÜCKEN SIE GLEICHZEITIG DIE... -
Seite 30: Den Sonnenschutz In Die Lieblingsposition Bringen
DEN SONNENSCHUTZ IN DIE LIEBLINGSPOSITION BRINGEN Für die folgende Anleitung suchen Sie auf Ihrer Fernbedienung die Kanaltaste 1, die Taste FAVORIT und die ALL-Taste. Kanal 1 So bringen Sie alle Anlagen die dieser Kanaltaste zugeordnet sind, auf Ihre Lieblingsposition: Favourit DRÜCKEN SIE DIE KANALTASTE 1 Alle Kanal 1 leuchtet auf. -
Seite 31: Eine Anlage Aus Einer Gruppe Der Fernbedienung Entfernen
EINE ANLAGE AUS EINER GRUPPE DER FERNBEDIENUNG ENTFERNEN Mit diesem Schritt wird eine Sonnenschutzanlage aus Ihrer Fernbedienung entfernt, nicht jedoch aus dem PowerView®- Netzwerk. Kanal 1 Für diesen Schritt benötigen Sie auf Ihrer Fernbedienung die Stop Kanaltaste 1, die STOP- und die CLOSE-Taste. -
Seite 32: Drücken Sie Kurz Auf Die Kanaltaste
HALTEN SIE DIE STOP-TASTE FÜR SECHS SEKUNDEN GEDRÜCKT Das Licht der Fernbedienung fängt dann an zu blinken. DRÜCKEN SIE KURZ AUF DIE KANALTASTE 1 Der Kanal 1 wird nun aktiviert. Diese Tastenkombination HALTEN SIE DIE MOTORTASTE GEDRÜCKT muss innerhalb von drei Sekunden ausgeführt DRÜCKEN SIE GLEICHZEITIG DIE CLOSE-TASTE... - Seite 33 SZENARIEN MIT DEM SZENARIO- CONTROLLER INSTALLIEREN Die Szenarien, die Sie mit der App erstellt haben, werden mit dem Szenario Controller auf Ihre Anlagen angwendet. STARTEN SIE DIE APP UND ÖFFNEN SIE DAS MENÜ WÄHLEN SIE IM MENÜ DEN SZENARIO CONTROLLER AUS Folgen Sie dann der Anleitung in der App.
- Seite 34 POWERVIEW® PROGRAMMIERUNG MIT FERNBEDIENUNG Programmieranleitung nur für geschultes Fachpersonal !
-
Seite 35: Jalousie
Falls der Motorentyp nicht zur vorliegenden Anlage passt, muss die Einstellung geändert werden. Verwenden Sie hierzu das PowerView® Programmierwerkzeug. 1.1.3 The LED sequence should read: 1.1.3 The LED sequence should read: Häufig gestellte Fragen und weitere Informationen finden Sie unter www.luxaflex.de/service/faq... -
Seite 36: Eine Fernbedienung Mit Einer Sonnenschutzanlage Verbinden
A PowerView® remote can control up to 6 individual groups of blinds (buttons 1 to 6 at the top of the remote). The instructions below assign a blind to group 1. 2. EINE FERNBEDIENUNG MIT EINER Press and hold the stop button for 6... -
Seite 37: Laufrichtung Überprüfen
3.2.4 Fahren Sie mit Schritt 4.1.4 fort. 3.2.1 Press the arrow down button to check The blind will jog 1x to acknowledge motor direction. the direction is reversed Häufig gestellte Fragen und weitere Informationen finden Sie unter www.luxaflex.de/service/faq The blind will jog 1x to acknowledge... -
Seite 38: Endlagen Einstellen
start with the open (top) limit. 4.1.3 Release the manual control button . 4.1. Open limit (top) 4. ENDLAGEN EINSTELLEN 4.1.1 4.1.2 4.1.2 Press the open button. 4.1.2 Press the open button. The motor LED turns red to acknowledge Grundsätzlich macht es keinen Unterschied, ob Sie mit der oberen oder unteren Endlage 4.1.1 Press and hold the manual control button... - Seite 39 Note Note To re-position the top limit of the blind, repeat step 4.1 Open limit (top) Häufig gestellte Fragen und weitere Informationen finden Sie unter www.luxaflex.de/service/faq To re-position the top limit of the blind, repeat step 4.1 Open limit (top)
-
Seite 40: Untere Endlage
The blind will jog 1x The blind will jog 1x 4.2. Close limit (bottom) 4.2.2 Press the close button. 4.2.3 Release the manual control button . 4.2 Untere Endlage 4.2.3 Release the manual control button . 4.2.1 4.2.2 4.2.2 Press the ... -
Seite 41: Die Untere Endlage Ist Eingestellt
To re-position the bottom limit of the blind, repeat step 4.2. Close limit (bottom) Page 13 of 20 5. Slat open position The slat open position is automatically set, by selecting blind type in the PowerView® Programmer software tool: Häufig gestellte Fragen und weitere Informationen finden Sie unter www.luxaflex.de/service/faq... - Seite 42 Er löscht nicht die Netzwerk-ID und die Kanalzuordnungen. Durch das Zurücksetzen der Endlagen wird die PowerView® Fernbedienung oder App keine Sonnenschutzanlage steuern können, bis diese erneut programmiert ist. The motor LED turns red/green The motor LED turns red/green 4.3.1 Den Motor (das Stromkabel) vom Stromanschluss oder vom...
-
Seite 43: Einstellen Der Lamellenposition Auf „Offen
5. EINSTELLEN DER LAMELLENPOSITION AUF „OFFEN“ Die Position OFFEN ist automatisch eingestellt, wenn der Anlagentyp im PowerView® Locate the manual control button on your Press the group1 button. Press the group1 button. Press the close button to move the blind Programmierwerkzeug ausgewählt wurde. - Seite 44 the motor LED turns red to acknowledge the motor is in program mode Determine the maximum rotation position using Determine the maximum rotation position using 5.6 Legen Sie die maximale Rotationsposition fest. the arrow up , arrow down and stop the ...
- Seite 45 The motor control button LED gives an indication of the motor status. The LED can flash RED or GREEN. Below you find an overview of all possible combinations. Page 17 of 20 Sequence Explanation After power up Häufig gestellte Fragen und weitere Informationen finden Sie unter www.luxaflex.de/service/faq...
-
Seite 46: Netzwerk Zurücksetzen
2. Pairing a remote A PowerView® remote can control up to 6 individual groups of blinds (buttons 1 to 6 at the top A PowerView® remote can control up to 6 individual groups of blinds (buttons 1 to 6 at the top... -
Seite 47: Led Motorkontrollleuchte
Anlage an einem Hindernis Anlagentyp: Jalousie 16mm. S. Kapitel 1.3 hängengeblieben ist. Netzwerk zurücksetzen über Motortaste, (durchgehend) Der Motor ist im Programmiermodus Anlagentyp: Jalousie 25mm (bei der Endlageneinstellung) Häufig gestellte Fragen und weitere Informationen finden Sie unter www.luxaflex.de/service/faq... - Seite 48 Bewegungssequenzen Eine kurze Bewegung (1 × hoch, 1 × runter) Aktion bestätigt Zwei kurze Bewegungen – Aktion verweigert Keine Endlagen eingestellt Untere Endlage ungültig Obere Endlage ungültig Drei kurze Bewegungen Aktion verweigert beim Einstellen der oberen Endlage: Die Endlage konnte nicht eingestellt werden, weil die Kopfschiene nicht berührt wurde.
-
Seite 49: Rollo Und Doppelrollo
1.1.3 LED sequence of motor set to Roller LED sequence of motor set to Twist™ blind type: blind type: 1.1.4 LED Sequenz eines Motors mit Doppelrollo-Einstellung: ALL GOOD! NOT OK! Häufig gestellte Fragen und weitere Informationen finden Sie unter www.luxaflex.de/service/faq... -
Seite 50: Eine Fernbedienung Mit Einer Sonnenschutzanlage Verbinden
Procedure A PowerView® remote can control up to 6 individual groups of blinds (buttons 1 to 6 at the top of the remote). The instructions below assign a blind to group 1. Locate the manual control button on your This instruction will make use of these buttons 2. -
Seite 51: Laufrichtung Überprüfen
3.1.6 Halten Sie die Motortaste für eine Sekunde gedrückt, um die Laufrichtung zu ändern. reversed Page 6 of 17 Häufig gestellte Fragen und weitere Informationen finden Sie unter www.luxaflex.de/service/faq The blind will jo Press the open button. The blind will jog 1x to acknowledge the dire... -
Seite 52: Endlagen Einstellen
Watch out to perform steps 2.4 and 2.5 within 3 seconds! 4. ENDLAGEN EINSTELLEN 4.1.1 4.1.2 Press the open button. Grundsätzlich macht es keinen Unterschied, ob Sie mit der oberen oder unteren Endlage Press and hold the manual control button beginnen. -
Seite 53: Put Motor In Program Mode
If the top or bottom Limit is already set, and the motor direction has to be reversed, perform a reset before continuing. 3.1. Put motor in program mode Page 6 of 17 Häufig gestellte Fragen und weitere Informationen finden Sie unter www.luxaflex.de/service/faq... -
Seite 54: Untere Endlage
Watch out to perform steps 2.4 and 2.5 within 3 seconds! 4.2 Untere Endlage 4.2.1 4.2.2 4.2.2 Press the close button. Press and hold the manual control button Press the close button to move the blind Anmerkung: Stellen Sie sicher, dass der gewünschte Kanal auf der Fernbedienung ausgewählt ist. to the bottom position. - Seite 55 If the top or bottom Limit is already set, and the motor direction has to be reversed, 4.2.10 The bottom limit is set! perform a reset before continuing. Häufig gestellte Fragen und weitere Informationen finden Sie unter www.luxaflex.de/service/faq 3.1. Put motor in program mode...
- Seite 56 It will not clear the end limits. Completing a Network reset will prevent a assignments. It will not clear the end limits. Completing a Network reset will prevent a PowerView® remote or App from operating the window covering until it is reprogrammed.
-
Seite 57: Doppelrollo Festlegen Der
Arrow up Arrow down Page 14 of 20 PowerView™ EOS® 500 Rollerblind/Twist™ programming with Remot Stop Arrow up Keep pressing until the remote lights start Häufig gestellte Fragen und weitere Informationen finden Sie unter www.luxaflex.de/service/faq blinking... - Seite 58 Press and hold the button for 6 seconds. Page 15 of 20 5.10 The slat open position is set! PowerView™ EOS® 500 Rollerblind/Twist™ programming with Rem stop Note: The remote will exit programming mode automatically after 20 seconds. SLAT OPEN...
-
Seite 59: Durchsicht"-Position Löschen
Determine the slat open position using the buttons. arrow up arrow down stop Press and hold the Arrow down manual control button Stop Arrow up Keep pressing until the remote lights start Häufig gestellte Fragen und weitere Informationen finden Sie unter www.luxaflex.de/service/faq blinking... - Seite 60 Keep pressing until the remote lights start blinking The next 2 steps need to be performed within 3 seconds! Achtung: Die folgenden zwei Schritte müssen innerhalb von drei Sekunden durchgeführt werden ! Press and hold the Press the button. manual control button arrow down ...
-
Seite 61: Netzwerk Zurücksetzen
Page 4 of 17 2. Pairing a remote to the blind A PowerView® remote can control up to 6 individual groups of blinds (buttons 1 to 6 a of the remote). The instructions below assign a blind to group 1. -
Seite 62: Led Motorkontrollleuchte
8. LED MOTORKONTROLLLEUCHTE Die Motorkontrollleuchte zeigt den Motorenstatus an. Die Leuchte kann ROT, ORANGE oder GRÜN leuchten. Hier ist ein Überblick über die möglichen Kombinationen. LED blinkt nach Anschalten LED blinkt während des Batteriebetriebs Start / Neustart Niedriger Batteriestand (< 11.0 V). Die Anlage wird langsam laufen und Anlagentyp: Rollo kann nur nach oben gefahren werden. -
Seite 63: Werkseinstellung
Fernbedienung anfangen Keep pressing until the remote lights start blinking Press the open button. Über eine PowerView® Fernbedienung lassen sich bis zu sechs einzelne Kanäle von Press and hold the manual control button zu blinken Anlagen bedienen (Tasten 1 – 6 im oberen Teil der Fernbedienung). Die folgenden Press and hold the ... - Seite 64 group 2.6 Lassen Sie die Motortaste los. Press and hold the stop button for 4 seconds. 2.7 Die Anlage wird sich zweimal auf und ab bewegen, um anzuzeigen, dass sie der gewünschten Kanaltaste zugeordnet wurde. The remote will exit programming mode automatically after 20 seconds.
-
Seite 65: Laufrichtung Überprüfen Und Ändern
Watch out to perform steps 2.4 and 2.5 within 3 seconds! Note If end limits were already set, the motor will not jog, indicating the motor direction did not change. Press and hold the manual control button Häufig gestellte Fragen und weitere Informationen finden Sie unter www.luxaflex.de/service/faq... -
Seite 66: Laufrichtung Überprüfen Und Bestätigen
3.2.1 Press the arrow down button to check 3.2 Laufrichtung überprüfen und bestätigen motor direction. 3.2.1 3.2.1 Press the arrow down button to check 3.2.2.A If the blind moves upwards, repeat Achtung: Die Schritte 3.2.1 und 3.2.2 müssen direkt hintereinander ausgeführt werden, motor direction. -
Seite 67: Endlagen Einstellen
DO NOT select a group on the remote! 4.1.6 Release the manual control button . 4.1.6 Release the manual control button . Page 8 of 18 Häufig gestellte Fragen und weitere Informationen finden Sie unter www.luxaflex.de/service/faq Keep pressing until the remote lights start blinking... - Seite 68 The blind will jog 2x to acknowledge the limit is set Achtung: 4.1.6 und 4.1.7 müssen innerhalb von drei Sekunden durchgeführt werden ! 4.1.6 4.1.7 4.1.7 Press and hold the stop button for 6 4.1.6 Release the manual control button . seconds.
-
Seite 69: Untere Endlage
Sie die Schritte ab 4.2. The remote will exit programming mode automatically Keep pressing until the remote lights stop blinking Keep pressing until the remote lights start blinking after 20 seconds. Häufig gestellte Fragen und weitere Informationen finden Sie unter www.luxaflex.de/service/faq... -
Seite 70: Endlagen Zurücksetzen
5.1 Clear top limit 5.1.3 Press the open button. 5. Clearing end limits 5.1 Clear top limit 5.1.1 Deselect all Group number on the remote 5.1.2 Press and hold the manual control button 5. ENDLAGEN ZURÜCKSETZEN 5.1.1 5.1.2 5.1.1 Deselect all Group number on the remote 5.1 Obere Endlage zurücksetzen The blind will jog 2x to indicate the top limit is... -
Seite 71: Netzwerk Zurücksetzen
2. Pairing a remote to the blind A PowerView® remote can control up to 6 individual groups of blinds (buttons 1 to 6 at the top A PowerView® remote can control up to 6 individual groups of blinds (buttons 1 to 6 at the top of the remote). -
Seite 72: Plissee Und Duette
Das Verhalten der Anlage ist für jeden Motorentyp etwas unterschiedlich. 1.1.2 Immediately Check the motor button LED 1.1.2 Damit die PowerView® App die Anlage richtig erkennen kann, wird der korrekte 1.1.2 Immediately Check the motor button LED Motorentyp benötigt. Um den eingestellten Motorentyp abzulesen, betrachten sequence after start up. - Seite 73 A PowerView® remote can control up to 6 individual groups of blinds (buttons 1 to 6 at the top Watch out to perform steps 2.4 and 2.5 within 3 seconds! of the remote). The instructions below assign a blind to group 1.
- Seite 74 the motor is in program mode The motor LED turns red to the motor is in program mo 3.1.1 3.1.2 3.1.2 Press the open button. 3. LAUFRICHTUNG ÜBERPRÜFEN 3.1.2 Press the open button. 3.1.1 Press and hold the manual control button Achtung: Das Ändern der Laufrichtung ist nur möglich, wenn der Motor das erste Mal 3.2.
- Seite 75 Keep pressing until the remote 4.1.6 Move the blind to the desired top position with lights start blinking Page 10 of 18 Häufig gestellte Fragen und weitere Informationen finden Sie unter www.luxaflex.de/service/faq the open , close and stop buttons.
- Seite 76 4.1.9 Press the open button. 4.1.8 4.1.9 Achtung: 4.1.8 und 4.1.9 müssen innerhalb von drei Sekunden durchgeführt werden ! 4.1.9 Press the open button. 4.1.8 Press and hold the manual control button Anmerkung: Die Fernbedienung wird den Programmiermodus automatisch nach 20 Sekunden verlassen.
- Seite 77 DO NOT select a group on the remote! The blind will jog 1x to acknowledge the limit is set Häufig gestellte Fragen und weitere Informationen finden Sie unter www.luxaflex.de/service/faq The blind will jog 1x to acknowledge the limit is set...
- Seite 78 The blind will jog 1x to acknowledge the limit is set The motor LED turns off 4.2.8 4.2.9 4.2.8 Release the manual control button . 4.2.8 Lassen Sie die Motortaste los. 4.2.9 Press and hold the stop button for 6 seconds.
- Seite 79 The end limits have been cleared. This procedure will erase all network data stored in the motor, including Network ID and Group PowerView® remote or App from operating the window covering until it is reprogrammed. The end limits have been cleared.
- Seite 80 2. Pairing a remote A PowerView® remote can control up to 6 individual groups of blinds (buttons 1 to 6 at the top A PowerView® remote can control up to 6 individual groups of blinds (buttons 1 to 6 at the top...
- Seite 81 Die maximale Motorspannung ist erreicht, (Anlagentyp Plissee, freihängend) z.B. wenn die Anlage an einem Hindernis hängengeblieben ist. Netzwerk zurücksetzen über Motortaste (Anlagentyp Duette®, freihängend) (durchgehend) Der Motor ist im Programmiermodus (bei der Endlageneinstellung) Häufig gestellte Fragen und weitere Informationen finden Sie unter www.luxaflex.de/service/faq...
- Seite 82 Bewegungssequenzen Eine kurze Bewegung (1 × hoch, 1 × runter) Aktion bestätigt Zwei kurze Bewegungen – Aktion verweigert Keine Endlagen eingestellt Untere Endlage ungültig Obere Endlage ungültig Drei kurze Bewegungen Aktion verweigert beim Einstellen der oberen Endlage: Die Endlage konnte nicht eingestellt werden, weil die Kopfschiene nicht berührt wurde. S. Kapitel 4.1.5 Vier kurze Bewegungen Aktion verweigert bei Endlageneinstellung: ungültige Anlagenhöhe...
-
Seite 83: Duette® Top-Down / Bottom-Up
1. EINE FERNBEDIENUNG MIT EINER IMPORTANT SONNENSCHUTZANLAGE VERBINDEN Über eine PowerView® Fernbedienung lassen sich bis zu sechs einzelne Gruppen von Watch out to perform steps 2.4 and 2.5 within 3 seconds! Gedrückt halten, bis die Lichter Anlagen bedienen (Tasten 1 – 6 im oberen Teil der Fernbedienung). Die folgenden... -
Seite 84: Kalibrierung
Watch out to perform steps 2.4 and 2.5 within 3 seconds! The blind will jog 1x 2. KALIBRIERUNG Die Kalibrierung lässt die Anlage ein paar Mal auf- und abbewegen, Press and hold the manual control button Release the manual control button . um die Endlagen festzulegen. -
Seite 85: Bewegen / Prüfen Der Anlage
4.2.8 Release the manual control button . Press Press open open Häufig gestellte Fragen und weitere Informationen finden Sie unter www.luxaflex.de/service/faq Press Press arrow down open The bottom rail will move to the top position. Top and bottom rail will move to the top... - Seite 86 Press arrow up Press the open button. 3.6 Drücken Sie erst die rechte Pfeiltaste und dann die OPEN-Taste. The top rail will move to the top position. Die obere und untere Schiene fahren in die oberste Position. 3.7 Die Anlage ist bereit ! The blind will jog 1x Press open...
- Seite 87 Achtung: Es ist wichtig, den korrekten Motorentyp auszuwählen ! Das Verhalten der Anlage ist für jeden Motorentyp etwas unterschiedlich. Damit die PowerView® App die Anlage richtig erkennen kann, wird der korrekte Motorentyp benötigt. Um den eingestellten Motorentyp abzulesen, betrachten 1.1.2 Immediately Check the motor button LED 1.1.2...
- Seite 88 A PowerView® remote can control up to 6 individual groups of blinds (buttons 1 to 6 at the top of the remote). The instructions below assign a blind to group 1. 2. EINE FERNBEDIENUNG MIT EINER Press and hold the stop button for 6 Press and hold the ...
-
Seite 89: Laufrichtung Überprüfen
3.2.3 Halten Sie die Motortaste für eine Sekunde gedrückt, um die Laufrichtung zu ändern. geändert wurde. 3.2.4 Fahren Sie mit Schritt 4.1.4 fort. 3.2. Check and confirm The blind will jog 1x to acknowledge the direction is reversed Häufig gestellte Fragen und weitere Informationen finden Sie unter www.luxaflex.de/service/faq... - Seite 90 4.1. Open limit 4.1.3 Release the manual control button . 4.1.1 4.1.2 4. ENDLAGEN EINSTELLEN 4.1.2 Press the open button. 4.1.2 Press the open button. 4.1.1 Press and hold the manual control button Grundsätzlich macht es keinen Unterschied, ob Sie mit der offenen oder geschlossenen Endlage beginnen.
- Seite 91 20 seconds. Keep pressing until the remote lights stop blinking 4.1.11 The open limit is set! Note To re-position the top limit of the blind, repeat step 4.1 Open limit (top) Häufig gestellte Fragen und weitere Informationen finden Sie unter www.luxaflex.de/service/faq...
- Seite 92 The blind will jog 1x 4.2. Close limit 4.2.3 Release the manual control button . 4.2.2 Press the close button. 4.2.1 4.2.2 4.2 Geschlossene Endlage 4.2.3 Release the manual control button . 4.2.2 Press the close button. 4.2.1 Press and hold the manual control button 4.2.5 Press and hold the ...
- Seite 93 5. Slat open position Note To re-position the close limit of the blind, repeat step 4.2. Close limit The slat open position is automatically set, by selecting blind type in the PowerView® Häufig gestellte Fragen und weitere Informationen finden Sie unter www.luxaflex.de/service/faq...
- Seite 94 Er löscht nicht die Netzwerk-ID und die Kanalzuordnungen. Durch das Zurücksetzen der and hold the manual control button . on the motor. wand or power supply and wait for 20 Endlagen wird die PowerView® Fernbedienung oder App keine Sonnenschutzanlage seconds. steuern können, bis diese erneut programmiert ist. 1.2.3 Reconnect power to the motor while press and hold the manual control button .
- Seite 95 Press the close button to move the blind Locate the manual control button on your Press the group1 button. Press the group1 button. Die Position OFFEN ist automatisch eingestellt, wenn der Anlagentyp im PowerView® to the close position. blind. Programmierwerkzeug ausgewählt wurde.
- Seite 96 the motor is in program mode 5.6 Legen Sie die maximale Rotationsposition fest. Determine the maximum rotation position using Verwenden Sie dazu die beiden Pfeiltasten und die STOP-Taste. the arrow up , arrow down and stop buttons. Achtung: Legen Sie keine Kanaltaste (1 –...
- Seite 97 Keep pressing until the remote lights GREEN. Below you find an overview of all possible combinations. stop blinking Sequence Explanation 5.12 The slat open position is set! Häufig gestellte Fragen und weitere Informationen finden Sie unter www.luxaflex.de/service/faq After power up...
-
Seite 98: Netzwerk Zurücksetzen
12 seconds. der Netzwerk-ID und der Kanalzuteilung. Die Endlagen werden dadurch nicht gelöscht. Durch das Zurücksetzen der Netzwerkdaten wird die PowerView® Fernbedienung oder App keine Sonnenschutzanlage steuern können, bis diese erneut programmiert ist. 6.1 Halten Sie die Motortaste für 12 Sekunden gedrückt. - Seite 99 Behanganordnung links) S. Kapitel 1.3. z.B. wenn die Anlage an einem Hindernis hängengeblieben ist. Netzwerk zurücksetzen über Motortaste (Anlagentyp: Vertikalanlage, (durchgehend) Der Motor ist im Programmiermodus Behanganordnung rechts) S. Kapitel 1.3. (bei der Endlageneinstellung) Häufig gestellte Fragen und weitere Informationen finden Sie unter www.luxaflex.de/service/faq...
- Seite 100 Bewegungssequenzen Eine kurze Bewegung (1 ×) Aktion bestätigt Zwei kurze Bewegungen – Aktion verweigert Keine Endlagen eingestellt Geschlossene Endlage ungültig Offene Endlage ungültig Drei kurze Bewegungen Aktion verweigert beim Einstellen der offenen Endlage: Die Endlage konnte nicht eingestellt werden, weil das Ende Kopfschiene nicht berührt wurde. S. Kapitel 4.1.5 Vier kurze Bewegungen Aktion verweigert bei Endlageneinstellung: ungültige Anlagenhöhe...
- Seite 101 1.6 Lassen Sie die Motortaste los. 1.7 Wenn die Tasten der Fernbedienung noch blinken, ist die Fernbedienung noch im Programmiermodus. Halten Sie dann die STOP-Taste sechs Sekunden lang gedrückt, damit sie den Programmiermodus verlässt. Häufig gestellte Fragen und weitere Informationen finden Sie unter www.luxaflex.de/service/faq...
-
Seite 102: Netzwerk Zurücksetzen
Der folgende Ablauf löscht alle Programmierungen und Netzwerkdaten, die im Motor gespeichert sind. Die Endlagen werden dadurch nicht gelöscht. Durch das Zurücksetzen der Netzwerkdaten wird die Anlage nicht über die PowerView® App oder die Fernbedienung gesteuert werden können, bis diese erneut programmiert ist. - Seite 103 Smartes Design macht den Unterschied. Häufig gestellte Fragen und weitere Informationen finden Sie unter www.luxaflex.de/service/faq...
- Seite 104 Alle Rechte vorbehalten. Die unerlaubte Vervielfältigung, auch in Auszügen, ist untersagt. Technische Angaben können sich jederzeit ohne gesonderte Ankündigung ändern, ebenso wie sämtliche Angaben zu Stoffen, Farben, Designs, Bauteilen oder luxaflex.de -gruppen, Produktversionen usw. Luxaflex® ist ein eingetragenes Warenzeichen und ein Produkt von HunterDouglas®. luxaflex.ch © Copyright HunterDouglas® 2018.