Inhaltsverzeichnis
Werbung
Quicklinks
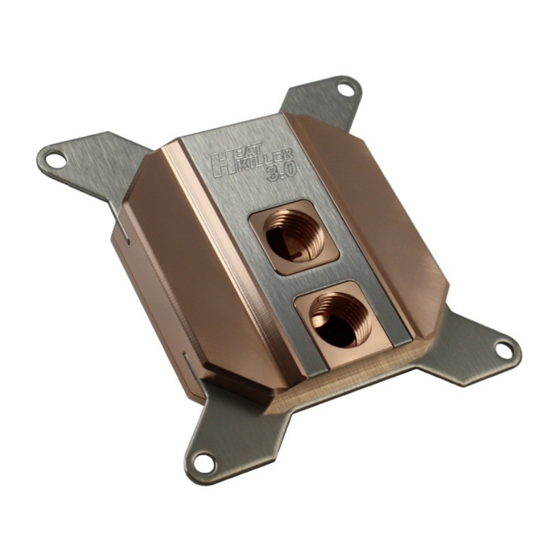
HEATKILLER®
CPU Rev. 3.0
1
Montageanleitung /
Assembly Instructions
1. Beschreibung
Die HEATKILLER® CPU Rev3.0 - Serie setzt
neue Maßstäbe im Bereich Leistung, Qualität
und Montagefreundlichkeit. Die Entwicklung
der neuen High-End Prozessorkühlerfamilie
wurde konsequent auf die aktuellen CPU-
Generationen ausgerichtet.
Eine farbige Montageanleitung im PDF-
Format finden Sie im Servicebereich unserer
Homepage unter www.watercool.de
Die Installation erfolgt auf eigene Gefahr.
Das Nichtbeachten der Montageanleitung
kann das Produkt beschädigen. Die Firma
Watercool übernimmt keinerlei Haftung bei
Beschädigungen an der Hardware.
1. Description
The HEATKILLER ® CPU Rev3.0 Series sets
new standards in performance, quality and
ease of assembly. The development of the
new high end processor cooler family was
consistently aligned with the latest CPU
generations.
You
will
find
instructions in Pdf format in the service area of
our homepage. ( www.watercool.de )
The Watercool Company assumes no
liability for any damages caused to hardware.
If uncertain hire a specialist to carry out the
modification, or use our modification service.
coloured
assembly
Werbung
Inhaltsverzeichnis

Verwandte Anleitungen für Watercool HEATKILLER CPU Rev. 3.0


Inhaltszusammenfassung für Watercool HEATKILLER CPU Rev. 3.0
- Seite 1 Format finden Sie im Servicebereich unserer instructions in Pdf format in the service area of Homepage unter www.watercool.de our homepage. ( www.watercool.de ) Die Installation erfolgt auf eigene Gefahr. The Watercool Company assumes no Das Nichtbeachten der Montageanleitung liability for any damages caused to hardware.
-
Seite 2: Technische Daten
Technische Daten: Technical data: HEATKILLER® CPU Rev3.0 HEATKILLER® CPU Rev3.0 HEATKILLER® CPU Rev3.0 LT HEATKILLER® CPU Rev3.0 LT HEATKILLER® CPU Rev3.0 LC HEATKILLER® CPU Rev3.0 LC Dimensions (L/W/H) 60 x 59 x 17 mm Abmaße (L x B x H) 60 x 59 x 17 mm (Cu/Ni-Bl) 390g (Cu/Ni-Bl) 390g... - Seite 3 und in den Abstandshalter geschraubt. Alle (X), please refer to the spring pressure table vier Schrauben sind gleichmäßig (über Kreuz) und ohne Kraftaufwand einzuschrauben. Nähere Angaben zur Einschraubtiefe (X) entnehmen Sie bitte der Federkrafttabelle. Federkraft ( spring pressure) 100 N 150 N 200 N 250 N...
- Seite 4 Isolationsmaterial. Dieses mainboard and the back plate. You must be muss unbedingt zwischen Mainboard und able to see the Watercool lettering after Backplate gelegt werden. Nach erfolgreicher successful assembly. Montage muss der Watercool Schriftzug zu lesen sein.
- Seite 5 Mainboardunterseite zusammen mit der beil- together with the enclosed insulation material. iegenden Isolierung angebracht werden. Nach You must be able to see the Watercool erfolgreicher Montage muss der Watercool lettering after successful assembly. Schriftzug zu lesen sein.
- Seite 6 Nach the back plate. You must be able to see the erfolgreicher Montage muss der Watercool Watercool lettering after successful assembly. Schriftzug zu lesen sein. For some socket 1366 motherboard types, the heat sink must be rotated and Bei einigen Sockel 1366 Mainboard mounted at 90 degrees.
-
Seite 7: Montage Auf Sockel 2011
2. Montage auf Sockel 2011 2. Mounting on socket 2011 Vor der Installation des HEATKILLER CPU- Before installing the HEATKILLER CPU cooler Kühlers ist der Prozessor gleichmäßig mit the processor is to be evenly applied with a einer Wärmeleitpaste versehen. thermal industrial paste. - Seite 8 3. Montage auf den Sockeln 3. Mounting on sockets 754 / 939 / 940 / AM2(+) / AM3(+) 754 / 939 / 940 / AM2(+) / AM3(+) Vor der Installation des HEATKILLER CPU- Before installing the HEATKILLER CPU cooler Kühlers ist der Prozessor gleichmäßig mit the processor is to be evenly applied with a einer Wärmeleitpaste...
-
Seite 9: Nachträgliche Umrüstung Auf Einen Anderen Sockel
4. Subsequently convert to a 4. Nachträgliche Umrüstung auf different socket einen anderen Sockel Your HEATKILLER ® CPU Rev3.0 can also be HEATKILLER® Rev3.0 kann reequipped to another base. Conversion kits nachträglich auch auf einen anderen Sockel are separately available. umgerüstet werden. - Seite 10 screws and mount the base plate again. Make ziehen sie die Madenschrauben wieder fest. absolutely sure that the die plate and the o-ring Beachten Sie bitte, dass die glänzende Edelstahlseite der Halterung in Richtung der are seated again correctly. The base plate can be damaged irreparably if the die plate is not Anschlussseite des Kühlers zeigt.
-
Seite 11: Allgemeine Hinweise
6. Allgemeine Hinweise 6. General tips Alle Kühler der HEATKILLER® CPU Rev3.0 – All coolers of the HEATKILLER ® CPU Rev3.0 Serie haben einen definierten Ein- und series have a defined inlet and outlet. The Auslass. Der Eingang befindet sich immer opening is always located centrally in the zentral in der Mitte des Kühlers.