Herunterladen Inhalt Inhalt Diese Seite drucken

Werbung

Verfügbare Sprachen
  • DE

Verfügbare Sprachen

  • DEUTSCH, seite 17
Libretto di Istruzioni
Instructions Manual
Manuel d'Instructions
Bedienungsanleitung
Gebruiksaanwijzing
Manual de instrucciones
KSED61X - KSED91X

Werbung

Inhaltsverzeichnis
loading

Inhaltszusammenfassung für Smeg KSED61X

  • Seite 1 Libretto di Istruzioni Instructions Manual Manuel d’Instructions Bedienungsanleitung Gebruiksaanwijzing Manual de instrucciones KSED61X - KSED91X...
  • Seite 2 Libretto di Istruzioni INDICE AVVERTENZE - COMPONENTI ............................8 INSTALLAZIONE ................................... 9 USO - MANUTENZIONE ..............................10...
  • Seite 3 Instructions Manual INDEX WARNINGS - COMPONENTS ............................11 INSTALLATION..................................12 USE - MAINTENANCE ................................ 13...
  • Seite 4 Manuel d’Instructions SOMMAIRE ATTENTION - COMPOSANTS............................14 INSTALLATION..................................15 UTILISATION - ENTRETIEN ............................... 16...
  • Seite 5 Bedienungsanleitung INHALTSVERZEICHNIS HINWEIS - KOMPONENTEN .............................. 17 MONTAGE ................................... 18 BEDIENUNG - WARTUNG..............................19...
  • Seite 6 Gebruiksaanwijzing INHOUDSOPGAVE AANWIJZINGEN - ONDERDELEN............................20 INSTALLATIE..................................21 GEBRUIK - ONDERHOUD ..............................22...
  • Seite 7 Manual de instrucciones ÍNDICE ADVERTENCIAS - COMPONENTES..........................23 INSTALACIÓN ..................................24 USO - MANTENIMIENTO..............................25...
  • Seite 8 AVVERTENZE - COMPONENTI AVVERTENZE Questo apparecchio è stato progettato per essere utilizzato come cappa ASPIRANTE (evacua- zione dell'aria all'esterno) o FILTRANTE (riattivazione dell'aria all'interno). - La distanza minima tra il piano di cottura e la parte inferiore della cappa deve essere almeno di 650mm.
  • Seite 9: Installazione

    INSTALLAZIONE La cappa deve essere montata al centro del piano cottura. La distanza minima tra il piano di cottura e la superficie inferiore della cappa deve essere di 650mm. Per il montaggio della cappa procedere nel modo seguente: 1) Praticare n°6 fori (X1-X2-J) Ø 8mm rispettando le quote indicate in fig. 1. 2) Per i vari montaggi utilizzare le viti e i tasselli espansione in dotazione.
  • Seite 10: Uso - Manutenzione

    USO - MANUTENZIONE Vi raccomandiamo di far funzionare l'apparecchio poco prima di procedere alla cottura di qualsiasi vivanda e di lasciar funzionare lo stesso ancora per 15 minuti dopo la cottura, co- munque fin tanto che ogni odore sia scomparso. 1) Quadro comandi con interruttori - Un interruttore che comanda l'accensione dell'impianto di illuminazione.
  • Seite 11: Warnings - Components

    WARNINGS - COMPONENTS WARNINGS This appliance has been designed for use as either an EXTRACTION (ducting to the outside) or RECIRCULATION (filtering) hood. The measurements contained on the drawings in this booklet refer to two models of cooker hood. Therefore, it is essential that you refer to the cor- rect drawing when taking measurements for installation.
  • Seite 12: Installation

    INSTALLATION The cooker hood must be installed centrally over a cooking appliance. The minimum distance between the cooking surface and the metal grease filters on the underside of the hood must be at least 650mm. To install the hood proceed as follows: 1) Drill six 8mm diameter holes at X1-X2-J and insert the plastic rawl plugs supplied as illus- trated in fig.
  • Seite 13: Use - Maintenance

    USE - MAINTENANCE The cooker hood functions are controlled by a series of slider or push button switches mounted on the front of the hood and control the worktop lighting and fan motor speeds. This cooker hood will not remove steam. 1) SLIDER SWITCHES - A switch controls the wotktop lighting - ON/OFF.
  • Seite 14: Attention - Composants

    ATTENTION - COMPOSANTS ATTENTION Cet appareil a été conçu pour être employé en version ASPIRANTE (évacuation de l'air vers l'extérieur) ou en version RECYCLAGE (air conduite vers l'intérieur). - La distance minimum entre le plan de cuisson et la partie inférieure de la hotte doit être au moins de 650mm.
  • Seite 15 INSTALLATION La hotte doit être assemblée au centre du plan de cuisson. La distance minimum entre le plan de cuisson et la surface inférieure de la hotte doit être de 650mm. Pour l'assemblage de la hotte procéder de la manière suivante: 1)Faire n°6 trous (X1-X2-J) de 8mm respectant les chiffres indiqués à...
  • Seite 16: Entretien

    UTILISATION - ENTRETIEN UTILISATION Nous vous recommandons de faire fonctionner l'appareil quelque temps avant de procéder à la cuisson de n'importe quel aliment, de le laisser fonctionner encore pendant 15 minutes après la cuisson et de toute manière tant que les odeurs n'auront pas disparu. 1) Bandeau de commandes avec interrupteurs - Un interrupteur qui commande l'allumage de l'installation d'éclairage.
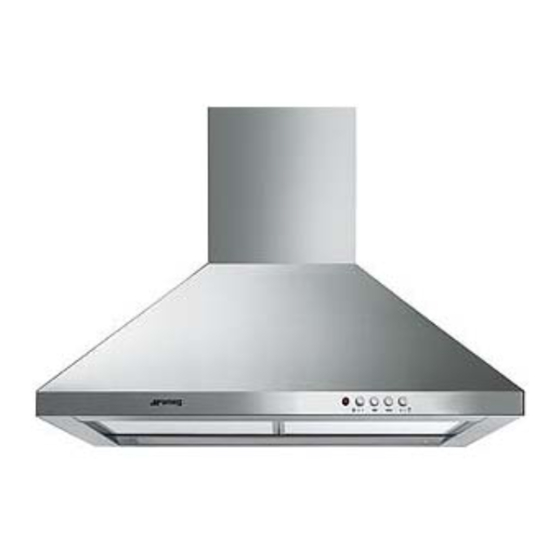
  • Seite 17 HINWEIS - KOMPONENTEN HINWEIS Dieses Gerät ist sowohl für den Abluftbetrieb als auch für den Umluftbetrieb (Filterversion) geeignet. Die Abmessungen, die in den Zeichnungen dieser Bedienungsanleitung angegeben sind, beziehen sich auf zwei verschiedene Haubenmodelle. Daher ist es äußerst wichtig, daß Sie die richtige Zeichnung zugrunde legen, bevor Sie die In- stallation ausführen.
  • Seite 18: Montage

    MONTAGE Die Haube muss mittig über dem Kochfeld installiert werden. Der Mindetsabstand zwischen Kochfeld und Fettfilter an der Unterseite der Haube muss mindestens 650 mm betragen. Die Installation verläuft wie folgt : 1) Bohren sie sechs Löcher mit 8mm Durchmesser in den Punkten X1, X2, J. Stecken Sie die Wand-Dübel in die vorgebohrten Löcher gemäß...
  • Seite 19: Wartung

    BEDIENUNG - WARTUNG BEDiENUNG Die Dunsthaube ist, je nach Modellart, mit verschiedenen Schiebeschaltern oder Drucktasten an der Haubenfront ausgestattet, mit denen die Arbeitsflächenbeleuchtung und die Motorge- schwindigkeit geschaltet werden . 1) Schiebeschaltung Ein Schalter schaltet die Beleuchtung ein. Ein Schalter steuert die drei Gebläsestufen. Eine Kontrolllampe zeigt den Motorbetrieb an.
  • Seite 20 AANWIJZINGEN - ONDERDELEN AANWIJZINGEN Dit apparaat werd ontworpen om zowel in AFZUIGVERSIE (luchtafvoer naar buiten) als ook in FILTRERENDE VERSIE (recyclage van de lucht) gebruikt te worden. - De minimumafstand tussen het kookvlak en de onderkant van de afzuigkap moet min- stens 650mm zijn.
  • Seite 21 INSTALLATIE De afzuigkap moet in het midden van het kookvlak worden gemonteerd. De afstand tussen het kookvlak en de onderkant van de afzuigkap moet minstens 650mm zijn. Voor de montage van de afzuigkap gaat u als volgt te werk: 1) Boor 6 gaten (X1-X2-J) Ø 8mm, gebruik makend van de afmetingen in fig. 1. 2) Voor de verschillende montages gebruikt u de meegeleverde schroeven en pluggen.
  • Seite 22 GEBRUIK - ONDERHOUD GEBRUIK Wij adviseren het apparaat al aan te zetten voordat u voedsel gaat bereiden, en het nog 15 mi- nuten na de bereiding te laten, of totdat alle geuren verdwenen zijn. 1) Bedieningspaneel met schakelaars - Een bedieningsschakelaar voor de verlichting. - Een schakelaar voor instelling van de afzuigsnelheid.
  • Seite 23 ADVERTENCIAS - COMPONENTES ADVERTENCIAS Este aparato ha sido proyectado para usarlo como campana ASPIRANTE (evacuación del aire hacia el exterior) o FILTRANTE (reactivación del aire en el interior). - La distancia mínima entre el plano de cocción y la parte inferior de la campana debe ser de 650mm por lo menos.
  • Seite 24: Instalación

    INSTALACIÓN La campana debe montarse al centro del plano de cocción. La distancia mínima entre el plano de cocción y la superficie inferior de la campana debe ser de 650mm. Para el montaje de la campana proceder de la manera siguiente: 1) Hacer n°6 orificios (X1-X2-J) Ø...
  • Seite 25: Uso - Mantenimiento

    USO - MANTENIMIENTO Les recomendamos hacer funcionar el aparato un poco antes de proceder a la cocción de cual- quier alimento y dejarlo funcionar hasta 15 minutos después de la cocción, en todo caso hasta que haya desaparecido todo el olor. 1) Tablero de mandos con interruptores - Un interruptor que manda el encendido de la instalación de iluminación.
  • Seite 26 750 min 1140 max 590 min S30_01_n X X1 S30_02_n...
  • Seite 28 Dir. 89/336/CEE 73/23/CEE 93/68/CEE Il simbolo sul prodotto o sulla confezione indica che il prodotto non deve essere considerato come un normale rifiuto domestico, ma deve essere portato nel punto di raccolta appropriato per il riciclaggio di apparecchiature elettriche ed elettroniche. Provvedendo a smaltire questo prodotto in modo appropriato, si contribuisce a evitare potenziali conseguenze negative per l’ambiente e per la salute, che potrebbero derivare da uno smaltimento inadeguato del prodotto.

Diese Anleitung auch für:

Ksed91x

Inhaltsverzeichnis