Herunterladen Inhalt Inhalt Diese Seite drucken

Werbung

Verfügbare Sprachen
  • DE

Verfügbare Sprachen

  • DEUTSCH, seite 1
VT37 Set
VIDEO-TÜRSPRECHANLAGE
D
Bedienungsanleitung Seite 2
INTERPHONE VIDÉO
F
Mode d'emploi page 9
VIDEO-INTERCOMSYSTEEM
NL
Gebruiksanwijzingen pagina 15
VIDEO DOOR INTERCOM
GB
Operating instructions page 21
IMPIANTO DI VIDEOCITOFONO
I
Istruzioni per funzionamento pagina 26

Werbung

Inhaltsverzeichnis
loading

Inhaltszusammenfassung für indexa VT37 Set

  • Seite 1 VT37 Set VIDEO-TÜRSPRECHANLAGE Bedienungsanleitung Seite 2 INTERPHONE VIDÉO Mode d'emploi page 9 VIDEO-INTERCOMSYSTEEM Gebruiksanwijzingen pagina 15 VIDEO DOOR INTERCOM Operating instructions page 21 IMPIANTO DI VIDEOCITOFONO Istruzioni per funzionamento pagina 26...
  • Seite 2: Bestimmungsgemäße Verwendung

    Handhabung der Geräte sein, fragen Sie einen Fachmann oder sicherzustellen, dass sie nicht mit dem Gerät spielen. informieren Sie sich im Internet unter www.indexa.de. Bewahren Sie diese Anleitung sorgfältig auf und geben Sie sie ggf. an Dritte weiter. 3. Lieferumfang 2.
  • Seite 3 2 3 4 9 10 11 12 13 14 VT37 Set VT37C 1R 2W 3B 4Y 21 22 23 24 25 26 27 28 29 15 V DC VT37M (optional) 31 32 33 35 36 37 38 39 40 15 V DC...
  • Seite 4: Sicherheitshinweise

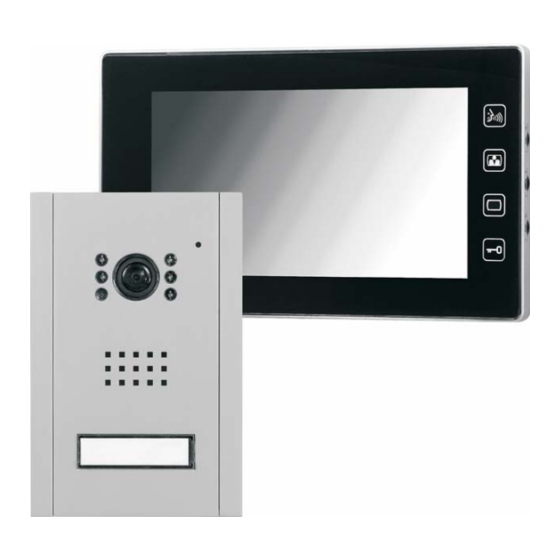
    Innenstation VT37M Klemmen " Aussparung Betriebsspannung: 15 V Unterputzhalterung Stromaufnahme: max. 1 A Befestigungsloch für Außenstation Klingelton: max. 80 dB(A) ±3 dB(A) (in 1 m Abstand) Kabel-Durchführmöglichkeit Monitor: 7“ TFT LCD Farbe Aufputzhalterung (sichtbare Diagonale 176 mm) Befestigungsloch für Außenstation Monitor-Auflösung: 480 x 234 Pixel "...
  • Seite 5: Montage Planen

    Schließen Sie kein beschädigtes Gerät (z. B. Transportschaden) an und Achten Sie darauf, dass sich eine Netzsteckdose für die Netzstrom- trennen Sie bei Beschädigungen sofort die Netzstromversorgung! versorgung innerhalb der Reichweite des Netzgerätekabels befindet. Ziehen Sie das Netzgerät aus der Netzsteckdose. Lassen Sie die Achten Sie auf die Länge des notwendigen Verbindungskabels zur Schäden sofort durch einen Fachmann beheben.
  • Seite 6: Beschriftung Des Namenschildes

    Die Außenstation kann auf- oder unterputz montiert werden. Verwenden 10. Beschriftung des Namenschildes Sie dazu die entsprechende Halterung: Entfernen Sie die Blende [21] von der Außenstation, indem Sie mit z.B. einem kleinen Schlitz-Schraubendreher die Blende an der Montage der Aufputzhalterung für die Außenstation Aussparung [30] vom Gerät vorsichtig abhebeln (s.
  • Seite 7: Bedienung

    DR3015 Hutschienen-Trafo, Art. Nr. 32216 13. Bedienung Schaltnetzteil 15 V DC, max. 2 A zur Montage auf 35 mm DIN- Ein Besucher drückt die Klingeltaste [27] der Außenstation. An der Normschienen; Eingang: 100 - 240 V AC, Ausgang: 13,5 - 16,5 V Innenstation ertönt ein Klingelton.
  • Seite 8: Fehler Beheben

    Hinsicht auf entstandene Personen- oder Sachschäden durch die Indexa GmbH Benutzung oder durch keine oder durch fehlerhafte Funktion des Gerätes Paul-Böhringer-Str. 3 ausgeschlossen. 74229 Oedheim Deutschland www.indexa.de Änderungen vorbehalten 19. Fehler beheben Fehler Ursache Behebung Prüfen Sie die Stromversorgung...
  • Seite 9: Utilisation Conforme

    Si vous avez des questions ou des doutes livré est complet et en parfait état. sur l'utilisation de cet appareil, demandez conseil à un spécialiste ou renseignez-vous sur le site Internet www.indexa.de. Conservez station intérieure (avec support mural) soigneusement cette notice d'utilisation et remettez-la à toute autre station extérieure...
  • Seite 10: Consignes De Sécurité

    Résolution de l'écran: 0 x 234 pixels 35 Trou de fixation pour la station extérieure " Tension de l'ouvre-porte: 12 V DC (max. A) (L'ouvre-porte 36 Passage de câble 37 Trou de fixation doit être conforme à ces spécifications) 38 Vis de montage Dimensions: env.
  • Seite 11: Préparer Le Montage

    immédiatement réparer le problème par un professionnel. Car il y Faites attention à la longueur nécessaire du câble de connexion pour aurait danger de mort par électrocution ou par incendie! la station extérieure. La longueur maximale est de 70 m. Un câble Ne faites fonctionner l'installation qu'avec une tension de 15,0 V DC existant adapté...
  • Seite 12 Percez un trou approprié de passage pour le câble ainsi que les trous de 11. Connexion fixation repérés. Attention! Fixez le support pour applique à l'aide des vis fournies [38] et si Évitez toute mauvaise connexion des câbles d'alimentation ! Assurez- nécessaire des chevilles [39].
  • Seite 13: Entretien / Nettoyage

    Allumer et éteindre l'écran 18. Garantie Pour voir l'image de la caméra, appuyez sur le bouton ON [4] de En plus des prétentions de garantie légales vis-à-vis du vendeur et l'écran. L'image de la caméra apparaît sur l'écran [1] et les sons de la conformément aux conditions ci-dessous, le fabricant offre une GARANTIE DE station extérieure peuvent être entendus sur la station intérieure.
  • Seite 14: Résoudre Les Problèmes

    L'image de l'écran comporte un fond clair, Il y a trop de lumière en arrière-plan Mettez un éclairage supplémentaire ou modifiez la mais le visiteur est foncé sur l'écran position de montage de la station extérieure Indexa GmbH Paul-Böhringer-Str. 3 74229 Oedheim Allemagne www.indexa.de...
  • Seite 15: Reglementair Voorgeschreven Gebruik

    (incl. wandconsole) of informeer u op het Internet via www.indexa.de. Bewaar deze buitenstation handleiding zorgvuldig en geef ze eventueel aan derden door.
  • Seite 16: Veiligheidsinstructies

    Afmetingen: ca. 207 x 126 x 25 mm 39 Plug Bedrijfstemperatuur: ±0 °C tot + 5 °C 40 Machineschroef Toepassing: uitsluitend binnenskamers, IP20 Bedradingsschema (zie afbeelding D) Voedingsapparaat 41 elektrische deuropener (optioneel) Stroomvoorziening: 100-240 V AC, 50-60 Hz " Stroomuitgang: 15 V DC, 1 A 6.
  • Seite 17: Montage Plannen

    voedingsapparaat. Vergewis u vóór de aansluiting van het een geschikte aanwezige kabel gebruikt worden (dwarse doorsnede voedingsapparaat op de netstroom dat de netstroom zoals van de leidingdraden minstens 0,8 mm², lengte max. 70 m; voor voorgeschreven met 230 V AC, 50 Hz en met een reglementair kortere verbindingen (minder dan 20 m) kan een aderdiameter van voorgeschreven zekering uitgerust is.
  • Seite 18 Bevestig de houder voor opbouw met de meegeleverde schroeven [38] 12. Montage en ingebruikneming van de en evt. pluggen [39]. toestellen Breng de verbindingskabel door de kabelopening in de wand en door de kabeldoorlaat op de houder voor opbouw. 1. Binnenstation Breng de aders en de aansluitkabel van de voedingsapparaat [20] Montage van de houder voor inbouw voor het buitenstation langs de kabel door laat [8] en hang het binnenstation vast op de...
  • Seite 19: Optionele Accessoires

    Deuropener (optioneel) in elk geval beperkt tot de normale prijs van het apparaat. De garantie geldt Als er een deuropener aangesloten is, kunt u de deur / de poort met druk niet voor slijtageonderdelen, batterijen en accu's. de toets voor de deuropener [2] in. De deur is ontgrendeld zolang de toets Deze garantie geldt uitsluitend op voorwaarde dat de bedienings- en wordt ingedrukt.
  • Seite 20: Fouten Verhelpen

    Het monitorbeeld toont een lichte achtergrond, Op de achtergrond is er teveel tegenlicht Breng een extra verlichting aan of wijzig de plaats van het bezoeker lijkt echter donker montage van het buitenstation Indexa GmbH Paul-Böhringer-Str. 3 D - 74229 Oedheim Duitsland www.indexa.de...
  • Seite 21: Proper Use

    If you have any questions or are unsure about using the 1x mains adapter with approx. 1,8 m cable equipment, ask a specialist or obtain information online at www.indexa.de. 6x mounting screws Keep these instructions in a safe place and pass them on to third parties if 6x wall plugs necessary.
  • Seite 22: Safety Instructions

    Mains adapter Connection diagram (see Fig. D) Power supply: 100-240 V AC, 50-60 Hz 41 electric door release (option) " Power output: 15 V DC, 1 A Application: indoor use only 6. Safety instructions The following instructions are provided for your safety and satisfaction during 5.
  • Seite 23: Planning The Installation

    personnel. Otherwise there is a risk of damage due to improper use and scope of delivery) with a two-core cable (not included) to the outdoor invalidation of the warranty. station (see chapter "Connection"). Connect the low-voltage connector of the mains adapter [20] to the connection.
  • Seite 24: Operation

    Drill suitable fixing holes and if necessary a suitable cable hole. Press the talk button [5] in order to speak to the visitor. Fix the bracket using the supplied screws [16] and wall plugs [15]. To end the conversation or to turn off the monitor touch the monitor OFF If necessary pull the connection cable and the 2-core door release cable button [3], otherwise the unit will turn off automatically after approx.
  • Seite 25: Warranty

    Your viewing angle to the monitor [1] is adjust the monitor brightness [14] unfavourable Install additional lighting or change the installation There is too much backlighting in the background location of the outdoor station Indexa GmbH Paul-Böhringer-Str. 3 74229 Oedheim Germany www.indexa.de GB - 25...
  • Seite 26: Utilizzo Conforme

    (incl. supporto parete) esperto o si informi in Internet all'indirizzo www.indexa.de. Conservi 1x stazione esterna 6x viti di montaggio questo manuale con attenzione e lo passi eventualmente a terzi.
  • Seite 27: Informazioni Per La Sicurezza

    di apertura porta deve corrispondere a queste Pericolo! In caso di inosservanza di questa indicazione, pericolo per specifiche vita e salute. Dimensioni: ca. 207 x 126 x 25 mm Non lasci bambini incustoditi con l'apparecchio, il materiale d'imballo Temperatura di esercizio: da ±0 °C a + 5 °C o la minuteria! Altrimenti potrebbero rischiare la vita per Applicazione: solo all'interno...
  • Seite 28: Controllare Il Funzionamento

    suona sia rilevato dalla telecamera (normale altezza di montaggio: Controlli l'inquadratura. 150 cm, minima altezza di montaggio raccomandata: 135 cm). Ottimizzi il posizionamento degli apparecchi. La stazione esterna è applicata di solito lateralmente rispetto alla Stacchi l'alimentatore dalla presa. porta d'ingresso. Si assicuri che il viso del visitatore, che si trova di Allenti tutti gli altri collegamenti.
  • Seite 29: Manutenzione/Pulizia

    Installazione del supporto a parete per la stazione interna Rimontare il pannello sulla stazione esterna facendo in modo che tutti e Tenere il supporto a parete [17] nella posizione di montaggio quattro gli angoli siano incastrati: incastrare prima la parte superiore desiderata (le linguette di montaggio devono [19] essere rivolte verso del pannello e premere con decisione sulla parte inferiore.
  • Seite 30: Accessori Opzionali

    Indexa GmbH, Paul-Böhringer-Str. 3, D - 74229 Oedheim, Germania private. I diritti sanciti dalla legge non vengono limitati da tale garanzia. La www.indexa.de...

Inhaltsverzeichnis