Herunterladen Inhalt Inhalt Diese Seite drucken

Werbung

Verfügbare Sprachen
  • DE

Verfügbare Sprachen

  • DEUTSCH, seite 27
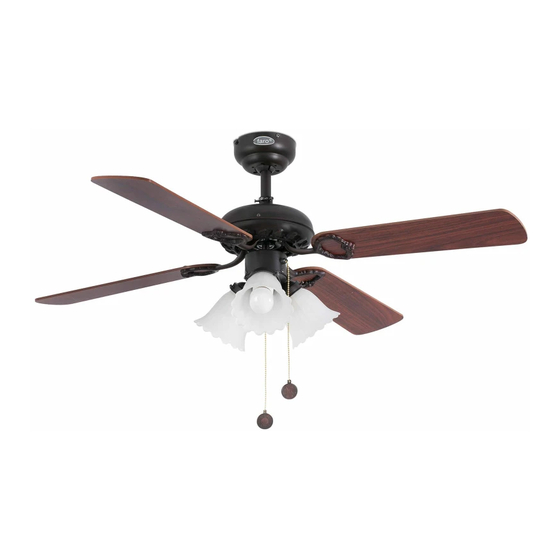
INSTRUCCIONES DE INSTALACIÓN PARA VENTILADOR DE TECHO
MANUALE
MANUEL
MANUAL
LEGGERE E CONSERVARE LE ISTRUZIONI
LIRE ET CONSERVER CES INSTRUCTIONS
ISTRUZIONI DI INSTALLAZIONE PER VENTILATORE A SOFFITTO
INSTRUCTIONS D'INSTALLATION POUR VENTILATEUR DE PLAFOND
CEILING FAN INSTRUCTIONS
MANUAL
INSTRUÇÕES DE INSTALAÇÃO PARA VENTILADOR DE TECTO
ANLEITUNGEN FÜR DIE INSTALLATION VON DECKEN-VENTILATOREN
INSTALLATIE-INSTRUCTIES VOOR PLAFONDVENTILATOR
MOD:
LEA Y GUARDE ESTAS INSTRUCCIONES
BITTE AUFMERKSAM LESEN UND AUFBEWAHREN
GELIEVE DEZE INSTRUCTIES TE LEZEN EN TE BEWAREN
LISBOA
MANUAL
HANDBUCH
HANDLEIDING
READ AND SAVE THESE INSTRUCTIONS
LEIA E GUARDE ESTAS INSTRUÇÕES

Werbung

Inhaltsverzeichnis
loading

Inhaltszusammenfassung für Faro LISBOA

  • Seite 1 MANUEL HANDLEIDING MANUAL INSTRUÇÕES DE INSTALAÇÃO PARA VENTILADOR DE TECTO ANLEITUNGEN FÜR DIE INSTALLATION VON DECKEN-VENTILATOREN INSTALLATIE-INSTRUCTIES VOOR PLAFONDVENTILATOR MOD: LISBOA • • READ AND SAVE THESE INSTRUCTIONS LEGGERE E CONSERVARE LE ISTRUZIONI LEA Y GUARDE ESTAS INSTRUCCIONES • •...
  • Seite 2: Instrucciones De Instalación

    A continuación coloque la horquilla (5) para evitar que este se salga de su sitio y apriete el tornillo (6) contra la tija para que esta quede bien sujeta. Faro - 1 -...
  • Seite 3 2. Si el ventilador tiene kit de luz o se quiere instalar uno, empalmar entre si los cables rojo y marrón y conectar en un cable del techo y al azul en el otro. (ver dibujos) Faro - 2 -...
  • Seite 4 El ventilador puede ser instalado de dos formas diferentes o bien con la tija, como ya hemos explicado, o bien sin ella y quedará el ventilador tipo plafón. Ver dibujos. MONTAJE CON TIJA MONTAJE A RAS La cadena del motor tiene 4 posiciones: 1. velocidad máxima 2. velocidad media 3. velocidad mínima 4. parada Faro - 3 -...
  • Seite 5 3. Usar solamente un paño suave para evitar rayar el acabado. El cromado esta sellado con una capa de laca para minimizar la decoloración o deslustre. 4. No es necesario engrasar el ventilador. El motor tiene rodamientos lubricados permanentemente. Faro - 4 -...
  • Seite 6: Guía De Localización De Averías

    La luz no se enciende Revisar que el conector moles de la caja del interruptor está conectado. Revisar se hay bombillas quemadas. Sien kit de luz podavía no funciona, pedir la ayuda de un electricista cualificado. Faro - 5 -...
  • Seite 7: Istruzioni Di Installazione

    Inserire l’albero nella parte superiore del motore (3) e inserire il perno (4) attraverso il motore e l’albero come indicato nell’illustrazione. Applicare la forcella (5) per evitare l’uscita dalla sede e fissare la vite (6) all’albero. Faro - 6 -...
  • Seite 8 2. Se il ventilatore è dotato di un kit luce o se si intende installarne uno, connettere fra loro i cavi rosso e marrone e collegare ad un cavo del soffitto e al cavo azzurro. (ved. illustrazioni) INSTALLAZIONE DELLE PALE Faro - 7 -...
  • Seite 9 Il ventilatore può essere installato in due modi: con o senza l’albero. Ved. illustrazioni. MONTAGGIO A RASO FISSAGGIO CON ALBERO La stringa del motore ha 4 posizioni: 1. velocità massima 2. velocità media 3. velocità minima 4. arresto Faro - 8 -...
  • Seite 10 3. Utilizzare un panno morbido per evitare rigature. La cromatura è fissata con uno strato di lacca per ridurre l’effetto di decolorazione od opacità. 4. Non lubrificare il ventilatore. I cuscinetti del motore sono già lubrificati. Faro - 9 -...
  • Seite 11: Guida Alla Localizzazione Dei Guasti

    La luce non si accende: Accertarsi che il connettore della cassa dell’interruttore sia connesso. Controllare che non vi siano lampadine bruciate. Se il problema al kit luce persiste, rivolgersi ad un elettricista qualificato. Faro - 10 -...
  • Seite 12: Instructions D'installation

    Ensuite placez la goupille fendue(5) pour éviter que la contre-goupille se déplace et serrer la vis (6) contre la tige pour que celle-ci soit bien fixée. Contre- goupille Rond transversaux Vis de fixation Faro - 11 -...
  • Seite 13 2. Si le ventilateur a kit de lumière ou on veut installer un, rejoindre entre eux les câbles rouge et marron et relier dans un câble du plafond et à ce qui est bleu dans l'autre. (voir les dessins) Faro - 12 -...
  • Seite 14: Installation Du Ventilateur

    être horizontal À TIGE VERTICALE AU RAS DU PLAFOND Ce type de montage est préféré La chaîne du moteur a 4 positions : − vitesse élevée − vitesse moyenne − vitesse basse − mise en arrêt Faro - 13 -...
  • Seite 15 3. Utiliser seulement une brosse douce ou un chiffon ou tissu non pelucheux pour éviter toute égratignure. Le revêtement est scellé de laque pour minimiser toute altération de la couleur ou décoloration. 4. Le roulement du moteur est lubrifié en permanence. Il ne pas nécessite aucune lubrification. Faro - 14 -...
  • Seite 16 La lumière ne fonctionne pas : Vérifier que le connecteur molex du boîtier de commutateur soit connecté. Vérifier que les ampoules électriques ne soient pas défectueuses. Si l´ensemble d´éclairage ne fonctionne toujours pas, contacter un électricien qualifié Faro - 15 -...
  • Seite 17: Installation Instructions

    (4) through the holes crossing the motor and the down rod as indicated in the illustration. Next insert the stop pin (5) to secure the connector pin and tighten the screw (6) against the down rod so that all holds well. Clamp Fixation setscrew Faro - 16 -...
  • Seite 18 2. If the ventilator has kit of light or you wish to install one, join the red and brown cables together and connect them to a cable in the ceiling and the blue one to the other blue one. (see drawings) Faro - 17 -...
  • Seite 19 The ceiling must be horizontal. HANG DOWN HUGGER This method is preferred if The chain of the motor has 4 positions: 1 High speed 2 Medium speed 3 Low speed 4 Off Faro - 18 -...
  • Seite 20: Operation And Maintenance

    3. Use a soft brush or lint-free cloth to prevent scratching the surface. There is no need to oil the motor as the bearings are permanently lubricated Faro - 19 -...
  • Seite 21: Troubleshooting Guide

    If a major adjustment is needed insert a washer (not The light does not ignite provided) Check the terminal connections are tight. Check for blown bulbs If the light is still not working contact an electrician Faro - 20 -...
  • Seite 22: Instruções De Instalação

    Em seguida, coloque o grampo (5) para evitar que este saia do sítio e aperte o parafuso (6) contra a haste, para que esta fique bem firme. Grampo Perno Parafuso transversal de fixação Faro - 21 -...
  • Seite 23 2. Se o ventilador tiver kit de luz ou se quiser instalar um, ligue entre si os cabos vermelho e castanho e ligue-os a um cabo do tecto e o azul ao outro. (veja os desenhos) Faro - 22 -...
  • Seite 24 Veja os desenhos. MONTAGEM COM HASTE MONTAGEM ATÉ CIMA A cadeia do motor tem a posições: 1. velocidade máxima 2. velocidade média 3. velocidade mínima 4. paragem Faro - 23 -...
  • Seite 25: Utilização E Manutenção

    3. Use apenas um pano mole para evitar riscar o acabamento. O cromado está protegido por uma camada de laca para minimizar a descoloração ou deslustre. 4. Não é necessário lubrificar o ventilador. O motor tem rolamentos permanentemente lubrificados. Faro - 24 -...
  • Seite 26 Reveja se o conector mole da caixa do interruptor está ligado. A luz não se acende Reveja se há lâmpadas queimadas. Se o kit de iluminação não funcionar, peça ajuda a um electricista qualificado. Faro - 25 -...
  • Seite 27: Hinweise Zur Installation

    Sie nun den Sicherungsstift (5) an um zu vermeiden, dass sich der Zusammenbau durch die Bewegungen löst, und ziehen Sie abschließend die Schraube (6) gegen den Schaft an, um einen sicheren Sitz zu gewährleisten. Sicherungsstif Stift Befestigungsschraube Faro - 26 -...
  • Seite 28: Durchführung Des Elektrischen Anschlusses

    2. Wenn der Ventilator über ein Lampen-Kit verfügt oder eine solche angeschlossen werden soll, sind das rote und braune Kabel zu verdrillen und gemeinsam an das braune Deckenkabel anzuschließen und das blaue an das blaue Deckenkabel (siehe Abbildungen). Faro - 27 -...
  • Seite 29: Installation Der Flügel

    Verwendung des Schafts in der bereits beschriebenen Weise bzw. ohne den Schaft direkt an der Decke. (Siehe Abbildungen). MONTAGE OHNE MONTAGE MIT SCHAFT SCHAFT Der Kettenschalter des Motors hat 4 Positionen: 1. Maximale Geschwindigkeit 2. Mittlere Geschwindigkeit 3. Minimale Geschwindigkeit 4. Stop Faro - 28 -...
  • Seite 30: Verwendung Des Auswucht-Kits

    3. Zur Vermeidung von Kratzern empfiehlt sich für die Reinigung des Ventilators die Verwendung eines weichen Tuchs. Die verchromten Teile sind versiegelt um Verfärbungen oder Glanzverlusten vorzubeugen. 4. Ein Schmieren bzw. Ölen des Ventilators ist nicht erforderlich. Der Motor verfügt über auf Lebensdauer geschmierte Wälzlager. Faro - 29 -...
  • Seite 31: Fehlersuche

    STÖRUNG: Das licht lässt sich nicht einschalten Prüfen Sie, ob der Mole-Stecker am Schaltergehäuse gesteckt ist. Überprüfen Sie ob eine Birne ausgefallen ist. Sollte die Beleuchtung immer noch nicht funktioneiren, wenden Sie sich an einen Elektriker Faro - 30 -...
  • Seite 32: Voorzorgsmaatregelen

    Breng vervolgens de haarspeld (5) aan, om te vermijden dat de spie loskomt, en draai de schroef (6) aan tegen de spie, opdat deze stevig vast komt te zitten. Haarspeld Dwarsspie Faro - 31 - Vastzetschroef...
  • Seite 33 2. Als de ventilator voorzien is van een lampenkit of als u er een wilt installeren, moeten de rode en de bruine kabel onderling verbonden worden en aangesloten worden op een kabel in het plafond, en moet de blauwe kabel verbonden worden met de andere kabel in het plafond. (zie tekeningen) Faro - 32 -...
  • Seite 34 Zie de tekeningen. MONTAGE TEGEN MONTAGE MET STIFT PLAFOND Voor de ketting van de motor zijn er 4 standen: 1. maximale snelheid 2. middelmatige snelheid 3. minimale snelheid 4. stilstand Faro - 33 -...
  • Seite 35: Gebruik En Onderhoud

    4. Een smering van de ventilator is niet noodzakelijk. De motor is uitgerust met lagers die voortdurend gesmeerd worden. Faro - 34 -...
  • Seite 36 Nagaan of de moles-connector van de schakelaardoos is aangesloten. Nagaan of er doorgebrande gloeilampen zijn. Als de lampenkit nog steeds niet werkt, de hulp inroepen van een gekwalificeerde elektricien. Faro - 35 -...
  • Seite 37 INSTRUCCIONES DE SEGURIDAD / INSTRUCTION DE SÉCURITÉ SAFETY INSTRUCTIONS / INSTRUÇÕES DE SEGURANÇA SICHERHEITSHINWEISE / VEILIGHEIDSINSTURCTIES INSTRUZIONI DI SICUREZZA Faro - 36 -...
  • Seite 38 INSTRUCCIONES DE SEGURIDAD / INSTRUCTION DE SÉCURITÉ SAFETY INSTRUCTIONS / INSTRUÇÕES DE SEGURANÇA SICHERHEITSHINWEISE / VEILIGHEIDSINSTURCTIES INSTRUZIONI DI SICUREZZA Faro - 37 -...

Inhaltsverzeichnis