Herunterladen Inhalt Inhalt Diese Seite drucken
Inhaltsverzeichnis

Werbung

Verfügbare Sprachen

Verfügbare Sprachen

ESN 8260
Benutzer- und Wartungshandbuch
User and maintenance manual
Manuel d'utilisation et d'entretien
Manuale d'uso e manutenzione
IT

Werbung

Inhaltsverzeichnis
loading

Inhaltszusammenfassung für Bauknecht ESN 8260

  • Seite 1 ESN 8260 Benutzer- und Wartungshandbuch User and maintenance manual Manuel d’utilisation et d’entretien Manuale d’uso e manutenzione...
  • Seite 3: Wichtige Sicherheitshinweise

    WICHTIGE SICHERHEITSHINWEISE IHRE SICHERHEIT UND DIE ANDERER PERSONEN IST SEHR WICHTIG Diese Anweisungen sowie das Gerät beinhalten wichtige Sicherheitshinweise, die Sie durchlesen und stets beachten sollten. Dieses Symbol warnt vor möglichen Gefahren für die Sicherheit des Benutzers und anderer Personen. Alle Sicherheitshinweise werden von dem Gefahrensymbol und folgenden Begriffen begleitet: Weist auf eine gefährliche Situation hin, die bei mangelnder Vorsicht zu schweren GEFAHR...
  • Seite 4: Installation

    INSTALLATION Prüfen Sie nach dem Auspacken, ob der Backofen etwaige Transportschäden aufweist und die Backofentür richtig schließt. Bei auftretenden Problemen wenden Sie sich bitte an Ihren Händler oder rufen die nächste Kundendienststelle an. Um eventuellen Schäden vorzubeugen, sollten Sie das Gerät erst unmittelbar vor der Installation von der Polystyrolunterlage nehmen. VORBEREITUNG DES UNTERBAUSCHRANKS •...
  • Seite 5: Konformitätserklärung

    Entsorgung von Altgeräten Dieses Gerät ist gemäß der Europäischen Richtlinie 2002/96/EC für Elektro- und Elektronik-Altgeräte gekennzeichnet. Durch eine vorschriftsmäßige Geräteinstallation tragen Sie zum Umweltschutz bei und vermeiden eventuelle Unfallgefahren. Das Symbol auf dem Gerät bzw. auf dem beiliegenden Informationsmaterial weist darauf hin, dass dieses Gerät kein normaler Haushaltsabfall ist, sondern in einer Sammelstelle für Elektro- und Elektronik-Altgeräte entsorgt werden muss.
  • Seite 6: Ausbau Der Tür

    Geräteinnenraum WICHTIG: Vermeiden Sie den Gebrauch von Scheuerschwämmen, Topfkratzern und Metallschabern. Diese können die Emailflächen und das Glas der Gerätetür mit der Zeit beschädigen. • Lassen Sie den Backofen nach jedem Gebrauch abkühlen und reinigen Sie ihn, so lange er noch handwarm ist, um Verkrustungen und Flecken durch Speisereste (z.
  • Seite 7: Absenken Des Oberen Grillelements (Nur Bei Einigen Modellen)

    ABSENKEN DES OBEREN GRILLELEMENTS (NUR BEI EINIGEN MODELLEN) Entfernen Sie die seitlichen Einhängegitter. Ziehen Sie das Heizelement (Abb. 3) etwas nach vorn und senken Sie es anschließend ab (Abb. 4). Um das Grillelement wieder korrekt einzusetzen, heben Sie es an und ziehen Sie es leicht zu sich her. Vergewissern Sie sich, dass es korrekt in den seitlichen Aussparungen sitzt.
  • Seite 8: Nicht Mitgeliefertes Zubehör

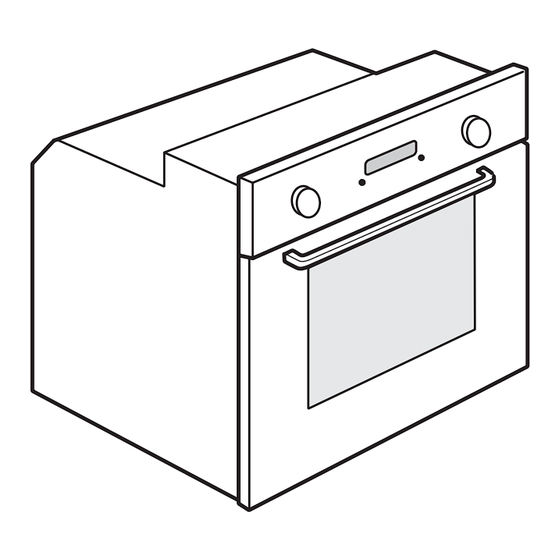
    BEDIENUNGSANLEITUNG FÜR DEN OFEN FÜR DEN ELEKTRISCHEN ANSCHLUSS LESEN SIE BITTE DEN TEIL BEZÜGLICH DER INSTALLATION Bedienfeld Oberes Heizelement/Grill Kühlgebläse (nicht sichtbar) Typenschild (darf nicht entfernt werden) Innenbeleuchtung Gebläse Drehspieß (falls mitgeliefert) Unteres Heizelement (nicht sichtbar) Tür 10. Position der Ebenen (die Nummer der Ebene steht auf der Vorderkante des Ofens) 11.
  • Seite 9: Beschreibung Des Bedienfelds

    BESCHREIBUNG DES BEDIENFELDS FUNKTIONSWAHLKNOPF: Einschalten/Ausschalten und Auswahl der Funktionen THERMOSTAT-BEDIENKNOPF: Temperaturwahl BEDIENKNOPF KOCHZONE VORNE LINKS 1 ... 10 BEDIENKNOPF KOCHZONE HINTEN LINKS 1 ... 10 BEDIENKNOPF KOCHZONE HINTEN RECHTS 1 ... 10 BEDIENKNOPF KOCHZONE VORNE RECHTS 1 ... 10 THERMOSTAT-KONTROLLLEUCHTE KOCHFELD-BETRIEBSANZEIGE Die Funktion „Multizone“...
  • Seite 10 TABELLE FUNKTIONSBESCHREIBUNGEN DES KOCHFELDS (modellabhängig) BEDIENKNÖPFE DES KOCHFELDS Zum Aufgehen von Nudelteig, Aufweichen von gefrorener Butter, Warmhalten der Milch in der Trinkflasche oder der Babynahrung, zur Herstellung von Joghurt, zum Schmelzen von Schokolade, usw. Diese Betriebsart funktioniert nur bei leuchtender Restwärme-Kontrollleuchte. Achten Sie SCHMELZSTUFE darauf, dass die Restwärme-Kontrollleuchte der Kochzone leuchtet, die Sie verwenden möchten.
  • Seite 11 GARTABELLE Rezept Betriebsart Vorheizen Einschubebene Temperatur Zeit Zubehör (von unten) (°C) (Min.) Hefekuchen 150-175 35-90 Kuchenform auf Rost Gefüllter Kuchen Fettpfanne / Backblech oder (Käsekuchen, Strudel, 170-190 30-85 Kuchenform auf Rost Obstkuchen) Plätzchen, Törtchen 160-175 20-45 Fettpfanne / Kuchenblech Beignets 175-200 30-40 Fettpfanne / Kuchenblech...
  • Seite 12: Hinweise Zum Gebrauch Und Empfehlungen

    HINWEISE ZUM GEBRAUCH UND EMPFEHLUNGEN So lesen Sie die Garzeittabelle Die Tabelle gibt die beste Garfunktion für ein bestimmtes Lebensmittel an, das auf einer oder mehreren Ebenen gleichzeitig gegart werden kann. Die Garzeiten gelten ab dem Moment, in dem Sie das Gargut in den Ofen geben, die (eventuell erforderliche) Aufheizzeit zählt nicht dazu.
  • Seite 13: Important Safety Instructions

    IMPORTANT SAFETY INSTRUCTIONS YOUR SAFETY AND THAT OF OTHERS IS PARAMOUNT This manual and the appliance itself provide important safety warnings, to be read and observed at all times. This is the danger symbol, pertaining to safety, which alerts users to potential risks to themselves and others. All safety warnings are preceded by the danger symbol and the following terms: Indicates a hazardous situation which, if not avoided, will cause serious injury.
  • Seite 14: Electrical Connection

    INSTALLATION Unpack the oven and make sure that the oven has not been damaged during transport and that the oven door closes properly. In the event of problems, contact the dealer or your nearest After-sales Service. To prevent any damage, only remove the oven from its polystyrene foam base at the time of installation.
  • Seite 15: Declaration Of Conformity

    Energy saving Only pre-heat the oven if specified in the cooking table or your recipe. Use dark lacquered or enamelled baking moulds as they absorb heat far better. Switch the oven off 10/15 minutes before the set cooking time. Food requiring prolonged cooking will continue to cook even once the oven is switched off.
  • Seite 16: Maintenance

    Accessories: • Soak the accessories in water with washing up detergent immediately after use, handling them with oven gloves if still hot. • Food residues can be easily removed using a brush or sponge. Cleaning the rear wall and catalytic side panels of the oven (if present): IMPORTANT: do not use corrosive or abrasive detergents, coarse brushes, pot scourers or oven sprays which could damage the catalytic surface and ruin its self-cleaning properties.
  • Seite 17: Replacing The Oven Lamp

    REPLACING THE OVEN LAMP To replace the rear lamp (if present): Disconnect the oven from the power supply. Unscrew the lamp cover (Fig. 5), replace the lamp (see note for lamp type) and screw the lamp cover back on. Reconnect the oven to the power supply. To replace the side lamp (if present): Disconnect the oven from the power supply.
  • Seite 18 INSTRUCTIONS FOR OVEN USE FOR ELECTRICAL CONNECTION, SEE THE PARAGRAPH ON INSTALLATION Control panel Upper heating element/grill Cooling fan (not visible) Dataplate (not to be removed) Lamp Turnspit (if present) Lower heating element (not visible) Door 10. Position of shelves (the number of shelves is indicated on the front of the oven) 11.
  • Seite 19: Control Panel Description

    CONTROL PANEL DESCRIPTION FUNCTION SELECTOR KNOB: On/off and function selector knob THERMOSTAT KNOB: selecting the temperature CONTROL KNOB FOR FRONT LEFT HOTPLATE 1 ... 10 CONTROL KNOB FOR REAR LEFT HOTPLATE 1 ... 10 CONTROL KNOB FOR REAR RIGHT HOTPLATE 1 ...
  • Seite 20 COOKTOP FUNCTIONS TABLE (depending on model) COOKTOP CONTROL KNOBS To allow dough to rise, to soften butter taken from the fridge, to keep baby bottles or food warm, also for making yoghurt, melting chocolate, etc. This function is only available when the residual heat indicator is on. For this function, make sure GENTLE HEAT the residual heat indicator of the desired hotplate is on.
  • Seite 21: Cooking Table

    COOKING TABLE Recipe Function Preheating Shelf Temperature Time Accessories (from bottom) (°C) (min) Leavened cakes 150-175 35-90 Cake tin on wire shelf Filled pies (cheesecake, Drip tray/ baking tray or cake tin 170-190 30-85 strudel, apple pie) on wire shelf Biscuits/Tartlets 160-175 20-45...
  • Seite 22: Recommended Use And Tips

    RECOMMENDED USE AND TIPS How to read the cooking table The table indicates the best function to use for any given food, to be cooked on one or more shelves at the same time. Cooking times start from the moment food is placed in the oven, excluding pre-heating (where required). Cooking temperatures and times are purely for guidance and will depend on the amount of food and type of accessory used.
  • Seite 23: Instructions Importantes Sur La Sécurité

    INSTRUCTIONS IMPORTANTES SUR LA SÉCURITÉ VOTRE SÉCURITÉ AINSI QUE CELLE D’AUTRUI EST PARTICULIÈREMENT IMPORTANTE Le présent manuel contient d’importants messages relatifs à la sécurité, qui figurent également sur l’appareil. Nous vous invitons à les lire soigneusement et à les respecter en toute circonstance. Ceci est le symbole de danger relatif à...
  • Seite 24: Branchement De L'appareil

    INSTALLATION Après avoir déballé le four, contrôlez que l’appareil n’a pas été endommagé pendant le transport et que la porte ferme parfaitement. En cas de problème, contactez votre revendeur ou le Service Après-vente le plus proche. Nous recommandons de retirer le four de la base en polystyrène uniquement avant de procéder à l’installation, afin d’éviter tout risque d’endommagement de l’appareil.
  • Seite 25: Conseils Pour La Protection De L'environnement

    CONSEILS POUR LA PROTECTION DE L’ENVIRONNEMENT Élimination des emballages Les matériaux d’emballage sont entièrement recyclables comme l’indique le symbole de recyclage ( ). Par conséquent, ne les jetez jamais dans la nature mais conformez-vous aux réglementations locales en vigueur en matière d’élimination des déchets. Mise au rebut de l’appareil Cet appareil est certifié...
  • Seite 26 NETTOYAGE N’utilisez jamais d’appareil à vapeur. AVERTISSEMENT Attendez que le four soit froid avant de procéder à son nettoyage. Veillez à toujours débrancher l’appareil. Extérieur du four REMARQUE IMPORTANTE : n’utilisez en aucun cas de produits corrosifs ou de détergents abrasifs. Si l’un de ces produits entre en contact avec le four, essuyez-le immédiatement à...
  • Seite 27: Entretien

    ENTRETIEN Munissez-vous de gants de protection. AVERTISSEMENT Procédez aux opérations indiquées lorsque l’appareil est froid. Veillez à toujours débrancher l’appareil. DÉMONTAGE DE LA PORTE Pour démonter la porte : Ouvrez complètement la porte du four. Soulevez les deux manettes d’arrêt des charnières en les poussant vers l’avant, jusqu’à la butée (Fig. 1). Fermez complètement la porte (A), soulevez-la (B) et faites-la pivoter (C) jusqu’à...
  • Seite 28: Remplacement De L'ampoule

    REMPLACEMENT DE L’AMPOULE Pour remplacer l’ampoule arrière (si présente) : Débranchez le four. Dévissez le capot de l’ampoule (Fig. 5), remplacez l’ampoule brûlée èar une neuve (voir « Remarque » pour connaître le type), puis revissez le capot de l’ampoule. Rebranchez le four.
  • Seite 29: Accessoires Non Fournis

    INSTRUCTIONS POUR L’UTILISATION DU FOUR POUR LE BRANCHEMENT ÉLECTRIQUE, CONSULTEZ LA PARTIE RELATIVE À L’INSTALLATION Bandeau de commande Résistance supérieure/gril Ventilateur (non visible) Plaque signalétique (à ne pas enlever) Éclairage Ventilateur Tournebroche (si présent) Résistance inférieure (non visible) Porte 10. Position des plaques (le nombre de gradins est indiqué sur la façade du four) 11.
  • Seite 30: Description Du Bandeau De Commande

    DESCRIPTION DU BANDEAU DE COMMANDE BOUTON DES FONCTIONS : allumage/extinction et sélection des fonctions BOUTON DE THERMOSTAT : sélection de la température BOUTON DE COMMANDE DE LA ZONE DE CUISSON AVANT GAUCHE 1 ... 10 BOUTON DE COMMANDE DE LA ZONE DE CUISSON ARRIÈRE GAUCHE 1 ...
  • Seite 31 TABLEAU DESCRIPTIF DES FONCTIONS DE LA TABLE DE CUISSON (selon le modèle) BOUTONS DE COMMANDE DE LA TABLE DE CUISSON Utilisez cette fonction pour faire lever une pâte, ramollir une plaquette de beurre dur sortie du réfrigérateur, réchauffer un biberon ou le repas d’un bébé, fabriquer du yaourt, faire fondre du chocolat, etc.
  • Seite 32 TABLEAU DE CUISSON Recette Fonction Préchauffage Gradin (en Température Durée Accessoires partant du bas) (°C) (min) Gâteaux levés 150-175 35-90 Moule à gâteau sur grille Tourtes fourrées (tarte au fromage blanc, strudel Lèchefrite / plaque à pâtisserie 170-190 30-85 aux pommes, tarte aux ou moule à...
  • Seite 33: Conseils D'utilisation Et Suggestions

    CONSEILS D’UTILISATION ET SUGGESTIONS Comment lire le tableau de cuisson Le tableau indique la meilleure fonction à utiliser pour un aliment donné, à cuire sur un ou plusieurs gradins simultanément. Les temps de cuisson commencent au moment de l’introduction du plat dans le four et ne tiennent pas compte du préchauffage (si nécessaire).
  • Seite 34: Istruzioni Importanti Per La Sicurezza

    ISTRUZIONI IMPORTANTI PER LA SICUREZZA LA SICUREZZA VOSTRA E DEGLI ALTRI È MOLTO IMPORTANTE Il presente manuale e l’apparecchio stesso sono corredati da importanti messaggi relativi alla sicurezza, da leggere ed osservare sempre. Questo è il simbolo di pericolo, relativo alla sicurezza, il quale avverte dei potenziali rischi per l’utilizzatore e per gli altri. Tutti i messaggi relativi alla sicurezza saranno preceduti dal simbolo di pericolo e dai seguenti termini: Indica una situazione pericolosa che, se non evitata, provoca lesioni gravi.
  • Seite 35: Installazione

    INSTALLAZIONE Dopo aver disimballato il forno verificare che non si sia danneggiato durante il trasporto e che la porta si chiuda perfettamente. In caso di problemi, contattare il rivenditore o il Servizio Assistenza Clienti. Per prevenire eventuali danni, si consiglia di rimuovere il forno dalla base in polistirolo soltanto prima dell’installazione.
  • Seite 36: Dichiarazione Di Conformità

    Risparmio energetico Preriscaldare l’apparecchio solo se indicato nella tabella di cottura o nella vostra ricetta. Usare stampi da forno scuri, laccati o smaltati, perché assorbono molto meglio il calore. Spegnere il forno 10/15 minuti prima del tempo totale di cottura impostato. Nel caso di cibi che richiedono tempi lunghi, questi continueranno comunque a cuocere.
  • Seite 37: Manutenzione

    Accessori: • Mettere a bagno gli accessori con detersivo per piatti dopo l’uso, maneggiandoli con guanti da forno, se ancora caldi. • I residui di cibo possono essere rimossi con una idonea spazzola o con una spugna. Pulizia della paratia posteriore e dei pannelli laterali catalitici (se in dotazione): IMPORTANTE: non usare detergenti corrosivi o abrasivi, spazzole ruvide, spugne per pentole o spray per forno che potrebbero danneggiare la superficie catalitica, facendole perdere le sue proprietà...
  • Seite 38: Sostituzione Della Lampada

    SOSTITUZIONE DELLA LAMPADA Per sostituire la lampada posteriore (se in dotazione): Scollegare il forno dalla rete elettrica. Svitare il copri-lampada (Fig. 5), sostituire la lampada (per il tipo vedere nota) e riavvitare il copri-lampada. Ricollegare il forno alla rete elettrica. Per sostituire la lampada laterale (se in dotazione): Scollegare il forno dalla rete elettrica.
  • Seite 39 ISTRUZIONI PER L’USO DEL FORNO PER IL COLLEGAMENTO ELETTRICO CONSULTARE LA PARTE RELATIVA ALL’INSTALLAZIONE Pannello comandi Resistenza superiore/grill Ventola raffreddamento (non visibile) Targhetta matricola (da non rimuovere) Lampada Ventola Girarrosto (se in dotazione) Resistenza inferiore (non visibile) Porta 10. Posizione dei ripiani (il numero di livello è indicato sul frontale del forno) 11.
  • Seite 40: Descrizione Pannello Comandi

    DESCRIZIONE PANNELLO COMANDI MANOPOLA FUNZIONI: accensione /spegnimento e selezione delle funzioni MANOPOLA TERMOSTATO: selezione della temperatura MANOPOLA COMANDO DI COTTURA ANTERIORE SINISTRA 1 ... 10 MANOPOLA COMANDO ZONA DI COTTURA POSTERIORE SINISTRA 1 ... 10 MANOPOLA COMANDO ZONA DI COTTURA POSTERIORE DESTRA 1 ...
  • Seite 41 TABELLA DESCRIZIONE FUNZIONI PIANO (secondo il modello) MANOPOLE COMANDO PIANO Per far lievitare la pasta, ammorbidire il burro tolto dal frigo, mantenere al caldo i biberon o la pappa dei bambini, per fare lo yogurt, sciogliere il cioccolato, ecc. È disponibile solo quando la spia di calore residuo è accesa. Per il funzionamento, accertarsi che TEPORE la spia di calore residuo della zona di cottura che si vuole usare è...
  • Seite 42 TABELLA DI COTTURA Ricetta Funzione Preriscaldamento Livello Temperatura Tempo Accessori (dal basso) (°C) (min) Torte a lievitazione Sì 150-175 35-90 Tortiera su griglia Torte ripiene (cheese cake, Leccarda / piastra dolci o Sì 170-190 30-85 strudel, torta di frutta) tortiera su griglia Biscotti / Tortine Sì...
  • Seite 43 CONSIGLI D’UTILIZZO E SUGGERIMENTI Come leggere la tabella di cottura La tabella indica la funzione migliore da utilizzare per un determinato alimento, da cuocere su uno o più ripiani contemporaneamente. I tempi di cottura si riferiscono all’introduzione del cibo nel forno, escluso il preriscaldamento (ove richiesto).
  • Seite 44 IT42...
  • Seite 46 Printed in Italy 03/2011 5019 410 01053 Copyright Whirlpool Europe s.r.l. 2010. All rights reserved...

Inhaltsverzeichnis