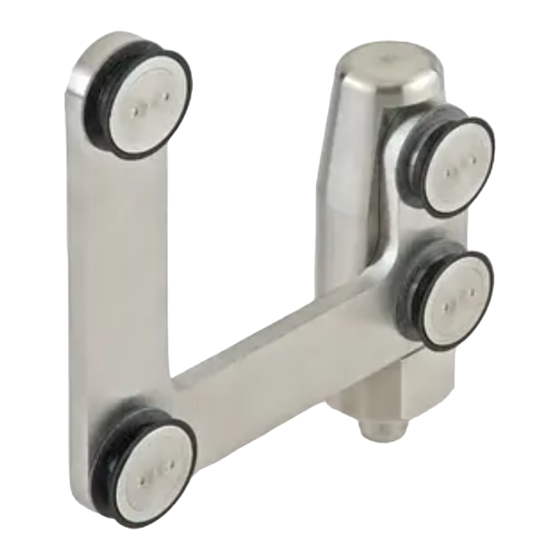
Dorma MANET Montageanleitung
Drehflügeltürsystem

Verwandte Anleitungen für Dorma MANET


Inhaltszusammenfassung für Dorma MANET
- Seite 1 Montageanleitung DORMA MANET Drehflügeltürsystem Mounting instruction DORMA MANET Pivoting door system DORMA-Glas Stand/Issue 10.08 / 003456 800.52.318.6.32...
- Seite 2 Verdünnung verwenden Do not use thinners Glasbearbeitung: Glass preparation: Bohrung für Punkthalter. Hole for countersunk single-point fixing. Montagewerkzeug: Installation tool: 4 mm 3 mm 6 mm DORMA-Glas Seite/Page 2/15 Stand/Issue 09.07...
- Seite 3 * Seitenteil = 5mm Luft / Wand = 8mm Luft * Sidelight = 5mm clearance / wall = 8mm clearance Drehtür mit Oberlicht Pivoting door with overpanel Drehtür mit Oberlicht und Seitenteil Pivoting door with overpanel and sidelight DORMA-Glas Seite/Page 3/15 Stand/Issue 09.07...
- Seite 4 Drehstangen Ausführungen: Types of pivot rods: Durchgehende Drehstange Full-length pivot rod Kurzausführung Drehstange Pivot rod set, short type Kurzausführung mit Zwischenrohr Pivot rod set with intermediate tube DORMA-Glas Seite/Page 4/15 Stand/Issue 09.07...
- Seite 5 4 single-point fixings. Optional with intermediate tube. SET 1 Drehbeschlag für DORMA BTS/Bodenlager Pivot bearing for DORMA BTS/floor pivot Drehlager für Deckenmontage, einstellbar Pivot bearing for installation to ceiling, adjustable PT 25 Zapfen mit Spreizdübel PT 25 top pivot with plug SET 2 Drehbeschlag für DORMA BTS/Bodenlager...
- Seite 6 Scope of delivery CONCEPT: Punkthalter zur Drehstangenbefestigung am Glas Single-point fixing, rod to glass Drehbeschlag unten für DORMA BTS/Bodenlager Pivot bearing for DORMA BTS/floor pivot Durchgehende Drehstange, gebohrt, Fixlänge Solid pivot rod, drilled, fixed length oder / or oder / or...
- Seite 7 2.1 Ensure that the overpanel and sidelight are professional installed. Fix overpanel/sidelight connector with pivot bearing with single-point fixings. Seitenteil / sidelight Oberlicht / overpanel 6 mm 15 Nm Punkthalter für Oberlicht-/Seitenteilverbinder Single-point fixing for overpanel / sidelight connector DORMA-Glas Seite/Page 7/15 Stand/Issue 09.07...
- Seite 8 4. Montage des unteren Drehlagers: 4. Installation of bottom pivot bearing: 4.1 Unteres Drehlager mit der abgeflachten Seite zum Glas, auf die Drehstange schieben. 4.1 Slide the bottom pivot bearing with flat side to glass onto pivot rod. DORMA-Glas Seite/Page 8/15 Stand/Issue 10.08...
- Seite 9 5.1 Oberes Drehlager mit der flachen Seite zum Glas bis zum Punkthalter auf die Drehstange schieben. 5.1 Slide the top pivot bearing with flat side to glass until it touches single-point fixing on pivot rod. DORMA-Glas Seite/Page 9/15 Stand/Issue 10.08...
- Seite 10 7.1 Drehtür auf die Achse des Bodenlagers und auf 7mm Unterlegklötze setzen. 7.1 Place pivot door onto spindle of bottom pivot bearing and additional 7mm support blocks. 7.2 Tür lotrecht unter das obere Drehlager schwenken. 7.2 Align siwng door into plumb position. Unterlegklötze support blocks DORMA-Glas Seite/Page 10/15 Stand/Issue 09.07...
- Seite 11 8.1 Oberes Drehlager entsprechend der Einbausituation mit der Buchse auf den Zapfen schieben (siehe unten). 8.1 Slide the top pivot bearing according to installation situation with the bush onto the PT 25 bolt (see below) . 4 mm ca. 15Nm DORMA-Glas Seite/Page 11/15 Stand/Issue 09.07...
-
Seite 12: Schrauben Lösen
Adjutment of door height, zero position, as well as lateral clearance at the bottom: Please see instruction of floor spring! 6 mm 9.1 Schrauben lösen 9.1 loosen screws 9.2 Tür einstellen und Schrauben anziehen. 9.2 Adjust the door and tighten the screws. 6 mm 15 Nm ± 2,5 DORMA-Glas Seite/Page 12/15 Stand/Issue 09.07... - Seite 13 Possible adjustments for insert in the top pivot bearing to adjust the swing door to PT 25. Einsatz um 90° gedreht, zusätzlich Einstellung mittels Gewindestifte Adjustment by means of grub screws einstellbar mittels Gewindestifte Insert rotated to 90°, also adjustment by means of grub screws 75.5 DORMA-Glas Seite/Page 13/15 Stand/Issue 09.07...
- Seite 14 ± 2,5 Einstellung: Adjustment: 10.1 Einstellung mittels Gewindestifte 10.1 Adjustment through grub screws 10.2 Nach erfolgter Einstellung der Nullstellung, Gewindestifte fest anziehen! 10.2 After adjustment is completed, tighten the grub screws! ± 2,5 4 mm DORMA-Glas Seite/Page 14/15 Stand/Issue 10.08...
-
Seite 15: Ausschnitt / Cut Out
11.2 Zur Demontage des Deckels, mit dem Fingernagel oder einem anderen weichen Gegenstand an die Kante des Deckels drücken. Der Deckel spring raus. 11.2 To disassamble the cover, press the edge of cover with the fingernail or another soft subjekt. The cover will jump out. DORMA-Glas Seite/Page 15/15 Stand/Issue 09.07... - Seite 16 Montageanleitung MANET Eckschloss Mounting instruction MANET corner lock STEP 1 Schloss auseinanderschrauben STEP 1 Disable lock Vor der Montage das Glas mit handelsübli- Please clean the glass with standard glass chem Glasreiniger im Bereich der Klemmflä- cleaner prior to installation.
-
Seite 17: Beidseitige Griffstange, Verschließbar
Montageanleitung DORMA Beidseitige Griffstange, verschließbar Installation DORMA Pair of handle bars, lockable Stand/Issue 11.09 / 004403 800.52.646.6.32 DORMA-Glas... - Seite 18 Keine Verdünnung verwenden Do not use thinners Glasbearbeitungen: Glass preparations: untere Glasbohrung obere Glasbohrung bottom drilling hole top drilling hole 6-16mm 6-16mm Montagewerkzeug: Mounting tools: 2 mm 6 mm Seite/Page 2/7 Stand/Issue 11.09 DORMA-Glas...
- Seite 19 Handle bar is delivered assembled. 1. Vorbereitung: 1. Preparation: Der Verriegelungsbolzen muss eingefahren sein, bevor die Griffstange demontiert wird! The locking bolt must be retracted before disassembling! Knopf / knob Knopf / knob einfahren ausfahren retract extend Seite/Page 3/7 Stand/Issue 11.09 DORMA-Glas...
- Seite 20 Keep the knob in the prior position until the handle bar is mounted at the glass! DETAIL W lösen loosen 2 mm DETAIL X lösen loosen 2 mm DETAIL Y DETAIL Z 2.11 2.10 6 mm Seite/Page 4/7 Stand/Issue 11.09 DORMA-Glas...
- Seite 21 3. Montage der Griffstange: 3. Assembly of handle bar: Bitte auf die Position achten. Pay attention to the position. Bitte auf die Position achten. Pay attention to the position. 6 mm 8 Nm Seite/Page 5/7 Stand/Issue 11.09 DORMA-Glas...
- Seite 22 DETAIL Y Bolzenaufnahme bolt location Bolzen bolt Bolzen und Bolzenaufnahme müssen horizontal stehen um die beiden Griffstangen zu verbinden. Bolt and bolt location must be in horizontal position to connect the both handles. 3.10 3.10 Seite/Page 6/7 Stand/Issue 11.09 DORMA-Glas...
- Seite 23 4.1 Close the door. 4.2 Position der Bodenbuchse festlegen. Loch bohren und Buchse in den Boden einbringen. 4.2 Define the position of the floor bushing. Drill the hole and set the bushing into the floor. Seite/Page 7/7 Stand/Issue 11.09 DORMA-Glas...