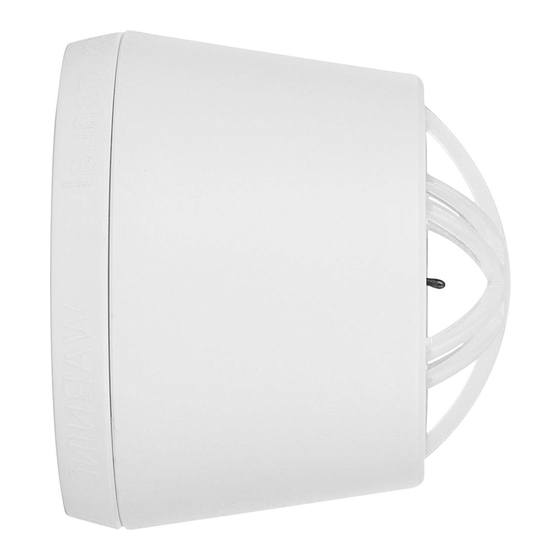
Smartwares RM640K Gebrauchsanweisung
Hitzemelder
Quicklinks
Conform with
EN 5446-2:2003
EN Heat detector / Manual
service.smartwares.eu/dop and follow the instructions.
DE Hitzemelder / Gebrauchsanweisung
service.smartwares.eu/dop und folgen Sie den Anweisungen.
PL Czujnik ciepła / instrukcje
service.smartwares.eu/dop i postępuj zgodnie z instrukcjami.
GENERAL INFORMATION
in such a way that they can be reached unimpe-
EN
Thank you for purchasing this
ded by the fire heat, so that fires can be
Smartwares heat alarm device!
detected reliably in the development phase.
Warning: Requirements for smoke and heat
Please read these instructions
carefully before using the smoke alarm device.
alarm devices vary from state to state and from
Retain this information in a safe and easily
region to region. Always check the relevant
accessible place for future use and maintenance.
requirements in your area with your local
If you have any questions or if you are looking
authorities!
for additional information about your smoke
How many heat alarm devices?
alarm device, please visit our website service.
smartwares.eu.
Place a heat alarm near possible fire sources
such as:
Make/model number : Smartwares RM640K
• Kitchen area
Description : This fire alarm reacts on heat, this
• Generator room
means that the temperature of the air is conti-
• Living room with wooden stove burner
nuously checked. The alarm does not detect heat,
• Garage area
gas or fire but activates when the temperature
• Washing and drying area
reaches a certain value. The advantage of this fire
Additional heat alarms increase your security.
alarm compared to a smoke alarm device is that
Please visit our website service.smartwares.eu for
it is extremely convenient for installation in kit-
more detailed advice.
Where to mount a heat alarm device?
chens or in spaces where people smoke. In these
spaces a common smoke alarm device would
• Centered at ceiling of the room or close to
often give a false alarm. The heat alarm gives an
the possible source of the flames
alarm at an early stage when correctly installed
• Max height: 6m
and maintained. In case of a fire, this can give you
• Min 50 cm distance to walls/ barriers
the extra seconds needed to leave your house
Where not to mount your heat alarm device?
and to call the fire brigade. The alarm is designed
• Closer than 50 cm to light sources/electrical
to detect fire, not to prevent fire. This apparatus
sources;
contains a 3V DC CR14250 lithium battery with a
• Locations that are difficult to reach and
lifetime of 10 year.
impede the accessibility of the test button,
Function : Heat alarm device intended to alert
battery replacement and maintenance
the persons present near a fire/fire heat, to give
ALARM SILENCE / HUSH MODE
them time to react properly to the danger.
Scope of application : Heat alarm device for
When the heat alarm devices gives an alarm,
buildings with residential function.
please verify the cause of the alarm first. If requi-
Caution : The alarm is designed in order to
red, the heat alarm device can be placed into
detect heat; it cannot prevent a fire!
hush mode by pressing the test button. During
Caution : The heat alarm may not be painted
hush mode the LED will flash every 8 seconds to
or covered because this may cause loss of
indicate the heat alarm device is in hush mode.
functionality.
Please remove the heat or cause of the alarm and
Caution : Using a heat alarm is part of your fire
after 10 minutes the heat alarm will automatically
protection, just as fire extinguishers, emergency
reset to normal mode. If the cause of the alarm
ladders, ropes, but also your choice in the use of
is still present the heat alarm device will give an
building materials for renovation. A heat alarm
alarm again.
is not suitable as a fire safety device unless it
EMPTY BATTERY SIGNAL
is part of a planned fire safety system which
should always include (connected) smoke alarms.
If the battery is running low, the heat alarm
Always ensure that there is an evacuation plan
device will indicate this with an audible "beep".
and discuss this with your children. Ensure that
This indicator sounds continually with intervals of
each room can be left without opening the door,
35-45 seconds for at least 30 days. The empty
e.g. by the window. If there is any question as to
battery indication can be overruled for 8-10
the cause of an alarm, it should be assumed that
hours by pressing the test button, allowing you
the alarm is due to an actual fire and the dwelling
to finish your sleep and still be protected from
evacuated immediately.
heat. The alarm can be deactived by removing
Warning : Heat alarm devices must be replaced
the heat alarm from the mounting base.
no later than 10 years after initial activation. Fill
MAINTENANCE
out the activation date on the rating label on the
Testing : We highly recommend you to test the
product and mark the replacement date in your
calendar. Please register for free reminders at
functionality of your heat alarm device every
smartreminder.eu.
month to check if the heat alarm is functioning
correctly and to ensure the full lifetime of the
INITIAL ACTIVATION
battery. Press and hold the test button until an
Before mounting this heat alarm device, it is
alarm signal sounds. The signal stops once the
important to activate and test the apparatus.
button is released. If the alarm signal does not
Activate and test the heat alarmdevice as follows:
sound after pressing the test button, the heat
Detector will be activated when it is mounted
alarm device is not working properly and the
on the base plate. Press and hold the test button
advice of Smartwares should be sought.
(see image 1) until an alarm signal sounds and
Warning : Do not use an open flame to test your
release. If the alarm signal does not sound after
heat alarm device, this could damage the appara-
pressing the test button, the heat alarm device
tus or ignite combustible materials and start a
is not working properly and the advice of Smart-
fire.
Cleaning : For optimal performance, the heat
wares should be sought.
alarm device must be dusted and vacuumed
MOUNTING
every six months. Do not touch the inside of the
To mount the heat alarm device, fix the base
heat alarm device with the nozzle of the vacuum
plate with the screws supplied and gently tighten
cleaner. Always test the functionality of the
the alarm onto the base plate (see image 2). You
apparatus after cleaning by pressing the test
can also use the Smartwares universal moun-
button. Please register for free reminders at
ting kit RMAG3 instead of the included screws,
smartreminder.eu
please refer to the relevant manual for this.
TROUBLE SHOOTING
Pay close attention to below siting recommenda-
tions to guarantee optimal performance of your
• If no sound is heard when testing the heat
heat alarm device. After installing the heat alarm
alarm, please make sure the alarm is tightened
device, always test its functionality by using the
on the base correctly.
test button.
• Smartwares can never be made liable for loss
Warning: To prevent injury, this apparatus must
and/or damage of whatever nature, including
be securely attached to the ceiling in accordance
incidental and/or consequential loss, arising
with the installation instructions.
from the fact that the signal from the heat
Warning: Heat alarm devices should be installed
alarm did not sound during heat or fire.
TECHNICAL DATA
• Heat sensivity: 54-70°C
• Battery type : Lithium DC3V CR14250
• Battery replaceable : No
• Battery lifetime : 10 year
• Lifetime device : 10 year
• Operating temperature : 4 ~ 38 °C
• Operating humidity : 10 ~ 95 %
• Alarm volume : >85dB at 3m
• Mounting type : Ceiling
• Detection area : Max 40m2
• Pause function : Yes
• Installation in LAV : No
: For indoor use only
: Please read manual before use, and store it carefully for future use
and maintenance
Condition
LED
Sound
Normal operation
Flashes every 30-34 seconds
None
Testing
Flashes rapidly
Quick beeps
Alarm
Flashes rapidly
Quick beeps
Hush mode
Flashes every 8 seconds
None
Let me sleep mode
Flashes every 8 seconds
None
Low battery indication Flashes every 30-34 seconds
1 short beep every 34 seconds
Malfunction
Flashes every 30-34 seconds
1 short beep every 34 seconds
RM640K
INTENDED USE: FIRE SAFETY
ESSENTIAL CHARACTERISTICS: PASSED
- Nominal activation conditions/ Sensitivity, Response
delay (response time) and Performance under fire condition
- Operational reliability
- Tolerance to supply voltage
- Durability of operational reliability and response delay,
temperature resistance
- Durability of operational reliability, vibration resistance
- Durability of operational reliability, humidity resistance
- Durability of operational reliability, corrosion resistance
- Durability of operational reliability, electrical stability
ALLGEMEINE INFORMATIONEN
DE
Vielen Dank, dass Sie sich für einen
Hitzemelder von Smartwares
entschieden haben! Bitte lesen Sie
vor der Inbetriebnahme des Hitzemelders die
Bedienungsanleitung sorgfältig durch. Bewahren
Sie dieses Dokument zum späteren Nachschla-
gen und für Wartungszwecke an einem sicheren
und leicht zugänglichen Ort auf. Antworten auf
eventuelle Fragen und weitere Informationen
zu Ihrem Hitzemelder finden Sie auf unserer
Homepage service.smartwares.eu.
Fabrikations-/Modellnummer :
Smartwares RM640K
Beschreibung : Der Brandmelder reagiert auf
Hitze. Das Gerät misst konstant die Temperatur
der Raumluft. Das Gerät ist nicht geeignet, die
Quelle einer Hitzeentwicklung zu lokalisieren.
Hitzemelder können im Vergleich zu Rauch-
meldern problemlos im Küchenbereich und in
Raucherbereichen eingesetzt werden. In den
genannten Bereichen würden Rauchmelder feh-
lerhaft auslösen. Hitzemelder lösen bei korrekter
Montage und regelmäßiger Wartung sehr früh-
zeitig einen Alarm aus. Im Brandfall gewinnen Sie
somit zusätzliche Reaktions- und Rettungszeit.
Das Gerät dient ausschließlich der Erkennung
einer Hitzeentwicklung und ist nicht geeignet,
einen Brand zu verhindern. Das Gerät arbeitet
mit einer Lithiumbatterie Typ 3V DC CR14250. Die
Lebensdauer der Batterie liegt bei zehn Jahren.
Funktion : Der Hitzemelder dient im Brandfall
bzw. im Falle starker Rauchentwicklung
zur Alarmierung aller Personen, die sich in
unmittelbarer Nähe befinden. Den Personen
im Gefahrenbereich soll auf diese Weise Zeit
verschafft werden, angemessen auf die Gefahr
zu reagieren.
Anwendungsbereich : Hitzemelder für den
Einsatz in Wohngebäuden.
Vorsicht : Das Gerät dient ausschließlich der
Erkennung einer Hitzeentwicklung und ist nicht
geeignet, einen Brand zu verhindern
Vorsicht : Hitzemelder dürfen keinesfalls mit Far-
be angestrichen oder auf irgendeine Art bedeckt
werden, um die einwandfreie Funktion zu
gewährleisten.
Vorsicht : Hitzemelder sind genauso wie
Feuerlöschgeräte, Feuerleitern, Rettungsseile
bis hin zu den gewählten Baumaterialien als
Bestandteil des jeweiligen Brandschutzkonzepts
zu betrachten. Hitzemelder sind ausschließlich
im Verbund mit anderen Brandschutzeinricht-
ungen - insbesondere mit Rauchmeldern - als
Sicherheitseinrichtung für den Brandfall zu
betrachten. Erarbeiten Sie einen geeigneten
Evakuierungsplan und besprechen Sie diesen
auch mit Ihren Kindern. Stellen Sie sicher, dass
jeder Raum z.B. auch durch ein Fenster statt
durch die Raumtüre verlassen werden kann.
Auch wenn die Ursache für einen Alarm nicht
unmittelbar ersichtlich ist: jeder Alarm warnt vor
einer konkreten Gefahr durch Brand. Verlassen
Sie im Alarmfall in jedem Fall das Gebäude!
Achtung : Hitzemelder sind alle zehn (10) Jahre
ab dem Zeitpunkt ihrer Aktivierung zu ersetzen.
Vermerken Sie das Datum der Aktivierung auf
dem Typschild des Geräts und vermerken Sie den
Zeitpunkt des fälligen Austauschs in Ihrem Kalen-
der. Registrieren Sie sich für den kostenlose
Erinnerungsdienst auf unserer Homepage
smartreminder.eu.
AKTIVIERUNG DES GERÄTS
Vor der Montage muss der Hitzemelder aktiviert
und auf korrekte Funktion geprüft werden. Akti-
vieren und Prüfen Sie den Hitzemelder wie folgt:
Das Gerät wird aktiviert, indem es auf die
Grundplatte montiert wird. Drücken und halten
Sie die Test-Taste (siehe Abbildung 1) gedrückt,
bis das Alarmsignal ertönt. Lassen Sie dann die
Taste los. Sollte kein Alarmsignal durch das
Betätigen der Test-Taste ausgelöst werden, funk-
tioniert der Hitzemelder nicht einwandfrei. Kont-
aktieren Sie in diesem Fall die Fa. Smartwares.
BEFESTIGUNG
Befestigen Sie zunächst die Grundplatte mithilfe
der mitgelieferten Schrauben an der Raumdecke.
Befestigen Sie anschließend den Hitzemel-
der vorsichtig auf der Grundplatte (siehe
Abbildung 2). Anstelle der mitgelieferten
Schrauben kann die Montage mithilfe des
Smartwares-Universal-Montagekits RMAG3
erfolgen. Beachten Sie die entsprechenden
Montagehinweise. Beachten Sie die folgenden
Empfehlungen zur Positionierung des Hitzemel-
ders, um die bestmögliche
Leistung zu gewährleisten. Betätigen Sie nach
der Montage des Hitzemelders die Test-Taste, um
TECHNISCHE DATEN
• Hitzeempfindlichkeit: 54-70°C
• Batterie ersetzbar: Nein
• Lebensdauer Gerät: 10 Jahre
• Zulässige Luftfeuchtigkeit: 10 ~ 95 %
• Montage: Decke
• Pausen-Funktion: Ja
Bedingung
Normalbetrieb
Test
Alarm
Unterbrechungs-Modus
Schlaf-Modus
Batteriespannungswarnung Blinkt alle 30-34 Sekunden
Fehlfunktion
1
Smartwares Europe
Jules Verneweg 87
NL - 5015BH Tilburg
service.smartwares.eu
RM640K • Heat Detector device
EN Turn to left to open,
turn to right to close.
DE Im Uhrzeigersinn drehen um zu öffnen,
gegen um zu schließen.
PL Skręcić w lewo, aby otworzyć,
po prawej stronie, aby zamknąć.
die korrekte Funktion zu prüfen.
Achtung: Um Verletzungen vorzubeugen, muss
das Gerät den Montageanweisungen entspre-
chend sicher an der Raumdecke befestigt
werden.
Achtung: Hitzemelder sind so zu positionieren,
dass jedwedeHitzeentwicklung zuverlässig,
direkt und frühzeitig erfasst werden kann.
Achtung: Hitzemelder unterliegen den am Ein-
satzort geltenden gesetzlichen Bestimmungen.
Erfragen Sie die einschlägigen Vorschriften
bei den örtlichen Behörden!
Wieviele Hitzemelder sollten montiert werden?
Positionieren Sie einen Hitzemelder so nahe wie
möglich an potenziellen Brandquellen z.B.:
• Küchenbereich
• Generatorraum
• Wohnzimmer mit Kaminofen
• Garagen
• Waschküchen und Trockenbereiche
Zusätzliche Hitzemelder steigern die Sicherheit.
Weitere detaillierte Informationen zum Thema
finden Sie auf unserer Homepage
service.smartwares.eu.
Wo sollten Hitzemelder platziert werden?
• Zentral an der Raumdecke bzw. in unmittel-
barer Nähe zur potenziellen Brandquelle.
• Max. Höhe: 6m
• Achten Sie auf einen Mindestabstand von
50 cm zu Wänden/Hindernissen:
Wo sollten Hitzemelder nicht platziert werden?
• In einem Abstand von weniger als 50 cm
zu Lichtquellen/Stromquellen.
• Schwer zugängliche Stellen, insbesondere
erschwerter Zugriff auf die Test-Taste,
erschwerter Batterieaustausch und erschwerte
Wartung.
UNTERBRECHUNGSMODUS
Versuchen Sie im Alarmfall zunächst, die mögli-
che Alarmursache zu lokalisieren. Falls erforder-
lich, kann der Hitzemelder durch Betätigen der
Test-Taste in den Unterbrechungs-Modus
geschaltet werden. Im Unterbrechungs-Modus
blinkt die LED des Hitzemelders alle acht
Sekunden. Beseitigen Sie die Alarmursache. Nach
zehn Minuten kehrt der Hitzemelder automatisch
in den Normalbetrieb zurück. Wenn die Alarmurs-
ache weiterhin besteht, löst der Hitzemelder
erneut aus.
BATTERIEWARNUNG
Bei nachlassender Batteriespannung erzeugt
der Hitzemelder ein akustischer Warnsignal. Der
Warnton ertönt konstant und in Intervallen
von 35-45 Sekunden für eine Gesamtdauer von
mindestens 30 Tagen. Die Batteriewarnung kann
durch Betätigen der Test-Taste für acht bis zehn
Stunden unterdrückt werden, ohne die Schut-
zfunktion außer Kraft zu setzen. Der Hitzemelder
wird deaktiviert, sobald Sie das Gerät von der
Grundplatte nehmen.
WARTUNG
Test : Wir empfehlen, den Hitzemelder einmal
monatlich auf korrekte Funktion und ausreichen-
de Batteriespannung zu prüfen. Drücken und
halten Sie die Test-Taste gedrückt, bis das
Alarmsignal ertönt. Das Signal wird abgeschaltet,
sobald Sie die Taste loslassen. Sollte kein
Alarmsignal durch das Betätigen der Test-Taste
ausgelöst werden, funktioniert der Hitzemelder
nicht einwandfrei. Kontaktieren Sie in diesem Fall
die Fa. Smartwares.
Achtung : Testen Sie Hitzemelder niemals, indem
Sie eine offene Flamme an das Gerät halten! Es
besteht die Gefahr, das Gerät zu beschädigen
und brennbare Materialien in Brand zu setzen.
Reinigung : Zur Gewährleistung der einwandfrei-
en Funktion muss der Hitzemelder alle sechs
Monate von Staubablagerungen befreit und mit
einem Staubsauger ausgesaugt werden.
Berühren Sie beim Aussaugen keine innenliegen-
den Teile des Hitzemelder mit der Saugspitze des
Staubsaugers. Prüfen Sie das Gerät nach jeder
Reinigung auf korrekte Funktion, indem Sie die
Test-Taste betätigen. Registrieren Sie sich für den
kostenlose Erinnerungsdienst auf unserer Home-
page smartreminder.eu
FEHLERBEHEBUNG
• Wenn kein Alarmton erzeugt wird, muss der
korrekte Sitz des Hitzemelders auf der
Grundplatte überprüft werden.
• Smartwares übernimmt keinerlei Haftung für
direkte und/oder indirekte Verluste oder
Schäden jedweder Art, welche auf ein
ausbleibendes Alarmsignal des Hitzemelders
im Falle einer Rauchentwicklung oder im
Brandfall zurückzuführen sind.
• Batterien: Lithium DC3V CR14250
• Lebensdauer Batterie: 10 Jahre
• Betriebstemperatur: 4 ~ 38 °C
• Alarmlautstärke: > 85 dB im Abstand von 3 m
• Erfassungsbereich: Max. 40 m2
• Einsatz im Schwingungs- und Akustiklabor: Nein
: Nur für den Einsatz im Innenbereich
: Lesen Sie die Anleitung vor dem Gebrauch vollständig durch. Heben Sie
die Anleitung zum späteren Nachschlagen und zu Wartungszwecken auf.
LED
Ton
Blinkt alle 30-34 Sekunden
Ohne
Blinkt schnell
Akustisches Signal (Piepton) in schneller Frequenz
Blinkt schnell
Akustisches Signal (Piepton) in schneller Frequenz
Blinkt alle 8 Sekunden
Ohne
Blinkt alle 8 Sekunden
Ohne
Ein kurzer Piepton alle 34 Sekunden
Blinkt alle 30-34Sekunden
Ein kurzer Piepton alle 34 Sekunden
EN Mounting type ceiling
DE Montageart Decke
PL Rodzaj montażu sufit
2
- BATTERY NOT REPLACEABLE -
INFORMACJE OGÓLNE
skuteczne wykrycie pożaru we wczesnej fazie.
PL
Uwaga:Wymogi w stosunku do urządzeń wykry-
Dziękujemy za zakup urządzenia
Smartwares wykrywającego wzrost
wających dym i ciepło różnią się w zależności od
temperatury! Przed rozpoczęciem
stanu czy regionu. Skontaktuj się z lokalnymi
korzystania z urządzenia wykrywającego wzrost
służbami, by sprawdzić odpowiednie wymogi!
temperatury należy uważnie przeczytać poniższe
Ile urządzeń wykrywających wzrost
instrukcje. Przechowuj je w bezpiecznym i łatwo
temperatury?
dostępnym miejscu, aby móc z nich skorzystać w
przyszłości. W przypadku jakichkolwiek pytań lub
Umieść urządzenie alarmowe w pobliżu możli-
konieczności znalezienia dodatkowych informacji
wych źródeł pożaru, na przykład:
na temat urządzenia wykrywającego wzrost tem-
• Kuchnia
peratury, odwiedź naszą stronę internetową:
• Pomieszczenie generatora
service.smartwares.eu.
• Pokój gościnny z drewnianym palnikiem
kuchenki
Numer produkcji/modelu :
• Garaż
Smartwares RM640K
• Pralnia i suszarnia
Opis : Ten alarm przeciwpożarowy reaguje na
Dodatkowe alarmy informujące o wzroście tem-
wzrost temperatury, co oznacza, że temperatura
peratury zwiększają Twoje bezpieczeństwo.
powietrza jest nieustannie monitorowana. Alarm
Odwiedź naszą stronę internetową – website ser-
nie wykrywa ciepła, gazu czy ognia, ale aktywuje
vice.smartwares.eu – aby dowiedzieć się więcej.
Gdzie zamocować urządzenie wykrywające
się, kiedy temperatura osiągnie określoną war-
wzrost temperatury?
tość. Zaletą tego alarmu przeciwpożarowego, w
porównaniu z urządzeniami wykrywającymi dym,
• Na suficie po środku pomieszczenia lub
jest niezwykle wygodna instalacja w kuchniach
możliwie blisko możliwego źródła płomieni
lub pomieszczeniach dla palących. W tych
• Maksymalna wysokość: 6m
miejscach zwykłe urządzenie wykrywające dym
• Przynajmniej 50 cm odstępu od ścian/
emitowałoby fałszywy alarm. Po prawidłowej
przeszkód:
instalacji i przy prawidłowej eksploatacji urządze-
Gdzie nie instalować urządzenia
wykrywającego wzrost temperatury?
nie będzie alarmowało o wzroście temperatury.
W przypadku pożaru może to zapewnić kilka
• W odległości mniejszej niż 50 cm od źródła
dodatkowych sekund na opuszczenie domu i we-
światła/elektryczności.
zwanie straży pożarnej. Alarm jest przeznaczony
• W lokalizacjach o ograniczonym dostępie,
do wykrywania pożarów, nie do zapobiegania
gdzie naciśnięcie przycisku testowania,
im. Urządzenie zawiera baterię litową 3 V DC
wymiana baterii czy czynności konserwacyjne
CR14250, której okres żywotności wynosi 10 lat.
są utrudnione.
Funkcja : Urządzenie wykrywające wzrost
temperatury informuje osoby znajdujące się w
WYCISZENIE ALARMU/TRYB CICHY
pobliżu pożaru/źródła ciepła, zapewniając im
Kiedy urządzenie wykrywające wzrost
czas na odpowiednią reakcję na zagrożenie.
temperatury emituje alarm, należy najpierw
Zakres zastosowania : Urządzenie wykrywające
zweryfikować jego przyczynę. Jeśli to konieczne,
wzrost temperatury dla budynków z funkcją
urządzenie wykrywające wzrost temperatury
mieszkalną.
można przełączyć w tryb cichy, naciskając
Uwaga : Alarm jest przeznaczony do wykrywania
przycisk testowania. W trybie cichym dioda LED
ciepła, nie do zapobiegania pożarom!
będzie migać co 8 sekund, informując że urząd-
Uwaga : Nie wolno zamalowywać ani zakrywać
zenie wykrywające wzrost temperatury pracuje w
urządzenia alarmowego, ponieważ może to
trybie cichym. Usuń źródło ciepła lub przyczynę
doprowadzić do utraty sprawności.
alarmu. Po 10 minutach alarm zostanie auto-
Uwaga : Urządzenie wykrywające wzrost tem-
matycznie zresetowany, a urządzenie przełączy
peratury to element instalacji przeciwpożarowej,
się w tryb normalny. Jeśli przyczyna alarmu jest
tak jak gaśnice, drabiny czy liny, ale również
nadal obecna, urządzenie wykrywające wzrost
dobór materiałów budowlanych. Urządzenie alar-
temperatury ponownie wyemituje alarm.
mujące musi być instalowane w ramach plano-
SYGNAŁ INFORMUJĄCY O
wanego systemu przeciwpożarowego, który
powinien zawsze obejmować (podłączone)
WYCZERPANEJ BATERII
wykrywacze dymu. Zawsze upewniaj się, że znasz
Jeśli bateria jest bliska wyczerpania, urządzenie
plan ewakuacyjny i omów go ze swoimi dziećmi.
wykrywające wzrost temperatury poinformuje
Upewnij się, że każde pomieszczenie można
o tym, emitując sygnał dźwiękowy. Będzie on
opuścić bez otwierania drzwi, np. przez okno. W
powtarzany co 35-45 sekund przez co najmniej
przypadku wątpliwości co do przyczyny alarmu
30 dni. Sygnał informujący o wyczerpanej baterii
należy zawsze założyć, że jest on spowodowany
można pominąć na 8-10 godzin, naciskając pr-
pożarem i opuścić mieszkanie lub dom.
zycisk testowania. Dzięki temu można wrócić do
Uwaga : Urządzenia wykrywające wzrost tempe-
snu i zachować ochronę przed nagłym wzrostem
ratury należy wymienić najpóźniej po 10 latach
temperatury. Alarm można zdezaktywować,
od pierwszej aktywacji. Datę aktywacji należy
zdejmując urządzenie z podstawy mocującej.
wpisać na naklejce znamionowej na produkcie i
KONSERWACJA
wpisać datę wymiany w swoim kalendarzu. Aby
otrzymywać bezpłatne przypomnienia, należy
Testowanie : Zdecydowanie zalecamy prze-
zarejestrować się na stronie smartreminder.eu.
prowadzanie testów sprawności urządzenia
wykrywającego wzrost temperatury co miesiąc,
PIERWSZA AKTYWACJA
aby mieć pewność, że funkcjonuje ono pra-
Przed zamontowaniem urządzenia wykrywają-
widłowo, a bateria jest naładowana. Naciśnij i
cego wzrost temperatury należy je aktywować i
przytrzymaj przycisk testowania do momentu
przetestować. Aktywacja i testowanie urządzenia
wyemitowania sygnału alarmowego. Emisja
alarmującego przebiega następująco: Detektor
sygnału zakończy się po zwolnieniu przycisku.
zostanie aktywowany po zamontowaniu na
Jeśli sygnał alarmowy nie zostanie wyemitowany
płycie bazowej. Naciśnij i przytrzymaj przycisk
po naciśnięciu przycisku testowania, urządzenie
testowania (patrz obraz 1) do momentu
wykrywające wzrost temperatury nie działa pop-
wyemitowania sygnału alarmowego. Jeśli sygnał
rawnie. Należy zasięgnąć opinii przedstawiciela
alarmowy nie zostanie wyemitowany po
firmy Smartwares.
naciśnięciu przycisku testowania, urządzenie
Uwaga : Nie należy korzystać z otwartego
wykrywające wzrost temperatury nie działa pop-
płomienia w celu przetestowania urządzenia
rawnie. Należy zasięgnąć opinii przedstawiciela
wykrywającego wzrost temperatury. Może to
firmy Smartwares.
doprowadzić do uszkodzenia urządzenia lub
zapalenia łatwopalnych materiałów i pożaru.
MONTAŻ
Czyszczenie : Urządzenie wykrywające wzrost
Aby zamocować urządzenie wykrywające wzrost
temperatury należy czyścić i odkurzać co sześć
temperatury, przykręć płytę bazową za pomocą
miesięcy, aby zapewnić optymalną pracę. Nie
dostarczonych śrub i lekko dokręć urządzenie
dotykać wnętrza urządzenia wykrywającego
alarmowe do płyty (patrz obraz 2). Możesz
wzrost temperatury końcówką odkurzacza.
skorzystać również uniwersalnego zestawu
Zawsze testować sprawność urządzenia po
montażowego Smartwares RMAG3 zamiast
czyszczeniu, naciskając przycisk testowania. Aby
dołączonych śrub. W takim przypadku zapo-
otrzymywać bezpłatne przypomnienia, należy
znaj się z odpowiednim podręcznikiem. Zwróć
zarejestrować się na stronie smartreminder.eu
szczególną uwagę na poniższe rekomendacje,
aby zagwarantować optymalną pracę Twojego
ROZWIĄZYWANIE PROBLEMÓW
urządzenia wykrywającego wzrost temperatury.
• Jeśli podczas testowania urządzenia nie jest
Po zainstalowaniu urządzenia wykrywającego
emitowany żaden dźwięk, upewnij się, że
wzrost temperatury przeprowadź test jego funkc-
zostało ono prawidłowo dokręcone do
ji, korzystając z przycisku testowego.
podstawy.
Uwaga: Aby uniknąć obrażeń ciała, niniejsze
• Firma Smartwares nie ponosi odpowiedzi
urządzenie musi być dobrze zamocowane do
alności za straty lub uszkodzenia jakiejkolwiek
sufitu, zgodnie z instrukcją montażu.
natury, w tym przypadkowe i/lub następcze,
Uwaga: Urządzenia wykrywające wzrost
wynikające z tego, że sygnał urządzenia nie
temperatury należy instalować w taki sposób,
został wyemitowany w przypadku zwiększonej
aby ciepło spowodowane pożarem miało do nich
temperatury lub wystąpienia pożaru.
dostęp. Tylko w ten sposób można zapewnić
DANE TECHNICZNE
• Zakres czułości na ciepło: 54-70°C
• Rodzaj baterii: Litowa DC 3 V CR14250
• Bateria wymienna: Nie
• Okres żywotności baterii: 10 lat
• Okres żywotności urządzenia: 10 lat
• Rodzaj montażu: Na suficie
• Temperatura pracy: 4 ~ 38°C
• Wilgotność pracy: 10 ~ 95%
• Montaż w układzie LAV: Nie
• Głośność alarmu: >85 dB w odległości 3 m
• Obszar wykrywania: Maks. 40 m2
• Funkcja pauzy: Tak
: Tylko do użytku w pomieszczeniach
: Przed przystąpieniem do użytkowania należy zapoznać się z instrukcją
obsługi i przechowywać ją ostrożnie na przyszłość.
Warunek
Dioda LED
Normalna praca
Miga co 30-34 s
Testowanie
Miga szybko
Alarm
Miga szybko
Tryb cichy
Miga co 8 s
Tryb „pozwól mi spać"
Miga co 8 s
Wskaźnik niskiego naładowania baterii
Miga co 30-34 s
Awaria
Miga co 30-34 s
- BATTERY NOT REPLACEABLE -
Dźwięk
Brak
Krótkie sygnały dźwiękowe
Krótkie sygnały dźwiękowe
Brak
Brak
1 krótki sygnał dźwiękowy co 34 s
1 krótki sygnał dźwiękowy co 34 s

Verwandte Anleitungen für Smartwares RM640K


Inhaltszusammenfassung für Smartwares RM640K
- Seite 1 łatwopalnych materiałów i pożaru. MONTAŻ Czyszczenie : Urządzenie wykrywające wzrost test button. • Smartwares can never be made liable for loss tioniert der Hitzemelder nicht einwandfrei. Kont- den Teile des Hitzemelder mit der Saugspitze des Warning: To prevent injury, this apparatus must and/or damage of whatever nature, including aktieren Sie in diesem Fall die Fa.
- Seite 2 (voir image 1) jusqu’à ce que le signal Nettoyage : Pour optimiser les performances, mantenga pulsado el botón de prueba (véase la dit geval contact op met Smartwares voor advies. melder iedere zes maanden met de stofzuiger af. podría dañar el aparato o inflamar materiales imagen 1) hasta que suene una señal de alarma...
- Seite 3 Se il dispositivo o innescare i materiali combustibili e plakasını birlikte gelen vidalarla sabitleyin ve • Smartwares ısı alarmı sinyalinin ısı veya yangın Smartwares universalmonteringssats RMAG3 på grund av att värmelarmets signal inte ljöd segnale di allarme non viene emesso dopo la causare un incendio.
- Seite 4 či požáru. jeho funkčnosť pomocou tlačidla skúšky. zar o kit de montagem universal Smartwares Varování: V rámci prevence zranění je třeba Výstraha: Aby nedošlo k úrazu, toto zariadenie limpar, premindo o botão de teste. Registe-se RMAG3 em vez dos parafusos incluídos;...