BORETTI bikp-91 Bedienungsanleitung
Induktionskochgeschirr

Verwandte Anleitungen für BORETTI bikp-91


Inhaltszusammenfassung für BORETTI bikp-91
- Seite 1 E D I E N U N G S A N L E I T U N G P E R AT I N G I N S T R U C T I O N S © Boretti B.V. BIKP-91inductionkochgeschirr.
- Seite 2 Vorwort Herzlichen Glückwunsch! Jetzt nennen Sie offi ziell einen Boretti Ihr Eigen. In den kommenden Jahren werden Sie entdecken, dass ein Boretti das Kochen zu einem wahren Fest werden lässt. Bei der Entwicklung Ihres Einbaugeräts haben wir alles getan, damit Sie als Koch im Mittelpunkt stehen.
-
Seite 3: Inhaltsverzeichnis
Inhalt Sicherheit Vorsichtsmaßnahmen vor der inbetriebnahme Allgemeine sicherheits-hinweise Schutz vor beschädigungen Vorsichtsmaßnahmen bei geräteausfall Schutz vor weiteren gefahren Gerätebeschreibung Bedienfeld Technische beschreibung Bedienung des kochfeldes Anzeige Belüftung Inbetriebnahme des kochfeldes Vor dem ersten aufheizen Induktionsprinzip Funktion der sensorschaltfelder „ Slider „ auswahlzone und zeitschaltuhr auswählung Kochfeld ein- und ausschalten Topferkennung Restwärmeanzeige... -
Seite 4: Sicherheit
Sicherheit Vorsichtsmaßnahmen vor der Inbetriebnahme Verbrennungen während und nach Benutzung • Alle Teile der Verpackung abnehmen. des Gerätes. • Achten Sie darauf, dass kein elektrisches • Das Gerät darf nur von einem Elektrofach- Kabel von einem freistehenden oder einge- mann eingebaut und angeschlossen werden. bautem Gerät in Kontakt mit der Scheibe Der Hersteller kann nicht verantwortlich ge- macht werden für Schäden, die durch Fehler... -
Seite 5: Vorsichtsmaßnahmen Bei Geräteausfall
doch nicht unzerbrechlich. Besonders spitze Vorsichtsmaßnahmen bei Geräteausfall und harte Gegenstände, die auf die Koch- • Sollte ein Fehler festgestellt werden, muss fläche fallen, können sie beschädigen. das Gerät ausgeschaltet und vom Netz get- rennt werden. • Töpfe und Ränder nicht an der Scheibe •... -
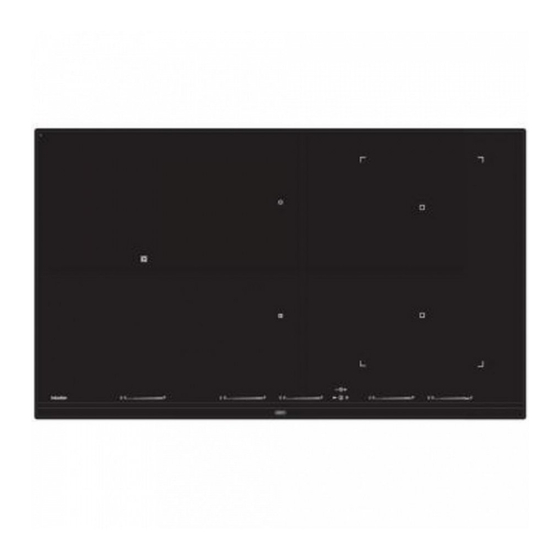
Seite 6: Gerätebeschreibung
Zweite Booster Minimum Leistung Leistung* Leistung * Topferkenung 11.100 W Links 180/260 mm 1850/3700 W 2300/4500 W 3000/5500 W 90/220 mm BIKP-91 Vorne Zentrum 180 mm 1850 W 2300 W 3000 W 100 mm Hinten Zentrum 180 mm 1850 W... -
Seite 7: Bedienung Des Kochfeldes Anzeige
Zeitschaltuhr Zeitschaltuhr Leistungs-Anzeige Tasten Anzeige “SLIDER” Leistung und Zeitschaltuhr Auswahlzone (front zone) Warmhalte VerriegelungTaste Ein/Aus Stop&Go Taste Taste Taste Bedienung des kochfeldes Beschreibung Anzeige Benennung Null Die Kochzone ist aktiviert 1…9 Leistungsstufe Einstellung der Leistung Nicht Topferkennung Topf nicht aufgesetzt oder nicht geeignet Ankochautomatik Höchste Leistung + Ankochen Fehleranzeige... -
Seite 8: Inbetriebnahme Des Kochfeldes
Inbetriebnahme des kochfeldes Vor dem ersten Aufheizen • Nicht geeignetes Induktionskochgeschirr : Zuerst Ihr Gerät mit einem feuchten Lappen Kupfer, Aluminium, Glas, Holz, Steingut, Ke- reinigen, dann trockenreiben. Benutzen Sie ramik, nicht magnetisches Edelstahl. kein Reinigungsmittel, das eine bläuliche Fär- Die Induktionskochzone wird automatisch an bung auf der verglasten Oberfl äche verursa- die Grösse des Kochgeschirrs angepasst. -
Seite 9: Topferkennung 9
Kochfeld ein- und ausschalten Zuerst das Kochfeld und dann die Kochzone einschalten. • Kochfeld: einschalten/ ausschalten : Betätigung Bedienfeld Anzeige Einschalten Auf [ 0/I ] drücken [ 0 ] Ausschalten Auf [ 0/I ] drücken Keine oder [ H ] •... -
Seite 10: Zeitschaltuhr
• Power einschalten/ ausschalten : Betätigung Bedienfeld Anzeige Booster einschalten Auf dem “SLIDER“ bis zum Ende [ P ] rutschen oder gleich am Ende drücken Booster ausschalten Auf dem “SLIDER“ rutschen [ 9 ] bis [ 0 ] • Super Power einschalten/ ausschalten : Betätigung Bedienfeld Anzeige... -
Seite 11: Ankochautomatik
• Zeitschaltuhr ausschalten: Betätigung Bedienfeld Anzeige Zeitschaltuhr auswählen Auf [ + ] und [ - ] der Zeitschaltuhr Die Anzeige gleichzeitig drücken bis die der ausgewählten gewünschte Kochzone erreicht ist Kochzone leuchtet auf Zeitschaltuhr ausschalten Auf [ - ] bis [ 000 ] drücken [ 000 ] Wenn mehrere Zeitschaltuhren in Betrieb sind, bitte Vorgang wiederholen. -
Seite 12: Stop&Go Funktion
• Abschalten der Ankochautomatik: Betätigung Bedienfeld Anzeige Leistung auswählen Auf dem “SLIDER“ rutschen [ 0 ] bis [ 9 ] Stop&Go Funktion Diese Funktion erlaubt vorübergehend, das Kochen mit denselben Krafteinstellungen zu unterbre- chen oder zu reaktivieren. • Stop&Go Funktion einschalten/ ausschalten : Betätigung Bedienfeld Anzeige... -
Seite 13: Bridge-Funktion
Bridge-Funktion Diese Funktion erlaubt eine Brückung von den Kochzonen (links Kochzonen, zentral Kochzonen, rechts Kochzonen) mit den gleichen Funktionalitäten wir eine Kochzone. Boosterfunktion ist nicht erlaubt. Betätigung Bedienfeld Anzeige Einschalten der Kochmulde Auf [ 0/I ] drücken [ 0 ] Bridge einschalten Auf die zu brücken beide [ U ] [ 0 ] und [ ]... -
Seite 14: Kochempfehlungen
Kochempfehlungen Kochgeschirr • Halten Sie einen Magneten an den Geschir- rboden. Bleibt der Magnet haften, ist das Geeignete Materialien: Geschirr geeignet. Stahl, emaillierter Stahl, Gußeisen, Edelstahl mit magnetischem Boden, Aluminium mit mag- Einige Töpfe können Lärm erzeugen, wenn sie netischem Boden auf einer Induktions-Kochzone gesetzt werden. -
Seite 15: Reinigung Und Pflege
Reinigung und pflege Lassen Sie das Gerät abkühlen, es könnte Ver- brennungsgefahr bestehen. Reinigen Sie das verschmutzte Kochfeld immer • Verwenden Sie in keinem Fall scheuernde regelmäßig. Benutzen Sie dazu ein feuchtes oder aggressive Reinigungsmittel, wie z.B. Tuch und ein wenig Putzmittel. Grill und Backofensprays, Fleck oder Ros- tentferner, Scheuersande oder Schwämme •... -
Seite 16: Was Tun Wenn
Was tun wenn… Das Kochfeld oder die Kochzonen lassen sich nicht einschalten: • Das Kochfeld ist falsch am Stromnetz angeschlossen. • Die Sicherung der Hausinstallation ist nicht korrekt eingesetzt oder defekt. • Das Kochfeld ist verriegelt. • Die Sensortasten sind mit Wasser oder Schmutz bedeckt. •... -
Seite 17: Montagehinweise
(3) mit 2 mm Abstand der Außer kannte des Glases aufkleben. Einbau • Einfügdimensionen : Type Einbaumasse BIKP-91 810 x 490 810 x 490 mm • Der Abstand vom Ausschnitt bis zu einer • Befindet sich unter dem Kochfeld eine Schu- Mauer und/oder einem Möbelstück muss blade, dürfen in der Schublade keine bren-... -
Seite 18: Elektroanschluss
Elektroanschluss • Wenn das Gerät nicht mit einem zugänglichen • Zum Anschluss des Gerätes an das Elektro- netz beauftragen Sie einen Elektrofachmann, Stecker ausgestattet ist, müssen beim fes- der die landesüblichen Vorschriften der örtli- ten Einbau gemäß den Montageanweisungen chen Elektroversorgungsunternehmen genau andere Trennungsmöglichkeiten berücksich- kennt und sorgfältig beachtet. -
Seite 19: Umweltschutz
Biphasen 400V~2P+N Bringen Sie eine Polbrücke zwischen Anschlussklemme 1 und 2 dann zwischen Anschlussklemme 4 und 5. Befestigen Sie die Erdung an die « Erde » Anschlussklemme, den Nullleiter an Anschlus- sklemme 4 oder 5, die Phase L1 an Anschlussklemme 1 oder 2 und die Phase L2 an Anschlus- sklemme 3. - Seite 40 B O R E T T I B V De Dollard 17 1454 AT Watergang T +31(0) 20-4363439 F +31(0) 20-4361326 S +31(0) 20-4363525 (service) info@boretti/com The Netherlands NV BORETTI SA Rupelweg 16 2850 Boom T +32(0)3-4508180 F +32(0)3-4586847 E info.be@boretti.com Belgium 16598/0...