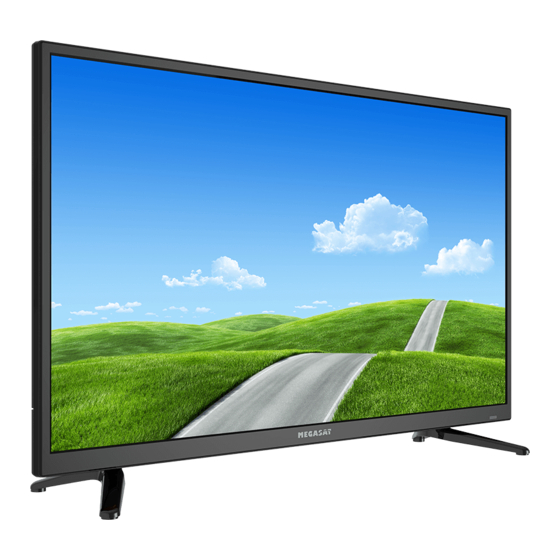
Herunterladen Inhalt Inhalt Diese Seite drucken
Inhaltsverzeichnis

Werbung

Verfügbare Sprachen

Verfügbare Sprachen

Royal Line 32
Bedienungsanleitung

Werbung

Inhaltsverzeichnis
loading

Inhaltszusammenfassung für Megasat Royal Line 32

  • Seite 1 Royal Line 32 Bedienungsanleitung...
  • Seite 2: Inhaltsverzeichnis

    Inhaltsverzeichnis 1. Sicherheitshinweise ........................03 2. Lieferumfang ........................... 03 3. Standfußmontage ........................04 4. Bezeichnungen 4.1 Front- und Seitenansicht....................06 4.2 Anschlüsse ..........................07 4.3 Fernbedienung ........................08 ....................5. Erstinbetriebnahme 6. Grundfunktionen 6.1 Lernfunktion der Fernbedieung ................. 10 6.2 Eingangsquelle wählen ....................10 6.3 Navigation im Hauptmenü...
  • Seite 3: Sicherheitshinweise

    1. Sicherheitshinweise Bitte lesen Sie die Bedienungsanleitung sorgfältig vor Inbetriebnahme des Gerätes. Bei falscher oder unsachgemäßer Handhabung erlischt der Gewährleistungsanspruch. Netzanschluss: Vor der Inbetriebnahme überprüfen Sie bitte die richtige Betriebs- spannung Ihres Stromanschlusses. Die Betriebsspannung des Gerätes beträgt AC 100~240 V, 50/60Hz / DC 9-36 V. Überlastung: Überlasten Sie nicht die Wandsteckdose, das Verlängerungskabel oder den Adapter.
  • Seite 4: Standfußmontage

    3. Standfußmontage 1. Für die Montage benötigen Sie folgende Teile Hinweis: Bevor Sie die Standfüße montieren, überprüfen Sie bitte ob alle Teile vollständig und keine sichtbaren Schäden vorhanden sind. Wenn ein Teil fehlen sollte oder beschä- digt ist, wenden Sie sich bitte an Ihren Fachhändler. Fernseher Standfüße 4x Schrauben...
  • Seite 5 3. Standfußmontage 2. So montieren Sie den Standfuß Legen Sie den Fernseher auf eine flache, weiche Unterlage (z. B. Decke, Schaumstoff, ...) um Schäden am Fernseher, bzw. Display zu vermeiden. hinten (kürzer) Vergewissern Sie sich, dass die Standfüße in die richtige Rich- tung zeigen.
  • Seite 6: Bezeichnungen

    4. Bezeichnungen 4.1 Front- und Seitenansicht Frontansicht Infrarotempfänger Empfänger für die Signale der Fernbedienung. LED Leuchte Drücken Sie die Powertaste um Netzschalter den TV ein oder aus zu schalten. Hauptschalter für ROT = Standby / GRÜN = eingeschaltet die Stromver- sorgung auf der Rückseite des Fernsehers...
  • Seite 7: Anschlüsse

    4. Bezeichnungen 4.2 Anschlüsse Ansicht Unterseite DC IN Anschluss für 230 Volt Netzteil oder 12 Volt Bordspannung Kopfhörer Ausgang für Kopfhörer mit 3,5 mm Klinke HDMI 1 HDMI Eingang 1 HDMI 2 HDMI Eingang 2 HDMI 3 HDMI Eingang 3 SCART Scart Anschluss Videoeingang für VGA Signale vom PC...
  • Seite 8: Fernbedienung

    4. Bezeichnungen 4.3 Fernbedienung POWER Fernseher ein- / ausschalten (Standby) VOL +/- Lautstärke erhöhen / verringern MUTE Ton stummschalten AUDIO Wechselt zu den Audio-Einstellungen SLEEP Automatischer Ausschalttimer einstellen TEXT Videotext aufrufen und beenden CH +/- Wechselt die Kanäle hoch / runter Elektronischer Programmführer INFO Zeigt die aktuellen Systeminformationen an...
  • Seite 9: Erstinstallation

    5. Erstinstallation 1. Verbinden den Fernseher mit der Stromversorgung und schalten Sie den Netzschal- ter an der Rückseite des Gehäuses ein. Der Fernseher befindet sich nun im Standby Modus (LED leuchtet ROT). 2. Drücken Sie anschließend die Power Tas- te an der Fernbedienung (LED leuchtet GRÜN).
  • Seite 10: Grundfunktionen

    6. Grundfunktionen 6.1 Lernfunktion der Fernbedieung 1. Drücken und halten Sie die LERN-Taste der Fernbedienung. 2. Drücken Sie nun zusätzlich die Taste, die Sie neu programmieren möchten. 3. Drücken Sie die Taste auf der Fernbedienung, die Sie auf diese Taste legen möchten. 4.
  • Seite 11: Das Hauptmenü

    7. Das Hauptmenü 7.1 Sendersuche Im Menüpunkt Sendersuche können Sie nach neuen Programmen suchen, Programme bearbeiten oder Konfigurationen an Ihrer Empfangsart vornehmen. Hinweis: Die Untermenüs der Sendersuche unterscheiden sich je nach dem, was für eine Emp- fagsart Sie bei der Erstinstallation eingestellt haben (Satellit, Kabel oder Terrestrisch). 7.1.1 Sender (Satellit) Automatische Sendersuche Land...
  • Seite 12 7. Das Hauptmenü Kanalliste bearbeiten Löschen (ROTE Taste) Wählen Sie mit den Pfeiltasten ein Pro- gramm aus und drücken Sie die ROTE Taste um es zu löschen. Bewegen (GELBE Taste) Wählen Sie mit den Pfeiltasten ein Pro- gramm aus und drücken Sie die GELBE Taste um es zu markieren.
  • Seite 13 7. Das Hauptmenü Signalinformationen In diesem Menü sehen Sie diverse In- formationen über den jeweiligen Trans- ponder, bzw. Sender. Signalqualität und -pegel können hier abgelesen werden. CI Informationen In diesem Menü erhalten Sie Informationen über das eingesteckte CI Modul, bzw. über die Smartcard (falls vor- handen).
  • Seite 14 7. Das Hauptmenü SAT Konfiguration In diesem Menü können Sie grundlegende Änderungen Ihrer Satellitenanlage vorneh- men, Transpondern und Satelliten bearbeiten, hinzufügen und eine Satellitensuche durch- führen. Nutzen Sie die Tasten um zwischen den jeweiligen Spalten zu navigieren. Satellit Löschen (ROTE Taste) Löscht den ausgewählten Satelliten.
  • Seite 15: Antenneneinstellung

    7. Das Hauptmenü Transponder Löschen (ROTE Taste) Löscht den ausgewählten Transponder. Bestätigen Sie den unwiderruflichen Löschvorgang mit OK. Bearbeiten (GRÜNE Taste) Ändern Sie die Frequenz, die Symbolrate und die Polarität des ausgewählten Transponders. Bestätigen Sie anschließend mit OK. Neu (GELBE Taste) Fügen Sie einen neuen Transponder hinzu.
  • Seite 16: Sender (Kabel Und Terrestrisch)

    7. Das Hauptmenü 7.1.2 Sender (Kabel und Terrestrisch) Empfangsquelle Wählen Sie Ihre Empfangsart aus. Kabel oder terrest- risches Fernsehen. Automatische Sendersuche Land Wählen Sie das gewünschte Land Empfangsart ATV (analog) und/oder DTV (digital) Sorting LCN LCN ist eine automatische Sendersortierung Drücken Sie anschließend OK um die Suche zu starten.
  • Seite 17: Bild

    7. Das Hauptmenü 7.2 Bild Im Menüpunkt Bild können Sie grundlegende Einstellungen über das TV Bild vorneh- men. Nutzen Sie voreingestellte Einstellungen oder legen Sie Ihre eigenen Werte fest. Bildeinstellung Wählen Sie eine voreingestellte Bildeinstellung Kontrast Stellen Sie den Kontrastwert ein Helligkeit Stellen Sie den Helligkeitswert ein Farbe...
  • Seite 18: Ton

    7. Das Hauptmenü 7.3 Ton Im Menüpunkt Ton können Sie grundlegende Einstellungen über den Ton vornehmen. Nutzen Sie voreingestellte Einstellungen oder legen Sie Ihre eigenen Werte fest. Ton Profil Wählen Sie ein voreingestelltes Ton-Profil Höhen Stellen Sie die Höhen ein Bässe Stellen Sie die Bässe ein Balance...
  • Seite 19: Uhrzeit

    7. Das Hauptmenü 7.4 Uhrzeit Im Menüpunkt Uhrzeit können Sie die Uhrzeit des Fernsehers sowie diverse andere automatische Funktionen einstellen. Zeitzone Wählen Sie die Zeitzone in der Sie sich befinden Ausschaltzeit Stellen Sie die Uhrzeit ein, bei der sich der Fernseher automa- tisch ausschalten soll.
  • Seite 20: Konfiguration

    Software Update Sollte es für den Fernseher eine neue Firmware geben, können Sie diese hier aktualisieren. Die aktuellste Firmware finden Sie immer auf unserer Homepage www.megasat.tv 1. Kopieren Sie die Firmware in das Hauptverzeichnis eines formatierten USB Sticks (ohne Unterordner).
  • Seite 21: Schutz

    7. Das Hauptmenü 7.6 Schutz Im Menüpunkt Schutz können Passwörter zur Sendersperre vergeben, einen Ju- genschutz hinzufügen oder einen Hotelmodus konfigurieren. System sperren Wählen Sie EIN, um den die Passwortsperre zu aktivieren. Das Standardpasswort ist: 0000 Kennwort ändern Ändern Sie das Standardpasswort. Geben Sie zunächst das aktuelle Passowort ein, anschließend ein neues.
  • Seite 22: Dvd Betrieb

    8. DVD Betrieb Im DVD Menü können Sie DVDs oder Video CDs abspielen. Drücken Sie zu- nächst die INPUT Taste auf der Fern- bedienung und wählen Sie die DVD Quelle. Legen Sie nun eine Disc mit der beschriebenen Seite in Richtung Bild- schirm ein.
  • Seite 23: Dvd Einstellungsmenü

    8. DVD Betrieb 8.2 DVD Einstellungsmenü Um grundlegende Einstellungen im DVD Menü vorzunehmen drücken Sie die ROTE Taste (D.SET). Anschließend öffnet sich das DVD Einstellungsmenü. Allgemeine Einstellungen T V Anzeige Definieren Sie das passende Bildformat. Wählen Sie zwischen 4:3 PS, 4:3 LB und 16:9. Anzeigesprache Wählen Sie hier die DVD Menüsprache.
  • Seite 24: Einstellungen

    8. DVD Betrieb Einstellungen TV Typ Wählen Sie zwischen PAL, Multi oder NTSC. In Europa ist PAL die Standardein- stellung. Audio Wählen Sie die bevorzugte Audiosprache der DVD (falls auf der Disc vorhanden). Untertitel Wählen Sie die bevorzugte Untertitelsprache der DVD (falls auf der Disc vorhanden). Discmenü...
  • Seite 25: Multimediabetrieb (Usb)

    9. Multimediabetrieb (USB) Sie können über ihren Fernseher Multi- mediadateien, wie z. B. Fotos, Musik, Fil- me oder eBooks wiedergeben. Stecken Sie einen geeigneten USB Stick oder externe Festplatte in den USB Anschluss. Drücken Sie auf der Fernbedienung IN- PUT und wechseln Sie mit den Pfeiltas- ten auf MEDIEN.
  • Seite 26: Audio

    9. Multimediabetrieb (USB) 9.2 Audio Wechseln Sie in das Menü „Musik“, anschließend erscheint das Musik-Menü mit der Ord- ner-Struktur. Wechseln Sie mit der OK Taste in den Hauptordner C, anschließend werden alle Musik Dateien vom USB Gerät angezeigt. Navigieren Sie mit den Pfeiltasten auf eine gewünschte Musikdatei. Eine kleine Vorschau wie Titel oder Interpret werden auf dem Bildschirm angezeigt.
  • Seite 27: Video

    9. Multimediabetrieb (USB) 9.3 Video Wechseln Sie in das Menü „Film“, anschließend erscheint das Film-Menü mit der Ord- ner-Struktur. Wechseln Sie mit der OK Taste in den Hauptordner C, anschließend werden alle Filmdateien vom USB Gerät angezeigt. Navigieren Sie mit den Pfeiltasten auf eine gewünschte Filmdatei. Eine kleine Vorschau sowie diverse Informationen werden auf dem Bildschirm angezeigt.
  • Seite 28: Epg Menü (Programmführer)

    10. EPG Menü (Programmführer) Im Elektronischen Programmführer können Sie eine 7-Tage Vorschau aller Sender sehen (soweit der jeweilige Sender dies zur Verfügung stellt). Nutzen Sie die Pfeiltasten auf der Fernbedienung, um zwischen Programmen und Sendungen zu navigieren. Drücken Sie die DISPLAY Taste auf der Fernbedienung, um mehr Informationen zur je- weiligen Sendung zu erhalten.
  • Seite 29: Ci+ Schacht Zur Pay-Tv Erweiterung

    11. CI+ Schacht zur Pay-TV Erweiterung Sie können mit dem Fernseher nicht nur frei empfangbare (Free to Air) Programme, son- dern auch verschlüsselte Programme empfangen, sofern Sie im Besitz einer Smartcard und eines CI-Moduls des jeweiligen Programmanbieters sind. 1. Einsetzen der Smartcard in das CI Modul: Stecken Sie die Smartcard vorsichtig in das CI Modul.
  • Seite 30: Fehlerbehebung

    12. Fehlerbehebung Lesen Sie bitte die folgenden Informationen, um die mögliche Ursache zu einem Prob- lem herauszufinden, bevor Sie sich an den Kundendienst wenden. TV lässt sich nicht einschalten • Überprüfen Sie, ob das Stromkabel korrekt an der Steckdose und dem Stromadapter angeschlossen ist. •...
  • Seite 31: Technische Daten

    13. Technische Daten Display LED Display (Pixelklasse 1) Bildschirmgröße 32 Zoll (81 cm) Auflösung 1920 x 1080 Pixel (Full HD) Kontrastverhältnis 4000 : 1 Helligkeitswert 200 cd/m² Betrachtungswinkel 178° (horizontal) / 178° (vertikal) Tuner DVB-S / -S2 / -C / -T / -T2 (H.265/HEVC) Satellit: 5000 | Terrestrisch: 100 | Kabel: 1000 Senderspeicher Antennenimpedanz...
  • Seite 32: Konformitätsinformation

    Konformitätsinformation Hiermit erklärt die Firma Megasat Werke GmbH, dass sich folgendes Gerät in Über- einstimmung mit den grundlegenden Anforderungen und den übrigen ein- schlägigen Bestimmungen der Richtlinie Royal Line 32 2014/30/EU und 2014/35/EU befindet: Megasat Royal Line 32 (Art.-Nr. 240071) Die Konformitätserklärung zu diesem...
  • Seite 33 Notizen DEUTSCH...
  • Seite 34 Version 1.0 (Dezember 2017) // Technische Änderungen, Druckfehler und Irrtümer vorbehalten. Megasat Werke GmbH | Industriestraße 4a | D-97618 Niederlauer | www.megasat.tv | info@megasat.tv...
  • Seite 35 Royal Line 32 User manual...
  • Seite 36 Content Content 1. Safety instructions ........................03 2. Delivery ..............................03 3. Stand assembly..........................04 4. Designations 4.1 Front and side view ......................06 4.2 Connections ..........................07 4.3 Remote control ........................08 ....................... 5. First installation 6. Basic functions 6.1 Learning feature remote control ................
  • Seite 37: Safety Instructions

    1. Safety instructions Please read the manual thoroughly before operating the equipment. In case of incorrect or improper handling, the warranty becomes void. Power supply: Before start please check the correct operation voltage of the power point. The operating voltage of this device is AC 100~240 V, 50/60Hz / DC 9-36 V.
  • Seite 38: Stand Assembly

    3. Stand assembly 1. For the assembly you need the following parts Note: Before installing the stand, please check that you have all of the parts and that there is no visible damage. If a part is missing or appears damaged, please contact custo- mer service.
  • Seite 39 3. Stand assembly 2. How to mount the stand Place the TV face down on a soft and flat surface (blanket, foam, cloth, etc.) to prevent any damage to the TV. rear (shorter) Before you put on the stand, please make sure the direction is correct as shown below.
  • Seite 40: Designations

    4. Designations 4.1 Front and side view Front view Infrared sensor Receiver for remote control signals LED light Press the power button Power switch to switch on or off the TV. Main switch for RED = Standby / Green = Power on power on the backside Side view...
  • Seite 41: Connections

    4. Designations 4.2 Connections Bottom view DC IN Mains connection for 230 V power supply or 12 V board voltage Kopfhörer Output for Headphones with 3,5 mm jack HDMI 1 HDMI input 1 HDMI 2 HDMI input 2 HDMI 3 HDMI input 3 SCART Scart port...
  • Seite 42: Remote Control

    4. Designations 4.3 Remote control POWER Turn on / off the TV (standby) VOL +/- Increase / decrease volume MUTE Mute sound AUDIO Go to the audio settings SLEEP Setting Auto shutdown timer TEXT Access and exit Teletext CH +/- Switches the channels up / down Electronic Program Guide INFO...
  • Seite 43: First Installation

    5. First installation 1. Connect the TV to the power supply and turn on the power switch at the bottom of the housing. The TV is now in standby mode (LED is RED). 2. Then press the Power button on the re- mote control (LED is GREEN).
  • Seite 44: Basic Functions

    6. Basic Functions 6.1 Learning feature remote control 1. Press and hold the LEARN button on the remote. 2. Now press additionally the button you want to reprogram. 3. Press the button on the remote that you want to assign to this key. 4.
  • Seite 45: The Main Menu

    7. The Main Menu 7.1 Channel search In the menu Channel Search you can search for new channels, edit channels or set con- figurations at your reception mode. Note: The submenu of Channel Search differ depending on what kind of a reception mode you have set during the first installation (satellite, cable or terrestrial).
  • Seite 46 7. The Main Menu Edit channels Delete (RED button) Use the arrow keys to choose a channel, then press to RED button to delete it. Move (YELLOW button) Use the arrow keys to choose a channel, then press the YELLOW button to high- light it.
  • Seite 47 7. The Main Menu Signal informations In this menu you can see various informa- tion about the respective transponder or channel. Signal quality and level can be read here. CI Informations This menu provides informa- tion about the inserted CI module, or about the smart card (if available).
  • Seite 48 7. The Main Menu SAT configuration This menu allows you to make basic changes to your satellite system, edit transponders and satellites, add and perform a satellite scan. Use the keys to navigate between the respective columns. Satellite Delete (RED button) Deletes the selected satellite.
  • Seite 49: Antenna Setting

    7. The Main Menu Transponder Delete (RED button) Deletes the selected transponder. Confirm the irrevocable deletion by clicking OK. Edit (GREEN button) To change the frequency, the symbol rate and the polarity of the selected transponder. Confirm with OK. New (YELLOW button) Add a new transponder.
  • Seite 50: Channel (Cable And Terrestrial)

    7. The Main Menu 7.1.2 Channel (Cable and Terrestrial) Antenna Select your reception mode. Cable or terrestrial TV. Automatic Channel Search Country Select the desired country Recept. mode ATV (analogue) and/or DTV (digital) Sorting by LCN LCN is an automatic channel sorting Then press OK to start the search.
  • Seite 51: Picture

    7. The Main Menu 7.2 Picture In this menu you can set up basic settings for the TV picture. Use default settings or set your own values. Picture settings You can select a preset Picture settings Contrast Adjust the contrast value Brightness Adjust the Brightness value Color...
  • Seite 52: Sound

    7. The Main Menu 7.3 Sound In this menu you can set up basic settings for the TV sound. Use default settings or set your own values. Sound profile Select a preset sound profile Treble Adjust the treble Bass Adjust the base Balance Adjust the balance between right and left channel...
  • Seite 53: Clock

    7. The Main Menu 7.4 Clock In this menu you can set the time of the TV as well as various other automatic functions. Time zone Select the time zone which you are located Off time Set the time when the TV should switch off automatically.
  • Seite 54: Configuration

    Software update If there is a new firmware for the TV, you can this update here. You can find the latest firmware always on our homepage www.megasat.tv 1. Copy the firmware to the root directory of a formatted USB drive (without subfolders).
  • Seite 55: Protection

    7. The Main Menu 7.6 Protection In this menu passwords can be assigned to Channel Lock, add a youth protection or configure a hotel mode. System lock Select ON to enable the password lock. The default password is: 0000 Set password Change the default password.
  • Seite 56: Dvd Operation

    8. DVD operation In DVD menu allows you to play DVDs or Video CDs. First, press the INPUT but- ton on the remote control and select the DVD source. Now insert a disc with text side towards the screen. The DVD is au- tomatically pulled in.
  • Seite 57: Dvd Settings Menu

    8. DVD operation 8.2 DVD Settings menu To make basic settings in the DVD menu, press the RED button (D.SET). Then open the DVD settings menu. General Settings T V display Define the appropriate image format. Choose between 4:3 PS, 4:3 LB and 16:9. Display language Select the DVD menu language.
  • Seite 58 8. DVD operation User settings TV type Choose between PAL, Multi or NTSC. In Europe, PAL is the default setting. Audio Select the preferred audio language of the DVD (if available on the disc). Subtitle Select the preferred subtitle language of the DVD (if available on the disc). Discmenu Select the preferred language of the DVD menu (if present on the disc).
  • Seite 59: Multimedia Operation (Usb)

    9. Multimedia operation (USB) With your TV you can play back multi- media files such as. photos, music, mo- vies and eBooks. Insert a suitable USB drive or external hard drive into the USB port. Press INPUT on the remote control and switch to using the arrow keys on MEDIA.
  • Seite 60: Audio

    9. Multimedia operation (USB) 9.2 Audio Change to the menu „Music“, then the music menu appears with the folder structure. Navigate with the OK button to the main folder C, then displays all the music from the USB drive. Navigate with the arrow keys to a desired music file. A small preview as title or artist are displayed on the screen.
  • Seite 61: Video

    9. Multimedia operation (USB) 9.3 Video Change to the menu „Movies“, then the Movie menu appears with the folder structure. Navigate with the OK button to the main folder C, then displays all the movies from the USB drive. Navigate with the arrow keys to a desired movie file. A small preview as well as informa- tion to be displayed on the screen.
  • Seite 62: Epg Menu (Programm Guide)

    10. EPG menu (program guide) In Electronic Programme Guide, you can see a 7-day preview of all channels (where the respective stations so provides). Use the arrow keys on the remote control to navigate between programs and broadcasts. Press the DISPLAY button on the remote control to get more information on the broadcast. Declaration of color buttons Note: Move to the previous day...
  • Seite 63: Ci+ Slot For Pay Tv Expansion

    11. CI+ slot for pay-TV expansion You can receive not only free to air (Free to Air) channels on the TV, but also encrypted channels unless you are in possession of a smart card and a CI module of the respective provider.
  • Seite 64: Troubleshooting

    12. Troubleshooting Please read the following information to find out the possible cause of a problem before contacting customer service. No power • Check if the power cord is fully plugged into the electrical outlet and the power adapter. • Check if the cable of the power adapter is properly connected to the TV unit.
  • Seite 65: Specifications

    13. Specifications Display LED Display (Pixel class 1) Screen size 32 inch (81 cm) Resolution 1920 x 1080 Pixel (Full HD) Contrast ratio 4000 : 1 Brightness value 200 cd/m² Viewing angle 178° (horizontal) / 178° (vertical) Tuner DVB-S / -S2 / -C / -T / -T2 (H.265/HEVC) satellite: 5000 | terrestrial: 100 | cable: 1000 Channel memory Antenna impedance...
  • Seite 66: Conformity Information

    Conformity information Hereby declare the company Megasat Werke GmbH that the following device is in compliance with the essential re- quirements and other relevant provi- sions of Directive Council 2014/30/EU Royal Line 32 and 2014/35/EU: Megasat Royal Line 32 (Art.-No. 240071)
  • Seite 67 Notes ENGLISH...
  • Seite 68 Version 1.0 (December 2017) // Technical changes, misprints and errors reserved. Megasat Werke GmbH | Industriestraße 4a | D-97618 Niederlauer | www.megasat.tv | info@megasat.tv...
  • Seite 69 Royal Line 32 Mode d‘emploi...
  • Seite 70 Sommaire 1. Consignes de sécurité ......................03 2. Volume de livraison ........................03 3. Montage du pied .......................... 04 4. Vue d’ensemble de l‘appareil 4.1 Vue avant et vue de côté ....................06 4.2 Raccordements ........................07 4.3 Télécommande ........................08 .....................
  • Seite 71: Consignes De Sécurité

    1. Consignes de sécurité Lisez attentivement les consignes de sécurité avant de mettre l’appareil en service. Veuil- lez noter qu’en cas d’utilisation non conforme, la garantie est annulée. Branchement sur le réseau électrique: Avant de mettre l’appareil en service, cont- rôlez la tension d’alimentation de votre branchement électronique.
  • Seite 72: Montage Du Pied

    3. Montage du pied 1. Pour la montage vous avez besoin des pièces suivantes. Remarque: Avant de monter le pied, veuillez vérifier si toutes les pièces sont complètes et n’ont pas subis des dégâts visibles. S’il y a des pièces manquantes ou endommagées, veuillez contacter votre revendeur.
  • Seite 73 3. Montage du pied 2. Pour monter le stand Placez le téléviseur sur un support plat et doux (p. ex. sur une couverture, une mousse, …) pour éviter des dégâts sur le téléviseur ou plutôt sur l’écran. Arrière (plus court) Assurez-vous que les pieds poin- tent dans la bonne direction.
  • Seite 74: Vue D'ensemble De L'appareil

    4. Vue d’ensemble de l‘appareil 4.1 Vue avant et vue de côté Vue avant Capteur infrarouge champ de réception pour les signaux infrarouges de la télécommande Lampe LED Dtouchez Standby pour allumer Interrupteur l’appareil ou pour l‘éteindre d’alimentation ROUGE = Standby / VERT = allumé Interrupteur principal l‘alimentation...
  • Seite 75: Raccordements

    4. Vue d’ensemble de l‘appareil 4.2 Raccordements Vue inférieure DC IN Raccordement au réseau pour une alimentation électrique de 230 V ou pour une tension de bord de 12 V Headphones Sortie casque avec une prise jack de 3,5 mm HDMI 1 l’entrée HDMI 1 HDMI 2...
  • Seite 76: Télécommande

    4. Vue d’ensemble de l‘appareil 4.3 Télécommande POWER allumer/éteindre le téléviseur (mode Veille) VOL +/- Augmenter/réduire le volume MUTE interrompre la sortie sonore (mode muet) AUDIO Les modifications apportées aux paramètres audio SLEEP Régler la fonction d’arrêt automatique TEXT Fermer le télétexte CH +/- Changer la chaîne Guide électronique des programmes...
  • Seite 77: Première Installation

    5. Première installation 1. Branchez le téléviseur avec l’alimentation de courant et allumez l’interrupteur réseau en bas du boîtier. Le téléviseur est maintenant en mode veille (la LED est allumée ROUGE). 2. Puis, appuyez sur la touche POWER de la télécommande (la LED est allumée VERT ).
  • Seite 78: Les Fonctions De Base

    6. Les fonctions de base 6.1 Fonction d‘apprentissage de la télécommande 1. Appuyez et maintenez enfoncé le bouton LEARN sur la télécommande. 2. Maintenant, appuyez sur le bouton en plus vous voulez reprogrammer. 3. Appuyez sur le bouton de la télécommande que vous souhaitez affecter à cette touche. 4.
  • Seite 79: Menu Principal

    7. Menu principal 7.1 Recherche de chaînes A l’aide de l’option recherche de chaînes dans le menu vous pouvez chercher des nou- velles chaînes, modifier les chaînes ou configurer la mode de réception. Remarque: Les sous-menus de la recherche de chaînes dépendent du mode de réception sélectionné à...
  • Seite 80 7. Menu principal Modifier des chaînes Supprimer (touche rouge) Sélectionnez une chaîne avec les tou- ches fléchées et appuyez sur la touche rouge pour la supprimer. Déplacer (touche jaune) Utilisez les touches fléchées pour un programme, puis appuyez sur pour mettre en évidence la touche JAUNE pour l‘ajouter.
  • Seite 81 7. Menu principal Informations sur les signaux Dans ce menu vous pouvez voir des in- formations sur le transpondeur respectif ou l’émetteur respectif. Dans ce menu vous pouvez également voir la qualité du signal et le niveau de signal. Informations CI Dans ce menu vous trou- vez des informations sur le module CI branché...
  • Seite 82 7. Menu principal Configuration SAT Dans ce menu vous pouvez modifier votre récepteur satellite, modifier et ajouter des trans- pondeurs et des satellites et chercher des satellites. Utilisez les touches pour naviguer dans les colonnes respectives. Avec le bouton EPG pour basculer entre les satellites et les transpondeurs. Satellite Supprimer (touche rouge) Supprime le satellite sélectionné.
  • Seite 83: Toneburst

    7. Menu principal Transpondeur Supprimer (touche rouge) Supprime le transpondeur sélectionné. Confirmez la supression irrévocable en appuyant sur OK. Modifier (touche verte) Modifier la fréquence, le débit de symboles et la polarité du transpondeur sélectionné. Ensuite, confirmez en appuyant sur OK. Nouveau (touche jaune) Ajoutez un nouveau transpondeur.
  • Seite 84: Recherche De Chaînes (Accès Au Réseau Câblé Et Terrestre)

    7. Menu principal 7.1.2 Recherche de chaînes (accès au réseau câblé et terrestre) Antenne Sélectionnez votre mode de réception. Télévision câblée ou terrestre. Recherche de chaînes automatique Pays Sélectionnez votre pays Mode de réception ATV (analogue) et/ou DTV (digital) Triage LCN LCN est un triage de chaînes automatique Puis, appuyez sur OK pour commencer la recherche.
  • Seite 85: Image

    7. Menu principal 7.2 Image A l’aide de l’option image dans le menu vous pouvez effectuer des réglages de l’image TV. Utilisez des réglages préréglés ou fixez votre propres valeurs. Mode image Sélectionnez un mode image préréglé Contraste Réglez la valeur de contraste Luminosité...
  • Seite 86: Son

    7. Menu principal 7.3 Son A l’aide de l’option son dans le menu vous pouvez effectuer des réglages du son. Utilisez des réglages préréglés ou fixez votre propres valeurs. Profile sonore Sélectionnez un profile sonore préréglé Aigus Réglez l‘aigus Grave Réglez le grave Equilibrage Réglez l’équilibrage entre le canal...
  • Seite 87: Heure

    7. Menu principal 7.4 Heure A l’aide de l’option heure dans le menu vous pouvez régler l’heure ainsi que autres fonctions automatiques. Fuseau horaire Sélectionnez le fuseau horaire dans lequel vous vous trouvez Temps d‘arrêt Réglez l‘heure à laquelle le téléviseur doit s‘éteindre automatiquement.
  • Seite 88: Paramètres Guration

    7. Menu principal 7.5 Paramètres guration A l’aide de l’option paramètres dans le menu vous pouvez effectuer des réglages fonda- mentaux concernant le téléviseur. Langue OSD Sélectionnez la langue du menu de l‘écran Télétexte Sélectionnez la police de caractères du télétexte (ouest, est, …) langue audio Sélectionnez la langue audio pré- férée pour les chaînes TV...
  • Seite 89: Verrouillage

    7. Menu principal 7.6 Verrouillage A l’aide de l’ o ption verrouillage dans le menu vous pouvez attribuer des mots de passe pour un blocage de chaîne, ajouter une protection des mineurs ou configurer un mode d’hôtel. Verrouiller système Sélectionnez ACTIVÉ pour activer la protection par un mot de passe.
  • Seite 90: Lecteur Dvd

    8. Lecteur DVD Dans le menu DVD vous pouvez visua- liser des DVD ou CD vidéo. D’abord, appuyez sur la touche INPUT sur la télécommande et sélectionnez la sour- ce DVD. Insérez maintenant un disque. Faites attention que la face enregistrée doit montrer en direction de l’écran.
  • Seite 91: Menu De Réglages Du Lecteur Dvd

    8. Lecteur DVD 8.2 Menu de réglages du lecteur DVD Pour procéder aux quelques réglages fondamentaux dans le menu DVD appuyez sur la touche DVD SETUP. Puis, le menu de réglages du lecteur DVD est affiché. Réglages généraux L’affichage TV Définissez le format de l’image approprié.
  • Seite 92: Paramètres Utilisateur

    8. Lecteur DVD Paramètres utilisateur Type TV Sélectionnez PAL, multi ou NTSC. En Eu- rope, PAL est le réglage par défaut. Audio Sélectionnez la langue audio préférée du DVD (si existant). Sous-titre Sélectionnez la langue de sous-titre préférée du DVD (si existant). Menu disque Sélectionnez la langue de menu préférée (si existant).
  • Seite 93: Afficher Des Photos

    9. Multimediabetrieb (USB) Avec votre téléviseur, vous pouvez lire des fichiers multimédias, p. ex. des fi- chiers photo, audio, vidéo ou ebook. Branchez une clé USB approprié ou un disque dur externe sur le port USB. Ap- puyez sur la touche INPUT de la télé- commande et sélectionnez la source MEDIA avec les touches fléchées.
  • Seite 94: Lecteur Multimédia (Usb)

    9. Lecteur multimédia (USB) 9.2 Ecouter de la musqiue Si vous sélectionnez MUSIQUE dans le menu, le menu musique avec la structure de dossiers est présenté sur l’écran. Sélectionnez le dossier principal C en appuyant sur OK. Puis, toutes les fichiers audio de la clé USB sont affichés. Sélectionnez le fichier audio souhaité...
  • Seite 95: Visionner Des Vidéos

    9. Lecteur multimédia (USB) 9.3 Visionner des vidéos Si vous sélectionnez VIDÉO dans le menu, le menu vidéo avec la structure de dossiers est présenté sur l’écran. Sélectionnez le dossier principal C en appuyant sur OK. Puis, tous les vidéos de la clé USB sont affichées. Sélectionnez la vidéo souhaitée avec les touches fléchées.
  • Seite 96: Menu Epg (Guide Des Programmes Électronique)

    10. Menu EPG (Guide des programmes électronique) Avec l’EPG vous pouvez voir un aperçu de 7 jours de toutes les chaînes (si disponible). Utilisez les touches fléchées de la télécommande pour naviguer entre les chaînes et les émissions. Appuyez sur la touche DISPLAY de la télécommande pour recevoir des informations sur l’émission respective.
  • Seite 97: Puits Ci+ Pour La Télévision Payante

    11. Puits CI+ pour la télévision payante Avec le téléviseur vous ne pouvez pas capter seulement les chaînes en clair (Free to Air), mais également les chaînes cryptées si vous êtes en possession d’une smartcard et d’un module CI du diffuseur respectif. 1.
  • Seite 98: Dépannage

    12. Dépannage Veuillez lire les informations suivantes pour trouver l’origine d’un problème avant de contacter le service après-vente. Vous ne pouvez pas allumer • Vérifiez si le cordon d’alimentation est correctement le téléviseur. relié à la prise de courant et à l’adaptateur. •...
  • Seite 99: Caractéristiques Techniques

    13. Caractéristiques techniques Écran LED Display (classe 1 pixel) Taille de l‘écran 32“ (81 cm) Résolution physique 1920 x 1080 Pixel (Full HD) Rapport de contraste 4000 : 1 Valeur de luminosité 200 cd/m² Angle de vuel 178° (horizontal) / 178° (vertical) Syntoniseur DVB-S / -S2 / -C / -T / -T2 (H.265/HEVC) Satellite: 5000 | Terrestre: 100 | Câble: 1000...
  • Seite 100: Informations De Conformité

    Informations de conformité Par la présente, l’entreprise Megasat Werke GmbH déclare que l’appareil suivant est en conformité avec les exi- gences essentielles et les dispositions pertinentes de la directive 2014/30/EU Royal Line 32 et 2014/35/EU: Megasat Royal Line 32 (Numéro d’article 240071) La déclaration de conformité...
  • Seite 101 Note FRANÇAIS...
  • Seite 104 Version 1.0 (Décembre 2017) // Technique des changements, erreurs d‘impression et d‘erreurs. Megasat Werke GmbH | Industriestraße 4a | D-97618 Niederlauer | www.megasat.tv | info@megasat.tv...

Inhaltsverzeichnis