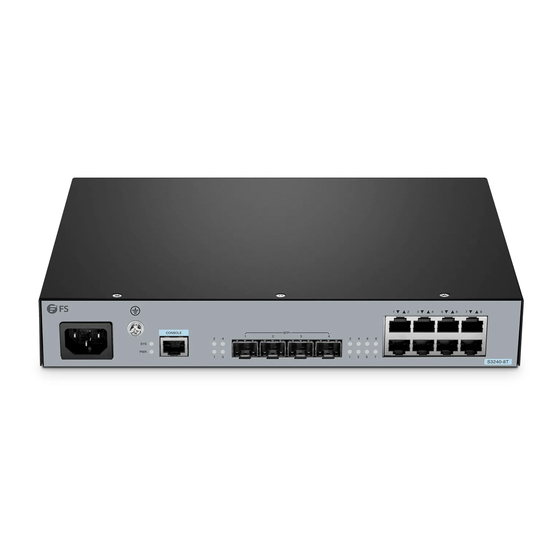
FS S3240 Serie Kurzanleitung
Inhaltsverzeichnis
Verfügbare Sprachen
Verfügbare Sprachen
Quicklinks
CON SOL E
4
8
12
16
20
24
SYS
3
7
11
15
S3 24 0-2 4T
19
23
2
6
10
14
18
22
PW R
1
5
9
13
17
21
S3 24 0-2 4F
1
2
3
4
5
CON SOL E
4
8
12
16
20
24
28
SYS
3
7
11
15
19
23
27
2
6
10
14
18
22
26
PW R
1
5
9
13
17
21
25
S3240 SERIES ENTERPRISE SWITCHES
UNTERNEHMENS-SWITCHES DER S3240-SERIE
COMMUTATEURS D'ENTREPRISE SÉRIE S3240
S����シリーズ エンタープライズスイッチ
Quick Start Guide
Quick Start Anleitung
Guide de Démarrage Rapide
クイックスタートガイド
1
2
3
4
5
6
7
8
9
10
11
12
13
14
15
28
27
26
25
6
7
8
1
2
3
4
5
6
7
8
9
10
11
COM BO
V1.0
16
17
18
19
20
21
22
23
24
SFP
25
26
27
28
12
13
14
15
16
17
18
19
20
21
22
23
24
25
SFP
26
27
28
Inhaltsverzeichnis

Verwandte Anleitungen für FS S3240 Serie


Inhaltszusammenfassung für FS S3240 Serie
- Seite 1 CON SOL E S3 24 0-2 4T PW R S3 24 0-2 4F CON SOL E PW R COM BO S3240 SERIES ENTERPRISE SWITCHES UNTERNEHMENS-SWITCHES DER S3240-SERIE COMMUTATEURS D'ENTREPRISE SÉRIE S3240 S����シリーズ エンタープライズスイッチ Quick Start Guide V1.0 Quick Start Anleitung Guide de Démarrage Rapide クイックスタートガイド...
-
Seite 2: Accessories
Introduction Thank you for choosing the switches. This guide is designed to familiarize you with the layout of the switches and describe how to deploy them in your network. S3240-8P S3240-8T S3240-24F S3240-24F CONSOLE COMBO S3240-24T CONSOLE S3240-24T Accessories S3240-8P/S3240-8T Power Cord x1 Ethernet Cable x1 Console Cable x1... - Seite 3 S3240-24F Power Cord x2 Console Cable x1 Ethernet Cable x1 M6 Cage Nut x4 Grounding Cable x1 M6 Screw x4 M3 Screw x8 Rubber Pad x4 Mounting Bracket x2...
- Seite 4 S3240-24T Power Cord x2 Console Cable x1 Ethernet Cable x1 M6 Cage Nut x4 Grounding Cable x1 M6 Screw x4 M3 Screw x6 Rubber Pad x4 Mounting Bracket x2 NOTE: The accessories may vary from illustration, please prevail in kind. NOTE: This power cord cannot be used with other devices, and other power cords should not be used with this device.
-
Seite 5: Hardware Overview
Hardware Overview Front Panel Ports S3240-8P CONSOLE SFP+ RJ45/PoE S3240-8T PWR CONSOLE SFP+ RJ45 S3240-24F COMBO S3240-24F CONSOLE COMBO CONSOLE SFP+ S3240-24T CONSOLE RJ45 SFP+ CONSOLE S3240-24T... - Seite 6 Ports Description An AC power port (S3240-8P/S3240-8T) An RJ45 console port for serial management CONSOLE SFP+ SFP+ ports for 1/10 Gbps connection RJ45 10/100/1000BASE-T ports for Ethernet connection (S3240-8P, S3240-8T, (S3240-8P supports the PoE function) and S3240-24T) A COMBO port integrating one RJ45 port and one SFP port, COMBO(S3240-24F) with only one port active simultaneously SFP(S3240-24F)
-
Seite 7: Installation Requirements
Installation Requirements Before the installation, make sure that you have the following: Phillips screwdriver and ESD tools. Standard-sized, 19" wide rack with a minimum of 1U height available. Fiber optic cables. Control terminals such as a PC. Site Environment The installation site must be well-ventilated. Ensure that there is adequate air ow around the device. -
Seite 8: Mounting The Switch
Mounting the Switch Desk Mounting 1. Attach four rubber pads to the bottom of the switch. 2. Place the switch on a stable desk. CAUTION: The device's top surface cannot support more than 4.5kg. Exceeding this weight may cause damage. Rack Mounting 1. - Seite 9 2. Attach the switch to the rack using the M6 screws and cage nuts. Grounding the Switch 1. Connect one end of the grounding cable to a proper earth ground, such as the rack in which the switch is mounted. 2.
- Seite 10 Connecting the RJ45 Ports 1. Connect one end of an Ethernet cable to the RJ45 port on a network device. 2. Connect the other end to an available RJ45 port of the switch. Connecting the SFP/SFP+ Ports 1. Insert a compatible SFP/SFP+ transceiver into the SFP/SFP+ port of the switch. 2.
-
Seite 11: Connecting The Power
Connecting the Console Port 1. Insert the RJ45 connector of the console cable into the console port on the switch. 2. Connect the DB9 female connector of the console cable to the serial port on the computer. Connecting the Power 1. - Seite 12 Troubleshooting System and Power LEDs Are Not Working Check if the switch’s power switch is turned on. Check if the switch’s power cord is securely connected. Check if the switch’s power module is faulty. Check if the hot-swappable power module is faulty: Replace it with another working hot-swappable power module.
-
Seite 13: Product Warranty
Product Warranty FS ensures our customers that for any damage or faulty items due to our workmanship, we will o er a free return within 30 days from the day you receive your goods. This excludes any custom-made items or tailored solutions. -
Seite 14: Einführung
Einführung Vielen Dank, dass Sie sich für die Switches entschieden haben. In dieser Anleitung werden Sie mit dem Aufbau der Switches vertraut gemacht und erfahren, wie Sie sie in Ihrem Netzwerk einsetzen. S3240-8P S3240-8T S3240-24F S3240-24F CONSOLE COMBO S3240-24T CONSOLE S3240-24T Zubehör S3240-8P/S3240-8T... - Seite 15 S3240-24F Netzkabel x2 Konsolenkabel x1 Ethernetkabel x1 M6-Kä gmutter x4 Erdungskabel x1 M6-Schraube x4 M3-Schraube x8 Gummipad x4 Montagehalterung x2...
- Seite 16 S3240-24T Netzkabel x2 Konsolenkabel x1 Ethernetkabel x1 M6-Kä gmutter x4 Erdungskabel x1 M6-Schraube x4 M3-Schraube x8 Gummipad x4 Montagehalterung x2 HINWEIS: Bitte beachten Sie, dass das Zubehör von der Abbildung abweichen kann. HINWEIS: Dieses Netzkabel kann nicht mit anderen Geräten verwendet werden, und andere Netzkabel sollten nicht mit diesem Gerät verwendet werden.
-
Seite 17: Hardware-Übersicht
Hardware-Übersicht Ports auf der Vorderseite S3240-8P CONSOLE SFP+ RJ45/PoE S3240-8T PWR CONSOLE SFP+ RJ45 S3240-24F COMBO S3240-24F CONSOLE COMBO CONSOLE SFP+ S3240-24T CONSOLE RJ45 SFP+ CONSOLE S3240-24T... -
Seite 18: Beschreibung
Ports Beschreibung Ein AC-Netzport (S3240-8P/S3240-8T) Ein RJ45-Konsolenport für serielle Verwaltung CONSOLE SFP+ SFP+-Ports für 1/10 Gbps Verbindungen RJ45 10/100/1000BASE-T ports for Ethernet connection (S3240-8P, S3240-8T, (S3240-8P supports the PoE function) and S3240-24T) Ein COMBO-Port, der einen RJ45-Port und einen SFP-Port COMBO(S3240-24F) integriert, wobei immer jeweils ein Port aktiv ist. -
Seite 19: Aufstellungsort
Installationsanforderungen Bevor Sie mit der Installation beginnen, stellen Sie sicher, dass die folgenden Gegenstände bereitliegen: Kreuzschlitzschraubendreher und ESD-Werkzeug. 19"-Standard-Rack mit einer Mindesthöhe von 1 HE. Glasfaserkabel Kontrollterminals z.B. ein PC. Aufstellungsort Der Installationsort muss gut belüftet sein. Stellen Sie sicher, dass das Gerät von einem ausreichendem Luftstrom umgeben ist. -
Seite 20: Montage Des Switches
Montage des Switches Tischmontage 1. Bringen Sie die vier Gummipads auf der Unterseite des Switches an. 2. Platzieren Sie den Switch auf einem stabilen Tisch. HINWEIS: Gewichte über 4,5 kg, die auf dem Gerät platziert werden, können Schäden verursachen. Rackmontage 1. -
Seite 21: Erdung Des Switches
2. Befestigen Sie den Switch mit den M6-Schrauben und -Kä gmuttern am Rack. Erdung des Switches 1. Schließen Sie ein Ende des Erdungskabels an eine geeignete Erdung an, z.B. an das Rack, in dem der Switch montiert ist. 2. Befestigen Sie die Erdungslasche mit Schraube und Unterlegscheiben am Erdung- spunkt der Rückseite des Switches. -
Seite 22: Verbinden Der Rj45-Ports
Verbinden der RJ45-Ports 1. Schließen Sie ein Ende eines Ethernetkabels an den RJ45-Port eines Netzwerkgeräts an. 2. Schließen Sie das andere Ende an einen verfügbaren RJ45-Port des Switches an. Verbinden der SFP/SFP+-Ports 1. Stecken Sie einen kompatiblen SFP/SFP+-Transceiver in den SFP/SFP+-Port des Switches. -
Seite 23: Anschließen Der Stromversorgung
Verbinden des Konsolenports 1. Schließen Sie den RJ45-Verbinder des Konsolenkabels an den Konsolenport des Switches an. 2. Schließen Sie die DB9-Buchse des Konsolenkabels an den Serienport Ihres Computers an. Anschließen der Stromversorgung 1. Schließen Sie das AC-Netzkabel an den Netzport auf der Rückseite des Switches an. 2. - Seite 24 Fehlerbehebung System- und Power-LEDs funktionieren nicht Überprüfen Sie, ob der Ein-/Ausschalter des Switches eingeschaltet ist. Überprüfen Sie, ob das Netzkabel des Switches sicher verbunden ist. Überprüfen Sie, ob das Netzmodul des Switches fehlerhaft ist. Überprüfen Sie, ob das hot-swap-fähige Netzmodul fehlerhaft ist: Ersetzen Sie es mit einem anderen, funktionierenden hot-swap-fähigen Netzmodul.
-
Seite 25: Produktgarantie
Produktgarantie FS garantiert seinen Kunden bei allen Schäden oder Fehlern, die auf FS zurückzuführen sind, eine kostenlose Rückgabe innerhalb von 30 Tagen nach Erhalt der Ware. Ausgenommen sind Sonderanfertigungen oder maßgeschneiderte Lösungen. Garantie: Für dieses Produkt gilt eine eingeschränkte Garantie über 5 Jahre auf Material- und Verarbeitungsfehler. - Seite 26 Introduction Merci d'avoir choisi ce commutateur. Ce guide a pour but de vous familiariser avec la con guration du commutateur et indique comment procéder à son installation. S3240-8P S3240-8T S3240-24F S3240-24F CONSOLE COMBO S3240-24T CONSOLE S3240-24T Accessoires S3240-8P/S3240-8T Câble d'alimentation x1 Câble Ethernet x1 Câble console x1 Écrou cage M6 x4...
- Seite 27 S3240-24F Cordon d'alimentation x2 Câble de console x1 Câble Ethernet x1 Écrou cage M6 x4 Câble de terre x1 Vis M6 x4 Vis M3 x8 Pattes en caoutchouc x4 Support de montage x2...
- Seite 28 S3240-24T Cordon d'alimentation x2 Câble de console x1 Câble Ethernet x1 Écrou cage M6 x4 Câble de terre x1 Vis M6 x4 Vis M3 x6 Pattes en caoutchouc x4 Support de montage x2 NOTE: Les accessoires peuvent di érer de l'illustration, veuillez prévaloir en nature.
-
Seite 29: Présentation Du Matériel
Présentation du matériel Ports du Panneau Frontal S3240-8P CONSOLE SFP+ RJ45/PoE S3240-8T PWR CONSOLE SFP+ RJ45 S3240-24F COMBO S3240-24F CONSOLE COMBO CONSOLE SFP+ S3240-24T CONSOLE RJ45 SFP+ CONSOLE S3240-24T... - Seite 30 Ports Description Port d'alimentation AC. (S3240-8P/S3240-8T) Port console RJ45 pour la gestion série. CONSOLE SFP+ Ports SFP+ pour une connexion 1/10 Gbit/s RJ45 Ports 10/100/1000BASE-T pour connexion Ethernet (le (S3240-8P, S3240-8T, S3240-8P prend en charge la fonction PoE) and S3240-24T) Port COMBO intégrant un port RJ45 et un port SFP, avec un COMBO(S3240-24F) seul port actif à...
-
Seite 31: Conditions Requises Pour L'installation
Conditions Requises Pour l'Installation Avant l'installation, assurez-vous de disposer des éléments suivants : Tournevis Phillips et outils ESD. Rack standard de 19 pouces de large avec une hauteur minimale de 1U disponible. Câbles à bre optique. Terminaux de contrôle tels qu'un PC. Site de l'Installation Le site d'installation doit être bien ventilé. -
Seite 32: Installation En Rack
Installation du Commutateur Installation sur Bureau 1. Fixez quatre pads en caoutchouc à la base du commutateur. 2. Placez le commutateur sur un bureau ou une surface plane et stable. ATTENTION : la surface supérieure de l'appareil ne peut supporter plus de 4,5 kg. - Seite 33 2. Fixez le commutateur au rack à l'aide des vis M6 et des écrous cage. Mise à la terre du Commutateur 1. Connectez une extrémité du câble de mise à la terre à une prise de terre appropriée, telle que le rack sur lequel le commutateur est installé. 2.
- Seite 34 Connexion des Ports RJ45 1. Connectez une extrémité d'un câble Ethernet au port RJ45 d'un périphérique réseau. 2. Connectez l'autre extrémité à un port RJ45 disponible du commutateur. Connexion des Ports SFP/SFP 1. Insérez un émetteur-récepteur SFP/SFP+ compatible dans le port SFP/SFP+ du commutateur.
-
Seite 35: Branchement De L'alimentation
Connexion du Port Console 1. Insérez le connecteur RJ45 du câble console dans le port console du commutateur. 2. Connectez le connecteur femelle DB9 du câble console au port série de l'ordinateur. Branchement de l'Alimentation 1. Branchez le câble d'alimentation AC dans le port d'alimentation situé à l'arrière du commutateur. - Seite 36 Dépannage Les voyants système et d'alimentation ne sont pas allumés. Véri ez si l'interrupteur d'alimentation du commutateur est en position de fonctionnement. Véri ez si le câble d'alimentation du commutateur est correctement branché. Véri ez si le module d'alimentation du commutateur est défectueux. Véri ez si le module d'alimentation remplaçable à...
-
Seite 37: Garantie Du Produit
Garantie du Produit FS garantit à ses clients que tout article endommagé ou défectueux en raison de sa fabrication pourra être retourné gratuitement dans les 30 jours suivant la date de réception. Cette garantie ne s'applique pas aux articles sur mesure ou aux solutions personnalisées. - Seite 38 はじめに スイッチをお買い上げいただき、ありがとうざいます。本ガイドは、スイッチのレイアウ トを理解し、操作方法を説明するためのものです。 S����-�P S����-�T S3240-24F S����-��F CONSOLE COMBO S����-��T CONSOLE S3240-24T 付属品 S����-�P/S����-�T 電源コード x� イーサネッ トケーブル x� コンソールケーブル x� M�ケージナット x� 接地ケーブル x� M�ネジ x� M�ネジ x� ゴムパッ ド x� 取付ブラケッ ト x�...
- Seite 39 S����-��F 電源コード x� イーサネッ トケーブル x� コンソールケーブル x� M�ケージナット x� 接地ケーブル x� M�ネジ x� M�ネジ x� ゴムパッ ド x� 取付ブラケッ ト x� (S����-��Fのみ)...
- Seite 40 S����-��T 電源コード x� イーサネッ トケーブル x� コンソールケーブル x� M�ケージナット x� 接地ケーブル x� M�ネジ x� M�ネジ x� ゴムパッ ド x� 取付ブラケッ ト x� 注: 付属品はイラストと異なる場合がありますので、あらかじめご了承ください。 注: この電源コードは他の機器には使用できません。また、他の電源コードはこ の機器に使用しないでください。...
- Seite 41 ハードウェアの概要 フロントパネルポート S����-�P RJ��/PoE CONSOLE SFP+ S����-�T PWR CONSOLE SFP+ RJ�� S3240-24F COMBO S3240-24F CONSOLE COMBO CONSOLE SFP+ S3240-24T CONSOLE RJ45 SFP+ CONSOLE S3240-24T...
- Seite 42 ポート 説明 AC電源ポート (S����-�P/S����-�T) シリアル管理用RJ��コンソールポート CONSOLE �/��Gbps接続用SFP+ポート SFP+ RJ�� イーサネット接続用��/���/����BASE-Tポート(S����-�P (S����-�P, S����-�T, はPoE機能をサポート) and S����-��T) RJ��ポート�つとSFPポータ�つを統合したコンボポート(同 COMBO(S����-��F) 時に�つのみアクティブ) SFP(S����-��F) �Gbps接続用SFPポート フロントパネルボタン S����-��F/S����-��T Power Switch POWER POWER Input: 100-240Vac Input: 100-240Vac Freq: 50/60Hz Freq: 50/60Hz ボタン 状態 ONは電源が入っている状態を意味し、OFFは電源が切れて Power Switch いる状態を意味します。 注...
- Seite 43 設置の条件 取り付けの前に、以下の物が準備されていることを確認してください: プラスドライバーと静電気防止ツール。 標準サイズの��インチ幅のラックで、最小�Uの高さからから利用可能です。 光ファイバーケーブル。 PCなどの制御端末。 設置環境 設置場所は十分に換気されている必要があります。 機器の周囲に十分な空気の流れが あることを確認してください。 周囲温度が以下の限界値を超える場所では機器を使用しないくださ い: S����-�P/S����-�T: ��°C、S����-��F/S����-��T:��°C。 ほこりの多い場所に機器を設置しないでください。 設置場所は、水漏れ、水滴、または激しい結露がない状態である必要があります。 ラックが確実に接地されていることを確認してください。 使用上の注意 設置時は静電気対策を実施し、機器の電源を切った状態で行って下さい。 入力電圧範囲が機器に表示されている仕様と一致していることを確認してください。 機器の筐体を開けたり分解したりしないでください。 機器を清掃する前に、電源を切ってください。液体で清掃しないでください。 機器を、電力線、電灯、および電力網から遠ざけて設置してください。 機器が水平で安定していることを確認し、危険な状態を避けるようにしてください。...
- Seite 44 スイッチの取り付け デスクへの取り付け �. 底面にゴムパッドを�枚取り付けます。 �. スイッチを安定したデスクの上に置きます。 注 : 損傷の原因となる可能性があるので、スイッチの上に�.�kg以上の物を載せ ないでください。 ラックへの取り付け �. M�ネジを使用して、取り付けブラケットをスイッチの両側に取り付けます。...
- Seite 45 �. M�ネジとケージナットを使用して、スイッチをラックに取り付けます。 スイッチの接地 �. 接地ケーブルの一方の端を、スイッチが取り付けられているラックなどの適切な接地 に接続します。 �. ネジとワッシャーを使用して、接地ラグをスイッチのバックパネルの接地点に固定し ます。 ご注意 : すべての電源接続を切らない限り、 アース接続を取り外すことは出来ません。...
- Seite 46 RJ��ポートへの接続 �. イーサネットケーブルの一端をネットワーク機器のRJ��ポートに接続します。 �. もう一方の端をスイッチの空いているRJ��ポートに接続します。 SFP/SFP+ポートへの接続 �. 互換性のあるSFP/SFP+トランシーバーをスイッチのSFP/SFP+ポートに挿入します。 �. 光ファイバーケーブルを光ファイバートランシーバーに接続します。 次に、ケーブルの もう一方の端を別のファイバー機器に接続します。...
- Seite 47 コンソールポートへの接続 �. コンソールケーブルのRJ��コネクターをスイッチのコンソールポートに挿入します。 �. コンソールケーブルのDB�メスコネクターをコンピューターのシリアルポートに接続し ます。 電源接続 �. AC電源コードをスイッチのバックパネルの電源ポートに差し込みます。 �. 電源コードのもう一方の端をAC電源に接続します。 警告 : 電源を入れたまま電源ケーブルを取り付けないでください。...
- Seite 48 問題解決 システムLEDと電源LEDが点灯しない場合 スイッチの電源スイッチがオンになっているか確認してください。 スイッチの電源コードが確実に接続されているか確認してください。 スイッチの電源モジュールに不具合がないか確認してください。 ホットスワップ対応電源モジュールに不具合がないか確認してください:不具合が ある場合は、別の正常なホットスワップ対応電源モジュールと交換してください。 スイッチが正常に電源が入る場合、元の電源モジュールに不具合があります。 外部電源アダプターに不具合がないか確認してください:不具合がある場合は別の 作動する外部電源アダプターと交換してください。スイッチが正常に電源が入る場 合、元のアダプターに不具合があります。 �/��Gポートが作動しない場合 互換性のあるケーブルとトランシーバーを使用してもポートの初期化に失敗する場合は、 次の手順を試してください: ポート速度モードを自動ネゴシエーション設定にしてください。 もしくはポート速度を�/�� Gbpsに強制的に設定してください。 スイッチのリモート接続に失敗する場合 pingを使用してネットワーク接続性をテストします。 ネットワークに到達出来る場合は、スイッチの再起動を試みてください。 対応するリモート管理サービスが有効になっているか確認してください。 ポートが機能しない場合 スイッチポートがシャットダウンされていない状態にあるか確認してください。 スイッチがDDM情報を読み取れるかどうかを確認してください。 ポート速度の設定が正しいかどうかを確認してください。 スイッチケーブルをループさせてみてください。 問題が解決しない場合は、テクニカルサポートまでお問い合わせください。...
- Seite 49 製品保証 FSは、カスタム製品又はカスタムソリューションを除き、当社の過失による製品の破損 や不良品があった場合、お客様が製品を受け取った日から��日以内に無料で返品をする ことを保証します。 保証:この製品は、材料または製造上の欠陥に対して�年間の限定保証を提供し ます。保証の詳細については、下記のURLをご参照ください。 https://www.fs.com/jp/policies/warranty.html 返品:返品を希望される場合、方法については下記のURLをご参照ください。 https://www.fs.com/jp/policies/day_return_policy.html オンラインリソース その他の技術資料については、下記のURLをご参照ください。 https://www.fs.com/jp/technical_documents.html FSアプリをダウンロード QRコードを読み取り、App StoreまたはGoogle PlayストアからFSア プリをダウンロードしてインストールできます。若しくは下記の URLにアクセスしてください。 https://www.fs.com/jp/appdownload.html...
- Seite 50 Q.C. PASSED 354559 Copyright © 2025 FS.COM All Rights Reserved.