Planika VITRO Montageanleitung

Verwandte Anleitungen für Planika VITRO


Inhaltszusammenfassung für Planika VITRO
- Seite 1 EN Installation manual / DE Montageanleitung / ES Manual de montaje / FR Notice de montage / IT Istruzioni di montaggio / PL Instrukcja montażu / Left Corner / Right Corner Room Divider Copyright Planika Sp. z o.o. www.planika.com I1571#01 21.10.2025...
- Seite 2 Do not use the device in humid spaces. Use only with chimney flue system Only use manufacturer-approved decorative accessories for Planika fireplaces. Follow the provided guidelines to prevent damage to the unit. Only use the plugs/electrical cords supplied with the fireplace.
- Seite 3 3. No utilice el dispositivo en espacios húmedos. 4. Utilizar únicamente con un sistema de chimenea. 5. Utilizar únicamente accesorios decorativos homologados por el fabricante para las chimeneas Planika. Seguir las instrucciones proporcionadas para evitar daños en la unidad. 6. Utilizar únicamente los enchufes/cables eléctricos suministrados con la chimenea.
- Seite 4 3. Non utilizzare il dispositivo in ambienti umidi. 4. Utilizzare solo con sistema di canne fumarie 5. Utilizzare solo accessori decorativi approvati dal produttore per i caminetti Planika. Seguire le indicazioni fornite per evitare di danneggiare l'apparecchio. 6. Utilizzare esclusivamente le spine e i cavi elettrici forniti con il caminetto.
- Seite 5 Naturalna wymiana powietrza w pomieszczeniu – min. 1/h. Nie używaj urządzenia w wilgotnych pomieszczeniach. Używać wyłącznie z systemem kominowym. Do kominków Planika używać wyłącznie akcesoriów dekoracyjnych zatwierdzonych przez producenta. Przestrzegać dostarczonych wytycznych, aby zapobiec uszkodzeniu urządzenia. Używać wyłącznie wtyczek/przewodów elektrycznych dostarczonych wraz z kominkiem.
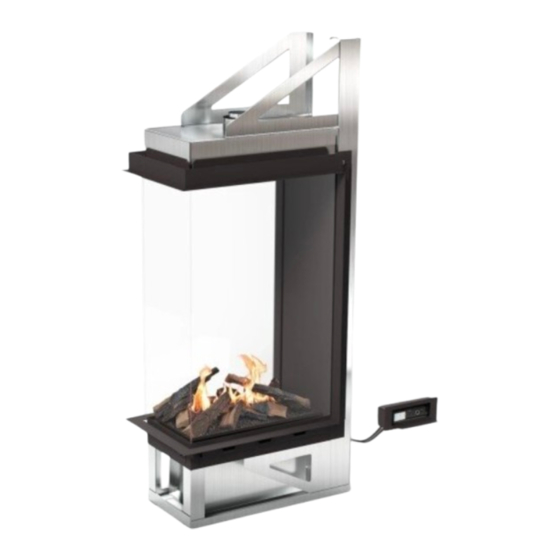
- Seite 6 5 cm poniżej linii ognia. Musi on znajdować się w miejscu, z którego widoczny jest kominek. Niezastosowanie się do tego wymogu może spowodować awarię urządzenia i unieważnienie gwarancji. Burner / Feuerungsleiste / Hogar / Foyer / Focolare / Palenisko VITRO Left Corner, Right Corner, Room Divider...
- Seite 7 Quantity Complete fireplace Kompletter Kamin Chimenea completa Cheminée complète Caminetto completo Kompletny kominek Pannello frontale in 1x LC / RC, 2x Front glass panel Frontscheibe Panel frontal de cristal Panneau vitré avant Przedni panel szklany vetro Pannello di vetro Side glass panel Seitenscheibe Panel lateral de cristal Panneau vitré...
- Seite 8 2. Left / Right Corner Unscrew the 4 screws securing the fireplace during transport. The screws are located in the corners. Unpack the fireplace from the tape/foil and transport boxes and remove the device from the pallet. Lösen Sie die 4 Schrauben, mit denen der Kamin für den Transport gesichert ist. Die Schrauben befinden sich in den Ecken. Packen Sie den Kamin aus dem Klebeband/der Folie und den Transportkartons aus und nehmen Sie das Gerät von der Palette.
- Seite 9 230 V, 50 Hz, PE RJ45 Ethernet Min. 3x1,5 mm, 230 V, 50 Hz, PE (not supplied by producer) Optional SHS Planika SHS module Device control signal (Potential / Potential Free) (not supplied by producer) Input / Output Connection (not supplied by producer)
- Seite 10 Install the chimney in accordance with the section on chimney systems (page 62). We recommend using chimney systems from POUJOULAT. The diameter of the adapter in the fireplace is shown in the detail. If the chimney layout is different from the diagrams shown in the section on chimney systems, be sure to install an additional exhaust fan.
- Seite 11 Prepare the connection to the control panel and add support elements for the fireplace finish to the structure. Remember that the structure must be self-supporting – the fireplace must not transfer any loads to the structure. Bereiten Sie die Verbindung zum Bedienfeld vor und fügen Sie Stützelemente für die Kaminverkleidung zur Konstruktion hinzu. Denken Sie daran, dass die Konstruktion selbsttragend sein muss –...
- Seite 12 Connect the control panel and switch on the device, test that it is working correctly and take appropriate action if necessary. At this stage, the fireplace can be removed without dismantling the structure. Schließen Sie das Bedienfeld an, schalten Sie das Gerät ein, überprüfen Sie, ob es ordnungsgemäß funktioniert, und ergreifen Sie gegebenenfalls geeignete Maßnahmen.
- Seite 13 If the fireplace is functioning properly, disconnect the control panel and proceed to finish the structure with cladding material. Remember to make ventilation holes in the structure (top and bottom) and an inspection hole for the electrical connection. Make a hole for the control panel, pull the control panel wires through and place the control panel pocket in place, securing it.
- Seite 14 Collegare il pannello di controllo secondo lo schema a destra e disporre i ceppi (pagina 22). Installare le griglie di ventilazione o lasciare uno spazio di ventilazione - si prega di notare che le griglie non VITRO incluse nel set.
- Seite 15 3. Room Divider Remove the 4 screws securing the fireplace during transport. The screws are located in the corners. Unpack the fireplace from the tape/foil and transport boxes and remove the device from the pallet. Entfernen Sie die 4 Schrauben, mit denen der Kamin während des Transports gesichert war. Die Schrauben befinden sich in den Ecken. Packen Sie den Kamin aus dem Klebeband/der Folie und den Transportkartons aus und nehmen Sie das Gerät von der Palette.
- Seite 16 230 V, 50 Hz, PE Min. 3x1,5 mm, 230 V, 50 Hz, PE RJ45 Ethernet (not supplied by producer) Optional SHS Planika SHS module Device control signal (Potential / Potential Free) (not supplied by producer) Input / Output Connection (not supplied by producer)
- Seite 17 Install the chimney in accordance with the section on chimney systems (page 62). We recommend using chimney systems from POUJOULAT. The diameter of the adapter in the fireplace is shown in the detail. If the chimney layout is different from the diagrams shown in the section on chimney systems, be sure to install an additional exhaust fan.
- Seite 18 Prepare the connection to the control panel and add support elements for the fireplace finish. Remember that the structure must be self-supporting - the fireplace must not bear any structural loads. Bereiten Sie den Anschluss an das Bedienfeld vor und fügen Sie Stützelemente für die Kaminverkleidung hinzu. Denken Sie daran, dass die Konstruktion selbsttragend sein muss –...
- Seite 19 Connect the control panel and switch on the device, test that it is working properly and take appropriate action if necessary. At this stage, the fireplace can be removed without dismantling the surround. Schließen Sie das Bedienfeld an, schalten Sie das Gerät ein, überprüfen Sie, ob es ordnungsgemäß funktioniert, und ergreifen Sie gegebenenfalls geeignete Maßnahmen.
- Seite 20 If the fireplace is working properly, disconnect the control panel and proceed to finish the structure with cladding material. Remember to make ventilation holes in the surround (top and bottom) and an inspection hole for the electrical connection. Make a hole for the control panel, pull the control panel wires through and place the control panel pocket in place, securing it.
- Seite 21 Collegare il pannello di controllo secondo lo schema a destra e disporre i ceppi (pagina 22). Installare le griglie di ventilazione o lasciare una fessura di ventilazione - si prega di notare che le griglie non VITRO incluse nel set.
- Seite 22 Place the foam glass evenly in the marked area, leaving no exposed areas. Ensure that the foam glass does not come into contact with the filament or temperature sensor. Place the ceramic logs as shown in the diagram in the photograph. Verteilen Sie das Schaumglas gleichmäßig auf der markierten Fläche, sodass keine Stellen frei bleiben.
- Seite 23 CAUTION! Ensure that the appliance is switched off and the glass panes have cooled down to room temperature. Before proceeding with disassembly, loosen the screws holding the glass profiles in the upper part of the appliance – be careful not to damage the sealing cord. Attach the suction cups to the centre of the glass pane.
- Seite 24 1. Filament 1. Glühelement 1. Filamento 2. Foyer 1. Filament 2. Feuerungsleiste 2. Hogar 3. Brûleur 2. Burner 3. Feuerungsrost 3. Rejilla 4. Panneau de 3. Device surface 4. Externes bedienpanel 4. Panel de control externo commande externe 4. External control panel 5.
- Seite 25 Screen 1 Screen 2 Port de service Puerto de servicio Alimentation ON/OFF Encendido/Apagado Service port Service-Anschluss Déblocage de la pompe à Desbloqueo de la bomba de Power ON/OFF Strom EIN/AUS carburant combustible Fuel pump release Freigabe der Kraftstoffpumpe Accouplement de la pompe Acoplamiento de la bomba de Fuel pump coupling Kupplung der Kraftstoffpumpe...
- Seite 26 REFUELLING Open the lid (I) and turn the device on by pressing (NO FUEL) If the fuel tank is empty - will appear on display (II) or if you want to refuel the fireplace, firmly plug in the fuel (REFUELLING) pump inlet ‘a’...
-
Seite 27: Panel Lock
FLAME HEIGHT REGULATION When the flame is on, press the button on the remote or scroll the flame level bar in the mobile app to choose one of the six flame heights. The flame starts on height 4 by default. NOTE. -
Seite 28: Remote Control
AUTO OFF To set the Auto Off - go to and then choose . Set the time length by clicking on . Increase the time by clicking , decrease by clicking button. Confirm it with button. Auto OFF button in Menu Set time button Setting time Confirmation symbol... - Seite 29 Turn on the Wi-Fi on your mobile device and find the one you set before on the list. Connect to it using the password you set. Switch on the Planika BEV app, the message (FINDING DEVICE) will appear on the screen. The application will automatically search for the fireplace.
- Seite 30 PLANIKA BEV APP 1. Newsletter 2. Fireplace status 3. Fuel level 4. Flame height 5. Start and stop 6. Info 7. Menu MENU To access menu, press the button. To go back to the main panel, press BACK To access general information about the fireplace, press the button.
- Seite 31 Your fireplaces Contact us Press LOCK to lock Press AUTO OFF to Change the default Check available Contact Planika by e- the control panel on automatically turn off launch flame height. fireplaces. Press EDIT to mail. Press SEND to the fireplace. Press the device.
-
Seite 32: Brennstoffnachfüllen
BRENNSTOFFNACHFÜLLEN Öffnen Sie die Klappe des Bedienpanels und Einfüllklappe (I) und drücken Sie um den Kamin einzuschalten. Wenn der Brennstofftank leer ist (NO FUEL) - erscheint auf dem Display (II) oder wenn Sie den Kamin auftanken wollen, stecken Sie den Eingang der Brennstoffpumpe 'a' fest ein (Sie werden ein Klickgeräusch hören) und das Netzkabel 'b' (III) (REFUELLING) - erscheint auf dem Display (IV) . -
Seite 33: Regulierung Der Flammenhöhe
REGULIERUNG DER FLAMMENHÖHE Wenn die Flamme eingeschaltet ist, drücken Sie die Taste oder auf der Fernbedienung oder scrollen Sie durch die Flammenstufenleiste in der mobilen App, um eine der sechs Flammenhöhen zu wählen. Die Flamme startet standardmäßig auf Höhe Warnung. Wenn die Temperatur des Geräts zu hoch ist, wird die Flammenhöhe automatisch verringert und für eine Änderung gesperrt. -
Seite 34: Fernbedienung
AUTO OFF Um die automatische Abschaltung einzustellen, gehen Sie zu und wählen Sie dann . Stellen Sie die Zeitdauer ein, indem Sie auf . Erhöhen Sie die Zeit, indem Sie auf , verringern Sie sie durch Klicken Schaltfläche. Bestätigen Sie die Einstellung mit Schaltfläche. -
Seite 35: Konfiguration Der Drahtlosen Steuerung
Schalten Sie das Wi-Fi auf Ihrem mobilen Gerät ein und suchen Sie das zuvor eingestellte in der Liste. Verbinden Sie sich mit dem Passwort, das Sie festgelegt haben. Schalten Sie die Planika BEV-App ein, auf dem Bildschirm erscheint die Meldung (FINDING DEVICE). - Seite 36 APPLIKATION PLANIKA BEV 1. Newsletter 2. Kaminmodus 3. Brennstoffniveau 4. Flammenhöhe 5. Flammenzündung und – auslöschung 6. Info 7. Menü MENU Das Menü ist erreichbar durch das drücken der Ikone . Die Rückkehr zum Hauptpaneel ist möglich durch das Drücken der ZURÜCK...
- Seite 37 Your fireplaces Contact Us Drücken Sie LOCK, um Drücken Sie auf AUTO Stellen Sie das Niveau Überprüfen Sie die Kontaktieren Sie Planika den Steuerpaneel des OFF, um das Gerät der Flamme ein, auf dem verfügbaren Kamine. durch durch E-Mail. Kamins zu blockieren.
- Seite 38 RELLENO DEL COMBUSTIBLE 1. Abra la tapa (I) y encienda el aparato pulsando . 2. Si el depósito de combustible está vacío (NO FUEL) - - aparecerá en la pantalla (II) o si desea repostar la chimenea, enchufe firmemente la entrada de la bomba de combustible 'a' (oirá un clic) y el cable de alimentación 'b' (III) (REFUELLING) - aparecerá en la pantalla (IV) 3.
-
Seite 39: Apagar El Dispositivo
REGULACIÓN DE LA ALTURA DE LA LLAMA Cuando la llama esté encendida, pulsa el botón en el mando a distancia o desplaza la barra de nivel de llama en la aplicación móvil para elegir una de las seis alturas de llama. La llama comienza en la altura 4 por defecto. NOTA. -
Seite 40: Control Remoto
AUTO OFF Para configurar el Auto Off - vaya a y seleccione . Ajuste la duración pulsando Aumente el tiempo pulsando , redúzcalo pulsando . Confírmelo con botón. Botón Auto OFF en Menú otón de ajuste de hora Ajuste de la hora Símbolo de confirmación CONTROL REMOTO Para emparejar el mando a distancia con el quemador vaya a... - Seite 41 Encienda el Wi-Fi de su dispositivo móvil y busque en la lista el que configuró anteriormente. Conéctate a él utilizando la contraseña que hayas establecido. Encienda la aplicación Planika BEV, el mensaje (FINDING DEVICE) se mostrará en la pantalla. La aplicación buscará automáticamente la chimenea.
-
Seite 42: Apagar Y Encender
APLICACION PLANIKA BEV 1. Newsletter 2. Modo chimenea 3. Nivel de combustible 4. Altura de la llama 5. Apagar y encender 6. Info 7. Menu MENU El menú está disponible después de hacer clic en el icono . Puede volver al panel principal después de hacer clic en ATRÁS Para obtener información general sobre la chimenea, haga clic en el icono... - Seite 43 Establezca el nivel Consulte las Póngase en contacto AUTO OFF para bloquear el para apagar de llama en el que la chimeneas con Planika por panel de control de automáticamente el chimenea disponibles. Haga correo electrónico. la chimenea. Haga aparato. Ajuste el comenzará...
-
Seite 44: Ravitaillement Du Carburant
RAVITAILLEMENT DU CARBURANT 1. Ouvrez le couvercle (I) et mettez l'appareil en marche en appuyant sur 2. Si le réservoir de combustible est vide (NO FUEL)) - s'affiche sur l'écran (II) ou si vous souhaitez ravitailler le foyer, branchez fermement l'entrée de la pompe à combustible 'a' (vous entendrez un déclic) et le cordon d'alimentation 'b' (III) (REFUELLING) - s'affiche sur l'écran (IV). -
Seite 45: Mise Hors Tension De L'appareil
RÉGLAGE DE LA HAUTEUR DE LA FLAMME Lorsque la flamme est allumée, appuyez sur la touche de la télécommande ou faites défiler la barre de niveau de flamme dans l'application mobile pour choisir l'une des six hauteurs de flamme. Par défaut, la flamme démarre à la hauteur 4. ALETRE. -
Seite 46: Historique Des Erreurs
AUTO OFF Pour régler l'arrêt automatique - allez à et choisissez . Réglez la durée en cliquant sur . Augmentez la durée en cliquant sur , et diminuer en cliquant sur en cliquant sur le bouton . Confirmez avec le bouton en cliquant sur le bouton. - Seite 47 Allumez le Wi-Fi sur votre appareil mobile et trouvez celui que vous avez défini précédemment dans la liste. Allumez l'application Planika BEV, le message (FINDING DEVICE) s'affiche à l'écran. L'application recherchera automatiquement le foyer. Écran du panneau de commande du brûleur Écran de l'appareil mobile...
- Seite 48 APPLICATION PLANIKA BEV 1. Newsletter 2. Mode cheminée 3. Niveau de carburant 4. Hauteur de la flamme 5. Éteindre et allumer 6. Informations 7. Menu MENU Le menu est accessible après avoir cliqué sur l'icône . Vous pouvez revenir au panneau principal après avoir cliqué sur RETOUR Pour obtenir des informations générales sur la cheminée, cliquez sur l'icône...
- Seite 49 Auto OFF Default Level Your fireplaces Contact Us Cliquez sur LOCK Appuyez sur AUTO Réglez le niveau de Vérifiez les Contactez Planika par OFF pour éteindre pour verrouiller le flamme auquel le cheminées e-mail. Cliquez sur automatiquement panneau de foyer commencera à...
- Seite 50 RIFORNIMENTO DI COMBUSTIBILE Aprire il coperchio (I) e accendere l'apparecchio premendo Se il serbatoio del combustibile è vuoto (NO FUEL) - apparirà sul display (II) o se si desidera rifornire il caminetto, collegare saldamente l'ingresso della pompa del combustibile 'a' (si sentirà un clic) e il cavo di alimentazione 'b' (III) (REFUELLING) - apparirà sul display (IV) 3.
-
Seite 51: Spegnimento Del Dispositivo
REGOLAZIONE DELL'ALTEZZA DELLA FIAMMA Quando la fiamma è accesa, premere il pulsante sul telecomando o scorrere la barra del livello della fiamma nell'applicazione mobile per scegliere una delle sei altezze della fiamma. Per impostazione predefinita, la fiamma si avvia all'altezza 4. ATTENZIONE. - Seite 52 SPEGNIMENTO AUTOMATICO Per impostare lo spegnimento automatico, andare su e scegliere . Impostare la durata cliccando . Aumentare il tempo facendo clic su , e diminuire facendo clic su pulsante . Confermare con il pulsante . button. Pulsante di spegnimento Pulsante di impostazione dell'ora Impostazione dell'ora Simbolo di conferma...
- Seite 53 Accendere il Wi-Fi sul dispositivo mobile e trovare quello impostato in precedenza nell'elenco. Accendere l'applicazione Planika BEV, sullo schermo apparirà il messaggio (TROVA DISPOSITIVO). L'applicazione cercherà automaticamente il caminetto. Schermata del pannello di controllo del bruciatore...
- Seite 54 APPLICAZIONE PLANIKA BEV 1. Newsletter 2. Modalità camino 3. Livello combu 4. L'altezza della fiamma 5. Spegnere e accendere 6. Info 7. Menu MENU Il menu è disponibile dopo aver cliccato sull'icona . Per tornare al pannello principale fare clic su INDIETRO Per informazioni generali sul camino, fare clic sull'icona .
- Seite 55 95-96,6% di etanolo in volume. Fanola è il combustibile raccomandato con purezza farmacologica. NON USARE COMBUSTIBILI SINTETICI A BASE DI PETROLIO PERCHÉ VITRO CONTAMINATI, EMETTONO ODORI SGRADEVOLI E POSVITRO DANNEGGIARE IL CAMINETTO! NON UTILIZZARE COMBUSTIBILI CONTENENTI IL 100%, GEL O COMBUSTIBILI AROMATICI! L'utilizzo di combustibile con un contenuto alcolico diverso da 95-96,6% può...
-
Seite 56: Uzupełnianie Paliwa
UZUPEŁNIANIE PALIWA 1. Otwórz klapkę (I) i włącz urządzenie, wciskając 2. Jeśli zbiornik paliwa jest pusty (NO FUEL) - pojawi się na wyświetlaczu (II) lub jeśli chcesz zatankować kominek, podłącz wlot pompy paliwa "a" (usłyszysz dźwięk kliknięcia) i przewód zasilający "b" (III) (REFUELLING) - pojawi się na wyświetlaczu (IV). 3. -
Seite 57: Wyłączanie Urządzenia
REGULACJA WYSOKOŚCI PŁOMIENIA Gdy płomień jest włączony, naciśnij przycisk na pilocie / wyświetlaczu lub przewiń pasek poziomu płomienia w aplikacji mobilnej, aby wybrać jedną z sześciu wysokości płomienia. Domyślnie płomień uruchamia się na wysokości 4. UWAGA. W przypadku zbyt wysokiej temperatury urządzenia, wysokość płomienia zostanie automatycznie zmniejszona i zablokowana przed zmianą. -
Seite 58: Automatyczne Wyłączanie
AUTOMATYCZNE WYŁĄCZANIE Aby ustawić automatyczne wyłączanie - przejdź do a następnie wybierz . Ustaw długość czasu, klikając na . Zwiększ czas, klikając przycisk , lub zmniejsz, klikając przycisk Potwierdź przyciskiem Auto OFF w Menu Przycisk Set Time Ustawianie czasu Symbol potwierdzajacy ZDALNE STEROWANIE Aby sparować... - Seite 59 Włącz Wi-Fi na swoim urządzeniu mobilnym i znajdź na liście to, które ustawiłeś wcześniej. Połącz się z nim za pomocą ustawionego hasła. Włącz aplikacje Planika BEV, na ekranie zostanie wyświetlony komunikat (FINDING DEVICE). Aplikacja automatycznie wyszuka kominek.
- Seite 60 APLIKACJA PLANIKA BEV Newsletter Tryb kominka Poziom paliwa Wysokość płomienia Wygaszenie i odpalanie Info Menu MENU Menu jest dostępne po kliknięciu w ikonę . Powrót do głównego panelu jest możliwy po kliknięciu WSTECZ W celu uzyskania informacji ogólnych o kominku kliknij ikonę...
- Seite 61 Panel Lock Auto OFF Default Level Your fireplaces Contact Us Kliknij LOCK aby Naciśnij AUTO OFF, Ustaw poziom Sprawdź dostępne Skontaktuj się z zablokować panel aby automatycznie płomienia, na którym kominki. Kliknij EDIT Planiką poprzez sterowania na wyłączyć urządzenie. kominek rozpocznie aby edytować...