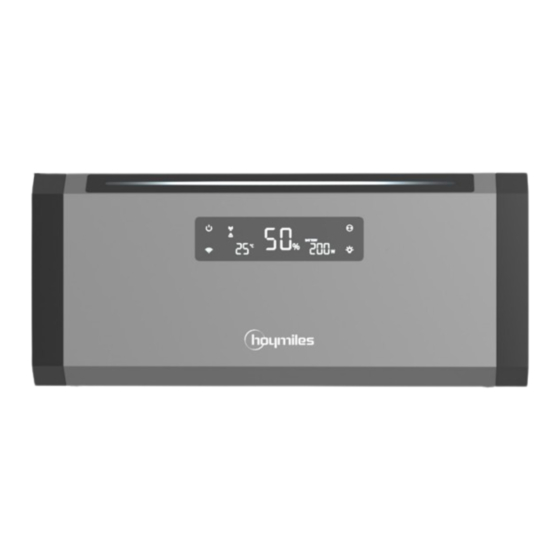
Hoymiles HiBattery 1920 AC Bedienungsanleitung
Inhaltsverzeichnis
Verfügbare Sprachen
Verfügbare Sprachen
Inhaltsverzeichnis

Verwandte Anleitungen für Hoymiles HiBattery 1920 AC


Inhaltszusammenfassung für Hoymiles HiBattery 1920 AC
- Seite 1 Open Energy for All User Manual HiBattery 1920 AC Region: Global AP041066 REV1.1 hoymiles.com...
- Seite 2 Contents English ..........................01 Deutsch..........................17 Français ..........................33 Nederlands......................... 49...
-
Seite 3: Packing List
1. Packing List • Immediately contact your supplier or distributor upon noticing any damaged or missing parts. • In these instructions, HiBattery 1920 AC is referred to as “HiBattery AC” for short. NOTICE HiBattery 1920 AC × 1 MS Plug-and-Play Cable × 1 MS Off-Grid Cable ×... - Seite 4 Button Quick Reference Guide Button Action Function Display The center LED lights up toward both Touch and hold for 1 to 2s Power on sides, and the screen lights up. The LED on both sides fades toward the Touch and hold for 1 to 2s Power off center, and the screen goes off.
-
Seite 5: Mechanical Installation
Position the HiBattery AC on a flat and stable surface. The back of the device must be separated from the wall by at least 1 cm. Method 2 Wall-Mounted The mounting kit (brackets, screws, and expansion bolts) must be purchased separately. You can contact sales@hoymiles.com the distributor or email our sales team at to order the mounting kit. NOTICE A) Prepare installation tools. - Seite 6 C) Use a level to ensure the wall-mount bracket is completely level. Then mark drilling positions. D) Drill in the marked positions. (Depth ≥ 50 mm) E) Secure the wall-mount bracket to the wall with M6 × 50 expansion screws. (Torque: 9 N·m) E)-1.
-
Seite 7: Electrical Connection
3.2 Electrical Connection Before proceeding with the installation, make sure the microinverter system is disconnected from the power supply, the solar panels are shaded or isolated, and the HiBattery AC is turned off. DANGER Step 1 Connecting the Microinverter System to the HiBattery AC A) Open the cover of one end of the MS Off-Grid Cable, and insert the AC Cable of the microinverter into the end. - Seite 8 The application diagram of the home PV system is as follows. PV Panel Any Inverter Smart Meter Home Load Distribution Box Grid Support Shelly Pro 3EM / Ecotracker HiBattery 1920 AC...
-
Seite 9: Connecting Two Hibattery Acs In One System
3.3 Connecting Two HiBattery ACs in One System The parallel connection cable and mounting kit must be purchased separately. You can contact the distributor or email our sales team at sales@hoymiles.com to order. NOTICE Step 1 Stack HiBattery ACs A) Install the wall bracket to the top HiBattery AC, and secure it with M5 × 10 screws. (Torque: 1.5 to 2 N·m) B) Stack two HiBattery ACs together. -
Seite 10: Downloading The App
4. Using the HiBattery AC The screenshots provided here are for reference only. The actual screens may vary. NOTICE 4.1 Downloading the App There are two ways to download the S-Miles Home App: • Scan the QR code on the right side. •... - Seite 11 4.4 Connecting the HiBattery AC to Wi-Fi Make sure the Bluetooth is turned on, and the Wi-Fi network signal is stable. Do not place the HiBattery AC too far away from the router. NOTICE A) Launch and log in to the app using your credentials. B) Tap Devices >...
-
Seite 12: Adding Two Hibattery Acs In One System
C) Tap Start to establish communication between HiBattery ACs. D) Tap Confirm to finish adding. 4.6 Upgrading the Firmware A) Tap Devices > HiBattery 1920 AC > Device settings B) Tap Firmware Upgrade to check the version, and upgrade the firmware if needed. A)-1. A)-2. - Seite 13 4.7 Setting Up the Load Power Curve and Output Power Setting the Load Power Curve A) Tap System > System Settings B) Tap Home Load Setting > Load power curve. C) Tap the curve to be set. D) Choose the day for which you want to set up the load power curve. Divide the day into different periods and enter the load power value for each period.
- Seite 14 4.8 Adding Smart Devices • The Shelly device should be configured to the same Wi-Fi network as the HiBattery AC. • A system can add up to five Shelly devices, and only one smart meter can be added, which is added NOTICE by default on the grid side.
- Seite 15 D) Select one setting mode. • Recommended Settings It can provide you with the best charge and discharge plan based on different variables and you don’t need to set anything. • Basic Settings a) Tap to add a new plan, or edit the default plan. b) Tap Add Time Period to set charge and discharge periods, and tap Confirm to save your settings.
-
Seite 16: Storage And Maintenance
• Checking the HiBattery AC Performance • Checking the Energy System Performance Tap Devices > HiBattery 1920 AC. Tap System 5. Storage and Maintenance The following requirements should be met if the HiBattery AC is not put into use directly: •... -
Seite 17: Technical Specifications
6. Technical Specifications Model HB-1920-AC-SV AC Output (On-Grid Port) Nominal output apparent power (VA) Maximum output apparent power (VA) Grid type Single-phase Nominal AC voltage/range (V) 230/180 to 270 Nominal AC frequency/range (Hz) 50/45 to 55 Nominal output current (A) 3.48 Maximum output current (A) 3.48... -
Seite 18: Safety Information
WARNING • Only use attachments recommended or sold by Hoymiles to prevent the risk of fire, electric shock, or injury. • Do not attempt to disassemble the HiBattery AC. Seek help from a qualified service person for servicing or repairs to prevent the risk of fire or electric shock. -
Seite 19: Lieferumfang
1. Lieferumfang • Informieren Sie Ihren Lieferanten oder Händler unverzüglich, wenn Teile beschädigt sind oder fehlen. • In dieser Anleitung wird der HiBattery 1920 AC kurz als „HiBattery AC” bezeichnet. HINWEIS 1 × MS netzunabhängiges 1 × HiBattery 1920 AC 1 ×... -
Seite 20: Funktion
Kurzanleitung für Taste Taste Maßnahme Funktion Anzeige Die mittlere LED leuchtet nach beiden Berühren und 1 - Einschaltvorgang Seiten hin auf, wodurch der Bildschirm 2 Sekunde(n) lang halten beleuchtet wird. Die LEDs auf beiden Seiten werden zur Berühren und 1 - Ausschalten Mitte hin abgeblendet und der Bildschirm 2 Sekunde(n) lang halten... -
Seite 21: Mechanische Installation
Der Montagesatz (Halterungen, Schrauben und Dehnschrauben) muss separat erworben werden. Sie können sich an den Händler wenden oder eine E-Mail an unser Vertriebsteam unter HINWEIS sales@hoymiles.com senden, um den Montagesatz zu bestellen. A) Bereiten Sie die Installationswerkzeuge vor. Elektrischer Schraubendreher... - Seite 22 C) Stellen Sie mithilfe einer Wasserwaage sicher, dass die Wandmontagehalterung vollständig gerade ausgerichtet ist. Markieren Sie die Bohrpositionen. D) Bohren Sie in die markierten Positionen. (Tiefe ≥ 50 mm) E) Sichern Sie die Wandmontagehalterung mit M6-x-50-Dehnschrauben an der Wand. (Anzugsdrehmoment: 9 N·m) Tiefe ≥...
-
Seite 23: Elektrischer Anschluss
3.2 Elektrischer Anschluss Bevor Sie mit der Installation fortfahren, vergewissern Sie sich, dass das Mikro-Wechselrichtersystem vom Stromnetz getrennt ist, die Solarmodule beschattet oder isoliert sind und der HiBattery AC GEFAHR ausgeschaltet ist. Schritt 1 Anschluss des Mikro-Wechselrichtersystems an den HiBattery AC A) Öffnen Sie die Abdeckung eines Endes des netzunabhängigen MS-Kabels und stecken Sie das AC-Kabel des Mikro-Wechselrichters in das Ende. - Seite 24 Steckdose im Haus angeschlossen werden, und der intelligente Stromzähler kann in das System integriert werden, um ein präzises Energiemanagement zu erreichen. Das Anwendungsdiagramm der Home-PV-Anlage sieht wie folgt aus. PV-Modul Jeder Wechselrichter Intelligenter Stromzähler Home laden Verteilerkasten Netz Shelly Pro 3EM/Ecotracker-Support HiBattery 1920 AC...
-
Seite 25: Anschluss Von Zwei Hibattery Acs An Ein System
3.3 Anschluss von zwei HiBattery ACs an ein System Das parallele Anschlusskabel und der Montagesatz müssen separat erworben werden. Sie können sich an den Händler wenden oder eine E-Mail an unser Vertriebsteam unter sales@hoymiles.com senden. HINWEIS Schritt 1 Stapeln von HiBattery ACs A) Bringen Sie die Wandhalterung am oberen HiBattery AC an, und befestigen Sie sie mit M5 ×... -
Seite 26: Verwendung Des Hibattery Ac
4. Verwendung des HiBattery AC Die hier gezeigten Screenshots dienen nur als Referenz. Die tatsächlichen Bildschirme können abweichen. HINWEIS 4.1 Download der App Es bieten sich zwei Möglichkeiten zum Download der S-Miles Home-App: • Scannen Sie den QR-Code, der sich auf der rechten Seite befindet. •... -
Seite 27: Verbinden Des Hibattery Ac Mit Wlan
4.4 Verbinden des HiBattery AC mit WLAN Vergewissern Sie sich, dass Bluetooth eingeschaltet und das WLAN-Netzwerksignal stabil ist. Stellen Sie den HiBattery AC nicht zu weit vom Router entfernt auf. HINWEIS A) Starten Sie die App und melden Sie sich mit Ihren Anmeldedaten an. B) Tippen Sie auf Geräte >... -
Seite 28: Hinzufügen Von Zwei Hibattery Acs In Einem System
D) Tippen Sie auf Bestätigen, um das Hinzufügen abzuschließen. 4.6 Aktualisierung der Firmware A) Tippen Sie auf Geräte > HiBattery 1920 AC > Geräteeinstellungen B) Tippen Sie auf Firmware-Upgrade, um die Version zu überprüfen und die Firmware bei Bedarf zu aktualisieren. -
Seite 29: Einstellung Lastleistungskurve Und Ausgangsleistung
4.7 Einstellung Lastleistungskurve und Ausgangsleistung Einstellung der Lastleistungskurve A) Tippen Sie auf System > Systemeinstellungen B) Tippen Sie auf Heimlasteinstellung > Lastleistungskurve. C) Tippen Sie auf die einzustellende Kurve. D) Wählen Sie den Tag, für den Sie die Lastleistungskurve einrichten möchten. Unterteilen Sie den Tag in unterschiedliche Zeitspannen und geben Sie den Lastleistungswert für jede Zeitspanne ein. -
Seite 30: Intelligente Geräte Hinzufügen
4.8 Intelligente Geräte hinzufügen • Das Shelly-Gerät sollte für dasselbe WLAN-Netzwerk konfiguriert sein wie der HiBattery AC. • Ein System kann bis zu fünf Shelly-Geräte hinzufügen, und es kann nur ein intelligenter Stromzähler HINWEIS hinzugefügt werden, der standardmäßig auf der Netzseite hinzugefügt wird. A) Tippen Sie auf System >... - Seite 31 D) Wählen Sie einen Einstellungsmodus. • Empfohlene Einstellungen Es kann Ihnen den besten Lade- und Entladeplan auf der Grundlage verschiedener Variablen anbieten, ohne dass Sie etwas einstellen müssen. • Grundlegende Einstellungen a) Tippen Sie auf , um einen neuen Plan hinzuzufügen oder den Standardplan zu bearbeiten. b) Tippen Sie auf Zeitraum hinzufügen, um Lade- und Entladezeiten einzustellen.
-
Seite 32: Prüfen Der Leistung Des Hibattery Ac- Und Energiesystems
• Prüfen der Leistung des HiBattery AC • Überprüfung der Leistung des Energiesystems Tippen Sie auf Geräte > HiBattery 1920 AC. Tippen Sie auf System 5. Lagerung und Wartung Die folgenden Anforderungen sollten erfüllt sein, wenn der HiBattery AC nicht direkt in Betrieb genommen wird: •... -
Seite 33: Technische Daten
6. Technische Daten Modell HB-1920-AC-SV AC-Ausgang (netzgebundener Anschluss) Nennausgangsscheinleistung (VA) Maximale Ausgangsscheinleistung (VA) Netztyp Einphasig AC-Nennspannung/Bereich (V) 230/180 bis 270 AC-Nennfrequenz/Bereich (Hz) 50/45 bis 55 Nennausgangsstrom (A) 3,48 Maximaler Ausgangsstrom (A) 3,48 > 0,99 Einstellbarer Leistungsfaktor (bei Nennlast) 0,8 vorlaufend ... 0,8 nachlaufend AC-Eingang und -Ausgang (netzunabhängiger Anschluss) Maximale Ausgangsscheinleistung (VA) Spitzenausgangsscheinleistung (VA) -
Seite 34: Sicherheitshinweise
• Werfen Sie Akkus oder Batterien niemals ins Feuer. Akkus oder Batterien können im Feuer explodieren. WARNUNG • Verwenden Sie ausschließlich das von Hoymiles empfohlene und/oder verkaufte Zubehör, damit Brand, Stromschlag und/ oder Verletzungen vermieden werden. • Versuchen Sie nicht, den HiBattery AC zu demontieren. Wenden Sie sich bezüglich Instandhaltung oder Reparaturen an qualifiziertes Personal, um das Risiko von Feuer oder Stromschlag zu vermeiden. -
Seite 35: Liste D'emballage
• Contactez sans délai votre fournisseur ou distributeur si vous constatez des pièces endommagées ou manquantes. AVIS • Dans ces instructions, la batterie HiBattery 1920 AC est appelée « HiBattery AC » pour faire court. 1 HiBattery 1920 AC 1 câble plug-and-play MS 1 câble MS hors réseau... - Seite 36 Guide de référence rapide sur les boutons Bouton Action Fonction Affichage Maintenir enfoncé pendant Le voyant central s’allume vers les côtés Mise sous tension 1 à 2 s et l’écran s’allume. Maintenir enfoncé pendant Les voyants des deux côtés s’estompent Mise hors tension 1 à...
-
Seite 37: Installation Mécanique
Placez la HiBattery AC sur une surface plane et stable. Le dos de l’appareil doit être éloigné du mur d’au moins 1 cm. Méthode 2 : montage mural Le kit de montage (supports, vis et boulons d’expansion) doit être acheté séparément. Contactez le sales@hoymiles.com distributeur ou notre équipe commerciale à l’adresse pour commander le kit de AVIS montage. - Seite 38 C) À l’aide d’un niveau, assurez-vous que le support de montage mural est parfaitement horizontal. Marquez ensuite les trous de perçage. D) Percez les trous marqués. (Profondeur ≥ 50 mm) E) Fixez le support de montage mural au mur à l’aide des vis à expansion M6 × 50. (Couple : 9 N·m) Profondeur ≥...
-
Seite 39: Branchement Électrique
3.2 Branchement électrique Avant de procéder à l’installation, assurez-vous que le système de micro-onduleur est déconnecté de l’alimentation électrique, que les panneaux solaires sont recouverts d’ombre ou isolés et que la DANGER HiBattery AC est hors tension. Étape 1 Connexion du système de micro-onduleur à la HiBattery AC A) Ouvrez le couvercle d’une extrémité... - Seite 40 être branchée à n’importe quelle prise domestique, et le compteur intelligent du réseau peut être intégré au système pour une gestion énergétique précise. Le schéma d’application du système photovoltaïque domestique est le suivant. Panneau photovoltaïque Tout onduleur Compteur intelligent Charge domestique Boîtier de distribution Réseau Compatible avec Shelly Pro 3EM/Ecotracker HiBattery 1920 AC...
- Seite 41 3.3 Connexion de deux HiBattery AC dans un seul système Le câble de connexion parallèle et le kit de montage doivent être achetés séparément. Contactez le distributeur ou notre équipe commerciale à l’adresse sales@hoymiles.com pour commander. AVIS Étape 1 Empiler les HiBattery AC A) Installez le support mural sur la HiBattery AC supérieure, puis fixez-le avec des vis M5 ×...
-
Seite 42: Téléchargement De L'application
4. Utilisation de la HiBattery AC Les captures d’écran fournies sont uniquement à titre indicatif. Les écrans réels peuvent différer. AVIS 4.1 Téléchargement de l’application Le téléchargement de l’application S-Miles Home peut se faire de deux manières : • Scannez le code QR figurant sur la droite. •... - Seite 43 4.4 Connexion de la HiBattery AC au Wi-Fi Assurez-vous que le Bluetooth est activé et que le signal Wi-Fi est stable. Ne placez pas la HiBattery AC trop loin du routeur. AVIS A) Démarrez l’application et connectez-vous à l’aide de vos identifiants. B) Appuyez sur Appareils >...
-
Seite 44: Mise À Jour Du Micrologiciel
D) Appuyez sur Confirmer pour terminer l’ajout. 4.6 Mise à jour du micrologiciel A) Appuyez sur Appareils > HiBattery 1920 AC > Paramètres de l’appareil B) Appuyez sur Mise à niveau du micrologiciel pour vérifier la version, et mettez à jour le micrologiciel si nécessaire. - Seite 45 4,7 Réglage de la courbe de puissance de charge et de la puissance de sortie Réglage de la courbe de puissance de charge A) Appuyez sur Système > Paramètres du système B) Appuyez sur Paramètres de charge domestique > Courbe de puissance de charge. C) Appuyez sur la courbe à...
- Seite 46 4.8 Ajouter des appareils intelligents • L’appareil Shelly doit être configuré sur le même réseau Wi-Fi que la HiBattery AC. • Un système peut intégrer jusqu’à cinq appareils Shelly, et un seul compteur intelligent peut être ajouté – AVIS il est ajouté par défaut côté réseau. A) Appuyez sur Système >...
- Seite 47 D) Sélectionnez un mode de réglage. • Paramètres recommandés Fournit automatiquement le meilleur plan de charge et de décharge en fonction de différents paramètres – aucune configuration requise. • Paramètres de base a) Appuyez sur pour ajouter un nouveau plan ou modifier le plan par défaut. b) Appuyez sur Ajouter une période pour configurer les périodes de charge et de décharge, puis appuyez sur Confirmer pour enregistrer vos réglages.
- Seite 48 • Contrôle des performances du système • Contrôle des performances de la HiBattery AC d’énergie Appuyez sur Appareils > HiBattery 1920 AC. Appuyez sur Système 5. Rangement et maintenance Les conditions suivantes doivent être remplies si la HiBattery AC n’est pas utilisée immédiatement : •...
-
Seite 49: Spécifications Techniques
6. Spécifications techniques Modèle HB-1920-AC-SV Sortie CA (port sur réseau) Puissance apparente de sortie nominale (VA) Puissance apparente de sortie maximale (VA) Type de réseau Monophasé Plage de tensions CA nominales (V) 230/180 à 270 Plage de fréquences CA nominales (Hz) 50/45 à... -
Seite 50: Informations Sur La Sécurité
• Ne jetez pas les batteries au feu. Les batteries peuvent exploser dans le feu. AVERTISSEMENT • N’utilisez que les accessoires recommandés ou vendus par Hoymiles afin d’éviter tout risque d’incendie, d’électrocution ou de blessure. • N’essayez pas de démonter la HiBattery AC. Confiez l’entretien ou les réparations à un technicien qualifié afin d’éviter tout risque d’incendie ou d’électrocution. -
Seite 51: Overzicht
• Neem onmiddellijk contact op met uw leverancier of distributeur als u beschadigde of ontbrekende onderdelen opmerkt. OPMERKING • In deze instructies wordt HiBattery 1920 AC kortweg ‘HiBattery AC’ genoemd. HiBattery 1920 AC × 1 MS-plug-and-play-kabel × 1 MS-off-gridkabel × 1 Gebruikershandleiding ×... - Seite 52 Beknopte handleidingsknop Knop Actie Functie Display De LED in het midden licht aan naar 1 tot 2 s blijven aanraken Inschakelen beide zijden en het scherm licht op. De LED’ s aan beide zijden dimmen naar 1 tot 2 s blijven aanraken Uitschakelen het midden toe en het scherm gaat uit.
-
Seite 53: Mechanische Installatie
1 cm van de muur verwijderd zijn. Methode 2 Muurmontage The montageset (beugels, schroeven en keilbouten) moet apart worden aangeschaft. U kunt contact opnemen met de distributeur of een e-mail sturen naar ons verkoopteam op sales@hoymiles.com OPMERKING om de montageset te bestellen. A) Het installatiegereedschap voorbereiden. - Seite 54 C) Gebruik een waterpas om te controleren of de muurmontagebeugel volledig waterpas is. Markeer vervolgens de boorposities. D) Boor gaten op de gemarkeerde posities. (Diepte ≥ 50 mm) E) Bevestig de muurmontagebeugel aan de muur met M6 × 50 keilbouten. (Koppel: 9 N·m) Diepte ≥...
-
Seite 55: Elektrische Aansluiting
3.2 Elektrische aansluiting Voordat u verdergaat met de installatie, moet u controleren of het micro-omvormersysteem is losgekoppeld van de stroomvoorziening, de zonnepanelen zijn afgeschermd of geïsoleerd en de GEVAAR HiBattery AC is uitgeschakeld. Stap 1 Het micro-omvormersysteem aansluiten op de HiBattery AC A) Open het deksel van één uiteinde van de MS-off-gridkabel en steek de AC-kabel van de micro-omvormer in het uiteinde. - Seite 56 Het schema van de toepassing van woning-PV-systeem voor thuisgebruik is als volgt. PV-paneel Een omvormer Slimme meter Belastingen in de Verdeelkast woning Ondersteuning Shelly Pro 3EM/Ecotracker HiBattery 1920 AC...
- Seite 57 U kunt contact opnemen met de distributeur of een e-mail sturen naar ons verkoopteam via OPMERKING hoymiles.com om deze te bestellen. Stap 1 HiBattery AC's stapelen A) Monteer de muurbeugel op de bovenste HiBattery AC en zet deze vast met M5 × 10 schroeven.
-
Seite 58: De App Downloaden
4. De HiBattery AC gebruiken De hier gegeven schermafbeeldingen zijn alleen bedoeld ter referentie. Het beeld kan er in werkelijkheid anders uitzien. OPMERKING 4.1 De app downloaden Er zijn twee manieren om de S-Miles Home App te downloaden: • De QR-code aan de rechterkant scannen. •... - Seite 59 4.4 De HiBattery AC verbinden met WiFi Verifieer of Bluetooth is ingeschakeld en of het WiFi-netwerksignaal stabiel is. Plaats de HiBattery AC niet te ver van de router. OPMERKING A) Start de app en log in met uw inloggegevens. B) Tik op Apparaten >...
-
Seite 60: De Firmware Upgraden
D) Tik op Bevestigen om het toevoegen te voltooien. 4.6 De firmware upgraden A) Tik op Apparaten > HiBattery 1920 AC > Apparaatinstellingen B) Tik op Firmware-upgrade om de versie te controleren en de firmware indien nodig te upgraden. A)-1. - Seite 61 4.7 De Laadvermogenscurve en het Uitgangsvermogen Instellen De Laadvermogenscurve Instellen A) Tik op Systeem > Systeeminstellingen B) Tik op Thuis-belastingsinstellingen > Laadvermogenscurve. C) Tik op de curve die u wilt instellen. D) Kies de dag waarvoor u de laadvermogenscurve wilt instellen. Verdeel de dag in verschillende periodes en voer voor elke periode de laadvermogenswaarde in.
- Seite 62 4.8 Smart apparaten toevoegen • Het Shelly-apparaat moet worden geconfigureerd voor hetzelfde WiFi-netwerk als de HiBattery AC. • Een systeem kan maximaal vijf Shelly-apparaten toevoegen en er kan slechts één slimme meter OPMERKING worden toegevoegd, die standaard aan de netzijde wordt toegevoegd. A) Tik op Systeem >...
- Seite 63 D) Selecteer een instellingsmodus. • Aanbevolen instellingen Dit biedt u het beste laad- en ontlaadplan op basis van verschillende variabelen en u hoeft niets in te stellen. • Basisinstellingen a) Tik op om een nieuw plan toe te voegen of het standaardplan te bewerken. b) Tik op Tijdsperiode toevoegen om de laad- en ontlaadperioden in te stellen en tik op Bevestigen om uw instellingen op te slaan.
-
Seite 64: Opslag En Onderhoud
• De prestaties van de HiBattery AC controleren controleren Tik op Apparaten > HiBattery 1920 AC. Tik op Systeem 5. Opslag en Onderhoud Als de HiBattery AC niet direct in gebruik wordt genomen, moet aan de volgende vereisten worden voldaan: •... -
Seite 65: Technische Specificaties
6. Technische specificaties Model HB-1920-AC-SV AC-uitgang (On-gridpoort) Nominaal uitgangsschijnvermogen (VA) Maximaal schijnbaar uitgangsvermogen (VA) Nettype Eenfasig Nominale AC-spanning/-bereik (V) 230/180 tot 270 Nominale AC-frequentie/bereik (Hz) 50/45 tot 55 Nominale uitgangsstroom (A) 3,48 Maximale uitgangsstroom (A) 3,48 > 0,99 Regelbare vermogensfactor (@nominale belasting) 0,8 leidend …... - Seite 66 • Gooi accu's niet in open vuur. Accu's kunnen exploderen in vuur. WAARSCHUWING • Gebruik uitsluitend door Hoymiles aanbevolen of verkochte hulpstukken om het risico van brand, elektrische schokken of letsel te voorkomen. • Probeer de HiBattery AC niet te demonteren. Raadpleeg een gekwalificeerde onderhoudsmonteur voor onderhoud of reparaties om het risico van brand of elektrische schokken te voorkomen.
- Seite 68 Hoymiles Information S-Miles Home Hoymiles Power Electronics Inc. Germany service.de@hoymiles.com Headquarters Spain Floor 6, Building 5, Housheng 99 Road, service.es@hoymiles.com Gongshu District, Hangzhou 310015 P. R. China Italy Europe Sales and Support Center service.it@hoymiles.com High Tech Campus 9, Unit BK3.28, 5656AE...