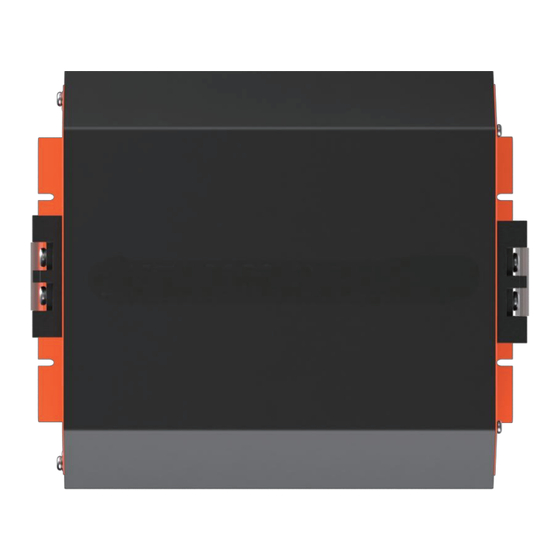
VEVOR SDC-20A Bedienungsanleitung
Dc-dc-batterie-ladegerät

Verwandte Anleitungen für VEVOR SDC-20A


Inhaltszusammenfassung für VEVOR SDC-20A
- Seite 1 DC-DC BATTERY CHARGER MODEL:SDC-20A, SDC-30A, SDC-40A, SDC-60A Technical Support and E-Warranty Certificate www.vevor.com/support...
- Seite 3 (The picture is for reference only, please refer to the actual object) This is the original instruction, please read all manual instructions carefully before operating. VEVOR reserves a clear interpretation of our user manual. The appearance of the product shall be subject to the product you received.
-
Seite 4: Important Safety Instructions
Important Safety Instructions Ple ase save these instructions . This manual contains important safety, installation, and operating instructions for the charger. The following symbols are used throughout the manual to indicate potentially dangerous conditions or important notes. Indicates a potentially dangerous condition. Use extreme caution when WARNING performing this task. - Seite 5 Ensure secure location where it cannot tip or fall For installation on boats: if the electrical devices are incorrectly connected, this can lead to corrosion damage on the boat. Verify installation with a qualified electrician or installer . Lay cables so they cannot be damaged by doors or be a tripping hazard. Damaged cables can lead to serious injury Use ductwork or cable ducts if necessary , to lay cables through metal plates or other panels Do not lay AC and DC cable in the same conduit and do not pull on the cables.
-
Seite 6: Inhaltsverzeichnis
Table of Contents Safety Information General Information Product Overview Identification of Parts Dimensions Optional Components Installation Location Considerations Wiring and Fusing Grounding DC Output Wiring (House) DC Input Wiring (Starter) D+ Ignition Wiring LC Current Limit Wiring Operation LED Indicators Setting Battery Type Setting Lead Acid Setting Lithium... -
Seite 7: General Information
General Information The DC-DC Series battery chargers are the most effective way to charge your auxiliary or house batteries from the alternator/starter battery. Compatible with smart or traditional alterna- tor types, the DC-DC offers correct charging for AGM, Flooded, Gel, and even Lithium deep cycle batteries! Featuring a 3-stage battery charger and multiple electronic protections, owners can feel confident that their batteries are being charged optimally and automatically. -
Seite 8: Product Overview
Product Overview Identification of Parts Key Features 1. Negative DC Input Terminal 2. Positive DC Input Terminal 3. Ventilation Fans DC Output Side Key Features 1.Power LED 5.D+ Ignition Terminal 2.Fault LED 6.LC Terminal – Current Limiting Terminal 3.Dip Switches 7.Positive DC Output Terminal 4.RJ11 Temperature Sensor Port 8.Negative DC Output Terminal... -
Seite 9: Dimensions
Dimensions 83.0mm 165.0mm DCC1212-20 The dimensions have a ±0.5mm tolerance NOTE 205.0mm 83.0mm DCC1212-40 The dimensions have a ±0.5mm tolerance NOTE 240.0mm 83.0mm The dimensions have a ±0.5mm tolerance DCC1212-60 NOTE... -
Seite 10: Optional Components
Optional Components DC-DC Temperature Sensor (Model: RTSDCC) Do not use with Lithium batteries. CAUTION CAUTION The RTSDCC comes in handy for reading incoming temperature values from the house battery bank while adjusting the charging voltage of your DC to DC On-Board Battery Charger. - Seite 11 Mounting Have at least 5cm of clearance from all areas and ensure some ventilation for best perfor - mance Trace the mounting holes with a pencil/pen when placing the DC-DC against the desired area Use 4 x screws to secure the dc-dc onto a surface 5 cm 5 cm...
-
Seite 12: Wiring And Fusing
Wiring and Fusing Battery Ring terminals are recommended for 12V input and output connections. The following is a reference incorporating a critical 0-3% max voltage drop and may not cover all unique applications that may exist. When the battery charger is sending the rated amps, the input side may experience a draw higher current draw by a factor of up to 50%. -
Seite 13: Dc Output Wiring (House)
D+IGN Wiring to Ignition Circuit ALTERNATOR ANL FUSE ANL FUSE DC INPUT (STARTER) DC OUTPUT (HOUSE) CHASSIS GROUND CHASSIS GROUND DC Output Wiring (House) Only use 12V batteries. Damages due to connecting higher voltage batteries will not WARNING be covered in warranty. The DC-DC output will connect to the 12V auxiliary or house battery that you are intending to charge. -
Seite 14: Dc Input Wiring (Starter)
counterclockwise clockwise DC Input Wiring (Starter) The DC-DC will not power on or operate until the D+ ignition cable is connected. NOTE When connecting the DC input, note that the DC-DC will still be off until the D+ ignition cable voltage senses. The DC-DC input will connect to the 12V starter battery that will be used to charge your auxilia- ry or house battery. -
Seite 15: D+ Ignition Wiring
counterclockwise clockwise D+ Ignition Wiring The D+ terminal will be located on the output side but connects to the DC ignition circuit of the input starter battery. This may be in the engine bay fuse block for some vehicles. Refer to your own vehicle’s electrical diagram for D+ wiring placement. May require splicing or cable adjustments to connect correctly to your ignition circuit. - Seite 16 The DC-DC will not power on or operate until the D+ ignition cable is connected to the ignition circuit where it will detect a 12V source to operate ON. The purpose is to toggle the DC-DC switch on when the vehicle is running with the alternator to prevent the DC-DC from operating incorrectly with just the starter battery leaving you with a drained starter battery.
-
Seite 17: Lc Current Limit Wiring
Engine Bay Fuse Block Recommendation Review your vehicle’s fuse layout diagram to identify a fuse location that is live when the vehicle is running with the alternator. Key positions in the ignition are typically lock, accessory, on, and start. Off position where no accessories will work, and steering is also likely LOCK locked Accessories are given power such as radio and some other small... -
Seite 18: Operation
18-16AWG, copper cable recommended Operation Assuming correct 12V battery connections and D+ ignition cable wiring, then the POWER LED will illuminate green. LED Indicator Power LED Color Status Meaning Off Powered Off; if abnormal refer to troubleshooting Green Solid ON Normal Color Status... -
Seite 19: Setting Lead Acid
DIP Switches The 5 x dip switches can be configured to charge lead acid or lithium batteries. Note that ON is position down and OFF is position up if facing the dip switches directly. Lead acid profiles have an absorption charge and a float charge whereas lithium batteries will only have an absorption charge and no float charge. -
Seite 20: Setting Lithium
Setting Lithium To get started, make sure SW5 = OFF to gear the charger for lithium batteries. There will not be a float voltage and instead users will select between Type 1 lithium voltages or switch into Type 2 lithium voltages depending on your lithium battery specifications. You must select a lithium Type to when selecting your charge voltage. -
Seite 21: Battery Charging Logic
Battery Charging Logic Bulk Absorption Float 100 % 10 % Bulk (Phase I) (Lead Acid + Lithium) In the beginning, a discharged battery will be charged with maximum current and voltage will be climbing steadily until reaching the absorption voltage setpoint. Absorption (Phase U0) (Lead Acid + Lithium) The battery reaches the absorption voltage setpoint and holds the voltage constant while the current gradually decreases until the battery is becoming full (within 10-20%). -
Seite 22: Troubleshooting
Troubleshooting If the DC-DC is not functioning correctly, it may be undergoing an internal electronic protection and stop normal operation. This is not indicative of a defective unit but may require some troubleshooting to resume normal operation. Electronic Protection Behavior Protection Troubleshoot Steps 1.Use a multi-meter to measure the DC input and DC output... - Seite 23 Behavior Protection Troubleshoot Steps 1.Double check that your wiring is correct with a multi-meter and that the battery levels are suitable within the operating voltage range 2. Observe the ambient temperature. Avoid installations in direct sun. Ambient temperatures above 122°F/50°C will cause the High unit to stop functioning until conditions get cooler.
-
Seite 24: Maintenance
Behavior Cause 1.Inspect your connections for tight, secure, and undamaged wiring to and from the DC-DC Connection 2.Check fuses for any breaks and replace them to continue break normal operation. 3.Use your multi-meter’s (check with manufacturer) continuity test to individually check each line (positive and negative) at the input and output to verify consistent connection. -
Seite 25: Technical Specifications
Technical Specifications DCC1212-40 Model DCC1212-20 DCC1212-30 DCC1212-60 → Transformation 12 V 12 V Input Battery Voltage Range 8V ~ 16VDC Rated Charging Current 20 A 30 A 40 A 60 A Lead Acid: 13.2V ~ 14.7V Charging Voltage Range Lithium: 12.6V ~ 14.6V Rated Max Power 250W 360W... - Seite 26 Manufacturer: Shanghaimuxinmuyeyouxiangongsi Address: Shuangchenglu 803nong11hao1602A-1609shi, baoshanqu, shanghai 200000 CN. Imported to AUS: SIHAO PTY LTD. 1 ROKEVA STREETEASTWOOD NSW 2122 Australia Imported to USA: Sanven Technology Ltd. Suite 250, 9166 Anaheim Place, Rancho Cucamonga, CA 91730 YH CONSULTING LIMITED. C/O YH Consulting Limited Office 147, Centurion House, London Road, Staines-upon-Thames, Surrey, TW18 4AX E-CrossStu GmbH...
- Seite 28 Technical Support and E-Warranty Certificate www.vevor.com/support...
- Seite 29 Machine Translated by Google CHARGEUR D E B ATTERIE C CCC MODÈLE : S DC20A, S DC30A, S DC40A, S DC60A Assistance t echnique e t c ertificat d e g arantie électronique w ww.vevor.com/support...
- Seite 30 Machine Translated by Google...
- Seite 31 Machine Translated by Google BATTERIE C CCC CHARGEUR MODÈLE : S DC20A, S DC30A, S DC40A, S DC60A (L'image e st à t itre i ndicatif u niquement, v euillez v ous r éférer à l 'objet r éel) Ceci ...
-
Seite 32: Consignes De Sécurité Importantes
Machine Translated by Google Consignes d e s écurité i mportantes Veuillez c onserver c es i nstructions. Ce m anuel c ontient d es i nstructions i mportantes c oncernant l a s écurité, l 'installation e t l e f onctionnement d u c hargeur. L es symboles ... - Seite 33 Machine Translated by Google Assurezvous q u'il s oit p lacé d ans u n e ndroit s ûr o ù i l n e p eut p as b asculer o u t omber Installation s ur b ateau : u n m auvais b ranchement d es a ppareils é lectriques p eut e ntraîner d es d ommages d us à l a c orrosion. F aites v érifier l 'installation par ...
- Seite 34 Machine Translated by Google Table d es m atières Informations d e s écurité Informations g énérales Présentation d u p roduit Identification d es p ièces Dimensions Composants o ptionnels Installation Considérations r elatives à l 'emplacement Câblage e t f usibles Mise ...
-
Seite 35: Informations G Énérales
Machine Translated by Google Informations g énérales Les c hargeurs d e b atterie d e l a s érie D CDC c onstituent l e m oyen l e p lus e fficace d e r echarger v os b atteries a uxiliaires o u domestiques ... -
Seite 36: Présentation D U P Roduit
Machine Translated by Google Présentation d u p roduit Identification d es p ièces Caractéristiques p rincipales 1. B orne d 'entrée C C n égative 2. B orne d 'entrée C C p ositive 3. V entilateurs d 'aération 17 ... -
Seite 37: Dimensions
Machine Translated by Google Dimensions 83,0 m m 165,0 m m DCC121220 Les d imensions o nt u ne t olérance d e ± 0,5 m m NOTE 205,0 m m 83,0 m m DCC121240 Les d imensions o nt u ne t olérance d e ± 0,5 m m NOTE 240,0 ... -
Seite 38: Composants O Ptionnels
Machine Translated by Google Composants o ptionnels Capteur d e t empérature D CDC ( modèle : R TSDCC) ATTENTION N e p as u tiliser a vec d es p iles a u l ithium. PRUDENCE Le R TSDCC e st p ratique p our l ire l es v aleurs d e t empérature e ntrantes d u p arc d e b atteries d e s ervice t out e n a justant l a tension ... - Seite 39 Machine Translated by Google Montage Prévoyez a u m oins 5 c m d 'espace l ibre p ar r apport à t outes l es z ones e t a ssurez u ne c ertaine v entilation p our d e m eilleures p erformances. mance Tracez ...
-
Seite 40: Câblage E T F Usibles
Machine Translated by Google Câblage e t f usibles Les c osses à a nneau d e b atterie s ont r ecommandées p our l es c onnexions d 'entrée e t d e s ortie 1 2 V . L es i nformations s uivantes sont ... -
Seite 41: Câblage D E S Ortie C C ( Maison)
Machine Translated by Google Câblage D +IGN v ers l e c ircuit d 'allumage ALTERNATEUR FUSIBLE A NL FUSIBLE A NL ENTRÉE C C ( DÉMARREUR) SORTIE C C ( MAISON) SOL D U C HÂSSIS SOL D U C HÂSSIS Câblage ... -
Seite 42: Câblage D 'Entrée C C ( Démarreur)
Machine Translated by Google 1 s ens i nverse d es a iguilles d 'une m ontre 3 d ans l e s ens d es a iguilles d 'une m ontre Câblage d 'entrée C C ( démarreur) Le D CDC n e s 'allumera p as e t n e f onctionnera p as t ant q ue l e c âble d 'allumage D + n e s era p as c onnecté. NOTE Lors ... -
Seite 43: Câblage D 'Allumage D
Machine Translated by Google dans l e s ens i nverse d es a iguilles d 'une m ontre dans l e s ens d es a iguilles d 'une m ontre Câblage d 'allumage D + La b orne D + e st s ituée c ôté s ortie, m ais s e c onnecte a u c ircuit d 'allumage C C d e l a b atterie d e d émarrage d 'entrée. S ur certains ... - Seite 44 Machine Translated by Google Le D CDC n e s 'allumera p as e t n e f onctionnera p as t ant q ue l e c âble d 'allumage D + n 'est p as c onnecté a u c ircuit d'allumage. ...
-
Seite 45: Câblage D E L Imitation D E C Ourant L C
Machine Translated by Google Recommandation p our l e b loc d e f usibles d u c ompartiment m oteur Consultez l e s chéma d e d isposition d es f usibles d e v otre v éhicule p our i dentifier l 'emplacement d 'un f usible s ous t ension l orsque le ... -
Seite 46: Opération
Machine Translated by Google Câble e n c uivre 1816AWG r ecommandé Opération En s upposant q ue l es c onnexions d e b atterie 1 2 V e t l e c âblage d u c âble d 'allumage D + s oient c orrects, l a L ED P OWER s 'allumera e n v ert. Indicateur ... - Seite 47 Machine Translated by Google Commutateurs D IP Les 5 c ommutateurs D IP p euvent ê tre c onfigurés p our c harger d es b atteries a u p lomb o u a u l ithium. N otez q ue l a p osition O N e st v ers l e b as e t la ...
-
Seite 48: Réglage D U L Ithium
Machine Translated by Google Réglage d u l ithium Pour c ommencer, a ssurezvous q ue S W5 e st d ésactivé p our a dapter l e c hargeur a ux b atteries a u l ithium. I l n 'y a ura p as d e t ension d e m aintien ; l'utilisateur ... -
Seite 49: Logique D E C Harge D E L A B Atterie
Machine Translated by Google Logique d e c harge d e l a b atterie Flotter En g ros Absorption DANS DANS 100 % 10 % En v rac ( Phase I ) ( Plombacide + L ithium) Au d ébut, u ne b atterie d échargée s era c hargée a vec u n c ourant m aximal e t l a t ension a ugmentera r égulièrement j usqu'à atteindre ... -
Seite 50: Dépannage
Machine Translated by Google Dépannage Si l e D CDC n e f onctionne p as c orrectement, i l e st p ossible q u'une p rotection é lectronique i nterne i ntervienne e t i nterrompe s on fonctionnement ... - Seite 51 Machine Translated by Google Protection d u c omportement Étapes d e d épannage 1. V érifiez q ue v otre c âblage e st c orrect a vec u n m ultimètre e t q ue l es n iveaux d e batterie ...
-
Seite 52: Entretien
Machine Translated by Google Comportement C ause Réparer 1. I nspectez v os c onnexions p our v ous a ssurer q ue l e c âblage v ers e t d epuis l e D C DC e st s erré, s écurisé e t n on e ndommagé. Rupture ... -
Seite 53: Spécifications T Echniques
Machine Translated by Google Spécifications t echniques DCC121240 Modèle DCC121220 DCC121230 DCC121260 Transformation 12V 1 2V → Plage d e t ension d 'entrée d e l a b atterie 8 V ~ 1 6 V C C Courant ... - Seite 54 Machine Translated by Google Fabricant : S hanghaimuxinmuyeyouxiangongsi A dresse : Shuangchenglu 8 03nong11hao1602A1609shi, b aoshanqu, s hanghai 2 00000 C N. Importé e n A ustralie : S IHAO P TY L TD. 1 R OKEVA S TREET, A STWOOD NSW 2 122 A ustralie Importé ...
- Seite 55 Machine Translated by Google...
- Seite 56 Machine Translated by Google Assistance t echnique e t c ertificat d e g arantie électronique w ww.vevor.com/support...
- Seite 57 Machine Translated by Google DC-DC-BATTERIE-LADEGERÄT MODELL: SDC-20A, SDC-30A, SDC-40A, SDC-60A Technischer Support und E-Garantie-Zertifikat www.vevor.com/support...
- Seite 58 Machine Translated by Google...
- Seite 59 (Das Bild dient nur als Referenz, bitte beziehen Sie sich auf das tatsächliche Objekt) Dies ist die Originalanleitung. Bitte lesen Sie alle Anweisungen sorgfältig durch, bevor Sie das Gerät in Betrieb nehmen. VEVOR behält sich das Recht vor, die Bedienungsanleitung klar und deutlich zu interpretieren. Das Aussehen des Produkts hängt vom gelieferten Produkt ab.
-
Seite 60: Wichtige Sicherheitshinweise
Machine Translated by Google Wichtige Sicherheitshinweise Bitte bewahren Sie diese Anleitung auf. Dieses Handbuch enthält wichtige Sicherheits-, Installations- und Betriebsanweisungen für das Ladegerät. Die folgenden Symbole werden im Handbuch verwendet, um auf potenziell gefährliche Situationen oder wichtige Hinweise hinzuweisen. Weist auf eine potenziell gefährliche Situation hin. Gehen Sie bei dieser Aufgabe äußerst vorsichtig vor. WARNUNG Weist auf ein wichtiges Verfahren für die sichere und ordnungsgemäße Installation und VORSICHT... -
Seite 61: Betriebssicherheit
Machine Translated by Google Sorgen Sie für einen sicheren Standort, an dem das Gerät nicht umkippen oder herunterfallen kann Bei Installation auf Booten: Ein falscher Anschluss der elektrischen Geräte kann zu Korrosionsschäden am Boot führen. Lassen Sie die Installation von einem qualifizierten Elektriker oder Installateur überprüfen. Verlegen Sie Kabel so, dass sie nicht durch Türen beschädigt werden können oder eine Stolperfalle darstellen. - Seite 62 Machine Translated by Google Inhaltsverzeichnis Sicherheitshinweise Allgemeine Informationen Produktübersicht Identifizierung der Teile Maße Optionale Komponenten Installation Überlegungen zum Standort Verdrahtung und Absicherung Erdung DC-Ausgangsverkabelung (Haus) DC-Eingangsverkabelung (Starter) D+ Zündverkabelung LC-Strombegrenzungsverdrahtung Betrieb LED-Anzeigen Einstellen des Batterietyps Einstellung Blei-Säure Einstellung Lithium Batterieladelogik Lithium-Aktivierung Fehlerbehebung Wartung...
-
Seite 63: Allgemeine Informationen
Machine Translated by Google Allgemeine Informationen Die Batterieladegeräte der DC-DC-Serie laden Ihre Zusatz- oder Bordbatterien effektiv über die Lichtmaschine/Starterbatterie. Kompatibel mit intelligenten und herkömmlichen Lichtmaschinentypen, bietet das DC-DC die korrekte Ladung von AGM-, Nass-, Gel- und sogar Lithium-Deep-Cycle-Batterien! Dank des dreistufigen Batterieladegeräts und mehrerer elektronischer Schutzvorrichtungen können sich Besitzer darauf verlassen, dass ihre Batterien optimal und automatisch geladen werden. -
Seite 64: Produktübersicht
Machine Translated by Google Produktübersicht Identifizierung der Teile Hauptmerkmale 1. Negativer DC-Eingangsanschluss 2. Positiver DC-Eingangsanschluss 3. Ventilatoren 17 2 8 5 6 DC-Ausgangsseite Hauptmerkmale 1.Power-LED 5.D+ Zündungsklemme 2.Fehler-LED 6.LC-Klemme – Strombegrenzungsklemme 3.DIP-Schalter 7.Positiver DC-Ausgangsanschluss 4.RJ11-Temperatursensoranschluss 8.Negativer DC-Ausgangsanschluss (muss separat erworben werden) -
Seite 65: Maße
Machine Translated by Google Maße 83,0 mm 165,0 mm DCC1212-20 Die Abmessungen haben eine Toleranz von ±0,5 mm NOTIZ 205,0 mm 83,0 mm DCC1212-40 Die Abmessungen haben eine Toleranz von ±0,5 mm NOTIZ 240,0 mm 83,0 mm Die Abmessungen haben eine Toleranz von ±0,5 mm DCC1212-60 NOTIZ... -
Seite 66: Optionale Komponenten
Machine Translated by Google Optionale Komponenten DC-DC-Temperatursensor (Modell: RTSDCC) VORSICHT Nicht mit Lithiumbatterien verwenden. VORSICHT Der RTSDCC ist praktisch, um eingehende Temperaturwerte vom Hausbatteriespeicher abzulesen und gleichzeitig die Ladespannung Ihres DC/DC-Bordbatterieladegeräts anzupassen. Mit einem Temperaturbereich von -20 °C bis +80 °C trägt der Sensor maßgeblich zur Lebensdauer und Leistung Ihres Hausbatteriespeichers bei, indem er eine höhere Ladespannung anlegt, um dem erhöhten Widerstand durch niedrige Temperaturen entgegenzuwirken. - Seite 67 Machine Translated by Google Montage Halten Sie zu allen Bereichen mindestens 5 cm Abstand und sorgen Sie für ausreichend Belüftung, um eine optimale Leistung zu erzielen. ment Zeichnen Sie die Befestigungslöcher mit einem Bleistift/Kugelschreiber nach, wenn Sie den DC-DC an der gewünschten Stelle platzieren Befestigen Sie den DC-DC-Wandler mit 4 Schrauben auf einer Oberfläche 5 cm 5 cm...
-
Seite 68: Verdrahtung Und Absicherung
Machine Translated by Google Verdrahtung und Absicherung Für 12-V-Ein- und -Ausgangsanschlüsse werden Batterie-Ringkabelschuhe empfohlen. Die folgenden Angaben beziehen sich auf einen kritischen maximalen Spannungsabfall von 0–3 % und decken möglicherweise nicht alle möglichen Anwendungen ab. Wenn das Batterieladegerät die Nennstromstärke liefert, kann die Eingangsseite einen bis zu 50 % höheren Strombedarf aufweisen. -
Seite 69: Dc-Ausgangsverkabelung (Haus)
Machine Translated by Google D+IGN-Verkabelung zum Zündkreis GENERATOR ANL-SICHERUNG ANL-SICHERUNG DC-EINGANG (STARTER) DC-AUSGANG (HAUS) Chassis-Masse Chassis-Masse DC-Ausgangsverkabelung (Haus) Verwenden Sie ausschließlich 12-V-Batterien. Schäden durch den Anschluss von Batterien mit höherer Spannung sind WARNUNG nicht von der Garantie abgedeckt. Der DC-DC-Ausgang wird mit der 12-V-Zusatz- oder Bordbatterie verbunden, die Sie laden möchten. Diese Batterien können eine andere chemische Zusammensetzung aufweisen als die Starterbatterie. -
Seite 70: Dc-Eingangsverkabelung (Starter)
Machine Translated by Google 1 gegen den Uhrzeigersinn 3 im Uhrzeigersinn DC-Eingangsverkabelung (Starter) Der DC-DC lässt sich erst einschalten oder betreiben, wenn das D+-Zündkabel angeschlossen ist. NOTIZ Beachten Sie beim Anschließen des DC-Eingangs, dass der DC-DC-Eingang noch ausgeschaltet bleibt, bis die Spannung des D+- Zündkabels erkannt wird. -
Seite 71: D+ Zündverkabelung
Machine Translated by Google gegen den Uhrzeigersinn im Uhrzeigersinn D+ Zündverkabelung Der D+-Anschluss befindet sich auf der Ausgangsseite, ist aber mit dem Gleichstrom-Zündkreis der Starterbatterie verbunden. Bei manchen Fahrzeugen kann er sich im Sicherungskasten im Motorraum befinden. Die Verlegung der D+- Verkabelung entnehmen Sie bitte dem Schaltplan Ihres Fahrzeugs. - Seite 72 Machine Translated by Google Der DC-DC-Schalter schaltet sich erst ein, wenn das D+-Zündkabel an den Zündkreis angeschlossen ist. Dort erkennt er eine 12-V-Quelle und schaltet ein. Der DC-DC-Schalter schaltet ein, wenn das Fahrzeug mit Lichtmaschine läuft. So wird verhindert, dass der DC-DC-Schalter fehlerhaft funktioniert und nur die Starterbatterie leer ist. Verwenden Sie ein Kupferkabel (18–16 AWG).
-
Seite 73: Lc-Strombegrenzungsverdrahtung
Machine Translated by Google Empfehlung für den Sicherungskasten im Motorraum Überprüfen Sie den Sicherungsplan Ihres Fahrzeugs, um eine Sicherung zu finden, die bei laufendem Fahrzeug mit Lichtmaschine unter Spannung steht. Die Schlüsselpositionen im Zündschloss sind typischerweise Verriegeln, Zubehör, Ein und Starten. Aus-Position, in der kein Zubehör funktioniert und die Lenkung wahrscheinlich auch gesperrt SPERREN Zubehör wie Radios und andere kleine elektronische Geräte werden mit Strom versorgt. -
Seite 74: Betrieb
Machine Translated by Google 18–16 AWG, Kupferkabel empfohlen Betrieb Bei korrekten Anschlüssen der 12-V-Batterie und korrekter Verdrahtung des D+-Zündkabels leuchtet die POWER-LED grün. LED-Anzeige Betriebs-LED Farbe Status Bedeutung Ausgeschaltet; falls abnormal, siehe Fehlerbehebung Grün Normal Dauerhaft EIN Farbe Status Bedeutung Keine Mängel Dauerhaft EIN Fehler erkannt;... - Seite 75 Machine Translated by Google DIP-Schalter Die fünf DIP-Schalter können zum Laden von Blei-Säure- oder Lithium-Batterien konfiguriert werden. Beachten Sie, dass die Position „ON“ unten und die Position „OFF“ oben ist, wenn Sie direkt auf die DIP-Schalter blicken. Blei-Säure-Profile verfügen über eine Konstantladung und eine Erhaltungsladung, während Lithium-Batterien nur eine Konstantladung und keine Erhaltungsladung haben.
-
Seite 76: Einstellung Lithium
Machine Translated by Google Einstellung Lithium Stellen Sie zunächst SW5 auf OFF, um das Ladegerät auf Lithiumbatterien einzustellen. Es wird keine Erhaltungsspannung angelegt. Stattdessen können Sie je nach den Spezifikationen Ihrer Lithiumbatterie zwischen Lithiumspannungen Typ 1 oder Typ 2 wählen. Bei der Auswahl der Ladespannung müssen Sie einen Lithiumtyp auswählen. -
Seite 77: Batterieladelogik
Machine Translated by Google Batterieladelogik Absorption Schüttgut Schweben Ich/A 100 % 10 % Bulk (Phase I) (Blei-Säure + Lithium) Zu Beginn wird eine entladene Batterie mit maximalem Strom geladen und die Spannung steigt stetig an, bis der Sollwert der Konstantspannungsspannung erreicht ist. Absorption (Phase U0) (Blei-Säure + Lithium) Die Batterie erreicht den Sollwert der Konstantspannungsspannung und hält diese konstant, während der Strom allmählich abnimmt, bis die Batterie voll ist (innerhalb von 10–20 %). -
Seite 78: Fehlerbehebung
Machine Translated by Google Fehlerbehebung Wenn der DC-DC nicht ordnungsgemäß funktioniert, kann es sein, dass ein interner elektronischer Schutz vorliegt und der normale Betrieb unterbrochen wird. Dies ist kein Anzeichen für ein defektes Gerät, erfordert aber möglicherweise eine Fehlerbehebung, um den Normalbetrieb wiederherzustellen. - Seite 79 Machine Translated by Google Verhaltensschutz Schritte zur Fehlerbehebung 1. Überprüfen Sie mit einem Multimeter, ob Ihre Verkabelung korrekt ist und ob die Batteriestände innerhalb der Betriebsspannung liegen. Reichweite 2. Achten Sie auf die Umgebungstemperatur. Vermeiden Sie direkte Sonneneinstrahlung. Bei Temperaturen über 50 °C stellt das Gerät den Betrieb Hoch ein, bis es wieder kühler wird.
-
Seite 80: Wartung
Machine Translated by Google Verhalten Ursache 1.Überprüfen Sie Ihre Verbindungen auf feste, sichere und unbeschädigte Verkabelung zum und vom DC-DC Verbindungsabbruch 2. Überprüfen Sie die Sicherungen auf Unterbrechungen und ersetzen Sie sie, um den normalen Betrieb fortzusetzen. 3. Verwenden Sie den Durchgangsprüfer Ihres Multimeters (fragen Sie beim Hersteller nach), um jede Leitung (positiv und negativ) am Ein- und Ausgang einzeln zu prüfen und so eine durchgehende Verbindung sicherzustellen. -
Seite 81: Technische Spezifikationen
Machine Translated by Google Technische Spezifikationen DCC1212-40 Modell DCC1212-20 DCC1212-30 DCC1212-60 Transformation 12V 12V ÿ 8 V bis 16 V DC Eingangsspannungsbereich der Batterie Nennladestrom 20 A 30 A 40 A 60 A Blei-Säure: 13,2 V ~ 14,7 V Ladespannungsbereich Lithium: 12,6 V ~ 14,6 V Maximale Nennleistung 250 W... - Seite 82 Machine Translated by Google Hersteller: Shanghaimuxinmuyeyouxiangongsi Adresse: Shuangchenglu 803nong11hao1602A-1609shi, Baoshanqu, Shanghai 200000 CN. Importiert nach AUS: SIHAO PTY LTD. 1 ROKEVA STREETEASTWOOD NSW 2122 Australien Importiert in die USA: Sanven Technology Ltd. Suite 250, 9166 Anaheim Place, Rancho Cucamonga, CA 91730 YH CONSULTING LIMITED.
- Seite 83 Machine Translated by Google...
- Seite 84 Machine Translated by Google Technischer Support und E-Garantie-Zertifikat www.vevor.com/support...
- Seite 85 Machine Translated by Google CARICABATTERIE DC-DC MODELLO:SDC-20A, SDC-30A, SDC-40A, SDC-60A Supporto tecnico e certificato di garanzia elettronica www.vevor.com/support...
- Seite 86 Machine Translated by Google...
- Seite 87 (L'immagine è solo di riferimento, fare riferimento all'oggetto reale) Questa è l'istruzione originale, si prega di leggere attentamente tutte le istruzioni del manuale prima di utilizzare. VEVOR si riserva una chiara interpretazione del nostro manuale utente. L'aspetto del prodotto sarà...
-
Seite 88: Importanti Istruzioni Di Sicurezza
Machine Translated by Google Importanti istruzioni di sicurezza Si prega di conservare queste istruzioni. Questo manuale contiene importanti istruzioni di sicurezza, installazione e funzionamento per il caricabatterie. I seguenti simboli sono utilizzati in tutto il manuale per indicare condizioni potenzialmente pericolose o note importanti. Indica una condizione potenzialmente pericolosa. - Seite 89 Machine Translated by Google Assicurare una posizione sicura dove non possa ribaltarsi o cadere Per l'installazione su imbarcazioni: se i dispositivi elettrici sono collegati in modo errato, ciò può causare danni da corrosione sull'imbarcazione. Verificare l'installazione con un elettricista o un installatore qualificato. Disporre i cavi in modo che non possano essere danneggiati dalle porte o rappresentare un pericolo di inciampo.
- Seite 90 Machine Translated by Google Sommario Informazioni sulla sicurezza Informazioni generali Panoramica del prodotto Identificazione delle parti Dimensioni Componenti opzionali Installazione Considerazioni sulla posizione Cablaggio e fusibile Messa a terra Cablaggio di uscita CC (casa) Cablaggio di ingresso CC (avviatore) Cablaggio accensione D+ Cablaggio del limite di corrente LC Operazione Indicatori LED...
-
Seite 91: Informazioni Generali
Machine Translated by Google Informazioni generali I caricabatterie della serie DC-DC sono il modo più efficace per caricare le batterie ausiliarie o domestiche dalla batteria dell'alternatore/avviamento. Compatibile con i tipi di alternatore intelligenti o tradizionali, il DC-DC offre una carica corretta per batterie AGM, Flooded, Gel e persino al litio a ciclo profondo! Grazie a un caricabatterie a 3 stadi e a molteplici protezioni elettroniche, i proprietari possono essere certi che le loro batterie vengano caricate in modo ottimale e automatico. -
Seite 92: Panoramica Del Prodotto
Machine Translated by Google Panoramica del prodotto Identificazione delle parti Caratteristiche principali 1. Terminale di ingresso CC negativo 2. Terminale di ingresso CC positivo 3. Ventilatori di ventilazione 17 2 8 5 6 Lato uscita CC Caratteristiche principali 1. LED di alimentazione 5.D+ Terminale di 2.LED di guasto accensione 6.LC Terminale –... -
Seite 93: Dimensioni
Machine Translated by Google Dimensioni 83,0mm 165,0mm Le dimensioni hanno una tolleranza di ±0,5 mm Codice articolo: DCC1212-20 NOTA 205,0mm 83,0mm Le dimensioni hanno una tolleranza di ±0,5 mm NOTA Codice articolo: DCC1212-40 240,0mm 83,0mm Le dimensioni hanno una tolleranza di ±0,5 mm NOTA Codice articolo: DCC1212-60... -
Seite 94: Componenti Opzionali
Machine Translated by Google Componenti opzionali Sensore di temperatura DC-DC (Modello: RTSDCC) ATTENZIONE Non utilizzare con batterie al litio. ATTENZIONE Il RTSDCC è utile per leggere i valori di temperatura in entrata dal banco batterie domestico durante la regolazione della tensione di carica del tuo caricabatterie di bordo CC-CC. Con un intervallo di temperatura di funzionamento da -4°F a 176°F / -20°C a +80°C, il sensore sarà... - Seite 95 Machine Translated by Google Montaggio Mantenere almeno 5 cm di spazio libero da tutte le aree e garantire una certa ventilazione per prestazioni ottimali. Mancia Tracciare i fori di montaggio con una matita/penna quando si posiziona il DC-DC contro l'area desiderata Utilizzare 4 viti per fissare il cc-cc su una superficie 5 centimetri 5 centimetri...
-
Seite 96: Cablaggio E Fusibile
Machine Translated by Google Cablaggio e fusibile I terminali ad anello della batteria sono consigliati per connessioni di ingresso e uscita a 12 V. Quanto segue è un riferimento che incorpora una caduta di tensione massima critica dello 0-3% e potrebbe non coprire tutte le applicazioni uniche che potrebbero esistere. -
Seite 97: Cablaggio Di Uscita Cc (Casa)
Machine Translated by Google Cablaggio D+IGN al circuito di accensione ALTERNATORE FUSIBILE ANL FUSIBILE ANL INGRESSO CC (AVVIATORE) USCITA CC (CASA) TERRA DEL TELAIO TERRA DEL TELAIO Cablaggio di uscita CC (casa) Utilizzare solo batterie da 12 V. I danni dovuti al collegamento di batterie a voltaggio più elevato non saranno AVVERTIMENTO coperti dalla garanzia. -
Seite 98: Cablaggio Di Ingresso Cc (Avviatore)
Machine Translated by Google 1 in senso antiorario 3 in senso orario Cablaggio di ingresso CC (avviatore) Il DC-DC non si accenderà né funzionerà finché non sarà collegato il cavo di accensione D+. NOTA Quando si collega l'ingresso CC, tenere presente che il CC-CC sarà comunque spento finché non verrà rilevata la tensione del cavo di accensione D+. -
Seite 99: Cablaggio Accensione D
Machine Translated by Google antiorario in senso orario Cablaggio accensione D+ Il terminale D+ sarà posizionato sul lato di uscita ma si collega al circuito di accensione CC della batteria di avviamento di ingresso. Questo potrebbe trovarsi nel blocco fusibili del vano motore per alcuni veicoli. - Seite 100 Machine Translated by Google Il DC-DC non si accenderà o non funzionerà finché il cavo di accensione D+ non sarà collegato al circuito di accensione, dove rileverà una sorgente da 12 V per funzionare. Lo scopo è quello di attivare l'interruttore DC-DC quando il veicolo è in funzione con l'alternatore per evitare che il DC-DC funzioni in modo errato solo con la batteria di avviamento, lasciandoti con una batteria di avviamento scarica.
-
Seite 101: Cablaggio Del Limite Di Corrente Lc
Machine Translated by Google Raccomandazione per il blocco fusibili del vano motore Esaminare lo schema di disposizione dei fusibili del veicolo per identificare una posizione del fusibile che sia attiva quando il veicolo è in funzione con l'alternatore. Le posizioni della chiave nell'accensione sono in genere blocco, accessori, acceso e avvio. -
Seite 102: Operazione
Machine Translated by Google Cavo in rame 18-16AWG consigliato Operazione Supponendo che i collegamenti della batteria da 12 V e il cablaggio del cavo di accensione D+ siano corretti, il LED di ACCENSIONE si illuminerà di verde. Indicatore LED LED di potenza Colore Stato Senso... -
Seite 103: Impostazione Piombo Acido
Machine Translated by Google Interruttori DIP I 5 dip switch possono essere configurati per caricare batterie al piombo o al litio. Nota che ON è in posizione abbassata e OFF è in posizione sollevata se si guardano direttamente i dip switch. I profili al piombo hanno una carica di assorbimento e una carica di mantenimento, mentre le batterie al litio avranno solo una carica di assorbimento e nessuna carica di mantenimento. -
Seite 104: Impostazione Del Litio
Machine Translated by Google Impostazione del litio Per iniziare, assicurati che SW5 = OFF per impostare il caricabatterie per batterie al litio. Non ci sarà una tensione di mantenimento e invece gli utenti selezioneranno tra tensioni al litio di tipo 1 o passeranno a tensioni al litio di tipo 2 a seconda delle specifiche della batteria al litio. -
Seite 105: Logica Di Carica Della Batteria
Machine Translated by Google Logica di carica della batteria Massa Assorbimento Galleggiante Io/A 100% Bulk (Fase I) (Piombo acido + litio) All'inizio, una batteria scarica verrà caricata con la massima corrente e la tensione aumenterà costantemente fino a raggiungere il punto di regolazione della tensione di assorbimento. Assorbimento (Fase U0) (Piombo + Litio) La batteria raggiunge il setpoint di tensione di assorbimento e mantiene la tensione costante mentre la corrente diminuisce gradualmente fino a quando la batteria non si carica completamente (entro il 10-20%). -
Seite 106: Risoluzione Dei Problemi
Machine Translated by Google Risoluzione dei problemi Se il DC-DC non funziona correttamente, potrebbe essere sottoposto a una protezione elettronica interna e interrompere il normale funzionamento. Ciò non è indicativo di un'unità difettosa, ma potrebbe richiedere una risoluzione dei problemi per riprendere il normale funzionamento. - Seite 107 Machine Translated by Google Protezione del comportamento Passaggi per la risoluzione dei problemi 1. Controllare attentamente che il cablaggio sia corretto con un multimetro e che i livelli della batteria siano adatti alla tensione di esercizio. allineare 2. Osservare la temperatura ambiente. Evitare installazioni alla luce diretta del sole. Temperature ambiente superiori a 122°F/50°C causeranno l'arresto del funzionamento dell'unità...
-
Seite 108: Manutenzione
Machine Translated by Google Causa del comportamento Aggiustare 1. Ispezionare i collegamenti per verificare che il cablaggio da e verso il CC-CC sia ben saldo, sicuro e integro Interruzione della connessione 2. Controllare che i fusibili non siano rotti e sostituirli per continuare a funzionare normalmente. -
Seite 109: Specifiche Tecniche
Machine Translated by Google Specifiche tecniche Modello Codice articolo: DCC1212-20 Codice articolo: DCC1212-30 Codice articolo: DCC1212-40 Codice articolo: DCC1212-60 Trasformazione 12V 12V ÿ 8V ~ 16VCC Intervallo di tensione della batteria in ingresso Corrente di carica nominale 20 A 30 A 40 A 60 A Piombo acido: 13,2 V ~ 14,7 V... - Seite 110 Machine Translated by Google Produttore: Shanghaimuxinmuyeyouxiangongsi Indirizzo: Shuangchenglu 803nong11hao1602A-1609shi, baoshanqu, shanghai 200000 CN. Importato in AUS: SIHAO PTY LTD. 1 ROKEVA STREETEASTWOOD Nuovo Galles del Sud 2122 Australia Importato negli USA: Sanven Technology Ltd. Suite 250, 9166 Anaheim Place, Rancho Cucamonga, CA 91730 YH CONSULTING LIMITED.
- Seite 111 Machine Translated by Google...
- Seite 112 Machine Translated by Google Supporto tecnico e certificato di garanzia elettronica www.vevor.com/support...
- Seite 113 Machine Translated by Google CARGADOR D E B ATERÍA C CCC MODELO: S DC20A, S DC30A, S DC40A, S DC60A Soporte t écnico y c ertificado d e g arantía electrónica w ww.vevor.com/support...
- Seite 114 Machine Translated by Google...
- Seite 115 Machine Translated by Google BATERÍA C CCC CARGADOR MODELO: S DC20A, S DC30A, S DC40A, S DC60A (La i magen e s s olo d e r eferencia, c onsulte e l o bjeto r eal) Estas s on l as i nstrucciones o riginales; l ea a tentamente t odas l as instrucciones ...
-
Seite 116: Instrucciones De Seguridad Importantes
Machine Translated by Google Instrucciones d e s eguridad i mportantes Por f avor g uarde e stas i nstrucciones. Este m anual c ontiene i nstrucciones i mportantes d e s eguridad, i nstalación y f uncionamiento d el c argador. L os siguientes ... - Seite 117 Machine Translated by Google Asegúrese d e q ue e sté e n u na u bicación s egura d onde n o p ueda v olcarse n i c aerse. Para l a i nstalación e n e mbarcaciones: u na c onexión i ncorrecta d e l os d ispositivos e léctricos p uede p rovocar d años p or corrosión ...
- Seite 118 Machine Translated by Google Tabla d e c ontenido Información d e s eguridad Información g eneral Descripción g eneral d el p roducto Identificación d e p iezas Dimensiones Componentes o pcionales Instalación Consideraciones d e u bicación Cableado y f usibles Toma ...
-
Seite 119: Información G Eneral
Machine Translated by Google Información g eneral Los c argadores d e b atería d e l a s erie C CCC s on l a m anera m ás e ficaz d e c argar l as b aterías a uxiliares o d omésticas desde ... -
Seite 120: Descripción G Eneral D El P Roducto
Machine Translated by Google Descripción g eneral d el p roducto Identificación d e p iezas Características p rincipales 1. T erminal d e e ntrada d e C C n egativo 2. T erminal d e e ntrada d e C C p ositivo 3. ... -
Seite 121: Dimensiones
Machine Translated by Google Dimensiones 83,0 m m 165,0 m m DCC121220 Las d imensiones t ienen u na t olerancia d e ± 0,5 m m. NOTA 205,0 m m 83,0 m m DCC121240 NOTA Las d imensiones t ienen u na t olerancia d e ± 0,5 m m. 240,0 ... -
Seite 122: Componentes O Pcionales
Machine Translated by Google Componentes o pcionales Sensor d e t emperatura C CCC ( modelo: R TSDCC) PRECAUCIÓN N o u tilizar c on b aterías d e l itio. PRECAUCIÓN El R TSDCC r esulta m uy ú til p ara l eer l os v alores d e t emperatura e ntrantes d el b anco d e b aterías d oméstico mientras ... - Seite 123 Machine Translated by Google Montaje Mantenga a l m enos 5 c m d e e spacio l ibre e n t odas l as á reas y a segúrese d e q ue h aya c ierta v entilación p ara u n m ejor r endimiento. rendimiento Trace ...
-
Seite 124: Cableado Y F Usibles
Machine Translated by Google Cableado y f usibles Se r ecomiendan t erminales d e a nillo d e b atería p ara c onexiones d e e ntrada y s alida d e 1 2 V . L a s iguiente e s u na r eferencia q ue incorpora ... -
Seite 125: Cableado D E S Alida D E C C ( Casa)
Machine Translated by Google Cableado D +IGN a l c ircuito d e e ncendido ALTERNADOR norte FUSIBLE A NL FUSIBLE A NL ENTRADA D E C C ( ARRANCADOR) SALIDA D E C C ( CASA) CONEXIÓN A T IERRA D EL C HASIS CONEXIÓN ... -
Seite 126: Cableado D E E Ntrada D E C C ( Arranque)
Machine Translated by Google 1 e n s entido a ntihorario 3 e n e l s entido d e l as a gujas d el r eloj Cableado d e e ntrada d e C C ( arranque) El D CDC n o s e e ncenderá n i f uncionará h asta q ue s e c onecte e l c able d e e ncendido D +. NOTA Al ... -
Seite 127: Cableado D E E Ncendido D
Machine Translated by Google sinistrórsum dextrorso Cableado d e e ncendido D + El t erminal D + s e e ncuentra e n e l l ado d e s alida, p ero s e c onecta a l c ircuito d e e ncendido d e C C d e l a batería ... - Seite 128 Machine Translated by Google El C CCC n o s e e ncenderá n i f uncionará h asta q ue e l c able d e e ncendido D + e sté c onectado a l c ircuito d e e ncendido, donde ...
-
Seite 129: Cableado D E L Ímite D E C Orriente L C
Machine Translated by Google Recomendación d el b loque d e f usibles d el c ompartimento d el m otor Revise e l d iagrama d e d istribución d e f usibles d e s u v ehículo p ara i dentificar l a u bicación d e u n f usible a ctivo c uando e l vehículo ... -
Seite 130: Operación
Machine Translated by Google 1816 A WG, s e recomienda c able d e c obre Operación Suponiendo q ue l as c onexiones d e l a b atería d e 1 2 V y e l c ableado d el c able d e e ncendido D + s ean c orrectos, e ntonces e l L ED d e ENCENDIDO ... -
Seite 131: Configuración D E P Lomo Á Cido
Machine Translated by Google Interruptores D IP Los 5 i nterruptores D IP s e p ueden c onfigurar p ara c argar b aterías d e p lomoácido o l itio. T enga e n c uenta q ue, s i s e m iran directamente ... -
Seite 132: Configuración D E L Itio
Machine Translated by Google Configuración d e l itio Para c omenzar, a segúrese d e q ue S W5 e sté e n O FF p ara c onfigurar e l c argador p ara b aterías d e l itio. N o h abrá v oltaje de ... -
Seite 133: Lógica D E C Arga D E L A B Atería
Machine Translated by Google Lógica d e c arga d e l a b atería Ultravioleta Flotar Absorción A g ranel IOWA 100 % 10 % A g ranel ( Fase I ) ( Plomo Á cido + L itio) Al ... -
Seite 134: Solución D E P Roblemas
Machine Translated by Google Solución d e p roblemas Si e l D CDC n o f unciona c orrectamente, e s p osible q ue e sté b ajo p rotección e lectrónica i nterna y d eje d e f uncionar c on normalidad. ... - Seite 135 Machine Translated by Google Protección d el c omportamiento Pasos p ara s olucionar p roblemas 1. V erifique n uevamente q ue e l c ableado s ea c orrecto c on u n m ultímetro y q ue l os n iveles de ...
-
Seite 136: Mantenimiento
Machine Translated by Google Causa d el c omportamiento Arreglar 1. I nspeccione s us c onexiones p ara v erificar q ue e l c ableado h acia y d esde e l C CCC e sté f irme, seguro ... -
Seite 137: Especificaciones T Écnicas
Machine Translated by Google Especificaciones t écnicas DCC121240 Modelo DCC121220 DCC121230 DCC121260 Transformación 12 V 1 2 V → 8 V ~ 1 6 V C C Rango d e v oltaje d e e ntrada d e l a b atería Corriente ... - Seite 138 Machine Translated by Google Fabricante: S hanghaimuxinmuyeyouxiangongsi Dirección: S huangchenglu 8 03nong11hao1602A1609shi, b aoshanqu, shanghai 2 00000 C N. Importado a A US: S IHAO P TY L TD. 1 R OKEVA S TREET, E ASTWOOD NSW 2 122 A ustralia Importado ...
- Seite 139 Machine Translated by Google...
- Seite 140 Machine Translated by Google Soporte t écnico y c ertificado d e g arantía electrónica w ww.vevor.com/support...
- Seite 141 Machine Translated by Google ŁADOWARKA AKUMULATORÓW DC-DC MODEL: SDC-20A, SDC-30A, SDC-40A, SDC-60A Wsparcie techniczne i certyfikat gwarancji elektronicznej www.vevor.com/support...
- Seite 142 Machine Translated by Google...
- Seite 143 (Zdjęcie ma charakter poglądowy, proszę odnosić się do rzeczywistego obiektu) To jest oryginalna instrukcja, przed użyciem należy uważnie przeczytać wszystkie instrukcje. VEVOR zastrzega sobie jasną interpretację naszej instrukcji obsługi. Wygląd produktu będzie zależał od produktu, który otrzymałeś. Prosimy o wybaczenie, że nie poinformujemy Cię ponownie, jeśli w naszym produkcie pojawią...
-
Seite 144: Ważne Instrukcje Bezpieczeństwa
Machine Translated by Google Ważne instrukcje bezpieczeństwa Proszę zachować te instrukcje. Niniejsza instrukcja zawiera ważne instrukcje dotyczące bezpieczeństwa, instalacji i obsługi ładowarki. Poniższe symbole są używane w całej instrukcji, aby wskazać potencjalnie niebezpieczne warunki lub ważne uwagi. Oznacza potencjalnie niebezpieczny stan. Należy zachować szczególną ostrożność podczas wykonywania OSTRZEŻENIE tego zadania. - Seite 145 Machine Translated by Google Zapewnij bezpieczne miejsce, w którym nie będzie mogło się przewrócić lub spaść. W przypadku instalacji na łodziach: jeśli urządzenia elektryczne są nieprawidłowo podłączone, może to prowadzić do uszkodzeń korozyjnych na łodzi. Sprawdź instalację z wykwalifikowanym elektrykiem lub instalatorem. Ułóż...
- Seite 146 Machine Translated by Google Spis treści Informacje dotyczące bezpieczeństwa Informacje ogólne Przegląd produktu Identyfikacja części Wymiary Komponenty opcjonalne Instalacja Rozważania dotyczące lokalizacji Okablowanie i bezpieczniki Grunt Okablowanie wyjściowe prądu stałego (dom) Okablowanie wejściowe DC (rozrusznik) Okablowanie zapłonu D+ Okablowanie ograniczające prąd LC Działanie Wskaźniki LED Ustawianie typu baterii...
-
Seite 147: Informacje Ogólne
Machine Translated by Google Informacje ogólne Ładowarki akumulatorów serii DC-DC to najskuteczniejszy sposób ładowania akumulatorów pomocniczych lub domowych z akumulatora alternatora/rozrusznika. Kompatybilne z inteligentnymi lub tradycyjnymi typami alternatorów, DC-DC oferuje prawidłowe ładowanie akumulatorów AGM, zalewanych, żelowych, a nawet litowych o głębokim cyklu! Dzięki 3-stopniowej ładowarce akumulatorów i wielu zabezpieczeniom elektronicznym właściciele mogą... -
Seite 148: Przegląd Produktu
Machine Translated by Google Przegląd produktu Identyfikacja części Główne cechy 1. Ujemny zacisk wejściowy prądu stałego 2. Zacisk wejściowy prądu stałego dodatni 3. Wentylatory wentylacyjne 17 2 8 5 6 Strona wyjścia DC Główne cechy 1. Dioda LED zasilania 5.D+ Zacisk zapłonu 6.LC 2. -
Seite 149: Wymiary
Machine Translated by Google Wymiary 83,0 mm 165,0 mm DCC1212-20 Wymiary mają tolerancję ±0,5 mm NOTATKA 205,0 mm 83,0 mm DCC1212-40 Wymiary mają tolerancję ±0,5 mm NOTATKA 240,0 mm 83,0 mm Wymiary mają tolerancję ±0,5 mm DCC1212-60 NOTATKA... -
Seite 150: Komponenty Opcjonalne
Machine Translated by Google Komponenty opcjonalne Czujnik temperatury DC-DC (model: RTSDCC) UWAGA Nie stosować z bateriami litowymi. OSTROŻNOŚĆ RTSDCC przydaje się do odczytywania wartości temperatury przychodzącej z domowego banku akumulatorów podczas regulacji napięcia ładowania ładowarki pokładowej DC do DC. Posiadając zakres temperatur roboczych od -4°F ~ 176°F / -20°C ~ +80°C, czujnik będzie ważny dla ogólnej żywotności i wydajności domowego banku akumulatorów poprzez zastosowanie wyższego napięcia ładowania w celu przeciwdziałania zwiększonemu oporowi spowodowanemu niską... - Seite 151 Machine Translated by Google Montowanie Aby uzyskać najlepszą wydajność, zachowaj co najmniej 5 cm odstępu od wszystkich obszarów i zapewnij wentylację. mance Podczas umieszczania DC-DC na żądanym obszarze zaznacz ołówkiem/długopisem otwory montażowe. Za pomocą 4 śrub przymocuj dc-dc do powierzchni 5 cm 5 cm...
-
Seite 152: Okablowanie I Bezpieczniki
Machine Translated by Google Okablowanie i bezpieczniki Zaciski pierścieniowe akumulatora są zalecane do połączeń wejściowych i wyjściowych 12 V. Poniżej znajduje się odniesienie uwzględniające krytyczny maksymalny spadek napięcia 0–3% i może nie obejmować wszystkich unikalnych zastosowań, które mogą istnieć. Gdy ładowarka akumulatora wysyła znamionowe ampery, strona wejściowa może pobierać... -
Seite 153: Okablowanie Wyjściowe Prądu Stałego (Dom)
Machine Translated by Google Podłączenie D+IGN do obwodu zapłonowego ALTERNATOR BEZPIECZNIK ANL BEZPIECZNIK ANL WEJŚCIE DC (ROZRUSZNIK) WYJŚCIE DC (OBUDOWA) UZIEMIENIE PODWOZIA UZIEMIENIE PODWOZIA Okablowanie wyjściowe prądu stałego (dom) Używaj wyłącznie akumulatorów 12 V. Uszkodzenia spowodowane podłączeniem akumulatorów o wyższym napięciu nie będą OSTRZEŻENIE objęte gwarancją. -
Seite 154: Okablowanie Wejściowe Dc (Rozrusznik)
Machine Translated by Google 1 przeciwnie do ruchu wskazówek zegara 3 zgodnie z ruchem wskazówek zegara Okablowanie wejściowe DC (rozrusznik) Urządzenie DC-DC nie włączy się ani nie będzie działać, dopóki nie zostanie podłączony przewód zapłonowy D+. NOTATKA Podłączając wejście DC, należy pamiętać, że DC-DC będzie wyłączone do momentu wykrycia napięcia na przewodzie zapłonowym Wejście DC-DC połączy się... -
Seite 155: Okablowanie Zapłonu D
Machine Translated by Google przeciwnie do ruchu wskazówek zegara zgodnie ze wskazówkami zegara Okablowanie zapłonu D+ Zacisk D+ będzie znajdował się po stronie wyjściowej, ale łączy się z obwodem zapłonu DC akumulatora rozruchowego wejściowego. W niektórych pojazdach może znajdować się w bloku bezpieczników komory silnika. Zapoznaj się ze schematem elektrycznym swojego pojazdu, aby uzyskać... - Seite 156 Machine Translated by Google DC-DC nie włączy się ani nie będzie działać, dopóki przewód zapłonowy D+ nie zostanie podłączony do obwodu zapłonowego, gdzie wykryje źródło 12 V, aby działać. Celem jest włączenie przełącznika DC-DC, gdy pojazd jest uruchomiony z alternatorem, aby zapobiec nieprawidłowej pracy DC-DC z samym akumulatorem rozruchowym, co spowoduje rozładowanie akumulatora rozruchowego.
-
Seite 157: Okablowanie Ograniczające Prąd Lc
Machine Translated by Google Zalecenia dotyczące bloku bezpieczników w komorze silnika Przejrzyj schemat układu bezpieczników w swoim pojeździe, aby zidentyfikować lokalizację bezpiecznika, który jest pod napięciem, gdy pojazd jest uruchomiony z alternatorem. Pozycje kluczyka w stacyjce to zazwyczaj blokada, akcesoria, włączony i start. Pozycja wyłączona, w której żadne akcesoria nie będą... -
Seite 158: Działanie
Machine Translated by Google Zalecany kabel miedziany 18-16AWG Działanie Przy założeniu, że podłączenie akumulatora 12 V i przewodu zapłonowego D+ jest prawidłowe, dioda LED POWER zaświeci się na zielono. Wskaźnik LED Dioda LED zasilania Kolor Status Oznaczający Wyłączone; jeśli coś jest nie tak, zapoznaj się z rozwiązywaniem problemów Wyłączony Zielony Normalna... - Seite 159 Machine Translated by Google Przełączniki DIP 5 przełączników DIP można skonfigurować do ładowania akumulatorów kwasowo-ołowiowych lub litowych. Należy pamiętać, że ON jest w pozycji dolnej, a OFF w pozycji górnej, jeśli przełączniki DIP są skierowane bezpośrednio do użytkownika. Profile kwasowo- ołowiowe mają...
-
Seite 160: Ustawianie Litu
Machine Translated by Google Ustawianie litu Aby rozpocząć, upewnij się, że SW5 = OFF, aby przestawić ładowarkę na baterie litowe. Nie będzie napięcia podtrzymującego, a zamiast tego użytkownicy będą wybierać między napięciami litowymi typu 1 lub przełączać się na napięcia litowe typu 2 w zależności od specyfikacji baterii litowej. -
Seite 161: Logika Ładowania Akumulatora
Machine Translated by Google Logika ładowania akumulatora Wchłanianie Cielsko Platforma Ja/A 100% Luzem (Faza I) (Kwas ołowiowy + lit) Na początku rozładowany akumulator będzie ładowany maksymalnym prądem, a napięcie będzie stopniowo rosło, aż do osiągnięcia nastawionego napięcia absorpcji. Absorpcja (Faza U0) (Kwas ołowiowy + lit) Akumulator osiąga zadany punkt napięcia absorpcji i utrzymuje stałe napięcie, podczas gdy prąd stopniowo maleje, aż... -
Seite 162: Rozwiązywanie Problemów
Machine Translated by Google Rozwiązywanie problemów Jeśli DC-DC nie działa prawidłowo, może przechodzić przez wewnętrzną ochronę elektroniczną i zatrzymać normalną pracę. Nie jest to oznaką wadliwego urządzenia, ale może wymagać pewnych działań naprawczych, aby wznowić normalną pracę. Ochrona elektroniczna Ochrona zachowania Kroki rozwiązywania problemów 1. - Seite 163 Machine Translated by Google Ochrona zachowania Kroki rozwiązywania problemów 1. Sprawdź dokładnie za pomocą multimetru, czy okablowanie jest prawidłowe i czy poziomy naładowania akumulatora mieszczą się w zakresie napięcia roboczego. zakres 2. Obserwuj temperaturę otoczenia. Unikaj instalacji w bezpośrednim słońcu. Temperatury otoczenia powyżej 122°F/50°C spowodują, że jednostka przestanie działać, dopóki warunki Wysoki nie staną...
-
Seite 164: Konserwacja
Machine Translated by Google Zachowanie Przyczyna Naprawić 1. Sprawdź połączenia pod kątem szczelności, bezpieczeństwa i braku uszkodzeń przewodów do i od DC-DC. Zerwanie połączenia 2. Sprawdź bezpieczniki pod kątem przepalonych elementów i wymień je, aby zapewnić normalną pracę urządzenia. 3. Użyj testu ciągłości swojego multimetru (sprawdź u producenta), aby osobno sprawdzić każdą... -
Seite 165: Dane Techniczne
Machine Translated by Google Dane techniczne DCC1212-40 Model DCC1212-20 DCC1212-30 DCC1212-60 Transformacja 12V 12V Zakres napięcia wejściowego akumulatora 8V ~ 16V prądu stałego Prąd znamionowy ładowania 20 lat 30 lat 40 lat 60 lat Kwasowo-ołowiowy: 13,2 V ~ 14,7 V Zakres napięcia ładowania Lit: 12,6 V ~ 14,6 V Maksymalna moc znamionowa... - Seite 166 Machine Translated by Google Producent: Shanghaimuxinmuyeyouxiangongsi Adres: Shuangchenglu 803nong11hao1602A-1609shi, Baoshanqu, Szanghaj 200000 Importowane do AUS: SIHAO PTY LTD. 1 ROKEVA STREETEASTWOOD NSW 2122 Australia Importowane do USA: Sanven Technology Ltd. Suite 250, 9166 Anaheim Place, Rancho Cucamonga, CA 91730 YH CONSULTING LIMITED. C/O YH Consulting Limited Biuro 147, Centurion House, London Road, Staines- REP WIELKIEJ BRYTANII upon-Thames, Surrey, TW18 4AX...
- Seite 167 Machine Translated by Google...
- Seite 168 Machine Translated by Google Wsparcie techniczne i certyfikat gwarancji elektronicznej www.vevor.com/support...
- Seite 169 Machine Translated by Google DC-DC BATTERIJLADER MODEL: SDC-20A, SDC-30A, SDC-40A, SDC-60A Technische ondersteuning en e-garantiecertificaat www.vevor.com/support...
- Seite 170 Machine Translated by Google...
- Seite 171 (De afbeelding is alleen ter referentie, kijk naar het daadwerkelijke object) Dit is de originele instructie, lees alle handleidingen zorgvuldig door voordat u het product gebruikt. VEVOR behoudt zich een duidelijke interpretatie van onze gebruikershandleiding voor. Het uiterlijk van het product is afhankelijk van het product dat u hebt ontvangen.
-
Seite 172: Belangrijke Veiligheidsinstructies
Machine Translated by Google Belangrijke veiligheidsinstructies Bewaar deze instructies. Deze handleiding bevat belangrijke veiligheids-, installatie- en bedieningsinstructies voor de lader. De volgende symbolen worden in de handleiding gebruikt om potentieel gevaarlijke omstandigheden of belangrijke opmerkingen aan te geven. Geeft een potentieel gevaarlijke toestand aan. Wees uiterst voorzichtig bij het uitvoeren van deze taak. WAARSCHUWING Geeft een cruciale procedure aan voor de veilige en juiste installatie en bediening van de VOORZICHTIGHEID... - Seite 173 Machine Translated by Google Zorg voor een veilige locatie waar het niet kan kantelen of vallen Voor installatie op boten: als de elektrische apparaten verkeerd zijn aangesloten, kan dit leiden tot corrosieschade aan de boot. Controleer de installatie met een gekwalificeerde elektricien of installateur. Leg kabels zo neer dat ze niet door deuren beschadigd kunnen raken of een struikelgevaar kunnen vormen.
- Seite 174 Machine Translated by Google Inhoudsopgave Veiligheidsinformatie Algemene informatie Productoverzicht Identificatie van onderdelen Afmetingen Optionele componenten Installatie Locatieoverwegingen Bedrading en zekering Aarding DC-uitgangsbedrading (huis) DC-ingangsbedrading (starter) D+ Ontstekingsbedrading LC-stroomlimietbedrading Bediening LED-indicatoren Batterijtype instellen Loodzuur instellen Lithium instellen Logica van het opladen van de batterij Lithium-activering Probleemoplossing Onderhoud...
-
Seite 175: Algemene Informatie
Machine Translated by Google Algemene informatie De DC-DC-serie acculaders zijn de meest effectieve manier om uw hulp- of huisaccu's op te laden vanaf de dynamo/startaccu. De DC-DC is compatibel met slimme of traditionele dynamo- typen en biedt correct opladen voor AGM-, Flooded-, Gel- en zelfs Lithium deep cycle-accu's! Met een 3-traps acculader en meerdere elektronische beveiligingen kunnen eigenaren erop vertrouwen dat hun accu's optimaal en automatisch worden opgeladen. -
Seite 176: Productoverzicht
Machine Translated by Google Productoverzicht Identificatie van onderdelen Belangrijkste kenmerken 1. Negatieve DC-ingangsaansluiting 2. Positieve DC-ingangsaansluiting 3. Ventilatoren 17 2 8 5 6 DC-uitgangszijde Belangrijkste kenmerken 1. Stroom-LED 5.D+ Ontstekingsaansluiting 2. Fout-LED 6.LC-aansluiting – Stroombegrenzingsaansluiting 3.Dipschakelaars 7. Positieve DC-uitgangsaansluiting 4. RJ11-temperatuursensorpoort (vereist 8. -
Seite 177: Afmetingen
Machine Translated by Google Afmetingen 83,0 mm 165,0 mm DCC1212-20 De afmetingen hebben een tolerantie van ±0,5 mm OPMERKING 205,0 mm 83,0 mm DCC1212-40 De afmetingen hebben een tolerantie van ±0,5 mm OPMERKING 240,0 mm 83,0 mm De afmetingen hebben een tolerantie van ±0,5 mm DCC1212-60 OPMERKING... -
Seite 178: Optionele Componenten
Machine Translated by Google Optionele componenten DC-DC-temperatuursensor (model: RTSDCC) LET OP Niet gebruiken met lithium-batterijen. VOORZICHTIGHEID De RTSDCC is handig voor het lezen van binnenkomende temperatuurwaarden van de huisaccubank terwijl u de laadspanning van uw DC naar DC On-Board Battery Charger aanpast. Met een temperatuurbereik van -4°F ~ 176°F / -20°C ~ +80°C, zal de sensor belangrijk zijn voor de algehele levensduur en prestaties van uw huisaccubank door een hogere laadspanning toe te passen om de toegenomen weerstand als gevolg van lage temperaturen tegen te gaan. - Seite 179 Machine Translated by Google Montage Zorg voor minimaal 5 cm vrije ruimte vanaf alle plekken en zorg voor enige ventilatie voor de beste prestaties. mans Trek de bevestigingsgaten over met een potlood/pen wanneer u de DC-DC op het gewenste gebied plaatst Gebruik 4 schroeven om de dc-dc op een oppervlak te bevestigen...
-
Seite 180: Bedrading En Zekering
Machine Translated by Google Bedrading en zekering Batterijringklemmen worden aanbevolen voor 12V-ingangs- en uitgangsaansluitingen. Hieronder volgt een referentie met een kritische maximale spanningsval van 0-3% en dekt mogelijk niet alle unieke toepassingen die er kunnen zijn. Wanneer de batterijlader de nominale ampère verzendt, kan de ingangszijde een hogere stroomopname ervaren met een factor van maximaal 50%. -
Seite 181: Dc-Uitgangsbedrading (Huis)
Machine Translated by Google D+IGN-bedrading naar ontstekingscircuit ALTERNATOR ANL-ZEKERING ANL-ZEKERING DC-INGANG (STARTER) DC-UITGANG (HUIS) CHASSIS GROND CHASSIS GROND DC-uitgangsbedrading (huis) Gebruik alleen 12V-accu's. Schade door het aansluiten van accu's met een hogere spanning valt niet onder WAARSCHUWING de garantie. De DC-DC-uitgang wordt aangesloten op de 12V-hulpaccu of huishoudaccu die u wilt opladen. Deze accu's kunnen een andere chemie hebben dan de startaccu. -
Seite 182: Dc-Ingangsbedrading (Starter)
Machine Translated by Google 1 tegen de klok in 3 met de klok mee DC-ingangsbedrading (starter) De DC-DC wordt pas ingeschakeld of werkt als de D+-ontstekingskabel is aangesloten. OPMERKING Wanneer u de DC-ingang aansluit, moet u er rekening mee houden dat de DC-DC nog steeds uit is totdat de D+ ontstekingskabelspanning wordt gedetecteerd. - Seite 183 Machine Translated by Google tegen de klok in rechtsom D+ Ontstekingsbedrading De D+-aansluiting bevindt zich aan de uitgangszijde, maar is verbonden met het DC-ontstekingscircuit van de ingangsstartaccu. Dit kan zich bij sommige voertuigen in het zekeringenblok van de motorruimte bevinden. Raadpleeg het elektrische schema van uw eigen voertuig voor de plaatsing van de D+-bedrading. Mogelijk moet u de kabel splitsen of aanpassen om deze correct op uw ontstekingscircuit aan te sluiten.
- Seite 184 Machine Translated by Google De DC-DC wordt niet ingeschakeld of werkt niet totdat de D+ ontstekingskabel is aangesloten op het ontstekingscircuit, waar het een 12V-bron detecteert om AAN te werken. Het doel is om de DC-DC-schakelaar in te schakelen wanneer het voertuig draait met de dynamo om te voorkomen dat de DC-DC onjuist werkt met alleen de startaccu, waardoor u met een lege startaccu achterblijft.
-
Seite 185: Lc-Stroomlimietbedrading
Machine Translated by Google Aanbeveling voor zekeringblok in motorruimte Bekijk het zekeringschema van uw voertuig om een zekeringlocatie te identificeren die onder spanning staat wanneer het voertuig draait met de dynamo. De sleutelposities in het contact zijn doorgaans lock, accessory, on en start. Uit-positie waar geen accessoires werken en de besturing waarschijnlijk ook vergrendeld SLOT Accessoires worden van stroom voorzien, zoals radio's en andere kleine elektronica. -
Seite 186: Bediening
Machine Translated by Google 18-16AWG, koperkabel aanbevolen Bediening Als de 12V-accu correct is aangesloten en de D+-ontstekingskabel correct is aangesloten, zal de POWER-LED groen oplichten. LED-indicator Stroom-LED Kleur Staat Betekenis Uitgeschakeld; indien abnormaal, raadpleeg de probleemoplossing Groente Vast AAN Normaal Kleur Staat Betekenis... -
Seite 187: Loodzuur Instellen
Machine Translated by Google DIP-schakelaars De 5 x dipswitches kunnen worden geconfigureerd om loodzuur- of lithiumbatterijen op te laden. Let op dat AAN de positie omlaag is en UIT de positie omhoog als u de dipswitches direct bekijkt. Loodzuurprofielen hebben een absorptielading en een floatlading, terwijl lithiumbatterijen alleen een absorptielading hebben en geen floatlading. -
Seite 188: Lithium Instellen
Machine Translated by Google Lithium instellen Om te beginnen, zorg ervoor dat SW5 = UIT om de lader in te stellen op lithiumbatterijen. Er zal geen floatspanning zijn en in plaats daarvan zullen gebruikers kiezen tussen Type 1 lithiumspanningen of overschakelen naar Type 2 lithiumspanningen, afhankelijk van de specificaties van uw lithiumbatterij. -
Seite 189: Logica Van Het Opladen Van De Batterij
Machine Translated by Google Logica van het opladen van de batterij Vlot Absorptie Grootverpakking Ik/A 100% Bulk (fase I) (loodzuur + lithium) In het begin wordt een ontladen accu opgeladen met maximale stroom en de spanning zal gestaag stijgen totdat de ingestelde absorptiespanning is bereikt. -
Seite 190: Probleemoplossing
Machine Translated by Google Probleemoplossing Als de DC-DC niet goed functioneert, kan er sprake zijn van een interne elektronische beveiliging en kan de normale werking worden gestopt. Dit is geen indicatie voor een defecte unit, maar kan wat probleemoplossing vereisen om de normale werking te hervatten. - Seite 191 Machine Translated by Google Gedragsbescherming Problemen oplossen stappen 1. Controleer met een multimeter of de bedrading correct is en of de batterijniveaus binnen de bedrijfsspanning vallen bereik 2. Let op de omgevingstemperatuur. Vermijd installaties in direct zonlicht. Omgevingstemperaturen boven 122°F/50°C zorgen ervoor dat de unit stopt met Hoog werken totdat de omstandigheden koeler worden.
-
Seite 192: Onderhoud
Machine Translated by Google Gedrag Oorzaak Repareren 1. Controleer of de verbindingen van en naar de DC-DC goed vastzitten, veilig zijn en onbeschadigd zijn. Verbinding verbroken 2. Controleer of de zekeringen kapot zijn en vervang ze om de normale werking te kunnen voortzetten. -
Seite 193: Technische Specificaties
Machine Translated by Google Technische specificaties DCC1212-40 Model DCC1212-20 DCC1212-30 DCC1212-60 12V 12V ÿ Transformatie 8V ~ 16VDC Ingangsspanningsbereik batterij Nominale laadstroom 20 Een 30 Een 40 Een 60 Een Loodzuur: 13,2V ~ 14,7V Laadspanningsbereik Lithium: 12,6V ~ 14,6V 250W 360W 500W 750W... - Seite 194 Machine Translated by Google Fabrikant: Shanghaimuxinmuyeyouxiangongsi Adres: Shuangchenglu 803nong11hao1602A-1609shi, baoshanqu, shanghai 200000 Geïmporteerd naar AUS: SIHAO PTY LTD. 1 ROKEVA STREETEASTWOOD NSW 2122 Australië Geïmporteerd naar de VS: Sanven Technology Ltd. Suite 250, 9166 Anaheim Place, Rancho Cucamonga, CA 91730 YH CONSULTING LIMITED.
- Seite 195 Machine Translated by Google...
- Seite 196 Machine Translated by Google Technische ondersteuning en e- garantiecertificaat www.vevor.com/support...
- Seite 197 Machine Translated by Google DC-DC BATTERILADDARE MODELL: SDC-20A, SDC-30A, SDC-40A, SDC-60A Teknisk support och e-garanticertifikat www.vevor.com/support...
- Seite 198 Machine Translated by Google...
- Seite 199 (Bilden är endast för referens, se det faktiska objektet) Detta är den ursprungliga instruktionen, läs alla instruktioner noggrant innan du använder den. VEVOR reserverar sig för en tydlig tolkning av vår användarmanual. Utseendet på produkten är beroende av den produkt du fått. Ursäkta oss att vi inte kommer att informera dig igen...
-
Seite 200: Viktiga Säkerhetsinstruktioner
Machine Translated by Google Viktiga säkerhetsinstruktioner Spara dessa instruktioner. Denna manual innehåller viktiga säkerhets-, installations- och driftsinstruktioner för laddaren. Följande symboler används i hela handboken för att indikera potentiellt farliga förhållanden eller viktiga anmärkningar. Indikerar ett potentiellt farligt tillstånd. Var extremt försiktig när du utför denna uppgift. VARNING Indikerar en kritisk procedur för säker och korrekt installation och drift av styrenheten. - Seite 201 Machine Translated by Google Säkerställ en säker plats där den inte kan tippa eller falla För installation på båtar: om de elektriska enheterna är felaktigt anslutna kan detta leda till korrosionsskador på båten. Kontrollera installationen med en kvalificerad elektriker eller installatör. Lägg kablar så...
- Seite 202 Machine Translated by Google Innehållsförteckning Säkerhetsinformation Allmän information Produktöversikt Identifiering av delar Mått Valfria komponenter Installation Platsöverväganden Kabeldragning och säkring Grundstötning DC-utgångsledningar (hus) DC-ingångsledning (starter) D+ tändkabel LC-strömgränsledningar Drift LED-indikatorer Ställa in batterityp Inställning av blysyra Inställning av litium Batteriladdningslogik Litiumaktivering Felsökning Underhåll...
-
Seite 203: Allmän Information
Machine Translated by Google Allmän information Batteriladdare i DC-DC-serien är det mest effektiva sättet att ladda dina extra- eller husbatterier från generatorn/startbatteriet. Kompatibel med smarta eller traditionella generatortyper, DC-DC erbjuder korrekt laddning för AGM, Flooded, Gel och till och med litium djupcykelbatterier! Med en 3-stegs batteriladdare och flera elektroniska skydd kan ägare känna sig säkra på... -
Seite 204: Produktöversikt
Machine Translated by Google Produktöversikt Identifiering av delar Nyckelfunktioner 1. Negativ DC-ingång 2. Positiv DC-ingång 3. Ventilationsfläktar 17 2 8 5 6 DC-utgångssida Nyckelfunktioner 1. Ström LED 5.D+ Tändningsterminal 2.Fel LED 6.LC Terminal – Strömbegränsningsterminal 3.Dip-omkopplare 7.Positiv DC-utgång 4.RJ11 temperatursensorport (kräver 8.Negativ DC-utgång separat köp) -
Seite 205: Mått
Machine Translated by Google Mått 83,0 mm 165,0 mm DCC1212-20 Måtten har en tolerans på ±0,5 mm NOTERA 205,0 mm 83,0 mm DCC1212-40 Måtten har en tolerans på ±0,5 mm NOTERA 240,0 mm 83,0 mm Måtten har en tolerans på ±0,5 mm DCC1212-60 NOTERA... -
Seite 206: Valfria Komponenter
Machine Translated by Google Valfria komponenter DC-DC temperatursensor (modell: RTSDCC) FÖRSIKTIGHET Använd inte med litiumbatterier. FÖRSIKTIGHET RTSDCC är praktiskt för att läsa inkommande temperaturvärden från husets batteribank samtidigt som du justerar laddningsspänningen för din DC till DC-batteriladdare. Med ett temperaturområde från -4°F ~ 176°F / -20°C ~ +80°C, kommer sensorn att vara viktig för den totala livslängden och prestandan för din husbatteribank genom att applicera högre laddningsspänning för att motverka det ökade motståndet på... - Seite 207 Machine Translated by Google Montering Ha minst 5 cm fritt utrymme från alla områden och se till att få ventilation för bästa resultat mance Rita upp monteringshålen med en penna/penna när du placerar DC-DC mot önskat område Använd 4 x skruvar för att fästa DC-DC på en yta 5 cm 5 cm...
-
Seite 208: Kabeldragning Och Säkring
Machine Translated by Google Kabeldragning och säkring Batteriringanslutningar rekommenderas för 12V in- och utgångsanslutningar. Följande är en referens som innehåller ett kritiskt 0-3 % max spänningsfall och täcker kanske inte alla unika applikationer som kan existera. När batteriladdaren skickar de nominella förstärkarna, kan ingångssidan uppleva ett högre strömdrag med en faktor på... -
Seite 209: Dc-Utgångsledningar (Hus)
Machine Translated by Google D+IGN Kabeldragning till tändkrets ALTERNATOR ANL SÄKRING ANL SÄKRING DC INPUT (STARTER) DC OUTPUT (HUS) CHASSISMARK CHASSISMARK DC-utgångsledningar (hus) Använd endast 12V-batterier. Skador på grund av anslutning av högre spänningsbatterier täcks inte VARNING av garantin. DC-DC-utgången ansluter till 12V-extra eller husbatteriet som du tänker ladda. Dessa batterier kan ha en annan kemi än startbatteriet. -
Seite 210: Dc-Ingångsledning (Starter)
Machine Translated by Google 1 moturs 3 medurs DC-ingångsledning (starter) DC-DC kommer inte att slås på eller fungera förrän D+ tändkabeln är ansluten. NOTERA När du ansluter DC-ingången, observera att DC-DC fortfarande kommer att vara avstängd tills D+ tändkabelns spänning känner av. DC-DC-ingången ansluter till 12V startbatteriet som kommer att användas för att ladda ditt hjälp- eller husbatteri. -
Seite 211: D+ Tändkabel
Machine Translated by Google moturs medurs D+ tändkabel D+-terminalen kommer att vara placerad på utgångssidan men ansluts till DC- tändningskretsen på ingångsstartbatteriet. Detta kan finnas i motorrummets säkringsblock för vissa fordon. Se ditt eget fordons elschema för D+-ledningsplacering. Kan kräva skarvning eller kabeljusteringar för att ansluta korrekt till din tändningskrets. 18-16AWG, kopparkabel rekommenderas... - Seite 212 Machine Translated by Google DC-DC kommer inte att slås på eller fungera förrän D+ tändkabeln är ansluten till tändningskretsen där den kommer att detektera en 12V källa för att slå PÅ. Syftet är att slå på DC-DC-brytaren när fordonet körs med generatorn för att förhindra att DC-DC fungerar felaktigt med bara startbatteriet som lämnar dig med ett urladdat startbatteri.
-
Seite 213: Lc-Strömgränsledningar
Machine Translated by Google Motorrumssäkringsblocksrekommendation Granska ditt fordons säkringslayoutdiagram för att identifiera en säkringsplats som är strömförande när fordonet körs med generatorn. Nyckellägen i tändningen är vanligtvis lås, tillbehör, på och start. Av-läge där inga tillbehör fungerar och styrningen troligen också är låst LÅSA Tillbehör får ström som radio och lite annan liten elektronik. -
Seite 214: Drift
Machine Translated by Google 18-16AWG, kopparkabel rekommenderas Drift Förutsatt korrekta 12V batterianslutningar och D+ tändkabeldragning, kommer POWER LED att lysa grönt. LED-indikator Ström LED Färg Status Menande Avstängd; om onormalt se felsökning Grön Fast PÅ Normal Färg Status Menande Inga fel Röd Fast PÅ... -
Seite 215: Inställning Av Blysyra
Machine Translated by Google DIP-omkopplare De 5 x dip-omkopplarna kan konfigureras för att ladda blysyra- eller litiumbatterier. Observera att ON är position nere och OFF är position upp om du vänder dig direkt mot dip-omkopplarna. Blysyraprofiler har en absorptionsladdning och en flytladdning medan litiumbatterier endast har en absorptionsladdning och ingen flytladdning. PÅ... -
Seite 216: Inställning Av Litium
Machine Translated by Google Inställning av litium För att komma igång, se till att SW5 = OFF för att ladda laddaren för litiumbatterier. Det kommer inte att finnas en flytspänning och istället kommer användare att välja mellan typ 1 litiumspänningar eller byta till typ 2 litiumspänningar beroende på... -
Seite 217: Batteriladdningslogik
Machine Translated by Google Batteriladdningslogik Bulk Flyta Absorption 100 % 10 % Bulk (fas I) (blysyra + litium) I början kommer ett urladdat batteri att laddas med maximal ström och spänningen kommer att stiga stadigt tills den når absorptionsspänningens börvärde. Absorption (Fas U0) (blysyra + litium) Batteriet når absorptionsspänningens börvärde och håller spänningen konstant medan strömmen gradvis minskar tills batteriet börjar bli fullt (inom 10-20%). -
Seite 218: Felsökning
Machine Translated by Google Felsökning Om DC-DC inte fungerar korrekt kan den genomgå ett internt elektroniskt skydd och stoppa normal drift. Detta tyder inte på en defekt enhet men kan kräva viss felsökning för att återuppta normal drift. Elektroniskt skydd Beteendeskydd Felsökningssteg 1. - Seite 219 Machine Translated by Google Beteendeskydd Felsökningssteg 1. Dubbelkolla att dina kablar är korrekta med en multimeter och att batterinivåerna ligger inom driftsspänningen räckvidd 2. Observera den omgivande temperaturen. Undvik installationer i direkt sol. Omgivningstemperaturer över 122°F/50°C gör att enheten slutar fungera tills Hög förhållandena blir svalare.
-
Seite 220: Underhåll
Machine Translated by Google Beteende Orsak Fixera 1. Inspektera dina anslutningar för täta, säkra och oskadade ledningar till och från DC-DC Anslutningsavbrott 2.Kontrollera säkringarna för eventuella brott och byt ut dem för att fortsätta normal drift. 3.Använd multimeterns (kontrollera med tillverkaren) kontinuitetstest för att individuellt kontrollera varje linje (positiv och negativ) vid ingången och utgången för att verifiera konsekvent anslutning. -
Seite 221: Tekniska Specifikationer
Machine Translated by Google Tekniska specifikationer Modell DCC1212-20 DCC1212-30 DCC1212-40 DCC1212-60 Omvandling 12V 12V ÿ Ingångsbatteriets spänningsområde 8V ~ 16VDC Nominell laddningsström 20 A 30 A 40 A 60 A Blysyra: 13,2V ~ 14,7V Laddningsspänningsområde Litium: 12,6V ~ 14,6V Nominell maxeffekt 250W 360W 500W... - Seite 222 Machine Translated by Google Tillverkare: Shanghaimuxinmuyeyouxiangongsi Adress: Shuangchenglu 803nong11hao1602A-1609shi, baoshanqu, shanghai 200000 CN. Importerad till AUS: SIHAO PTY LTD. 1 ROKEVA STREETEASTWOOD NSW 2122 Australien Importerad till USA: Sanven Technology Ltd. Suite 250, 9166 Anaheim Place, Rancho Cucamonga, CA 91730 YH CONSULTING LIMITED.
- Seite 223 Machine Translated by Google...
- Seite 224 Machine Translated by Google Teknisk support och e-garanticertifikat www.vevor.com/support...