Herunterladen Inhalt Inhalt Diese Seite drucken
Inhaltsverzeichnis

Werbung

Verfügbare Sprachen
  • DE

Verfügbare Sprachen

  • DEUTSCH, seite 93
Contact SAMSUNG WORLD-WIDE
If you have any questions or comments relating to Samsung products,
please contact the SAMSUNG customer care centre.
Comment contacter Samsung dans le monde
Si vous avez des suggestions ou des questions concernant les produits Samsung, veuillez
contacter le Service Consommateurs Samsung.
Kontakt zu Samsung
Falls Sie Fragen oder Anregungen zu Samsung-Produkten haben, wenden Sie sich bitte an
den Samsung-Kundendienst.
Contact Samsung wereldwijd
Wanneer u suggesties of vragen heeft met betrekking tot Samsung producten, gelieve con-
tact op te nemen met de consumenten dienst van Samsung.
Contacte con SAMSUNG WORLD-WIDE
Si tiene alguna pregunta o comentario referente a nuestros productos,
por favor contacte con nuestro Servicio de Atención al Cliente
Contacte SAMSUNG GLOBAL
Se tem algumas dúvidas ou comentários sobre os produtos Samsung,
contacte por favor a nossa linha de apoio a clientes Samsung.
Contatta SAMSUNG WORLD-WIDE
Se avete commenti o domande sui prodotti Samsung, contattate il
Servizio Clienti Samsung.
Country
Customer Care Center
BELGIUM
02 201 2418
CZECH REPUBLIC
844 000 844
DENMARK
38 322 887
FINLAND
09 693 79 554
FRANCE
08 25 08 65 65 (€ 0,15/Min)
GERMANY
01805 - 121213 (€ 0,12/Min)
HUNGARY
06 40 985 985
ITALIA
199 153 153
LUXEMBURG
02 261 03 710
NETHERLANDS
0900 20 200 88 (€ 0.10/Min)
NORWAY
231 627 22
POLAND
0 801 801 881
PORTUGAL
80 8 200 128
RUSSIA
8-800-200-0400
SLOVAKIA
0850 123 989
SPAIN
902 10 11 30
SWEDEN
08 585 367 87
U.K
0870 242 0303
UKRAINE
8-800-502-0000
Web Site
www.samsung.com/be
www.samsung.com/cz
www.samsung.com/dk
www.samsung.com/fi
www.samsung.com/fr
www.samsung.de
www.samsung.com/hu
www.samsung.com/it
www.samsung.lu
www.samsung.com/nl
www.samsung.com/no
www.samsung.com/pl
www.samsung.com/pt
www.samsung.ru
www.samsung.com/sk
www.samsung.com/es
www.samsung.com/se
www.samsung.com/uk
www.samsung.com/ur
BN68-01090G-00
Owner's Instructions
Before operating the unit,
please read this manual thoroughly,
and retain it for future reference.
ON-SCREEN MENUS
PC DISPLAY
PICTURE IN PICTURE (PIP)
TELETEXT
Register your product at www.samsung.com/global/register
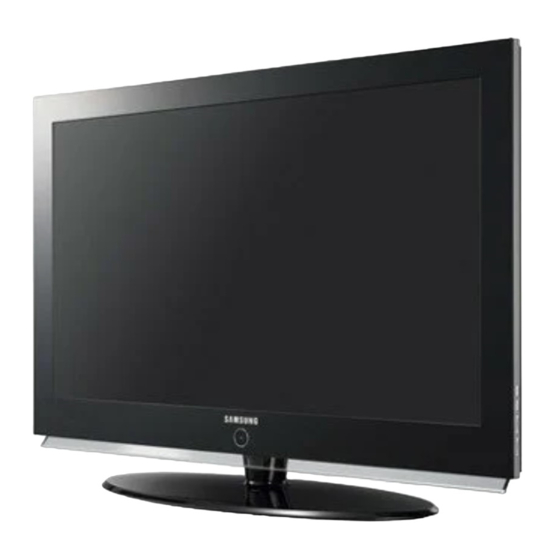
LCD TV
LE40M7
LE32M7

Werbung

Inhaltsverzeichnis
loading

Inhaltszusammenfassung für Samsung LE40M7

  • Seite 1 If you have any questions or comments relating to Samsung products, please contact the SAMSUNG customer care centre. Comment contacter Samsung dans le monde Si vous avez des suggestions ou des questions concernant les produits Samsung, veuillez contacter le Service Consommateurs Samsung. Kontakt zu Samsung Falls Sie Fragen oder Anregungen zu Samsung-Produkten haben, wenden Sie sich bitte an den Samsung-Kundendienst.
  • Seite 2 La visualizzazione prolungata di immagini fisse da videogiochi e PC può causare la visualizzazione di immagini residue parziali. Per evitare questo problema, ridurre la ‘luminosità’ e il ‘contrasto’ mentre si visualizzano immagini fisse. © 2006 Samsung Electronics Co., Ltd. All rights reserved.
  • Seite 3: Inhaltsverzeichnis

    Contents CONNECTING AND PREPARING YOUR TV SETTING THE OTHERS List of Parts..................2 Choosing Your Language ............22 Installing the Wall Mount Kit ..........2 Using Game Mode ..............22 Viewing the Control Panel ............3 Setting the Blue Screen Mode / Viewing the Connection Panel ..........
  • Seite 4: List Of Parts

    Wall Mount items. Contact a technician for assistance when installing the wall mounted bracket. Samsung Electronics is not responsible for any damage to the product or injury to yourself or others if you elect to install the TV on your own.
  • Seite 5: Viewing The Control Panel

    Viewing the Control Panel The product colour and shape may vary depending on the model. SOURCE Toggles between all the available input Press to change channels. sources (TV, Ext.1, Ext.2, AV, S-Video, Component, PC, In the on-screen menu, use the buttons HDMI1, HDMI2).
  • Seite 6: Viewing The Connection Panel

    Viewing the Connection Panel [Rear Panel Jacks] [Side Panel Jacks] Power Input Whenever you connect an external device to your TV, make sure that power on the unit is turned off. When connecting an external device, match the colour of the connection terminal to the cable. English-4...
  • Seite 7 Connecting an Aerial or Cable Television Network To view television channels correctly, a signal must be received by the set from one of the following sources: - An outdoor aerial / A cable television network / A satellite network Connecting HDMI/DVI - Supports connections between HDMI-connection-enabled AV devices (Set-Top Boxes, DVD players, AV receivers and digital TVs).
  • Seite 8: Viewing The Remote Control

    Viewing the Remote Control Selects a target device to be Previous channel controlled by the Samsung remote Automatic Power-off control (TV, DVD, STB, CABLE, VCR) This function enables you to load saved (Refer to page 37~41) photo (JPEG) and audio files (MP3) Television Standby button and to view or play them on the TV.
  • Seite 9: Switching On And Off

    Switching On and Off The mains lead is attached to the rear of your set. Plug the mains lead into an appropriate socket. The standby indicator lights up on the front of the set. Press the button on the front of the set. You also can press the POWER button or the TV button on the remote control to turn the TV on.
  • Seite 10: Storing Channels Automatically

    If you want to reset this feature... Press the MENU button to display the menu. Press the button to select “Setup”, then press the ENTER button. Press the ENTER button again, to select “Plug & Play”. The message to “Start Plug & Play” is displayed. - Storing Channels Automatically - Storing Channels Manually Storing Channels Automatically...
  • Seite 11: Setting The Channel Manager

    Press the button to select “Colour System”, then press the ENTER button. Select the colour standard required by pressing the button then, press the ENTER button. Press the button to select “Sound System”, then press the ENTER button. Select the sound standard required by pressing the button, then press the ENTER button.
  • Seite 12: Activating The Child Lock

    Activating the Child Lock This feature allows you to prevent unauthorized users, such as children, from watching unsuitable programmes by muting out video and audio. Child Lock can- not be released using the buttons on the side. Only the remote control can release the Child Lock setting, so keep the remote control away from children.
  • Seite 13: Assigning Channels Names

    Assigning Channels Names Channel names will be assigned automatically when channel information is broadcast. These names can be changed, allowing you to assign new names. Press the MENU button to display the menu. Press the button to select “Channel”, then press the ENTER button. Press the button to select “Name”, then press the ENTER button.
  • Seite 14: Using The Lna (Low Noise Amplifier) Feature

    Using the LNA (Low Noise Amplifier) Feature This function is very useful in the situation that the TV is used in a weak signal area. LNA amplifies the TV signal in the weak signal area, a low-noise preamplifier boosts the incoming signal. Press the MENU button to display the menu.
  • Seite 15: Changing The Colour Tone

    Changing the Colour Tone You can select the most comfortable colour tone to your eyes. To select the desired picture effect, follow the “Changing the Picture Standard” instructions number 1 to 4 on page 12. Press the button to select “Colour Tone”, then press the ENTER button. Press the button to select the desired colour tone setting.
  • Seite 16: Resetting The Picture Settings To The Factory Defaults

    Resetting the Picture Settings to the Factory Defaults You can return to the factory defaults picture settings. To select the desired picture effect, follow the “Changing the Picture Standard” instructions number 1 to 4 on page 12. Press the button to select “Reset”, then press the ENTER button. Press the EXIT button to exit.
  • Seite 17: Freezing The Current Picture

    Press the EXIT button to exit. DNIe Demo (Digital Natural Image engine) Samsung’s new technology brings you more detailed images with contrast and white enhancement. A new image compensation algorithm gives viewers brighter and clearer images. DNIe technology will match every signal to your eyes.
  • Seite 18: Changing The Colour Space

    Changing the Colour Space Colour space is a colour matrix composed of red, green, and blue colours. Select your favorite colour space and experience the world of natural colour. Press the MENU button to display the menu. Press the button to select “Picture”, then press the ENTER button.
  • Seite 19: Viewing The Picture In Picture (Pip)

    Viewing the Picture In Picture (PIP) You can display a sub picture within the main picture of set programme or video input. In this way, you can watch the picture of set pro- gramme or video input from any connected equipment while watching the main picture.
  • Seite 20: Changing The Sound Standard

    Changing the Sound Standard You can select the type of the special sound effect to be used when watching a given broadcast. Press the MENU button to display the menu. Press the button to select “Sound”, then press the ENTER button. Press the ENTER button again, to select “Mode”.
  • Seite 21: Adjusting The Volume Automatically

    Adjusting the Volume Automatically Each broadcasting station has its own signal conditions, and so it is not easy for you to adjust the volume every time the channel is changed. This feature allows you to automatically adjust the volume of the desired channel by lowering the sound output when the modulation signal is high or by raising the sound output when the modulation signal is low.
  • Seite 22: Resetting The Sound Settings To The Factory Defaults

    Resetting the Sound Settings to the Factory Defaults If Game Mode is On, the Reset Sound function is activated. Selecting the Reset function after setting the equalizer resets the equalizer setting to the factory defaults. Press the MENU button to display the menu. Press the button to select “Sound”, then press the ENTER button.
  • Seite 23: Setting The Sleep Timer

    Setting the Sleep Timer You can select a time period of between 30 and 180 minutes after which the televi- sion automatically switches to standby mode. Press the MENU button to display the menu. Press the button to select “Setup”, then press the ENTER button. Press the button to select “Time”, then press the ENTER button.
  • Seite 24: Choosing Your Language

    Choosing Your Language When you start using your set for the first time, you must select the language which will be used for displaying menus and indications. Press the MENU button to display the on-screen menu. Press the button to select “Setup”, then press the ENTER button. Press the button to select “Language”, then press the ENTER button.
  • Seite 25: Setting The Blue Screen Mode / Selecting The Melody

    Setting the Blue Screen Mode / Selecting the Melody Blue Screen: If no signal is being received or the signal is very weak, a blue screen automatically replaces the noisy picture background. If you wish to continue viewing the poor pic- ture, you must set the "Blue Screen"...
  • Seite 26: Selecting The Source

    Selecting the Source You can select among external sources connected to your TV’s input jacks. Press the MENU button to display the menu. Press the ENTER button, to select “Input”. Press the ENTER button again, to select “Source List”. When no external device is connected to your set, only “TV”, “Ext.1”, “Ext.2” are activated in the “Source List”.
  • Seite 27: Using The Wiselink Function

    Using the WISELINK Function You can view stored photos (JPEG files) or play music files (MP3) using a memory card or USB storage media. The "Photo" menu supports image files in the JPEG format only. The "Music" menu supports sound files in the MP3 format only. Compact Flash (CF) / Micro Driver (MD) / MAGICSTOR Secure Digital Card (SD Card) / Smart Media Card (SM) / Multimedia Card (MMC) / Memory Stick / MSPRO / XD...
  • Seite 28: Using The Wiselink Menu

    Using the WISELINK Menu This menu shows JPEG and MP3 files and folders saved on a memory card. Press the MENU button to display the menu. Press the ENTER button, to select “Input”. Press the button to select “WISELINK”, then press the ENTER button. If the "Insert memory cards."...
  • Seite 29 Using the Options Menu "Slide Show": Starts a slide show. (Refer to “Selecting a Photo and Slide Show” on page 28) "Rotate": You can rotate images in full screen mode. Images are rotated in the order of 90°, 180°, 270° and 0° (original state). (Refer to “Rotating”...
  • Seite 30: Viewing Photo File Information

    Viewing Photo File Information When selecting a photo file, the photo file information is displayed on the left in the TV screen, such as the resolution, the date modified and the order of the file in the current directory. Such as the resolution File size Date modified Order of the file in the current directory...
  • Seite 31: Rotating

    "Background Music Setting": The saved file information is displayed as folder or MP3 file. Select the "Background Music Settings" and press the ENTER button. Navigate to the folder that contains the MP3 files to use as the background music. Select an MP3 file and press ENTER button. The selected file is displayed in yellow.
  • Seite 32: Zooming-In

    Zooming-in Displays a 2x, 3x or 4x zoomed-in image in full screen mode. Complete Steps 1 to 4 of "Using the WISELINK Menu". (Refer to page 26) Press the button to select “Photo”, then press the ENTER button. The saved file information is displayed as a folder or file. Press the buttons to select a file, then press the ENTER button.
  • Seite 33: Copying Image Files

    Copying Image Files You can copy image files to a different memory card. Complete Steps 1 to 4 of "Using the WISELINK Menu". (Refer to page 26) Press the button to select “Photo”, then press the ENTER button. The saved file information is displayed as a folder or file. Press the buttons to select a file, then press the ENTER button.
  • Seite 34: Printing A Photo

    Printing a Photo You can print image files directly with your printer. Complete Steps 1 to 4 of "Using the WISELINK Menu". (Refer to page 26) Press the button to select “Photo”, then press the ENTER button. The saved file information is displayed as a folder or file. Press the buttons to select a file, then press the ENTER button.
  • Seite 35: Copying Music Files

    Music function information Current OSD Function (Music) Play/Pause When pressing the PLAY/PAUSE button on the remote control while music is playing. (Music) Stop When pressing the STOP button on the remote control when music is stopped. Copying Music Files You can copy music files to a different memory card. Complete Steps 1 to 4 of "Using the WISELINK Menu".
  • Seite 36: Using The Setup Menu

    Using the Setup Menu Setup displays the user settings of the WISELINK menu. Complete Steps 1 to 4 of "Using the WISELINK Menu". (Refer to page 26) Press the button to select “Setup”, then press the ENTER button. The saved file information is displayed as a folder or file. Press the button to select an item you want, then press the ENTER button.
  • Seite 37: Teletext Decoder

    Teletext Decoder Most set channels carry “ Teletext ”, pages of written information that provide information such as: Television programme times. News bulletins and Weather forecasts. Sports results. Subtitles for the hard of hearing. The Teletext pages are organized according to six categories: Part Contents Selected page number.
  • Seite 38: Selecting A Specific Teletext Page

    Selecting a Specific Teletext Page Press the number buttons on the remote control to enter the page number directly: Enter the three-digit page number listed in the contents by pressing the corresponding numeric buttons. If the selected page is linked with several secondary pages, the secondary pages are displayed in sequence.
  • Seite 39: Setting Up Your Remote Control

    Setting Up Your Remote Control After it has been set up properly, your remote control can operate in five different modes: TV, DVD, Cable, Set-Top Box, VCR. Pressing the corresponding button on the remote control allows you to switch between these modes, and control whichever piece of equipment you choose.
  • Seite 40 Setting Up the Remote to Operate Your DVD Turn off your DVD. Press the DVD button on your TV’s remote control. Press the SET button on your TV’s remote control. Using the number buttons on your remote control, enter three digits of the DVD code listed on page 40~41 of this manual for your brand of DVD.
  • Seite 41: Remote Control Codes

    Remote Control Codes Brand Code Brand Code SAMSUNG 000 001 002 003 004 005 077 078 079 MONTGOMERY WARD ADMIRAL 002 025 AIWA MULTITECH 002 005 025 038 AKAI 004 027 032 007 008 018 026 037 062 064 AUDIO DYNAMICS...
  • Seite 42 VIEWSTAR 019 021 023 028 PIONEER 004 018 020 044 WARNER AMEX 014 022 040 ZENITH 017 029 035 037 045 REGAL SAMSUNG DVD Product Code Product Code 000 001 002 Home Theater VCR COMBO 014 015 016 DVDR 003 004...
  • Seite 43 032 063 SHARP YAMAKAWA 040 073 SANSUI XWAVE SANYO 062 090 ZENITH 076 121 SHINSONIC SAMSUNG SET-TOP BOX Product Code Product Code Ground wave STB 001 002 Satellite STB HDD COMBO Premium Satellite STB CABLE STB HDD COMBO Standard CABLE STB...
  • Seite 44: Setting Up Your Pc Software (Based On Windows Xp)

    Windows and your particular video card. Even if your actual screens look different, the same, basic set-up information will apply in almost all cases. (If not, contact your computer manu- facturer or Samsung Dealer.) First, click on “Control Panel” on the Windows start menu.
  • Seite 45: Setting The Pc

    Setting the PC Coarse and Fine Tuning of the Image (Image Lock): The purpose of picture quality adjustment is to remove or reduce picture noise. If the noise is not removed by Fine-tuning alone, then adjust the frequency as best as possible (coarse) and Fine-tune again. After the noise has been reduced, re-adjust the picture so that it is aligned on the center of screen.
  • Seite 46: Using The Anti-Theft Kensington Lock

    Using the Anti-Theft Kensington Lock The Kensington lock is a device used to physically fix the system when using it in a public place. The locking device has to be purchased separately. The appearance and locking method may differ from the illustration depending on the manufacturer.
  • Seite 47: Technical And Environmental Specifications

    Technical and Environmental Specifications LE32M7 LE40M7 Model Name 32 inch 40 inch Screen Size (Diagonal) AC 220-240 V, 50 Hz AC 220-240 V, 50 Hz Power Supply 155 W 210 W Power Consumption PC Resolution 1360 x 768 @ 60 Hz...
  • Seite 48 Table des matières CONNEXION ET PREPARATION DE VOTRE TELEVISEUR REGLAGE DES AUTRES OPTIONS Liste de pièces ................2 Choix de la langue ..............22 Installation du kit de montage mural........2 Utilisation du Mode Jeu ............22 Présentation du panneau de commande ......3 Réglage du mode d’écran bleu / Présentation du panneau de branchement ......
  • Seite 49: Liste De Pièces

    Faites appel à un technicien pour obtenir de l’assistance lors de l’installation du support mural. Samsung Electronics n’est pas responsable de tout dommage au produit ou toute blessure sur vous-même ou une autre personne si vous choisissez d’installer le téléviseur vous-même.
  • Seite 50: Présentation Du Panneau De Commande

    Présentation du panneau de commande La couleur et la forme du produit peuvent varier en fonction du modèle. SOURCE Bascule entre toutes les sources d’entrée Pour changer de canal. disponibles. (TV, Ext.1, Ext.2, AV, S-Vidéo, Composant, Dans le menu à l’écran, utilisez les boutons PC, HDMI1, HDMI2).
  • Seite 51: Présentation Du Panneau De Branchement

    Présentation du panneau de branchement [Prises du panneau arrière] [Prises du panneau latéral] Entrée de l’alimentation Lorsque vous raccordez un appareil externe au téléviseur, assurez-vous que l’appareil est arrêté. Lorsque vous connectez un périphérique externe, faites correspondre les couleurs du terminal de connexion et du câble. Français-4...
  • Seite 52 Branchement à un réseau de télévision câblé ou hertzien Afin d’afficher correctement les canaux de télévision, un signal doit être reçu par le téléviseur/moniteur depuis l’une des sources suivantes: - Une antenne extérieure / Un réseau de télévision câblée / Un réseau satellite Branchement HDMI/DVI - Prend en charge les connexions entre des périphériques audio/vidéo compatibles HDMI (boîtiers déCodeurs, lecteurs DVD, récepteurs AV et moniteurs).
  • Seite 53: Présentation De La Télécommande

    Présentation de la télécommande Sélectionne un dispositif cible qui sera Arrêt automatique commandé par la télécommande Samsung (TV, Cette fonction vous permet de charger des DVD, STB, CABLE, VCR) photos (JPEG) et des fichiers audio (MP3) (voir page 37~41) enregistrés, puis de les afficher sur le Bouton veille du téléviseur...
  • Seite 54: Mise En Marche Et Arrêt

    Mise en marche et arrêt Le câble relié au secteur est fixé à l’arrière du téléviseur/moniteur. Relier le câble principal à la prise appropriée. L’indicateur de veille situé à l’avant du téléviseur s’allume. Appuyez sur le bouton à l’avant du téléviseur. POWER Vous pouvez également appuyer sur le bouton ou le bouton TV...
  • Seite 55: Mémorisation Automatique Des Chaînes

    Pour réinitialiser cette fonction… Appuyez sur le bouton MENU pour afficher le menu. Appuyez sur le bouton pour sélectionner "Configuration”, puis sur la touche ENTER. Appuyez de nouveau sur le bouton ENTER pour sélectionner "Plug & Play”. Le message "Démarrer Plug & Play" s’affiche. - Mémorisation automatique des chaînes - Mémorisation manuelle des chaînes Mémorisation automatique des chaînes...
  • Seite 56: Réglage De Gestionnaire De Chaînes

    Appuyez sur le bouton pour sélectionner "Système Sonore”, puis sur la touche ENTER. Sélectionnez la norme audio voulue en appuyant de façon répétée sur la touche ou , puis sur la touche ENTER. S’il n’y a aucun son ou si le son est anormal, re-sélectionnez la norme Son requise. Si vous connaissez le numéro de la chaîne à...
  • Seite 57: Activation Du Verrouillage Parental

    Activation du verrouillage parental Cette fonction vous permet d’empêcher que des utilisateurs non autorisés, tels que des enfants, regardent des programmes inappropriés en désactivant la vidéo et l’audio. Le verrouillage parental ne peut pas être désactivée à l’aide des boutons du panneau latéral.
  • Seite 58: Attribution De Noms Aux Canaux

    Attribution de noms aux canaux Les noms de chaînes sont attribués automatiquement lorsque les informations des chaînes sont émises. Ces noms peuvent être changés, vous autorisant à attribuer de nouveaux noms. Appuyez sur le bouton MENU pour afficher le menu. Appuyez sur le bouton pour sélectionner "Canal”, puis sur la touche ENTER.
  • Seite 59: Utilisation De La Fonction Lna (Amplificateur À Faible Bruit)

    Utilisation de la fonction LNA (Amplificateur à faible bruit) Cette fonction se révèle particulièrement utile si le signal TV est faible. La fonction LNA (amplificateur à faible bruit) amplifie le signal TV dans une zone où il est faible. Un préam- plificateur à...
  • Seite 60: Changement De La Nuance De Couleur

    Changement de la nuance de couleur Vous pouvez sélectionner la nuance de couleur qui vous convient le mieux. Pour sélectionner l’effet visuel souhaité, observez les instructions 1 à 3 dans la section "Modification de l’image standard” à la page 12. Appuyez sur le bouton pour sélectionner "Nuance Coul.
  • Seite 61: Rétablir Les Paramètres De Réglage De L'image D'usine

    Rétablir les paramètres de réglage de l’image d’usine. Vous pouvez rétablir les réglages de l’image définis par défaut en usine. Pour sélectionner l’effet visuel souhaité, observez les instructions 1 à 3 dans la section "Modification de l’image standard” à la page 12. Appuyez sur le bouton pour sélectionner "Réinitialiser”, puis sur la touche ENTER.
  • Seite 62: Sélection Du Format De L'image

    Appuyez sur le bouton EXIT pour quitter le menu. DNle Démo (Digital Natural Image engine) La nouvelle technologie de Samsung vous apporte des images plus détaillées avec une amélioration des contrastes et des blancs. Le nouvel algorithme de compensation d’images vous donne une image plus lumineuse et plus claire.
  • Seite 63: Modification De L'espace Couleur

    Modification de l’espace couleur L’espace couleur est une matrice de couleurs composée de rouge, de vert et de bleu. Sélectionnez votre espace couleur préféré et appréciez le monde de la couleur naturelle. Appuyez sur le bouton MENU pour afficher le menu. Appuyez sur le bouton pour sélectionner "Image”, puis sur la touche ENTER.
  • Seite 64: Affichage De L'image Dans L'image (Pip)

    Affichage de l’Image dans l’image (PIP) Vous pouvez afficher une image secondaire dans l’image principale du pro- gramme télévisé ou de l’entrée vidéo. De cette manière, vous pouvez regarder le programme télévisé ou l’entrée vidéo depuis n’importe quel équipement branché tout en regardant l’image principale.
  • Seite 65: Changement De La Norme Son

    Changement de la norme Son Vous pouvez sélectionner le type d’effet sonore souhaité lorsque vous regardez un programme donné. Appuyez sur le bouton MENU pour afficher le menu. Appuyez sur le bouton pour sélectionner "Son”, puis sur la touche ENTER. Appuyez de nouveau sur le bouton ENTER pour sélectionner "Mode”.
  • Seite 66: Réglage Automatique Du Volume

    Réglage automatique du volume Chaque station de radiodiffusion possède ses propres conditions d’émission de signal. Il vous faut alors régler le volume à chaque fois que vous changez de chaîne. Cette fonction vous permet de régler automatiquement le volume de la chaîne désirée en réduisant la puissance sonore lorsque le signal de modulation est élevé...
  • Seite 67: Rétablir Les Paramètres De Son Par Défaut

    Rétablir les paramètres de son par défaut Si le mode Jeu est activé, la fonction Réinitialiser le son est disponible. Sélectionner la fonction Réinitialiser après avoir réglé l’égaliseur rétablit ses paramètres par défaut. Appuyez sur le bouton MENU pour afficher le menu. Appuyez sur le bouton pour sélectionner "Son”, puis sur la touche ENTER.
  • Seite 68: Réglage De La Minuterie De Mise En Veille

    Réglage de la minuterie de mise en veille Vous pouvez sélectionner une durée comprise entre 30 et 180 minutes à l’issue de laquelle le téléviseur passera automatiquement en mode veille. Appuyez sur le bouton MENU pour afficher le menu. Appuyez sur le bouton pour sélectionner "Configuration”, puis sur la touche ENTER.
  • Seite 69: Choix De La Langue

    Choix de la langue Lorsque vous utilisez le téléviseur pour la première fois, vous devez sélectionner la langue utilisée pour afficher les menus et les indications. Appuyez sur le bouton MENU pour afficher le menu affiché à l’écran. Appuyez sur le bouton pour sélectionner "Configuration”, puis sur la touche ENTER.
  • Seite 70: Réglage Du Mode D'écran Bleu / Sélection De Mélodie

    Réglage du mode d’écran bleu / Sélection de mélodie Ecran Bleu: Si aucun signal n’est reçu ou si le signal est très faible, un écran bleu remplace automa- tiquement l’arrière-plan de l’image parasité. Pour continuer malgré tout à afficher l’image de mauvaise qualité, vous devez "Arrêt”...
  • Seite 71: Sélection De La Source

    Sélection de la source Vous pouvez sélectionner l’une des sources externes connectées aux prises d’entrée de votre téléviseur. Appuyez sur le bouton MENU pour afficher le menu. Appuyez sur le bouton ENTER pour sélectionner "Entrée”. Appuyez de nouveau sur le bouton ENTER pour sélectionner "Liste Source”. Quand aucun périphérique externe n’est relié...
  • Seite 72: Utilisation De La Fonction Wiselink

    Utilisation de la fonction WISELINK Vous pouvez afficher des photos (fichiers JPEG) ou lire des fichiers audio (MP3) à l’aide d’une carte mémoire ou d’un périphérique de stockage USB. Le menu " Photo" prend en charge les fichiers images au format JPEG uniquement. Le menu "...
  • Seite 73: Utilisation Du Menu Wiselink

    Utilisation du menu WISELINK Ce menu présente les fichiers JPEG et MP3 ainsi que les dossiers enregistrés sur une carte mémoire. Appuyez sur le bouton MENU pour afficher le menu. Appuyez sur le bouton ENTER, pour sélectionner "Entrée". Appuyez sur le bouton pour sélectionner "...
  • Seite 74 Utilisation du menu Options "Diaporama": Lance un diaporama. (reportez-vous à la section "Sélection d’une photo et d’un diaporama", page 28). "Rotat." : Vous pouvez faire pivoter les images lorsque vous êtes en mode Plein écran. Les images peuvent pivoter de 90°, 180°, 270° et 0° (sens d’origine) (reportez-vous à...
  • Seite 75: Affichage Des Informations D'un Fichier Photo

    Affichage des informations d’un fichier photo Lorsque vous sélectionnez un fichier photo, les informations le concernant s’affichent à gauche de l’écran du téléviseur, notamment la résolution, la date de modification et l’ordre du fichier dans le répertoire courant. Résolution Taille du fichier Date de modification Ordre du fichier dans le répertoire courant Sélection d’une photo et d’un diaporama...
  • Seite 76: Rotation

    "Paramètres du fond musical" : Les informations relatives au fichier enregistré s’affichent sous forme de dossier ou de fichier MP3. Sélectionnez "Paramètres du fond musical" et appuyez sur le bouton ENTER. Naviguez jusqu’au dossier contenant les fichiers MP3 à utiliser comme fond musical. Sélectionnez le fichier MP3 souhaité...
  • Seite 77: Zoom Avant

    Zoom avant Affiche en plein écran la photo agrandie par un zoom X2x, 3x ou 4x. Observez les étapes 1 à 4 de la procédure "Utilisation du menu WISELINK". (voir page 26). Appuyez sur le bouton pour sélectionner "Photo", puis appuyez sur le bouton ENTER. Les informations relatives au fichier enregistré...
  • Seite 78: Copie De Fichiers Images

    Copie de fichiers images Vous pouvez copier des fichiers images sur une carte mémoire différente Observez les étapes 1 à 4 de la procédure "Utilisation du menu WISELINK ". (voir page 26). Appuyez sur le bouton pour sélectionner "Photo", puis appuyez sur le bouton ENTER. Les informations relatives au fichier enregistré...
  • Seite 79: Impression D'une Photo

    Impression d’une photo Vous pouvez imprimer des fichiers images directement sur votre imprimante. Observez les étapes 1 à 4 de la procédure "Utilisation du menu WISELINK ". (voir page 26). Appuyez sur le bouton pour sélectionner " Photo ", puis appuyez sur le bouton ENTER. Les informations relatives au fichier enregistré...
  • Seite 80: Copie De Fichiers Audio

    Informations sur la fonction Musique OSD courant Fonction Lorsque vous appuyez sur le bouton (Musique) PLAY/PAUSE de la télécommande, pendant Lecture/Pause la lecture Lorsque vous appuyez sur le bouton (Musique) Stop STOP de la télécommande, lorsque la lecture est interrompue Copie de fichiers audio Vous pouvez copier des fichiers audio sur une carte mémoire différente.
  • Seite 81: Utilisation Du Menu De Configuration (Setup)

    Utilisation du menu de configuration (Setup) Ce menu affiche les paramètres utilisateur pour le menu WISELINK. Observez les étapes 1 à 4 de la procédure "Utilisation du menu WISELINK ". (voir page 26). Appuyez sur le bouton pour sélectionner "Setup", puis appuyez sur le bouton ENTER.
  • Seite 82: Décodeur Télétexte

    DéCodeur télétexte La plupart des chaînes du téléviseur possèdent des pages "télétexte” fournissant des informations telles que : Les horaires des programmes télévisés. Bulletins d’informations et prévisions météo. Des résultats sportifs. Des sous-titres pour les malentendants. Les pages télétextes sont organisées en six catégories Part Table des matières Numéro de la page sélectionnée.
  • Seite 83: Sélection D'une Page Télétexte Spécifique

    Sélection d’une page télétexte spécifique Appuyez sur les touches numériques de la télécommande pour entrer directe- ment le numéro de page : Entrez le numéro de page à trois chiffres figurant dans la table des matières en appuyant sur les boutons numériques correspondants. Si la page sélectionnée est liée à...
  • Seite 84: Programmation De La Télécommande

    Programmation de la télécommande Une fois configurée, votre télécommande peut fonctionner dans cinq modes différents : Téléviseur, Magnétoscope, Câble, Lecteur DVD ou DéCodeur. Une pression sur le bouton correspondant de la télécommande vous permet de basculer entre ces différents modes et de contrôler l’appareil de votre choix. La télécommande peut ne pas être compatible avec tous les lecteurs DVD, magnétoscopes, boîtes de jonction et déCodeurs.
  • Seite 85 Configuration de la télécommande pour faire fonctionner votre lecteur DVD Éteignez votre lecteur DVD. Appuyez sur la touche DVD de la télé-commande du téléviseur. Appuyez sur la touche SET de la télé-commande du téléviseur. Appuyez sur les touches numériques de votre télécommande qui correspondent aux trois chiffres du Code du lecteur DVD dont les marques sont répertoriées à...
  • Seite 86: Codes De La Télécommande

    Codes de la télécommande Magnétoscope Marque Code Marque Code SAMSUNG 000 001 002 003 004 005 077 078 079 MONTGOMERY WARD ADMIRAL 002 025 AIWA MULTITECH 002 005 025 038 AKAI 004 027 032 007 008 018 026 037 062 064...
  • Seite 87 VIEWSTAR 019 021 023 028 PIONEER 004 018 020 044 WARNER AMEX 014 022 040 ZENITH 017 029 035 037 045 REGAL SAMSUNG DVD Produit Code Produit Code 000 001 002 Home Theater VCR COMBO 014 015 016 DVDR 003 004...
  • Seite 88 032 063 SHARP YAMAKAWA 040 073 SANSUI XWAVE SANYO 062 090 ZENITH 076 121 SHINSONIC SAMSUNG déCodeur Produit Code Produit Code Ground wave STB 001 002 Satellite STB HDD COMBO Premium Satellite STB CABLE STB HDD COMBO Standard CABLE STB...
  • Seite 89: Paramétrage Du Logiciel Pc (Basé Sur Windows Xp)

    (Si ce n’est pas le cas, contactez le fabricant de votre ordinateur ou un revendeur Samsung.) Cliquez sur "Control Panel” dans le menu Démarrer de Windows.
  • Seite 90: Sélection Du Pc

    Sélection du PC Réglage de base et réglage fin de l’image (Verrouillage Image) : Le but du réglage de la qualité de l’image est d’éliminer ou de réduire le bruit parasite de l’image (défauts). Si le bruit parasite n’est pas éliminé en effectuant uniquement une syntonisation fine, réglez la fréquence du mieux que vous pouvez (approximative) puis effectuez à...
  • Seite 91: Utilisation Du Verrouillage Kensington Antivol

    Utilisation du verrouillage Kensington antivol Le verrou Kensington est un dispositif permettant de fixer le système lorsqu’il est utilisé dans un lieu public. Le dispositif de verrouillage doit être acheté séparément. Il se peut que l’apparence et la méthode de verrouillage soient différents de l’illustration en fonction du fabricant. Veuillez vous reporter au manuel fourni avec le verrou Kensington pour une utilisation adéquate.
  • Seite 92: Spécifications Techniques Et Environnementales

    Spécifications techniques et environnementales LE32M7 LE40M7 Modèle 32 pouces 40 pouces Taille de l’écran (diagonale) AC 220-240 V, 50 Hz AC 220-240 V, 50 Hz Alimentation 155 W 210 W Consommation 1360 x 768 @ 60 Hz 1360 x 768 @ 60 Hz PC Résolution...
  • Seite 93 Inhalt ANSCHLIESSEN UND VORBEREITEN DES VORNEHMEN SONSTIGER EINSTELLUNGEN FERNSEHGERÄTS Sprache der Bedienerführung wählen ......22 Lieferumfang ................... 2 Spielemodus verwenden ............22 Wandhalterung anbringen ........... 2 Anzeigen eines blauen Bildschirms / Bedienfeld ..................3 Melodie wählen ............... 23 Anschlussfeld .................. 4 Verwenden der Energiesparfunktion .......
  • Seite 94: Lieferumfang

    Sie in den Anweisungen, die im Lieferumfang der Wandhalterung enthalten sind. Lassen Sie sich beim Anbringen der Wandmontagehalterung von einem Techniker helfen. Samsung Electronics haftet nicht für Schäden an Gerät oder Personen, wenn die Montage vom Kunden selbst durchgeführt wird.
  • Seite 95: Bedienfeld

    Bedienfeld Die Produktfarbe und -form kann je nach Modell unterschiedlich sein. SOURCE Kanäle wechseln. Schaltet zwischen allen verfügbaren Signalquellen um. Im Bildschirmmenü können Sie die Tasten (TV, Ext.1, Ext.2, AV, S-Video, Komp., PC, HDMI1, HDMI2). die Tasten auf der Fernbedienung Im Bildschirmmenü...
  • Seite 96: Anschlussfeld

    Anschlussfeld [Buchsen an der [Buchsen an der Seitenverkleidung] Rückseite] Netzkabelbuchse Wenn Sie ein externes Gerät an das Fernsehgerät anschließen möchten, muss das Gerät unbedingt ausgeschaltet sein. Achten Sie beim Anschließen von Kabeln an die Ausgänge des Geräts darauf, das die Kabel den entsprechenden farbcodierten Anschlüssen zugeordnet werden.
  • Seite 97 An der Antenne oder am Kabelfernsehnetz anschließen Damit die Fernsehkanäle korrekt empfangen werden, muss der Monitor an eine der folgenden Signalquellen angeschlossen sein: - Terrestrische Antenne / Kabelfernsehanschluss / Satellitenempfänger Anschließen von HDMI/DVI-Schnittstellen - Unterstützt Verbindungen zwischen AV-Geräten (Settopboxen, DVD-Playern, AVReceivern und Digital-TV-Geräten), die für HDMI-Schnittstellen geeignet sind.
  • Seite 98: Fernbedienung

    Fernbedienung Wählt ein Zielgerät aus, das mit der Voriger Sender Samsung-Fernbedienung Sleep-Timer aktivieren/stellen (TV, DVD, STB, CABLE, VCR) gesteuert Mit dieser Funktion können Sie werden soll. (Informationen hierzu gespeicherte Photo- (JPEG) und finden Sie auf Seite 37~41.) Audiodateien (MP3) laden und sie auf dem Standby-Taste des Fernsehgeräts...
  • Seite 99: Ein-Und Ausschalten

    Ein-und Ausschalten Das Netzkabel ist auf der Rückseite des Geräts angeschlossen. Schließen Sie das Netzkabel an eine geeignete Netzsteckdose an. Die Standby-Anzeige auf der Vorderseite des Geräts leuchtet. Drücken Sie auf der Vorderseite des Geräts die Taste Zum Einschalten des Fernsehgeräts können Sie auch die Taste POWER oder die Taste TV auf der Fernbedienung drücken.
  • Seite 100: Kanäle Automatisch Speichern

    So setzen Sie diese Funktion zurück: Drücken Sie die Taste MENU, um das Menü anzuzeigen. Drücken Sie die Taste oder , um "Einstellungen" auszuwählen, und drücken Sie dann die Taste ENTER. Drücken Sie die Taste ENTER erneut, um "Plug & Play" auszuwählen. Die Meldung zum "Starten von Plug &...
  • Seite 101: Programmverwaltung

    Drücken Sie die Taste oder , um "Fernsehnorm" auszuwählen, und drücken Sie dann die Taste ENTER. Wählen Sie den erforderlichen Farbstandard aus, indem Sie wiederholt die Taste oder drücken und dann die Taste ENTER drücken. Drücken Sie die Taste oder um "Tonsystem"...
  • Seite 102: Aktivieren Der Kindersicherung

    Aktivieren der Kindersicherung Mit dieser Funktion können Sie nicht autorisierte Benutzer, z. B. Kinder, daran hindern, ungeeignete Programme anzuschauen, indem das Bild blockiert und der Ton stummge- schaltet wird. Die Kindersicherung kann nicht über die Tasten an der Seite aufgehoben werden. Sie kann nur über die Fernbedienung deaktiviert werden.
  • Seite 103: Kanalnamen Zuweisen

    Kanalnamen zuweisen Kanalnamen werden automatisch zugewiesen, sofern Kanalinformationen ausgestrahlt werden. Diese Namen können geändert werden, so dass Sie neue Namen vergeben können. Drücken Sie die Taste MENU, um das Menü anzuzeigen. Drücken Sie die Taste oder , um "Kanal" auszuwählen, und drücken Sie dann die Taste ENTER. Drücken Sie die Taste oder , um "Name"...
  • Seite 104: Lna-Funktion (Rauscharmer Verstärker) Benutzen

    LNA-Funktion (Rauscharmer Verstärker) benutzen Diese Funktion ist bei schlechtem Empfang sehr nützlich. Die LNA-Funktion verstärkt in Gebieten mit schwachem Empfang das TV-Signal, und ein rauscharmer Vorverstärker verstärkt das Eingangssignal. Drücken Sie die Taste MENU, um das Menü anzuzeigen. Drücken Sie die Taste oder , um "Kanal"...
  • Seite 105: Farbwert Ändern

    Farbwert ändern Sie können den für Ihre Augen angenehmsten Farbton auswählen. Um den gewünschten Bildeffekt zu erzielen, befolgen Sie die Anweisungen 1 bis 3 unter "Bildstandard ändern" auf Seite 12. Drücken Sie die Taste oder , um "Farbtemp. " auszuwählen, un drücken Sie dann die Taste ENTER.
  • Seite 106: Zurücksetzen Der Bildeinstellungen Auf Die Werkseitig Festgelegten Standardwerte

    Zurücksetzen der Bildeinstellungen auf die werkseitig festgelegten Standardwerte Sie können die Einstellungen auf die werkseitig festgelegten Standardbildeinstellungen zurücksetzen. Um den gewünschten Bildeffekt zu erzielen, befolgen Sie die Anweisungen 1 bis 3 unter "Bildstandard ändern" auf Seite 12. Drücken Sie die Taste oder , um "Reset"...
  • Seite 107: Aktuelles Bild Einfrieren

    Zum Beenden drücken Sie die Taste EXIT. DNIe Demo (Digital Natural Image engine) Die neue Technologie von Samsung garantiert kontrastreiche, detailgetreuere Bilder mit verbesserter Weißdarstellung. Der neue Bildausgleichsalgorithmus sorgt für ein helleres, klareres Bild. Wenn Sie den DNIe Demomodus auf "Ein" stellen, können Sie sich von der Optimierung der Bildwiedergabe durch DNIe überzeugen.
  • Seite 108: Farbraum Einstellen

    Farbraum einstellen Der Farbraum ist eine Farbmatrix bestehend aus den Farben rot, grün und blau. Wählen Sie Ihren bevorzugten Farbraum, um die Welt der natürlichen Farben zu erfahren. Drücken Sie die Taste MENU, um das Menü anzuzeigen. Drücken Sie die Taste oder um "Bild"...
  • Seite 109: Bild-In-Bild-Funktion Verwenden (Pip)

    Bild-in-Bild-Funktion verwenden (PIP) Sie können innerhalb des Hauptbildes (Fernsehsendung oder Video) ein Nebenbild ein- blenden. Dadurch können Sie gleichzeitig eine Fernsehsendung oder ein Video von einem beliebigen angeschlossenen Gerät im Auge behalten. Drücken Sie die Taste MENU, um das Menü anzuzeigen. Drücken Sie die Taste oder um "Bild"...
  • Seite 110: Tonwiedergabestandard Ändern

    Tonwiedergabestandard ändern Sie können spezielle Toneffekte auswählen, die wiedergegeben werden, wenn Sie eine bestimmte Sendung sehen. Drücken Sie die Taste MENU, um das Menü anzuzeigen. Drücken Sie die Taste oder , um "Ton" auszuwählen, und drücken Sie dann die Taste ENTER. Drücken Sie die Taste ENTER erneut, um "Modus"...
  • Seite 111: Lautstärke Automatisch Einstellen

    Lautstärke automatisch einstellen Jeder Fernsehsender verfügt über seine eigenen Signalbedingungen, so dass es für Sie mitunter recht mühsam sein kann, beim Umschalten des Programms jedes Mal die Lautstärke nachzuregeln. Mit der Funktion für automatische Lautstärkeeinstellung wird die Lautstärke automatisch bei starkem Modulationssignal verringert und bei schwachem Modulationssignal erhöht.
  • Seite 112: Zurücksetzen Der Toneinstellungen Auf Die Werkseitig Festgelegten Standardwerte

    Zurücksetzen der Toneinstellungen auf die werkseitig festgelegten Standardwerte Im Spielemodus ist die Funktion zum Zurücksetzen der Audioeinstellungen aktiviert. Durch Auswählen der Reset-Funktion nach dem Einstellen des Equalizers wird die Equalizer-Einstellung auf die Werkseinstellungen zurückgesetzt. Drücken Sie die Taste MENU, um das Menü anzuzeigen. Drücken Sie die Taste oder , um "Ton"...
  • Seite 113: Stellen Der Einschlafschaltuhr

    Stellen der Einschlafschaltuhr Sie können ein Intervall zwischen 30 und 180 Minuten auswählen, nach dessen Ablauf der Fernseher automatisch in den Standby-Modus geschaltet wird. Drücken Sie die Taste MENU, um das Menü anzuzeigen. Drücken Sie die Taste oder , um "Einstellungen" auszuwählen, und drücken Sie dann die Taste ENTER.
  • Seite 114: Sprache Der Bedienerführung Wählen

    Sprache der Bedienerführung wählen Wenn Sie das Gerät das erste Mal verwenden, müssen Sie die Sprache auswählen, die für die Menüs und Hinweise verwendet wird. Drücken Sie die Taste MENU, um das Bildschirmmenü anzuzeigen. Drücken Sie die Taste oder , um "Einstellungen" auszuwählen, und drücken Sie dann die Taste ENTER.
  • Seite 115: Anzeigen Eines Blauen Bildschirms / Melodie Wählen

    Anzeigen eines blauen Bildschirms / Melodie wählen Blaues Bild: Wenn kein Signal empfangen wird oder das Signal sehr schwach ist, wird der rauschende Bildhintergrund automatisch durch ein blaues Bild ersetzt. Wenn Sie das schlechte Bild weiterhin anzeigen möchten, legen Sie den Modus "Blaues Bild" auf "Aus"...
  • Seite 116: Signalquelle Auswählen

    Signalquelle auswählen Sie können zwischen den an den Eingangsbuchsen des Fernsehgeräts angeschlossenen externen Quellen auswählen. Drücken Sie die Taste MENU, um das Menü anzuzeigen. Drücken Sie die Taste ENTER, um "Eingang" auszuwählen. Drücken Sie die Taste ENTER, um "Quellen" auszuwählen. Wenn keine externen Geräte mit dem TV-Gerät verbunden sind, werden unter "Quellen"...
  • Seite 117: Verwenden Der Wiselink-Funktion

    Verwenden der WISELINK-Funktion Mithilfe einer Speicherkarte oder von USB-Speichermedien können Sie gespeicherte Photos (JPEG-Dateien) anzeigen oder Musikdateien (MP3) abspielen. Das Photo-Menü unterstützt nur Bilddateien im JPEG-Format. Das Musik-Menü unterstützt nur Sounddateien im MP3-Format. Compact Flash (CF) / Micro Driver (MD) / MAGICSTOR Secure Digital Card (SD Card) / Smart Media Card (SM) / Multimedia Card (MMC) / Memory Stick / MSPRO / XD USB-Massenspeicher...
  • Seite 118: Verwenden Des Wiselink-Menüs

    Verwenden des WISELINK-Menüs Dieses Menü zeigt auf einer Speicherkarte gespeicherte JPEG- und MP3- Dateien und Ordner an. Drücken Sie die Taste MENU, um das Menü anzuzeigen. Drücken Sie die Taste ENTER, um “Eingang” auszuwählen. Drücken Sie die Taste oder , um „WISELINK“ auszuwählen, und drücken Sie dann ENTER.
  • Seite 119: Kopieren", "Kopie Aller Dateien

    Verwenden des Optionsmenüs "Diashow ": Starten einer Präsentation. (Weitere Informationen finden Sie unter "Auswählen eines Photos und einer Präsentation" auf Seite 28.) "Drehen": Sie können Bilder im Vollbildmodus drehen. Die Bilder werden der Reihenfolge nach um 90°, 180°, 270° and 0° (ursprüngliche Darstellung) gedreht.
  • Seite 120: Anzeigen Von Photodatei-Informationen

    Anzeigen von Photodatei-Informationen Wenn Sie eine Photodatei auswählen, werden Photodatei-Informationen, z. B. Auflösung, Änderungsdatum und Stellung der Datei, im aktuellen Verzeichnis links auf dem Fernsehbildschirm angezeigt. Z. B. Auflösung Dateigröße Änderungsdatum Stellung der Datei im aktuellen Verzeichnis Auswählen eines Photos und einer Präsentation Dieses Menü...
  • Seite 121: Drehen

    "HintergrMusik Einstellg.": Die Informationen der gespeicherten Datei werden als Ordner oder MP3-Datei angezeigt. Wählen Sie die "HintergrMusik Einstellg. " , und drücken Sie die ENTER-Taste. Navigieren Sie zum Ordner mit den MP3-Dateien, die als die Hintergrundmusik verwendet werden sollen. Wählen Sie eine MP3-Datei aus, und drücken Sie die ENTER -Taste.
  • Seite 122: Vergrößern

    Vergrößern Zeigt im Vollbildmodus ein um den Faktor 2, 3 oder 4 vergrößertes Bild an. Führen Sie die Schritte 1 bis 4 von "Verwenden des WISELINK-Menüs" aus. (Informationen hierzu finden Sie auf Seite 26.) Drücken Sie die Tasten oder , um "Photo" auszuwählen, und drücken Sie dann ENTER.
  • Seite 123: Kopieren Von Bilddateien

    Kopieren von Bilddateien Sie können Bilddateien auf eine andere Speicherkarte kopieren. Führen Sie die Schritte 1 bis 4 von "Verwenden des WISELINK-Menüs" aus. (Informationen hierzu finden Sie auf Seite 26.) Drücken Sie die Tasten oder , um "Photo" auszuwählen, und drücken Sie dann ENTER. Die Informationen der gespeicherten Datei werden als Ordner oder Datei angezeigt.
  • Seite 124: Drucken Von Photos

    Drucken von Photos Sie können Bilddateien direkt mit Ihrem Drucker drucken. Führen Sie die Schritte 1 bis 4 von "Verwenden des WISELINK-Menüs" aus. (Informationen hierzu finden Sie auf Seite 26.) Drücken Sie die Tasten oder , um "Photo" auszuwählen, und drücken Sie dann ENTER. Die Informationen der gespeicherten Datei werden als Ordner oder Datei angezeigt.
  • Seite 125: Informationen Zur Musik-Funktion Aktuelles Bildschirmmenü

    Informationen zur Musik-Funktion Aktuelles Bildschirmmenü Funktion (Musik) Wiedergabe/ Wenn Sie, während Musik abgespielt wird, die Taste Pause PLAY/PAUSE der Fernbedienung drücken, endet die Musikwiedergabe. (Musik) Stopp Wenn Sie, während die Musik gestoppt ist, die Taste STOP der Fernbedienung drücken, wird die Musikwiedergabe wieder aufgenommen.
  • Seite 126: Verwenden Des Setup-Menüs

    Verwenden des Setup-Menüs Mit dem Setup zeigen Sie die Benutzereinstellungen im WISELINK-Menü an. Führen Sie die Schritte 1 bis 4 von "Verwenden des WISELINK-Menüs" aus. (Informationen hierzu finden Sie auf Seite 26.) Drücken Sie die Tasten oder , um "Setup" auszuwählen, und drücken Sie dann ENTER.
  • Seite 127: Videotextdecoder

    Videotextdecoder Zusammen mit den meisten Fernsehprogrammen werden Videotextseiten ausgestrahlt. Diese Seiten enthalten unter anderem die folgenden Informationen: Sendezeiten. Nachrichten und Wetterberichte. Sportergebnisse. Untertitel für Hörgeschädigte. Die Videotextseiten sind in sechs Kategorien unterteilt: Teil Inhalt Gewählte Seitennummer Aktuelle Seitennummer oder Suchstatus Senderkürzel Datum und Uhrzeit Text...
  • Seite 128: Auswählen Einer Bestimmten Videotextseite

    Auswählen einer bestimmten Videotextseite Sie können Seitenzahlen direkt über die Nummerntasten auf der Fernbedienung eingeben. Geben Sie die dreistellige Seitennummer der gewünschten Seite mit den entsprechenden Nummerntasten ein. Falls die ausgewählte Seite mit weiteren Unterseiten verknüpft ist, werden diese nachein- ander angezeigt.
  • Seite 129: Einstellen Der Fernbedienung

    Einstellen der Fernbedienung Wenn Sie die Fernbedienung entsprechend konfiguriert haben, sind fünf verschiedene Modi verfügbar: TV, VCR (Videorecorder), Cable (Kabelreceiver), DVD und STB (Set-Top- Box). Mit der entsprechenden Taste auf der Fernbedienung können Sie zwischen diesen Modi wechseln und das gewünschte Gerät ansteuern. Die Fernbedienung ist möglicherweise nicht mit allen DVD-Playern, Videorecordern, Kabelreceivern und Set-Top-Boxen kompatibel.
  • Seite 130 Einstellen der Fernbedienung zur Steuerung des DVD-Players. Schalten Sie den DVD-Player aus. Drücken Sie die DVD- Taste auf der Fernbedienung Ihres Fernsehgerätes. Drücken Sie die SET- Taste auf der Fernbedienung Ihres Fernsehgerätes. Geben Sie den Herstellercode – siehe Seite 40~41 dieser Bedienungsanleitung - für die Marke Ihres DVD- Player mit den Zahlentasten auf der Fernbedienung ein.
  • Seite 131: Fernbedienungscodes

    Fernbedienungscodes Videorekorder Hersteller Code Hersteller Code SAMSUNG 000 001 002 003 004 005 077 078 079 MONTGOMERY WARD ADMIRAL 002 025 AIWA MULTITECH 002 005 025 038 AKAI 004 027 032 007 008 018 026 037 062 064 AUDIO DYNAMICS...
  • Seite 132 VIEWSTAR 019 021 023 028 PIONEER 004 018 020 044 WARNER AMEX 014 022 040 ZENITH 017 029 035 037 045 REGAL SAMSUNG DVD Produkt Code Produkt Code 000 001 002 Home Theater VCR COMBO 014 015 016 DVDR 003 004...
  • Seite 133 032 063 SHARP YAMAKAWA 040 073 SANSUI XWAVE SANYO 062 090 ZENITH 076 121 SHINSONIC SAMSUNG STB Produkt Code Produkt Code Ground wave STB 001 002 Satellite STB HDD COMBO Premium Satellite STB CABLE STB HDD COMBO Standard CABLE STB...
  • Seite 134: Installation Der Pc-Software (Unter Windows Xp)

    Computer angezeigten Fenster variieren je nach Version von Windows und der jeweiligen Videokarte. Selbst wenn das angezeigte Fenster abweicht, gelten in den meisten Fällen die gleichen Grundinformationen für die Einstellung. (Wenden Sie sich andernfalls an den Computerhersteller oder Samsung-Händler.) Klicken Sie im Startmenü von Windows auf "Control Pane".
  • Seite 135: Pc Auswählen

    PC auswählen Grob-und Feinabstimmung des Bildes vornehmen (Bildjustierung): Mithilfe der Anpassung der Bildqualität sollen Bildstörungen beseitigt oder verringert werden. Sollte sich das Bildrauschen durch die Feinabstimmung allein nicht beheben lassen, stellen Sie zunächst die Frequenz möglichst genau ein (Grob), und führen Sie dann erneut eine Feinabstimmung durch.
  • Seite 136: Kensington-Schloss Als Diebstahlsicherung

    Kensington-Schloss als Diebstahlsicherung Das Kensington-Schloss dient zur sicheren Befestigung des Geräts, wenn dieses an einem öffentlichen Ort verwendet wird. Das Schloss muss separat erworben werden. Je nach Hersteller können Aussehen und Verriegelungsverfahren von der Abbildung abweichen. Informationen zur richtigen Anwendung entnehmen Sie bitte der Bedienungsanleitung des Kensington-Schlosses.
  • Seite 137: Technische Daten Und Umgebungsbedingungen

    Technische Daten und Umgebungsbedingungen Modell LE32M7 LE40M7 Bildgröße (Diagonal) 32 Zoll 40 Zoll Stromversorgung AC 220-240 V, 50 Hz AC 220-240 V, 50 Hz Leistungsaufnahme 155 W 210 W Auflösung (PC) 1360 x 768 @ 60 Hz 1360 x 768 @ 60 Hz...
  • Seite 138 Inhoud UWTV/MONITOR AANSLUITEN EN GEBRUIKSKLAAR MAKEN VERSCHILLENDE FUNCTIES GEBRUIKEN Lijst met onderdelen ..............2 Taal kiezen ..................22 De muurbevestigingsbeugel installeren ......2 De Spelmodus gebruiken ............22 Overzicht van het bedieningspaneel ........3 Blauwe schermmodus instellen / Overzicht van het aansluitpaneel..........4 Melodie selecteren ..............
  • Seite 139: Lijst Met Onderdelen

    Neem contact op met een technicus alvorens de wand- steunen te bevestigen. Samsung Electronics is niet verantwoordelijk voor schade aan het product of voor verwondingen die u zelf of anderen oplopen wanneer u besluit de tv zelfstandig te installeren.
  • Seite 140: Overzicht Van Het Bedieningspaneel

    Overzicht van het bedieningspaneel De kleur en vormgeving van het product kunnen afhankelijk van het model variëren. SOURCE Schakelen tussen alle beschikbare ingangsbronnen. Druk op de afstandsbediening om van kanaal te veran- (TV, Ext.1, Ext.2, AV, S-Video, Component, PC, HDMI1, deren.
  • Seite 141: Overzicht Van Het Aansluitpaneel

    Overzicht van het aansluitpaneel [Aansluitingen op chterpaneel] [Aansluitingen op zijpaneel] Netvoeding Wanneer u een extern apparaat aansluit op de tv moet het toestel zijn uitgeschakeld. Zorg bij het aansluiten van een externe aansluiting dat de kleuren van de aansluiting en de kabel overeenkomen. Nederlands-4...
  • Seite 142 Aansluiten op antenne of kabeltelevisienetwerk Voor de juiste weergave van tv-kanalen moet het toestel een signaal ontvangen via een van de volgende bronnen: - Een buitenantenne / Een kabeltelevisienetwerk / Een satellietnetwerk Het aansluiten van HDMI/DVI - Ondersteunt verbindingen met audiovisuele apparatuur die met HDMI verbonden kan worden (set top boxes, dvd-spelers, audiovisuele ontvangers en digitale tv’s).
  • Seite 143: Overzicht Van De Afstandsbediening

    Hiermee selecteert u het apparaat dat Vorig kanaal bediend moet worden met de Automatisch uitschakelen Samsung-afstandsbediening (TV, DVD, STB, Deze functie stelt u in staat opgeslagen CABLE, VCR). (Zie pagina 37~41) foto- (JPEG) en audiobestanden (MP3) te Standby-toets voor de televisie...
  • Seite 144: In - En Uitschakelen

    In - en uitschakelen Het netsnoer is bevestigd aan de achterzijde van de tv. Steek de stekker in een geschikt stopcontact. De stand-by-indicator op het voorpaneel gaat Merken. Druk op de AAN/UIT-knop aan de voorzijde van de set. POWER U kunt ook op de toets of de toets TV op de afstandsbediening drukken om de tv aan te zetten.
  • Seite 145: Kanalen Automatisch Opslaan

    Als u deze functie wilt herstellen... Druk op de toets MENU voor weergave van het menu. Druk op de toets om “Instellingen” te selecteren en druk vervolgens op ENTER. Druk nogmaals op de toets ENTER om “Plug & Play” te selecteren. Het bericht om "Plug &...
  • Seite 146: De Kanaalbeheer Instellen

    Druk op de toets om “Geluidssysteem” te selecteren en druk vervolgens op ENTER. Selecteer het gewenste standaardgeluid door op de toets te blijven drukken en vervolgens op ENTER te drukken. Als er geen geluid is of als het geluid vervormd is, selecteert u nogmaals de gewenste geluidsstandaard. Als u het nummer weet van het kanaal dat u wilt opslaan, drukt u op de toets om “Kanaal”...
  • Seite 147: Het Kinderslot Activeren

    Het kinderslot activeren Met deze functie kunt u voorkomen dat bijvoorbeeld kinderen naar programma’s kijken die niet geschikt zijn voor hen, door het beeld en het geluid uit te schakelen. Het kinderslot kan niet uitgezet worden door de toetsen op het zijpaneel te gebruiken.
  • Seite 148: Kanaalnamen Vastleggen

    Kanaalnamen vastleggen Kanalen krijgen automatisch een naam toegewezen wanneer kanaalinformatie wordt uitgezonden. U kunt deze naam wijzigen en nieuwe Naam toewijzen. Druk op de toets MENU voor weergave van het menu. Druk op de toets om “Kanaal” te selecteren en druk vervolgens op ENTER. Druk op de toets om “Naam”...
  • Seite 149: De Functie Lna (Low Noise Amplifier)

    De functie LNA (Low Noise Amplifier) Deze functie is vooral handig wanneer de tv wordt gebruikt in gebieden waar het signaal zwak is. De functie LNA versterkt het TV-signaal in het gebied met het zwakke signaal, een ruisvrije versterker versterkt het inkomende signaal. Druk op de toets MENU voor weergave van het menu.
  • Seite 150: De Kleurtint Wijzigen

    De kleurtint wijzigen U kunt de kleurtoon selecteren die u het prettigst vindt voor uw ogen. Om het gewenste beeldeffect te selecteren, volgt u de instructies 1 t/m 3 op pagina 12 van “De beeldstandaard aanpassen”. Druk op de toets om “Kleur tint” te selecteren en druk vervolgens op ENTER.
  • Seite 151: De Beeldinstellingen Terugstellen Naar De Standaard Fabrieksinstellingen

    De beeldinstellingen terugstellen naar de standaard fabrieksinstellingen U kunt terugkeren naar de beeldinstellingen zoals deze standaard in de fabriek zijn ingesteld. Om het gewenste beeldeffect te selecteren, volgt u de instructies 1 t/m 3 op pagina 12 van “De beeldstandaard aanpassen”. Druk op de toets om “Reset”...
  • Seite 152: Het Beeld Stilzetten

    Druk op de toets EXIT om af te sluiten. DNIe-demo (Digital Natural Image engine) Met de nieuwe technologie biedt Samsung u nog betere beeldkwaliteit met scherper contrast en versterking van de wittonen. Dit nieuwe systeem voor beeldsamenstelling biedt de kijkers een helderder en duidelijker beeld. De DNIe-technologie garandeert een perfecte beeldkwaliteit.
  • Seite 153: De Kleurruimte Wijzigen

    De kleurruimte wijzigen Kleurruimte is een kleurenmatrix opgebouwd uit rood, groen en blauw. Selecteer uw favoriete kleurruimte en beleef de wereld van natuurlijke kleuren. Druk op de toets MENU voor weergave van het menu. Druk op de toets om “Beeld” te selecteren en druk vervolgens op ENTER. Druk op de toets om “Kleurruimte”...
  • Seite 154: Beeld-In-Beeld (Pip)

    Beeld-in-Beeld (PIP) U kunt een klein beeld binnen het hoofdbeeld van een ingesteld programma of video-input weergeven. Op deze manier kunt u het beeld van een ingesteld programma of video-input van een aangesloten apparaat bekijken terwijl u het hoofdbeeld bekijkt. Druk op de toets MENU voor weergave van het menu.
  • Seite 155: De Geluidsstandaard Wijzigen

    De geluidsstandaard wijzigen U kunt het geluidseffect selecteren dat het best overeenkomt met de beelden die u bekijkt. Druk op de toets MENU voor weergave van het menu. Druk op de toets om “Geluid” te selecteren en druk vervolgens op ENTER. Druk nogmaals op de toets ENTER om “Modus”...
  • Seite 156: Het Volume Automatisch Aanpassen

    Het volume automatisch aanpassen Elk zendstation heeft zijn eigen signaalcondities waardoor het voor u niet handig is het volume in te moeten stellen zodra een kanaal is gewijzigd. Met deze functie wordt het volume van het gewenste kanaal automatisch ingesteld. Bij een hoog modulaties- ignaal wordt de geluidsuitvoer verlaagd en bij een laag modulatiesignaal wordt de geluidsuitvoer verhoogd.
  • Seite 157: De Geluidsinstellingen Terugstellen Naar De Standaard Fabrieksinstellingen

    De geluidsinstellingen terugstellen naar de standaard fabrieksinstellingen Indien de spelmodus aan staat, wordt de functie Reset Sound (geluid terugstellen) geactiveerd. Met het selecteren van de functie Reset nadat de equalizers zijn ingesteld leidt ertoe dat de equalizer teruggezet wordt naar de standaard fabrieksinstellingen.
  • Seite 158: Standby-Klok Instellen

    Standby-klok instellen U kunt een tijdsduur tussen 30 en 180 minuten instellen waarna de tv automatisch uitschakelt. Druk op de toets MENU voor weergave van het menu. Druk op de toets om “Instellingen” te selecteren en druk vervolgens op ENTER. Druk op de toets om “Tijd”...
  • Seite 159: Taal Kiezen

    Taal kiezen Wanneer u de tv voor het eerst gebruikt, moet u de taal selecteren voor het weergeven van menu’s en aanwijzingen. Druk op de toets MENU voor weergave van het menu. Druk op de toets om “Instellingen” te selecteren en druk vervolgens op ENTER.
  • Seite 160: Blauwe Schermmodus Instellen / Melodie Selecteren

    Blauwe schermmodus instellen / Melodie selecteren Blauw scherm: Als er geen signaal wordt ontvangen of het signaal is heel zwak, vervangt een blauw scherm automatisch de onrustige achtergrond van het beeld. Als u het slechtere beeld wilt blijven zien, dient u de modus “Blauw scherm” op “Uit” te zetten.
  • Seite 161: De Bron Selecteren

    De bron selecteren U kunt kiezen tussen de externe bronnen die zijn aangesloten op de ingangen van de tv. Druk op de toets MENU voor weergave van het menu. Druk nogmaals op de toets ENTER om “Invoer” te selecteren. Druk nogmaals op de toets ENTER om “Bronlijst” te selecteren. Als er geen extern apparaat met uw toestel is verbonden, worden alleen “TV”, “Ext.1”, “Ext.2”...
  • Seite 162: De Functie Wiselink Gebruiken

    De functie WISELINK gebruiken U kunt opgeslagen foto’s (JPEG-bestanden) bekijken of muziekbestanden (MP3) afspelen vanaf een geheugenkaart of USB-opslagmedium. Het menu Photo <Foto> biedt alleen ondersteuning voor afbeeldingsbestanden met het JPEG-formaat. Het menu Music <Muziek> biedt alleen ondersteuning voor geluidsbestanden met het MP3-formaat. Compact Flash (CF) / Micro Driver (MD) / MAGICSTOR Secure Digital Card (SD Card) / Smart Media Card (SM) / Multimedia Card (MMC) / Memory Stick / MSPRO / XD...
  • Seite 163: Het Menu Wiselink Gebruiken

    Het menu WISELINK gebruiken In dit menu ziet u de JPEG- en MP3-bestanden en de mappen op een geheugenkaart. Druk op de toets MENU om het menu weer te geven. Druk op ENTER om “Invoer” te selecteren. Druk op om “WISELINK” te selecteren en druk vervolgens op ENTER.
  • Seite 164: Presentatie

    Het menu Opties gebruiken "Presentatie": Hiermee start u een diavoorstelling. (Raadpleeg “Een foto of diavoorstelling selecteren” op pagina 28) "Roteren": U kunt de afbeeldingen draaien in de volledige-schermmodus. Afbeeldingen worden achtereenvolgens 90°, 180°, 270° en 0° (oorspronkelijke toestand) gedraaid. (Raadleeg “Draaien” op pagina 29) U kunt een gedraaide afbeelding niet opslaan.
  • Seite 165: Informatie Voor Fotobestanden Weergeven

    Informatie voor fotobestanden weergeven Wanneer u een fotobestand selecteert, wordt de informatie voor dat fotobestand, zoals de resolutie, de wijzigingsdatum en de volgorde van het bestand in de huidige directory links op het TV-scherm afgebeeld. Zoals de resolutie Bestandsgrootte Wijzigingsdatum Volgorde van het bestand in de huidige directory Een foto of diavoorstelling selecteren In dit menu ziet u de JPEG-bestanden en de mappen op een geheugenkaart.
  • Seite 166: Draaien

    "Inst. achtergrondmuziek": De opgeslagen bestandsinformatie wordt afgebeeld als map of MP3-bestand. Selecteer “Inst. achtergrondmuziek” en druk op ENTER. Blader naar de map die de MP3-bestanden bevat die u als achtergrondmuziek wilt gebruiken. Selecteer een MP3-bestand en druk op ENTER. Het geselecteerde bestand wordt geel gemarkeerd. Druk nogmaals op de toets MENU om terug te keren naar het scherm “Presentatie”.
  • Seite 167: Inzoomen

    Inzoomen Hiermee beeldt u een 2x, 3x of 4x ingezoomde afbeelding op het volledige scherm Voltooi stappen 1 tot en met 4 van “Het menu WISELINK gebruiken”. (Zie pagina 26) Druk op om “Photo” te selecteren en druk vervolgens op ENTER. De opgeslagen informatie wordt afgebeeld als een map of een bestand.
  • Seite 168: Afbeeldingsbestanden Kopiëren

    Afbeeldingsbestanden kopiëren U kunt afbeeldingsbestanden naar een andere geheugenkaart kopiëren. Voltooi stappen 1 tot en met 4 van “Het menu WISELINK gebruiken”. (Zie pagina 26) Druk op om “Photo” te selecteren en druk vervolgens op ENTER. De opgeslagen informatie wordt afgebeeld als een map of een bestand. Druk op de toetsen om een bestand te selecteren en druk vervolgens op de toets ENTER.
  • Seite 169: Een Foto Afdrukken

    Een foto afdrukken U kunt afbeeldingsbestanden direct afdrukken met uw printer. Voltooi stappen 1 tot en met 4 van “Het menu WISELINK gebruiken”. (Zie pagina 26) Druk op om “Photo” te selecteren en druk vervolgens op ENTER. De opgeslagen informatie wordt afgebeeld als een map of een bestand. Druk op de toetsen om een bestand te selecteren en druk vervolgens op de toets ENTER.
  • Seite 170: Muziekbestanden Kopiëren

    Informatie muziekfunctie Huidige OSD Functie (Muziek) Wanneer u op de toetsPLAY/PAUSE drukt op de Afspelen/Pauze afstandbediening terwijl de muziek speelt. (Muziek) Stop Wanneer u op de toets STOP drukt op de afstandbediening, wordt de muziek gestopt. Muziekbestanden kopiëren U kunt muziekbestanden naar een andere geheugenkaart kopiëren. Voltooi stappen 1 tot en met 4 van “Het menu WISELINK gebruiken”.
  • Seite 171: Het Menu Instellingen Gebruiken

    Het menu Instellingen gebruiken In het menu vindt u de gebruikersinstellingen van het menu WISELINK. Voltooi stappen 1 tot en met 4 van “Het menu WISELINK gebruiken”. (Zie pagina 26) Druk op om “Setup” te selecteren en druk vervolgens op ENTER. De opgeslagen informatie wordt afgebeeld als een map of een bestand.
  • Seite 172: Teletekstdecoder

    Teletekstdecoder De meeste tv-kanalen bieden “teletekst” aan, ofwel pagina’s met schriftelijke informatie over zaken als: Tijden van tv-programma’s. Nieuws- en weerberichten. Sportuitslagen. Ondertiteling voor slechthorenden. Deze informatie is onderverdeeld in genummerde pagina’s (zie schema). Onderdeel Inhoud Geselecteerd paginanummer. Aanduiding kanaal/zendstation. Huidig paginanummer of zoekstatus.
  • Seite 173: Specifieke Teletekstpagina Selecteren

    Specifieke teletekstpagina selecteren Druk op de cijfertoetsen op de afstandsbediening om het paginanummer direct op te vragen: Voer het op de inhoudspagina vermelde driecijferig paginanummer in door op de desbetreffende cijfertoetsen te drukken. Als de geselecteerde pagina koppelingen naar subpagina’s bevat, worden de subpagina’s na elkaar weergegeven.
  • Seite 174: Uw Afstandsbediening Instellen

    Uw afstandsbediening instellen Uw afstandsbediening kan in vijf verschillende modi opereren nadat deze juist is ingesteld: TV, videorecorder, kabel, DVD, of Set- Top Box. Door op de overeenstemmende knop te drukken kunt u met de afstandsbediening tussen deze modi schakelen en het apparaat van uw keuze bedienen. De afstandsbediening is mogelijk niet compatibel met alle DVD-spelers, videorecorders, aftakdozen en Set-Top Boxen.
  • Seite 175 De afstandsbediening instellen voor uw DVD. Schakel uw DVD uit. Druk op de knop DVD van de afstandsbediening van uw televisie. Druk op de knop SET van de afstandsbediening van uw televisie. Maak voor het invoeren van de driecijferige code voor uw DVD gebruik van de cijfers van uw afstandsbediening.
  • Seite 176: Afstandsbedieningscodes

    Afstandsbedieningscodes Videorecorder Merk Code Merk Code SAMSUNG 000 001 002 003 004 005 077 078 079 MONTGOMERY WARD ADMIRAL 002 025 AIWA MULTITECH 002 005 025 038 AKAI 004 027 032 007 008 018 026 037 062 064 AUDIO DYNAMICS...
  • Seite 177 VIEWSTAR 019 021 023 028 PIONEER 004 018 020 044 WARNER AMEX 014 022 040 ZENITH 017 029 035 037 045 REGAL SAMSUNG DVD Product Code Product Code 000 001 002 Home Theater VCR COMBO 014 015 016 DVDR 003 004...
  • Seite 178 SHARP YAMAKAWA 040 073 SANSUI XWAVE SANYO 062 090 ZENITH 076 121 SHINSONIC SAMSUNG Set- Top Box Product Code Product Code Ground wave STB 001 002 Satellite STB HDD COMBO Premium Satellite STB CABLE STB HDD COMBO Standard CABLE STB...
  • Seite 179: Uw Software Installeren (Gebaseerd Op Windows Xp)

    PC kunnen anders zijn, afhankelijk van uw Windows-versie en uw videokaart. Ook als uw weergaven anders zijn, kloppen de instellingsgegevens in grote lijnen in bijna alle gevallen. Als dit niet het geval is, kunt u contact opnemen met uw computerfabrikant of uw Samsung-dealer. Klik op “Configuratiescherm” in het menu Start van Windows.
  • Seite 180: De Pc Selecteren

    De PC selecteren Grovere of fijnere afstelling van het beeld (Beeld vergrendelen): U past de beeldkwaliteit aan om beeldruis te verwijderen of te verminderen. Als de ruis niet verdwijnt door het kanaal nauwkeurig (fine) in te stellen, stel dan de frequentie zo goed mogelijk in (coarse)en voer opnieuw een nauwkeurige instelling uit.
  • Seite 181: De Anti-Diefstal Vergrendeling Gebruiken

    De anti-diefstal vergrendeling gebruiken Het Kensington-slot is een apparaat om het systeem fysiek te vergrendelen bij gebruik in een openbare ruimte. Het slot dient apart te worden aangeschaft. Het ontwerp en gebruik kan iets afwijken, afhankelijk van de fabrikant. Gebruik de bijgeleverde handleiding voor juist gebruik. 1.
  • Seite 182: Technische Specificaties En Milieu

    Technische specificaties en milieu Type LE32M7 LE40M7 Schermgrootte (diagonaal) 32 inch 40 inch Stroomtoevoer AC 220-240 V, 50 Hz AC 220-240 V, 50 Hz Energieverbruik 155 W 210 W PC Resolutie 1360 x 768 @ 60 Hz 1360 x 768 @ 60 Hz...
  • Seite 183 Índice CONEXIÓN Y CONFIGURACIÓN DEL TELEVISOR OTROS AJUSTES Lista de componentes ..............2 Selección del idioma ............... 22 Instalación del equipo de montaje en la pared .... 2 Uso del Modo Juego ............... 22 Visualización del panel de control .......... 3 Ajuste del modo Pantalla Azul / Visualización del panel de conexión ........
  • Seite 184: Lista De Componentes

    Para la instalación del soporte mural, póngase en con- tacto con un técnico. Samsung Electronics no se hace responsable de los daños causados al producto o a los usuarios si éstos han efectuado personalmente la instalación del televisor.
  • Seite 185: Visualización Del Panel De Control

    Visualización del panel de control El color y la forma del producto pueden variar según el modelo. SOURCE Púlselos para cambiar de canal. Cambia entre todas las fuentes de entrada En el menú de la pantalla, use estos botones disponibles. (TV, Ext.1, Ext.2, AV, S-Vídeo, Componente, del mismo modo que los botones PC, HDMI1, HDMI2).
  • Seite 186: Visualización Del Panel De Conexión

    Visualización del panel de conexión [Tomas del panel lateral] [Tomas del panel posterior] Entrada de alimentación Cada vez que conecte un dispositivo externo al televisor, compruebe que la unidad esté desconectada de la alimentación. Cuando conecte un terminal externo, debe hacer coincidir los colores del terminal de conexión y del cable. Español-4...
  • Seite 187 Conexión a la antena o a la red de televisión por cable Para ver los canales de televisión correctamente, la unidad debe recibir una señal de una de las fuentes siguientes: - Una antena exterior / Una red de televisión por cable / Una red por satélite Conexión de HDMI/DVI - Admite conexiones entre dispositivos de AV con conexión HDMI (receptores de televisión digital, reproductores de DVD, receptores de AV y televisores digitales).
  • Seite 188: Visualización Del Mando A Distancia

    Visualización del mando a distancia Selecciona un dispositivo de destino para Canal anterior controlar con el mando a distancia Samsung Apagado automático (TV, DVD, STB, CABLE, VCR). Esta función permite cargar fotos (Consulte la página 37~41.) guardadas (JPEG) y archivos de audio Botón de suspensión del televisor...
  • Seite 189: Encendido Y Apagado

    Encendido y apagado El cable de alimentación se encuentra en la parte posterior de la unidad. Conecte el cordón eléctrico en un enchufe adecuado. Se enciende el indicador de modo en espera de la parte frontal del equipo. Pulse el botón de la parte frontal del aparato.
  • Seite 190: Memorización Automática De Canales

    Si quiere volver a ajustar esta característica... Pulse el botón MENU para ver el menú. Pulse los botones para seleccionar "Configuración" y pulse el botón ENTER. Pulse de nuevo el botón ENTER para seleccionar "Plug & Play". Aparece el mensaje para iniciar "Iniciar Plug & Play". - Memorización automática de canales - Memorización manual de canales Memorización automática de canales...
  • Seite 191: Configuración Del Gestor De Canales

    Pulse los botones para seleccionar "Sistema de color" y pulse el botón ENTER. Seleccione el estándar de color deseado pulsando varias veces los botones y, a continuación, pulse el botón ENTER. Pulse los botones para seleccionar "Sistema de sonido" y pulse el botón ENTER. Seleccione el estándar de sonido deseado pulsando varias veces los botones y, a continuación, pulse el botón ENTER.
  • Seite 192: Activación Del Bloqueo Para Niños

    Activación del bloqueo para niños Esta función permite evitar que usuarios no autorizados, como niños, puedan ver progra- mas poco recomendables desactivando el vídeo y el audio. El bloqueo infantil no se puede desactivar mediante los botones del panel lateral. Únicamente con el mando a distancia es posible desactivar el ajuste del bloqueo infantil;...
  • Seite 193: Asignación De Nombres De Canales

    Asignación de nombres de canales Los nombres de los canales se asignarán automáticamente si se emite la infor- mación del canal. Estos nombres se pueden cambiar y puede asignar nombres nuevos. Pulse el botón MENU para ver el menú. Pulse los botones para seleccionar "Canal"...
  • Seite 194: Uso De La Opción Lna

    Uso de la opción LNA (Low Noise Amplifier, Amplificador de ruido bajo) Esta función es muy útil cuando se utiliza el televisor en una zona con una recepción de señal débil. La función LNA amplifica la señal de TV en el área de señal débil, un preamplificador de nivel bajo de ruido aumenta la señal de entrada.
  • Seite 195: Cambio Del Tono Del Color

    Cambio del tono del color Puede seleccionar el tono de color que le resulte más cómodo para su vista. Para seleccionar el efecto de imagen deseado, siga las instrucciones 1 a 3 de "Cambio del formato de la imagen” de la página 12. Pulse los botones para seleccionar "Tono de color"...
  • Seite 196: Reajuste De Los Valores De La Imagen A Los Valores Predefinidos De Fábrica

    Reajuste de los valores de la imagen a los valores predefinidos de fábrica Puede volver a los ajustes de imagen predefinidos de fábrica. Para seleccionar el efecto de imagen deseado, siga las instrucciones 1 a 3 de "Cambio del formato de la imagen” de la página 12. Pulse los botones para seleccionar "Restablecer"...
  • Seite 197: Congelación De La Imagen Actual

    Pulse el botón EXIT para salir. DNIe Demo (motor digital de imágenes naturales) La nueva tecnología de Samsung le ofrece imágenes más detalladas con mejoras en contraste y blancos. Un nuevo algoritmo de compensación de imagen propor- ciona a los usuarios una imagen más brillante y más clara.
  • Seite 198: Cambio De Gama De Colores

    Cambio de Gama de colores Gama de colores es una matriz de compuesta por los colores rojo, verde y azul. Seleccione su gama favorita de color y disfrute de unos colores auténticamente naturales. Pulse el botón MENU para ver el menú. Pulse los botones para seleccionar "Imagen"...
  • Seite 199: Visualización De Imagen En Imagen (Pip)

    Visualización de imagen en imagen (PIP) Puede visualizar una imagen secundaria dentro de la imagen principal del pro- grama o de la entrada de video definidos. De esta manera, es posible visualizar la imagen del programa o la entrada de video definidos desde cualquier equipo conectado mientras se visualiza la imagen principal.
  • Seite 200: Cambio Del Estándar De Sonido

    Cambio del estándar de sonido Puede seleccionar un tipo de efecto de sonido especial que se usará cuando se visualice una emisión concreta. Pulse el botón MENU para ver el menú. Pulse los botones para seleccionar "Sonido" y pulse el botón ENTER. Pulse de nuevo el botón ENTER para seleccionar "Modo".
  • Seite 201: Ajuste Automático Del Volumen

    Ajuste automático del volumen Cada emisora tiene sus propias condiciones de señal, así que no resulta cómodo ajustar el volumen cada vez que se cambia de canal. Con esta función el volumen del canal deseado se ajusta de forma automática ya que reduce la salida de sonido cuando la señal de modulación es alta o la aumenta cuando es baja.
  • Seite 202: Reajuste De Valores De Sonido A Los Valores Predefinidos De Fábrica

    Reajuste de valores de sonido a los valores predefinidos de fábrica Si Modo Juego está activado, la función de restablecer el sonido se activa. Si, tras configurar el ecualizador selecciona la función Restabl., se restauran los parámetros de fábrica de la configuración del ecualizador. Pulse el botón MENU para ver el menú.
  • Seite 203: Ajuste Del Temporizador De Desconexión

    Ajuste del temporizador de desconexión Puede seleccionar un período de tiempo entre 30 y 180 minutos para que, una vez transcurridos, el televisor pase automáticamente al modo de espera. Pulse el botón MENU para ver el menú. Pulse los botones para seleccionar "Configuración"...
  • Seite 204: Selección Del Idioma

    Selección del idioma Cuando utilice la unidad por primera vez, debe seleccionar el idioma que se utili- zará para visualizar menús e indicaciones. Pulse el botón MENU para ver el menú en pantalla. Pulse los botones para seleccionar "Configuración" y pulse el botón ENTER.
  • Seite 205: Ajuste Del Modo Pantalla Azul / Selección De Melodía

    Ajuste del modo Pantalla Azul / Selección de Melodía Pantalla azul: Si no se recibe ninguna señal o la señal es muy débil, una pantalla azul sustituirá automáti- camente el fondo ruidoso de la imagen. Si desea continuar visualizando la imagen deficiente, ajuste el modo "Pantalla azul"...
  • Seite 206: Selección De La Fuente

    Selección de la fuente Puede elegir entre varias fuentes externas conectadas a las tomas de entrada del televisor. Pulse el botón MENU para ver el menú. Pulse el botón ENTER para seleccionar "Entrada". Pulse el botón ENTER para seleccionar "Fuentes". Si no hay ningún dispositivo externo conectado a la unidad, solo las opciones "TV", "Ext.1", "Ext.2"...
  • Seite 207: Uso De La Función Wiselink

    Uso de la función WISELINK Puede ver las fotos almacenadas (archivos JPEG) o reproducir archivos de música (MP3) mediante una tarjeta de memoria o un dispositivo de almacenamiento USB. El menú "Photo" (Foto) sólo admite archivos de imágenes en formato JPEG. El menú...
  • Seite 208: Uso Del Menú Wiselink

    Uso del menú WISELINK Este menú muestra archivos y carpetas JPEG y MP3 guardados en una tarjeta de memoria. Pulse el botón MENU para ver el menú. Pulse el botón ENTER para seleccionar "Entrada". Pulse el botón para seleccionar "WISELINK", y después pulse el botón ENTER.
  • Seite 209 Uso del menú Options (Opciones) "Secuencia": Inicia un visionado automático. (Consulte “Selección de una foto y un visionado automático” en la página 28.) "Girar": Puede girar las imágenes en el modo de pantalla completa. Las imágenes se giran 90º, 180º, 270º y 0º (estado original). (Consulte “Giro”...
  • Seite 210: Visualización De La Información Del Archivo De Foto

    Visualización de la información del archivo de foto Al seleccionar un archivo de foto, la información de éste (la resolución, la fecha de modificación y el orden del archivo en el directorio) aparece a la izquierda de la pantalla del televisor. Resolución Tamaño del archivo Fecha de modificación...
  • Seite 211: Giro

    "Config. música fondo": La información del archivo guardado se muestra como una carpeta o un archivo MP3. Seleccione “Config. música fondo” y pulse después el botón ENTER. Navegue hasta la carpeta que contenga los archivos MP3 que desee utilizar como música de fondo. Seleccione un archivo MP3 y pulse el botón ENTER.
  • Seite 212: Ampliación

    Ampliación Muestra una imagen ampliada x2, x3 o x4 en el modo de pantalla completa. Siga los pasos del 1 al 4 de “Uso del menú WISELINK”. (Consulte la página 26.) Pulse el botón para seleccionar “Photo”, y después pulse el botón ENTER. La información del archivo guardado aparece como una carpeta o archivo.
  • Seite 213: Copia De Archivos De Imagen

    Copia de archivos de imagen Puede copiar archivos de imágenes en una tarjeta de memoria diferente. Siga los pasos del 1 al 4 de “Uso del menú WISELINK”. (Consulte la página 26.) Pulse el botón para seleccionar “Photo”, y después pulse el botón ENTER. La información del archivo guardado aparece como una carpeta o archivo.
  • Seite 214: Impresión De Una Foto

    Impresión de una foto Puede imprimir archivos de imagen directamente con la impresora. Siga los pasos del 1 al 4 de “Uso del menú WISELINK”. (Consulte la página 26.) Pulse el botón para seleccionar “Photo”, y después pulse el botón ENTER. La información del archivo guardado aparece como una carpeta o archivo.
  • Seite 215: Copia De Archivos De Música

    Información sobre la función de música Presentación en pantalla Función (Música) Reproducir/ Al pulsar el botón PLAY/PAUSE del mando a Pausa distancia mientras la música se reproduce. (Música) Detener Al pulsar el botón STOP del mando a distancia cuando la música se detiene. Copia de archivos de música Puede copiar archivos de música en una tarjeta de memoria diferente.
  • Seite 216: Uso Del Menú De Configuración

    Uso del menú de configuración Setup (Configuración) muestra los ajustes del usuario del menú WISELINK. Siga los pasos del 1 al 4 de “Uso del menú WISELINK”. (Consulte la página 26.) Pulse el botón para seleccionar “Setup”, y después pulse el botón ENTER. La información del archivo guardado aparece como una carpeta o archivo.
  • Seite 217: Decodificador De Teletexto

    Decodificador de teletexto Muchos canales de televisor incluyen "teletexto", páginas de información escrita que proporciona datos como: Horas de los programas de televisión Boletines de noticias y partes meteorológicos Resultados deportivos Subtítulos para sordos Las páginas de teletexto se organizan en seis categorías : Parte Contenido Número de página seleccionado.
  • Seite 218: Selección De Una Página De Teletexto Específica

    Selección de una página de teletexto específica Pulse los botones numéricos en el mando a distancia para introducir los números de página directamente: Introduzca los tres dígitos del número de la página que se enumera en el índice pulsando los botones numéricos correspondientes. Si la página seleccionada está...
  • Seite 219: Configuración Del Mando A Distancia

    Configuración del mando a distancia Una vez configurado correctamente, el mando a distancia puede funcionar en cinco modos diferentes: TV, vídeo, Decodificador, DVD o receptor TV digital. Pulsando el botón correspondiente del mando a distancia podrá cambiar de un modo a otro y controlar cualquiera de estos equipos.
  • Seite 220 Configuración del mando a distancia para controlar el DVD. Apague el DVD. Pulse el botón DVD del mando a distancia del televisor. Pulse el botón SET del mando a distancia del televisor. Mediante los botóns de número del mando a distancia, intro duzca los tres dígitos del código del DVD correspondi-entes a la marca de su DVD, que aparece en la lista de la página 40~41 de este manual.
  • Seite 221: Códigos Del Mando A Distancia

    Códigos del mando a distancia Vídeo, Marca Código Marca Código SAMSUNG 000 001 002 003 004 005 077 078 079 MONTGOMERY WARD ADMIRAL 002 025 AIWA MULTITECH 002 005 025 038 AKAI 004 027 032 007 008 018 026 037 062 064...
  • Seite 222 VIEWSTAR 019 021 023 028 PIONEER 004 018 020 044 WARNER AMEX 014 022 040 ZENITH 017 029 035 037 045 REGAL SAMSUNG DVD Producto Código Producto Código 000 001 002 Home Theater VCR COMBO 014 015 016 DVDR 003 004...
  • Seite 223 SHARP YAMAKAWA 040 073 SANSUI XWAVE SANYO 062 090 ZENITH 076 121 SHINSONIC SAMSUNG receptor TV digital. Producto Código Producto Código Ground wave STB 001 002 Satellite STB HDD COMBO Premium Satellite STB CABLE STB HDD COMBO Standard CABLE STB...
  • Seite 224: Configuración Del Software Del Pc (Basado En Windows Xp)

    (En caso contrario, póngase en contacto con el fabricante del ordenador o con el distribuidor de Samsung.) Primero, haga clic en "Control Panel" dentro del menú Inicio de Windows.
  • Seite 225: Selección Del Pc

    Selección del PC Sintonización gruesa y fina de la imagen (Bloqueo de Imagen): El propósito del ajuste de la calidad de imagen es remitir o reducir el ruido de la imagen. Si no se eliminan mediante la sintonización fina, ajuste la frecuencia lo mejor que pueda (grueso) y vuelva a realizar la sintonización fina.
  • Seite 226: Utilización Del Bloqueo Kensington Antirrobo

    Utilización del bloqueo Kensington antirrobo El anclaje Kensington es un dispositivo utilizado para asegurar un aparato cuando se utiliza en un sitio público. Este dispositivo de bloqueo se adquiere por separado. El aspecto y método de bloqueo puede diferir del que se muestra en la ilustración dependiendo del fabricante.
  • Seite 227: Especificaciones Técnicas Y Medioambientales

    Especificaciones técnicas y medioambientales LE32M7 LE40M7 Nombre del modelo 32 pulg. 40 pulg. Tamaño de pantalla (diagonal) 220-240 V CA 50 Hz 220-240 V CA 50 Hz Fuente de alimentación 155 W 210 W Consumo de energía 1360 x 768 @ 60 Hz 1360 x 768 @ 60 Hz Resolución del PC...
  • Seite 228 Índice LIGAÇÃO E PREPARAÇÃO DO TELEVISOR REGULAÇÃO DE OUTRAS PROGRAMAÇÕES Lista de acessórios ................ 2 Seleccionar o idioma ............... 22 Instalar o kit de montagem na parede ......2 Opção Modo de Jogos ............22 Funções do painel de controlo ..........3 Programar o modo de Ecrã...
  • Seite 229: Lista De Acessórios

    A instalação do suporte para montagem na parede tem de ser feita por um técnico. Se a instalação for feita pelo cliente, a Samsung Electronics não se responsabiliza por quaisquer danos no produto nem por ferimentos sofridos pelo cliente ou por outras pessoas.
  • Seite 230: Funções Do Painel De Controlo

    Funções do painel de controlo A forma e a cor do produto podem variar consoante o modelo. SOURCE Alterna entre todas as fontes de entrada Move o selector para a esquerda ou para a direita disponíveis. (TV, Ext.1, Ext.2, AV, S-Vídeo, nos ecrãs.
  • Seite 231: Apresentar O Painel De Ligação

    Apresentar o painel de ligação [Tomadas do [Tomadas do painel posterior] painel lateral] Potência de entrada Sempre que ligar um dispositivo externo ao televisor, verifique se a unidade está desligada. Quando ligar um terminal exterior, faça a correspondências de cores entre o terminal e o respectivo cabo. Português-4...
  • Seite 232 Ligar uma antena ou uma rede de televisão por cabo Para ver os canais de televisão correctamente, o aparelho tem de receber um sinal de uma das seguintes fontes: - Uma antena externa / Uma rede de televisão por cabo / Uma rede por satélite Ligar HDMI/DVI - Suporta ligações entre os dispositivos AV compatíveis com ligação HDMI (set top boxes, leitores de DVD, receptores de AV e tele visores digitais).
  • Seite 233: Funções Do Telecomando

    Funções do telecomando Selecciona um dispositivo alvo a ser Canal anterior controlado pelo telecomando Samsung Desligar o televisor automaticamente (TV, DVD, STB, CABLE, VCR) Esta função permite-lhe carregar ficheiros (Consulte a página 37~41) de fotografia (JPEG) e ficheiros áudio Botão de televisor em espera (MP3) gravados, bem como visualizá-los...
  • Seite 234: Ligar/Desligar O Aparelho

    Ligar/desligar o aparelho O cabo de alimentação está ligado à parte traseira do aparelho. Ligue o cabo principal a uma tomada adequada. Os indicadores luminosos do modo de suspensão acendem-se na parte frontal do televisor. Carregue no botão na parte da frente do televisor. ou no botão TV ( ) do telecomando para ligar o televisor.
  • Seite 235: Memorizar Canais Automaticamente

    Se desejar repor esta função... Carregue no botão MENU para ver o menu. Carregue no botão para seleccionar “Configurar” e depois carregue no botão ENTER. Carregue novamente no botão ENTER para seleccionar “Plug & Play”. Aparece a mensagem “Iniciar Plug & Play” - Memorizar canais automaticamente - Memorizar canais manualmente Memorizar canais automaticamente...
  • Seite 236: Definir Gestor Canais

    Carregue no botão para seleccionar “Sistema cores” e depois carregue no botão ENTER . Seleccione a cor padrão necessária carregando repetidamente no botão e depois carregue no botão ENTER . Carregue no botão para seleccionar “Sistema som” e depois carregue no botão ENTER . Seleccione o som padrão necessário premindo repetidamente o botão e em seguida prima o botão ENTER .
  • Seite 237: Activar Bloqueio Crianças

    Activar Bloqueio crianças Esta função permite-lhe evitar que utilizadores não autorizados, como as crianças, vejam programas não apropriados, cortando o som e a imagem. Não é possível desactivar a opção Bloqueio crianças com os botões laterais. Como só o telecomando consegue desbloquear a definição Bloqueio cri- anças, mantenha o telecomando longe do alcance de crianças.
  • Seite 238: Atribuir Nomes A Canais

    Atribuir nomes a canais Os nomes dos canais são atribuídos automaticamente quando a informação do canal é transmitida. Estes nomes podem ser alterados o que lhe permite atribuir nomes novos. Carregue no botão MENU para ver o menu. Carregue no botão para seleccionar “Canal”...
  • Seite 239: Utilizar A Função Lna (Low Noise Amplifier - Amplificador De Baixo Ruído)

    Utilizar a função LNA (Low Noise Amplifier - Amplificador de baixo ruído) Esta função é muito útil se o televisor estiver a receber um sinal fraco. A função LNA amplifica o sinal do televisor na área de sinal fraco; um pré-amplificador de baixo ruído intensifica o sinal.
  • Seite 240: Seleccionar A Tonalidade

    Seleccionar a tonalidade Pode seleccionar o tom de cor mais confortável para si. Para seleccionar o efeito de imagem pretendido, siga as instruções 1 a 3 de “Escolher o tipo de imagem” na página 12. Carregue no botão para seleccionar “Tonalidade” e depois carregue no botão ENTER .
  • Seite 241: Repor Os Valores De Fábrica Das Definições De Imagem

    Repor os valores de fábrica das definições de imagem Pode voltar aos valores de fábrica das definições de imagem. Para seleccionar o efeito de imagem pretendido, siga as instruções 1 a 3 de “Escolher o tipo de imagem” na página 12. Carregue no botão para seleccionar “Reiniciar”...
  • Seite 242: Parar A Imagem

    Prima o botão EXIT para sair. Demonstração DNIe (Digital Natural Image Engine) A nova tecnologia da Samsung permite obter imagens mais detalhadas, com mel- horias no contraste e no equilíbrio do branco. Um novo algoritmo de compensação de imagem proporciona imagens mais nítidas.
  • Seite 243: Alterar A Colorimetria

    Alterar a colorimetria A colorimetria é uma matriz de cores composta por vermelho, verde e azul. Seleccione a sua colorimetria preferida para obter cores completamente naturais. Carregue no botão MENU para ver o menu. Carregue no botão para seleccionar “Imagem” e depois carregue no botão ENTER . Carregue no botão para seleccionar “Matriz de cores”...
  • Seite 244: Apresentar A Imagem Na Imagem (Pip)

    Apresentar a imagem na imagem (PIP) Pode apresentar uma sub-imagem na imagem principal ou definir o programa ou a entrada de vídeo. Desta forma, pode ver a imagem de um programa definido ou entrada de vídeo de qualquer equipamento ligado com capacidade para apresentar a imagem principal.
  • Seite 245: Escolher O Som Padrão

    Escolher o som Padrão Pode seleccionar o tipo de efeito sonoro especial a utilizar quando vê uma determinada transmissão. Carregue no botão MENU para ver o menu. Carregue no botão para seleccionar “Som” e depois carregue no botão ENTER . Carregue novamente no botão ENTER , para seleccionar “Modo”.
  • Seite 246: Ajustar Automaticamente O Volume

    Ajustar Automaticamente o Volume Cada estação de difusão tem as suas próprias condições de sinal, não sendo por isso fácil ao utilizador ajustar o volume sempre que mudar de canal. Esta função permite-lhe regular automaticamente o volume do canal desejado, baixando o som quando o sinal de modulação é...
  • Seite 247: Repor Os Valores De Fábrica Das Definições De Som

    Repor os valores de fábrica das definições de som Se Modo Jogo estiver Lig., a função Redefinir som é activada. Se seleccionar a função Reiniciar depois de programar o equalizador, repõe os valores de fábrica do equalizador. Carregue no botão MENU para ver o menu. Carregue no botão para seleccionar “Som”...
  • Seite 248: Programar O Temporizador

    Programar o temporizador Pode seleccionar um intervalo de tempo entre 30 e 180 minutos, após o qual o televisor muda automaticamente para o modo de espera. Carregue no botão MENU para ver o menu. Carregue no botão para seleccionar “Configurar” e depois carregue no botão ENTER . Carregue no botão para seleccionar “Tempo”...
  • Seite 249: Seleccionar O Idioma

    Seleccionar o idioma Quando utilizar o aparelho pela primeira vez, tem de seleccionar o idioma dos menus e indicações apresentados no ecrã. Carregue no botão MENU para ver o menu no ecrã. Carregue no botão para seleccionar “Configurar” e depois carregue no botão ENTER .
  • Seite 250: Programar O Modo De Ecrã Azul / Seleccionar A Melodia

    Programar o modo de Ecrã azul / Seleccionar a Melodia Ecrã azul: Se não estiver a receber nenhum sinal ou se o sinal for muito fraco, um ecrã azul substitui automaticamente o ruído de fundo no ecrã. Para continuar a ver a imagem em más condições, defina o modo “Ecrã azul” para “Deslig.”.
  • Seite 251: Seleccionar Fontes Externas

    Seleccionar fontes externas Pode seleccionar uma das fontes externas ligadas às tomadas de entrada do televisor. Carregue no botão MENU para ver o menu. Carregue no botão ENTER, para seleccionar “Entrada”. Carregue novamente no botão ENTER, para seleccionar “Lista de fontes”. Quando nenhum dispositivo externo está...
  • Seite 252: Utilizar A Função Wiselink

    Utilizar a função WISELINK Pode visualizar ficheiros de fotografia (ficheiros JPEG) ou de reprodução de música (MP3) guardados utilizando um cartão de memória ou um suporte de armazenamento USB . O menu “Photo” só suporta ficheiros de imagem em formato JPEG. O menu “Music”...
  • Seite 253: Utilizar O Menu Wiselink

    Utilizar o menu WISELINK Este menu mostra ficheiros e pastas JPEG e MP3 guardados num cartão de memória. Carregue no botão MENU para ver o menu. Carregue no botão ENTER para seleccionar “Entrada”. Carregue no botão para seleccionar “WISELINK” e, em seguida, carregue no botão ENTER.
  • Seite 254 Utilizar o menu Opções "Apresentação diapositivos": Inicia uma apresentação de diapositivos. (Consulte “Seleccionar uma apresentação de fotografias e de diapositivos” na página 28) "Rodar": Pode rodar imagens no modo de ecrã inteiro. As imagens são rodadas pela ordem 90°, 180°, 270° e 0° (estado original). (Consulte “Rodar”...
  • Seite 255: Ver Informação De Ficheiros De Fotografias

    Ver informação de ficheiros de fotografias Quando selecciona um ficheiro de fotografias, a respectiva informação aparece no lado esquerdo do ecrã do televisor, bem como a resolução, a data de modificação e a ordem do ficheiro no directório actual. Resolução Tamanho do ficheiro Data de modificação Ordem do ficheiro no directório actual...
  • Seite 256: Rodar

    "Def. Música de fundo": A informação do ficheiro guardado é apresentada como pasta ou ficheiro MP3. Seleccione as "Def. Música de fundo” e carregue no botão ENTER. Navegue para a pasta que contém os ficheiros MP3 a utilizar como música de fundo.
  • Seite 257: Ampliar

    Ampliar Mostra uma imagem ampliada X2x, 3x ou 4x no modo de ecrã inteiro. Execute os passos 1 a 4 de "Utilizar o menu WISELINK". (Consulte a página 26) Carregue no botão para seleccionar “Photo” e, em seguida, carregue no botão ENTER. A informação do ficheiro guardado é...
  • Seite 258: Copiar Ficheiros De Imagem

    Copiar ficheiros de imagem Pode copiar ficheiros de imagem para um cartão de memória diferente. Execute os passos 1 a 4 de "Utilizar o menu WISELINK". (Consulte a página 26) Carregue no botão para seleccionar “Photo” e, em seguida, carregue no botão ENTER. A informação do ficheiro guardado é...
  • Seite 259: Imprimir Uma Fotografia

    Imprimir uma fotografia Pode imprimir ficheiros de imagem directamente na impressora. Execute os passos 1 a 4 de "Utilizar o menu WISELINK". (Consulte a página 26) Carregue no botão para seleccionar “Photo” e, em seguida, carregue no botão ENTER. A informação do ficheiro guardado é apresentada como pasta ou ficheiro. Carregue nos botões para seleccionar um ficheiro e, em seguida, carregue no botão ENTER.
  • Seite 260: Copiar Ficheiros De Música

    Informação da função Música OSD actual Função (Música) Ao carregar no botão PLAY/PAUSE Reproduzir/Pausa telecomando durante a reprodução de música. (Música) Parar Ao carregar no botão STOP do telecomando quando a música pára. Copiar ficheiros de música Pode copiar ficheiros de música para um cartão de memória diferente. Execute os passos 1 a 4 de "Utilizar o menu WISELINK".
  • Seite 261: Utilizar O Menu Configurar

    Utilizar o menu Configurar O menu Configurar mostra as definições do utilizador do menu WISELINK. Execute os passos 1 a 4 de "Utilizar o menu WISELINK". (Consulte a página 26) Carregue no botão para seleccionar “Setup” e, em seguida, carregue no botão ENTER. A informação do ficheiro guardado é...
  • Seite 262: Descodificador De Teletexto

    Descodificador de teletexto A maioria dos canais de televisão têm páginas de “teletexto”, com informações escritas sobre o seguinte: Horários dos programas de televisão. Serviços informativos e boletins meteorológicos. Resultados desportivos. Legendas para os deficientes auditivos. As páginas do teletexto estão divididas em seis categorias: Secção Conteúdo Número da página seleccionada.
  • Seite 263: Seleccionar Uma Página De Teletexto Específica

    Seleccionar uma página de teletexto específica Carregue nos botões numéricos do telecomando para introduzir directamente o número da página: Introduza o número de página de três dígitos, fornecido no conteúdo, premindo os botões numéricos correspondentes. Se a página seleccionada estiver ligada a várias páginas secundárias, as páginas secundárias são apresentadas em sequência.
  • Seite 264: Configurar O Telecomando

    Configurar o telecomando Depois de o configurar correctamente, o telecomando permite funcionar com cinco modos diferentes: Televisor, Videogravador, Cabo, DVD ou Set-Top Box. Se carregar no botão correspondente no telecomando pode alternar entre este modos e comandar o equipamento desejado. O telecomando pode não ser compatível com todos os leitores de DVD, videogravadores, descodificadores de cabo e Set-Top Boxes.
  • Seite 265 Configurar o telecomando para funcionar com o DVD Desligue o DVD. Prima o botão DVD no telecomando do aparelho de televis ão. Prima o botão SET no telecomando do aparelho de televis ão. Utilizando os botões de número no telecomando, introduza três dígitos do código de DVD listado na página 40~41 deste manual relativo à...
  • Seite 266: Codici Del Telecomando

    Codici del telecomando Videogravador Marca Código Marca Código SAMSUNG 000 001 002 003 004 005 077 078 079 MONTGOMERY WARD ADMIRAL 002 025 AIWA MULTITECH 002 005 025 038 AKAI 004 027 032 007 008 018 026 037 062 064...
  • Seite 267 VIEWSTAR 019 021 023 028 PIONEER 004 018 020 044 WARNER AMEX 014 022 040 ZENITH 017 029 035 037 045 REGAL SAMSUNG DVD Produto Código Produto Código 000 001 002 Home Theater VCR COMBO 014 015 016 DVDR 003 004...
  • Seite 268 032 063 SHARP YAMAKAWA 040 073 SANSUI XWAVE SANYO 062 090 ZENITH 076 121 SHINSONIC SAMSUNG Set-Top Box Produto Código Produto Código Ground wave STB 001 002 Satellite STB HDD COMBO Premium Satellite STB CABLE STB HDD COMBO Standard CABLE STB...
  • Seite 269: Configurar O Software Do Pc (Baseado No Windows Xp)

    Windows e da placa de vídeo. Em quase todos os casos, mesmo que os ecrãs reais tenham um aspecto diferente, aplica-se a mesma informação de configuração básica. (Caso contrário, contacte o fabricante do computador ou o distribuidor da Samsung.) Primeiro, clique em “Control Panel” no menu Iniciar do Windows.
  • Seite 270: Seleccionar O Pc

    Seleccionar o PC Sintonização básica e fina da imagem (Bloq. imagem): O objectivo da regulação da qualidade da imagem é reduzir o ruído da imagem. Se não conseguir retirar o ruído fazendo apenas a sintonização fina, regule a frequência o melhor possível e volte a fazer a sintonização fina. Depois de ter reduzido o ruído, volte a regular a imagem de forma a ficar alinhada no centro do ecrã.
  • Seite 271: Utilizar O Sistema De Bloqueio Kensington Anti-Roubo

    Utilizar o sistema de bloqueio Kensington anti-roubo O mecanismo de fixação Kensington refere-se a um dispositivo utilizado para fixar fisicamente o sistema quando o utilizar num local público. O dispositivo de fixação tem de ser adquirido em separado. O aspecto e método de fixação podem diferir da ilustração dependendo do fabricante.
  • Seite 272: Características Técnicas E Ambientais

    Características técnicas e ambientais Nome do modelo LE32M7 LE40M7 Tamanho do ecrã (Diagonal) 32 polegadas 40 polegadas Fonte de alimentação AC 220-240 V, 50 Hz AC 220-240 V, 50 Hz Consumo de energia 155 W 210 W PC Resolução 1360 x 768 @ 60 Hz 1360 x 768 @ 60 Hz Saída...
  • Seite 273 Sommario COLLEGAMENTO E PREPARAZIONE DEL TELEVISORE IMPOSTAZIONE DI ALTRE FUNZIONI Elenco dei componenti ............... 2 Scelta della lingua ..............22 Installazione del Kit di montaggio a parete ....2 Uso di Modalità gioco ............22 Vista del pannello di controllo..........3 Impostazione della modalità...
  • Seite 274: Elenco Dei Componenti

    Contattare un tecnico per rich- iedere assistenza quando si monta la staffa a parete. Samsung Electronics non può essere ritenuta responsabile per qualsiasi danno al prodotto, lesioni personali o altri problemi causati da una installazione autonoma del televisore da parte dell’utente.
  • Seite 275: Vista Del Pannello Di Controllo

    Vista del pannello di controllo La forma e il colore del prodotto possono variare in base al modello. SOURCE Passa tra tutte le sorgenti di ingresso disponibili (TV, Premere per cambiare canale. Est.1, Est.2, AV, S-Video, Comp., PC, HDMI1, HDMI2). Nel menu a video, utilizzare i tasti così...
  • Seite 276: Vista Del Pannello Dei Collegamenti

    Vista del pannello dei collegamenti [Jack pannello laterale] [Jack pannello posteriore] Ingresso alimentazione Quando si collega un dispositivo esterno al televisore, assicurarsi che l’alimentazione dell’unità sia scollegata. Quando si collega un terminale esterno, far corrispondere il colore del terminale di collegamento a quello del cavo. Italiano-4...
  • Seite 277 Collegamento di un’antenna o di una rete televisiva via cavo Per vedere correttamente i canali televisivi, il monitor TV deve ricevere un segnale da una delle seguenti fonti: - Un’antenna all’esterno / Una rete televisiva via cavo / Una rete satellitare Collegamento di HDMI/DVI - Supporta le connessioni tra periferiche AV con connessione HDMI (set top box, lettori DVD, ricevitori AV e televisori digitali).
  • Seite 278: Illustrazione Del Telecomando

    Seleziona un dispositivo di destinazione da Canale precedente controllare con il telecomando Spegnimento automatico Samsung (TV, DVD, STB, CABLE, VCR) Questa funzione consente di caricare le foto (Vedere pagina 37~41) (JPEG) e i file audio (MP3) salvati e di Pulsante di standby del televisore visualizzarli o riprodurli sul televisore.
  • Seite 279: Accensione E Spegnimento

    Accensione e spegnimento Il conduttore isolato di corrente è collegato al retro del monitor. Inserire il conduttore isolato di corrente nell’apposita presa. L’indicatore di standby sul pannello anteriore del dispositivo si accende. Premere il pulsante sul pannello anteriore del dispositivo. o il tasto TV ( ) sul telecomando.
  • Seite 280: Memorizzazione Automatica Dei Canali

    Per reimpostare questa funzione… Premere il tasto MENU per visualizzare il menu. Premere il pulsante per selezionare “Impostazione” e premere ENTER. Premere nuovamente il tasto ENTER per selezionare la funzione “Plug & Play”. Viene visualizzato il messaggio “Avvio Plug & Play” - Memorizzazione automatica dei canali - Memorizzazione manuale dei canali Memorizzazione automatica dei canali...
  • Seite 281: Impostazione Del Gestore Canale

    Premere il pulsante per selezionare “Sistema colore” e premere ENTER . Per selezionare i colori standard desiderati, premere il pulsante più volte, quindi premere ENTER . Premere il pulsante per selezionare “Sistema audio” e premere ENTER . Per selezionare lo standard audio desiderato, premere il pulsante più...
  • Seite 282: Attivazione Di Blocco Canali

    Attivazione di Blocco canali Tramite questa funzione è possibile impedire a utenti non autorizzati, ad esempio i bambini, di guardare programmi non adatti annullando il video e azzerando l’audio. La funzione Blocca canali non può essere disattivata utilizzando i tasti sul pannello laterale.
  • Seite 283: Assegnazione Dei Nomi Ai Canali

    Assegnazione dei nomi ai canali I nomi dei canali vengono attribuiti automaticamente al ricevimento del segnale di broadcasting del canale. Tali nomi possono essere modificati in seguito, consentendone una personalizzazione. Premere il tasto MENU per visualizzare il menu. Premere il pulsante per selezionare “Canale”...
  • Seite 284: Uso Della Funzione Lna (Low Noise Amplifier)

    Uso della funzione LNA (Low Noise Amplifier) Questa funzione è molto utile in caso di segnale TV debole. La funzione LNA amplifica il segnale TV in condizioni di segnale debole, attraverso un preamplificatore low-noise che potenzia il segnale in ingresso. Premere il tasto MENU per visualizzare il menu.
  • Seite 285: Modifica Della Tonalità Di Colore

    Modifica della tonalità di colore E’ possibile selezionare il tono colore ottimale per la propria vista. Per selezionare l’effetto dell’immagine desiderato, seguire le istruzioni “Modifica dello standard dell’immagine” dal punto 1 al punto 3 a pagina 12. Premere il pulsante per selezionare “Toni colore”...
  • Seite 286: Azzeramento Delle Impostazioni Di Visualizzazione Dell'immagine Ai Valori Preimpostati In Fabbrica

    Azzeramento delle impostazioni di visualizzazione dell’immagine ai valori preimpostati in fabbrica E’ possibile ripristinare le impostazioni di visualizzazione dell’immagine preimpostate in fabbrica. Per selezionare l’effetto dell’immagine desiderato, seguire le istruzioni “Modifica dello standard dell’immagine” dal punto 1 al punto 3 a pagina 12. Premere il pulsante per selezionare “Reset”...
  • Seite 287: Fermo Immagine Corrente

    Premere il tasto EXIT per uscire. DNIe Demo (Digital Natural Image engine) La nuova tecnologia Samsung offre immagini più dettagliate e un miglioramento del contrasto e del bianco. Un nuovo algoritmo di compensazione dell’immagine offre immagini più chiare e brillanti. La tecnologia DNIe adatta ogni segnale per offrire un’immagine perfetta.
  • Seite 288: Cambiare Il Colour Space

    Cambiare il Colour Space Lo spazio colore è la matrice di colori composta dai colori rosso, verde e blu. Selezionare la modalità di colore preferita e scoprite lo straordinario mondo dei colori naturali. Premere il tasto MENU per visualizzare il menu. Premere il pulsante per selezionare “Immagine”...
  • Seite 289: Visualizzazione Dell'immagine Nell'immagine (Pip)

    Visualizzazione dell’immagine nell’immagine (PIP) È anche possibile visualizzare un’immagine secondaria all’interno dell’immagine principale del programma impostato o dell’ingresso video. In questo modo, è pos- sibile vedere l’immagine del programma impostato o l’ingresso video da un qual- siasi apparecchio collegato mentre si guarda l’immagine principale. Premere il tasto MENU per visualizzare il menu.
  • Seite 290: Modifica Dello Standard Audio

    Modifica dello standard audio È possibile selezionare il tipo di effetto audio speciale da utilizzare durante la visione di una determinata trasmissione. Premere il tasto MENU per visualizzare il menu. Premere il pulsante per selezionare “Suono” e premere ENTER . Premere nuovamente il tasto ENTER per selezionare “Modalità”.
  • Seite 291: Regolazione Automatica Del Volume

    Regolazione automatica del volume Ogni stazione delle emittenti ha le proprie condizioni del segnale e non è semplice per l’utente regolare il volume ogni volta che si cambia canale. Questa funzione consente di regolare automaticamente il volume del canale desiderato diminuendo il livello dell’uscita audio quando il segnale di modulazione è...
  • Seite 292: Azzeramento Delle Impostazioni Audio Ai Valori Preimpostati In Fabbrica

    Azzeramento delle impostazioni audio ai valori preimpostati in fabbrica Se la Modalità gioco è On, la funzione Reimposta audio è attiva. Selezionando la funzione Reset dopo aver effettuato l’impostazione, l’equalizzatore viene reimpostato ai valori di fabbrica. Premere il tasto MENU per visualizzare il menu. Premere il pulsante per selezionare “Suono”...
  • Seite 293: Impostazione Del Timer

    Impostazione del timer È possibile impostare un periodo di tempo compreso tra 30 e 180 minuti, scaduto il quale il monitor TV si spegne automaticamente. Premere il tasto MENU per visualizzare il menu. Premere il pulsante per selezionare “Impostazione” e premere ENTER . Premere il pulsante per selezionare “Ora”...
  • Seite 294: Scelta Della Lingua

    Scelta della lingua Quando si utilizza il monitor TV per la prima volta, è necessario selezionare la lingua di visualizzazione dei menu e delle indicazioni. Premere il tasto MENU per visualizzare il menu a video. Premere il pulsante per selezionare “Impostazione” e premere ENTER .
  • Seite 295: Impostazione Della Modalità Pagina Blu / Selezione Della Melodia

    Impostazione della modalità Pagina blu / Selezione della Melodia Pagina blu: Se il segnale non viene ricevuto o è molto debole, una schermata blu sostituisce automaticamente lo sfondo dell’immagine disturbata. Se si desidera continuare a visualizzare l’immagine di qualità scadente, è necessario impostare la modalità...
  • Seite 296: Selezione Della Sorgente

    Selezione della sorgente E’ possibile selezionare una delle sorgenti esterne collegate al jack di ingresso del televisore. Premere il tasto MENU per visualizzare il menu. Premere il tasto ENTER per selezionare “Inserisci”. Premere nuovamente il tasto ENTER per selezionare la funzione “Elenco sorgenti”.
  • Seite 297: Uso Della Funzione Wiselink

    Uso della funzione WISELINK È possibile visualizzare le foto (file JPEG) o i file musicali (MP3) memorizzati utilizzando una scheda di memoria oppure un dispositivo di archiviazione USB. Il menu “Photo” (Foto) supporta solo i file di immagine in formato JPEG. Il menu “Music”...
  • Seite 298: Uso Del Menu Wiselink

    Uso del menu WISELINK Questo menu mostra le cartelle e i file JPEG e MP3 salvati su una scheda di memoria. Premere il tasto MENU per visualizzare il menu. Premere il tasto ENTER per selezionare “Inserisci”. Premere il tasto per selezionare “WISELINK”, quindi premere il tasto ENTER .
  • Seite 299 Uso del menu Options (Opzioni) “Slideshow” : Avvia una proiezione di diapositive. (Per maggiori informazioni, consultare “Selezione di una foto e di una proiezione di diapositive” a pagina 28. ) “Ruota": È possibile ruotare le immagini in modalità a schermo intero. Le immagini possono essere ruotate di 90°, 180°, 270°...
  • Seite 300: Visualizzazione Delle Informazioni Relative A Un File Di Fotografie

    Visualizzazione delle informazioni relative a un file di fotografie Quando si seleziona un file di fotografie, sulla sinistra dello schermo del televisore appaiono le relative informazioni, come ad esempio la risoluzione, la data di modifica e l’ordine del file nella directory corrente. Risoluzione Dimensioni del file Data di modifica...
  • Seite 301: Rotazione

    “Imp. musica sfondo”: Le informazioni sul file salvato vengono visualizzate come cartella o file MP3. "Scegli file per musica sfondo", quindi premere il tasto ENTER. Passare alla cartella che contiene i file MP3 da utilizzare come musica di sottofondo. Selezionare un file MP3 file e premere il tasto ENTER. Il file selezionato verrà...
  • Seite 302: Ingrandimento

    Ingrandimento È possibile visualizzare un’immagine con ingrandimento 2x, 3x o 4x a schermo intero. Completare i passaggi da 1 a 4 della procedura “Uso del menu WISELINK”. (Vedere pagina 26) Premere il tasto per selezionare “Photo”, quindi premere il tasto ENTER. Le informazioni sul file salvato verranno visualizzate come cartella o file.
  • Seite 303: Copia Di File Di Immagine

    Copia di file di immagine È possibile copiare i file di immagine su una scheda di memoria differente. Completare i passaggi da 1 a 4 della procedura “Uso del menu WISELINK”. (Vedere pagina 26) Premere il tasto per selezionare “Photo” (Foto), quindi premere il tasto ENTER.
  • Seite 304: Stampa Di Una Fotografia

    Stampa di una fotografia È possibile stampare i file di immagine direttamente con la stampante. Completare i passaggi da 1 a 4 della procedura “Uso del menu WISELINK”. (Vedere pagina 26) Premere il tasto per selezionare “Photo”, quindi premere il tasto ENTER.
  • Seite 305: Copia Di File Musicali

    Informazioni sulla funzione Musica OSD corrente Funzione (Music) Esegui/Pausa Quando si preme il tasto PLAY/PAUSE telecomando durante la riproduzione di un brano Quando si preme il tasto STOP sul telecomando (Music) Arresto mentre il brano è in pausa Copia di file musicali È...
  • Seite 306: Uso Del Menu Di Impostazione

    Uso del menu di impostazione Il menu di impostazione mostra le impostazioni utente del menu WISELINK. Completare i passaggi da 1 a 4 della procedura “Uso del menu WISELINK”. (Vedere pagina 26) Premere il tasto per selezionare “Setup”, quindi premere il tasto ENTER. Le informazioni sul file salvato verranno visualizzate come cartella o file.
  • Seite 307: Teletext Decodicer

    Teletext DeCodicer La maggior parte dei canale del televisore è dotata di “teletext”, ovvero di pagine di informazioni scritte, quali: Orari dei programmi televisivi. Notiziari e previsioni del tempo. Risultati sportivi. Sottotitoli per non udenti. Le pagine del teletext sono suddivise in sei categorie: Parte Sommario Numero della pagina selezionata.
  • Seite 308: Selezione Di Una Pagina Teletext Specifica

    Selezione di una pagina Teletext specifica Premere i tasti numerici sul telecomando per immettere il numero di pagina direttamente: Immettere il numero della pagina a tre cifre indicato nel sommario utilizzando i tasti numerici corrispondenti. Se la pagina selezionata è collegata a diverse pagine secondarie, le pagine secondarie vengono mostrate in sequenza.
  • Seite 309: Configurazione Del Telecomando

    Configurazione del telecomando Una volta impostato correttamente, il telecomando può funzionare in cinque modi diversi: TV, VCR, Ricevitore televisivo via cavo, DVD, o Set- Top Box. Premendo sul telecomando i tasti corrispondenti, è possibile passare da una modalità all’altra e far funzionare l’apparecchio desiderato.
  • Seite 310 Configurazione del telecomando per controllare il lettore DVD Spegnere il lettore DVD. Premere il tasto DVD del telecomando della TV. Premere il tasto SET del telecomando della TV. Utilizzando i tasti numerici del telecomando, inserire le tre cifre del codice del lettore DVD elencate a pagina 40~41 di questo manuale per selezionare la marca del lettore DVD.
  • Seite 311: Codici Del Telecomando

    Codici del telecomando Marca Codice Marca Codice SAMSUNG 000 001 002 003 004 005 077 078 079 MONTGOMERY WARD ADMIRAL 002 025 AIWA MULTITECH 002 005 025 038 AKAI 004 027 032 007 008 018 026 037 062 064 AUDIO DYNAMICS...
  • Seite 312 SHARP YAMAKAWA 040 073 SANSUI XWAVE SANYO 062 090 ZENITH 076 121 SHINSONIC SAMSUNG Set- Top Box Prodotto Codice Prodotto Codice Ground wave STB 001 002 Satellite STB HDD COMBO Premium Satellite STB CABLE STB HDD COMBO Standard CABLE STB...
  • Seite 313 VIEWSTAR 019 021 023 028 PIONEER 004 018 020 044 WAMER AMEX 014 022 040 ZENITH 017 029 035 037 045 REGAL SAMSUNG DVD Prodotto Codice Prodotto Codice 000 001 002 Home Theater VCR COMBO 014 015 016 DVDR 003 004...
  • Seite 314: Configurazione Del Software Per Pc (Basato Su Windows Xp)

    Nel caso le schermate risultassero differenti, le stesse informazioni di base per la configurazione sono applicabili praticamente in ogni caso. (In caso contrario, contattare la casa costruttrice del proprio computer oppure un rivenditore Samsung). Fare clic su “Control Panel” nel menu Start di Windows.
  • Seite 315: Selezione Del Pc

    Selezione del PC Regolazione della qualità dell’immagine (Blocco immagine): Lo scopo della regolazione della qualità dell’immagine è di rimuovere o ridurre i dis- turbi. Se il disturbo non viene eliminato mediante la semplice sintonizzazione fine, è necessario regolare al meglio la frequenza (sintonizzazione grossa) ed eseguire nuovamente la sintonizzazione fine.
  • Seite 316: Uso Del Blocco Antifurto Kensington

    Uso del blocco antifurto Kensington Il blocco Kensington è utilizzato per fissare il sistema durante l’impiego in ambienti pubblici e deve essere acquistato separatamente. L’aspetto e il metodo di bloccaggio potrebbero differire dall’illustrazione a seconda del produttore. Per ulteriori informazioni relative all’uso corretto del blocco Kensington, fare riferimento al rispettivo manuale. 1.
  • Seite 317: Specifiche Tecniche E Ambientali

    Specifiche tecniche e ambientali LE32M7 LE40M7 Nome del modello poll. poll. Dimensione schermo (Diagonale) AC 220-240 V, 50 Hz AC 220-240 V, 50 Hz Alimentazione 155 W 210 W Consumo di energia 1360 x 768 @ 60 Hz 1360 x 768 @ 60 Hz...
  • Seite 318: Diagrammi A Blocchi

    Diagrammi a blocchi Italiano-46...
  • Seite 319 Questa pagina è stata lasciata intenzionalmente vuota.
  • Seite 320 Correct Disposal of This Product (Waste Electrical & Electronic Equipment) (Applicable in the European Union and other European countries with separate collection systems) This marking shown on the product or its literature, indicates that it should not be disposed with other household wastes at the end of its working life.

Diese Anleitung auch für:

Le32m7Le32m71bLe40m71b

Inhaltsverzeichnis