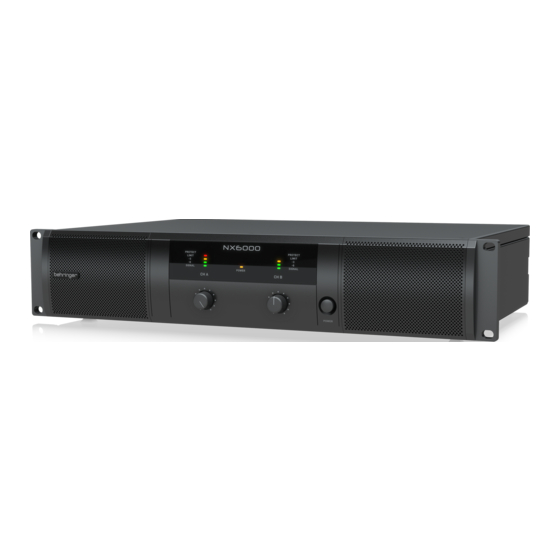
Behringer NX6000 Schnellstartanleitung
Vorschau ausblenden
Andere Handbücher für NX6000:
- Sicherheitshinweise (44 Seiten) ,
- Handbuch (44 Seiten)
Quick Start Guide
NX6000/NX3000/NX1000
Ultra-Lightweight 6000/3000/1000 W Class-D Power Amplifier with
SmartSense Loudspeaker Impedance Compensation
NX4-6000
Ultra-Lightweight 6000 W 4-Channel Class-D Power Amplifier with
SmartSense Loudspeaker Impedance Compensation
NX6000D/NX3000D/NX1000D
Ultra-Lightweight 6000/3000/1000 W Class-D Power Amplifier with
DSP Control and SmartSense Loudspeaker Impedance Compensation
V 6.0
Inhaltsverzeichnis

Verwandte Anleitungen für Behringer NX6000


Inhaltszusammenfassung für Behringer NX6000
- Seite 1 Quick Start Guide NX6000/NX3000/NX1000 Ultra-Lightweight 6000/3000/1000 W Class-D Power Amplifier with SmartSense Loudspeaker Impedance Compensation NX4-6000 Ultra-Lightweight 6000 W 4-Channel Class-D Power Amplifier with SmartSense Loudspeaker Impedance Compensation NX6000D/NX3000D/NX1000D Ultra-Lightweight 6000/3000/1000 W Class-D Power Amplifier with DSP Control and SmartSense Loudspeaker Impedance Compensation...
-
Seite 2: Important Safety Instructions
Lake, Tannoy, Turbosound, TC Electronic, TC Helicon, en el manual de operaciones. Las reparaciones deben ser Please refer to the information on the Behringer, Bugera, Aston Microphones and Coolaudio realizadas exclusivamente por personal cualificado. exterior of bottom enclosure for electrical are trademarks or registered trademarks of Music... - Seite 3 NX Series NX6000/NX3000/NX1000/NX4-6000 Controls (13) (10) (11) (12) NX3000/NX1000 (14) (10) (13) (11) (12) NX6000 (14) (10) (13) (11) (12) NX4-6000...
- Seite 4 MODE SWITCH Choose the amplifier mode by (11) knobs counter-clockwise. BREAKER (automated fuse, NX6000 and (14) toggling the sliding MODE SWITCH between NX4-6000 only). After eliminating the cause of (6) POWER button turns the amplifier on and off.
- Seite 5 NX Series NX6000D/NX3000D/NX1000D Controls (8) (9) (5) (7) (10) (11) (17) (12) (13) (14) (15) (16) NX3000D/NX1000D (8) (9) (5) (7) (10) (11) (18) (15) (17) (12) (13) (14) (16) NX6000D...
- Seite 6 LED will light and the unit will automatically and control over parameters via computer. mute the channel until the error is no longer Please visit behringer.com to download DSP detected, after which the PROTECT LED will control software for your computer. The USB switch off and the amp will behave normally.
- Seite 7 NX Series NX6000/NX3000/NX1000/NX4-6000 Getting started (EN) Step 3: Getting Make sure the amplifier and your Ligue sua fonte de som (mixer, CD player, (EN) (PT) sound source are turned OFF. computador). started Asegurese de que tanto el amplificador Accendi la sorgente sonora (mixer, lettore CD,...
- Seite 8 Quick Start Guide Adjust the INPUT CONTROLS to set Justera INPUT CONTROLS för att ställa in (EN) (SE) the input levels. ingångsnivåerna. If the LIMIT LEDs light up continuously, Om LIMIT-lysdioderna lyser kontinuerligt sänker lower the INPUT CONTROLS until the LIMIT LEDs du INGÅNGSKONTROLLER tills LIMIT-lysdioderna only light occasionally.
- Seite 9 NX Series NX6000D/NX3000D/NX1000D Getting started ボタンを押すと、 画面が表 (EN) Step 3: Getting Power on the amplifier by pressing PROCESS (EN) (JP) 示されます。 the POWER button. The startup screen started will appear on the LCD display. PROCESS (CN) 按下 按钮通过逐步执行 屏 Encienda el amplificador pulsando el botón POWER. 来移动。...
- Seite 10 Quick Start Guide Draai in de grafische modus aan de SELECT Nella schermata PEQ, distribuisci fino a 8 diversi (CN) 在编辑模式 旋转 编码器旋钮改 (NL) (IT) SELECT-encoderknop om het actieve kanaal en UP/DOWN/EXIT filtri dell'equalizzatore parametrico per modellare il 变参数。 按下 按钮逐步执行...
- Seite 11 NX Series NX6000D/NX3000D/NX1000D Getting started (EN) Step 3: Getting XOVER Nella schermata DEQ, è possibile distribuire (CN) 在 屏 为每个输出端选择多达 个 (IT) moduli Dynamic EQ (fino a 2 per canale stereo) per 截止频率分频点 和多达 个不同的滤波 started monitorare gli intervalli di frequenza designati 器曲线。...
- Seite 12 Quick Start Guide On the DELAY screens, you may Op de DELAY-schermen kunt u fase- Auf dem LIMIT–Bildschirm können Sie mit (EN) (NL) (DE) compensate for phase cancellation annuleringsproblemen in uw systeem compenseren den integrierten Limitern eigene Threshold problems in your system by altering door de signaalfase te wijzigen (FASE: 0 °...
- Seite 13 NX Series NX6000D/NX3000D/NX1000D Getting started (EN) Step 3: Getting Druk op de SETUP-knop om presets op te NOTA: El DSP almacena de forma automática (NL) (ES) slaan of te laden, het paneel te vergrendelen en cualquier cambio que haya realizado tras dos started een wachtwoord in te stellen, en het LCD-contrast minutos o una vez que vuelva a la pantalla principal...
- Seite 14 Quick Start Guide NX6000/NX3000/NX1000/NX4-6000 Bi-amping (EN) Step 4: Bi-amping Bi-amping splits a signal into upper and Bi-amping delar upp en signal i övre och nedre (EN) (SE) lower frequency bands, and then assigns each frekvensband och tilldelar sedan varje frekvensband frequency band to separate speaker cabinets.
- Seite 15 NX Series NX6000/NX3000/NX1000/NX4-6000 Bi-amping (EN) Step 4: Bi-amping UWAGA: NX4-6000 działa w zasadzie według (NL) Horizontale dubbele versterking (PL) Horizontale bi-amping gebruikt één NX-versterker tego samego scenariusza, ale ma tę zaletę, że om de hoge frequenties te verwerken, terwijl wszystkie połączenia i ustawienia są wymagane...
- Seite 16 Quick Start Guide (JP) モード ・ スイッチの位置を 「 ステ On the amplifier intended for low STEREO ( Kör en 4-polig högtalarkabel med professionella (EN) (SE) レオ 」 にします。 frequencies, slide the CROSSOVER switch vridlåskontakter från varje förstärkares CH A-utgång to the LF position. till en kontaktdistributionspanel.
- Seite 17 NX Series NX6000/NX3000/NX1000/NX4-6000 Bi-amping (EN) Step 4: Bi-amping Bedraad het verdeelpaneel om de CH A-uitgang Allo stesso modo, indirizzare l'uscita CH A (NL) (IT) van de HF-versterker (1+/1-) naar de pinnen 1+/1- dell'amplificatore LF (1+/1-) ai pin 2+/2- van de linkeruitgang van het paneel te leiden, terwijl...
- Seite 18 Impostare il subwoofer sulla modalità falantes mid/high-range (alcance médio-alto). O (IT) pinnen 1+/1- en het signaal van de LF-versterker op "BIAMPING". Sui subwoofer BEHRINGER, il segnale sinal do amplificador HF nos pinos 1+/1- agora de 2+/2-pinnen. dell'amplificatore LF sui pin 2+/2- farà funzionare il comandará...
- Seite 19 NX Series NX6000/NX3000/NX1000/NX4-6000 Bi-amping (EN) Step 4: Bi-amping NOTE: If your subwoofers run using only pins UWAGA: Poprowadź 2-biegunowy kabel (EN) (PL) 1+/1-, you may connect the subwoofers directly to głośnikowy z gniazda wyjściowego subwoofera the amplifiers and you will not need a distribution do głośników średnio- i wysokotonowych.
- Seite 20 Quick Start Guide Digital Snake S16 X32 Compact NX3000 NX3000 B1520 PRO B1520 PRO 4-pole 4-pole 2-pole 2-pole INPUT HF INPUT LF CH A / CH B CH A / CH B 4-pole 4-pole OUTPUT CH A OUTPUT CH A LF / HF LF / HF B1800X PRO...
- Seite 21 NX Series NX6000/NX3000/NX1000/NX4-6000 Bi-amping (JP) 垂直バイアンプ方式 (EN) Step 4: Bi-amping (EN) Vertical Bi-amping 垂直バイアンプ方式は、 各ステレオサイド Vertical bi-amping deploys a single amplifier per につきアンプリファー 台を接続します。 stereo side. An external crossover splits the original (ES) Paso 4: Bi-amping 外部クロスオーバー機器で、 オリジナル信 signal into separate low-frequency and mid/high- 号を、...
- Seite 22 Quick Start Guide Set your external crossover to split Wprowadź sygnały średniej / wysokiej Schuif op zowel de linker als de rechter (EN) (PL) (NL) your stereo signal into low and mid/high częstotliwości ze zwrotnic do wejść CH A każdego versterker de CROSSOVER-schakelaar naar de frequency bands at around 100 Hz.
- Seite 23 NX Series NX6000/NX3000/NX1000/NX4-6000 Bi-amping (EN) Step 4: Bi-amping Run a 4-pole speaker cable with Zet de subwoofer in de modus "BIAMPING". (EN) (NL) professional twist-locking connectors Ställ subwoofern i “BIAMPING” -läge. (SE) from each amplifier’s CH A output to the (ES) Paso 4: Bi-amping respective left and right subwoofers.
- Seite 24 Quick Start Guide Digital Snake S16 X32 Compact DCX2496 NX3000 NX3000 B1520 PRO B1520 PRO 2-pole 2-pole 4-pole 4-pole B1800X PRO B1800X PRO...
- Seite 25 NX Series NX6000D/NX3000D/NX1000D Bi-amping (EN) Step 4: Bi-amping Choose the BIAMP1 setting on the Verlegen Sie ein 4-Pol Boxenkabel (EN) (DE) Amp Mode screen. mit professionellen verriegelbaren Lautsprecheranschlüssen von OUTPUT CH A zum (ES) Paso 4: Bi-amping Elija el ajuste BIAMP1 en la pantalla (ES) Subwoofer.
- Seite 26 Quick Start Guide Set the subwoofer into BIAMPING Go to the XOVER screen using the UP/ Im Kanal A#1 wählen Sie einen entsprechenden (EN) (EN) (DE) mode. DOWN buttons to set appropriate high/ Hochpass-Filtertypus aus (HPtype: BUT6, BUT12, low crossover frequencies. BES12, etc.) und stellen die Cutoff Frequenz (HPfreq) Ajuste el subwoofer al modo (ES)
- Seite 27 NX Series NX6000D/NX3000D/NX1000D Bi-amping (EN) Step 4: Bi-amping In Channel B#1, choose your low-pass Na kanale B # 1 wybierz typ filtra (EN) (PL) filter type (LPtype: BUT6, BUT12, BES12, dolnoprzepustowego (typ LP: BUT6, BUT12, BES12 etc.) and set the cutoff frequency itp.) I ustaw częstotliwość...
- Seite 28 Quick Start Guide XLR balanced XLR balanced XENYX 1202FX NX3000D NX3000D 4-pole 4-pole 2-pole 2-pole B1520 PRO B1800X PRO B1520 PRO B1800X PRO B1800X PRO Rear B1800X PRO Rear...
- Seite 29 NX Series Specifications NX6000D NX6000 NX4-6000 NX3000D Maximum Output Power Stereo / 4-channel 2 Ω per channel, stereo — 4 x 1600 W 2 x 1500 W 4 Ω per channel, stereo 2 x 3000 W 4 x 860 W 2 x 900 W 8 Ω...
- Seite 30 Quick Start Guide NX6000D NX6000 NX4-6000 NX3000D System Inputs 2 x combo jacks 4 x combo jacks 2 x combo jacks Input impedance 10 kΩ unbalanced, 20 kΩ balanced Outputs 4 x locking-style professional 2 x locking-style professional 2 x locking-style professional speaker connectors...
- Seite 31 NX Series Specifications NX3000 NX1000D NX1000 Maximum Output Power Stereo / 4-channel 2 Ω per channel, stereo 2 x 1500 W 2 x 500 W 4 Ω per channel, stereo 2 x 900 W 2 x 300 W 8 Ω per channel, stereo 2 x 440 W 2 x 160 W Bridge connection...
- Seite 32 Quick Start Guide NX3000 NX1000D NX1000 System Inputs 2 x combo jacks Input impedance 10 kΩ unbalanced, 20 kΩ balanced Outputs 2 x locking-style professional speaker connectors Output circuit type Class D Distortion <0.05% <0.1% <0.05% Frequency response 20 Hz to 20 kHz, +0 / -1 dB Damping factor >145 @ 8 Ω...
-
Seite 33: Aspectos Importantes
NX Series Other important information Outras Informações Important information Informations importantes Importantes 1. Register online. Please register your new 1. Enregistrez-vous en ligne. Prenez le 1. Registre-se online. Por favor, registre seu Music Tribe equipment right after you purchase it by temps d’enregistrer votre produit Music Tribe aussi vite novo equipamento Music Tribe logo após a compra visiting musictribe.com. - Seite 34 Behringer substances that are generally associated with EEE. At the same time, your cooperation in the correct disposal of this product will contribute to the NX Series efficient use of natural resources.
- Seite 35 Quick Start Guide...
- Seite 36 We Hear You...