Werbung
Verfügbare Sprachen
Verfügbare Sprachen
Quicklinks
Werbung

Verwandte Anleitungen für AIPTEK Pocket DVT100


Inhaltszusammenfassung für AIPTEK Pocket DVT100
- Seite 1 All manuals and user guides at all-guides.com English...
- Seite 2 All manuals and user guides at all-guides.com Safety Notice: 1. Do not drop, puncture or disassemble the camera; otherwise the warranty will be voided. 2. Avoid all contact with water, and dry hands before using. 3. Do not expose the camera to high temperature or leave it in direct sunlight. Doing so may damage the camera.
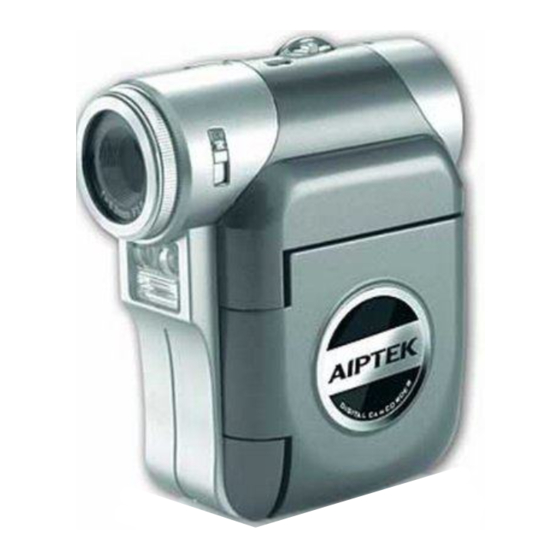
- Seite 3 All manuals and user guides at all-guides.com Camcorder Parts * Avoid blocking the strobe. Focus switch Mode/ button Speaker Microphone USB Port Shutter Button ( Strap hook TV-out Connector/ Lens Earphone *Record button ( Video light SD/MMC Card Slot Up button (Zoom in) Flash strobe Power Button ( Down button (Zoom out)
- Seite 4 All manuals and user guides at all-guides.com Inserting the SD/MMC card (optional) 1. Lift the SD card cover. 2. Insert the card in the direction of indication until it reaches the end of the slot. 3. When using a SD card, the built-in memory will become inaccessible. 4.
- Seite 5 All manuals and user guides at all-guides.com Reading LCD indicators Digital Camcorder mode: Flash mode Focus mode Photo resolution NightShot 1.1x Zoom ratio Smart Zoom SD card inserted Battery life Number of pictures/files Playback thumbnail mode: Current/total recordings Play mode File type Highlight box Playback full mode:...
- Seite 6 All manuals and user guides at all-guides.com Recording a video clip 1. Set the focus to an appropriate setting. Normally, you may set the focus to ( for most filming conditions. Select ( ) only for close-ups. 2. Press the Record button ( ) to start recording.
- Seite 7 All manuals and user guides at all-guides.com Connecting the camcorder to a TV Connect your camcorder and TV via the accessory AV cable for real-time display. You can display your video clips, still pictures, and audio recordings directly on your TV, sharing them with your friends and family.
- Seite 8 All manuals and user guides at all-guides.com Mode selection 1. Turn on the camcorder. 2. Press the button. 3. Use the Zoom buttons ( ) to select the desired item. 4. Press the button to confirm. Basic operation How to... Action Move the highlight bar Zoom buttons (...
- Seite 9 All manuals and user guides at all-guides.com Menu items in Camera mode (2) Item Option Description This setting allows you to add customized frames to photos. 10 * Photo- background frames are available on the LCD monitor. 1 ~ 10 Frame The Photo-Frame function is disabled Set the video resolution to VGA (640x480 pixels).
- Seite 10 All manuals and user guides at all-guides.com Menu items in Playback mode Power-on → Press the Mode button → Enter the Playback mode → Press the Shutter button Item Option Description Delete One Yes/No Delete current file. Delete All Yes/No Delete all pictures and video/audio files stored in the memory.
- Seite 11 All manuals and user guides at all-guides.com Menu items in Setting mode (2) Item Option Description Language Lets you select the language used for OSD. When connected to a PC, the camcorder displays a menu for Menu you to choose a desired connection mode. When connected to a PC, the camcorder automatically enters USB Mode Camera...
- Seite 12 All manuals and user guides at all-guides.com Storage Capacity Video (min.) Audio (min.) Memory QVGA Maximum SD/MMC card (128MB) SD/MMC card (256MB) SD/MMC card (512MB) SD/MMC card (1GB) Still picture Memory SD/MMC card (128MB) SD/MMC card (256MB) 1540 SD/MMC card (512MB) 1230 3080 SD/MMC card (1GB)
- Seite 13 All manuals and user guides at all-guides.com Specifications Sensor effective resolution 3 Mega (2048x1536) pixels Interpolated resolution 10 Mega (3584x2688) pixels External memory Built-in SD/MMC card slot (maximum: 2GB) JPEG (.JPG) format 3584x2688 (10 Mega) pixels Digital still camera 2560x1920 (5 Mega) pixels 2048x1536 (3 Mega) pixels 1280x960 (1 Mega) pixels VGA (640x480 pixels) / up to 30 fps...
- Seite 14 All manuals and user guides at all-guides.com Advanced Instructions English...
- Seite 15 All manuals and user guides at all-guides.com Copying files to Your PC Installing the driver to your PC You need to install the camcorder driver to ensure that video clips can be played back on your PC. To install the software: 1.
- Seite 16 All manuals and user guides at all-guides.com Copying files to Your PC (continued) 4. Install codecs. After the driver installation is completed, the program will prompt you to install Windows Media Player Codecs. If you are not sure whether the codecs have been installed in your computer, please click on Yes and follow the on-screen instructions to complete the installation.
- Seite 17 All manuals and user guides at all-guides.com Connecting the camcorder to your PC 1. Turn on the camcorder. 2. Connect the USB cable to your computer. Turn on your computer, and then connect the accessory USB cable to the USB port of your computer.
- Seite 18 All manuals and user guides at all-guides.com File location After connecting the camcorder to your computer, a removable disk will appear in your computer. The removable disk actually represents the storage medium of your camcorder. In the disk you can find all of your recordings. Refer to the figure below to see where the files are stored.
- Seite 19 All manuals and user guides at all-guides.com Using PC Camera Installing the software The PC camera software is included in the camera driver, and therefore you should install the driver before using the PC camera function. Starting the application 1. Turn on the camcorder and connect the camcorder to your computer. Turn on the camcorder, and then connect the camcorder to your computer using the accessory USB cable.
- Seite 20 All manuals and user guides at all-guides.com Using DV TS PC Camera Start recording a video clip Start/Stop preview window Stop recording Setting Snapshot Open album Format Select video source Source Sub-menu available. To view pictures taken by DV TS PC Camera, please click on to open the photo album.
- Seite 21 All manuals and user guides at all-guides.com Using DV TS PC Camera (Continued) Recording an AVI movie 1. Click on the icon. 2. Press to specify the path and name of the AVI file. 3. Set the frame rate and recording time according to your needs.
- Seite 22 All manuals and user guides at all-guides.com Using DV TS PC Camera (Continued) Configuring Source options Device Control: - Brightness: You can check the “Auto” item and let the program adjust image brightness for you, or uncheck the “Auto” item and slide the bar to adjust image brightness manually.
- Seite 23 All manuals and user guides at all-guides.com Appendix: A Troubleshooting When using the camcorder: Problem Cause Solution The battery is out of power. Replace the battery. The camcorder can not be powered on normally. The battery is incorrectly Re-install the battery. installed.
- Seite 24 All manuals and user guides at all-guides.com Appendix: A When using the camcorder: Problem Cause Solution If the battery icon indicates low battery, the flash strobe Cannot use the flash strobe. Replace the battery. may be disabled due to insufficient voltage. Remove the battery pack The camcorder does not The camcorder encounters...
- Seite 25 All manuals and user guides at all-guides.com Appendix: A When connecting the camcorder to the computer or TV: Problem Cause Solution Install Direct X 9.0c or above and Windows Media 9.0 Codecs to solve this problem. See “Installing the driver I cannot view the video clips Driver or software is not to your PC”...
- Seite 26 All manuals and user guides at all-guides.com Appendix: A Flicker Settings Country England Germany France Italy Spain Russia Setting 50Hz 50Hz 50Hz 50Hz 50Hz 50Hz Country Portugal America Taiwan China Japan Korea Setting 50Hz 60Hz 60Hz 50Hz 50/60Hz 60Hz Note: The flicker setting is based on the frequency standard of your local power supply. System Message Message Description...
- Seite 27 All manuals and user guides at all-guides.com Appendix: B Instruction for ArcSoft MediaConverter™ Introduction ArcSoft MediaConverter is a powerful all-in-one multimedia file converter. This utility quickly and effortlessly converts photo, video, and music files into formats optimized for use on your portable device. Multiple files and file types can be converted at the same time.
- Seite 28 All manuals and user guides at all-guides.com Appendix: B Supported file formats Video Video files are converted and copied to the selected location as MPEG-4 encoded AVI files, WMV files or MPEG-4 encoded ASF files (Default). Supported file types for conversion - AVI (Microsoft Video 1 format, Cinepak, Intel Indeo, uncompressed, etc.) - MPEG-1 in MPEG, MPG, MPE - DAT (VCD MPEG1)
- Seite 29 All manuals and user guides at all-guides.com Appendix: B Converted files...
- Seite 30 All manuals and user guides at all-guides.com Appendix: B Step 1: Select media Adding files for conversion 1 Click the “Select Media” button. 2 An “Open” window will appear. Navigate to the folder that contains the files you’d like to convert.
- Seite 31 All manuals and user guides at all-guides.com Appendix: B Step 2: Select destination Click the “Select Destination” button to select the location where your converted files will be saved. The default save location is “C:\Documents and Settings\ [current user]\My documents”. However, you’ll most likely want to save the files to your portable device.
- Seite 32 All manuals and user guides at all-guides.com Appendix: B Video settings When converting a video file, there are several different parameters: - Resolution (Options include QVGA (320 x 240) [default] and VGA (640 x 480)) - File Format (MPEG-4 encoded AVI files, WMV files or MPEG-4 encoded ASF files) - Video Bitrate (Options include 500KB, 1.0MB, 1.5MB, 2.0 MB [default], 2.5 MB, and 3.0 - Audio Bitrate (Options include 96 KB, 128 KB [default], 192 KB) - Frame Per Second (Options include [in fps] 15.00, 20.00, 24.00, 25.00 [default], and...
- Seite 33 All manuals and user guides at all-guides.com Appendix: B Playing the converted ASF files in your camcorder To play the video clips or movies (MPEG-4 in ASF format only) converted by ArcSoft MediaConverter in your MPEG-4 digital camcorder, please follow the steps below. Step 1 Insert a SD/MMC card in the card slot of the camcorder and connect the camcorder to PC via the USB cable.
- Seite 34 All manuals and user guides at all-guides.com Appendix: C System Requirements Operating System: Windows 2000/XP CPU: Pentium III or above System RAM: 128MB or above Graphic Card: 64MB, 24 bit true color CD-ROM speed: 4x or above Software: Direct X 9.0c or above and Windows Media Player Codecs Other: USB connector...
- Seite 35 All manuals and user guides at all-guides.com Digital-Camcorder Deutsch...
- Seite 36 All manuals and user guides at all-guides.com Camcorder-Teile * Achten Sie darauf, den Blitz nicht zu blockieren. Fokusschalter Modus-/ -Taste Lautsprecher Mikrofon USB-Anschluss Auslöser ( Riemenöse TV-Ausgang/Ohrhörer Objektiv *Aufnahmetaste ( SD-/MMC- Hilfslicht Karteneinschub Aufwärtstaste Blitzlicht (Einzoomen) Ein-/Aus-Taste ( Batteriefachabdeckung Hilfslicht Abwärtstaste Stativanschluss (Auszoomen)
- Seite 37 All manuals and user guides at all-guides.com Einlegen der SD-/MMC-Karte (optional) 1. Klappen Sie die SD-Karteneinschubabdeckung hoch. 2. Stecken Sie die Karte in die angegebene Richtung bis zum Anschlag in den Einschub hinein. 3. Bei Verwendung einer SD-Karte ist ein Zugriff auf den integrierten Speicher nicht mehr möglich. 4.
- Seite 38 All manuals and user guides at all-guides.com Lesen der LCD-Anzeigen Digitalcamcordermodus: Blitzmodus Fokusmodus Fotoauflösung Nachtaufnahme 1.1x Zoom-Verhältnis Smart-Zoom SD-Karte eingelegt Batterieladestand Anzahl der Bilder/Dateien Wiedergabeminiaturmodus: Aktuelle Aufnahme / Aufnahmen gesamt Wiedergabemodus Dateityp Markierungsrahmen Wiedergabevollbildmodus: Aufnahmezeit Wiedergabemodus Lautstärke Videoaufnahmemodus: Aufnahmezeit Hilfslichtmodus Fokusmodus Videoauflösung Nachtaufnahme...
- Seite 39 All manuals and user guides at all-guides.com Aufzeichnen von Videos 1. Stellen Sie den Fokus richtig ein. Für die meisten Filmaufnahmen sollten Sie den einstellen. Wählen Sie ( ) nur für Nahaufnahmen ( 2. Drücken Sie die Aufnahme ( ), um mit der Aufzeichnung zu beginnen. 3.
- Seite 40 All manuals and user guides at all-guides.com Anschließen des Camcorders an ein TV-Gerät Schließen Sie den Camcorder zur Echtzeitanzeige mit dem mitgelieferten AV-Kabel an ein TV-Gerät an. Sie können Ihre Videos, Fotos und Audiodateien direkt über ein TV-Gerät wiedergeben, um sie so mit Freunden und Familienangehörigen gemeinsam zu betrachten. TV-Gerät AV-Modus Video...
- Seite 41 All manuals and user guides at all-guides.com Moduswahl 1. Schalten Sie den Camcorder ein. 2. Drücken Sie die -Taste. 3. Mit den Zoomtasten ( ) wählen Sie den gewünschten Menüpunkt. 4. Drücken Sie die -Taste, um diesen Modus zu bestätigen. Grundbetrieb Funktion...
- Seite 42 All manuals and user guides at all-guides.com Menüpunkte im Kameramodus (2) Menüpunkt Optionen Beschreibung Diese Einstellung ermöglicht es Ihnen, Fotos mit definierten Rahmen zu versehen. Auf dem LCD-Bildschirm stehen zehn * Fotorahmen 1 ~ 10 Hintergrundrahmen zur Auswahl zur Verfügung. Die Fotorahmenfunktion wird deaktiviert.
- Seite 43 All manuals and user guides at all-guides.com Menüpunkte im Wiedergabemodus Einschalten → Modustaste drücken → Wiedergabemodus aufrufen → Drücken Sie den Auslöser ( Menüpunkt Optionen Beschreibung Löschen Ja/Nein Löschen der aktuellen Datei. Alles löschen Ja/Nein Löschen aller Fotos und Video-/Audiodateien im Speicher. Menüpunkte im Einstellungsmodus (1) Einschalten →...
- Seite 44 All manuals and user guides at all-guides.com Menüpunkte im Einstellungsmodus (2) Menüpunkt Optionen Beschreibung Sprache Ermöglicht Ihnen die Auswahl der Menüsprache. Bei Anschluss an einen PC zeigt der Camcorder ein Menü an, Menü aus dem Sie den gewünschten Verbindungsmodus auswählen können.
- Seite 45 All manuals and user guides at all-guides.com Speicherkapazität Video (Min.) Audio (Min.) Speicher QVGA Maximal SD/MMC-Karte (128MB) SD/MMC-Karte (256MB) SD/MMC-Karte (512MB) SD/MMC-Karte (1GB) Foto Speicher SD/MMC-Karte (128MB) SD/MMC-Karte (256MB) 1540 SD/MMC-Karte (512MB) 1230 3080 SD/MMC-Karte (1GB) 1600 2500 6160 Hinweis: Die tatsächliche Kapazität kann je nach Farbsättigung und Komplexität Ihres Aufnahmeobjekts und der Umgebung variieren (bis zu ±...
- Seite 46 All manuals and user guides at all-guides.com Technische Daten Effektive Sensorauflösung 3 Megapixel (2048 x 1536) Interpolierte Auflösung 10 Megapixel (3584 x 2688) Externer Speicher Eingebauter SD/MMC-Karteneinschub (Max: 2 GB) JPEG-Format (JPG) 3584 x 2688 (10 Megapixel) Digitale Fotokamera 2560 x 1920 (5 Megapixel) 2048 x 1536 (3 Megapixel) 1280 x 960 (1 Megapixel) Digitaler...
- Seite 47 All manuals and user guides at all-guides.com Erweiterte Anweisungen Digital-Camcorder Deutsch...
- Seite 48 All manuals and user guides at all-guides.com Kopieren von Dateien auf Ihren PC Installieren des Treibers auf dem PC Damit Videos auf dem PC wiedergegeben werden können, müssen Sie den Camcordertreiber installieren. So installieren Sie die Software: 1. Legen Sie die Treiber-CD ein. Schalten Sie den Computer ein.
- Seite 49 All manuals and user guides at all-guides.com Kopieren von Dateien auf den PC (Fortsetzung) 4. Installieren Sie Codecs. Nachdem die Treiberinstallation abgeschlossen ist, fordert das Programm Sie auf, Windows Media Player Codecs zu installieren. Falls Sie nicht sicher sind, ob die Codecs bereits auf Ihrem Computer installiert sind, klicken Sie bitte auf Ja und beachten Sie die Bildschirmanweisungen, um die Installation abzuschließen.
- Seite 50 All manuals and user guides at all-guides.com Anschließen des Camcorders an einen PC 1. Schalten Sie den Camcorder ein. 2. Schließen Sie das USB-Kabel an den Computer an. Schalten Sie den Computer ein und schließen Sie das mitgelieferte USB-Kabel an den USB- Anschluss Ihres Computers an.
- Seite 51 All manuals and user guides at all-guides.com Dateipfad Nach Anschluss des Camcorders an den Computer wird auf dem Computer ein Wechsellaufwerk angezeigt. Der Wechseldatenträger stellt das Speichermedium Ihres Camcorders dar. Auf diesem Wechsellaufwerk finden Sie alle Ihre Aufzeichnungen. Den Speicherort der Dateien entnehmen Sie bitte der nachstehenden Abbildung.
- Seite 52 All manuals and user guides at all-guides.com Verwenden als PC-Kamera Installieren der Software Die PC-Kamerasoftware ist im Kameratreiber enthalten, deshalb sollten Sie zuerst den Treiber installieren, bevor Sie die PC-Kamerafunktion verwenden. Starten des Programms 1. Schalten Sie den Camcorder ein und schließen Sie ihn an den Computer Schalten Sie den Camcorder ein und schließen Sie ihn mit dem mitgelieferten USB-Kabel an Ihren Computer an.
- Seite 53 All manuals and user guides at all-guides.com Verwenden der PC-Kamera DV TS Vorschaufenster Aufzeichnung eines Videos Vorschaufenster Starten/ beginnen Stopp Aufzeichnung beenden Einstellung Standbild Album öffnen Formatieren Auswahl der Videoquelle Quelle Untermenü verfügbar. Um mit der PC-Kamera DV TS aufgenommene Bilder anzuzeigen, klicken Sie auf , um das Fotoalbum zu öffnen.
- Seite 54 All manuals and user guides at all-guides.com Verwenden der PC-Kamera DV TS (Fortsetzung) Aufzeichnen eines AVI-Videos 1. Klicken Sie auf das Symbol 2. Klicken Sie auf , um den Pfad und den Namen für die AVI-Datei anzugeben. 3. Stellen Sie je nach Ihren Anforderungen die Bildwiederholfrequenz und die Aufnahmedauer ein.
- Seite 55 All manuals and user guides at all-guides.com Verwenden der PC-Kamera DV TS (Fortsetzung) Konfigurieren der Quelloptionen Gerätesteuerung: - Helligkeit: Sie können die Option “Auto” anwählen und das Programm die Bildhelligkeit für Sie anpassen lassen, oder Sie können die Option “Auto” abwählen und die Bildhelligkeit mit dem Schieberegler manuell einstellen.
- Seite 56 All manuals and user guides at all-guides.com Anhang: A Problembehebung Beim Verwenden des Camcorders: Problem Ursache Behebung Die Batterie ist leer. Wechseln Sie die Batterie. Der Camcorder lässt sich nicht normal einschalten. Die Batterie ist falsch Legen Sie die Batterie richtig eingelegt.
- Seite 57 All manuals and user guides at all-guides.com Anhang: A Beim Verwenden des Camcorders: Problem Ursache Behebung Wenn das Batteriesymbol einen niedrigen Ich kann den Blitz nicht Batterieladestand anzeigt, Wechseln Sie die Batterie. verwenden. kann der Blitz aufgrund unzureichender Spannung deaktiviert sein. Entfernen Sie die Batterie Der Camcorder reagiert und legen Sie sie wieder in...
- Seite 58 All manuals and user guides at all-guides.com Anhang: A Beim Anschließen des Camcorders an einen Computer oder ein TV-Gerät. Problem Ursache Behebung Installieren Sie Direct X 9.0c oder höher und Windows Media 9.0 Codecs, um das Problem zu beheben. Der Treiber oder die Software Details zum Installieren der Ich kann auf dem Computer sind nicht auf dem Computer...
- Seite 59 All manuals and user guides at all-guides.com Anhang: A Frequenzeinstellungen Land England Deutschland Frankreich Italien Spanien Russland Einstellung 50Hz 50Hz 50Hz 50Hz 50Hz 50Hz Land Portugal Amerika Taiwan China Japan Korea Einstellung 50Hz 60Hz 60Hz 50Hz 50/60Hz 60Hz Hinweis: Die Frequenzeinstellung basiert auf der Frequenz Ihrer örtlichen Stromversorgung. Systemmeldungen Meldung Beschreibung...
- Seite 60 All manuals and user guides at all-guides.com Anhang: B Anweisung für ArcSoft MediaConverter™ Einführung Der ArcSoft MediaConverter ist ein leistungsfähiger Alleskönner für die Umwandlung von Multimedia-Dateien. Das Programm wandelt Foto-, Video- und Musikdateien schnell und mühelos in das optimale Format für Ihr tragbares Gerät um.
- Seite 61 All manuals and user guides at all-guides.com Anhang: B Unterstützte Dateiformate Video Videodateien werden konvertiert und zum ausgewählten Standort als MPEG- 4 kodierte AVI-Dateien, WMV-Dateien oder MPEG-4 kodierte ASF-Dateien (Standard) kopiert. Unterstützte Dateitypen für die Umwandlung - AVI (Microsoft Video 1 Format, Cinepak, Intel Indeo, nicht komprimiert usw.) - MPEG-1 in MPEG, MPG, MPE - DAT (VCD MPEG1) - MPEG-4 in AVI format...
- Seite 62 All manuals and user guides at all-guides.com Anhang: B Konvertierte Dateien...
- Seite 63 All manuals and user guides at all-guides.com Anhang: B Schritt 1: Auswahl des Mediums Hinzufügen von Dateien zur Umwandlung 1 Klicken Sie auf die Schaltfläche “Medium auswählen”. 2 Das “Öffnen”-Fenster erscheint. Navigieren Sie zu dem Ordner, in dem sich die Dateien befinden, die Sie konvertieren möchten.
- Seite 64 All manuals and user guides at all-guides.com Anhang: B Schritt 2: Auswahl des Ziels Klicken Sie auf die Schaltfläche “Ziel auswählen”, um anzugeben, wo die konvertierten Dateien gespeichert werden sollen. “C:\Dokumente und Einstellungen\[aktueller Benutzer]\Eigene Dateien” wird als Speicherort vorgegeben. Jedoch werden Sie die Dateien sicherlich auf Ihrem tragbaren Gerät speichern wollen.
- Seite 65 All manuals and user guides at all-guides.com Anhang: B Videoeinstellungen Für die Umwandlung einer Videodatei gibt es mehrere Parameter: - Auflösung (Optionen sind QVGA (320 x 240) [Standard] VGA (640 x 480)) - Dateiformat (MPEG-4 kodierte AVI-Dateien, WMV-Dateien oder MPEG-4 kodierte ASF- Dateien) - Video-Bitrate (Optionen sind 500 KB, 1,0 MB, 1,5 MB, 2,0 MB [Standard], 2,5 MB 3,0 - Audio-Bitrate (Optionen sind 96 KB, 128 KB [Standard] 192 KB)
- Seite 66 All manuals and user guides at all-guides.com Anhang: B Wiedergabe der umgewandelten ASF-Dateien auf Ihrem Camcorder Führen Sie die folgenden Schritte durch, um Videoclips oder Filme (nur MPEG-4 im ASF-Format), die mit ArcSoft MediaConverter umgewandelt wurden, auf Ihrem MPEG-4 Digital-Camcorder abzuspielen. Schritt 1 Stecken Sie eine SD/MMC-Karte in den Karteneinschub des Camcorders und schließen Sie den Camcorder mit dem USB-Kabel am PC an.
- Seite 67 All manuals and user guides at all-guides.com Anhang: C Systemvoraussetzungen Betriebssystem: Windows 2000/XP Prozessor: Pentium III oder höher System-RAM: 128 MB oder mehr Grafikkarte: 64 MB, 24-Bit True Color Geschwindigkeit des CD-ROM-Laufwerks: 4x oder höher Software: Direct X 9.0c oder höher und Windows Media Player Codecs Sonstiges: USB-Anschluss...
- Seite 68 All manuals and user guides at all-guides.com Caméscope numérique Français...
- Seite 69 All manuals and user guides at all-guides.com Composants du caméscope * Evitez d’obstruer le fl ash. Bouton de mise au point Bouton Haut-parleur Microphone Bouton de mode/ Déclencheur ( Œillet dragonne Port USB Objectif *Bouton Connecteur sortie TV / Lumière appoint vidéo d’enregistrement ( écouteurs Flash...
- Seite 70 All manuals and user guides at all-guides.com Insérer la carte SD/MMC (facultatif) 1. Soulevez le couvercle de la carte SD. 2. Insérez la carte dans le sens indiqué jusqu’à ce qu’elle atteigne le fond du slot. 3. Lorsque vous utilisez une carte SD, La mémoire intégrée devient inaccessible. 4.
- Seite 71 All manuals and user guides at all-guides.com Lire les indicateurs LCD Mode caméscope numérique: Mode de flash Mode de mise au point Résolution photo Photos nuit 1.1x Taux de zoom Zoom intelligent Carte SD insérée Autonomie pile Nombre d’images/fichiers Lecture en mode miniatures: Enregistrements actuel/total Mode de lecture Type de fichier...
- Seite 72 All manuals and user guides at all-guides.com Enregistrer un clip vidéo 1. Réglez la mise au point sur une valeur appropriée. Normalement, vous pouvez régler la mise au point sur ( ) pour la plupart des conditions de prise de vue. Sélectionnez ( ) seulement pour les gros plans.
- Seite 73 All manuals and user guides at all-guides.com Relier le caméscope à un téléviseur Reliez votre caméscope à votre téléviseur via le câble AV accessoire pour un affichage en temps réel. Vous pouvez lire vos clips vidéo, vos photos, et vos enregistrements audio directement sur votre téléviseur pour les partager en famille et avec vos amis.
- Seite 74 All manuals and user guides at all-guides.com Sélection du mode 1. Allumez le caméscope. 2. Appuyez sur le bouton 3. Utilisez les boutons de Zoom ( ) pour sélectionner l’élément souhaité. 4. Appuyez sur le bouton pour confirmer. Utilisation de base Comment...
- Seite 75 All manuals and user guides at all-guides.com Les éléments de menu du mode appareil photo (2) Elément Option Description Ce réglage vous permet d’ajouter aux photos des cadres personnalisés. 10 cadres de fond sont disponibles sur le moniteur * Cadre 1 ~ 10 LCD.
- Seite 76 All manuals and user guides at all-guides.com Les éléments de menu du mode Lecture Mettez en marche → Appuyez sur le bouton Mode → Entrez dans le mode Lecture → Appuyez sur le bouton déclencheur ( Elément Option Description Supprimer Oui/Non Supprime le fichier en cours.
- Seite 77 All manuals and user guides at all-guides.com Les éléments de menu du mode réglage (2) Elément Option Description Langue Vous laisse choisir la langue utilisée par l’OSD. Lorsque relié à un PC, le caméscope affiche un menu vous Menu permettant de choisir le mode de connexion souhaité. Lorsqu’il est connecté...
- Seite 78 All manuals and user guides at all-guides.com Capacité de stockage Vidéo (min.) Audio (min.) Mémoire QVGA Maximum Carte SD/MMC (128MB) Carte SD/MMC (256MB) Carte SD/MMC (512MB) Carte SD/MMC (1GB) Photo Mémoire Carte SD/MMC (128MB) Carte SD/MMC (256MB) 1540 Carte SD/MMC (512MB) 1230 3080 Carte SD/MMC (1GB)
- Seite 79 All manuals and user guides at all-guides.com Spécifications Résolution efficace du capteur 3 Méga (2048x1536) pixels Résolution interpolée 10 Méga (3584x2688) pixels Mémoire externe Slot carte SD/MMC intégré (maximum: 2GB) Format JPEG (.JPG) 3584x2688 (10 Méga) pixels Appareil photo numérique 2560x1920 (5 Méga) pixels 2048x1536 (3 Méga) pixels 1280x960 (1 Méga) pixels...
- Seite 80 All manuals and user guides at all-guides.com Instructions avancées Caméscope numérique Français...
- Seite 81 All manuals and user guides at all-guides.com Copier des fichiers vers votre PC Installer le pilote sur votre PC Il vous faut installer le pilote du caméscope pour assurer que les clips vidéos pourront être lus sur votre PC. Pour installer le logiciel: 1.
- Seite 82 All manuals and user guides at all-guides.com Copier des fichiers vers votre PC (suite) 4. Installez les codecs. Une fois l’installation du pilote terminée, le programme vous demande d’installer les Codecs Windows Media Player. Si vous n’êtes pas certain si les codecs ont été...
- Seite 83 All manuals and user guides at all-guides.com Branchement du caméscope sur votre PC 1. Allumez le caméscope. 2. Reliez le câble USB à votre caméscope. Allumez votre ordinateur, puis branchez le câble USB accessoire sur le port USB de votre ordinateur.
- Seite 84 All manuals and user guides at all-guides.com Emplacement des fichiers Après avoir relié le caméscope à votre ordinateur, un disque amovible apparaît sur votre poste de travail. Le disque amovible représente en fait le support de stockage de votre caméscope. Vous trouverez l’ensemble de vos enregistrements sur ce disque.
- Seite 85 All manuals and user guides at all-guides.com Utiliser la PC Caméra Installer le logiciel Le logiciel PC caméra est inclus avec le pilote de l’appareil photo, et donc, il vous faut installer le pilote avant d’utiliser la fonction PC caméra. Démarrez l’application 1.
- Seite 86 All manuals and user guides at all-guides.com Utiliser la PC Caméra DV TS Fenêtre de prévisualisation Démarrer l’enregistrement Démarrer/arrêter la fenêtre d’un clip vidéo de prévisualisation Arrêter l’enregistrement Réglage Photo Ouvrir album Formater Sélectionner la source vidéo Source Sous-menu disponible. Pour visualiser des images prises avec la PC Caméra DV TS, veuillez cliquer sur pour ouvrir l’album photo.
- Seite 87 All manuals and user guides at all-guides.com Utiliser la PC Caméra DV TS (Suite) Enregistrer un film AVI 1. Cliquez sur l’icône 2. Appuyez sur pour spécifier le chemin et le nom du fichier AVI. 3. Réglez le débit d’images et la durée d’enregistrement selon vos besoins.
- Seite 88 All manuals and user guides at all-guides.com Utiliser la PC Caméra DV TS (Suite) Configurer les options de source Commande de périphérique: - Luminosité: Vous pouvez cocher l’élément “Auto” et laisser le programme régler la luminosité de l’image pour vous, ou décocher l’élément “Auto” et faire glisser l’ascenseur pour régler l’image manuellement.
- Seite 89 All manuals and user guides at all-guides.com Annexe: A Dépannage Lors de l’utilisation du caméscope: Problème Cause Solution La pile est usée. Remplacez la pile. Le caméscope n’est pas alimenté correctement. La pile est mal installée. Réinstallez la pile. Si le caméscope reste Le caméscope est toujours inactif pendant plus d’une Appuyez sur tout bouton sauf...
- Seite 90 All manuals and user guides at all-guides.com Annexe: A Lors de l’utilisation du caméscope: Problème Cause Solution Si l’icône de pile indique une pile faible, le flash peut se Impossible d’utiliser le flash. Remplacez la pile. trouver désactivé pour cause de tension insuffisante.
- Seite 91 All manuals and user guides at all-guides.com Annexe: A Lorsque vous branchez le caméscope sur un ordinateur ou sur un téléviseur: Problème Cause Solution Installez Direct X 9.0c ou supérieur et les Codecs Windows Media 9.0 pour résoudre ce problème. Voir Je n’arrive pas à...
- Seite 92 All manuals and user guides at all-guides.com Annexe: A Réglage de fréquence Pays Angleterre Allemagne France Italie Espagne Russie Réglage 50Hz 50Hz 50Hz 50Hz 50Hz 50Hz Pays Portugal Etats-Unis Taiwan Chine Japon Corée Réglage 50Hz 60Hz 60Hz 50Hz 50/60Hz 60Hz Note: Le réglage de fréquence est basé...
- Seite 93 All manuals and user guides at all-guides.com Annexe: B Instructions pour ArcSoft MediaConverter™ Introduction ArcSoft MediaConverter est un puissant convertisseur de fichiers multimédia. Cet utilitaire convertit rapidement et sans effort les fichiers photo, vidéo et musique dans des formats optimisés pour une utilisation sur votre appareil portable. De multiples fichiers et types de fichiers peuvent être convertis en même temps.
- Seite 94 All manuals and user guides at all-guides.com Annexe: B Formats de fichiers pris en charge Vidéo Les fichiers vidéo sont convertis et copiés vers l’emplacement sélectionné en tant que fichiers AVI encodés MPEG-4 fichiers WMV ou fichiers ASF encodés MPEG-4 (Par défaut). Formats de fichiers pris en charge pour la conversion - AVI (Format Microsoft Video 1, Cinepak, Intel Indeo, décompressé, etc.) - MPEG-1 en MPEG, MPG, MPE...
- Seite 95 All manuals and user guides at all-guides.com Annexe: B Fichiers convertis...
- Seite 96 All manuals and user guides at all-guides.com Annexe: B Etape 1: Sélectionnez le support Ajouter des fichiers pour la conversion 1 Cliquez sur le bouton “Sélection du support”. 2 Une fenêtre “Ouvrir” apparaît. Naviguez jusqu’au dossier qui contient les fichiers que vous voulez convertir.
- Seite 97 All manuals and user guides at all-guides.com Annexe: B Etape 2: Sélectionnez la destination Cliquez sur le bouton “Sélectionner la destination” pour choisir l’emplacement où vous voulez que les fichiers convertis soient sauvegardés. L’emplacement de sauvegarde par défaut est “C:\Documents and Settings\ [Utilisateur en cours]\My documents”.
- Seite 98 All manuals and user guides at all-guides.com Annexe: B Réglages vidéo Lors de la conversion d’un fichier vidéo, plusieurs paramètres différents existent: - Résolution (Les options comprennent QVGA (320 x 240) [par défaut] et VGA (640 x 480)) - Format de fichier (fichiers AVI encodés MPEG-4, fichiers WMV ou fichiers ASF encodés MPEG-4) - Débit vidéo (Les options comprennent 500KB, 1.0MB, 1.5MB, 2.0 MB [par défaut], 2.5 MB, et 3.0 MB)
- Seite 99 All manuals and user guides at all-guides.com Annexe: B Lire les fichiers convertis en ASF sur votre caméra Pour lire des clips vidéo ou des films (MPEG-4 au format ASF uniquement) convertis par ArcSoft MediaConverter sur votre caméra numérique MPEG-4, veuillez suivre les étapes ci-dessous.
- Seite 100 All manuals and user guides at all-guides.com Annexe: C Configuration système requise Système d’exploitation: Windows 2000/XP CPU: Pentium III ou supérieur RAM Système: 128MB ou plus Carte graphique: 64MB, 24 bit true color Vitesse CD-ROM : 4x ou plus Logiciels: Direct X 9.0c ou supérieur et Codecs Windows Media 9.0 Autre: Connecteur USB...
- Seite 101 All manuals and user guides at all-guides.com Videocamera digitale Italiano...
- Seite 102 All manuals and user guides at all-guides.com Parti della videocamera * Evitare di bloccare il fl ash. Interruttore di messa Tasto / modalitàn Altoparlante a fuoco Porta USB Tasto otturatore ( Microfono Connettore uscita TV Obiettivo Passante cinturino / cuffi e Luce ausiliaria video *Tasto registrazione Slot scheda SD/MMC...
- Seite 103 All manuals and user guides at all-guides.com Inserimento della scheda SD/MMC (opzionale) 1. Sollevare la copertura della scheda SD. 2. Inserire la scheda nella direzione indicata fino in fondo alla slot. 3. L’uso della scheda SD renderà accessibile la memoria integrata. 4.
- Seite 104 All manuals and user guides at all-guides.com Lettura degli indicatori del display LCD Modalità Videocamera digitale: Modalità Flash Modalità messa a fuoco Risoluzione foto NightShot (Scatto notturno) 1.1x Rapporto zoom Zoom intelligente Scheda SD inserita Durata della batteria Numero di foto/file Modalità...
- Seite 105 All manuals and user guides at all-guides.com Registrazione di una sequenza video 1. Impostare il fuoco in maniera appropriata. Di norma, è possibile impostare il fuoco su ( ) per la maggior parte delle condizioni di ripresa. Selezionare ( ) solo per primi piani.
- Seite 106 All manuals and user guides at all-guides.com Collegamento della videocamera al televisore Collegare la videocamera ed il televisore usando il cavo AV fornito in dotazione per ottenere la visualizzazione in tempo reale. Si possono visualizzare sequenze video, fotografie e registrazioni audio direttamente sul televisore e condividerle con amici e famigliari. Modalità...
- Seite 107 All manuals and user guides at all-guides.com Selezione modalità 1. Accendere la videocamera. 2. Premere il tasto 3. Usare i tasti di Zoom ( ) per selezionare la voce desiderata. 4. Premere il tasto per confermare. Funzionamento di base Come fare per... Azione Usare i tasti di Zoom per spostarsi verso l’alto o...
- Seite 108 All manuals and user guides at all-guides.com Voci del menu in modalità Fotocamera (2) Voce Opzione Descrizione Questa impostazione consente di aggiungere alle foto cornici personalizzate. Sul display LCD ci sono a disposizione 10 cornici. * Cornice foto 1 ~ 10 La Cornici fotografiche è...
- Seite 109 All manuals and user guides at all-guides.com Voci del menu in modalità Riproduzione Accendere → Premere il tasto Modalità → Accedere alla modalità Riproduzione → Premere il tasto Otturatore Voce Opzione Descrizione Elimina Sì/No Elimina il file corrente. Elimina tutte le immagini e file video/audio archiviati nella Elimina tutto Sì/No memoria.
- Seite 110 All manuals and user guides at all-guides.com Voci del menu in modalità Impostazioni (2) Voce Opzione Descrizione Lingua Permette di selezionare la lingua usata per l’OSD. Quando è collegata ad un PC, la videocamera visualizza un Menu menu che permette di scegliere la modalità di connessione preferita.
- Seite 111 All manuals and user guides at all-guides.com Capacità d’archiviazione Video (min.) Audio (min.) Memoria QVGA Massimo Scheda SD/MMC (128MB) Scheda SD/MMC (256MB) Scheda SD/MMC (512MB) Scheda SD/MMC (1GB) Fotografi a Memoria Scheda SD/MMC (128MB) Scheda SD/MMC (256MB) 1540 Scheda SD/MMC (512MB) 1230 3080 Scheda SD/MMC (1GB)
- Seite 112 All manuals and user guides at all-guides.com Specifiche Risoluzione del sensore 3 Mega pixel (2048x1536) Risoluzione interpolata 10 Mega pixel (3584x2688) Memoria esterna Slot scheda SD/MMC integrata (massimo: 2GB) Formato JPEG (.JPG) 3584x2688 pixel (10 Mega) Fotocamera digitale 2560x1920 pixel (5 Mega) 2048x1536 pixel (3 Mega) 1280x960 pixel (1 Mega) VGA (640x480 pixel) / fino a 30 fps...
- Seite 113 All manuals and user guides at all-guides.com Istruzioni avanzate Videocamera digitale Italiano...
- Seite 114 All manuals and user guides at all-guides.com Copiare i file sul PC Installazione del driver sul PC Per accertarsi se le sequenze video possono essere riprodotte sul PC, è necessario installare il driver della videocamera. Per installare il software: 1. Inserire il CD driver. Accendere il computer.
- Seite 115 All manuals and user guides at all-guides.com Copiare i file sul PC (segue) 4. Installazione dei codec. Dopo avere completato l’istallazione del driver, il programma richiederà di installare Windows Media Player Codecs. Se non si è certi che i codec siano stati installati sul computer, fare clic su Sì...
- Seite 116 All manuals and user guides at all-guides.com Collegamento della videocamera al PC 1. Accendere la videocamera. 2. Collegare il cavo USB al computer. Accendere il computer e collegare il cavo USB in dotazione alla porta USB del computer. Assicurarsi che il cavo e la porta siano allineati in modo corretto.
- Seite 117 All manuals and user guides at all-guides.com Posizione dei file Dopo avere collegato la videocamera al computer, apparirà un disco rimovibile. Il disco rimovibile rappresenta il supporto d’archiviazione della videocamera. Nel disco si trovano tutte le registrazioni. Fare riferimento alla figura che segue per vedere dove sono archiviati i file.
- Seite 118 All manuals and user guides at all-guides.com Uso della funzione PC Camera Installazione del software Il software PC camera è incluso nel driver della videocamera, quindi bisogna installare il driver prima di usare la funzione PC. Avviare l’applicazione 1. Accendere la videocamera e collegarla al computer. Accendere la videocamera e poi collegarla al computer usando il cavo USB in dotazione.
- Seite 119 All manuals and user guides at all-guides.com Uso della funzione PC Camera DV TS Finestra d’anteprima Avvia registrazione Avvia / chiudi finestra sequenza video d’anteprima Termina la registrazione Impostazioni Istantanea Apri album Formatta Selezione origine video Origine Menu secondario disponibile. Per visualizzare le immagini acquisite con PC Camera DV TS, fare clic su aprire l’album fotografico.
- Seite 120 All manuals and user guides at all-guides.com Uso della funzione PC Camera DV TS (segue) Registrare un filmato AVI 1. Fare clic sull’icona 2. Premere per specificare il percorso ed il nome del file AVI. 3. Impostare la velocità dei fotogrammi e la durata di registrazione in base alle proprie necessità.
- Seite 121 All manuals and user guides at all-guides.com Uso della funzione PC Camera DV TS (segue) Configurazione delle opzioni Origine Controllo dispositivo: - Luminosità: si può selezionare la voce “Automatica” e lasciare che il programma regoli da sé la luminosità, oppure deselezionare la voce “Automatica”...
- Seite 122 All manuals and user guides at all-guides.com Appendice: A Risoluzione dei problemi Quando si utilizza la videocamera: Problema Causa Soluzione La batteria è scarica. Sostituire la batteria. La videocamera non può essere accesa come al solito. La batteria è inserita in modo Reinstallare la batteria.
- Seite 123 All manuals and user guides at all-guides.com Appendice: A Quando si utilizza la videocamera: Problema Causa Soluzione Se la relativa icona indica che la batteria è scarica, il Impossibile utilizzare il flash. Sostituire la batteria. flash è disabilitato perché il voltaggio è...
- Seite 124 All manuals and user guides at all-guides.com Appendice: A Quando si collega la videocamera al computer o al televisore: Problema Causa Soluzione Installare DirectX 9.0c o superiore e Windows Media 9.0 Codecs per risolvere questo problema. Vedere Impossibile vedere le Il driver o il software non è...
- Seite 125 All manuals and user guides at all-guides.com Appendice: A Impostazioni della frequenza Nazione Inghilterra Germania Francia Italia Spagna Russia Impostazione 50Hz 50Hz 50Hz 50Hz 50Hz 50Hz Nazione Portogallo America Taiwan Cina Giappone Corea Impostazione 50Hz 60Hz 60Hz 50Hz 50/60Hz 60Hz Nota: l’impostazione della frequenza si basa sullo standard della frequenza del fornitore locale di energia elettrica.
- Seite 126 All manuals and user guides at all-guides.com Appendice: B Istruzioni per ArcSoft MediaConverter™ Introduzione ArcSoft MediaConverter è un potente convertitore (tutto in uno) di file multimediali. Questa utilità converte rapidamente e senza sforzi foto, video e file musicali nei formati ottimizzati per l’uso sul dispositivo portatile. Più file, e di tipo diverso possono essere convertiti allo stesso tempo.
- Seite 127 All manuals and user guides at all-guides.com Appendice: B Formati di file supportati Video I file video vengono convertiti e copiati nella posizione prescelta come file AVI codificati MPEG-4, file WMV o file ASF codificati MPEG-4 (predefinito). Tipi di file supportati per la conversione - AVI (formato Microsoft Video 1, Cinepak, Intel Indeo, uncompressed, eccetera) - MPEG-1 in MPEG, MPG, MPE - DAT (VCD MPEG1)
- Seite 128 All manuals and user guides at all-guides.com Appendice: B File convertiti...
- Seite 129 All manuals and user guides at all-guides.com Appendice: B Fase 1 Selezione del supporto multimediale Aggiungere i file da convertire 1 Fare clic su pulsante “Seleziona supporto”. 2 Apparirà la finestra “Apri”. Trovare la cartella che contiene i file che si vogliono convertire. a.
- Seite 130 All manuals and user guides at all-guides.com Appendice: B Fase 2 Selezione della destinazione Fare clic sul pulsante “Selezione destinazione” per selezionare il percorso su cui saranno salvati i file convertiti. Il percorso predefinito è “C:\Documents and Settings\[nome utente]\My documents”. Tuttavia, molto probabilmente si vorranno salvare i file sul dispositivo portatile.
- Seite 131 All manuals and user guides at all-guides.com Appendice: B Impostazioni Video Quando si converte un file video, ci sono molti parametri diversi: - Risoluzione (le opzioni includono QVGA (320 x 240) [impostazione predefinita] e VGA (640 x 480)) - Formato file (le opzioni includono AVI codificato MPEG-4, WMV, ASF codificato MPEG-4) - Bit rate video (le opzioni includono 500KB, 1,0MB, 1,5MB, 2,0 MB [impostazione predefinita], 2,5 MB e 3,0 MB)
- Seite 132 All manuals and user guides at all-guides.com Appendice: B Riproduzione dei file ASF convertiti con la videocamera Attenersi alle fasi che seguono per riprodurre le sequenze video o i filmati (solo MPEG-4 in formato ASF) convertiti da ArcSoft MediaConverter con la videocamera digitale MPEG-4.
- Seite 133 All manuals and user guides at all-guides.com Appendice: C Requisiti del sistema Sistema operativo: Windows 2000/XP CPU: Pentium III o superiore RAM di sistema: 128MB o superiore Scheda grafica: 64MB, colore reale a 24 bit Velocità CD-ROM: 4x o superiore Software: Direct X 9.0c o superiore e Windows Media Player Codecs Altro: Connettore USB...
- Seite 134 All manuals and user guides at all-guides.com Videocámara Digital Español...
- Seite 135 All manuals and user guides at all-guides.com Partes de la videocámara * No obture el fl ash. Selector de enfoque Modo / botón Altavoz Micrófono Puerto USB Botón Disparador ( Gancho para la correa Conector de salida de Objetivo TV/ para auriculares *Botón Grabar ( Luz de vídeo Ranura para tarjeta...
- Seite 136 All manuals and user guides at all-guides.com Insertar una tarjeta de memoria SD/MMC (opcional) 1. Levante la tapa de la tarjeta SD. 2. Inserte la tarjeta en la dirección indicada hasta que llegue al final de la ranura. 3. Si utiliza una tarjeta SD, no se podrá obtener acceso a la memoria integrada. 4.
- Seite 137 All manuals and user guides at all-guides.com Leer los indicadores LCD Modo Videocámara digital: Modo de Flash Modo de enfoque Resolución de la foto Escena nocturna 1.1x Relación de zoom Zoom automático Tarjeta SD insertada Vida de la batería Número de imágenes/archivos Modo Reproducir miniaturas: Grabaciones actuales y totales Modo Reproducir...
- Seite 138 All manuals and user guides at all-guides.com Grabar un clip de vídeo 1. Establezca el enfoque en un valor adecuado. Por lo general, el enfoque debe establecerse en ( ) para la mayoría de las condiciones de grabación. Seleccione la opción ( ) solamente para primeros planos.
- Seite 139 All manuals and user guides at all-guides.com Conectar la videocámara a un televisor Conecte la videocámara y el televisor mediante el cable AV adicional para ver imágenes en tiempo real. Puede mostrar los videos, fotografías y grabaciones de audio directamente en el televisor y compartirlos con sus amigos y familiares.
- Seite 140 All manuals and user guides at all-guides.com Seleccionar el modo 1. Encienda la videocámara. 2. Presione el botón 3. Utilice el botón Zoom ( ) para seleccionar la opción deseada. 4. Presione el botón para confirmar. Funcionamiento básico Cómo... Acción Utilice el botón Zoom para mover hacia arriba o Mover la barra de resalte...
- Seite 141 All manuals and user guides at all-guides.com Elementos de menú en el modo Cámara (2) Elemento Opción Descripción Esta configuración permite agregar marcos personalizados a las fotos. Puede elegir entre 10 marcos de fotos en el monitor LCD. * Marco foto 1 ~ 10 La función Marco de foto está...
- Seite 142 All manuals and user guides at all-guides.com Elementos de menú en el modo Reproducción Encienda la alimentación → Presione el botón Modo → Entre en el modo Reproducción → Presione el botón Disparador ( Elemento Opción Descripción Eliminar Sí/No Elimina el archivo actual. Elimina todas las imágenes y todos los archivos de audio y Borrar todo Sí/No...
- Seite 143 All manuals and user guides at all-guides.com Elementos de menú en el modo Configuración (2) Elemento Opción Descripción Permite seleccionar el idioma en el que se mostrarán los menús Idioma OSD. Cuando se conecta a su PC, la videocámara muestra un menú Menú...
- Seite 144 All manuals and user guides at all-guides.com Capacidad de almacenamiento Vídeo (min) Audio (min) Memoria QVGA Máximo Tarjeta SD/MMC (128 MB) Tarjeta SD/MMC (256 MB) Tarjeta SD/MMC (512 MB) Tarjeta SD/MMC (1 GB) Imagen estática Memoria Tarjeta SD/MMC (128 MB) Tarjeta SD/MMC (256 MB) 1540 Tarjeta SD/MMC (512 MB)
- Seite 145 All manuals and user guides at all-guides.com Especificaciones Resolución efectiva del sensor 3 mega píxeles (2048x1536) Resolución interpolada 10 mega píxeles (3584x2688) Memoria externa Ranura para tarjeta SD/MMC incluida (máximo: 2 GB) Formato JPEG (.JPG) 3584x2688 (10 Mega) píxeles Cámara fija digital 2560x1920 (5 Mega) píxeles 2048x1536 (3 Mega) píxeles 1280x960 (1 Mega) píxel...
- Seite 146 All manuals and user guides at all-guides.com Instrucciones avanzadas Videocámara Digital Español...
- Seite 147 All manuals and user guides at all-guides.com Copiar archivos al PC Instalar el controlador en el PC Para asegurarse de que los clips de vídeo grabados con la videocámara se vean en su PC es necesario instalar el controlador de la cámara. Para instalar el software: 1.
- Seite 148 All manuals and user guides at all-guides.com Copiar archivos al PC (continuación) 4. Instale los códecs. Tras completar la instalación del controlador, el programa le preguntará si desea instalar los códecs del Reproductor de Windows Media. Si no está seguro de si ha instalado los códecs en el equipo, haga clic en Sí...
- Seite 149 All manuals and user guides at all-guides.com Conectar la videocámara a su PC 1.Encienda la videocámara. 2. Conectar el cable USB al equipo. Encienda el equipo y, a continuación, conecte el cable USB al puerto USB de su PC. Asegúrese de que el cable y el puerto están bien alineados.
- Seite 150 All manuals and user guides at all-guides.com Ubicación de los archivos Tras conectar la videocámara al equipo, aparecerá una unidad extraíble en su PC. La unidad extraíble representa la unidad de almacenamiento de la videocámara. En el disco podrá encontrar todas las grabaciones. Consulte la figura que aparece a continuación para ver dónde se almacenan los archivos.
- Seite 151 All manuals and user guides at all-guides.com Utilizar la cámara de PC Instalar el software El software de la cámara de PC se incluye en el controlador de la cámara y, por lo tanto, debe instalar este controlador antes de utilizar la función de cámara de Iniciar la aplicación 1.
- Seite 152 All manuals and user guides at all-guides.com Utilización de la cámara de PC DV TS Ventana de vista previa Iniciar la grabación de un Iniciar/Detener la ventana de clip de vídeo vista previa Detener la grabación Configuración Instantánea Abrir el álbum Formatear Seleccionar fuente de vídeo Fuente...
- Seite 153 All manuals and user guides at all-guides.com Utilizar la cámara de PC DV TS (continuación) Grabar una película AVI 1. Haga clic en el icono 2. Pulse para especificar la ruta y el nombre del archivo AVI. 3. Defina la tasa de fotogramas y el tiempo de grabación dependiendo de sus necesidades.
- Seite 154 All manuals and user guides at all-guides.com Utilizar la cámara de PC DV TS (continuación) Configurar las opciones de fuente Control del dispositivo: - Brillo: puede activar el elemento “Automático” si desea que sea el programa el que ajuste el brillo de la imagen o desactivar dicho elemento y desplazar la barra para ajustar el brillo de la imagen manualmente.
- Seite 155 All manuals and user guides at all-guides.com Apéndice: A Solución de problemas Al utilizar la videocámara: Problema Causa Solución La batería no tiene carga. Reemplace la batería. La videocámara no se enciende con normalidad. La batería está instalada de Vuelva a instalar la batería. forma incorrecta.
- Seite 156 All manuals and user guides at all-guides.com Apéndice: A Al utilizar la videocámara: Problema Causa Solución Si el icono de la batería indica que la carga de la No se puede utilizar el flash. misma es baja, el flash puede Reemplace la batería.
- Seite 157 All manuals and user guides at all-guides.com Apéndice: A Al conectar la videocámara a un PC o TV: Problema Causa Solución Instale Direct X 9.0c o una versión posterior y los Códecs del reproductor multimedia de Windows para solucionar el problema. No se ha instalado en el No puedo ver los vídeos en Consulte “Instalar el...
- Seite 158 All manuals and user guides at all-guides.com Apéndice: A Configuración de parpadeo País Inglaterra Alemania Francia Italia España Rusia Configuración 50Hz 50Hz 50Hz 50Hz 50Hz 50Hz País Portugal América Taiwán China Japón Corea Configuración 50Hz 60Hz 60Hz 50Hz 50/60Hz 60Hz Nota: la configuración de parpadeo se basa en la norma de frecuencia de la fuente de alimentación eléctrica local.
- Seite 159 All manuals and user guides at all-guides.com Apéndice: B Instrucciones para la aplicación ArcSoft MediaConverter™ Introducción ArcSoft MediaConverter es un versátil convertidor de archivos multimedia multifunción. Esta utilidad convierte rápidamente y sin esfuerzo archivos de fotografía, vídeo y música en los formatos optimizados para poderlos utilizar en un dispositivo portátil.
- Seite 160 All manuals and user guides at all-guides.com Apéndice: B Formatos de archivo compatibles Vídeo Los archivos de vídeo se convierten y copian en la ubicación seleccionada como archivos AVI codificados en MPEG-4, archivos WMV o archivos ASF codificados en MPEG-4 (formato predeterminado). Tipos de archivo que se pueden convertir - AVI (formato de Vídeo 1 de Microsoft, Cinepak, Intel Indeo, no comprimido, etc.) - MPEG-1 en MPEG, MPG, MPE...
- Seite 161 All manuals and user guides at all-guides.com Apéndice: B Convertir archivos...
- Seite 162 All manuals and user guides at all-guides.com Apéndice: B Paso 1: seleccionar el medio Agregar archivos para convertir 1 Haga clic en el botón “Seleccionar medio”. 2 Aparecerá la ventana “Abrir”. Desplácese a la carpeta que contiene los archivos que desea convertir.
- Seite 163 All manuals and user guides at all-guides.com Apéndice: B Paso 2: seleccionar el destino Haga clic en el botón “Seleccionar destino” para seleccionar la ubicación en la que desea guardar los archivos convertidos. La ubicación de almacenamiento predeterminada es “C:\Documents and Settings\[usuario actual]\Mis documentos”.
- Seite 164 All manuals and user guides at all-guides.com Apéndice: B Configuración del vídeo Cuando convierta un archivo de vídeo, puede establecer diferentes parámetros: - Resolución (las opciones disponibles son QVGA (320 x 240) [opción predeterminada] y VGA (640 x 480)) - Formato de archivo (archivos AVI codificados con MPEG-4, archivos WMV o archivos ASF codificados con MPEG-4) - Tasa de bits de vídeo (las opciones disponibles son 500 KB, 1,0 MB, 1,5 MB, 2,0 MB [opción predeterminada], 2,5 MB y 3,0 MB)
- Seite 165 All manuals and user guides at all-guides.com Apéndice: B Reproducir los archivos ASF convertidos en la videocámara Para reproducir los clips de vídeo o las películas (solamente MPEG-4 en formato ASF) convertidos por ArcSoft MediaConverter en la videocámara digital MPEG-4, siga los pasos que se indican a continuación.
- Seite 166 All manuals and user guides at all-guides.com Apéndice: C Requisitos del sistema Sistema operativo: Windows 2000/XP Procesador: Pentium III o superior Memoria RAM del sistema: 128 MB o superior Tarjeta gráfica: 64 MB, color verdadero de 24 bits Velocidad del CD-ROM: 4x como mínimo Software: Direct X 9.0c o una versión posterior y los códecs del Reproductor de Windows Media Otros: Conector USB...
- Seite 167 All manuals and user guides at all-guides.com Camcorder Digital Português...
- Seite 168 All manuals and user guides at all-guides.com Componentes da camcorder * Evite bloquear o fl ash. Comutador de focagem Botão Mode/ Altifalante Microfone Porta USB Botão do obturador ( Ilhó para a correia Conector da saída de Lente TV/do auricular *Botão de gravação Luz para gravação de Ranhura para cartões de...
- Seite 169 All manuals and user guides at all-guides.com Introdução do cartão de memória SD/MMC (opcional) 1. Levante a tampa do compartimento do cartão de memória SD. 2. Introduza o cartão na direcção indicada e até este atingir o fim da ranhura. 3.
- Seite 170 All manuals and user guides at all-guides.com Significado dos ícones apresentados no ecrã LCD Modo de camcorder digital: Modo do flash Resolução da foto Modo de focagem Taxa de zoom Nocturno 1.1x Zoom inteligente Cartão de memória SD introduzido Carga das pilhas Número de fotografias/ficheiros Modo de reprodução de miniaturas: Gravação actual / Total de gravações...
- Seite 171 All manuals and user guides at all-guides.com Gravação de um clip de vídeo 1. Defina a focagem para a definição pretendida. Normalmente, deve definir a focagem para ( ) para a maior parte das condições de gravação. Seleccione a opção ( ) apenas para grandes planos.
- Seite 172 All manuals and user guides at all-guides.com Ligação da camcorder a um televisor Ligue a sua camcorder ao televisor utilizando o cabo AV incluído para visualização em tempo real. Pode desfrutar dos seus clips de vídeo, das fotografias e das gravações de áudio directamente no seu televisor, partilhando-os com os seus amigos e familiares.
- Seite 173 All manuals and user guides at all-guides.com Selecção dos modos da camcorder 1. Ligue a camcorder. 2. Prima o botão 3. Utilize os botões de zoom ( ) para seleccionar o item pretendido. 4. Prima o botão para confirmar. Operações básicas Como…...
- Seite 174 All manuals and user guides at all-guides.com Itens do menu no modo Câmara (2) Item Opção Descrição Esta definição permite-lhe adicionar molduras personalizadas às fotos. A camcorder dispõe de 10 molduras. * Moldura 1 ~ 10 A função Moldura está desactivada Define a resolução de vídeo para VGA (640x480 píxeis).
- Seite 175 All manuals and user guides at all-guides.com Itens do menu no modo Reproduzir Ligue a camcorder → Prima o botão Mode → Aceda ao modo Reproduzir → Prima o botão obturador Item Opção Descrição Eliminar Sim/Não Elimina o ficheiro actual. Elimina todos os ficheiros de imagem e de vídeo/áudio Eliminar tudo Sim/Não...
- Seite 176 All manuals and user guides at all-guides.com Itens do menu no modo Definição (2) Item Opção Descrição Permite-lhe seleccionar o idioma das opções apresentadas no Idioma ecrã. Quando ligada a um PC, a camcorder apresenta um menu onde Menu pode escolher o modo de ligação pretendido. Quando ligada a um PC, a camcorder acede automaticamente Modo USB Câmara...
- Seite 177 All manuals and user guides at all-guides.com Capacidade de armazenamento Vídeo (min.) Áudio (min.) Memória QVGA Máxima Cartão de memória SD/MMC (128 MB) Cartão de memória SD/MMC (256 MB) Cartão de memória SD/MMC (512 MB) Cartão de memória SD/MMC (1 GB) Fotografi...
- Seite 178 All manuals and user guides at all-guides.com Especificações Sensor resolução efectiva 3 Mega píxeis (2048x1536) Resolução interpolada 10 Megapíxeis (3584x2688) Ranhura incorporada para cartão de memória SD/MMC Memória externa (Máximo: 2 GB) Formato JPEG (.JPG) 3584x2688 (10 Mega) píxeis Câmara digital 2560x1920 (5 Mega) píxeis 2048x1536 (3 Mega) píxeis 1280x960 (1 Mega) píxeis...
- Seite 179 All manuals and user guides at all-guides.com Instruções avançadas Camcorder Digital Português...
- Seite 180 All manuals and user guides at all-guides.com Copiar ficheiros para o PC Instalação do controlador no PC Para assegurar a reprodução dos clips de vídeo no seu PC, terá de instalar o controlador da camcorder. Para instalar o software: 1. Introduza o CD com o controlador. Ligue o computador.
- Seite 181 All manuals and user guides at all-guides.com Copiar ficheiros para o PC (continuação) 4. Instale os codecs. Após concluída a instalação do controlador, o programa pede-lhe que instale os Codecs do Windows Media Player. Se não tem a certeza se os codecs foram instalados no seu computador, clique em Sim e siga as instruções no ecrã...
- Seite 182 All manuals and user guides at all-guides.com Ligação da camcorder ao PC 1. Ligue a camcorder. 2. Ligue o cabo USB ao computador. Ligue o computador e de seguida ligue o cabo USB à porta USB existente no seu computador. Certifique-se de que o cabo e a porta estão devidamente alinhados.
- Seite 183 All manuals and user guides at all-guides.com Localização dos ficheiros Após ligar a camcorder ao computador, um disco amovível aparece no computador. Na verdade, este disco amovível representa o suporte de armazenamento da sua camcorder. No disco, pode encontrar todas as suas gravações.
- Seite 184 All manuals and user guides at all-guides.com Utilização da função PC Camera Instalação do software O software da função PC Camera vem incluído no controlador da camcorder pelo que deve instalar o controlador antes de utilizar a função PC Camera. Iniciar a aplicação 1.
- Seite 185 All manuals and user guides at all-guides.com Utilização da função PC Camera do DV TS Janela de pré-visualização Iniciar a gravação de um clip Iniciar / Parar janela de de vídeo pré-visualização Parar a gravação Definição Tirar fotografias Abrir o álbum Formato Seleccionar origem do sinal de vídeo...
- Seite 186 All manuals and user guides at all-guides.com Utilização da função PC Camera do DV TS (continuação) Gravação de um vídeo AVI 1. Clique no ícone 2. Prima o botão para especificar o caminho e o nome do ficheiro AVI. 3. Defina o número de imagens e a duração da gravação de acordo com as suas necessidades.
- Seite 187 All manuals and user guides at all-guides.com Utilização da função PC Camera do DV TS (continuação) Configuração das opções do item Origem Controlo do dispositivo: - Brilho: Pode seleccionar o item “Auto” e deixar que o programa ajuste o brilho da imagem automaticamente, ou pode retirar o visto do item “Auto”...
- Seite 188 All manuals and user guides at all-guides.com Apêndice: A Resolução de problemas Ao utilizar a camcorder: Problema Causa Solução As pilhas estão gastas. Substitua as pilhas. A camcorder não liga normalmente. As pilhas foram colocadas Volte a colocar as pilhas. incorrectamente.
- Seite 189 All manuals and user guides at all-guides.com Apêndice: A Ao utilizar a camcorder: Problema Causa Solução Se o ícone das pilhas indicar carga fraca, o flash pode Não consigo utilizar o flash. Substitua as pilhas. estar desactivado devido à falta de energia. Remova as pilhas e volte A camcorder não responde Falha ao nível do software da...
- Seite 190 All manuals and user guides at all-guides.com Apêndice: A Ao ligar a camcorder ao computador ou ao televisor: Problema Causa Solução Instale o Direct X 9.0c ou acima e os Codecs para o Windows Media 9.0 para resolver este problema. Consulte a O controlador ou o software Não consigo ver os clips de secção “Instalação do...
- Seite 191 All manuals and user guides at all-guides.com Apêndice: A Definições de cintilação País Inglaterra Alemanha França Itália Espanha Rússia Definição 50Hz 50Hz 50Hz 50Hz 50Hz 50Hz País Portugal América Taiwan China Japão Coreia Definição 50Hz 60Hz 60Hz 50Hz 50/60Hz 60Hz Nota: A definição de cintilação tem por base a frequência padrão da rede eléctrica local.
- Seite 192 All manuals and user guides at all-guides.com Apêndice: B Instruções para o ArcSoft MediaConverter™ Introdução O ArcSoft MediaConverter é um potente conversor tudo-em-um para ficheiros multimédia. Este utilitário converte rápida e facilmente ficheiros de fotos, de vídeo e de música em formatos optimizados para utilização no seu dispositivo portátil.
- Seite 193 All manuals and user guides at all-guides.com Apêndice: B Formatos de ficheiros suportados Vídeo Os ficheiros de vídeo são convertidos e copiados para os locais de destino seleccionados como ficheiros AVI com codificação MPEG-4, como ficheiros WMV ou como ficheiros ASF com codificação MPEG-4 (predefinição). Tipos de ficheiros suportados para conversão - AVI (formato Microsoft Video 1, Cinepak, Intel Indeo, descompactado, etc.) - MPEG-1 em MPEG, MPG, MPE...
- Seite 194 All manuals and user guides at all-guides.com Apêndice: B Ficheiros convertidos...
- Seite 195 All manuals and user guides at all-guides.com Apêndice: B Etapa 1 : Seleccionar o suporte Adição de ficheiros para conversão 1 Clique no botão “Seleccionar suporte”. 2 Será apresentada uma janela “Abrir”. Vá até à pasta que contém os ficheiros que pretende converter.
- Seite 196 All manuals and user guides at all-guides.com Apêndice: B Etapa 2 : Seleccionar destino Clique no botão “Seleccionar destino” para seleccionar o local onde pretende guardar os ficheiros convertidos. A localização predefinida é “C:\Documents and Settings\[utilizador actual]\Os meus documentos”. No entanto, o mais provável é querer guardar estes ficheiros no seu dispositivo portátil.
- Seite 197 All manuals and user guides at all-guides.com Apêndice: B Definições de vídeo Ao converter um ficheiro de vídeo, existem vários parâmetros diferentes: - Resolução (As opções incluem a resolução QVGA (320 x 240) [predefinição] e VGA (640 x 480)) - Formato de ficheiro (ficheiros AVI com codificação MPEG-4, ficheiros WMV ou ficheiros ASF com codificação MPEG-4) - Taxa de bits do vídeo (As opções incluem 500 KB, 1,0 MB, 1,5 MB, 2,0 MB [predefinição], 2,5 MB e 3,0 MB)
- Seite 198 All manuals and user guides at all-guides.com Apêndice: B Reprodução dos ficheiros ASF convertidos na sua camcorder Para reproduzir os clips de vídeo ou os filmes (MPEG-4 apenas no formato ASF) convertidos pelo ArcSoft MediaConverter da sua camcorder digital MPEG-4, siga as seguintes etapas.
- Seite 199 All manuals and user guides at all-guides.com Apêndice: C Requisitos do sistema Sistema operativo: Windows 2000/XP CPU: Pentium III ou acima RAM do sistema: 128 MB ou acima Placa gráfica: 64 MB, true color de 24 bits Velocidade da unidade de CD-ROM: 4x ou acima Software: DirectX 9.0c ou acima e codecs para o Windows Media Player Outros: Conector USB...
- Seite 200 All manuals and user guides at all-guides.com Digitale camcorder Nederlands...
- Seite 201 All manuals and user guides at all-guides.com Onderdelen van de camcorder * Zorg ervoor dat u de fl itser niet blokkeert. Scherpstelschakelaar Knop Modus / Luidspreker Microfoon USB-poort Ontspanknop ( Riemhaak Aansluiting TV-uitgang/ Lens oortelefoon *Opnameknop ( Videolamp SD/MMC-kaartsleuf Knop Omhoog (inzoomen) Flitserlamp Voedingsknop ( Knop Omlaag (uitzoomen)
- Seite 202 All manuals and user guides at all-guides.com De SD/MMC-kaart plaatsen (optioneel) 1. Til de SD-kaartklep omhoog. 2. Stop de kaart in de richting van de aanwijzing tot deze het einde van de sleuf bereikt. 3. Wanneer u een SD-kaart gebruikt, zal het interne geheugen niet meer toegankelijk zijn. 4.
- Seite 203 All manuals and user guides at all-guides.com LCD-indicators aflezen Digitale camcordermodus: Flitsermodus Scherpstelmodus Fotoresolutie Nachtopname 1.1x Zoomverhouding Intelligent zoomen SD-kaart geplaatst Levensduur batterij Aantal foto’s/bestanden Miniatuurweergavemodus: Huidig/totaal aantal opnamen Weergavemodus Bestandstype Selectievenster Modus weergave volledige schermgrootte: Opnameduur Weergavemodus Volume Video-opnamemodus: Videolampmodus Opnameduur Scherpstelmodus...
- Seite 204 All manuals and user guides at all-guides.com Een videoclip opnemen 1. Stel de scherpstelling in op de gewenste instelling. Voor de meeste opnameomstandigheden stelt u de scherpstelling normaal in op ( Selecteer alleen ( ) voor close-ups. 2. Druk op de Opnameknop ( ) om de opname te starten.
- Seite 205 All manuals and user guides at all-guides.com De camcorder aansluiten op een tv Sluit uw camcorder aan op de tv met de meegeleverde AV-kabel voor real time-weergave. U kunt uw videoclips, foto’s en geluidsopnamen rechtstreeks op uw tv afspelen en ze delen met uw vrienden en familie.
- Seite 206 All manuals and user guides at all-guides.com Modusselectie 1. Schakel de camcorder in. 2. Druk op de knop 3. Gebruik de Zoomknoppen ( ) om het gewenste item te selecteren. 4. Druk op de knop om uw keuze te bevestigen. Basisbediening Hoe kan ik...
- Seite 207 All manuals and user guides at all-guides.com Menu-items in de cameramodus (2) Item Optie Beschrijving Met deze instelling kunt u aangepaste kaders toevoegen aan uw foto’’s. Er zijn 10 achtergrondkaders beschikbaar op het LCD- * Fotokader 1 ~ 10 scherm. De functie Fotokader is uitgeschakeld.
- Seite 208 All manuals and user guides at all-guides.com Menu-items in de weergavemodus Inschakelen → Druk op de knop Modus → Open de Weergavemodus → Druk op de Ontspanknop Item Optie Beschrijving Verwijderen Ja/Nee Huidig bestand wissen. Alle foto’s en video-/audiobestanden die in het geheugen zijn Alles verw Ja/Nee opgeslagen, wissen.
- Seite 209 All manuals and user guides at all-guides.com Menu-items in de Instellingsmodus (2) Item Optie Beschrijving Taal Hiermee kunt u de taal voor het OSD-menu selecteren. Wanneer de camcorder op de pc is aangesloten, wordt een Menu menu weergegeven waarin u de gewenste aansluitingsmodus kunt selecteren.
- Seite 210 All manuals and user guides at all-guides.com Opslagcapaciteit Video (min.) Audio (min.) Geheugen QVGA Maximum SD/MMC-kaart (128 MB) SD/MMC-kaart (256 MB) SD/MMC-kaart (512 MB) SD/MMC-kaart (1GB) Foto Geheugen SD/MMC-kaart (128 MB) SD/MMC-kaart (256 MB) 1540 SD/MMC-kaart (512 MB) 1230 3080 SD/MMC-kaart (1 GB) 1600 2500...
- Seite 211 All manuals and user guides at all-guides.com Specificaties Effectieve resolutie sensor 3 megapixels (2048x1536) Geïnterpoleerde resolutie 10 megapixels (3584x2688) Extern geheugen Ingebouwde SD/MMC-kaartsleuf (maximum: 2GB) JPEG (JPG)-indeling 3584x2688 (10 megapixels) Digitale fotocamera 2560x1920 (5 megapixels) 2048x1536 (3 megapixels) 1280x960 (1 megapixel) VGA (640x480 pixels) / tot 30 fps Digitale videocamcorder QVGA (320x240 pixels) / tot 30 fps...
- Seite 212 All manuals and user guides at all-guides.com Geavanceerde richtlijnen Digitale camcorder Nederlands...
- Seite 213 All manuals and user guides at all-guides.com Bestanden kopiëren naar uw pc Het stuurprogramma voor uw pc installeren U moet het stuurprogramma van de camcorder installeren om zeker te zijn dat u de videoclips kunt afspelen op uw pc. De software installeren: 1.
- Seite 214 All manuals and user guides at all-guides.com Bestanden kopiëren naar uw pc (vervolg) 4. De codecs installeren. Nadat de installatie van het stuurprogramma is voltooid, zal het programma u vragen de Windows Media Player Codecs te installeren. Als u niet zeker bent of er codes op uw computer zijn geïnstalleerd, klik dan op Ja en volg de instructies op het scherm om de installatie te voltooien.
- Seite 215 All manuals and user guides at all-guides.com De camcorder aansluiten op uw pc 1. Schakel de camcorder in. 2. Sluit de USB-kabel aan op uw computer. Schakel uw computer in en sluit vervolgens de bijgeleverde USB-kabel aan op de USB-poort van uw computer.
- Seite 216 All manuals and user guides at all-guides.com Bestandslocatie Nadat de camcorder is aangesloten op uw computer, verschijnt een verwisselbare schijf op uw computer. De verwisselbare schijf vertegenwoordigt eigenlijk het opslagmedium van uw camcorder. Op deze schijf kunt u al uw opnamen terugvinden.
- Seite 217 All manuals and user guides at all-guides.com De PC-camera gebruiken De software installeren De PC-camerasoftware is geleverd bij het stuurprogramma van de camera. Daarom dient u het stuurprogramma te installeren voordat u de functie PC- camera gebruikt. De toepassing starten 1.
- Seite 218 All manuals and user guides at all-guides.com De DV TS PC-camera gebruiken Voorbeeldvenster Opname videoclip starten Voorbeeldvenster starten/ stoppen Opname stoppen. Instelling Foto Album openen Formaat Videobron selecteren Bron Submenu beschikbaar. Klik op om het fotoalbum te openen en foto’s te bekijken die met de DV TS PC- camera zijn gemaakt.
- Seite 219 All manuals and user guides at all-guides.com De DV TS PC-camera gebruiken (vervolg) Een AVI-film opnemen 1. Klik op het pictogram 2. Druk op om het pad naar en de naam van het AVI-bestand op te geven. 3. Stel de beeldsnelheid en de opnameduur in volgens uw behoeften.
- Seite 220 All manuals and user guides at all-guides.com De DV TS PC-camera gebruiken (vervolg) De bronopties configureren Apparaatbeheer: - Helderheid: U kunt het item “Auto” inschakelen en het instellen van de beeldhelderheid aan het programma overlaten of u kunt het item “Auto” uitschakelen en de schuifbalk verplaatsen om de beeldhelderheid handmatig aan te passen.
- Seite 221 All manuals and user guides at all-guides.com Bijlage: A Problemen oplossen Als u de camcorder gebruikt: Probleem Oorzaak Oplossing De batterij is leeg. Vervang de batterij. De camcorder kan niet normaal worden De batterij is niet correct ingeschakeld. Installeer de batterij opnieuw. geïnstalleerd.
- Seite 222 All manuals and user guides at all-guides.com Bijlage: A Als u de camcorder gebruikt: Probleem Oorzaak Oplossing Als het batterijpictogram een laag vermogen Ik kan de flitser niet aangeeft, kan de flitser Vervang de batterij. gebruiken. worden uitgeschakeld door onvoldoende voltage. De camcorder reageert Verwijder de batterijdoos Er is een softwarefout...
- Seite 223 All manuals and user guides at all-guides.com Bijlage: A Als u de camcorder aansluit op de computer of op de tv: Probleem Oorzaak Oplossing Installeer Direct X 9.0c of hoger en Windows Media 9.0 Codecs om dit probleem op te lossen. Zie Het stuurprogramma of de “Het stuurprogramma Ik kan de videoclips niet...
- Seite 224 All manuals and user guides at all-guides.com Bijlage: A Flikkerinstellingen Land Engeland Duitsland Frankrijk Italië Spanje Rusland Instelling 50Hz 50Hz 50Hz 50Hz 50Hz 50Hz Land Portugal Amerika Taiwan China Japan Korea Instelling 50Hz 60Hz 60Hz 50Hz 50/60Hz 60Hz Opmerking: De Flikkerinstelling is gebaseerd op de frequentiestandaard van uw lokale voeding. Systeembericht Bericht Omschrijving...
- Seite 225 All manuals and user guides at all-guides.com Bijlage: B Richtlijnen voor ArcSoft MediaConverter™ Inleiding ArcSoft MediaConverter is een krachtig alles-in-een programma voor het converteren van multimediabestanden. Met dit hulpprogramma kunt u foto’s, video’s en muziekbestanden snel en moeiteloos converteren naar indelingen die geoptimaliseerd zijn voor gebruik op uw draagbaar apparaat.
- Seite 226 All manuals and user guides at all-guides.com Bijlage: B Ondersteunde bestandsindelingen Video Videobestanden worden geconverteerd en gekopieerd naar de geselecteerde locatie als MPEG-4-gecodeerde AVI-bestanden, WMV-bestanden of MPEG-4- gecodeerde ASF-bestanden (standaard). Ondersteunde bestandstypen voor de conversie - AVI (Microsoft Video 1-indeling, Cinepak, Intel Indeo, niet gecomprimeerd, enz.) - MPEG-1 in MPEG, MPG, MPE - DAT (VCD MPEG1) - MPEG-4 in AVI-indeling...
- Seite 227 All manuals and user guides at all-guides.com Bijlage: B Geconverteerde bestanden...
- Seite 228 All manuals and user guides at all-guides.com Bijlage: B Stap 1: Media selecteren Bestanden toevoegen voor de conversie 1 Klik op de knop “Media selecteren”. 2 Een venster “Openen” wordt weergegeven. Blader naar de map die de bestanden die u wilt converteren, bevat.
- Seite 229 All manuals and user guides at all-guides.com Bijlage: B Stap 2: Doel selecteren Klik op de knop “Doel selecteren” om de locatie waar de geconverteerde bestanden zullen worden opgeslagen, te selecteren. De standaard opslaglocatie is “C:\Documents and Settings\[huidige gebruiker]\My documents”. U zult de bestanden echter hoogstwaarschijnlijk op uw draagbaar apparaat willen opslaan.
- Seite 230 All manuals and user guides at all-guides.com Bijlage: B Video-instellingen Wanneer u een videobestand converteert, hebt u de keuze uit meerdere verschillende parameters: - Resolutie (opties omvatten QVGA (320 x 240) [standaard] en VGA (640 x 480)) - Bestandsindeling (MPEG-4 gecodeerde AVI-bestanden, WMV-bestanden of MPEG-4 gecodeerde ASF-bestanden) - Videobitsnelheid (opties omvatten 500KB, 1.0MB, 1.5MB, 2.0 MB [standaard], 2.5 MB en 3.0 MB)
- Seite 231 All manuals and user guides at all-guides.com Bijlage: B De geconverteerde ASF-bestanden afspelen op uw camcorder Om de videoclips of films (alleen MPEG-4 in ASF-indeling) die door ArcSoft MediaConverter in uw MPEG-4 digitale camcorder werden geconverteerd af te spelen, volgt u de onderstaande stappen. Stap 1 Stop een SD/MMC-kaart in de kaartsleuf van de camcorder en sluit deze aan op de pc via de USB-kabel.
- Seite 232 All manuals and user guides at all-guides.com Bijlage: C Systeemvereisten Besturingssysteem: Windows 2000/XP CPU: Pentium III of hoger Systeem-RAM: 128MB of hoger Grafische kaart : 64MB, 24 bits ware kleuren CD-ROM-snelheid: 4x of hoger Software: Direct X 9.0c of hoger en Windows Media Player Codecs Overige: USB-aansluiting...
- Seite 233 All manuals and user guides at all-guides.com Цифровая видеокамера Русский...
- Seite 234 All manuals and user guides at all-guides.com Компоненты камеры * Не закрывайте вспышку. Переключатель Кнопка «Mode/ » Ди намик фокусировки USB-порт Кнопка спуска затвора Микрофон ТВ-выход/ выход на Проушина для ремешка наушники Объектив *Кнопка записи ( Гнездо карты памяти Подсветка SD/MMC Кнопка...
- Seite 235 All manuals and user guides at all-guides.com Установка карты памяти SD или MMC (не входит в комплект поставки) 1. Поднимите крышку отсека карты памяти SD. 2. Полностью вставьте карту в гнездо, как показано на рисунке. 3. При использовании карты памяти SD встроенная память недоступна. 4.
- Seite 236 All manuals and user guides at all-guides.com Значения индикаторов ЖК-дисплея Режим цифровой камеры: Режим фотовспышки Режим фокусировки Разрешение фотоснимков Ночная съемка 1.1x Коэффициент масштабирования Интеллектуальное масштабирование Вставлена карта памяти SD Заряд батареи Число снимков/файлов Режим просмотра миниатюр: Текущая запись / всего записей Режим...
- Seite 237 All manuals and user guides at all-guides.com Видеосъемка 1. Установите переключатель фокусировки в необходимое положение. Как правило, для большинства условий съемки следует устанавливать режим фокусировки ( ). Выбирайте режим ( ) только для макросъемки. 2. Для начала записи нажмите кнопку записи ( 3.
- Seite 238 All manuals and user guides at all-guides.com Подключение камеры к телевизору Подключите камеру к телевизору при помощи входящего в комплект аудио-видеокабеля для просмотра файлов в реальном времени. Вы можете просматривать видеоролики, фотографии, прослушивать аудиозаписи непосредственно на телевизоре и демонстрировать их друзьям и родственникам. Телевизор...
- Seite 239 All manuals and user guides at all-guides.com Выбор режима 1. Включите камеру. 2. Нажмите кнопку 3. Используйте кнопки масштабирования ( ) для выбора необходимого пункта. 4. Нажмите кнопку « » для подтверждения выбора. Основные операции Тип операции Действие Используйте кнопки масштабирования для...
- Seite 240 All manuals and user guides at all-guides.com Пункты меню в режиме фотокамеры (2) Пункт Функция Описание Данный параметр позволяет добавить в фотографии настраиваемые рамки. 10 фоновых рамок доступны на ЖК- * Фоторамка дисплее. 1 ~ 10 Функция фоторамок отключена. Установка разрешения видеоизображения VGA (640 x 480 пикселов) Видео...
- Seite 241 All manuals and user guides at all-guides.com Пункты меню в режиме просмотра Включите питание → Нажмите кнопку «Mode» → Переключите камеру в режим «Просмотр» → Нажмите кнопку спуска затвора ( Пункт Функция Описание Удал. один Да/Нет Удаление текущего файла. Удаление всех фотографий и видео- аудиофайлов, Удалить...
- Seite 242 All manuals and user guides at all-guides.com Пункты меню в режиме настройки (2) Пункт Функция Описание Язык Выбор языка экранного меню. При подключении к ПК камера отображает меню для выбора Меню необходимого режима соединения. При подключении к ПК камера автоматически переходит в Режим...
- Seite 243 All manuals and user guides at all-guides.com Емкость носителей Видео (мин.) Аудио (мин.) Память QVGA Максимум Карта памяти SD/MMC (128 Мб) Карта памяти SD/MMC (256 Мб) Карта памяти SD/MMC (512 Мб) Карта памяти SD/MMC (1 Гб) Фотосъемка Память Карта памяти SD/MMC (128 Мб) Карта...
- Seite 244 All manuals and user guides at all-guides.com Технические характеристики Эффективное 3 мегапиксела (2048 x 1536 пикселов) разрешение матрицы Интерполированное 10 мегапикселов (3584 x 2688 пикселов) разрешение Встроенное гнездо для карт памяти SD/MMC Внешняя память (максимальный объем: 2 Гб) Формат JPEG (.JPG) 3584 x 2688 пикселов...
- Seite 245 All manuals and user guides at all-guides.com Дополнительные инструкции Цифровая видеокамера Русский...
- Seite 246 All manuals and user guides at all-guides.com Копирование файлов на ПК Установка драйвера на ПК Для воспроизведения видеороликов на компьютере необходимо установить драйвер камеры. Порядок установки программного обеспечения приведен ниже: 1. Вставьте компакт-диск драйвера. Включите компьютер. Вставьте входящий в комплект компакт-диск в дисковод...
- Seite 247 All manuals and user guides at all-guides.com Копирование файлов на ПК (продолжение) 4. Установка кодеков. После завершения установки драйвера программа выдаст запрос на установку кодеков Проигрывателя Windows Media. Если неизвестно, установлены ли уже кодеки на компьютер, нажмите кнопку «Да» и следуйте указаниям на экране...
- Seite 248 All manuals and user guides at all-guides.com Подключение камеры к компьютеру 1. Включите камеру. 2. Подключите кабель USB к компьютеру. Включите компьютер, а затем подключите входящий в комплект кабель USB к порту USB компьютера. Убедитесь, что разъем кабеля правильно установлен в порт. 3.
- Seite 249 All manuals and user guides at all-guides.com Расположение файлов После подключения камеры к компьютеру в папке «Мой компьютер» появится съемный диск. Съемный диск в действительности представляет собой носитель данных камеры. На диске находятся все записи камеры. Схему расположения файлов см. на рисунке ниже. Папка...
- Seite 250 All manuals and user guides at all-guides.com Использование веб-камеры Установка программного обеспечения Программное обеспечение для веб-камеры включено в драйвер камеры, поэтому следует установить драйвер перед использованием функции веб-камеры. Запуск приложения 1. Включите камеру и подключите ее к компьютеру. Включите камеру и подключите ее к компьютеру с помощью входящего в комплект...
- Seite 251 All manuals and user guides at all-guides.com Использование веб-камеры DV TS Окно предварительного просмотра Начать видеосъемку Включить/выключить окно предварительного просмотра Остановить запись Настройка Снимок Открыть альбом Формат Выбрать источник Источник видеосигнала Доступно подменю. Для просмотра снимков веб-камеры DV TS нажмите на для...
- Seite 252 All manuals and user guides at all-guides.com Использование веб-камеры DV TS (продолжение) Запись в формате AVI 1. Щелкните значок 2. Нажмите для выбора расположения и имени файла в формате AVI. 3. Установите нужную частоту кадров и продолжительность записи. 4. Нажмите кнопку «Начать запись» для начала записи.
- Seite 253 All manuals and user guides at all-guides.com Использование веб-камеры DV TS (продолжение) Настройка параметров источника Управление устройством: - Яркость: можно установить флажок «Авто» и позволить программе отрегулировать яркость, или снять этот флажок и при помощи регулятора настроить яркость изображения вручную. - Качество: если...
- Seite 254 All manuals and user guides at all-guides.com Приложение A Устранение неполадок При эксплуатации камеры: Проблема Причина Решение Батарея разряжена. Замените батарею. Камера не включается надлежащим образом.. Батарея неправильно Установите батарею заново. установлена. После простоя более Нажмите любую кнопку, Камера включена, но ЖК- одной...
- Seite 255 All manuals and user guides at all-guides.com Приложение A При эксплуатации камеры: Проблема Причина Решение Если пиктограмма батареи указывает на низкий заряд Невозможно использовать батареи, фотовспышка Замените батарею. фотовспышку. может быть отключена из- за низкого напряжения. Извлеките батарею и Камера включена, но Сбой...
- Seite 256 All manuals and user guides at all-guides.com Приложение A При подключении камеры к компьютеру или телевизору: Проблема Причина Решение Установите Direct X 9.0c или более новую версию и кодеки Windows Media 9.0 . Подробности Драйвер или ПО Невозможно просмотреть установки ПО см. в разделе не...
- Seite 257 All manuals and user guides at all-guides.com Приложение A Настройки мерцания Страна Англия Германия Франция Италия Испания Россия Параметр 50Hz 50Hz 50Hz 50Hz 50Hz 50Hz Страна Португалия США Тайвань Китай Япония Корея Параметр 50Hz 60Hz 60Hz 50Hz 50/60Hz 60Hz Примечание. Настройки частоты обновления основаны на стандарте частоты местной электросети. Системные...
- Seite 258 All manuals and user guides at all-guides.com Приложение B Инструкции по использованию ArcSoft MediaConverter™ Введение ArcSoft MediaConverter является мощным конвертером мультимедийных файлов, содержащим все необходимые инструменты. Данная программа быстро и без особых усилий преобразует музыкальные файлы, фотографии и видеозаписи в форматы, оптимизированные для использования на портативном...
- Seite 259 All manuals and user guides at all-guides.com Приложение B Поддерживаемые форматы файлов Видео Видеофайлы преобразуются и копируются в выбранную папку в файлы AVI, сжатые в формате MPEG-4, файлы ASF, файлы WMV в формате MPEG-4 или файлы MPEG-4, сжатые в формате ASF (по умолчанию). Поддерживаемые...
- Seite 260 All manuals and user guides at all-guides.com Приложение B Преобразование файлов...
- Seite 261 All manuals and user guides at all-guides.com Приложение B Шаг 1. Выбор мультимедийных файлов Добавление файлов, подлежащих преобразованию 1 Нажмите кнопку «Выбор файлов». 2 На экране появится диалоговое окно «Открыть». Откройте папку, содержащую файлы, подлежащие преобразованию. a. Используйте раскрывающийся список «Тип файлов» для отображения только файлов...
- Seite 262 All manuals and user guides at all-guides.com Приложение B Шаг 2. Выбор папки для сохранения файлов Нажмите кнопку «Выбор папки назначения» для выбора папки, где будут сохранены преобразованные файлы. Стандартная папка для сохранения: «C:\Documents and Settings\[текущий пользователь]\Мои документы». Тем не менее, скорее всего, потребуется сохранить файлы на портативном устройстве.
- Seite 263 All manuals and user guides at all-guides.com Приложение B Видеопараметры При преобразовании файла видеозаписи можно установить несколько различных параметров: - Разрешение (можно установить QVGA (320 x 240) [по умолчанию] и VGA (640 x 480)) - Формат файла (файлы AVI, кодированные в формате MPEG-4, файлы WMV или ASF, кодированные...
- Seite 264 All manuals and user guides at all-guides.com Приложение B Воспроизведение преобразованных файлов формата ASF на камере Для воспроизведения видеозаписей или фильмов (только MPEG-4 в формате ASF), преобразованных программой ArcSoft MediaConverter на цифровой камере стандарта MPEG-4, выполните следующую процедуру. Шаг 1. Вставьте...
- Seite 265 All manuals and user guides at all-guides.com Приложение C Системные требования Операционная система: Windows 2000/XP Процессор: Pentium III или выше Системное ОЗУ: 128 Мб или более. Видеокарта: 64 Мб, цветовой режим «true color» (24 бита). Скорость дисковода CD-ROM: 4-скоростной или более быстрый Программное...
- Seite 266 All manuals and user guides at all-guides.com Digital videokamera Svenska...
- Seite 267 All manuals and user guides at all-guides.com Kamerans delar * Se upp så att du inte blockerar stroben. Skärpeväxling Läge/ knapp Högtalare Mikrofon USB-port Avtryckare ( Nackrem TV-utkontakt/ Hörlur Objektiv *Inspelningsknapp SD/MMC-kortutrymme Videoljus Strömbrytare ( Blixtstrobe Uppknapp (Zooma in) Videoljus Batterilock Nerknapp (Zooma ut) LCD-panel...
- Seite 268 All manuals and user guides at all-guides.com Föra in SD/MMC-kortet (tillval) 1. Lyft på locket till SD-kortet. 2. För in kortet i anvisad riktning tills dess att den når botten på utrymmet. 3. När du använder ett SD-kort kommer det inbyggda minnet att bli otillgängligt. 4.
- Seite 269 All manuals and user guides at all-guides.com Avläsa LCD-indikatorer Läge för digital videokamera: Blixtläge Skärpeläge Fotoupplösning Nattbild 1.1x Zoomgrad Smart Zoom SD-kort infört Batteriets livslängd Antal bilder/filer Uppspelningsläge tumnaglar: Aktuell / totala inspelningar Filtyp Uppspelningsläge Markeringsruta Fullt uppspelningsläge: Inspelningstid Uppspelningsläge Volym Video REC-läge: Videoljusläge...
- Seite 270 All manuals and user guides at all-guides.com Spela in ett videoklipp 1. Ställ in skärpan till lämplig inställning. Normalt kan du ställa in fokus på ( för de flesta bildtagningssyften. Välj ( ) enbart för närbilder. 2. Tryck på inspelningsknappen ( ) för att börja spela in.
- Seite 271 All manuals and user guides at all-guides.com Ansluta kameran till en TV Anslut kamera och TV med den medföljande AV-kabeln för realtidsvisning. Du kan visa dina videoklipp, stillbilder och ljudinspelningar direkt på TV:n, och dela dem med vänner och familj. AV-läge Video Ljud...
- Seite 272 All manuals and user guides at all-guides.com Lägesval 1. Sätt på kameran 2. Tryck på knappen. 3. Använd Zoom-knapparna ( ) för att välja önskat alterntiv. 4. Tryck på knappen för att bekräfta. Grundläggande användning Hur gör jag... Åtgärd Använd zoom-knapparna för att flytta uppåt eller Flytta markeringsrutan neråt.
- Seite 273 All manuals and user guides at all-guides.com Menyposter i kameraläge (2) Post Alternativ Beskrivning Denna inställning låter dig använda anpassade ramar för foton. 10 bakgrundsramar är tillgängliga på LCD-skärmen. *Fotoruta 1 ~ 10 Fotoramfunktionen är inaktiverad. Ställ in videoupplösning på VGA (640x480 pixlar). Video QVGA Ställ in videoupplösning på...
- Seite 274 All manuals and user guides at all-guides.com Menyposter i uppspelningsläge Ström på → Tryck på Läge-knappen → Ange Uppspelnings -läget → Tryck på Avtryckare ( Post Alternativ Beskrivning Kameran visar bilder i följd. Endast JPEG-bilder och de första Bildvisning ramarna av MPEG-filer visas. Du kan trycka på knappen för att stoppa bildspelet.
- Seite 275 All manuals and user guides at all-guides.com Menyposter i inställningsläge (2) Post Alternativ Beskrivning Språk Låter dig välja önskat OSD-språk. Vid anslutning till PC, visar kameran en meny på vilken du kan Meny välja önskat anslutningsläge. Vid anslutning till PC, öppnar kameran automatiskt läget för USB-läge Kamera kamera (PC-kamera).
- Seite 276 All manuals and user guides at all-guides.com Lagringskapacitet Video (min.) Ljud (min.) Minne QVGA Maximum SD/MMC-kort (128 MB) SD/MMC-kort (256 MB) SD/MMC-kort (512 MB) SD/MMC-kort (1 GB) Stillbild Minne SD/MMC-kort (128 MB) SD/MMC-kort (256 MB) 1540 SD/MMC-kort (512 MB) 1230 3080 SD/MMC-kort (1 GB) 1600...
- Seite 277 All manuals and user guides at all-guides.com Specifikationer Sensorns effektiva upplösning 3 Mega (2048x1536 pixlar) Interpolerad upplösning 10 Mega (3584x2688) pixlar Externt minne Inbyggt SD/MMC-kortutrymme (maximum: 2GB) JPEG (.JPG) format 3584x2688 (10 Mega) pixlar Digital stillbildskamera 2560x1920 (5 Mega) pixlar 2048x1536 (3 Mega) pixlar 1280x960 (1 Mega) pixlar VGA (640 x 480 pixlar) / upp till 30 fps...
- Seite 278 All manuals and user guides at all-guides.com Avancerade anvisningar Digital videokamera Svenska...
- Seite 279 All manuals and user guides at all-guides.com Kopiera filer till PC Installera drivrutinen i din PC Du måste installera kameradrivrutinen för att säkerställa att videoklipp kan spelas upp på din PC. Så här installerar du programvaran: 1. Sätt i drivrutins-CD-skivan. Sätt på...
- Seite 280 All manuals and user guides at all-guides.com Kopiera filer till din PC (forts.) 4. Installera codec. När drivrutinsinstallationen är slutförd uppmanar programmet dig att installera Windows Media Player Codecs. Om du inte är säker på huruvida dessa codecs har installerats i datorn, klicka på...
- Seite 281 All manuals and user guides at all-guides.com Ansluta kameran till datorn 1. Sätt på kameran. 2. Anslut USB-sladden till PC:n. Sätt på datorn. Anslut därefter den medföljande USB-sladden till datorns USB-port. Kontrollera att sladd och port är rätt inriktade. 3. Anslut USB-sladden till kameran. Anslut den andra änden av USB-sladden till kameran.
- Seite 282 All manuals and user guides at all-guides.com Filplacering När du har anslutit kameran till datorn, visas en löstagbar disk i datorn. Den löstagbara disken representerar i själva verket kamerans lagringsmedium. I disken hittar du alla dina inspelningar. Se figuren nedan för att se var filerna är lagrade.
- Seite 283 All manuals and user guides at all-guides.com Använda PC-kamera Installera programvaran PC-kameraprogramvaran ingår i kameradrivrutinen, och därför måste du installera drivrutinen innan du använder PC-kamerafunktionen. Starta programmet 1. Sätt på kameran och anslut kameran till datorn. Sätt på kameran, och anslut därefter kameran till datorn med den medföljande USB-sladden.
- Seite 284 All manuals and user guides at all-guides.com Använda DV TS PC-kamera Förhandsgranskningsfönster Starta inspelning av ett Starta/Stoppa videoklipp förhandsgranskningsfönster Stoppa inspelning Inställning Stillbild Öppna album Format Välj videokälla Källa Undermeny är tillgänglig. För att visa bilder som tagits med DV TS PC-kameran, klicka på för att öppna fotoalbumet.
- Seite 285 All manuals and user guides at all-guides.com Använda DV TS PC-kamera (forts) Spela in AVI-film 1. Klicka på ikonen 2. Tryck på för att ange sökväg och namn på AVI-filen. 3. Ställ in ramhastighet och inspelningstid efter önskemål. 4. Tryck på starta inspelning för att starta inspelningen.
- Seite 286 All manuals and user guides at all-guides.com Använda DV TS PC-kamera (forts) Konfigurera källalternativ Enhetskontroll: - Ljusstyrka: Du kan markera posten “Auto” och låta programmet justera bildljusstyrkan åt dig, eller också kan du avmarkera posten “Auto” och dra i skjutreglaget för att ställa in bildljusstyrkan manuellt. - Kvalitet: Om nätverksbandbredden är igenproppad när du använder PC-kameran, för skjutreglaget mot “Faster Video”...
- Seite 287 All manuals and user guides at all-guides.com Bilagor: A Felsökning När du använder kameran: Problem Orsak Lösning Batteriet är urladdat Byt ut batteriet. Du kan inte sätta på kameran på normalt sätt. Batteriet är fel isatt Sätt i batteriet rätt. Om kameran inte används Tryck på...
- Seite 288 All manuals and user guides at all-guides.com Bilagor: A När du använder kameran: Problem Orsak Lösning Om batteriikonen visar svagt Kan inte använda batteri, kan blixtstroben vara Byt ut batteriet. blixtstroben. inaktiverad pga otillräcklig spänning. Kameran reagerar inte på Ta ur batteripaketet och sätt Kameran har råkat ut för någon åtgärd alls under sedan tillbaka det igen.
- Seite 289 All manuals and user guides at all-guides.com Bilagor: A Vid anslutning av kameran till dator eller TV: Problem Orsak Lösning Installera Direct X 9.0c eller högre och Windows Media9.0 Codecs för att lösa detta problem. Se “Installera Jag kan inte titta på Drivrutin eller programvara är styrrutinen på...
- Seite 290 All manuals and user guides at all-guides.com Bilagor: A Flimmerinställningar Land England Tyskland Frankrike Italien Spanien Ryssland Inställning 50Hz 50Hz 50Hz 50Hz 50Hz 50Hz Land Portugal Amerika Taiwan Kina Japan Korea Inställning 50Hz 60Hz 60Hz 50Hz 50/60Hz 60Hz Obs: Flimmerinställningen baseras på frekvensstandarden hos din lokala strömkälla. Systemmeddelande Meddelande Beskrivning...
- Seite 291 All manuals and user guides at all-guides.com Bilagor: B Instruktion för ArcSoft MediaConverter™ Introduktion ArcSoft MediaConverter är en kraftfull allt-i-ett-konverterare för multimediefiler. Detta verktygsprogram konverterar snabbt och enkelt foto, video och musikfiler till format som är optimerade för användning på din bärbara enhet. Multipla filer och filtyper kan konverteras samtidigt.
- Seite 292 All manuals and user guides at all-guides.com Bilagor: B Filformat som stöds Video Videofiler konverteras och kopieras till valt ställe som MPEG-4. Kodade AVI-filer, WMV-filer eller MPEG-4 kodade ASF-filer (standard). Filtyper som stöds för konvertering - AVI (Microsoft Video 1-format, Cinepak, Intel Indeo, okomprimerad osv) - MPEG-1 i MPEG, MPG, MPE - DAT (VCD MPEG1) - MPEG-4 i AVI-format...
- Seite 293 All manuals and user guides at all-guides.com Bilagor: B Konverterade filer...
- Seite 294 All manuals and user guides at all-guides.com Bilagor: B Steg 1: Välj medium Lägga till filer för konvertering 1 Klicka på knappen “välj medium”. 2 Fönstret “öppna” visas. Navigera till den mapp som innehåller de filer du vill konvertera. a. Använd rullgardinslistan “filer av typ” för att ange de filtyper du vill visa. b.
- Seite 295 All manuals and user guides at all-guides.com Bilagor: B Steg 2: Välj destination Klicka på knappen “välj destination” för att välja den plats där dina konverterade filer ska sparas. Standardplatsen för sparade filer är “C:\Documents and Settings\[current user]\My document”. Däremot, vill du antagligen spara filerna till din bärbara enhet.
- Seite 296 All manuals and user guides at all-guides.com Bilagor: B Videoinställningar Vid konvertering av en videofil, finns det åtskilliga parametrar: - Upplösning (alternativen är QVGA (320 x 240) [standard] och VGA (640 x 480)) - Filformat (MPEG-4 krypterade AVI-filer, WMV-filer eller MPEG-4 krypterade ASF-filer) - Videobithastighet (alternativen är 500KB, 1,0 MB, 1,5 MB, 2,0 MB [standard], 2,5 MB och 3,0 MB) - Ljudbithastighet (alternativen är 96 KB, 128 KB [standard], 192 KB)
- Seite 297 All manuals and user guides at all-guides.com Bilagor: B Spela upp de konverterade ASF-filerna i din kamera Du spelar upp de videoklipp eller filmer (endast MPEG-4 i ASF-format) som konverterats av ArcSoft MediaConverter i din MPEG-4 digitalkamera genom att följa stegen nedan.
- Seite 298 All manuals and user guides at all-guides.com Bilagor: C Systemkrav Operativsystem: Windows 2000/XP Processor: Pentium III eller högre System-RAM: 128 MB eller mer Grafikkort: 64 MB, 24-bitars äkta färg CD-ROM-hastighet: 4x eller snabbare Programvara: DirectX 9.0c eller högre och Windows Media Player Codecs Övrigt: USB-anslutning...
- Seite 299 All manuals and user guides at all-guides.com...