Werbung
Quicklinks
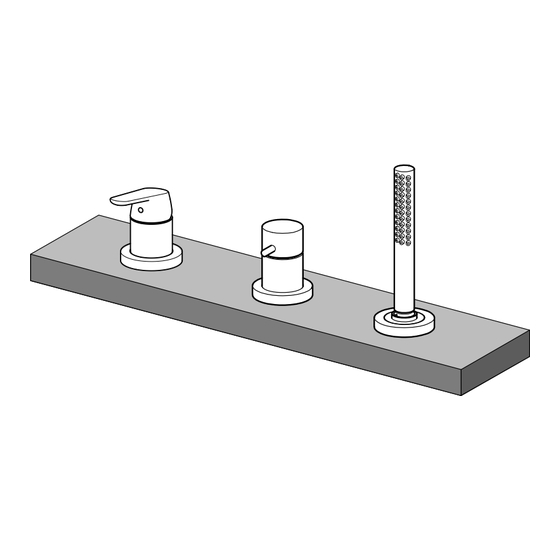
Complete assembly set • Kit de montage fi nal
Mounting- and operating instructions • Instructions de montage et d'utilisation
5303 0200
SIGMARINGER STRASSE 107 • D-70567 STUTTGART
PHONE: +49 (0) 711 1614-0 • TELEFAX: +49 (0) 711 1614-368
Ein Produkt der
Fertigmontageset
Montage- und Bedienungsanleitung
5731 9093
Armaturen GmbH
5301 0200
sanibel.de
sanibel.de
D
D
GB
GB
F
A023417/0315
Werbung

Verwandte Anleitungen für Hansa Sanibel 4001 5731 9093


Inhaltszusammenfassung für Hansa Sanibel 4001 5731 9093
- Seite 1 sanibel.de sanibel.de Fertigmontageset Complete assembly set • Kit de montage fi nal Montage- und Bedienungsanleitung Mounting- and operating instructions • Instructions de montage et d’utilisation 5731 9093 5303 0200 5301 0200 A023417/0315 SIGMARINGER STRASSE 107 • D-70567 STUTTGART PHONE: +49 (0) 711 1614-0 • TELEFAX: +49 (0) 711 1614-368 Ein Produkt der Armaturen GmbH...
- Seite 2 Für den Installateur For the Plumber Pour l’installateur Zur Wahrung der Gewährleistungsrechte sind Sanibel Produkte zwingend und ausschließlich durch einen sanitären Fachhandwerker zu montieren. Bei Reklamationen bzw. unerwartet auftretenden Mängeln wenden Sie sich an Ihren Installateur. To maintain warranty entitlements, Sanibel Products must be fi tted exclusively by a specialist sanitary engineer.
- Seite 3 Einbaumaße Installation dimensions Dimensions d’encastrement 5303 0200 5301 0200 7904724 7904725 Bohrdurchmesser ø 64 ø 64 ø 57 5-25 min. 120 min. 160 3° – min.120 min.160 495-650 5731 9093 7904726 2 1 2 1 0 1...
- Seite 4 Montage Mounting Instructions...
- Seite 5 Montage Mounting Instructions 5303 0200 Wannenseitig Install facing side of bath Installation cote drôit baignoire warm warm chaud kalt cold froid min.: 0,1 MPa (1 bar / 14,5 psi) max.: 1 MPa (10 bar / 145 psi) 0,5 MPa (5 bar / 72,5 psi) opt.: 0,1 MPa-0,5 MPa (1-5 bar / 14,5-72,5 psi) Technische Daten •...
- Seite 6 Montage Mounting Instructions Achtung! Vor Einbau der Armatur Rohrleitung gut spülen Attention! Flush pipes well before installing mixer Attention! Purger l’installation avant la pose de la robinetterie 59 912 307 warm warm chaud kalt cold froid Technische Änderungen vorbehalten Subject to technical alteration Sous réserve de modifi...
- Seite 7 Montage Mounting Instructions ø 64 mm ø 64 mm X +10 X +10 G 3/4 G 3/4 G 3/4 warm G 3/4 warm kalt 3 mm chaud cold froid G 3/4 G 3/4 G 3/4 3 mm Wannenseitig Install facing side of bath Installation cote drôit baignoire...
- Seite 8 Montage Mounting Instructions Achtung! Bauschutzkappe und Rückfallsicherung erst nach Brauseschlauchmontage entfernen! Attention! Remove the construction guard cap and relapse safety only during the shower hose installation! ø 57 mm Attention! Ne retirer le capuchon protecteur et la sécurité de chute qu´au moment du montage du tuyau douche!
- Seite 9 Montage Mounting Instructions min 150 mm Anbohrschelle nur bei glatten Rohren verwenden! Use the spot drill clamp only with smooth pipes! N´utiliser le collier de centrage que pour des tuyaux lisses! Der Einbau einer Revisionsöffnung ist vorzusehen! DIN EN 1717 There is space for the installation of an inspection opening! DIN EN 1717 Il faut prévoir le montage d‘une ouverture de révision DIN EN 1717...
- Seite 10 Montage Mounting Instructions 5301 0200 kalt cold warm froid warm chaud min.: 0,1 MPa (1 bar / 14,5 psi) max.: 1 MPa (10 bar / 145 psi) 0,5 MPa (5 bar / 72,5 psi) opt.: 0,1 MPa-0,5 MPa (1-5 bar / 14,5-72,5 psi) Technische Daten •...
- Seite 11 Montage Mounting Instructions Achtung! Bauschutzkappe und Rückfallsicherung erst während der Brauseschlauchmontage entfernen ! Attention! Remove the construction guard cap and relapse safety only during the shower hose installation! Attention! Ne retirer le capuchon protecteur et la sécurité de chute qu´au moment du montage du tuyau douche...
- Seite 12 Montage Mounting Instructions Wannenseitig Install facing side of bath Installation cote drôit baignoire Der Einbau einer Revisionsöffnung ist vorzusehen! DIN EN 1717 There is space for the installation of an inspection opening! DIN EN 1717 Il faut prévoir le montage d‘une ouverture de révision! DIN EN 1717...
- Seite 13 Montage Mounting Instructions Vor Einbau der Funktionseinheit Rohrleitung gut spülen Flush well before installation of the operating unit Avant le montage de l‘unité fonctionnelle, bien rincer la tuyauterie warm warm kalt chaud cold froid...
- Seite 14 Montage Mounting Instructions...
- Seite 15 Montage Mounting Instructions Höheneinstellung Height adjustment Ajustage en hauteur 10 mm 19 mm...
- Seite 16 Montage Mounting Instructions Feineinstellung Precision adjustment Ajustage de précision 19 mm 36 mm ±10 mm 27 mm 36 mm Einstellung - Neigungswinkel Adjustment - tilt angle Ajustage - angle d’inclinaison ±3° 17 mm ±3°...
- Seite 17 Montage Mounting Instructions 5301 HANSAFILL 0517 0100 Technische Änderungen vorbehalten Subject to technical alteration Sous réserve de modifi cations techniques Derechos reservados para efectuar modifi caciones técnicas Der Einbau einer Revisionsöffnung ist vorzusehen! DIN EN 1717 There is space for the installation of an inspection opening! DIN EN 1717 Il faut prévoir le montage d‘une ouverture de révision! DIN EN 1717...
- Seite 18 Montage Mounting Instructions...
- Seite 19 Montage Mounting Instructions 5731 2,5 mm 5301 0200 5303 0200 (HANSA) (HANSA) Ø 72 mm Ø 72 mm...
- Seite 20 Montage Mounting Instructions...
- Seite 21 Montage Mounting Instructions 5301 0200 (HANSA) 5303 0200 (HANSA) Ø 72 mm Ø 72 mm...
- Seite 22 Montage Mounting Instructions Ø 72 mm 3 mm 3 mm 3 mm...
- Seite 23 Montage Mounting Instructions Für den Fliesenleger For the tiler Pour le carreleur m a x . 2 5 m...
- Seite 24 Pfl egeanleitung für Sanibel-Armaturen Sehr geehrter Kunde, mit dieser Sanibel-Armatur haben Sie ein Qualitäts-Produkt erworben. Um die Schönheit der hochwertigen Oberfl äche zu erhalten, sind folgende Hinweise zu beachten: Chrom, chrom-edelmatt und farbbeschichtete Oberfl ächen sind empfi ndlich gegen säure- und sandhaltige Reinigungsmittel sowie kratzende Schwämme.