ESBE CRK210 Bedienungsanleitung
Inhaltsverzeichnis

Verwandte Anleitungen für ESBE CRK210


Inhaltszusammenfassung für ESBE CRK210
- Seite 1 SERIES CRA210 GB • DE • SE • PL • RU • ES • IT • FR • HR • CZ • GR...
- Seite 3 Series CRA210 LVD 2014/35/EU SI 2016 No. 1101 EMC 2014/30/EU SI 2016 No. 1091 RoHS 2011/65/EU SI 2012 No. 3032 EnEV 2014 DECLARATION OF CONFORMITY https://www.esbe.eu/group/support (Contorllers/Certificates) ˚ <-5 ˚ ˚ C − ˚ >+55...
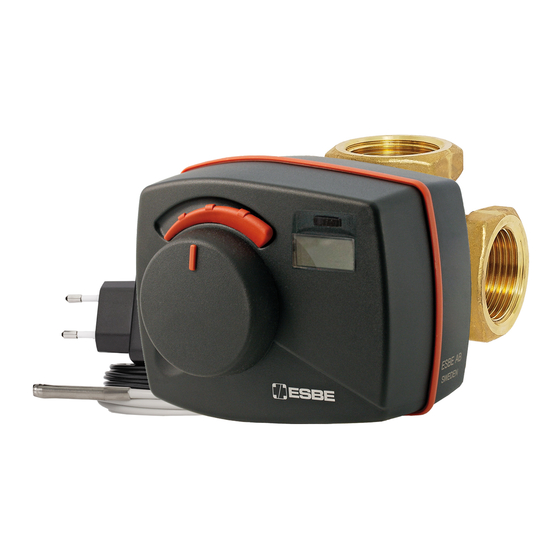
- Seite 4 Assembly Assembly Montage 1. Mount the actuator unit on the valve according to 1. Montieren Sie den Stellmotorregler auf den user instruction 1. Mischer, wie in Anleitung 1 beschrieben. 2. Mount the flow temperature sensor on the pipe 2. Befestigen Sie den Vorlauftemperaturfühler using the supplied aluminium tape.
- Seite 5 Montage Installazione 1. Monter le bloc moteur sur la vanne tel qu’expliqué 1. Installare l’attuatore sulla valvola secondo quanto dans le manuel d’instruction 1 puis identifiez le sens de riportato sulle istruzioni utente 1. rotation de la vanne: identifiez la position fermée (0%) 2.
- Seite 6 Start up 230V —...
-
Seite 7: Ändern Der Drehrichtung
Start up Ändern der Drehrichtung 1. Set the working direction of the controller by 1. Drücken Sie den Joystick nach links für “Auf = pressing the joystick to right for clockwise opening or gegen den Uhrzeigersinn = CCW”, nach rechts für left for counter clockwise opening (A). - Seite 8 Start up 230V —...
- Seite 9 Avviamento - Senso di rotazione Réglage du sens de rotation 1. Identificare il senso di rotazione desiderato, senso nel 1. Réglez le sens de rotation du contrôleur en maintenant quale deve girare il motore per aprire completamente le joystick vers la droite pour une ouverture vers la droite la porta calda.
- Seite 10 Change of target temperature Max°C 50 ° C — — ~ 40 - 50 ° C ~ 60 - 8 0 ° C 60 ° C Einstellen der Solltemperatur Change of target temperature 1. In order to change the target flow temperature, press 1.
- Seite 11 Réglage de la température souhaitée Impostazione della temperatura di mandata 1. Afin de modifier la température de départ, appuyez sur le 1. Per cambiare la temperatura di mandata obiettivo joystick vers la droite ou vers la gauche (A). desiderata girare il joystick verso destra o sinistra (A). 2.
-
Seite 12: Advanced Settings
Advanced Settings Symbol Explanation GB Förklaring SE Maximum Max begränsning Flow Temperature stant Minimum Min begränsning Flow Temperature ature Symbol Vysvětlení CZ Objašnjenje HR Maximální teplota Maksimalna topné vody temperatura protoka Minimální teplota Minimalna topné vody temperatura protoka Advanced Settings Erweiterte Einstellungen 1. - Seite 13 Erklärung DE Objaśnienia PL Пояснения RU Significato IT Explicación en ES Explication FR Réglage de la Maximale Максимальная Temperatura Temperatura máxima Maks. temp. zasilania température de Solltemperatur температура подачи massima di mandata de caudal départ maximale Réglage de la Minimale Минимальная...
-
Seite 14: Einstellen Der Maximalen Solltemperatur
Maximum Flow Temperature — — — M AX M AX MA X — — — — — — — — — — — — — — — — — — — — — Maximum Flow Temperature Einstellen der maximalen Solltemperatur 1. - Seite 15 50 ° C ~ 40 - 50 ° C Max°C Max°C ~ 60 - 8 0 ° C 50 ° C ~ 40 - 50 ° C ~ 60 - 8 0 ° C Temperatura massima di mandata Réglage de la température de départ maximale 1.
-
Seite 16: Se Lägsta Framledningstemperatur
— — — Minimum Flow temperature — — — — — M AX MA X — — — — — — — — — — — — — — — — — — — — — — — — — Minimum Flow Temperature Einstellen der minimalen Solltemperatur 1. - Seite 17 5 ° C ~ 5 - 25 ° C Min °C Min °C ~ 5 - 25 ° C 5 ° C ~ 5 - 25 ° C ~ 5 - 25 ° C Temperatura minima di mandata Réglage de la température de départ minimale 1.
- Seite 18 Alternative temperature °C Max 100 °C Alternative temperature Einstellen der alternativen Solltemperatur An alternative target flow temperature can be activated Eine alternative Solltemperatur (T2) kann durch ein externes for example during legionella flushing by an external Signal aktiviert werden (siehe Punkt 8) und zum Beispiel als signal (A).
- Seite 19 — — — — — — — — — — — — Temperatura alternativa Température alternative (ex : Pic Anti-Légionellose): Si può attivare una temperatura obiettivo di flusso Il est possible d’activer une température alternative, alternativa ad esempio per il ciclo antilegionella tramite un comme par exemple un Pic Anti-Légionellose, par un signal segnale esterno (A).
-
Seite 20: Aktivieren Der Alternativen Solltemperatur
Alternative temperature Alternative temperature Activate Alternative temperature Aktivieren der alternativen Solltemperatur Alternative temperature is activated by an external signal. Die alternative Solltemperatur wird durch ein externes Signal aktiviert. 1. Disconnect power to the controller. 2. Unscrew the cover (A) and connect two conductors to 1. - Seite 21 Max 100 RU Альтернативная температура Activar Temperatura alternativa Активируется с помощью внешнего сигнала La temperatura alternativa es activada mediante una señal 1. Отключите питание контроллера. externa. 2. Снимите крышку (A) и подключите два провода к зеленому 1. Desconecte la alimentación al controlador. разъему...
- Seite 22 Alternative temperature Alternative temperature IT Attivazione della temperatura alternativa Activation de la temperature alternative La temperatura alternativa viene attivata da un segnale esterno. La température alternative est activé par un signal externe. 1. Scollegare alimentazione della centralina. 1. Débranchez le contrôleur de l’alimentation électrique. 2. Svitare la vite e rimuovere il coperchio della centralina (A).
- Seite 23 Max 100 Aktiviranje odmaka / paralelne prilagodbe Aktivujte ofset / Paralelní nastavení Odmak/paralelna prilagodba aktiviraju se pomoću Nastavení Offset / Parallel se aktivuje externím signálem. vanjskim signalom. 1. Odpojte od regulátoru napájení. 2. Odšroubujte kryt (A) a k zelenému konektoru (B) připojte 1.
- Seite 24 Advanced settings: On/Off — — — M AX MA X — — — — — — — — — — Objaśnienia PL Объяснение RU Explicación ES Symbol Explanation GB Förklaring SE Erklärung DE Саморегу- Self adjusting Självinställande Selbstanpassenden Samoregulujący Factor P лирующийся...
- Seite 25 Self adjusting P-factor — — — — Symbol Significato IT Επεξήγηση GR Explication FR Vysvětlení CZ Objašnjenje HR Fattore P Αυτορυθμιζόμενος Auto-ajustement Samonastavitelný Samopodešavajući autoregolante συντελεστής P P-factor P-faktor P-faktor 4. Presione la palanca de mando durante 5 segundos para régler manuellement la sensibilité...
- Seite 28 ESBE AB Bruksgatan 22 SE‒333 75 Reftele www.esbe.eu Mtrl.nr. 98141095• Ritn.nr. 9327 utg. B • 2023-03-06...