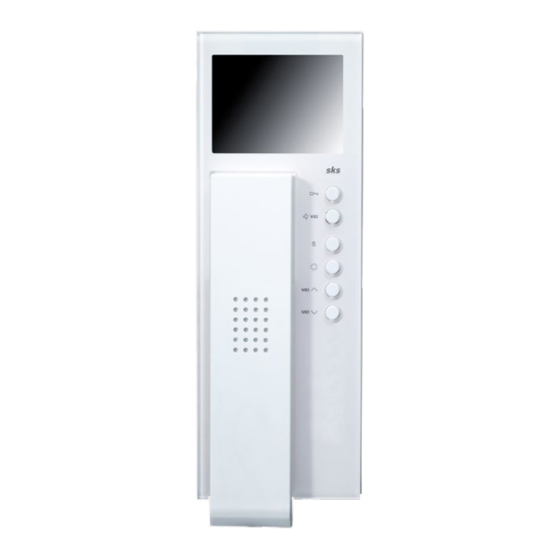
sks HTV4600 Montageanleitung
Vorschau ausblenden
Andere Handbücher für HTV4600:
- Bedienungsanleitung (5 Seiten) ,
- Bedienungsanleitung (14 Seiten) ,
- Bedienungsanleitung (20 Seiten)
Inhaltsverzeichnis
Werbung
Verfügbare Sprachen
Verfügbare Sprachen
Quicklinks
Werbung
Inhaltsverzeichnis

Verwandte Anleitungen für sks HTV4600


Inhaltszusammenfassung für sks HTV4600
- Seite 1 HTV 4600 Version 1.3 ~ 1 ~...
-
Seite 2: Installation
1. Installation Gefahr für Personen durch einen elektrischen Schlag. Verbrennungsgefahr, Geräteschäden und Fehlfunktionen. Bei der Installation sind die Richtlinien der VDE 0100 und VDE 0800 einzuhalten. (Deutschland) Gegenmaßnahmen: Schalten Sie zu Beginn der Arbeiten alle spannungsführenden Leitungen frei. Sichern Sie die ausgeschalteten Leitungen gegen irrtümliches Wiedereinschalten. - Seite 3 3. Montageanleitung HTV4600 Mit einem Schraubenzieher vorsichtig den unteren Klipp eindrücken und die Front abnehmen. Aufputz Montage: Mit Dübel und Schrauben das Hinterteil der Sprech- stelle an der Wand befestigen. Das Kabel darf im komplett montierten Zustand nicht gequetscht oder scharf geknickt werden.
- Seite 4 Rufadresse Sprechstelle ein. Jede Adresse ist einem Klingeltaster an der Türstation zugeordnet. Die Adressen sind im Anhang aufgeführt. In der Regel wird mit der SKS- BUS-Rufadresse „A1“ begonnen. Beim Austausch von Sprechstellen stellen Sie den DIP-Schalter so ein, wie bei der zuvor montierten Sprechstelle.
- Seite 5 Nach der im Anhang befindlichen SKS-BUS-Rufadressen-Tabelle die gewünschte Rufadresse des Gerätes am DIP-Schalter einstellen. Jede Rufadresse ist fest einem Klingeltaster in der Türstation zugeordnet. Die Rufadressenverteilung ist bei SKS Türstationen in der Türstation oder am Türlautsprecher hinterlegt. 4.2 Programmierung von bis zu 4 Rufadressen (2...4 Klingeltaster für eine Sprechstelle oder Internsprechen)
-
Seite 6: Einrichten Des Internrufs
Internsprechen ermöglicht das Sprechen zwischen zwei Innensprechstellen. Die Internsprech-Funktion ist nur mit dem 11Tasten-Modell möglich. Mit der HTV4600 kann mit bis zu 5 Innensprechstellen gesprochen werden. An der HTV4600 sind dafür die Tasten 1 bis 5 vorgesehen. Durch Drücken der entsprechenden Taste wird der Internruf abgesetzt. - Seite 7 6. Bedienungsanleitung HTV4600 Funktion Tasten Vorgehensweise Gespräch annehmen Nehmen Sie, nachdem das Gerät angeklingelt wurde, den Hörer ab. Nehmen Sie den Hörer ab und halten Sie die Ton-Bild-Taste solange gedrückt (ca.5 Sekunden), bis Sie den Bestätigungston hören. Der Rufton ist jetzt abgeschaltet. Um auf diesen Zustand hinzuweisen, Rufabschaltung blinkt die Ton-Bild-Taste im Sekunden-takt.
- Seite 8 Ton-Bild-Taste gedrückt halten anschließend Türöffnertaste innerhalb von 2 Sekunden drücken und beide Etagenrufklingelton gedrückt halten. Warten Sie bis die gewünschte Melodie ertönt. ändern Lassen Sie beide Tasten los. Es stehen 4 verschiedene Etagenruftöne zur Auswahl. Die Ton-Bild-Taste gedrückt halten, bis die gewünschte Lautstärke Klingellautstärke erreicht ist.
-
Seite 9: Programmierung Von Sonderfunktionen
7. Programmierung von Sonderfunktionen 7.1 Bild Autostart Funktion Für 2-Draht Geräte: Wird die Sprechstelle angeklingelt, so startet bei Auslieferung das Bild automatisch (Auslieferzustand). Es kann jedoch auch die Bild-Autostart-Funktion abgeschaltet werden. Drücken Sie dazu den Programmiertaster neben dem DIP-Schalter und danach die Bildhohltaste . -
Seite 10: Technische Daten
7.4 Löschen von Türstationsadressen Die gespeicherten Türstationsadressen können nur durch ein Rücksetzen auf den Auslieferzustand, wie unter 7.5 beschrieben, gelöscht werden. 7.5 Rücksetzen auf den Auslieferzustand Für 2-Draht Geräte: Um die Sprechstelle auf den Auslieferzustand zurückzusetzen, ziehen Sie den Stecker mit der a/b Klemme ab. - Seite 11 ~ 11 ~...
- Seite 12 ~ 12 ~...
- Seite 13 ~ 13 ~...
-
Seite 14: Terminal Description
1. Installation Danger of electrical shock, danger of burns, damage to equipment and malfunctioning. The VDE 0100 and VDE 0800 standards are to be complied with during installation. (Germany) Countermeasures: Switch off and uncouple all electrical lines before starting work. ... - Seite 15 3. Installation instructions HTV4600 Use a screwdriver to gently push in the bottom clip and remove the front. Surface mounting: Attach the rear part of the intercom unit to the wall using the plugs and screws. When fully assembled, the cable must not be squashed or bent sharply.
- Seite 16 Each address is assigned to a bell push button on the door unit. The addresses are listed in the annex. In general, the SKS-BUS call address "A1" is the one to start with. When replacing intercom units, set the DIP-switch to match the previously mounted intercom unit.
- Seite 17 Each call address is assigned to one bell button in the door station. The distribution of call addresses for SKS door stations is stored in the door station or on the door speaker. 4.2 Programming up to 4 call addresses (2...4 bell push buttons for one intercom unit or internal call)
- Seite 18 11 keys. With the HTV4600, communication between up to 5 internal units is possible. In case of the HTV4600, keys 1 to 5 are used for this purpose. By pressing the corresponding key until you hear a tone, the internal call is issued.
- Seite 19 6. Operating instructions HTV4600 Function Approach Accepting a call After the door bell rings, pick up the receiver. Pick up the receiver and press and hold the tone/image key (for approx. 5 seconds) until you hear confirmation tone. The ring tone is now switched off.
- Seite 20 Press and hold the tone/image key and, within 2 seconds, also press Changing the ring the open door key without releasing it. Wait until you hear the desired tone for floor calls ring tone. Release both keys. You can choose from 4 different ring tones.. Press and hold the tone/image key until the desired volume has been Modifying the volume reached.
- Seite 21 7.3 Programming of external units Programming of external units is only possible for 2-wire devices. This function is required when there are video floor level units in addition to the main entrance door. The internal units connected to the floor level external unit may only display the video image of this floor level external unit and of the main external unit.
-
Seite 22: Technical Data
8. Technical data Electrical data 19 – 23VDC Voltage a / b 18 – 24VDC Voltage +22 / GND General information Display resolution 320 x 240 pixels Ambient temperature -10°C to +45°C Humidity 20% to 90%, non-condensing Housing Glass or plastic surface with plastic housing Dimensions (width x height x depth) 90 x 255 x 43mm Disclaimer of liability... - Seite 23 ~ 23 ~...
- Seite 24 ~ 24 ~...
- Seite 25 ~ 25 ~...
- Seite 26 1. Installation Danger pour les personnes en raison de chocs électriques. Risque d'incendie, de dégâts matériels et de dysfonctionnements. Lors de l'installation, les directives VDE 0100 et VDE 0800 doivent être respectées. (Allemagne) Actions préventives: Commencez par éteindre toutes les lignes sous tension. ...
- Seite 27 3. Instructions d‘installation HTV4600 A l'aide d'un tournevis, poussez prudemment le clip inférieur et démontez la façade. Montage en saillie: Fixez le support arrière de l'interphone au mur avec vis et chevilles. Une fois le montage terminé, le câble ne doit pas être écrasé ou plié.
- Seite 28 Instructions d‘installation HTV4600 (Suite) Branchez le câble à la borne de raccord comme indiqué selon le plan d'installation. Réglez l'adresse d'appel BUS-SKS de l'interphone. Chaque adresse est assignée à une touche de sonnerie de la station de porte. Les adresses sont répertoriées...
- Seite 29 BUS-SKS en annexe. Chaque adresse d'appel est assignée de manière fixe à une touche de sonnerie de la station de porte. Pour les stations de porte SKS, la répartition des adresses d'appel est définie dans la station de porte ou dans le haut-parleur de porte.
- Seite 30 11 touches. Le HTV4600 permet de communiquer avec jusqu'à 5 interphones intérieurs. Le HTV4600 contient les touches 1 à 5 à cet effet. Appuyez sur la touche correspondante jusqu’à entendre un bip pour émettre une communication interne.
- Seite 31 6. Notice d‘utilisation HTV4600 Fonction Touches Utilisation Entamer une Lorsque quelqu’un a sonné, décrochez le combiné. conversation Décrochez le combiné et maintenez la touche de désactivation de la tonalité/l’image enfoncée (pendant environ 5 secondes) jusqu’à ce que vous entendiez 1 bips longs de confirmation. La tonalité est alors coupée.
- Seite 32 Maintenez la touche de réglage de la tonalité/l’image enfoncée et dans les 2 secondes, appuyez brièvement sur la touche de l’ouvre- Modifier la tonalité de porte et maintenez-les enfoncées. Attendez jusqu'à ce que vous l’appel à l’étage entendiez la tonalité souhaitée. Relâchez alors les deux touches. Vous avez le choix parmi 4 tonalités différentes.
- Seite 33 7.2 Secret visio Pour appareils 2 fils : Pour les appareils 2 fils, le secret visio ne peut pas être désactivé. Pour appareils 6 fils : Le secret visio peut uniquement être désactivé par une modification physique des pièces. Veuillez contacter notre support technique.
-
Seite 34: Caractéristiques Techniques
8. Caractéristiques techniques Caractéristiques électriques 19 – 23VDC Tension a / b 18 – 24VDC Tension +22 / GND Général Résolution de l‘écran 320 x 240 pixels Température de fonctionnement -10°C à +45°C Humidité 20% à 90% sans condensation Boîtier Surface en verre ou en plastique avec boîtier plastique Dimensions (largeur x hauteur x profondeur) 90 x 255 x 43mm... - Seite 35 ~ 35 ~...
- Seite 36 ~ 36 ~...
- Seite 37 ~ 37 ~...
-
Seite 38: Anhang, Appendix, Annexe
Anhang, Appendix, Annexe ~ 38 ~...