Inhaltsverzeichnis
Werbung
Verfügbare Sprachen
Verfügbare Sprachen
Quicklinks
Werbung
Kapitel
Inhaltsverzeichnis

Verwandte Anleitungen für YABER E1


Inhaltszusammenfassung für YABER E1
- Seite 1 E 1 PROJECTOR...
- Seite 2 LANGUAGE English 02-22 Français 23-43 Espanol 44-64 Italian 65-85 Deutsche 86-106 日本語 107-127...
-
Seite 3: Inhaltsverzeichnis
CONTENTS YABER Lifetime Professional Support YABER Lifetime Professional Support Dear customer, TIPS Thank you very much for supporting YABER. PACKAGE LIST PROJECTOR SPECIFICATIONS Please read this manual thoroughly before using the projector. If you have PROJECTOR OVERVIEW any issues, email your order number and the problem to support@yabertech.com. -
Seite 4: Package List
PACKAGE LIST PROJECTOR OVERVIEW Yaber E1 Projector*1 Remote Control*1 Power Cord*1 HDMI Cable*1 Cleaning Cloth*1 User Manual*1 Lens Cover*1 PROJECTOR SPECIFICATIONS Model No. E1 Native Resolution 1280*720p Aspect Ratio 4:3/16:9 Display Tech Light Source Color Gamut 45% NTSC Size 6.3x4.92x5.12 inch... -
Seite 5: Remote Control
REMOTE CONTROL Projector lens Optical coated glass lens IR window Infrared signal receiver Power Cord Port Insert the power cord Headphone Jack 3.5mm Headphone Output HDMI Port HDMI input USB Ports USB 1 port / USB 2 port Clean the dust (if the screen has a Detachable Dust Filter black spot) Prevent the projector from... -
Seite 6: Installation
Note: STARTING PROJECTOR 1).Install 2 pieces of AAA batteries into the remote before using it. Do not Turn on the projector: Connect to the power cable, when the red indicator combine new batteries with old ones in remote controller, which can cause light is on, press the power button on the panel ( Press the power key on the operation failure due to insufficient power supply. -
Seite 7: Setting Up The Projector
SETTING UP THE PROJECTOR 2. Multimedia Play 2.1 USB Disk Input Mode The projector's home page is as follow. Step1: Insert the USB flash disk into the USB port of the projector. Step2: Select “Media” and the press the "OK" key to enter. Step3: Depending on the file type, select the option [MOVIE/MUSIC/ 1. -
Seite 8: Play Interface
1. Go to home page Select the [Setting] menu Select the [WiFi] Select your home WiFi from the list menu Connect the E1 projector to your home WiFi. MENU Function Fast Backward,rewinds the video back quickly while playing it. Fast Forward,pushes the video to move forward quickly while playing it. -
Seite 9: Miracast ( For Android Devices )
2. Select the [ Settings ] menu on your Android device Select the [ Screen mirroring ] function Select your Miracast receiver named [ E1- Miracast-XXXX ] your Android device screen will be displayed on the projection screen after 3 seconds. -
Seite 10: Bluetooth Setting
Content Picture Mode Standard/Dynamic/Mild/User Note: Color Temperature Medium/Cool/Warm/User 1.The E1 projector is compatible with the Bluetooth headsets, Bluetooth speakers and Airpods, but not the Bluetooth keyboards or Bluetooth Noise Reduction Off/Low/Middle/High phones. 5.2 Sound Menu 2.If you have any question, please feel free to contact us via support@yabertech.com... -
Seite 11: Option Menu (Zoom & Keystone Correction)
SIGNAL LINES CONNECTION Menu Content Yaber E1 projector has 3 interfaces, HDMI port*1/ USB port*2/ 3.5mm Sound Mode Standard/Movie/Music/Sports/User headphone output. Please select the correct connecting port to connect your device (PC, DVD Player, Fire TV stick, TV box, Sound bar, USB disk, PS4... -
Seite 12: Connect To The Dvd Player
2).Select the HDMI source to project any files on your computer; Thank you so much for your purchase and support. We provide 3 year warranty for E1 projector. If you have any questions, please feel free to 3).On your laptop, hold down the key “Win+P” board keys to change your contact us via support@yabertech.com... - Seite 13 CONTENU Support professionnel à vie YABER CONSEILS LISTE DES FORFAITS SPÉCIFICATIONS DU PROJECTEUR APERÇU DU PROJECTEUR REMOTE CONTROL INSTALLATION 1. Méthode d'installation 2. Distance et taille de projection PROJECTEUR DE DÉMARRAGE RÉGLAGE DE L'IMAGE 1. Réglage de la mise au point électrique CONFIGURATION DU PROJECTEUR 1.
-
Seite 14: Support Professionnel À Vie Yaber
Support professionnel à vie YABER LISTE DES FORFAITS Cher client, Cordon Yaber E1 Projecteur*1 Télécommande*1 Merci beaucoup de soutenir YABER. d'alimentation*1 Veuillez lire attentivement ce manuel avant d’utiliser le projecteur. Si vous Câble HDMI*1 Chiffon de nettoyage*1 Manuel d'utilisation*1 rencontrez des problèmes, envoyez votre numéro de commande et le problème à... -
Seite 15: Aperçu Du Projecteur
APERÇU DU PROJECTEUR Lentille du projecteur Lentille en verre à revêtement optique Fenêtre IR Récepteur de signal infrarouge Port du cordon Insérez le cordon d'alimentation d'alimentation Prise casque Sortie casque 3,5 mm Ports HDMI Entrée HDMI Ports USB Port USB 1 / Port USB 2 Nettoyez la poussière (si l'écran a une Filtre à... -
Seite 16: Remote Control
REMOTE CONTROL Remarque: 1). Installez 2 piles AAA dans la télécommande avant de l’utiliser. Ne combinez pas de piles neuves avec d’anciennes dans la télécommande, ce qui peut entraîner une défaillance du fonctionnement en raison d’une alimentation électrique insuffisante. 2). Lors de l’utilisation de la télécommande, assurez vous que l’émetteur de signal de la télécommande vise un récepteur de signal infrarouge du projecteur. -
Seite 17: Projecteur De Démarrage
PROJECTEUR DE DÉMARRAGE CONFIGURATION DU PROJECTEUR Allumez le projecteur : Connectez vous au câble d’alimentation, lorsque La page d'accueil du projecteur est la suivante. le voyant rouge est allumé, appuyez sur le bouton d’alimentation du panneau (appuyez sur la touche d’alimentation de la télécommande) pour démarrer le projecteur, et le voyant passe du rouge au bleu et le projecteur est allumé. -
Seite 18: Lecture Multimédia (Mode D'entrée De Disque Usb)
2. Lecture multimédia (mode d’entrée de disque USB) lecteur. 3. Choisissez Formater. 2.1 Mode d'entrée du disque USB 4. Dans la liste déroulante Système de fichiers, veuillez choisir le format FAT32. Étape 1 : Insérez le disque flash USB dans le port USB du projecteur. 5. -
Seite 19: Réglage Wi Fi
Sélectionnez votre WiFi domestique dans 3. Faites votre choix dans la liste. E1 AirPlay F997 la liste Connectez le projecteur E1 à votre WiFi domestique. 3. Sélectionnez le menu [ Réglage ] sur votre appareil iOS Activez la fonction [ Wi-Fi ] Connectez votre appareil iOS au même réseau... -
Seite 20: Réglage Bluetooth
Activer [ Wi-Fi ], Connectez votre WiFi domestique. Remarque: Remarque: 1.Le projecteur E1 est compatible avec les casques Bluetooth, les haut 1.Différentes marques de téléphones Android ont des opérations parleurs Bluetooth et les Airpods, mais pas avec les claviers Bluetooth ou différentes pour certains écrans de mise en miroir, veuillez vous référer au... -
Seite 21: Réglage Du Projecteur
5. Réglage du projecteur Menu Contenu 5.1 Menu d'images Mode Sonore Standard/Movie/Music/Sports/User Allez à la page d'accueil Sélectionnez [ Réglage ] Sélectionnez [ Image ]. Utilisez les touches fléchées de la télécommande pour changer Volume Automatique Marche/Arrêt de menu, appuyez sur "OK " pour confirmer et régler. 5.3 Menu d'options (ZOOM &... -
Seite 22: Connexion Des Lignes De Signaux
3. Connectez-vous au lecteur DVD 1) Allumez votre lecteur DVD et le projecteur; Le projecteur Yaber E1 dispose de 3 interfaces, port HDMI * 1 / port USB * 2 / sortie casque 3,5 mm. Veuillez sélectionner le port de connexion approprié... -
Seite 23: Garantie
Scan and download the PDF user manual GARANTIE Merci beaucoup pour votre achat et votre soutien. Nous offrons une garantie de 3 ans pour le projecteur E1. Si vous avez des questions, n'hésitez pas à nous contacter via support@yabertech.com Where to Get More Help Support@yabertech.com... - Seite 24 CONTENIDO YABER Soporte Profesional de Por Vida YABER Soporte Profesional de Por Vida Estimado cliente, CONSEJOS Muchas gracias por apoyar YABER. LISTA DE EMPAQUE Lea detenidamente este manual antes de utilizar el proyector. Si tiene ESPECIFICACIONES DEL PROYECTOR algún problema, envíe un correo electrónico con su número de pedido RESUMEN DEL PROYECTOR y el problema a support@yabertech.com.
-
Seite 25: Lista De Empaque
LISTA DE EMPAQUE RESUMEN DEL PROYECTOR Cable de Yaber E1 Proyector*1 Control Remoto*1 Alimentación*1 Cable HDMI*1 Paño de Limpieza*1 Manual de Usuario*1 Cubierta de la Lente*1 ESPECIFICACIONES DEL PROYECTOR Model No. E1 Relación de Resolucion Nativa 1280*720p 4:3/16:9 Aspecto Tecnología de Fuente de Luz Visualización... -
Seite 26: Control Remoto
CONTROL REMOTO Lente de vidrio con revestimiento Lente del Proyector óptico IR window Infrared signal receiver Puerto del cable de Inserte el cable de alimentación alimentación Headphone Jack 3.5mm Headphone Output Puerto HDMI Entrada HDMI Puertos USB USB 1 port / USB 2 port Filtro de polvo Limpiar el polvo (si la pantalla tiene desmontable... -
Seite 27: Instalación
Nota: PROYECTOR DE INICIO 1). Instale 2 pilas AAA en el control remoto antes de usarlo. No combine Encienda el proyector: Conéctelo al cable de alimentación, cuando la baterías nuevas con viejas en el control remoto, lo que puede causar fallas luz indicadora roja esté... -
Seite 28: Configuración Del Proyector
CONFIGURACIÓN DEL PROYECTOR 2. Reproducción Multimedia 2.1 Modo de Entrada de Disco USB La página de inicio del proyector es la siguiente. Paso 1: Inserte el disco flash USB en el puerto USB del proyector. Paso 2: seleccione "Medios" y presione la tecla "OK" para ingresar. Paso 3: según el tipo de archivo, seleccione la opción [Película/Música/ 1. -
Seite 29: Interfaz De Juego
3.1 iOS Cast (Para dispositivos iOS) 1. Vaya a la página de inicio Seleccione el menú [ Configuración] Seleccione el menú [WiFi ] Seleccione su WiFi doméstico de la lista Conecte el proyector E1 a su WiFi doméstico. Información de red Menú Contenido None... -
Seite 30: Miracast (Para Dispositivos Android )
Seleccione y conecte el receptor 3. En su dispositivo Android, toque [ Configuración ] [ Pantalla WLAN ] iOS Cast llamado [E1-Airplay-XXXX] Encienda [ Wi-Fi ], conecte el WiFi de su hogar. la pantalla de su dispositivo iOS se mostrará en la proyección pantalla después de 3 segundos. -
Seite 31: Configuración De Bluetooth
Estándar / Dinámico / Suave / Usuario Nota: Temperatura de Color Media/Fría/Cálida/Usuario 1. El proyector E1 es compatible con auriculares Bluetooth, altavoces Bluetooth y Airpods, pero no con teclados Bluetooth o teléfonos Bluetooth. Reducción de Ruido Medio/Desactivado/Bajo/Alto 2. Si tiene alguna pregunta, no dude en contactarnos a través de 5.2 Menú... -
Seite 32: Menú De Opciones (Zoom & Corrección Trapezoidal)
CONEXIÓN DE LÍNEAS DE SEÑAL Menú Contenido El proyector Yaber E1 tiene 3 interfaces, puerto HDMI*1/puerto USB*2/salida Estándar/Película/Música/Deportes/ Modo de Sonido Usuario de auriculares de 3,5 mm. Seleccione el puerto de conexión correcto para conectar su dispositivo (PC, reproductor de DVD, dispositivo Fire TV, caja de Volumen Automático... -
Seite 33: Conéctese Al Reproductor De Dvd
Muchas gracias por su compra y apoyo. Ofrecemos 3 años de garantía para el proyector E1. Si tiene alguna pregunta, no dude en contactarnos a 3) En su computadora portátil, mantenga presionada la tecla "Win + P" para través de support@yabertech.com cambiar el modo de visualización. - Seite 34 CONTENUTO YABER Supporto Professionale a Vita CONSIGLI ELENCO PACCHETTI SPECIFICHE DEL PROIETTORE PANORAMICA DEL PROIETTORE TELECOMANDO INSTALLAZIONE 1. Metodo di Installazione 2. Distanza e Dimensioni di Proiezione PROIETTORE INIZIALE REGOLAZIONE DELL'IMMAGINE 1. Regolazione Elettrica del Fuoco CONFIGURAZIONE DEL PROIETTORE 1. Selezionare la Sorgente del Segnale di Ingresso 2.
-
Seite 35: Yaber Supporto Professionale A Vita
Gentile Cliente, Cavo di Yaber E1 Proiettore*1 Telecomando*1 Alimentazione*1 Grazie mille per il supporto di YABER. Leggere attentamente questo manuale prima di utilizzare il proiettore. In Cavo HDMI*1 Panno per la Pulizia*1 Manuale dell'utente*1 caso di problemi, inviare un'e mail con il numero dell'ordine e il problema a support@yabertech.com. -
Seite 36: Panoramica Del Proiettore
PANORAMICA DEL PROIETTORE Lente del proiettore Lente in vetro ottico rivestito Finestra IR Ricevitore di segnali a infrarossi Porta del cavo di Inserire il cavo di alimentazione alimentazione Headphone Jack 3.5mm Headphone Output Porte HDMI Ingresso HDMI Porte USB Porta USB 1 / Porta USB 2 Pulisci la polvere (se lo schermo ha Filtro antipolvere rimovibile una macchia nera) -
Seite 37: Telecomando
TELECOMANDO Nota: 1).Installare 2 batterie AAA nel telecomando prima di utilizzarlo. Non combinare batterie nuove con quelle vecchie nel telecomando, che possono causare problemi di funzionamento a causa di alimentazione insufficiente. 2).Quando si utilizza il telecomando, assicurarsi che il trasmettitore del segnale del telecomando punti al ricevitore del segnale a infrarossi del proiettore. -
Seite 38: Proiettore Iniziale
PROIETTORE INIZIALE CONFIGURAZIONE DEL PROIETTORE Accendere il proiettore: collegare al cavo di alimentazione, quando la La home page del proiettore è la seguente. spia rossa è accesa, premere il pulsante di accensione sul pannello (premere il tasto di accensione sul telecomando) per avviare il proiettore, l'indicatore passa dal rosso al blu, il proiettore è... -
Seite 39: Riproduzione Multimediale
2. Riproduzione Multimediale 4. Nel menu a tendina File System, scegli il formato FAT32. 5. Fare clic su Start e chiudere questa finestra al termine. 2.1 Modalità di Input del Disco USB Se il problema persiste, inviare il problema a questa e mail: Passaggio 1: inserire il disco flash USB nella porta USB del proiettore. -
Seite 40: Impostazione Wi Fi
Seleziona il WiFi di casa dall'elenco Collega il proiettore 3. Selezionare dall'elenco. E1 AirPlay F997 E1 al WiFi di casa. 3. Selezionare il menu [Impostazioni] sul proprio dispositivo iOS Attivare la funzione [Wi-Fi] Collegare il proprio dispositivo iOS alla stessa rete Informazioni di Rete domestica del proiettore. -
Seite 41: Impostazione Bluetooth
Attiva [ Wi-Fi ], Connetti il WiFi di casa. Nota: Nota: 1. Il proiettore E1 è compatibile con le cuffie Bluetooth, gli altoparlanti 1. Diverse marche di telefoni Android hanno operazioni diverse per Bluetooth e gli Airpod, ma non con le tastiere Bluetooth o i telefoni selezionare Screen Mirroring Display, fare riferimento al manuale del Bluetooth. -
Seite 42: Impostazione Del Proiettore
5. Impostazione del Proiettore Menù Contenuto 5.1 Menu Immagine Modalità Audio Standard/Film/Musica/Sport/Utente Vai alla home page Seleziona [ Ambientazione ] Seleziona [ IMMAGINE ] .Utilizzare i tasti freccia del telecomando per cambiare menu, Volume automatico On/Off premere il tasto “OK” per confermare e impostare. 5.3 Menu delle Opzioni (ZOOM &... -
Seite 43: Collegamento Linee Segnali
5. Collegati al Computer page, selezionare l'opzione [Film/Musica/Foto/TESTO] 1) Collegare al computer e al proiettore E1 con il cavo HDMI (incluso). 3) Selezionare il file desiderato (o la cartella per accedere alla sottocartella) nel disco USB, quindi premere il pulsante [ OK ] per riprodurlo. -
Seite 44: Garanzia
Scan and download the PDF user manual GARANZIA Grazie mille per l'acquisto e il supporto. Forniamo una garanzia di 3 anni per il proiettore E1. In caso di domande, non esitare a contattarci tramite support@yabertech.com Where to Get More Help Support@yabertech.com... - Seite 45 YABER Lebenslanger professioneller Support YABER Lebenslanger professioneller Support Lieber Kunde, TIPPS vielen Dank, dass Sie YABER unterstützen. PAKETLISTE Bitte lesen Sie dieses Handbuch sorgfältig durch, bevor Sie den Projektor TECHNISCHE DATEN DES PROJEKTORS benutzen. Wenn Sie irgendwelche Probleme haben, mailen Sie Ihre PROJEKTORÜBERSICHT...
-
Seite 46: Paketliste
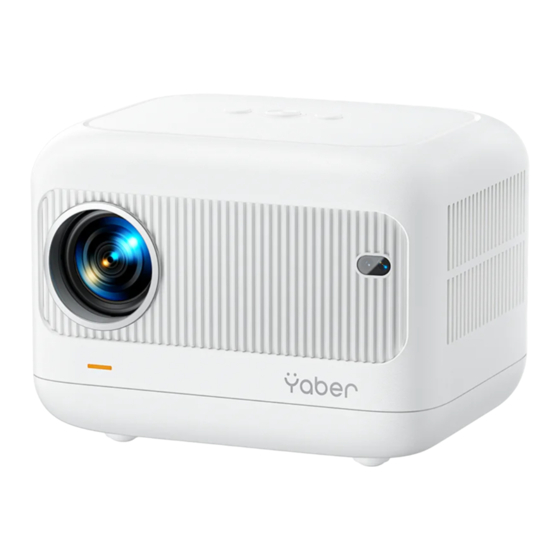
PAKETLISTE PROJEKTORÜBERSICHT Yaber E1 Projektor*1 Fernbedienung*1 Netzkabel*1 HDMI Kabel*1 Reinigungstuch*1 Benutzerhandbuch*1 Objektivabdeckung*1 TECHNISCHE DATEN DES PROJEKTORS Model No. E1 Native Auflösung 1280*720p Seitenverhältnis 4:3/16:9 Display Tech Lichtquelle Farbspiel 16.7M Full Größe 6.3x4.92x5.12 inch AC100 Gewicht 2.43 lbs Netzspannung 240V~50/60Hz Ausgangsport Kopfhörer... -
Seite 47: Fernbedienung
FERNBEDIENUNG Projektorlinse Optisch beschichtete Glaslinse IR Fenster Infrarot Signalempfänger Netzkabelanschluss Stecken Sie das Netzkabel ein Kopfhöreranschluss 3,5 mm Kopfhörerausgang HDMI Anschlüsse HDMI Eingang USB Anschlüsse USB 1 Anschluss / USB 2 Anschluss Reinigen Sie den Staub (wenn der Abnehmbarer Staubfilter Bildschirm einen schwarzen Fleck hat) Vermeiden Sie eine Überhitzung des Entlüften... -
Seite 48: Installation
Hinweis: PROJEKTOR STARTEN 1).Installieren Sie 2 AAA Batterien in die Fernbedienung, bevor Sie sie verwenden. Kombinieren Sie keine neuen Batterien mit alten in der Schalten Sie den Projektor ein: Schließen Sie das Netzkabel an, wenn Fernbedienung, da dies zu Betriebsausfällen aufgrund unzureichender die rote Kontrollleuchte leuchtet, drücken Sie die Ein /Aus Taste auf dem Stromversorgung führen kann. -
Seite 49: Aufstellen Des Projektors
AUFSTELLEN DES PROJEKTORS 2. Multimedia-Wiedergabe 2.1 USB-Datenträger-Eingabemodus Die Homepage des Projektors ist wie folgt. Schritt 1: Stecken Sie die USB Flash Disk in den USB Anschluss des Projektors. Schritt 2: Wählen Sie "Medien" und drücken Sie zum Aufrufen die "OK" Taste. Luftspiel Schritt 3: Wählen Sie je nach Dateityp die Option [Film/Musik/Foto/Text] 1. -
Seite 50: Play Schnittstelle
3.1 iOS Cast (für iOS-Geräte) Wählen Sie das Menü [Einstellung] 1. Gehen Sie zur Startseite Wählen Sie das Menü [WLAN] Wählen Sie Ihr Heim WLAN aus der Liste aus Verbinden Sie den E1 Projektor mit Ihrem Heim WLAN. Netzwerkinformationen Keiner Ermöglichen Netzwerk SPEISEKARTE Funktion Schneller Rücklauf, spult das Video während der Wiedergabe schnell zurück. -
Seite 51: Miracast (Für Android Geräte)
3. Tippen Sie auf Ihrem Android Gerät auf [ Einstellungen ] [ WLAN- mit dem Namen [E1-Airplay-XXXX] aus und verbinden Sie ihn Anzeige ] Schalten Sie [ Wi-Fi ] ein, verbinden Sie Ihr Heim WLAN. Bildschirm Ihres iOS Geräts wird auf der Projektion angezeigt Bildschirm nach 3 Sekunden. -
Seite 52: Bluetooth Einstellung
Bildmodus Standard/Dynamisch/Mild/Benutzer Hinweis: Farbtemperatur Mittel/Kalt/Warm/Benutzer 1. Der E1 Projektor ist mit Bluetooth Headsets, Bluetooth Lautsprechern und Airpods kompatibel, jedoch nicht mit Bluetooth Tastaturen oder Aus/Niedrig/Mittel/Hoch Bluetooth Telefonen. 5.2 Tonmenü 2. Wenn Sie Fragen haben, wenden Sie sich bitte per an uns support@yabertech.com... -
Seite 53: Optionsmenü
ANSCHLUSS DER SIGNALLEITUNGEN Speisekarte Inhalt Der Yaber E1 Projektor verfügt über 3 Schnittstellen, HDMI Anschluss * 1 Audiomodus Standard/Film/Musik/Sport/Benutzer / USB Anschluss * 2 / 3,5 mm Kopfhörerausgang. Bitte wählen Sie den richtigen Anschluss, um Ihr Gerät anzuschließen (PC, DVD Player, Fire TV... -
Seite 54: An Den Dvd Player Anschließen
AUX por t 5. Mit dem Computer verbinden GEWÄHRLEISTUNG 1) Verbinden Sie den Computer und den E1 Projektor mit dem HDMI Kabel (im Lieferumfang enthalten). Vielen Dank für Ihren Einkauf und Ihre Unterstützung. Wir gewähren 3 2) Wählen Sie die HDMI Quelle aus, um Dateien auf Ihrem Computer zu projizieren;... - Seite 55 5. プロジェクター設定 5.1 画像メニュー 5.2 音声メニュー 5.3 選択メニュー 信号線の接続 1. USB メモリを接続する 2. HDMI ポートを介してデバイスを接続する 3. DVD プレーヤーに接続する Where to Get More Help 4. サウンドバー / スピーカーに接続する 5. パソコンとの接続 Support@yabertech.com aftersales@yaber.com www.yaber.com 保証 @Yaber Entertainment Projector @Yaber Entertainment Projector JP 107...
- Seite 56 終身アフターサービスを無料で提供 パッケージリスト 皆さまへ E1 プロジェクター *1 リモコン *1 電源コード *1 YABER をご愛顧いただき誠にありがとうございます。 プロジェクターを使 用する前に / この説明書をよくお読みください。問題がある場合は / 注文 HDMI ケーブル *1 クリーニング布 *1 レンズカバー *1 番号と問題を support@yabertech.com へ送信してください。24 時間以 内に迅速な解決策を提供します。 説明書 *1 信号がない / 音が出ない /Bluetooth 接続が失敗する /WiFi 接続が失敗す る / アニメーションが途切れるなど / 設定することで多くの問題を簡単に...
- Seite 57 プロジェクターの外観 プロジェクターレンズ 光学コーティングガラスレンズ IR ウィンドウ 赤外線信号受信機 電源コードポート 電源コードを差し込む ヘッドホンジャック 3.5mm ヘッドホン出力 HDMI ポート HDMI 外部デバイスを接続する USB ポート USB 1 ポート / USB 2 ポート ホコリを掃除する(画面に黒点がある 着脱式防塵フィルター 場合) 換気口 プロジェクターの過熱を防ぐ 調整し / 最も鮮明な画像を得ることが フォーカス - できる 電源キー 電源のオン / オフを切り替える 調整し / 最も鮮明な画像を得ることが フォーカス...
- Seite 58 リモコン操作 ご注意 1) 使用する前に / 単 4 形電池 2 本をリモコンに取り付けます。リモコンで 新しい電池と古い電池を組み合わせないでください。電源不足により動作 不良の原因となります。 2) リモコンを使用する場合は / リモコンの信号送信機がプロジェクターの 赤外線信号受信機を向いていることを確認してください。 3) リモコンを長期間使用しない場合は / 電池漏れを防ぐために電池を取り 出してください。 インストール 1. インストール方法 安定した机の上にプロジェクターを置き / 以下の方法で投影することがで きます。 画面 プロジェクター プロジェクター 電源オン・オフ 画面 ホームページに戻る メニュー 1. フロントプロジェクター設置 2. リアプロジェクター設置 音量+...
- Seite 59 プロジェクターを起動する プロジェクターのセットアップ プロジェクターをオンにする:電源ケーブルに接続し / 赤いインジケーター プロジェクターのホームページは以下の通りです。 ライトが点灯しているときに / パネルの電源ボタンを押して(リモコン の 電源キーを押します)/ プロジェクターを起動します。インジケーターが赤 から緑に変わります。プロジェクターがオンになっています。 プロジェクターの電源を切ります:プロジェクターが正常に動作していると き に電源ボタンを押すと / インジケーターが青から赤に変わり / プロジェ クター がシャットダウンします。 画像調整 1. 電動フォーカス調整 1. 入力信号源を選択する ホームページで希望の入力信号源(USB/HDMI / AV)を選択します。 ご注意 : 外部デバイス(TV ボックス /Fire TV スティック /DVD プレーヤー マニュアルフォーカス - マニュアルフォーカス...
- Seite 60 2. マルチメディア再生 4. ファイルシステムのドロップダウンメニューで /FAT32 形式を選択します。 5. 開始をクリックし / 終了したらこのウィンドウを閉じます。 2.1 USB メモリ入力モード それでも解決しない場合は / こちらのメールアドレスにご質問ください。 Step1:USB メモリをプロジェクターの USB ポートに挿入します。 support@yabertech.com。 Step2: 「メディア」を選択し /OK キーを押して入力します。 2.2 インターフェイス再生 “OK”ボタンをクリックすると / 再生画面が表示されます。 Step3: ファイルの種類に応じて /[ 映画 / 音楽 / 写真 / テキスト ] オプシ ョンを選択します。...
- Seite 61 ロジェクターと同じホームネットワークに接続します。 ネットワーク情報 なし 4. iOS デバイスで [ コントロールセンター ] を開きます -[ スクリーンミラ 有効 ネ ッ ト ーリング ] 機能を選択します -[E1-XXXX-(icast)] という名前の iOSCast レ ワーク シーバーを選択して接続します -3 秒後に iOS デバイスの画面がプロジェク ションに表示されます。 スキャン 3.2 Miracast(Android デバイス用) 1. ホームページに移動 -[Miracast] を選択 -OK ボタンを押して Miracast 設定メニューに入ります。...
- Seite 62 -[Wi-Fi] をオンにして / 自宅の WiFi を接続します。 ご注意 : ご注意 : 1. Android スマートフォンのブランドによって / 選択したスクリーンミラ ーリングディスプレイの操作が異なります。スマートフォンのマニュア ル 1/E1 プロジェクターは /Bluetooth ヘッドセット /Bluetooth スピーカー / Airpod と互換性がありますが /Bluetooth キーボードや Bluetooth スマホ を参照してください。 [ マルチスクリーン / ワイヤレスディスプレイ / とは互換性がありません。 WLAN ディスプレイ / スクリーンミラーリング / ワイヤレスプロジェクシ...
- Seite 63 5. プロジェクター設定 メニュー 内容 5.1 画像メニュー 音声モード 標準 / 動画 / 音楽 / スポーツ / ユーザー ホーム画面に戻る -- [ 設定 ] を選択 -- [ 画像 ] を選択 . リモコンの矢印キー でメニューを切り替え /「OK」を押して / 設定することができます。 自動音量 オン / オフ 5.3 選択メニュー ホーム画面に戻る -- [ 設定 ] -- [ 選択 ] . リモコンの矢印キーでメニューを 切り替え...
- Seite 64 信号線の接続 3. DVD プレーヤーに接続する 1) DVD プレーヤーとプロジェクターの電源を入れる。 Yaber E1 プロジェクターは /HDMI ポート * 1 / USB ポート * 1 /3.5mm ヘッドフォン出力の 3 つのインターフェースを備えています。デバイスを 2) DVD プレーヤーとプロジェクターを HDMI ケーブルで接続する。 接続するための正しい接続ポートを選択してください(PC/DVD プレーヤ 3) ホームページに入り / 信号ソースとして対応する HDMI を選択する。 ー /Fire TV スティック /TV ボックス / サウンドバー /USB ディスク / PS4 など)。...
- Seite 65 Projector only: プロジェクターのようにセカンダりモニタにのみ表示せれ ます。 プロジェクター専用モードでは / 画面の解像度を変更することができます ステップ スタート > コントロールパネル > 外観と個人設定 > 画面の解像度 を調整する Scan and download the PDF user manual 保証 ご購入ありがとうございました! E1 プロジェクターには 3 年間の保証が付 いています。 ご不明な点がございましたら support@yabertech.com. ま でお気軽にお問い合わせください。 Where to Get More Help Support@yabertech.com aftersales@yaber.com www.yaber.com...
-
Seite 66: Fcc Statement
FCC STATEMENT : L’émetteur/récepteur exempt de licence contenu dans le présent appareil est conforme aux CNR d’Innovation, Sciences et Développement This device complies with Part 15 of the FCC Rules. Operation is subject économique Canada applicables aux appareils radio exempts de licence. to the following two conditions: L’exploitation est autorisée aux deux conditions suivantes : This device may not cause harmful interference, and... -
Seite 67: Declaration Of Conformity
Trade name: Yaber Equipment: Entertainment Projector Model No. : E1 to which this declaration relates is in conformity with the essential requirement set out in the Council Directive on the Approximation of the laws of the Member States relating to RED Directive(2014/53/EU) &...