Keter MANOR 4x6S Montageanleitung
Vorschau ausblenden
Andere Handbücher für MANOR 4x6S:
- Montageanleitung (36 Seiten) ,
- Gebrauchsanleitung (32 Seiten) ,
- Montageanleitung (24 Seiten)
Inhaltsverzeichnis
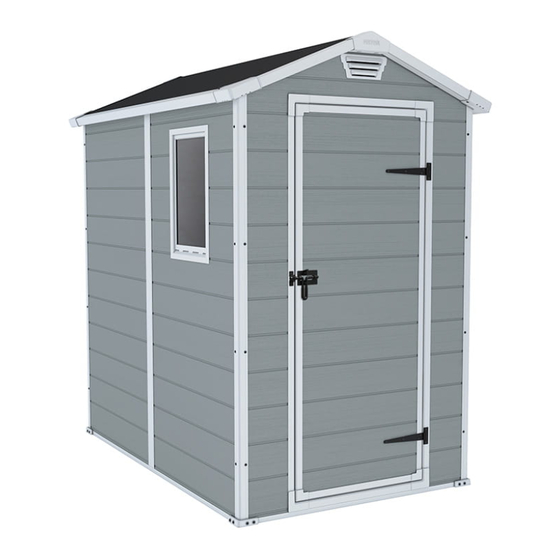
MANOR 4x6S
ASSEMBLY INSTRUCTIONS | CONSIGNES DE MONTAGE | INSTRUCCIONES DE MONTAJE | MONTAGEANLEITUNG |
MONTAGE-VOORSCHRIFTEN | ISTRUZIONI D'ASSEMBLAGGIO | INSTRUÇÕES DE MONTAGEM |
Thank you for your purchase of the Keter shed,
WARRANTY
In order to activate your warranty, please enter
www.keter.com, and fill in the form under
ACTIVATION
warranty activation.
IF THERE ARE MISSING OR BROKEN PARTS, PLEASE DO NOT RETURN THE PRODUCT TO THE STORE.
Please log onto our website, or contact Customer Service at:
S'IL Y A DES PIÈCES MANQUANTES OU CASSÉES, NE RETOURNEZ PAS LE PRODUIT AU MAGASINV.
euillez visiter notre site Internet, ou contacter notre Service Clientèle:
SI HUBIERA ALGUNA PARTE FALTANTE O DAÑADA, NO DEVUELVA EL PRODUCTO A LA TIENDA.
Inicie sesión en nuestro sitio en Internet o contáctese con nuestro servicio de atención al cliente:
BITTE BRINGEN SIE IHR PRODUKT NICHT GLEICH ZUM LADEN ZURÜCK, FALLS TEILE FEHLEN ODER DEFEKT SIND.
Bitte loggen Sie in unsere Website ein oder wenden Sie sich an unseren Kundenservice:
IN GEVAL VAN ONTBREKENDE OF GEBROKEN ONDERDELEN NIET HET PRODUCT NAAR DE WINKEL RETOURNEREN.
Ga naar onze website of neem contact op met de Klantenservice:
IN CASO DI PARTI MANCANTI O DANNEGGIATE, EVITARE DI RESTITUIRE IL PRODOTTO AL NEGOZIO.
Accedere al nostro sito o contattare il Servizio Clienti:
SE HOUVER PEÇAS EM FALTA OU PARTIDAS, NÃO DEVOLVA O PRODUTO À LOJA.
Entre na nossa página de Internet ou contacte o Serviço de Clientes:
JEŚLI W OPAKOWANIU BRAKUJE NIEKTÓRYCH CZĘŚCI LUB ZNAJDUJĄ SIĘ W NIM CZĘŚCI USZKODZONE, NIE NALEŻY
ZWRACAĆ PRODUKTU DO SKLEPUN.
Należy zalogować się na naszej stronie internetowej lub skontaktować się z Działem Obsługi Klienta:
INSTRUKCJA MONTAŻU
MANOR 4x6S
2 easy steps to use a QR-code:
1. Download a FREE QR-Code
reader from your smartphone
application site.
2. Scan the QR-Code.
SKU:
17197126 | 17194155
WWW.KETER.COM
US: # 1-888-374-4262
Canada: # 1-800-661-6721
UK: # 0121-5060008
Other European Countries:
# 31-1612-28301
Inhaltsverzeichnis

Verwandte Anleitungen für Keter MANOR 4x6S


Inhaltszusammenfassung für Keter MANOR 4x6S
- Seite 1 SKU: MANOR 4x6S 17197126 | 17194155 2 easy steps to use a QR-code: Thank you for your purchase of the Keter shed, 1. Download a FREE QR-Code WARRANTY In order to activate your warranty, please enter reader from your smartphone www.keter.com, and fill in the form under...
- Seite 2 KLANTENSERVICE | SERVIZIO CLIENTI | ASSISTÊNCIA AO CLIENTE | DZIAŁ OBSŁUGI KLIENTA IMPORTANT: For assistance with assembly or to request missing parts, please log onto our web site at www.keter.com or contact Customer Service. IMPORTANT : Pour toute assistance lors du montage ou pour obtenir des pièces manquantes, veuillez visiter notre site Internet : www.keter.com ou contacter notre Service Clientèle.
- Seite 3 LEVEL THE GROUND | NIVELLEMENT DU SOL | NIVELE EL SUELO | SORGEN SIE FÜR EINE EBENEGRUNDFLÄCHE MAAK DE GROND WATERPAS | METTERE IL TERRENO A LIVELLO | NIVELAR O SOLO | WYRÓWNANIE GRUNTU Clear area of stones | Remove all plants, roots and other obstacles | Rake the ground | Make ground level using a long, flat object (e.g.
- Seite 4 LEVEL THE GROUND | NIVELLEMENT DU SOL | NIVELE EL SUELO | SORGEN SIE FÜR EINE EBENEGRUNDFLÄCHE MAAK DE GROND WATERPAS | METTERE IL TERRENO A LIVELLO | NIVELAR O SOLO | WYRÓWNAJ PODŁOŻE In order to properly assemble some parts of the shed, it should be kept 27 inches / 70 cm from any fence or wall until fully assembled | Pour monter correctement les parties de l’abri, vous devez garder 27 pouces / 70 cm de distances d›un obstacle ou d’un mur jusqu’à...
- Seite 5 CAUTION | AVERTISSEMENT | WICHTIG | ADVERTENCIA | WAARSCHUWING | ATTENZIONE | ATENÇÃO | UWAGA Some parts have steel edges | Please be careful when handling components | Always wear work gloves, eye protection and long sleeves when assembling or performing any maintenance on your shed | Do not attempt assembly on days with strong winds or low temperatures. Certaines pièces ont des bords en acier | Soyez prudent en les manipulant | Portez toujours des gants de travail, des lunettes de protection et des vêtements à...
- Seite 6 Rimuovere tutti i pezzi dall’imballaggio e disporli a terra | Si raccomanda l’uso di un piano da lavoro sgombro per la sistemazione dei compo- nenti e lo svolgimento delle fasi di preassemblaggio | Rileggere tutte le istruzioni prima di iniziare e continuare a fare riferimento alle istruzioni anche durante il montaggio | Accertarsi di seguire attentamente tutte le procedure | Nelle istruzioni le parti sono contraddistinte da codici colorati che servono a indicare quelle da utilizzare nel corso di una particolare procedura | Preparare questicomponenti all›inizio di ogni fase.
- Seite 7 WALL PARTS | PIÈCES DU ROOF PARTS | PIÈCES DU TOIT | CONTOUR | PARTES DE LAS P A R T E S D E L T E C H O PAREDES | WANDELEMENTE | D A C H E L E M E N T E MUURONDERDELEN | PARTI DELLA DAKONDERDELEN | PARTI DEL PARETE | PAINÉIS LATERAIS |...
-
Seite 8: Inhaltsverzeichnis
WALL PARTS | PIÈCES DU CONTOUR | PARTES DE LAS PAREDES | WANDELEMENTE CZĘŚCI ŚCIAN | MUURONDERDELEN | PARTI DELLA PARETE | PAINÉIS LATERAIS | v (x2) bu1b (x1) bu1b 190x111 cm s1d (x1) 88x172 cm fu1b (x1) 190x111 cm w1d (x3) 88x172 cm cc (x4) - Seite 9 FLOOR ASSEMBLY | MONTAGE DU SOL | ARMADO DEL PISO | MONTAGE DER BODENPLATTE | VLOERMONTAGE | MONTAGGIO DEL PAVIMENTO | MONTAGEM DO PISO | SKŁADANIE PODŁOGI t (x1) fc1(x2) c1z(x2) t (x4)
- Seite 10 Turn over the floor panel Retournez le panneau du sol Dé la vuelta al panel del suelo Drehen Sie die Bodenplatte um Draai het vloerpaneel om Capovolgi il pannello del pavimento Vire o painel do pavimento Odwrócić podłogę s26b(x12) s26b découpe dentro del perfil akkurat in das Profil ein...
- Seite 11 Turn over the floor panel Retournez le panneau du sol Dé la vuelta al panel del suelo Drehen Sie die Bodenplatte um Draai het vloerpaneel om Capovolgi il pannello del pavimento Vire o painel do pavimento Odwrócić podłogę WALL ASSEMBLY | MONTAGE DU MUR | ARMADO DE PAREDES | MONTAGE DER WÄNDE | MONTAGE VAN DE MUREN | ASSEMBLAGGIO DELLE PARETI | MONTAGEM DA PAREDE | MONTAŻ...
- Seite 12 w1d(x1) cc1(x1) 88x172 cm bu1b(x1) s26b(x8) 190x111 cm découpe dentro del perfil akkurat in das Profil ein all’interno delle guide contorno Wsunąć panel w profile do końca...
- Seite 13 w1d(x1) cc1(x1) s26b(x8) 88x172 cm découpe dentro del perfil akkurat in das Profil ein all’interno delle guide contorno Wsunąć panel w profile do końca h1c(x2) découpe dentro del perfil akkurat in das Profil ein all’interno delle guide contorno Wsunąć panel w profile do końca...
-
Seite 14: S1D(X1)
w1d(x1) s1d(x1) s13b (x4) 88x172 cm 88x172 cm découpe dentro del perfil akkurat in das Profil ein all’interno delle guide s13b contorno Wsunąć panel w profile do końca cc(x2) s26b(x8) découpe dentro del perfil akkurat in das Profil ein all’interno delle guide contorno Wsunąć... - Seite 15 fu1b (x1) s26b(x8) 190x111 cm s26b(x29) découpe dentro del perfil akkurat in das Profil ein all’interno delle guide contorno Wsunąć panel w profile do końca...
- Seite 16 ROOF ASSEMBLY | MONTAGE DU TOIT | ARMADO DEL TECHO | DACHMONTAGE | DAKMONTAGE | MONTAGGIO DEL TETTO | MONTAGEM DO TELHADO | MONTAŻ DACHU r1m(x1)folded rc1(x2) e1d(x4) rc(x4) Uwaga: Na tym etapie linia składania dachu oraz etykieta „This side down” („Tą stroną w dół”) muszą być widoczne. s26b(x8) découpe dentro del perfil...
- Seite 17 s26b(x24) s26b...
- Seite 18 s26b(x16) Wkręty należy przykręcić na zaznaczonych liniach...
- Seite 19 DOOR ASSEMBLY | MONTAGE DE LA PORTE | ARMADO DE LA PUERTA | MONTAGE DER TÜR | DEURMONTAGE | MONTAGGIO DELLA PORTA | MONTAGEM DA PORTA | MONTAŻ DRZWI s13b(x11) d(x1) dh(x2) dl(x1) Pre-drilled holes Trous pré-percés Orificios preperforados Vorgebohrte Löcher Voorgeboorde gaten Fori prestampati Nawiercone otwory...
-
Seite 20: Dl (X1)
s13b (x10) dl (x1) -
Seite 21: S26B (X52)
s26b(x4) kc(x2) click s26b... - Seite 22 v (x2) assistant maintient le mur de l’intérieur. ventilación en la posición correcta. innen in einer stabilen Position hält. binnenzijde tegenhoudt. muro dall’interno. firme a partir do interior. click Wcisnąć wywietrznik. Druga osoba powinna przytrzymywać ścianę od wewnątrz. click...
- Seite 23 pls (x1) f - out (x1) acw (x1) f-out...
- Seite 24 f-in (x1) sc15 (x7) f-in OPTION | OPCIÓN | OPTIE | OPZION | OPÇÃOE Zalecamy przymocowanie skrzyni do nieruchomego obiektu lub do podłoża. Należy w tym celu wywiercić otwory w podłodze – w oznaczonych punktach – oraz użyć odpowiednich śrub lub kotew (rozmiar: 1,9’’-3’’ –...
-
Seite 25: Garantie Limitée De 2 Ans
In case a problem should occur, please address your claim to customer service either by phone or through our web site: www.keter.com. The warranty is valid as of the date of purchase and a dated proof of purchase should be presented on request. -
Seite 26: Garanzia Limitata Di 2 Anni
é produzida com materiais de elevada qualidade que são sujeitos a umcontrolo e supervisão rigorosos.Se ocorrer algum problema com o produto, faça a sua reclamação ao serviço de apoio ao cliente, através do telefone ou do nosso site: www.keter.com. A Garantia é válida a partir da data de compra e deve ser apresentada uma prova de compra, se solicitado. - Seite 27 CARE & SAFETY wind exposure of the shed in general, and the door side in particular. PRÉCAUTIONS ET SÉCURITÉ l’accès à l’intérieur. de l’abri au vent en général, et de la porte latérale en particulier. PFLEGE - UND SICHERHEITSHINWEISE Mitt elnvorgesehen noch gewährleistet sind.
-
Seite 28: Manutenzione E Sicurezza
over het algemeen het schuurtje en vooral de deurzijde, zo min mogelijk aan wind bloot te stellen. MANUTENZIONE E SICUREZZA pulitore abrasivo. consiglia in generale di ridurre l’esposizione del capanno al vento, in particolare il lato della porta. MANUTENZIONE E SICUREZZA substâncias inflamáveis ou corrosivas jardim e impedir uma utilização segura do mesmo.