Keter MANOR 4x3W Gebrauchsanleitung
Quicklinks
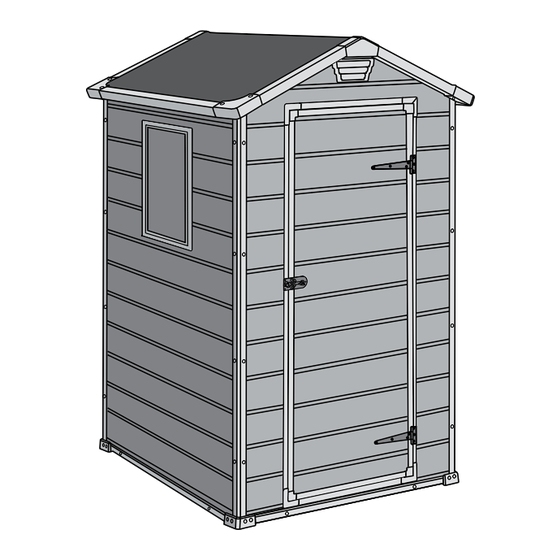
MANOR 4x3W
USER MANUAL | MODE D'EMPLOI | MANUAL DEL USUARIO | GEBRAUCHSANLEITUNG |
GEBRUIKSHANDLEIDING | MANUALE PER L'UTENTE | MANUAL DO UTILIZADOR
WARRANTY ACTIVATION
US:
Tel: 1-(888)-374-4262, Fax: 317-575-4502
Canada: Tel: 1-(800)-661-6721
UK:
Tel: 0121-5060008, Fax: 0121-4220808
Spain:
Tlf: +34.949 27 74 21, Fax: +34.949 34 89 76
Other European Countries:
Tel: 31-1612-28301, Fax: 31-1612-28322
Thank you for your purchase of the Keter shed. In order to activate your warranty,
please log onto our website and fill in the form under warranty activation.
SKU: 17198919
WWW.KETER.COM

Verwandte Anleitungen für Keter MANOR 4x3W


Inhaltszusammenfassung für Keter MANOR 4x3W
- Seite 1 Tlf: +34.949 27 74 21, Fax: +34.949 34 89 76 Other European Countries: Tel: 31-1612-28301, Fax: 31-1612-28322 Thank you for your purchase of the Keter shed. In order to activate your warranty, WARRANTY ACTIVATION please log onto our website and fill in the form under warranty activation.
- Seite 2 SITE PREPARATION | PRÉPARATION DU SITE | PREPARACIÓN DEL LUGAR | VORBEREITUNG DES AUFSTELLUNGSORTES BEFORE STARTING ASSEMBLY | AVANT DE COMMENCER LE MONTAGE | ANTES DE EMPEZAR EL ARMADO | VOR | VOORBEREIDING VAN HET TERREIN | PREPARAZIONE DEL LUOGO DI MONTAGGIO | PREPARAÇÃO DO LOCAL MONTAGEBEGINN | VOORDAT U BEGINT TE MONTEREN | PRIMA DI INIZIARE IL MONTAGGIO | ANTES DE INICIAR A MONTAGEM Level the ground surface | Égalisez la surface du sol | Nivele la superficie del suelo | Ebnen Sie die Bodenoberfläche | Maak de Read the care and safety guidelines at the end of this manual | Review all assembly instructions | Assemble all the parts...
- Seite 3 WALL PARTS | PIÈCES DU CONTOUR | PARTES DE LAS PAREDES | WANDELEMENTE | MUURONDERDELEN | PARTI DELLA SHED PARTS | PIÈCES DE L’ABRI | PARTES DEL COBERTIZO | TEILE DES SCHUPPENS | ONDERDELEN VAN PARETE | PAINÉIS LATERAIS HET SCHUURTJE | COMPONENTI DEL DEPOSITO ATTREZZI | PEÇAS DO ABRIGO Remove all parts from the package(s) and spread them out on a clean work surface | Code letters are imprinted on each part for easy identification | Retirez toutes les pièces du/des paquet(s) et étalez-les sur une surface de travail propre | Des lettres sont imprimées sur chaque pièce pour une identification facile | Saque todas las piezas del paquete o paquetes y póngalas sobre una...
- Seite 4 FLOOR ASSEMBLY | MONTAGE DU SOL | ARMADO DEL PISO | MONTAGE DER BODENPLATTE | VLOERMONTAGE | MONTAGGIO DEL PAVIMENTO | MONTAGEM DO PISO SCREWS | VIS | SCHRAUBEN | TORNILLOS | SCHROEVEN | VITI | PARAFUSOS | ŚRUBY • Please refer to the screw index below to find the actual screw size. •...
- Seite 5 • Turn over the floor panel • Turn over the floor panel • Retournez le panneau du sol • Retournez le panneau du sol • Dé la vuelta al panel del suelo • Dé la vuelta al panel del suelo •...
- Seite 6 • Use spatula (part “SPA”) for easier insertion of panel into profile. • Utilisez la spatule (partie « SPA ») pour une meilleure insertion du panneau dans le profil. • Utilice una espátula (pieza “SPA”) para una mejor inserción del panel en el perfil. •...
- Seite 7 ROOF ASSEMBLY | MONTAGE DU TOIT | ARMADO DEL TECHO | DACHMONTAGE | DAKMONTAGE | MONTAGGIO DEL TETTO | MONTAGEM DO TELHADO • Note: The roof fold line and the “This side down” label must be facing up as seen depicted in this figure. •...
- Seite 8 • Turn over the roof panel • Retourner le panneau supérieur • Dele la vuelta al panel del techo • Platte für das Dach umklappen • Draai het dakpaneel om • Capovolgi il pannello del tetto • Volte o painel do telhado s26b s26b •...
- Seite 9 DOOR ASSEMBLY | MONTAGE DE LA PORTE | ARMADO DE LA PUERTA | MONTAGE DER TÜR | DEURMONTAGE | MONTAGGIO DELLA PORTA | MONTAGEM DA PORTA • Screw on the mark line • Vissez sur la ligne dessinée • Atornillar en la línea de la marca rewf •...
- Seite 10 Self drill screw Self drill screw ds2b (x4) s10b (x8) 12 mm 12 mm 0.47” 0.47” click s13b (x4) 12 mm 0.47” ds2b...
- Seite 11 Self drill screw s10b (x8) 12 mm 0.47” s10b • Align edge of aluminum profile with edge of door panel • Alignez le bord du profil en aluminium avec le bord du panneau de porte • Alinee el borde del perfil de aluminio con el borde del panel de la puerta •...
- Seite 12 bd1 (x1) s13b (x3) 12 mm 0.47” • Turn over the door panel • Retourner le vantail • Dele la vuelta al panel de la puerta • Türplatte umklappen • Draai het deurpaneel om • Capovolgi il pannello della porta •...
- Seite 13 kc (x2) s26b (x4) f-out (x1) pls (x1) 26 mm 1” click s26b v (x2) acw (x1) f-out click click...
- Seite 14 f-in (x1) sc15 (x7) OPTION | OPCIÓN | OPTIE | OPZION | OPÇÃOE 18 mm 0.7” SECURING THE SHED TO A FOUNDATION Fix the shed to the foundation by drilling holes in the floor at the pre-marked locations and inserting suitable screws into the foundation (screws are not included).
- Seite 15 • Tragen Sie eine Schutzbrille und befolgen Sie bei Verwendung von Elektrowerkzeugen immer die Anweisungen des Herstellers. • Tragen Sie eine Schutzbrille und befolgen Sie bei Verwendung von Elektrowerkzeugen immer die Anweisungen des Herstellers. FETY GUIDELINES CARE AND SAFETY GUIDELINES •...
- Seite 16 Keter, a su discreción, reemplazará Al entregar el ticket o factura de compra y prueba del presunto fallo del producto, y sujeto a informar del fallo de manera puntual, Keter, a su discreción, reemplazará...
- Seite 17 5120 AE Rijen, the Netherlands Tel: 1-(888)-374-4262 B32 - 3DB, United Kingdom de Henares - Guadalajara, Spain Tel: 31-1612-28301, Fax: 317-575-4502 Tel: 0121-5060008 Tlf. +34.949 27 74 21 Fax: 31-1612-28322 Canada: Tel: 1-(800)-661-6721 Fax: 0121-4220808 Fax +34.949 34 89 76 WWW.KETER.COM...