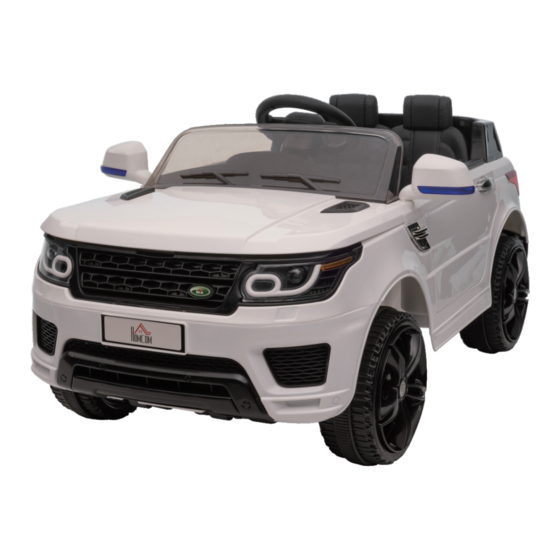
Herunterladen Inhalt Inhalt Diese Seite drucken

Werbung

Verfügbare Sprachen

Verfügbare Sprachen

● R/C controls forward/backward and left/right
● Music
● Volume adjustment
● Power display
● Forward and backward
● High and low speed
*Suitable for children of 3-6 years old.
*Max weight: 30 kg.
IMPORTANT, RETAIN FOR FUTURE REFERENCE: READ CAREFULLY
ASSEMBLY INSTRUCTION
!
WARNING: This product must be
assembled by an adult. When unassembled,
there are small and sharp parts, which could
be choked on if swallowed. Keep out the
reach of small children.
Warning: Do not use in traffic.
1
IN230300362V01_UK
370-217V70

Werbung

Inhaltsverzeichnis
loading

Inhaltszusammenfassung für HOMCOM 370-217V70

  • Seite 1 IN230300362V01_UK 370-217V70 ● R/C controls forward/backward and left/right ● Music WARNING: This product must be assembled by an adult. When unassembled, ● Volume adjustment there are small and sharp parts, which could ● Power display be choked on if swallowed. Keep out the ●...
  • Seite 2 Steering wheel Wheel Cover Main Rear wing Wheel Windshield +1(spare) Washer Seat Right and left bracket Rearview mirror +1(spare) Charger Cotter pin Screw Remote Control Screw...
  • Seite 3 Product Specifications : Battery 12V/4.5AHx1 Generator Drive Motor 12V,30W #390 x2 Steering Motor 12V #380 x1 Applicable Age Range 37-72 months Maximum load 30KG Speed 3-5 KM/H Hours of Use Using 1-2 hours after charging 8-12 hours Charger Input: AC120V-240V ,50-60Hz,0.2A; Output: DC12V,500mA,6W Remote Control Battery AAA1.5Vx2(not provided)
  • Seite 4 Remote Control Function and explaination ● Never switch forward and backward operations in the moving, or the gear box and motor will be damaged. ● Use the remote control with battery. ● Only the baby's legal guardian can use the remote control. ●The product is operated mainly by remote control.
  • Seite 5 2. Front and rear wheels assembly Assembling washer, front wheel, washer step by step, then using cotter pin to tighten, finally inserting wheel cover. Assembling rear wheel, washer step by step, then using cotter pin to tighten, finally inserting wheel cover. Same way to the other side.
  • Seite 6 5. Rear wing assembly Inserting rear wing into the right hole on the car. 6.Battery line connecting Connect the battery line correctly, red to red, black to black. 7.Seat assembly Inserting the seat into the right place in the car, then use 2pcs screw to tighten.
  • Seite 7 8. Rearview mirror assembly Inserting right and left rearview mirror into the right place.
  • Seite 8 WARNING The toy is to be assembled by an adult. ln unassembled state contain potentially hazardous sharp points, sharp edges and small part, so please keep out of baby's reach. Not to be used in traffic. Only adults can install parts and adjust the car, and keep moving parts out of children’s reach.
  • Seite 9 Charging steps are as follows: Step 1: The charging hole is under the steering wheel. Step 2: Put the charger plug into the plug hole. Step 3: Connect the charger to the power socket. Warning: Car must be charged by adults only. Car is useless during charging. Trouble Clearing Type Analysis...
  • Seite 10: Maintenance And Service

    Maintenance and Service Before use children’s parents should check whether charge' s wiring, plug, shell and other parts are damaged, and fix those damaged parts. After using the product for a time, parents should lubricate iron castings with lube, or those castings will get rusted; they should keep the product out of fire and lay it flat in dark places;...
  • Seite 11 IN230300362V01_ES 370-217V90 ● Controles R/C adelante/atrás e izquierda/derecha ADVERTENCIA: Este producto debe ● Música ser ensamblado por un adulto. Cuando está ● Ajuste de volumen desmontado, hay piezas pequeñas y afiladas que podrían ahogarse si se tragan. ● Indicador de batería Manténgase fuera del alcance de los niños ●...
  • Seite 12 Piezas Volante Llanta de rueda Cuerpo principal Rueda Alerón trasero Parabrisas Soporte derecho e Espejo retrovisor Arandela Asiento izquierdo +1 (spare) Rosca Pasador de Cargador Tornillo Control remoto Tornillo clavija...
  • Seite 13 Especificaciones del producto: Batería 12V/4,5AHx1 Generador Motor de accionamiento 12V,30W #390 x2 Motor de dirección 12V #380 x1 Rango de edad aplicable 37-72 meses Carga máxima 30 kg Velocidad 3-5 km/h Horas de uso 1-2 horas de uso tras 8-12 horas de carga Cargador Entrada: CA120V-240V ,50-60Hz,0,2A;...
  • Seite 14 Instrucciones del Control Remoto ● Cuando el automóvil esté en movimiento, no cambie entre “Adelante” y “Atrás”, de lo contrario, causará daños a la caja de cambios y el motor. ● Utilice el control remoto siempre con batería. ● El control remote solo puede ser usado por los tutores legales del menor o el adulto que esté...
  • Seite 15 2. Montaje de ruedas delanteras y traseras Monte en orden la arandela, la rueda frontal, y la arandela. Luego utilice una chaveta para apretarlas, finalmente inserte la llanta de la rueda en su lugar. Monte la rueda trasera y la arandela en orden, luego utilice una chaveta para apretarlas, finalmente inserte la llanta.
  • Seite 16: Montaje Del Asiento

    5. Montaje de alerón trasero Insertar el alerón trasero en el orificio derecho del automóvil. 6. Conexión de la línea de batería Conecte la línea de la batería correctamente, es decir, rojo con rojo, negro con negro. 7. Montaje del asiento Inserte el asiento en la posición correcta en el automóvil, luego utilice 2 tornillos para apretarlos.
  • Seite 17 8. Montaje de los espejos retrovisores Inserte los espejos retrovisores derecho e izquierdo en sus lugares correctamente. ADVERTENCIA Este coche de juguete debe ser montado por un adulto. El automóvil desmontado, contiene puntas afiladas potencialmente peligrosas, bordes afilados y piezas pequeñas, por lo que debe mantenerse fuera del alcance de los niños.
  • Seite 18 Aviso de uso: Nunca utilice el automóvil en zonas peligrosas como la calle, la carretera, pendientes o desagües. Nunca modifique el circuito ni los dispositivos eléctricos adicionales. Nunca utilice el control remoto bajo la lluvia o en el agua, nunca vierta agua u otros líquidos en el automóvil, manténgalo alejado del fuego, de lo contrario, podrá...
  • Seite 19: Solución De Problemas

    Solución de problemas Tipo Análisis Soluciones Baja tensión de la batería; Cargue la batería Protección de dispositivos completamente; eléctricos; Utilice el automóvil después de No se ha pulsado el botón unos minutos; El coche no puede correctamente; Utilice el automóvil de acuerdo arrancar.
  • Seite 20 Los padres deben limpiar la superficie del coche con un paño seco o limpiar las piezas de plástico con un producto para pulir muebles sin cera. No deben limpiar las piezas de plástico con soluciones químicas ni limpiar el automóvil con agua. Los niños no pueden conducir el automóvil con tiempo húmedo o lluvioso, de lo contrario, causarán daños al generador, al sistema de circuito y a la batería del automóvil.
  • Seite 21 IN230300362V01_DE 370-217V90 ● Fernsteuerung vorwärts/rückwärts und links/rechts. WARNUNG: Dieses Gerät muss von einem Erwachsenen zusammengebaut ● Musik werden. Im unmontierten Zustand befinden ● Einstellung der Lautstärke sich kleine und scharfe Teile, die verschluckt ● Betriebsanzeige werden können. Bewahren Sie sie außerhalb der Reichweite von Kleinkindern auf.
  • Seite 22 TEILE Lenkrad Radabdeckung Hauptkörper Heckverkleidung Windschutzscheibe Befestigung rechts und Rückspiegel Unterlegscheibe Sitz links +1 (spare) Mutter Ladegerät Schraube Splint Fernsteuerung Schraube...
  • Seite 23: Funktion

    Technische Daten: Akku 12V/4,5AHx1 Generator Fahrmotor 12 V, 30 W #390 × 2 Lenkmotor 12 V #380 × 1 Anwendbarer Altersbereich 37-72 Monate Maximale Belastung 30 kg GESCHWINDIGKEIT 3-5 km/h Betriebsstunden Einsatz 1-2 Stunden nach Aufladung 8-12 Stunden Ladegerät Eingang: AC 120 V bis 240 V, 50-60 Hz, 0,2 A; Ausgang: DC 12 V, 500 mA, 6 W Batterie für die Fernbedienung AAA 1,5V x 2 (nicht mitgeliefert)
  • Seite 24: Funktion Und Erklärung Der Fernbedienung

    Funktion und Erklärung der Fernbedienung ● Wechseln Sie niemals während der Fahrt zwischen Vorwärts- und Rückwärtsfahrt, da dies das Getriebe und den Motor beschädigen kann. ● Fernsteuerung mit Batterie verwenden. ● Die Fernsteuerung darf nur von den Erziehungsberechtigten verwendet werden. ●...
  • Seite 25: Montage Der Vorder- Und Hinterräder

    2. Montage der Vorder- und Hinterräder Unterlegscheibe, Vorderrad und Unterlegscheibe Schritt für Schritt zusammenbauen, dann mit dem Splint festziehen und schließlich die Radabdeckung aufsetzen. Das Hinterrad und die Unterlegscheibe Schritt für Schritt zusammenbauen, dann mit dem Splint festziehen und schließlich die Radabdeckung aufsetzen.
  • Seite 26: Montage Der Heckverkleidung

    5. Montage der Heckverkleidung Stecken Sie die Heckverkleidung in die dafür vorgesehene Öffnung am Fahrzeug. 6. Anschluss des Akkukabels Das Akkukabel richtig anschließen, rot an rot, schwarz an schwarz. 7. Sitzmontage Den Sitz an der richtigen Stelle in das Auto einsetzen und mit 2 Schrauben befestigen.
  • Seite 27: Rückspiegel Montieren

    8. Rückspiegel montieren Bringe den rechten und linken Rückspiegel an der richtigen Stelle an.
  • Seite 28 WARNUNG - Dieses Produkt muss von einem Erwachsenen zusammengebaut werden. - Dieses Produkt enthält im unmontierten Zustand kleine und scharfe Teile – bewahren Sie es außerhalb der Reichweite von Kleinkindern auf. - Nicht im Straßenverkehr verwenden. - Dieses Produkt darf nicht von Kindern unter drei Jahren benutzt werden. - Der Sicherheitsgurt muss bei der Benutzung dieses Produkts angelegt werden.
  • Seite 29: Die Schritte Zum Aufladen Sind Wie Folgt

    Die Schritte zum Aufladen sind wie folgt: Schritt 1: Die Ladeöffnung befindet sich unter dem Lenkrad. Schritt 2: Stecken Sie den Stecker des Ladegeräts in das Steckerloch. Schritt 3: Schließen Sie das Ladegerät an die Steckdose an. Warnung: Das Fahrzeug darf nur von Erwachsenen geladen werden. Das Fahrzeug darf während des Ladevorgangs nicht verwendet werden.
  • Seite 30: Wartung

    Wartung - Prüfen Sie vor dem Gebrauch die Verkabelung, den Stecker, das Gehäuse und andere Teile, um sicherzustellen, dass keine Schäden vorhanden sind. - Wenn Sie das Gerät nach längerer Zeit wieder benutzen, stellen Sie sicher, dass die Gussteile geschmiert sind, um Rost zu vermeiden. - Lagern Sie das Produkt auf einer ebenen Fläche und schützen Sie es vor direkter Sonneneinstrahlung.

Inhaltsverzeichnis