Inhaltsverzeichnis
Werbung
Verfügbare Sprachen
Verfügbare Sprachen
Quicklinks
Daily Reference Guide
THANK YOU FOR BUYING A BAUKNECHT PRODUCT.
In order to receive a more complete assistance, please
register your appliance on: www.bauknecht.eu/register
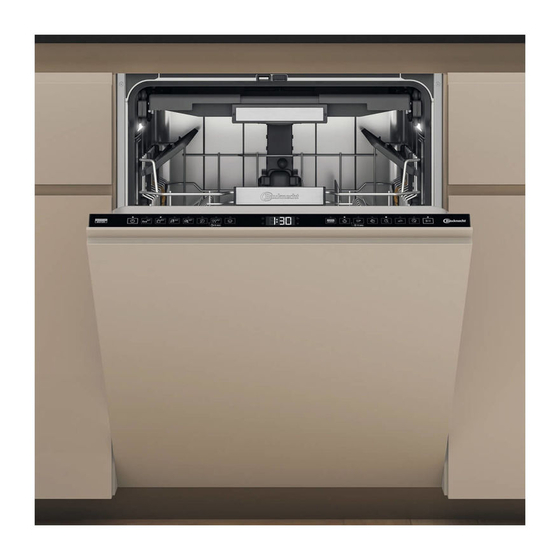
CONTROL PANEL
1
2
3
4
1.
ON-OFF/Reset button with indicator light
2.
Eco program button with indicator light
3.
Auto Intensive program button with indicator light
4.
Auto Mixed program button with indicator light
5.
Auto Fast program button with indicator light
6.
Rapid program button with indicator light
7.
Glass program button with indicator light/ Self-Clean program - 3 sec. press
8.
Prewash program button with indicator light
9.
Salt reservoir empty indicator light
10. Rinse Aid reservoir empty indicator light
11. Display
DISPLAY ON THE FLOOR
1
2
1. Delay Time on the floor - indicator of the time left to the start of the cycle, when the Delay option is set
2. Salt reservoir empty - indicator light on the floor
3. Remaining Time on the floor - indicator of the time left to the end of the cycle
3
FIRST TIME USE
SETTING MENU
1. Switch on the appliance by pressing the ON-OFF
2. Hold the Settings
(Extra Dry
a beep and the display shows „SEt".
3. After one second the first available setting (letter „h") will be displayed.
4. Press Prewash program
through the list of available settings (see table below), then press START/
Pause
to view and change the value of currently selected setting.
5. Press Prewash program
change the value, then press START/Pause
6. To change another setting, repeat points 2 and 5.
7. Press ON-OFF
or wait 30 seconds to exit the menu.
LETTER
Water Hardness Level
(see "SETTING THE WATER HARDNESS"
and "WATER HARDNESS TABLE")
Rinse Aid Level
(see "ADJUSTING THE DOSAGE OF RINSE AID")
ActiveDry (see "OPTIONS AND FUNCTIONS")
"1" = On, "0" = Off
Time on the floor (see "OPTIONS AND FUNCTIONS")
"1" = On, "0" = Off
"1" = On, "0" = Off
Internal Lights (see "OPTIONS AND FUNCTIONS")
"1" = On, "0" = Off
Factory Settings
Press START/Pause to restore to the factory
default all the values of the settings included in
the settings menu.
FILLING THE SALT RESERVOIR
The use of salt prevents the formation of LIMESCALE on the dishes and on
the machine's functional components.
The salt reservoir is located in the lower part of the dishwasher (under the
lower rack on the left side).
• It is mandatory that the salt reservoir never be empty.
• It is important to set the water hardness.
• Salt must be filled when the SALT REFILL indicator light
trol panel is lit.
1. Remove the lower rack and unscrew the reservoir cap
(anticlockwise).
2. Position the funnel (see figure) and fill the salt reservoir
right up to its edge (approximately 0,5 kg); it is not un-
usual for a little water to leak out.
3. Only the first time you do this: fill the salt reservoir
with water.
4. Remove the funnel and wipe any salt residue away from the opening.
Make sure the cap is screwed on tightly so that no detergent can get into
the container during the wash program (this could damage the water
softener beyond repair).
Run a program every time as soon as you completed refilling the salt
reservoir to avoid corrosion.
5
6
7
8
button.
) button for 3 seconds, until you hear
/ Power Clean® option
buttons to scroll
/ Power Clean® option
to save the new value.
SETTING
Sound
Safety and Installation Instructions. More information about your
product available on website: docs.bauknecht.eu
After installation, please remember to remove all transport protection
9 10
11
12
13 14
12. Program number and remaining time indicator
13. Closed water tap indicator light
14. DESCALE indicator light
15. Power Clean® option button with indicator light
16. Half Load option button with indicator light
17. Extra Dry option button with indicator light/ Settings - 3 sec. press
18. Silent option button with indicator light
19. Sani Rinse option button with indicator light
20. Turbo option button with indicator light
21. Delay option button with indicator light
22. START/Pause button with indicator light
Setting the water hardness
To allow the water softener to work in a perfect way, it is essential that the water
hardness setting is based on the actual water hardness in your house. This infor-
mation can be obtained from your local water supplier. The factory setting is "3".
See „WATER HARDNESS TABLE".
buttons to
Level
1 (Soft)
2 (Medium)
VALUES
3 (Average)
(Default - in bold)
4 (Hard)
5 (Very hard)
1 | 2 | 3 | 4 | 5
To change, follow instructions in section "SETTING MENU".
0 | 1 | 2 | 3 |
Only use salt that has been specifically designed for dishwashers.
4 | 5
After the salt has been poured into the machine, the SALT REFILL indicator
light switches off.
1 | 0
If the salt container is not filled, the water softener and the heating
element may be damaged as a result of limescale accumulation.
1 | 0
Using of Salt is recommended with any type of dishwasher detergent.
WATER SOFTENING SYSTEM
1 | 0
Water softener automatically reduces water hardness, consequently preventing
scale buildup on the heater, contributing also to better cleaning efficiency.
1 | 0
This system regenerates itself with salt, therefore it is required to refill
the salt container when empty. The frequency of regeneration depends
on the water hardness level setting - regeneration takes place once per 4-6
-
Eco cycles with the water hardness level set to 3. During runs with regenera-
tion, additional water management system fill will happen. The regeneration
and water management process occurs at the beginning of the cycle with
additional fresh water.
• Single regeneration consumes ~6,5L of water;
• Takes up to 5 additional minutes for the cycle;
• Consumes below 0.005kWh of energy.
FILLING THE RINSE AID DISPENSER
Rinse aid makes dish DRYING easier. The rinse aid dispenser A should be filled
when the RINSE AID REFILL indicator light
on the con-
B
3. Press the lid down until you hear a click to close it.
NEVER pour the rinse aid directly into the appliance tub.
Before using the appliance carefully read
parts from the dishwasher.
15
16
17
18
Water Hardness Table
°dH
German degrees
French degrees
0 - 6
7 - 11
12 - 16
17 - 34
35 - 50
1. Open the dispenser B by
2. Pour in the rinse aid (max.
A
EN
19
20
21
22
°fH
°Clark
English degrees
0 - 10
0 - 7
11 - 20
8 - 14
21 - 29
15 - 20
30 - 60
21 - 42
61 - 90
43 - 62
in the control panel is lit.
pressing and pulling up the
tab on the lid.
110 ml), making sure it does
not overflow from the dis-
penser. If this happens, clean
the spill immediately with a
dry cloth.
1
Werbung
Inhaltsverzeichnis

Verwandte Anleitungen für Bauknecht B7I HF60 TUSC CH


Inhaltszusammenfassung für Bauknecht B7I HF60 TUSC CH
- Seite 1 Daily Reference Guide Before using the appliance carefully read THANK YOU FOR BUYING A BAUKNECHT PRODUCT. Safety and Installation Instructions. More information about your In order to receive a more complete assistance, please product available on website: docs.bauknecht.eu register your appliance on: www.bauknecht.eu/register After installation, please remember to remove all transport protection parts from the dishwasher.
-
Seite 2: Daily Use
Adjusting the dosage of rinse aid FILLING THE DETERGENT DISPENSER To open the detergent dispenser use the opening device C. Introduce If you are not completely satisfied with the drying results, you can adjust the detergent into the dry dispenser D only. Place the amount of the quantity of rinse aid used. - Seite 3 Daily Reference Guide PROGRAMS TABLE Water Energy Duration con- con- Available of wash Programs description options program sumption sumption (h: min) (litres/cycle) (kWh/cycle) Eco 50°- program is suitable to clean normally soiled table- ware, that for this use, it is the most efficient program in terms of its combined energy and water consumption, and 4:30 0.55...
-
Seite 4: Loading The Racks
LOADING THE RACKS CAPACITY: 15 standard place-settings CUTLERY RACK Foldable flaps with adjustable position The third rack was designed to house the The side foldable flaps can be folded or unfolded cutlery. to optimize the arrangement of crockery inside Arrange the cutlery as shown in the figure. the rack. -
Seite 5: Cleaning The Spray Arms
Daily Reference Guide CLEANING THE SPRAY ARMS The lower spray arm may be removed by pulling it upwards and rotating it On occasions, food residue anti-clockwise. Mounting back the may become encrusted onto spray arm is by pulling it down and the spray arms and block the rotating it clockwise. - Seite 6 Policies, standard documentation, ordering of spare parts and additional product information can be found by • Using QR code and visiting our website: docs.bauknecht.eu • Visiting our website: parts-selfservice.whirlpool.com • Alternatively, contact our After-sales Service (See phone number in the warranty booklet). When contacting our After-sales Service, please state the codes provided on your product’s identification plate.
-
Seite 7: Anzeige Am Boden
Bedienungsanleitung DANKE, DASS SIE SICH FÜR EIN BAUKNECHT PRODUKT Diese Sicherheits- und Installationsanweisungen ENTSCHIEDEN HABEN vor dem Gebrauch aufmerksam durchlesen. Weitere Informationen Für eine umfassendere Unterstützung melden Sie Ihr Gerät über Ihr Produkt sind auf folgender Website verfügbar: bitte an unter: www.bauknecht.eu/register docs.bauknecht.eu runtergeladen werden. -
Seite 8: Täglicher Gebrauch
KLARSPÜLERSPENDER AUFFÜLLEN EINFÜLLEN DES SPÜLMITTELS Klarspüler macht das TROCKNEN von Geschirr einfacher. Der Klarspülerspen- Zum Öffnen des Spülmittelbehäters den Öffnungsmechanismus C der A muss aufgefüllt werden, wenn das KLARSPÜLER AUFFÜLLEN Anzei- drücken. Füllen Sie das Spülmittel ausschließlich in das trockene Fach gelicht auf der Bedienblende leuchtet. -
Seite 9: Energiespartipps
Bedienungsanleitung HYGIENE ENERGIESPARTIPPS Um Gerüche und Ablagerung, die sich in dem Geschirrspüler ansetzen kön- • Sofern man die Herstelleranweisungen beim Einsatz beachtet, ver- nen zu vermeiden, bitte mindestens einmal monatlich ein Hochtempera- braucht das Waschen von Geschirr im Geschirrspüler in der Regel turprogramm laufen lassen. -
Seite 10: Optionen Und Funktionen
OPTIONEN UND FUNKTIONEN OPTIONEN können nach Auswahl des Programms direkt durch Drücken der jeweiligen Taste gewählt bzw. abgewählt werden (falls vorhanden - die Anzeige leuchtet auf) (siehe BEDIENFELD). Wenn eine Option nicht mit dem ausgewählten Programm kompatibel ist (siehe PROGRAMMTABELLE), blinken die entsprechenden LED 3 Mal schnell und ein Piepton ertönt. -
Seite 11: Unterkorb
Bedienungsanleitung Klappbare Klappen mit verstellbarer position POWER CLEAN® Die seitlich, klappbaren Ablagen können ein - oder Bei Power Clean® sorgen spezielle aufgeklappt werden, um die Anordnung des Ge- Wasserdüsen hinten im Gerät für schirrs im Korb zu optimieren. Stielgläser kön- eine verstärkte Reinigung von stark nen an den Ablagen stabilisiert werden, indem verschmutztem Geschirr. -
Seite 12: Lösen Von Problemen
LÖSEN VON PROBLEMEN Falls Ihr Geschirrspüler nicht richtig funktioniert, versuchen Sie, das Problem anhand der folgenden Liste zu beheben. Für andere Fehler oder Probleme wenden Sie sich bitte an den autorisierten Kundendienst, dessen Kontaktdaten im Garantieheft aufgeführt sind. Ersatzteile werden für einen Zeitraum von entweder bis zu 7 oder bis zu 10 Jahren verfügbar sein, je nach den spezifischen Anforderungen der Verordnung. - Seite 13 F8 E5 an dendienst kontaktieren. Firmenrichtlinien, Standarddokumentation, Ersatzteilbestellung und zusätzliche Produkt- informationen finden Sie unter: • Verwenden Sie den QR-Code und besuchen Sie unsere Internetseite docs.bauknecht.eu • Besuchen Sie unsere Internetseite: parts-selfservice.whirlpool.com • Alternativ können Sie unseren Kundendienst kontaktieren (Siehe Telefonnummer in dem Garantieheft).
-
Seite 14: Panneau De Commande
MERCI D’AVOIR CHOISI UN PRODUIT BAUKNECHT. de sécurité et d’installation. Pour en savoir plus concernant votre Afin de recevoir une assistance plus complète, merci d’enregis- produit, consulter le site Internet : docs.bauknecht.eu trer votre appareil sur: www.bauknecht.eu/register Après l’installation, rappelez-vous d’enlever toutes les pièces de protection pour le transport du lave-vaisselle. -
Seite 15: Utilisation Quotidienne
Guide D’utilisation Quotidienne REMPLIR LE DISTRIBUTEUR DE DÉTERGENT REMPLIR LE DISTRIBUTEUR DE LIQUIDE DE RINÇAGE Pour ouvrir le distributeur de détergent, utilisez le dispositif d’ouver- Le liquide de rinçage permet à la vaisselle de SÉCHER plus facilement. Le ture C. Insérez le détergent dans le distributeur sec D seulement. Placez distributeur de liquide de rinçage A devrait être rempli lorsque le voyant la quantité... - Seite 16 VERRES ET VAISSELLE ENDOMMAGÉS ASTUCES SUR L’ÉCONOMIE D’ÉNERGIE • Seulement utiliser des verres ou de la porcelaine qui sont lavables au • Lorsque le lave-vaisselle domestique est utilisé conformément aux lave-vaisselle conformément aux recommandations du fabricant. instructions du fabricant, le lavage de la vaisselle dans un lave-vais- selle consomme habituellement MOINS D’ÉNERGIE et d’eau que le •...
-
Seite 17: Chargement Des Paniers
Guide D’utilisation Quotidienne OPTIONS ET FONCTIONS Les OPTIONS peuvent être sélectionnées/désélectionnées, après avoir choisi le programme, directement en appuyant sur la touche correspon- dante (si disponibles - les témoins s’allument) (voir le PANNEAU DE COMMANDE). Si une option n’est pas compatible avec le programme sélection- né... -
Seite 18: Panier Inférieur
Volets pliables avec positions ajustables POWER CLEAN® Les volets pliables latéraux peuvent être pliés ou Power Clean® utilise des jets d’eau spéciaux, dépliés afin d’optimiser la disposition de la vais- situés à l’arrière de la cavité, pour laver les selle à l’intérieur du panier. articles très sales avec une intensité... - Seite 19 Guide D’utilisation Quotidienne DÉPANNAGE Si votre lave-vaisselle ne fonctionne pas correctement, vérifiez si le problème peut être résolu en suivant la liste ci-après. Pour d’autres erreurs ou problèmes, contactez le Service après-vente agréé dont les coordonnées peuvent être trouvées dans le livret de garantie. Les pièces de rechange seront disponibles pour une période allant jusqu’à...
- Seite 20 Vous trouverez les documents normatifs, la documentation standard, le classement des pièces de rechange et des informations supplémentaires sur les produits • En utilisant le QR code sur votre produit et visitant notre site web docs.bauknecht.eu parts-selfservice.whirlpool.com • En visitant notre site web •...
-
Seite 21: Pannello Di Controllo
GRAZIE PER AVER ACQUISTATO UN PRODOTTO di sicurezza e di installazione. Maggiori informazioni sul prodotto BAUKNECHT. disponibili sul sito web: docs.bauknecht.eu Per ricevere assistenza in modo più completo, registrare il pro- prio apparecchio sul sito: www.bauknecht.eu/register Dopo l’installazione, ricordarsi di rimuovere tutte le parti di protezione per il trasporto dalla lavastoviglie. -
Seite 22: Uso Quotidiano
RIEMPIMENTO DEL DISTRIBUTORE BRILLANTANTE RIEMPIMENTO DEL DISTRIBUTORE DETERSIVO Per aprire il distributore detersivo utilizzare il dispositivo di apertura C. L’utilizzo di brillantante facilita il processo di ASCIUGATURA delle stoviglie. Il distributore di brillantante A deve essere riempito ogni volta che a spia Versare il detersivo esclusivamente nel distributore D asciutta. - Seite 23 Guida Rapida Guasti DANNEGGIAMENTO DI BICCHIERI E STOVIGLIE CONSIGLI PER IL RISPARMIO ENERGETICO • Se la lavastoviglie viene usata secondo le istruzioni del produttore, il • Utilizzare soltanto bicchieri e porcellane garantite dal produttore per il lavaggio delle stoviglie a macchina comporta normalmente un MINORE lavaggio in lavastoviglie.
- Seite 24 OPZIONI E FUNZIONI Le OPZIONI possono essere selezionate/deselezionate, dopo aver scelto il programma, direttamente premendo il pulsante corrispondente (se disponibile - l’indicatore si accende) (vedere PANNELLO DI CONTROLLO). In caso di opzione non compatibile con il programma selezionato (vedere TA- BELLA DEI PROGRAMMI), il LED corrispondente lampeggia 3 volte in rapida successione ed emette i previsti segnali acustici.
-
Seite 25: Cura E Manutenzione
Guida Rapida Guasti Sponde ribaltabili con posizione regolabile POWER CLEAN® Le sponde ribaltabili laterali possono essere L’opzione Power Clean® utilizza specifici get- estese o ripiegate per ottimizzare la disposizio- ti ’acqua nel retro della cavità per ottenere ne delle stoviglie nel cestello. un lavaggio più... -
Seite 26: Risoluzione Dei Problemi
RISOLUZIONE DEI PROBLEMI Se la lavastoviglie non funziona correttamente, provare a risolvere il problema consultando l’elenco sotto riportato. Per errori o problemi di altro tipo, contattare un Servizio Assistenza Tecnica autorizzato; i dati di contatto sono riportati nel libretto di garanzia. I ricambi saranno disponibili per un periodo fino a 7 o fino a 10 anni, secondo i requisiti specifici del regolamento. - Seite 27 Chiamare l’assistenza. Documentazione normativa, documentazione standard, ordinazione di pezzi di ricambio e altre informazioni sul prodotto possono essere reperite: • Usare il codice QR visitando il nostro sito web docs.bauknecht.eu parts-selfservice.whirlpool.com • Visitando il nostro sito web • Oppure, contattare il Servizio Assistenza Tecnica (al numero di telefono riportato sul libretto di garanzia).
- Seite 28 400011654695B 05/2023 dk - Xerox Fabriano...