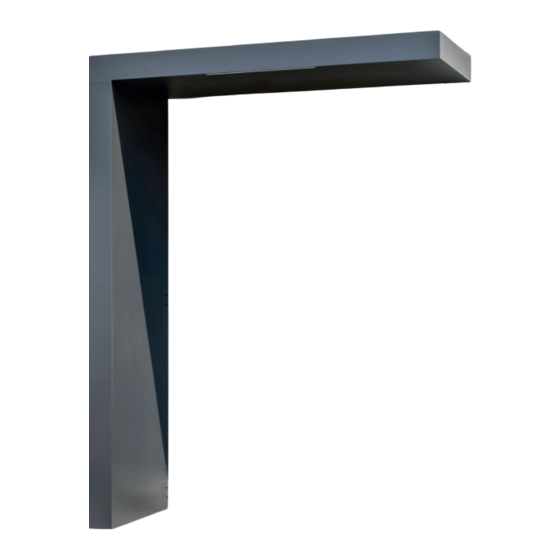
Gutta BS Plus 160 Upgrade Montageanleitung
Rechteckvordach mit seitenteil
Vorschau ausblenden
Andere Handbücher für BS Plus 160 Upgrade:
- Montageanleitung (28 Seiten) ,
- Montageanleitung (8 Seiten) ,
- Montageanleitung (11 Seiten)
Inhaltsverzeichnis
Werbung
Quicklinks
Rechteckvordach BS Plus 160/200 Upgrade
mit Seitenteil
Montageanleitung Rechteckvordach mit Seitenblende
D
Assembly instructions Rectangular canopy with side panel
GB
Instructions de montage
F
Montagevoorschriften Rechthoekige overkapping met zijpaneel
NL
BS Plus 160: Art.-Nr. / Art. no. / N° / Nr. 75006032 / 75006062
BS Plus 160:
Art.-Nr. / Art. no. / N° / Nr. 75006032 / 75006062
BS Plus 200: Art.-Nr. / Art. no. / N° / Nr. 75006092 /
BS Plus 200: Art.-Nr. / Art. no. / N° / Nr. 75006092 / 7500
Sonderanfertigung / Customised / Sur mesure / Speciaal ontwerp:
Sonderanfertigung / Customised / Sur mesure / Speciaal ontwerp:
Art.-Nr. / Art. no. / N° / Nr. 75006232 - - 75013722
Art.-Nr. / Art. no. / N° / Nr. 75006232
Auvent rectangulaire avec panneau latéral
75006122
6122
75013722
Nr.: 9219119
Montagevideo:
Werbung
Inhaltsverzeichnis

Inhaltszusammenfassung für Gutta BS Plus 160 Upgrade
- Seite 1 Rechteckvordach BS Plus 160/200 Upgrade mit Seitenteil Montageanleitung Rechteckvordach mit Seitenblende Nr.: 9219119 Assembly instructions Rectangular canopy with side panel Instructions de montage Auvent rectangulaire avec panneau latéral Montagevoorschriften Rechthoekige overkapping met zijpaneel BS Plus 160: BS Plus 160: Art.-Nr. / Art. no. / N° / Nr. 75006032 / 75006062 Art.-Nr.
-
Seite 2: Wichtige Hinweise
Important Recommandations Wichtige Hinweise! Reccommendations! importantes ! • Vor der Montage bitte Montageanleitung genau- • Prior to assembly please study the assembly in- • Avant le montage, veuillez lire attentivement les estens durchlesen und Produkt auf evtl. Transport- structions in detail and check the consignment for instructions de montage et vérifier que le produit schäden bzw. - Seite 3 Bezeichnung Designation Stück Quantity N° Désignation Aanwijzing Pièces Stuk BS plus 160 BS plus 200 Dübel Plugs Cheville Pluggen Ø 12 mm Unterleg-Scheibe Washers Rondelle Sluitring Schraube Screw Schroef 10 x 80 mm Metallschraube Metal srew Vis à métal Metaalschroef 4,8 x 35 mm Wandhalter - Vordach Wall bracket - Canopy...
-
Seite 4: Dimensions De Montage
Anbaumaße Mounting dimensions Dimensions de montage Montageafmetingen BS Plus 160 / 200 BS 160 = 1480 | BS 200 = 1880 mm 110 mm BS 200 = 775 mm 60 mm BS 160 BS 200 55 mm Neigung -> links oder rechts | Pitch ->... -
Seite 5: Wandhalter Montieren
Montage Mounting Instructions Assemblage Montage - BS Plus 160 / 200 Wandhalter montieren Mount wall bracket Montage du support mural Bevestiging van de muurbeugel 1. Abstände messen, gem. o.g. Neigung ausrichten, Bohrlöcher anzeichnen (Wandhalter als Schablone verwenden). 2. Bohren Sie die Löcher mit einem Ø 12 mm Bohrer. 3. - Seite 6 Montage Mounting instructions Assemblage Montage - BS Plus 160 / 200 Befestigung von oben at the top Pièce jointe supérieure Montage van bovenaf Bringen Sie das Fugendichtband wandseitig an den Winkel an. Bohren Sie die Löcher mit einem Bohrer Ø 3,5 mm BS 160 8 x vor.
-
Seite 7: Mounting Instructions
Montage Mounting instructions Assemblage Montage - BS Plus 160 / 200 Wandhalter montieren Mount wall bracket Montage du support mural Bevestiging van de muurbeugel 1. Abstände messen, im Wasser ausrichten, Bohrlöcher anzeichnen (Wandhalter als Schablone verwenden). 2. Bohren Sie die Löcher mit einem Ø 12 mm Bohrer. 3. -
Seite 8: Zusammenfügen
Montage Seitenteil Assembly of side part Montage de la partie latérale Montage zijpaneel Zusammenfügen Assembly Affilier Aaneenvoegen 1. Setzen Sie das Seitenteil auf die Wandhalter. 2. Heben Sie das Seitenteil an das Vordach. Place the side panel on the wall brackets. Lift the side panel onto the canopy. -
Seite 9: Befestigung
Montage Seitenteil Assembly of side part Montage de la partie latérale Montage zijpaneel Befestigung Fasting Fixation Bevestiging 1. Bohren Sie die Löcher mit einen Bohrer 3,5 mm vor. Pre-drill the holes with a 3.5 mm drill bit. Prépercez les trous avec une mèche de 3,5 mm. Boor de gaten met een 3,5 mm boor. - Seite 10 Montage Seitenteil Assembly of side part Montage de la partie latérale Montage zijpaneel Befestigung Fastening Attachement Bevestiging 1. Bohren Sie die Löcher mit einen Bohrer 3,5 mm vor. Pre-drill the holes with a 3.5 mm drill bit. BS 160 6x Pré-percer les trous avec une mèche de 3,5 mm.
- Seite 11 Montage Seitenteil Assembly of side part Montage de la partie latérale Montage zijpaneel Silikonfuge silicone joint joint silicone Siliconenvoeg Dichten Sie das Vordach oben und seitlich mit der Wand ab. Seal the canopy at the top and sides with the wall. Étanchéifiez l‘avant-toit en haut et sur les côtés avec le mur.
- Seite 12 Noppenbahn Plates for crafts Lawn grids Garden products Dimpled Membrane ... und vieles mehr ! ... and much more ! www.gutta.com Gutta Werke GmbH Bau- und Heimwerkerprodukte Bahnhofstraße 51-57 D-77746 Schutterwald Telefon 0781 6090 Telefax 0781 6093200 info@gutta.com www.scobalit.de Scobalitwerk Wagner GmbH...


