Seite 1
(b) Maximum radio-frequency power; 10mW (EIRP) (2014/53/EU art. 10-9 Simplified Declaration of Conformity) Hereby, MOB, declares that item MO9609 complies with the essential requirements and other relevant conditions of directive 2014/53/EU. The full text of the EU declaration of conformity is available at the following internet address: www.momanual.com.
Seite 2
MO9609 Wireless speaker Wireless v 5.1 speaker with light, with charging cable Speaker Function Keys: 1. Mic 2. ON/OFF 3. Micro SD/TF Card Slot (up to 32 GB) 4. Mode Switch 5. Previous track/Vol down 6. Play/Pause/Phone 7. Next track/Vol up Charging the speaker: Connect the provided Micro USB charging cable to speaker Micro USB port;...
Seite 3
Press the ⑤ “Vol-/Previous track” key to manually scan forward. Press the ⑦ “Vol+/Next track” key to manually scan backward. Using TF Card: Insert the TF card (with MP3 files) into the card slot of the speaker. Control volume and play back by pressing the key as described above. Mode Switch: Press the ④...
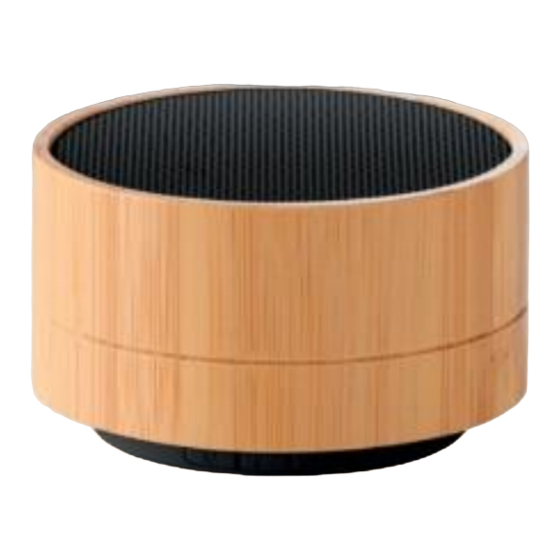
Seite 4
Wireless Version: V5.1 RF Range: Rated power: Stand-by time: about 10 hours Talking/Playing: about 4.5 hours / about 2.5 hours Charging time: about 3.0 hours 2.4 – 2.48 GHz Wireless frequency: Radiated Power: -3.52 dBm Wireless Lautsprecher Wireless V 5.1 mit Licht und Ladekabel Lautsprecher Funktionstasten: 1.
Seite 5
Drücken der ⑦ “Vol+/Next track” Taste um den Scan manuell rückwärts zu steuern. Gebrauch einer TF karte Fügen Sie die TF Karte (mit MP3 Daten) in den Karten Slot des Lautsprechers. Lautstärke steuern und durch Drücken der Taste wie oben beschrieben wiedergeben Modus ändern Drücken Sie die Taste ④...
Seite 6
Wen ein Anruf eingeht, das blaue Licht geht an. Drücken Sie kurz die ⑥ “Play/Pause/Phone" Taste um das Gespräch anzunehmen; lande drücken der "Play/Pause/Phone" Taste, um den Anruf abzulehnen. Während des Gesprächs, kurzes Drücken der ⑥ "Play/Pause/Phone" Taste um aufzulegen. Doppeldrücken der ⑥...
Seite 7
Avec le câble fourni, insérez la fiche Micro USB dans le haut-parleur, le câble agira comme antenne. Il n'est pas nécessaire de connecter le câble ailleurs. Faites glisser le bouton ② “ON / OFF" vers la droite pour allumer. Maintenez la touche ④ "M" enfoncée pour accéder au mode FM. Appuyez sur la touche ⑥...
Seite 8
pression rapide reprendra la lecture de la musique. Appuyez brièvement sur ⑤ "Piste précédente / Vol-", l'enceinte jouera la piste précédente. Appuyez longuement sur le bouton pour réduire le volume du haut-parleur. Appuyez brièvement sur ⑦ “Suivante / Vol+", l'enceinte jouera la piste suivante.
Seite 9
3. Ranura para tarjeta Micro SD / TF (hasta 32 GB) 4. Interruptor de modo 5. Pista anterior / Vol abajo 6. Reproducir / Pausa / teléfono 7. Pista siguiente / Vol arriba Cargando el altavoz: Conectar el cable cargador Micro USB al puerto Micro USB del altavoz, introducir el otro final del puerto USB para la conexión de energía.
Seite 10
luz azul permanecerá. Las versions más nuevas posiblemente no necesiten de password y habrá conexión automática. Si la conexión falla, por favor intentar de njevo según estas instrucciones Reproduciendo música : Presionar brevemente tecla ⑥ “Play/Pause/Phone” para detener la música o detener la música para responder a unallamada.
Seite 11
Speaker Wireless con Radio FM FM Scan Radio Utilizzando il cavo fornito, inserire la presa Micro USB nello speaker, il cavo funziona come un’antenna. Non è necessario connettere altri cavi. Spostare il cursore ② “ON/OFF” nella giusta posizione per accenderlo. Tenere premuto ④...
Seite 12
Tenendo premuto si aumenta il volume e verrete avvisate quando raggiungerete il massimo livello di volume. Risposta alle chiamate Quando c’è una chiamata in arrive si accende una luce blu. Premendo il tasto ⑥ “Play/Pause/Phone" si risponde alla chiamata, tenendolo premuto, si rifiuta la chiamata.
Seite 13
Wireless speaker met FM radio: Het scannen van radio: Met de meegeleverde kabel steekt u de micro-USB- stekker in de luidspreker. De kabel werkt als de antenne. Het is niet nodig om de kabel overal te verbinden. Schuif schakelaar ② “AAN/UIT” naar rechts om aan te zetten. Hou knop ④...
Seite 14
een gesprek te kunnen opnemen. Na een korte druk op knop ⑥ “Play/Pauze/Telefoon ” zal de muziek weer aan gaan. Druk kort op knop ⑤ “vorig nummer/Volume laag” voor het afspelen van het vorige nummer. Druk lang op de knop om het volume te kunnen verminderen.
Seite 15
5. Poprzedni utwór/Przycisz 6. Play/Pause/Telefon 7. Następny utwór/Podgłoś Ładowanie głośnika: Podłącz dostarczony kabel ładowania Micro USB do gniazda Micro USB głośnika, a drugi koniec do portu USB w celu podłączenia zasilania. Podczas ładowania głośnika zapala się czerwone światło i zostanie wyłączone po pełnym naładowaniu.
Seite 16
wersje mogą nie potrzebować hasła i będą się automatycznie łączyć. Jeśli połączenie nie powiedzie się, spróbuj ponownie zgodnie z tymi instrukcjami. Odtwarzanie muzyki Przyciśnij przycisk ⑥ Przycisk Play/Pause/Phone” aby wstrzymać muzykę lub wstrzymać odtwarzanie muzyki, aby odebrać połączenie. Drugie krótkie naciśnięcie powróci do odtwarzania muzyki. Przyciśnij przycisk ⑤...