Werbung
Verfügbare Sprachen
Verfügbare Sprachen
Quicklinks
USER MANUAL
(2014/53/EU art. 10-8)
(a) Frequency Range; 2402-2480 MHz
(b) Maximum radio-frequency power; 100mW (EIRP)
(2014/53/EU art. 10-9 Simplified Declaration of Conformity)
Hereby, MOB, declares that item MO9155 complies with the essential requirements and
other relevant conditions of directive 2014/53/EU. The full text of the EU declaration of
conformity is available at the following internet address: www.momanual.com
MOB, PO BOX 644, 6710 BP (NL).
PO: 41-XXXXXX
Made in China
Werbung

Inhaltszusammenfassung für MOB MO9155-37
- Seite 1 (b) Maximum radio-frequency power; 100mW (EIRP) (2014/53/EU art. 10-9 Simplified Declaration of Conformity) Hereby, MOB, declares that item MO9155 complies with the essential requirements and other relevant conditions of directive 2014/53/EU. The full text of the EU declaration of conformity is available at the following internet address: www.momanual.com MOB, PO BOX 644, 6710 BP (NL).
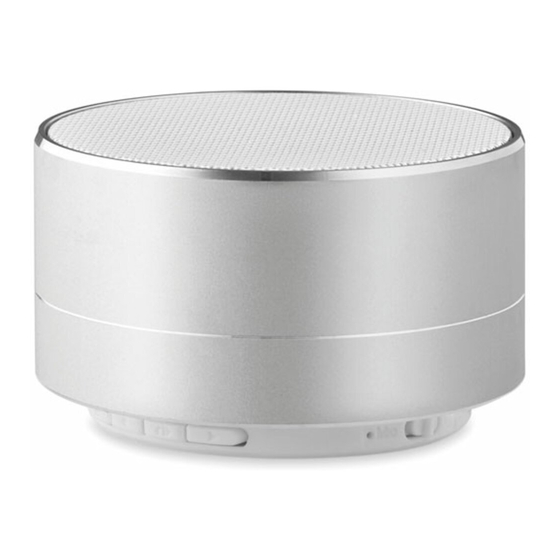
- Seite 2 MO9155 Wireless speaker Wireless 4.2+BR+EDR speaker with light, with charging cable Speaker Function Keys: 1. Mic 2. ON/OFF 3. Micro SD/TF Card Slot (up to 32 GB) 4. Mode Switch 5. Previous track/Vol down 6. Play/Pause/Phone 7. Next track/Vol up Charging the speaker: Connect the provided Micro USB charging cable to speaker Micro USB port;...
- Seite 3 Slide the ② “ON/OFF” switch to the right to power on. Press and hold the ④ "M" button to enter FM mode. Press the ⑥ "Play/Pause/Phone" key to scan stations. Press the ⑤ “Vol-/Previous track” key to manually scan forward. Press the ⑦...
- Seite 4 press the ⑥ “Play/Pause/Phone" key to answer; long press the "Play/Pause/Phone" key to reject the call. 2. When on an active call, short press the ⑥ "Play/Pause/Phone" to hang up. 3. Press ⑥ "Play/Pause/Phone" for double press, can switch the sounds between the mobile phone and speaker.
- Seite 5 Mit dem gelieferten Kabel, schließen Sie de n USB Plug am Lautsprecher an, das Kabel beinhaltet eine Antenne. Es ist nicht nötig das Kabel noch anderweitig anzuschließen. Schalten Sie ② “ON/OFF” nach rechts um den Lautsprecher einzuschalten. Drücken und halten der ④ "M" Taste um zu FM Modus zu gelangen.
- Seite 6 Abspielen der Musik: 1. Drücken Sie kurz ⑥ “Play/Pause/Phone” um die Musik anzuhalten, oder um ein Anruf anzunehmen. Drücken Sie erneut die Taste und die Musik beginnt wieder zu spielen. 2. Drücken Sie kurz ⑤ “Previous track/Vol-“, und das vorherige Lied wird gespielt.
- Seite 7 1. Mic 2. ON/OFF 3. Fente pour carte micro SD/TF (jusqu’à 32 GB) 4. Changement de mode 5. Piste précédente / Vol – 6. Play/Pause/Téléphone 7. Piste suivante / Vol + Chargement du haut-parleur: Connectez le câble de chargement Micro USB fourni au port micro USB de l'enceinte, insérez l'autre extrémité...
- Seite 8 Connexion au périphérique Wireless: 1. Suivez les instructions d'utilisation de votre appareil Wireless pour l'association avec le haut-parleur. En règle générale, cela se fait en allant dans le menu "Wireless", "Configurer" ou "Connecter" et en sélectionnant l'option pour rechercher des périphériques Wireless.
- Seite 9 Version Wireless: 2+BR+EDR Gamme RF: 10 m Puissance nominale: Temps de lecture: environ 10 heures Parler / Jouer: environ 4,5 heures | environ 2,5 heures Temps de chargement: environ 3, 0 heure Fréquence Wireless: 2, 4 - 2, 48 GHz Puissance rayonnée: -3.52 dBm Altavoz Wireless.
- Seite 10 adelante. Presionar la tecla ⑦ “Vol+/Next track” para escanear hacia atrás. Uso de la targeta TF Card: 1. Insertar la TF card (con archivos MP3) dentro de la ranura del altavoz. 2. Control de volumen y play back presionando la tecla como se describe según instrucciones de arriba.
- Seite 11 Especificaciones técnicas: Wireless Versión: 4.2+BR+EDR RF Rango: Potencia nominal: Tiempo stand by: sobre 10 horas Tiempo de conversación: sobre 4, 5 horas Tiempo de tocando musica: sobre 2, 5 horas Tiempo de Carga: sobre 3, 0 horas 2.4 – 2.48 GHz Frecuencia Wireless: Radiated Power: -3.52 dBm...
- Seite 12 Premere il tasto ⑤ “Vol-/Previous track” per trovare le stazioni manualmente . Premere il tasto ⑦ “Vol+/Next track” per trovare le stazioni manualmente scorrendo indietro. Utilizzo card TF: 1. Inserire la card TF (con MP3 files) nell’apposita slot dello speaker. 2.
- Seite 13 Risposta alle chiamate: 1. Quando c’è una chiamata in arrive si accende una luce blu. Premendo il tasto ⑥ “Play/Pause/Phone" si risponde alla chiamata, tenendolo premuto, si rifiuta la chiamata. 2. Per riagganciare dopo una chiamata, premere il tasto ⑥ "Play/Pause/Phone"...
- Seite 14 Wireless Speaker met FM Radio Het Scannen van de radio Met de meegeleverde kabel steekt u de micro-USB-stekker in de luidspreker. De kabel werkt als de antenne. Het is niet nodig om de kabel overal te verbinden. Schuif schakelaar ② “AAN/UIT” naar rechts om aan te zetten. Hou knop ④...
- Seite 15 Muziek afspelen 1. Druk kort op knop ⑥ “Play/Pauze/Telefoon ” om de muziek te pauzeren en een gesprek te kunnen opnemen. Na een korte druk op knop ⑥ “Play/Pauze/Telefoon ” zal de muziek weer aan gaan. 2. Druk kort op knop ⑤ “vorig nummer/Volume laag” voor het afspelen van het vorige nummer.
- Seite 16 1. Mic 2. ON/OFF 3. Wejście karty Micro SD/TF (do 32 GB) 4. Ustawienia 5. Poprzedni utwór/Przycisz 6. Play/Pause/Telefon 7. Następny utwór/Podgłośnij Ładowanie głośnika Podłącz dostarczony kabel ładowania Micro USB do gniazda Micro USB głośnika, a drugi koniec do portu USB w celu podłączenia zasilania.
- Seite 17 Połączenie z urządzeniem Wireless 1. Postępuj zgodnie z instrukcjami obsługi urządzenia Wireless, aby sparować się z głośnikiem. Zwykle odbywa się to przechodząc do menu "Wireless", "Ustaw" lub "Połącz" i wybierając opcję wyszukiwania urządzeń Wireless. 2. Przesuń przełącznik ②“ON/OFF” w prawo, aby włączyć urządzenie.
- Seite 18 Zasięg RF: Moc znamionowa: Czas czuwania: ok.10.0 godz. Czas odtwarzania/rozmowy: ok. 4.5 godz. | ok. 2.5 godz. Czas ładowania: ok. 3.0 godz. Częstotliwość Wireless: 2.4 – 2.48 GHz Głośność: -3.52 dBm...


