Seite 1
Benutzerinformation Mikrowellenofen Notice d'utilisation FR 22 FMW29EMGSW Four à micro-ondes Istruzioni per l’uso Forno a microonde User Manual EN 64 Microwave Oven electrolux.com/register...
WIR DENKEN AN SIE Vielen Dank für Ihren Kauf eines Electrolux-Geräts. Sie haben ein Produkt gewählt, das jahrzehntelange professionelle Erfahrung und Innovation mit sich bringt. Das ausgeklügelte und stilvolle Produkt wurde für Sie entwickelt. So können Sie jedes Mal, wenn Sie das Produkt verwenden, sicher sein, dass Sie großartige Ergebnisse erzielen werden.
SICHERHEITSHINWEISE Lesen Sie vor der Montage und dem Gebrauch des Geräts zuerst die Bedienungsanleitung. Bei Verletzungen oder Schäden infolge nicht ordnungsgemäßer Montage oder Verwendung übernimmt der Hersteller keine Haftung. Bewahren Sie die Anleitung zum Nachschlagen an einem sicheren und zugänglichen Ort auf. 1.1 Sicherheit von Kindern und schutzbedürftigen Personen WARNUNG!
Kinder dürfen keine Reinigung und Wartung des Geräts • ohne Beaufsichtigung durchführen. 1.2 Allgemeine Sicherheit Dieses Gerät ist nur zum Kochen bestimmt. • Dieses Gerät ist für den Hausgebrauch in einem • Einfamilienhaus in Innenräumen bestimmt. Dieses Gerät darf in Büros, Hotelzimmern, Gästezimmern •...
Seite 5
Verwenden Sie beim Garen in der Mikrowelle keine • Metallbehälter für Speisen und Getränke. Diese Vorgabe gilt nicht, wenn der Hersteller Angaben zur Größe und Form der Metallbehälter, die geeignet für das Garen in der Mikrowelle sind, zur Verfügung gestellt hat. Verwenden Sie nur mikrowellengeeignetes Kochgeschirr.
Die Temperatur der zugänglichen Oberflächen kann hoch • sein, wenn das Gerät in Betrieb ist. Der Mikrowellenherd darf nicht in einen Schrank gestellt • werden, es sei denn, er wurde in einem Schrank getestet. Die Rückseite der Geräte muss gegen eine Wand zeigen. •...
2.4 Reinigung und Pflege 2.5 Wartung • Wenden Sie sich zur Reparatur des WARNUNG! Geräts an den autorisierten Verletzungs-, Brandgefahr sowie Kundendienst. Dabei dürfen Risiko von Schäden am Gerät. ausschließlich Originalersatzteile verwendet werden. • Schalten Sie das Gerät immer aus und •...
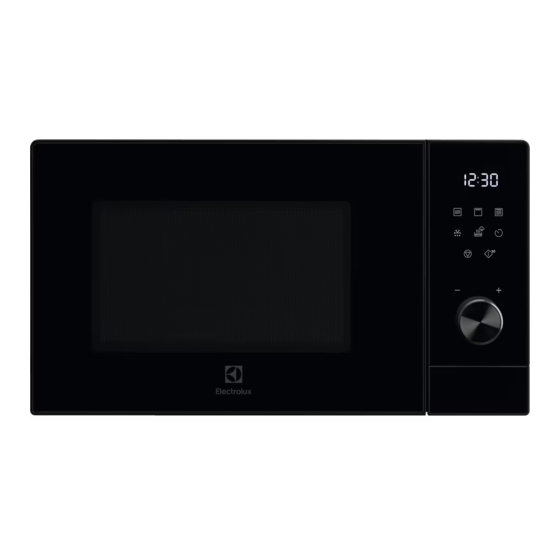
3.2 Bedienfeld Symbol Funktion Beschreibung — Display Zeigt die Einstellungen und die aktuelle Zeit an. Grill Zur Auswahl der Grillfunktion. Kombi-Kochen Zur Auswahl der Kombi-Kochfunktion. Timer/Uhr Zum Einstellen der Tageszeit und des Küchen- Timers. Voreinstellungen/Dampf-Menü Zur Auswahl zwischen zwei Modellen für das automatisches Kochen.
3.3 Zubehör Verwendung für: • Grillen von Speisen Drehteller-Set Dampfgarer Verwenden Sie immer das Die empfohlene Kochtabelle Drehteller-Set, um Speisen in finden Sie im Kapitel „Tipps und der Mikrowelle zuzubereiten. Hinweise“. Verwendung für: Glasbodenplatte und Drehtellerhalterung. • Garen mit Dampf Grillrost 4.
3. Schalten Sie den Backofen aus und 2. Drehen Sie den Zeiteinstellungsknopf, lassen Sie ihn abkühlen. um die Anzahl der Stunden einzugeben. 4. Reinigen Sie den Garraum mit einem 3. Drücken Sie zur Bestätigung feuchten, weichen Tuch und trocknen Sie 4.
Seite 11
• Lebensmittel nach der Hälfte der auftauen. Lassen Sie sie bei Auftauzeit wenden. Bereits angetaute Raumtemperatur auftauen. Stücke nach Möglichkeit abtrennen und • Durch Einstellen einer höheren herausnehmen. Mikrowellenleistung kann Obst und Auftauen von Butter, Portionen von Gemüse ohne vorheriges Auftauen gegart Kuchen, Quark werden.
Seite 12
Kochgeschirr / Material Mikrowelle Grillen Auftauen Heiz- Kochen Dampfgarer 1) Ohne Silber-, Gold-, Platin- oder Metallplattierung / Dekoration 2) Ohne Quarz- oder Metallkomponenten oder Glasuren, die Metalle enthalten 3) Sie müssen die Anweisungen des Herstellers bezüglich der maximalen Temperaturen befolgen. geeignet 5.
5.4 Schnellstart Kochstufenprogrammen. Jedes Kochprogramm wird separat heruntergezählt. Nach Ablauf der ersten eingestellten Zeit Drücken Sie , um die Mikrowelle startet das zweite Kochprogramm einzuschalten. automatisch. Die Standard-Kochzeit beträgt 30 Sekunden Im mehrstufigen Kochmodus können Sie und erhöht sich mit jedem weiteren folgende Programme einstellen: Auftauen Tastendruck um 30 Sekunden.
6. AUTOMATIKPROGRAMME 4. Drücken Sie zur Bestätigung WARNUNG! 5. Drehen Sie den Einstellknopf, um das Siehe Kapitel Gewicht einzustellen. Sicherheitshinweise. 6. Drücken Sie , um die Mikrowelle 6.1 Garen mit Dampf einzuschalten. Sie können die eingestellte Zeit 1. Stellen Sie das Dampfkochset auf den durch Drehen des Einstellknopfs Drehteller.
Lebensmittel Wasser (ml) Gewicht der Nah‐ Zeit Standzeit rung (g) (Min.) (Min.) 1) St11 9:30 Hähnchenbrust 1) Nach dem Garen die Lebensmittel im Dampfbehälter mit geschlossenem Deckel und Ventil aufbe‐ wahren. 6.2 Auto-Kochen 3. Drücken Sie zur Bestätigung 4. Drehen Sie den Einstellknopf, um das Verwenden Sie diese Funktion zum Gewicht des Gerichts einzustellen.
Menü Menge Display Leistung Zeit Hinweis (Min.) 250 g 4:30 Mit Plastikfolie ab‐ decken und einige 350 g 5:30 Fisch Löcher darin ma‐ chen. 450 g 7:00 120 ml (1 Tas‐ 0:50 240 ml (2 Tas‐ 1:40 Getränke sen) 360 ml (3 Tas‐ 2:30 sen) 50 g...
2. Kombinieren Sie die Teile des 3. Stellen Sie den Dampfkorb auf das Dampfgarers: C - Wasserbehälter, B - Drehteller-Set. Dampfkorb, A - Deckel. Das Dampfventil während des Kochens geschlossen halten. 8. ZUSATZFUNKTIONEN 8.1 Küchen-Timer Wenn die Uhr eingestellt ist, zuerst die Taste Löschen Sie können maximal 95 Minuten einstellen.
Störung Abhilfe Die Speise wurde zu trocken. Kürzere Garzeit einstellen oder niedrigere Mikrowellen-Leis‐ tung wählen. Die Speise ist nach Ablauf der Zeit immer noch Längere Garzeit einstellen oder höhere Leistung wählen. Be‐ nicht aufgetaut, heiß oder gegart. achten Sie, dass für die Zubereitung größerer Gargutmengen eine längere Gardauer erforderlich ist.
• Verwenden Sie zur Reinigung von ein weiches Tuch mit warmem Wasser Metalloberflächen ein übliches und etwas Reinigungsmittel an. Reinigungsmittel. • Um hartnäckige Rückstände leichter • Reinigen Sie das Innere des Geräts nach entfernen zu können, stellen Sie ein Glas jedem Gebrauch, um es in gutem Zustand Wasser in das Gerät, und lassen Sie das zu halten.
Wir empfehlen, hier folgende Daten zu notieren: Modell (MOD.) ........Produktnummer (PNC) ........Seriennummer (S.N.) ........12. MONTAGE Steckdose angeschlossen werden, die WARNUNG! ordnungsgemäß installiert und geerdet ist. Im Siehe Kapitel Falle eines elektrischen Kurzschlusses Sicherheitshinweise. reduziert die Erdung das Risiko eines Stromschlags.
GARANTIE Kundendienst Servicestellen Industriestrasse 10 Le Trési 6 Via Violino 11 5506 Mägenwil 1028 Préverenges 6928 Manno Morgenstrasse 131 3018 Bern Langgasse 10 9008 St. Gallen Am Mattenhof 4a/b 6010 Kriens Schlossstrasse 1 4133 Pratteln Comercialstrasse 19 7000 Chur Ersatzteilverkauf Industriestrasse 10, 5506 die Kosten für Material, Arbeits- und Mägenwil, Tel.
Seite 22
NOUS PENSONS À VOUS Merci d’avoir choisi un appareil Electrolux. Vous avez choisi un produit qui bénéficie de décennies d'expérience professionnelle et d'innovation. Ingénieux et élégant, il a été pensé pour vous. C'est la raison pour laquelle vous pouvez avoir la certitude d'obtenir d'excellents résultats à...
INFORMATIONS DE SÉCURITÉ Avant d'installer et d'utiliser cet appareil, lisez soigneusement les instructions fournies. Le fabricant ne pourra être tenu pour responsable des blessures et dégâts résultant d'une mauvaise installation ou utilisation. Conservez toujours les instructions dans un lieu sûr et accessible pour vous y référer ultérieurement.
1.2 Sécurité générale Cet appareil est exclusivement destiné à un usage • culinaire. Cet appareil est conçu pour un usage domestique unique, • dans un environnement intérieur. Cet appareil peut être utilisé dans les bureaux, les • chambres d’hôtel, les chambres d’hôtes, les maisons d’hôtes de ferme et d’autres hébergements similaires lorsque cette utilisation ne dépasse pas le niveau (moyen) de l’utilisation domestique.
Seite 25
taille et la forme des récipients métalliques adaptés à la cuisson au micro-ondes. N'utilisez que des ustensiles adaptés à une utilisation dans • un four à micro-ondes. Lorsque vous faites cuire des aliments dans des récipients • en plastique ou en papier, surveillez l’appareil car ces matières peuvent s’enflammer.
La surface arrière des appareils doit être placée contre un • mur. N'utilisez pas de produits abrasifs ni de racloirs pointus en • métal pour nettoyer la porte en verre car ils peuvent rayer la surface, ce qui peut briser le verre. N’activez pas l’appareil lorsqu’il est vide.
• Ne laissez pas les résidus alimentaires ou vendues séparément : Ces lampes sont de produits nettoyants s'accumuler sur les conçues pour résister à des conditions joints de la porte. physiques extrêmes dans les appareils • Les résidus de graisse et d'aliments dans électroménagers, telles que la l'appareil peuvent provoquer un incendie température, les vibrations, l’humidité, ou...
3.2 Bandeau de commande Symbole Fonction Description — Affichage Affiche les réglages et l'heure actuelle. Gril Pour sélectionner la fonction Gril. Pour sélectionner la fonction de cuisson combi‐ Cuisson combinée née. Minuterie/horloge Pour régler l’heure du jour et le minuteur de cui‐ sine.
3.3 Accessoires Utiliser pour : • griller des aliments Ensemble Plateau tournant Récipient cuisson vapeur Utilisez toujours l’ensemble Pour le tableau des cuissons plateau tournant pour préparer suggérées, reportez-vous au les aliments au micro-ondes. chapitre « Conseils et astuces ». Utiliser pour : Plateau de cuisson en verre et support de •...
2. Laissez le four en fonctionnement 2. Tournez la manette de réglage de l'heure pendant 30 minutes. pour entrer le nombre de minutes. 3. Éteignez le four puis laissez-le refroidir. 3. Appuyez sur pour confirmer. 4. Nettoyez la cavité du four avec un chiffon 4.
Seite 31
• Retournez les aliments à la moitié du entièrement dans l'appareil. Laissez-les temps de décongélation. Si possible, décongeler à température ambiante. séparez puis retirez les morceaux ayant • Vous pouvez utiliser une puissance de commencé à décongeler. micro-ondes plus élevée pour cuire les Décongélation du beurre, de portions de fruits et légumes sans les décongeler.
Seite 32
Ustensiles de cuisine / Matériaux Micro-ondes Gril Décongéla‐ Chauffe Cuisson tion Récipient cuisson vapeur 1) Sans placage/décorations en argent, or, platine ou métal. 2) Sans composants en quartz ou en métal ou avec un revêtement contenant du métal 3) Vous devez suivre les instructions du fabricant concernant les températures maximales. 4.
5.4 Démarrage rapide programme de cuisson est a son propre compte à rebours. À la fin de la première durée réglée, le second programme de Appuyez sur pour démarrer le micro- cuisson démarre automatiquement. ondes. Vous pouvez sélectionner les programmes Le temps de cuisson par défaut est de suivants en mode de cuisson en plusieurs 30 secondes.
6. PROGRAMMES AUTOMATIQUES 4. Appuyez sur pour confirmer. AVERTISSEMENT! 5. Tournez le bouton de réglage pour régler Reportez-vous aux chapitres le poids. concernant la sécurité. 6. Appuyez sur pour confirmer et 6.1 Cuisson à la vapeur activer le micro-ondes. Vous pouvez augmenter ou 1.
Aliments Eau (ml) Poids des ali‐ Durée Temps de re‐ ments (g) (min) pos (min) 1) St11 9:30 Escalope de poulet 1) Après la cuisson, conservez les aliments à l’intérieur de la marmite à vapeur avec le couvercle et la vanne fermée. 6.2 Cuisson automatique 4.
Menu Quantité Affichage Puissance Durée Remarque (min) Environ 230 5:00 Environ 460 Pommes de 8:00 terre Environ 690 12:00 250 g 4:30 Recouvrir d’un film plastique et le per‐ 350 g 5:30 Poisson cer de quelques trous. 450 g 7:00 120 ml (1 tas‐...
3. Placez le récipient cuisson vapeur sur le plateau tournant. 7.3 Insertion du récipient cuisson vapeur Maintenez la valve de vapeur fermée pendant la cuisson. ATTENTION! GRILL Le récipient cuisson vapeur ne peut pas être utilisé avec la fonction gril. 1.
9. CONSEILS AVERTISSEMENT! Reportez-vous aux chapitres concernant la sécurité. 9.1 Conseils pour la cuisson au micro-ondes Problème Solution Vous ne trouvez pas les détails pour la quantité Recherchez un type d'aliment similaire. Diminuez ou rallongez de nourriture préparée. le temps de cuisson selon la règle suivante : •...
Il existe 2 modes de cuisson combinée. ondes et gril à différents moments et à des Chaque mode associe les fonctions micro- niveaux de puissance différents. 10. ENTRETIEN ET NETTOYAGE • Nettoyez les saletés tenaces avec un AVERTISSEMENT! nettoyant spécial. Reportez-vous aux chapitres •...
Problème Cause possible Solution Il y a des étincelles dans la Des brochettes en métal ou du papier Assurez-vous que les brochettes et le cavité. d'aluminium touchent les parois intérieu‐ papier d'aluminium ne touchent pas les res. parois intérieures. L'ensemble du plateau Il y a un objet ou de la saleté...
12.3 Distances minimales Dimensions 1) La hauteur minimale qui doit rester libre au- dessus de la surface supérieure du four. 12.4 Dimensions du produit Dimensions Hauteur Dimensions Largeur Profondeur GARANTIE Service-clientèle Points de Service Industriestrasse 10 Le Trési 6 Via Violino 11 5506 Mägenwil 1028 Préverenges 6928 Manno...
14. EN MATIÈRE DE PROTECTION DE L'ENVIRONNEMENT Recyclez les matériaux portant le symbole Pour la Suisse: . Déposez les emballages dans les Où aller avec les appareils conteneurs prévus à cet effet. Contribuez à usagés ? la protection de l'environnement et à votre Partout où...
Seite 43
PENSIAMO A TE Grazie per aver acquistato un elettrodomestico Electrolux. Hai scelto un prodotto che ha alle spalle decenni di esperienza professionale e innovazione. Ingegnoso ed elegante, è stato progettato pensando a te. Quindi, in qualsiasi momento lo utilizzi, avrai la certezza di ottenere sempre i migliori risultati.
INFORMAZIONI DI SICUREZZA Leggere attentamente le istruzioni fornite prima di installare e utilizzare l'apparecchiatura. I produttori non sono responsabili di eventuali lesioni o danni derivanti da un'installazione o un uso scorretti. Conservare sempre le istruzioni in un luogo sicuro e accessibile per poterle consultare in futuro. 1.1 Sicurezza dei bambini e delle persone vulnerabili AVVERTENZA! Rischio di soffocamento, lesioni o invalidità...
1.2 Avvertenze di sicurezza generali L'apparecchiatura è destinata solo alla cottura. • Quest’apparecchiatura è progettata per un uso domestico • singolo in un ambiente interno. Quest’apparecchiatura può essere utilizzata in uffici, • camere d'albergo, camere di bed & breakfast, alloggi in agriturismi e altre sistemazioni simili in cui tale utilizzo non superi i livelli di utilizzo domestico (medi).
Seite 46
Usare solo utensili adatti all’uso in forno a microonde. • Quando si riscaldano o cuociono alimenti in recipienti di • plastica, carta, controllare il forno per evitare il rischio di incendio. L’apparecchiatura è destinata alla cottura di alimenti e • bevande.
Non utilizzare detergenti abrasivi o raschietti di metallo per • pulire il vetro dello sportello per non rigare la superficie e causare la rottura del vetro. Non accendere l’apparecchiatura quando è vuota. Le parti • metalliche all’interno della cavità possono generare scintille elettriche.
incendio e ustione quando viene attivata destinate a resistere a condizioni fisiche la funzione microonde. estreme negli elettrodomestici, come • Pulire l'apparecchiatura con un panno temperatura, vibrazioni, umidità, o sono inumidito e morbido. Utilizzare solo destinate a segnalare informazioni sullo detergenti neutri.
3.2 Pannello dei comandi Simbolo Funzione Descrizione — Display Mostra le impostazioni e l'ora corrente. Grill Per avviare la funzione grill. Per selezionare la funzione di cottura combina‐ Cottura combinata Timer/orologio Per impostare l’ora del giorno e il timer della cu‐ cina.
3.3 Accessori Utilizzare per: • grigliare gli alimenti Kit piatto girevole Set cottura a vapore Utilizzare sempre il kit del piatto Per la tabella di cottura girevole per preparare il cibo nel consigliata, rimandiamo al forno a microonde. capitolo “Consigli e suggerimenti”.
• Pulire accuratamente la cavità del forno 1. Premere fino a visualizzare 12 o 24 con un panno morbido umido. ore. 2. Ruotare la manopola di impostazione 4.3 Preriscaldamento dell’ora per inserire la quantità di ore. Preriscaldare il forno vuoto prima di iniziare a 3.
Seite 52
Scongelamento di carne, pollame, pesce Scongelamento di frutta, verdure • Sistemare gli alimenti congelati e senza • Qualora frutta e verdure restino crude, involucro su una piccola placca con angoli non scongelarle completamente all’interno con un contenitore al di sotto in modo che dell’apparecchiatura.
Seite 53
Pentole / Materiale Microonde Cottura al grill Scongela‐ Riscalda‐ Cottura mento mento Set pentola a vapore 1) Senza applicazioni o decorazioni in argento, oro, platino o metallo 2) Senza componenti in quarzo o metallo o smalti contenenti metalli 3) Sarà necessario attenersi alle istruzioni del produttore per le temperature massime. idoneo 5.
5.4 Avvio rapido Ogni programma di cottura viene conteggiato separatamente. Al termine del primo tempo impostato, il secondo programma di cottura Premere per attivare il forno a si avvia automaticamente. microonde. È possibile impostare i seguenti programmi Il tempo di cottura predefinito è di 30 secondi in modalità...
6. PROGRAMMI AUTOMATICI 4. Premere per confermare. AVVERTENZA! 5. Ruotare la manopola Impostazioni per Fare riferimento ai capitoli sulla impostare il peso. sicurezza. 6. Premere per confermare e attivare il 6.1 Cottura a vapore microonde. È possibile aumentare o 1. Posizionare il set di cottura a vapore sul diminuire il tempo impostato a set del piatto girevole.
Cibo Acqua (ml) Peso del cibo (g) Tempo di riposo (min.) (min) 1) St11 9:30 Petto di pollo 1) Dopo la cottura, tenere gli alimenti all’interno del pentola a vapore con il coperchio e la valvola chiusi. 6.2 Cottura automatica 4.
Menu Quantità Display Potenza Nota (min.) 250 g 4:30 Coprire con un in‐ 350 g 5:30 volucro di plastica e Pesce praticare alcuni fori. 450 g 7:00 120 ml (1 taz‐ 0:50 240 ml (2 taz‐ 1:40 Bevande 360 ml (3 taz‐ 2:30 50 g 1:10...
2. Assemblare le parti del Set Cottura 3. Posizionare il Set cottura vapore sul vapore: C - serbatoio dell'acqua, B - piatto girevole. cestello vapore, A - coperchio. Tenere chiusa la valvola del vapore durante la cottura. 8. FUNZIONI AGGIUNTIVE 8.1 Timer della cucina Quando l’orologio è...
9.1 Suggerimenti per la cottura a microonde Problema Soluzione Non è possibile trovare dettagli sulla quantità di Cercare un tipo di cibo simile. Aumentare o ridurre la durata cibo preparato. dei tempi di cottura in base alla seguente regola: • Una quantità...
10. PULIZIA E CURA residui di cibo. Assicurarsi di eliminare AVVERTENZA! vapore/umidità in eccesso. Fare riferimento ai capitoli sulla • Pulire lo sporco ostinato con un sicurezza. detergente speciale. • Pulire regolarmente tutti gli accessori e 10.1 Note e suggerimenti per la lasciarli asciugare.
11.2 Dati Assistenza La targhetta dei dati è applicata sull'apparecchiatura. Non rimuovere la Qualora non sia possibile trovare una targhetta dei dati dall'apparecchiatura. soluzione al problema, contattare il rivenditore o il Centro di Assistenza Autorizzato. Le informazioni necessarie per il Centro di Assistenza si trovano sulla targhetta dei dati.
Dimensioni Dimensioni Altezza 1) L’altezza minima dello spazio libero necessa‐ Larghezza rio al di sopra della superficie superiore del for‐ Profondità 12.4 Dimensioni del prodotto GARANZIA Servizio clienti Servizio dopo vendita Industriestrasse 10 Le Trési 6 Via Violino 11 5506 Mägenwil 1028 Préverenges 6928 Manno Morgenstrasse 131...
Seite 63
Per la Svizzera: Dove portare gli apparecchi fuori uso? In qualsiasi negozio che vende apparecchi nuovi oppure si restituiscono ai centri di raccolta ufficiali della SENS oppure ai riciclatori ufficiali della SENS. La lista dei centri di raccolta ufficiali della SENS è visibile nel sito www.erecycling.ch ITALIANO...
Seite 64
WE’RE THINKING OF YOU Thank you for purchasing an Electrolux appliance. You’ve chosen a product that brings with it decades of professional experience and innovation. Ingenious and stylish, it has been designed with you in mind. So whenever you use it, you can be safe in the knowledge that you’ll get great results every time.
SAFETY INFORMATION Before the installation and use of the appliance, carefully read the supplied instructions. The manufacturer is not responsible for any injuries or damage that are the result of incorrect installation or usage. Always keep the instructions in a safe and accessible location for future reference.
Seite 66
This appliance may be used in, offices, hotel guest rooms, • bed & breakfast guest rooms, farm guest houses and other similar accommodation where such use does not exceed (average) domestic usage levels. WARNING: The appliance and its accessible parts become •...
If smoke is emitted, switch off or unplug the appliance and • keep the door closed in order to stifle any flames. Microwave heating of beverages can result in delayed • eruptive boiling. Care must be taken when handling the container.
2.2 Electrical Connection • Before maintenance, deactivate the appliance and disconnect the mains plug from the mains socket. WARNING! • Clean regularly the appliance to prevent Risk of fire and electric shock. the deterioration of the surface material. • Do not allow food spills or cleaner residue •...
3. PRODUCT DESCRIPTION 3.1 General overview Lamp Safety interlock system Display Control panel Setting knob Door opener Waveguide cover Grill Turntable support 3.2 Control Panel Symbol Function Description — Display Shows the settings and current time. Grill To select the grilling function. Combi cooking To select the Combi cooking function.
Symbol Function Description Timer/Clock To set the hour of the day and the Kitchen tim‐ Presets/Steam Menu To choose in between two auto cooking mod‐ els. To activate the appliance or increase the cook‐ Start / +30 sec button ing time for 30 seconds at the selected power. Setting knob To set the cooking time or weight.
• Steam cooking 4. BEFORE FIRST USE 1. Set the function WARNING! 2. Let the oven operate for 30 minutes. Refer to Safety chapters. 3. Turn off the oven and let it cool down. 4. Clean the oven cavity with a moist soft 4.1 Removing protective film cloth and dry carefully.
Seite 72
• Pierce the skin or peel of potatoes, • Turn the food halfway through the tomatoes, sausages and similar types of defrosting time. If possible, separate and food with a fork several times before then remove the pieces that started to cooking so that the food does not burst.
Seite 73
Cookware / Material Microwave Grilling Defrosting Heating Cooking Roasting dishes made of metal, e. g. enamel, cast iron Baking tins, black lacquer or silicon-coated Baking tray Browning cookware, e. g. crisp pan or crunch plate Ready meals in packaging Steam pot set 1) With no silver, gold, platinum or metal plating / decorations 2) Without quartz or metal components, or glazes which contain metals 3) You must follow the manufacturer’s instructions about the maximum temperatures.
Symbol Power setting Power Combi Cooking 1 55 % Microwave, 45 % Grill (Lo) Combi Cooking 2 36 % Microwave, 64 % Grill (Hi) Defrost 270 W 5.4 Quick Start 4. Press to confirm and activate the microwave. Press to activate the microwave. 5.6 Multistage cooking The default cooking time is 30 second and it increases by 30 second with each additional...
5.7 Grilling and Combi Cooking 3. Turn the Setting knob to set the time. 4. Press to confirm and activate the 1. Press to set the desired microwave. function. 2. Press to confirm. 6. AUTOMATIC PROGRAMMES 4. Press to confirm. WARNING! 5.
Seite 76
Food Water (ml) Food weight (g) Time Standing time (min) (min) 1) St10 Shrimps 5:30 St11 9:30 Chicken Breast 1) After cooking, keep the food inside the Steam Pot with the lid and the valve closed. 6.2 Auto cooking 4. Turn the Setting knob to set the weight of the menu.
Menu Amount Display Power Time Note (min) 250 g 4:30 Cover with plastic 350 g 5:30 wrap and make Fish some holes in it. 450 g 7:00 120 ml (1 cup) 1 0:50 240 ml (2 1:40 cups) Beverage 360 ml (3 2:30 cups) 50 g...
2. Combine the steam pot parts: C - water 3. Place the steam pot on the turntable set. collector, B - steam basket, A - lid. Keep The Steam valve closed during cooking. 8. ADDITIONAL FUNCTIONS 8.1 Kitchen Timer When the clock is set, press the You can set a maximum 95 minutes.
Problem Remedy The food is not defrosted, hot or cooked when Set a longer cooking time or a higher power. Note that large the time ends. dishes need a longer time. After the cooking time ends, the food is overhea‐ Next time set a lower power and a longer time.
11. TROUBLESHOOTING WARNING! Refer to Safety chapters. 11.1 What to do if... Problem Possible cause Remedy The appliance does not op‐ The appliance is not plugged in. Plug in the appliance. erate. The appliance does not op‐ The fuse in the fuse box is blown. Check the fuse.
12.1 General Information 12.3 Minimal distances CAUTION! Do not connect the appliance to adapters or extension leads. This can cause overloading and risk of fire. CAUTION! The minimum installation height is 85 cm. • The microwave is for a kitchen counter Dimension top use only.
Point of Service Morgenstrasse 131 3018 Bern Langgasse 10 9008 St. Gallen Am Mattenhof 4a/b 6010 Kriens Schlossstrasse 1 4133 Pratteln Comercialstrasse 19 7000 Chur Spare parts service Industriestrasse 10, costs of materials, labour and travel. The 5506 Mägenwil, Tel. 0848 848 111 guarantee will lapse if the operating instructions and conditions of use are not Specialist advice/Sale Badenerstrasse 587,...