Search and download "Potensic Toy" from Google Play, or scan the QR code below to download. For smart phone with iOS 9.0+: Search and download "Potensic Toy" from App Store, or scan the QR code below to download. - 02 -...
Aircraft Overview Thank you for purchasing Potensic products. This chapter mainly introduces the features of Wisp and the names of various parts of aircraft and remote control. In order to make it easier for you to use the aircraft, please read this instructions carefully before you operate the aircraft.
Remote Control Diagram Battery Slot Fast 360° Rotate Battle Mode Speed Switch Headless Mode 3D Flip (Press down the middle button of the left stick) Control Stick Level Calibration Power Button Front Trimming One-key Take off/Land Right Trimming Take a Picture Back Trimming Emergency Stop Take a Video...
About Aircraft Aircraft Overview Wisp is mainly composed of flight control, communication system, infrared transceiver system, power system, and flight battery. The flight time can be up to 10 minutes. This chapter will introduce the basic functions of the aircraft. Attitude Hold: The aircraft only provides attitude stabilization and fixed altitude flight.
3D Flip Press down the middle button of the left stick, then one beep sound will emit from the remote control. Operate the right stick to control the aircraft’s flipping direction. Right flipping Left flipping Forward flipping Backward flipping 360° 360°...
Battery When the aircraft's power is too low, it should land in time and the battery be charged. As shown in the Picture, connect the adapter correctly to charge the battery. When charging, the indicator lights red, and after full charging, the indicator lights green. The charging time is about 2 hours.
50 meters. It can also display high-defini- tion images on mobile devices in real time through Potensic-Toy app (smoothly image transmission within 30m with no interference environment). The remote control is powered by 3 * AAA battery that included in the package.
Seite 11
Level Calibration After frequency linking, place the aircraft on the horizontal ground and press the level calibration key of the remote control for calibration. Then, the drone tail light "flashes alternately red and green" and turns green after calibration. Taking Off and Landing Manual take-off: Turn the left and right stick to the inside downwards at the same time (Picture 1), and push the throttle stick(left stick) upward.
50m(under no interference environment). 1. Turn on the drone, then enter the mobile phone “setting-WiFi” and connect "Potensic P7_xxxxxx", no passward is needed. 2. Start the mobile phone APP "Potensic Toy" to enter the operation interface. Operation Interface 10. Main interface 1.
Appendix Solutions Problems Causes Turn on the aircraft and the The frequency of the remote Do the frequency matching remote control, the tail light will control is not matched with the again. keep on red. But there is no aircraft successfully. reaction during operation.
Disclaimer and Notice The product is not a toy, but a precise equipment integrating mechanical, electronic, aerodynamics, high-frequency emission and other professional knowledge. It needs correct assembly and debugging to avoid accidents. The user must use a safe way to operate the drone. Improper operation may cause serious personal injury or property damage.
Warning and Tips 1. The package and instructions contain important information and should be properly kept. 2. It is your responsibility to ensure that this drone will not cause injury and property loss. 3. Our company and retailers shall not be responsible for any loss, damage and human injury caused by improper use or operation.
Seite 17
Inhalte 16 Lieferumfang 16 "Potensic Toy" herunterladen 17 Überblick des Fluggerätes Drohne-Diagramm Diagramm der Fernbedienung 19 Über das Fluggerät Überblick des Fluggerätes Status der Drohne-Anzeige Intelligenter Flug 3D Roll Over Kampfmodus Verteidigungsmodus 21 Batterie 21 Propeller installieren 22 Fernbedienung 24 Potensic Toy APP Verbindung mit Smartphone Bedienungsoberfläche...
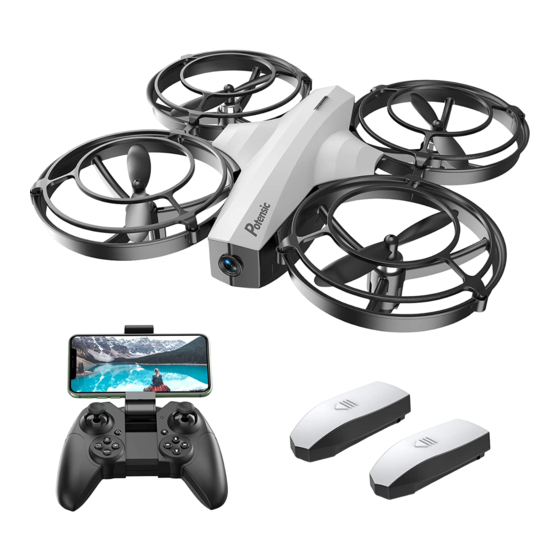
Propellern x 1 Potensic Toy herunterladen Für Smartphone mit Android 5.0+ oder Windows System: „Potensic Toy“ im Google Play finden und herunterladen, oder scannen Sie den folgenden QR-Code, um ihn herunterzuladen. Für Smartphone mit iOS 9.0+: „Potensic Toy“ im App Store finden und herunterladen, oder scannen Sie den folgenden QR-Code, um ihn herunterzuladen.
Überblick der Drohne TVielen Dank dafür, dass Sie sich für Potensic Produkte entschieden haben. In diesem Kapitel werden vor allem die Merkmale von Wisp und die Bezeichnungen verschiedener Bauteile des Fluggerätes und der Fernbedienung beschrieben. Um die Bedienung des Fluggerätes zu erleichtern, lesen Sie bitte diese Anleitung vor der ersten Benutzung des Fluggerätes sorgfältig durch.
Diagramm der Fernbedienung Batteriefach Schnelle 360° Umdrehung Kampfmodus Geschwind- Kopfloser Modus igkeitsschalter 3D Roll Over (Drücken Sie die Taste in den rechten Joystick) Steuerknüppel Waagerechte Power-Button Kalibrierung Vorwärts trimmen One-Button Abflug/Landung Nach rechts trimmen Ein Foto aufnehmen Rückwärts trimmen Not-Stop (für 2 Sekunden gedrückt Ein Video Nach links...
Über das Fluggerät Überblick des Fluggerätes Wisp besteht hauptsächlich aus Flugsteuerung, Kommunikationssystem, Infrarot-Transceiv- er-System, Power-System und Flugbatterie. Die Flugdauer beträgt bis zu 10 Minuten. In diesem Kapitel werden die grundlegenden Funktionen des Fluggerätes beschrieben. Höhehaltung: Das Fluggerät bietet lediglich Höhenstabilisierung und Flug auf einer bestimmten Höhe. Status der Drohne-Anzeigen Normaler Flug Leuchtet dauerhaft grün...
3D Roll Over Drücken Sie die Taste in den rechten Joystick. Sie können in den 3D-Roll-over-Modus wechseln, indem Sie einen Piepton hören. Der rechte Joystick kann die Drehrichtung steuern. Nach rechts drehen Nach links drehen Vorwärts drehen Rückwärts drehen 360° 360°...
Batterie Wenn der Batteriestand des Fluggerätes zu niedrig ist, soll es rechtzeitig landen, dann soll die Batterie aufgeladen werden. Wie in der Abbildung dargestellt, schließen Sie den Adapter richtig an, um die Batterie aufzuladen. Während der Aufladung leuchtet die Anzeige rot und nach der vollständigen Aufladung leuchtet die Anzeige grün.
Bedienungen und Einstellungen zwischen dem Fluggerät und der Kamera innerhalb des maximalen Kommunikationsabstandes von 50 Metern abschließen kann. Es kann auch in Echtzeit über Potensic-Toy App hochauflösende Bilder auf mobilen Geräten darstellen (reibungslose Bildübertragung innerhalb von 30 m ohne Störung in der Umgebung).
Waagerechte Kalibrierung Legen Sie das Fluggerät nach der Frequenzkopplung auf den horizontalen Boden und drücken Sie zur Kalibrierung die Taste für waagerechte Kalibrierung auf der Fernbedienung. Dann „blinkt das Rücklicht der Drohne abwechselnd rot und grün“, nach der Kalibrierung leuchtet es grün. Abflug und Landung Manueller Abflug: Schwenken Sie den linken und rechten Knüppel gleichzeitig nach innen und unten und schwenken Sie den Drosselknüppel (linken Knüppel)
1. Schalten Sie die Drohne ein, geben Sie dann das Mobiltelefon „Einstellung-WiFi“ ein und verbinden Sie es mit „Potensic P7 _ xxxxxx“, es ist kein Passwort erforderlich. 2. Starten Sie die APP „Potensic Toy“ auf dem Mobiltelefon, um in die Bedienungsober- fläche zu gelangen.
Anhang Häufig gestellte Fragen Lösungen Probleme Ursachen Schalten Sie das Fluggerät und Die Frequenz der Wiederholen Sie die die Fernbedienung ein, das Fernbedienung ist nicht Frequenzabstimmung. Rücklicht wird dauerhaft rot erfolgreich auf die Frequenz leuchten. Aber es gibt keine des Fluggerätes abgestimmt. Reaktion während der Bedienung.
Erklärungen und Hinweise Das Produkt ist kein Spielzeug, sondern ein präzises Gerät, in das mechanische, elektronische und aerodynamische Fachkenntnisse sowie Fachkenntnisse über Hochfrequenzemissionen und andere Fachkenntnisse integriert sind. Das Gerät benötigt eine korrekte Montage und Debugging, um Unfälle zu vermeiden. Der Anwender muss die Drohne auf eine sichere Art und Weise bedienen. Unsachgemäße Bedienung kann schwere Körperverletzungen oder Sachschäden verursachen.
6. Bleiben Sie fern von den mit hoher Geschwindigkeit rotierenden Teilen Wenn die Rotoren der Drohne mit hoher Geschwindigkeit rotieren, halten Sie die Bediener sowie die Menschen und Gegenstände in der Umgebung fern von den rotierenden Teilen, um Gefahren und Schäden zu vermeiden. Warnungen und Tipps 1.
Seite 31
Contenus 30 Liste d'emballage 30 Télécharger l'application "Potensic Toy" 31 Aperçu du drone Diagramme de drone Diagramme de télécommande 33 Par rapport du drone Aperçu du drone État de l'indicateur de charge Vol Intelligent Rouleau 3D Mode de combat Mode défense 35 Batterie 35 Installation des hélices...
Téléchargez l'application "Potensic Toy" Pour le téléphone intelligent avec le système d'Android 5.0+ ou de windows : Recherchez et téléchargez "Potensic Toy" du Google Play, ou scannez le code QR ci-dessous pour télécharger. Pour le téléphone intelligent avec l'iOS 9.0+ : Recherchez et téléchargez "Potensic Toy"...
Aperçu du drone Merci d'avoir acheté les produits de Potensic. Ce chapitre introduit principalement les fonctionnements d'Wisp et les noms des parties variantes du drone et de la télécommande. Afin de vous faciliter l'utilisation du drone, veuillez lire ces instructions soigneusement avant l'opération du drone. A la fois, veuillez conserver cette instruction correctement comme référence pour l'utilisation future.
Diagramme de télécommande Rotation Rapide de 360° Emplacement de Batterie Mode de Combat Commutateur Mode Sans Tête de Vitesse Rouleau 3D (appuyez sur le bouton central du joystick droit) Manette de contrôle Bouton Calibration d'alimentation de Niveau Trimming Avant Décollage/Atter- rissage d'un clic Trimming Arrière Rückwärts...
Par rapport au drone Aperçu de drone Wisp est principalement composé d'un contrôle de vol, d'un système de communication, d'un système d'émetteur-récepteur infrarouge, d'un système d'alimentation et d'une batterie de vol. Le temps de vol peut aller jusqu'à 10 minutes. Ce chapitre va introduire les fonctionnements de base du drone.
Rouleau 3D Appuyez sur le bouton central du joystick droit. Vous pouvez passer en mode de rouleau 3D lorsque vous entendez un bip. Le joystick droit peut contrôler la direction du flip. Tournez à droite Tournez à gauche Tournez en avant Tournez en arrière 360°...
Batterie Lorsque la puissance du drone est très faible, il doit atterrir à l'heure et la batterie doit être chargée. Comme illustré à l'image, connectez correctement l'adapteur pour charger la batterie. Lors du chargement, l'indicateur allume en rouge. Et après le chargement complet, l'indicateur allume en vert.
50 mètres. Il peut aussi afficher les images HD sur les appareils mobiles en temps réel par l'application "Potensic Toy" (transmission d'image fluide à l'intérieur de 30 mètres sans interférence). La télécommande est alimentée par 3 batteries AAA inclues dans l'emballage.
Calibration de Niveau Après la liaison de fréquence, placez le drone sur le sol horizontal, et appuyez sur la clé de calibration de niveau de la télécommande pour la calibration. Ensuite, le feu arrière du drone "clignote en alternance en rouge et en vert" et devient vert après la calibration.
1. Allumez le drone, ensuite entrez à la "configuration-WIFI" du téléphone mobile, et connectez "Potensic P7_xxxxxx". Aucune passe de mot n'est nécessaire. 2. Démarrez l'application du téléphone mobile "Potensic Toy" pour entrer à l'interface de l'opération. Interface d'opération 1.
Spécification Drone Poids de décollage: 68g Vitesse maximale de montée: 2m/s Vitesse maximale de descente: 1m/s Vitesse maximale de vol horizontal: 5m/s Durée de vol: environ 10 minutes Température de l'environnement de travail: 0°C ~ 40°C Système de positionnement: positionnement à flux optique Fréquence d'opération: 2.402 - 2.483GHz Caméra Objectif: FOV 78°...
Appendice Questions fréquentes Résolutions Problèmes Raisons Démarrez le drone et la La fréquence de la Refaites la correspondance de télécommande. Le feu arrière va télécommande ne correspond fréquence. rester en rouge. Mais il n'y aura pas avec le drone avec succès. pas de réaction pendant l'opération.
Clause et avis de non-responsabilité Ce produit n'est pas un jouet, mais un équipement précis intégrant mécanique, électronique, aérodynamique, d'émission de haute fréquence et des autres connaissances professionnelles. Il a besoin de l'assemblage et du débogage corrects pour éviter les accidents. L'utilisateur doit utiliser une méthode sûre pour faire fonctionner le drone.
Seite 44
6. Eloignez les parties de rotation à grande vitesse. Lorsque le rotor de drone tourne à une grande vitesse, éloignez les opérateurs, les gens et les objets à l'entour des parties de rotation pour éviter les dangers et les dommages. Avertissement et astuces 1.
Seite 45
Contenido 43 Lista de paquetes 43 Descargar Potensic Toy 44 Descripción general del drone Diagrama del drone Diagrama de control remoto 46 Acerca del drone Descripción general del drone Estado del indicador del drone Vuelo inteligente Rollo 3D Modo de batería Modo de defensa 48 Batería...
Busque y descargue "Potensic Toy" de Google Play, o escanee el código QR a continuación para descargar. Para teléfonos inteligentes con iOS 9.0+: Busque y descargue "Potensic Toy" de la App Store, o escanee el código QR a continuación para descargar. - 44 -...
Descripción general del drone Gracias por comprar productos de la marca Potensic. Este capítulo presenta principalmente las características de Wisp y los nombres de varias partes de la aeronave y del control remoto. Para facilitarle el uso de la aeronave, lea atentamente estas instrucciones antes de operar la aeronave.
Diagrama de control remoto Ranura de batería Rotación rápida 360° Modo de batalla Interruptor de Modo sin cabeza velocidad Rollo 3D (Presione el botón central del joystick derecho) Palanca de control Botón de encendido Calibración de nivel Recorte frontal Despegue/aterrizaje con un botón Recorte derecho Tomar una foto...
Acerca del drone Descripción general del drone Wisp se compone principalmente de control de vuelo, sistema de comunicación, sistema de transceptor de infrarrojos, sistema de energía y batería de vuelo. El tiempo de vuelo puede ser de hasta 10 minutos. Este capítulo presentará...
Rollo 3D Presione el botón central del joystick derecho. Puede cambiar al modo de sustitución 3D cuando escuche un pitido. El joystick derecho puede controlar la dirección del giro. Voltear a la derecha Voltear a la izquierda Voltear hacia adelante Voltear hacia atrás 360°...
Batería Cuando la batería del drone es demasiado baja, debe aterrizar a tiempo y cargar la batería. Como se muestra en la figura, conecte el adaptador correctamente para cargar la batería. Durante el proceso de carga, la luz indicadora se vuelve roja y cuando está completamente cargada, la luz indicadora se vuelve verde.
Potensic-Toy (transmisión de imágenes sin problemas dentro de los 30 m sin interferencia). El control remoto funciona con 3 pilas AAA incluidas en el paquete.
Seite 53
Calibración de nivel Después de la vinculación de frecuencia, coloque la aeronave en el suelo horizontal y presione la tecla de calibración de nivel del control remoto para la calibración. Luego, la luz trasera del drone "parpadea alternativamente en rojo y verde" y se vuelve verde después de la calibración.
1. Encienda el drone, luego ingrese el "Configuración-WiFi" del teléfono móvil y conecte "Potensic P7_xxxxxx", no se necesita ninguna contraseña. 2. Inicie la Aplicación del teléfono móvil "Potensic Toy" para ingresar a la interfaz de operación. Interfaz de operación 1.
Especificación Drone Despegue de peso: 68g Velocidad máxima de subida: 2m/s Velocidad máxima de descenso: 1m/s Velocidad máxima de vuelo horizontal: 5m/s Tiempo de vuelo: unos 10 minutos. Temperatura ambiente de trabajo: 0 °C ~ 40 °C Sistema de posicionamiento: posicionamiento de flujo óptico Frecuencia de funcionamiento: 2.402 - 2.483GHz Cámara Lente: FOV 78°...
Apéndice Preguntas más frecuentes Soluciones Problemas Causas Encienda la aeronave y el La frecuencia del control Haz la vinculación de frecuencia control remoto, la luz trasera remoto no se vincula con el de nuevo. sigue en rojo. Pero no hay aeronave con éxito.
Descargo de responsabilidad y aviso El producto no es un juguete, sino un equipo preciso que integra mecánica, electrónica, aerodinámica, emisión de alta frecuencia y otros conocimientos profesionales. Necesita un correcto montaje y eliminación de fallos para evitar accidentes. El usuario debe utilizar una forma segura de operar el drone.
Advertencias y consejos 1. El paquete y las instrucciones contienen información importante y deben guardarse adecuadamente. 2. Es su responsabilidad asegurarse de que este drone no cause lesiones ni pérdidas materiales. 3. Nuestra empresa y los minoristas no serán responsables de ninguna pérdida, daño o lesión humana causados por uso u operación inadecuados.
Seite 59
Contenuti 58 Elenco dei pacchetti 58 Scarica “Potensic Toy” 59 Panoramica del drone Diagramma del drone Diagramma del telecomando 61 Informazioni del drone Panoramica degli aeromobili Stato dell’indicatore del drone Volo intelligente Rotolo 3D Modalità di battaglia Modalità di Difesa...
Seite 60
Scarica Potensic Toy Per telefono con Android 5.0+ o sistema Windows: Cerca e scarica “Potensic Toy” da Google Play, oppure scansiona il codice QR qui sotto per scaricare. Per telefono con iOS 9.0+: Cerca e scarica “Potensic Toy” da App Store, oppure scansiona il codice QR qui sotto per scaricare.
Seite 61
Panoramica del drone Grazie per aver acquistato i prodotti Potensic. Questo capitolo introduce principalmente le caratteristiche di Wisp e i nomi delle varie parti del drone e del telecomando. Per rendere più facile l’utilizzo del drone, si prega di leggere attentamente queste istruzioni prima di utilizzare il drone.
Seite 62
Diagramma del telecomando Rotazione Modalità di Fessura di batteria veloce di 360° battaglia Interruttore di Modalità velocità senza testa Rotolo 3D (Premere il pulsante centrale della levetta destra) Levetta Pulsante di Calibrazione orizzontale alimentazione Regola in avanti Un tocco di decollo / atterraggio Regola a destra Scatta una foto...
Seite 63
Informazioni del drone Panoramica degli aeromobili Wisp è composto principalmente da controllo di volo, sistema di comunicazione, sistema di ricetrasmettitore a infrarossi, sistema di alimentazione e batteria di volo. Il tempo di volo può essere fino a 10 minuti. Questo capitolo introdurrà le funzioni di base del drone. Mantenimento Attitude: il drone fornisce solo stabilizzazione dell’...
Seite 64
Rotolo 3D Premere il pulsante centrale della levetta destra. È possibile passare alla modalità Rotolo 3D quando si sente un segnale acustico. La levetta destra può controllare la direzione del ribaltamento. Gira a destra Gira a sinistra Gira in avanti Gira indietro 360°...
Batteria Quando la potenza del drone è troppo bassa, dovrebbe atterrare in tempo e la batteria dovrebbe essere caricata. Come mostrato nell’immagine, si prega di collegare correttamente l’adattatore per caricare la batteria. Durante la ricarica, l’indicatore si accende in rosso, e dopo la ricarica complete, l’indicatore si accende in verde.
La distanza di comunicazione massima di 50 metri. Può anche visualizzare immagini ad alta definizione su dispositivi mobili in tempo reale tramite l’App Potensic-Toy (trasmissione uniforme delle immagini entro 30m senza interferenze ambientali). Il telecomando è alimentato da batteria 3 * AAA inclusa nel pacchetto.
Seite 67
Calibrazione orizzontale Dopo il collegamento della frequenza, si prega di posizionare il drone sul terreno orizzontale e premere il tasto di calibrazione orizzontale del telecomando per la calibrazione. Poi, la luce della coda del drone “lampeggia alternativamente in rosso e verde” e diventa verde dopo la calibrazione. Decollo e atterraggio Decollo manuale: ruota la levetta sinistra e quella destra all'interno verso il basso allo stesso tempo (figura 1) e spingi la levetta dell'acceleratore (levetta sinistra)
Seite 68
Wisp può anche controllare direttamente il drone tramite il telefono. Si prega di notare che la distanza del telecomando è di 50m (in assenza di interferenze). 1. Attiva il drone, quindi inserisci il telefono “setting-WiFi” e collega “Potensic P7_xxxxxx”, non è necessario alcun passward.
Seite 69
Specifica Drone Peso al decollo: 68g Velocità massima ascendente: 2m/s Velocità massima di discesa: 1m/s Velocità massima di volo orizzontale: 5m/s Tempo di volo: circa 10 minuti Temperatura ambiente di lavoro: 0℃ ~ 40℃ Sistema di posizionamento: posizionamento del flusso ottico Frequenza operativa: 2.402 - 2.483GHz Telecamera Obiettivo: FOV 78°...
Appendice Domande frequenti Soluzioni Problemi Cause Accendi il drone e il telecomando, La frequenza del telecomando Ripeti la corrispondenza della il fanale posteriore rimarrà rosso. non è compatibile con il drone. frequenza Ma non c’è reazione durante l’operazione Dopo aver inserito la batteria del 1.
Seite 71
Dichiarazione di non responsabilità e avviso Il prodotto non è un giocattolo, ma un’apparecchiatura precisa che integra meccanica, elettronica, aerodinamica, emissioni ad alta frequenza e altre conoscenze professionali. Ha bisogno di un corretto assemblaggio e regolazione per evitare incidenti. L’utente deve utilizzare un modo sicuro per utilizzare il drone.
Seite 72
Avvertenza e suggerimenti 1. La confezione e le istruzioni contengono informazioni importanti e devono essere adeguatamente conservate. 2. È tua responsabilità di garantire che questo drone non causerà lesioni e perdite di proprietà. 3. La nostra azienda e i rivenditori non saranno responsabili per eventuali perdite, danni e lesioni umane causati da uso o operzione impropri.
Seite 74
予備ブレード x 2ペア ドローン充電器 x 1 ドライバー x 1 (CCWおよびCW) 取扱説明書 x 1 単4電池 x 3 プロペラ 取り外す ツール x 1 Potensic Toyをダウンロードする Android 5.0+またはWindowsシステムを搭載したスマホの場合: Google Playで「 Potensic Toy 」を検索してダウンロードしてください,または、以下のQRコー ドをスキャンしてダウンロードしてください。 iOS 9.0以降を搭載したスマホの場合: App Storeから「 Potensic Toy 」を検索してダウンロードしてください,または、以下のQRコー ドをスキャンしてダウンロードしてください。 - 72 -...
Seite 87
Changes or modifications not expressly approved by the party responsible for compliance could void the user’s authority to operate the equipment. This device complies with Part 15 of the FCC Rules. Operation is subject to the following two conditions: (1) this device may not cause harmful interference, and (2) this device must accept any interference received, including interference that may cause undesired operation.