m-cro MICRO FLEX Gebrauchsanleitung
Inhaltsverzeichnis
Verfügbare Sprachen
Verfügbare Sprachen
Recyclable paper
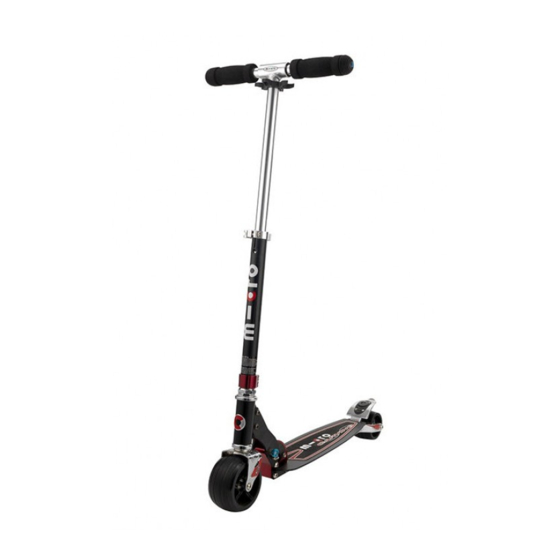
MICRO FLEX
MICRO FLEX AIR
MICRO FLEX 200 mm
MICRO BULLET
MICRO MONSTER BULLET
MICRO SPRITE
MICRO LIGHT
MICRO ROCKET
MICRO SPEED+
MICRO WHITE + BLACK
MICRO SUSPENSION
MICRO EAZY
MICRO CRUISER
Gebrauchsanleitung
Deutsch .... 05
English ...... 19
Español ..... 33
Français .... 47
Italiano ..... 61
... 75
中文 (繁)
Inhaltsverzeichnis

Verwandte Anleitungen für m-cro MICRO FLEX


Inhaltszusammenfassung für m-cro MICRO FLEX
- Seite 1 MICRO FLEX MICRO FLEX AIR MICRO FLEX 200 mm MICRO BULLET MICRO MONSTER BULLET MICRO SPRITE MICRO LIGHT MICRO ROCKET MICRO SPEED+ MICRO WHITE + BLACK MICRO SUSPENSION MICRO EAZY MICRO CRUISER Gebrauchsanleitung Deutsch ..05 English ..19 Español ..33 Français ..
-
Seite 4: Produktteile
Produktteile Spannhebel (Lenkrohr) Klapphebel (Lenkrohr) Rändelschraube (Lenkrohr) Druckknopf Druckknopf Lenkrohrsperre Schnappknopf (Lenkgriff) Schraube (Lenkgriff) Klemme Schnappknopf (Teleskopstange) Rändelschraube (Teleskopstange) Spannhebel (Teleskopstange) Hinterradbremse... -
Seite 5: Inhaltsverzeichnis
InhaltsverzeIchnIs Inhaltsverzeichnis Verwendung ..................2 Produktteile ...................4 Gebrauchsanleitung lesen und aufbewahren .........6 Sicherheitshinweise ................7 Montageanleitung ................10 Lenkrohr auf- und zuklappen ............... 10 Griffe / Lenkstange montieren und entfernen ........13 Höhe der Teleskopstange einstellen ........... 14 Bremssystem ..................14 Wartung ....................15 Garantiebestimmungen ...............15 Entsorgung ................... -
Seite 6: Gebrauchsanleitung Lesen Und Aufbewahren
Gebrauchsanleitung lesen und aufbewahren GebrauchsanleItunG lesen und aufbewahren Liebe Kundin, lieber Kunde, schön, dass Sie sich für Micro (das Original) entschieden haben – Sie können sicher sein, dass Sie ein hochwertiges Produkt erworben haben. Wir bieten Ihnen darüber hinaus einen guten After-Sales-Service an. -
Seite 7: Sicherheitshinweise
sIcherheItshInweIse Sicherheitshinweise WARNUNG! Verletzungs- und Unfallgefahr! Unvorsichtiger und unsachgemässer Umgang kann zu ernsthaften oder sogar tödlichen Unfällen und Verletzungen führen. Beachten Sie die folgenden Hinweise um Verletzun- gen und Unfälle zu vermeiden. • Kontrollieren Sie lhren MICRO SCOOTER vor jeder Fahrt und vergewissern Sie sich, dass alle Verriegler, Hebel, Muttern und Schrau ben fest angezogen sind. - Seite 8 sIcherheItshInweIse Bremsen, es besteht Verbrennungsgefahr. Vermeiden Sie längeres, kontinuierliches Betätigen der Bremse. • Fahren Sie nicht schneller als 10 km/h (6,2 MPH). • Meiden Sie Strassen, Wege und andere Orte mit Automobilverkehr. • Beachten Sie stets die Verkehrsregeln und Vorschriften. •...
- Seite 9 sIcherheItshInweIse WARNUNG! Erstickungsgefahr! Der MICRO SCOOTER enthält verschluckbare Kleinteile. Lassen Sie Kinder nicht mit der Verpackung und den Kleinteilen spielen. Kinder können sich beim Spielen darin verfan- gen und ersticken oder die Kleinteile verschlucken und daran ersticken. • Der MICRO SCOOTER muss von einem Erwachsenen zusammengebaut werden. VORSICHT! Quetschungsgefahr! Beim Auf- und Zuklappen des MICRO SCOOTER besteht die Gefahr von Quetschungen.
-
Seite 10: Montageanleitung
MontaGeanleItunG • Stützen Sie sich niemals mit dem ganzen Gewicht auf den Lenker, da sich dadurch das Rohr verbiegen kann und somit nicht mehr höhenverstellbar ist. Montageanleitung Lenkrohr auf- und zuklappen MICRO Light 1. Öffnen Sie den Spannhebel (siehe Abb. A). 2. - Seite 11 Klappen Sie dazu den Spannhebel auf, ziehen Sie die Rändelschraube an und spannen Sie den Spannhebel wieder. MICRO FLEX | FLEX AIR | FLEX 200 | SUSPENSION | Monster BULLET | SPEED+ | ROCKET | WHITE | BLACK Aufklappen: 1.
- Seite 12 MontaGeanleItunG Zuklappen: 1. Öffnen Sie den Spannhebel 2. Drücken Sie die Druckknöpfe gleichzeitig und klappen Sie das Lenkrohr ein (siehe Abb. G). MICRO EAZY − Aufklappen: Klappen Sie das Lenkrohr nach oben, bis die Lenkrohrsperre vollständig eingeras- tet und das Lenkrohr nicht mehr beweglich ist (siehe Abb. H). Drücken Sie dabei das Lenkrohr etwas nach vorne.
-
Seite 13: Griffe / Lenkstange Montieren Und Entfernen
MontaGeanleItunG Griffe / Lenkstange montieren und entfernen MICRO FLEX I FLEX AIR | FLEX 200 | SUSPENSION | BULLET | Monster BULLET | SPRITE | SPEED+ | ROCKET | WHITE | BLACK | MICRO EAZY − Griffe montieren: Stecken Sie die Griffe in das T-Stück des Lenkrohrs. Richten Sie die Griffe dabei so aus, dass beide Schnappknöpfe... -
Seite 14: Höhe Der Teleskopstange Einstellen
MontaGeanleItunG Höhe der Teleskopstange einstellen 1. Öffnen Sie den Spannhebel und drücken Sie den Schnappknopf nach innen (siehe Abb. L). 2. Die Teleskopstange kann jetzt auf die gewünschte Höhe verstellt werden. Ziehen Sie die Te- leskopstange soweit nach oben oder drücken Sie sie soweit nach unten, bis ein Schnappknopf wieder in der Öffnung einrastet. -
Seite 15: Wartung
wartunG Wartung • Reinigen Sie Ihren MICRO SCOOTER nach jedem Gebrauch mit einem feuchten, weichen Tuch. Reinigen Sie die Lager regelmässig mit einem weichen Tuch und fetten Sie sie in regelmässigen Abständen ein und tauschen Sie sie ggf. aus. Durch die Benutzung entstandene scharfe Kanten sind zu entfernen. - Seite 16 GarantIebestIMMunGen • Unfall oder unvorhergesehene Ereignisse (z.B. Blitz, Wasser, Feuer usw.) • Unsachgemässe Benutzung oder Transport • Missachtung der Sicherheits- und Wartungsvorschriften • Sonstige unsachgemässe Bearbeitung oder Veränderung • Verschleiss Die gesetzliche Gewährleistungspflicht des Herstellers/Händlers wird durch diese Garantie nicht eingeschränkt.
-
Seite 17: Entsorgung
entsorGunG Entsorgung Entsorgen Sie den MICRO SCOOTER entsprechend den in Ihrem Land gültigen Gesetzen und Bestimmungen. Verpackung entsorgen Entsorgen Sie die Verpackung sortenrein. Geben Sie Pappe und Karton zum Altpapier, Folien in die Wertstoffsammlung. MICRO SCOOTER entsorgen (Anwendbar in der Europäischen Union und anderen europäischen Staaten mit Systemen zur getrennten Sammlung von Wertstoffen) Altgeräte dürfen nicht in den Hausmüll! Sollte der MICRO SCOOTER einmal nicht mehr benutzt werden können, so ist je-... -
Seite 18: Micro Scooter-Pass
MICRO SCOOTER-PaSS MICRO SCOOTER-Pass Füllen Sie den SCOOTER-Pass aus. Lesen Sie die Seriennummer Ihres MICRO SCOOTER, die vorne auf dem MICRO SCOOTER eingestanzt ist. Bewahren Sie den Scooter-Pass an einem sicheren Ort auf. Eigentümer Vor- und Nachname: ................. Strasse/Hausnummer:................. SCOOTER Seriennummer: .................. - Seite 89 Micro Mobility Systems AG Bahnhofstrasse 10 8700 Küsnacht Switzerland Fon +41 (0) 44 910 11 22 info@micro.ms www.micro-mobility.com The micro® Team and kickboard® names, logos and devices are trademarks of Micro Mobility Systems AG, Switzerland Copyright © 2017. EN 14619 Class A...