Werbung
Quicklinks
BAR292/BAR292A
EN
to replace a cr2032 backup battery
prEcautIoNs
INtroductIoN
• Do not subject the unit to excessive force, shock, dust, temperature
Thank you for selecting the Oregon Scientific™ PRYSMAchrome
or humidity.
Weather Station. This device bundles precise time keeping, alarm, and
• Do not immerse the unit in water. If you spill liquid over it, dry it
temperature monitoring features into a single tool you can use from the
immediately with a soft, lint-free cloth.
convenience of your home. Keep this manual handy as you use your
new product. It contains practical step-by-step instructions, as well as
• Do not clean the unit with abrasive or corrosive materials.
technical specifications and warnings you should know.
• Do not tamper with the unit's internal components. This invalidates the
warranty.
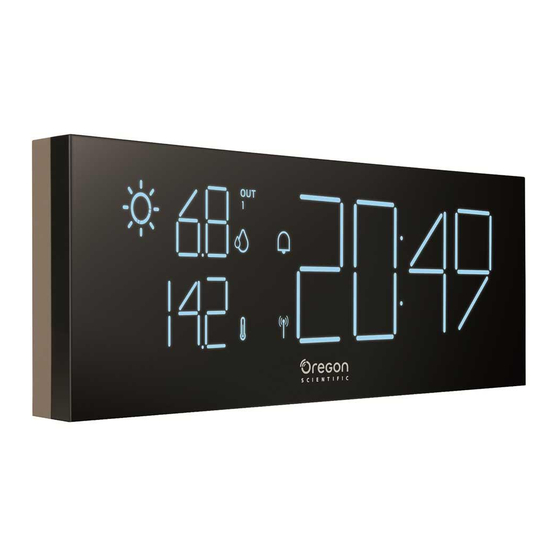
Lcd dIspLay
• Only use fresh batteries. Do not mix new and old batteries.
• Images shown in this manual may differ from the actual display.
Weather
Outdoor/Indoor
Time Display
forecast display
humidity display
• When disposing this product, ensure it is collected separately for
special treatment.
• Placement of this product on certain types of wood may result in
damage to its finish for which Oregon Scientific will not be responsible.
1. Open up the bottom left corner of the rubber cover, then gently push
the arched part of the backup battery door downwards as shown
Consult the furniture manufacturer's care instructions for information.
above.
• The contents of this manual may not be reproduced without the
permission of the manufacturer.
2. Replace the CR2032 backup battery to the compartment, then push
the battery compartment back into the main unit. Connect the main
• Do not dispose old batteries as unsorted municipal waste. Collection of
unit to the power supply and then press
.
such waste separately for special treatment is necessary.
When replacing the backup battery, flip the bottom left corner
• Please note that some units are equipped with a battery safety strip.
Outdoor/Indoor
NOTE
rubber cover only. Do not remove the entire rubber cover.
Remove the strip from the battery compartment before first use.
temperature display
NOTE
The technical specifications for this product and the contents
tEMpEraturE sENsItIVE Lcd dIspLay
of the user manual are subject to change without notice. To download
Icon
Description
an electronic copy of this user manual, please visit
In humidity display area (
): Low battery in remote sensor
The LCD display changes colors according to the temperature of the
http://global.oregonscientific.com/customerSupport.php.
In time display area (
first sensor with the lowest channel number available (e.g channel 1). If
): Low battery in main unit backup
battery (CR2032).
sensor channel 1 is not available, the LCD display will change its color
spEcIfIcatIoNs
according to the temperature of the next sensor channel (e.g. channel 2)
Remote sensor channel number
available in ascending order.
MaIN uNIt
You may also set the LCD display color manually by press and hold
Temperature/humidity auto-loop indicator
L x W x H
, then press
or
to toggle between the desired color number,
or choose auto to change colors according to the temperature.
Indoor temperature/humidity indicator
Weight
Humidity display indicator (%)
Outdoor Temperature (Channel 1)
Color
Color number
Temperature range
≤ 5.9 °C
Purple
1
Temperature display indicator (°C/°F)
Temperature accuracy
6 °C - 10.9 °C
Blue
2
Alarm is on.
11 °C - 15.9 °C
Pale blue
3
Temperature resolution
RCC signal reception indicator
16 °C - 20.9 °C
Green
4
Relative humidity
measurement
21 °C - 25.9 °C
Yellow
5
oVErVIEW
26 °C - 30 °C
Orange
6
Humidity accuracy
top VIEW
≥30.1°C
Red
7
Power
• Tab
to activate the brightest backlight (LV. 3) display for
5 seconds.
rEMotE uNIt (rtGN130/rtGN130a)
• Press
repeatedly to toggle the desired backlight display
brightness level (LV. 1/LV. 2/LV. 3).
L x W x H
• The unit might take some time to change its LED display color.
Weight
- Press to toggle the alarm display and alarm on/off. Press and hold
to enter alarm setting.
radIo rEcEptIoN
Transmission range
- Press to toggle between time and date display. Press and hold to
This unit is designed to automatically synchronize its calendar and clock
enter the setting.
Temperature range
when brought within the range of the radio signal. The main unit is able to
- Tap to snooze an alarm or activate the brightest backlight
receive RF clock data in different RCC signals from the sensors depend
for 5 seconds.
on the region:
Temperature accuracy
- Press to increase the value in setting, or press and hold to increase
a value rapidly in setting. Press to toggle the remote sensor channels
Region
Signal
Temperature resolution
in ascending order, or press and hold to search for the remote sensor.
- Press to decrease the value in setting, or press and hold to
EU
DCF
Relative humidity
decrease a value rapidly in setting. Press to toggle the remote sensor
UK
MSF
measurement
channels in descending order, or press and hold to remove selected
remote sensor.
US
WWVB
Humidity accuracy
rEar VIEW
Depending on the strength of the signal, the connection process takes
2 to 10 minutes. If the signal is weak, it could take up to 24 hours to
Signal frequency
receive a valid signal.
No. of channel selectable
Symbol
Description
aBout orEGoN scIENtIfIc
RCC is off
Visit our website www.oregonscientific.com to learn more about
RCC Time is received
Oregon Scientific products.
- Press to reset the unit to default.
For any inquiry, please contact our Customer Services at
- Press to turn on the RCC signal reception. Press and hold to
No RCC signal received
http://global.oregonscientific.com/customerSupport.php.
turn off.
Oregon Scientific Global Distribution Limited reserves the right to
- Micro USB power jack
The default time zone setting is Central (c) for the US and +/- 0 for
interpret and construe any contents, terms and provisions in this user
NOTE
- Press to toggle the temperature unit.
the EU/UK. Check your time zone setting before receiving the RCC signal.
manual and to amend it, at its sole discretion, at any time without
- Press to toggle the backlight brightness level. Press and hold
prior notice. To the extent that there is any inconsistency between the
to set the back light color.
English version and any other language versions, the English version
sEttING tIME MaNuaLLy
shall prevail.
remote sensor
1. Press and hold
. The screen displays
and the number flashes.
fcc statEMENt
2. Press once or press and hold
or
to adjust the setting. For EU/UK,
This device complies with Part 15 of the FCC Rules. Operation is subject
the time-zone offset sets the clock up to +/- 23 hours from the received
to the following two conditions: (1) This device may not cause harmful
clock signal time. For US, the time-zone setting is Central (c); Eastern
interference, and (2) This device must accept any interference received,
(E); Atlantic (a); Newfoundland (N); Pacific (p); Mountain (M).
including interference that may cause undesired operation.
3. Press
to confirm.
WARNING Changes or modifications not expressly approved by the
4. Press once or press and hold
or
to adjust the setting for 12/24
party responsible for compliance could void the user's authority to
hour format, hour, minute, year, calendar format (month-day/day-
operate the equipment.
month), month, date and daylight saving time (dst) auto/off.
This equipment has been tested and found to comply with the
NOTE
limits for a Class B digital device, pursuant to Part 15 of the FCC Rules.
5. Press
again to confirm.
These limits are designed to provide reasonable protection against
harmful interference in a residential installation.
NOTE
This equipment generates, uses and can radiate radio frequency energy
• The daylight saving time (dst) setting is available for the United
States only.
and, if not installed and used in accordance with the instructions, may
cause harmful interference to radio communications. However, there is
• The RCC and daylight saving time (dst) are disabled when the
cH Channel 1-5. If more than one sensor is being used, make sure
no guarantee that interference will not occur in a particular installation.
time/year, month or date is changed in the setting. The DST is also
If this equipment does cause harmful interference to radio or television
each one has a different channel number.
disabled when the RCC is turned off. If you turn the RCC back on, the
reception, which can be determined by turning the equipment off and on,
sEarcH Press to search for RCC function.
DST resumes from the last setting.
the user is encouraged to try to correct the nterference by one or more of
rEsEt Press if the sensor is not working correctly, after battery
• While in the setting mode, press and hold
to save the settings and
the following measures:
replacement or channel change.
return to idle.
Reorient or relocate the receiving antenna.
Increase the separation between the equipment and receiver.
GEttING startEd
aLarM fuNctIoN
Connect the equipment into an outlet on a circuit different from that to which
the receiver is connected.
connecting the main unit to power supply
setting/adjusting alarm time
Consult the dealer or an experienced radio / TV technician for help.
1. Press and hold
.
2. Use
and
to adjust the hour and press
to confirm.
dEcLaratIoN of coNforMIty
3. Use
and
to adjust the minute and press
to confirm.
The following information is not to be used as contact for support or
4. The alarm icon displays in idle. When the alarm sounds, it lasts for
sales. Please call our customer service number (listed on our website at
2 minutes.
www.oregonscientific.com),
While in the alarm setting mode, press
to save the settings and
or on the warranty card for this product for all inquiries instead.
NOTE
leave the alarm setting mode.
We
snooze function
• To use the snooze function, press the
on top of the clock when
Name:
the alarm sounds. The alarm will stop and start again after 8 minutes.
Address:
activating/deactivating the alarm
• Press
to turn on the alarm, press twice to turn off the alarm.
• When the alarm sounds, press
to stop the alarm. The alarm will
Telephone No.:
reactivate on the next day.
Connect the power cable to the Micro USB jack and plug the power
declare that the product
adaptor into a suitable power outlet.
WEatHEr forEcast
Product No.:
Inserting batteries into remote thermo sensor
This product forecasts the next 12 hours of weather in nearby area.
Product Name:
Manufacturer:
Screen display
Description
Address:
Sunny
is in conformity with Part 15 of the FCC Rules. Operation is subject
Partly cloudy
to the following two conditions: 1) This device may not cause harmful
interference. 2) This device must accept any interference received,
Cloudy
including interference that may cause undesired operation.
Eu-dEcLaratIoN of coNforMIty
Rainy
Hereby, Oregon Scientific, declares that this PRYSMAchrome Weather
1. Slide down the battery compartment cover to open, then insert 2 "AAA"
Station (Model: BAR292/BAR292A) is in compliance with R&TTE directive
Snowy
1999/5/EC. A copy of the signed and dated Declaration of Conformity is
batteries, matching the polarity as shown.
available on request via our Oregon Scientific Customer Service.
2. Press
. Slide to replace the battery compartment cover.
The main unit can connect up to 5 sensors. Press and hold + on
tEMpEraturE aNd HuMIdIty fuNctIoN
NOTE
the main unit to search for the remote sensor every time after adding a
The current outdoor/indoor temperature and humidity indicators locate at top
new sensor.
and bottom left of the screen. To receive outdoor temperature and humidity
information, you can connect up to 5 remote sensors to the main unit:
placement of the main unit
• Press
or
to toggle sensor display.
• Place the device as far as possible from computers and microwaves to
avoid any interference.
When the indoor temperature is lower than -5 °C (23.0 °F), the
dIsposaL INforMatIoN for usErs
NOTE
• Only use this device indoors in a dry location.
screen displays LL.L. When it is higher than 50 °C (122.0 °F), the screen
• Leave space around the device for ventilation purposes.
displays HH.H.
Pursuant to and in accordance with Article 14 of the Directive
• To ensure for good sound quality, do not cover the speaker.
When the indoor relative humidity is lower than 25%, the screen displays
2012/19/EU of the European Parliament on waste electrical and
LL. When it is higher than 95%, the screen displays HH.
electronic equipment (WEEE), and pursuant to and in accordance
placement of the remote thermo sensor
with Article 20 of the Directive 2006/66/EC of the European
to auto-loop between sensors:
Parliament on batteries and accumulators and waste batteries.
Press
or
repeatedly until
displays. The data on each sensor
displays for 3 seconds. Press +/-again turn off the auto-loop, the
icon
The barred symbol of the rubbish bin shown on the equipment indicates
that, at the end of its useful life, the product must be collected separately
turns off.
from other waste.
The sensor displays in ascending order. The main unit skips the
NOTE
absent sensor and advances to the next present sensor.
Please note that the batteries/rechargeable batteries must be removed
from the equipment before it is given as waste. To remove the batteries/
to search for remote sensors:
accumulators refer to the specifications in the user manual. Therefore,
Press and hold
.
any products that have reached the end of their useful life must be given
Max 164 ft (50 m)
to remove selected sensor:
to waste disposal centers specializing in separate collection of waste
electrical and electronic equipment, or given back to the dealer when
Min 5 ft (1.5 m)
Press and hold
.
purchasing a new WEEE, pursuant to and in accordance with Article 14 as
implemented in the country.
trouBLEsHoot
Place your sensor outside the home at a height of not less than 5 ft
The adequate separate collection for the subsequent start-up of the
(1.5 m), shielded from direct sunlight or wet conditions.
equipment sent to be recycled, treated and disposal of in an environmentally
Problem
Reason
Solution
• The
icon on the main unit flashes while searching the signal from
compatible way contributes to preventing possible negative effects on
The main unit
The main unit is not
the remote sensor.
Make sure the main unit is
the environment and health and optimizes the recycling and reuse of
does not display
connected to the
The radio signal reaches up to 164 ft (50 m) depending on
NOTE
connected with the power adapter.
components making up the apparatus.
conditions of surrounding.
at all.
power outlet.
replacing cr2032 backup battery
The outdoor display
The outdoor sensor is
Abusive disposal of the product by the user involves application of the
Reconnect the outdoor sensor.
area is blank.
removed.
administrative sanctions according to the laws in force.
This unit is equipped with a CR2032 battery as a backup power source.
The outdoor
The main unit is unable
When the main unit shows , replace the CR2032 backup battery.
Check the connection between the
display area
to receive data from
main unit and the sensor.
displays ---.
the remote sensor.
Make sure both main unit and the
The RCC signal
sensor are ready to receive the
The main unit
reception might
RCC signal. Press
on
does not receive
experiencing
the sensor and press
on the
RCC signal.
interference.
main unit to turn on the RCC signal
reception.
The main unit
The main unit is unable
Press
to reset the main
does not display
to receive data from
unit.
properly.
the remote sensor.
22 x 200 x 80 mm
224 g without batteries
-5.0 °C to +50.0 °C (23.0 °F to 122.0 °F)
0°C to 40°C: ±1°C (± 2.0°F)
T<0°C : ±2°C (± 4.0°F)
T>40°C : ±2°C (± 4.0°F)
0.1°C (0.2°F)
25% to 95% RH
40% to 80% RH: ±5%
25% to 40% RH: ±7%
80% to 95% RH: ±7%
5V adapter
CR2032 backup battery
125 x 50 x 19.5 mm
59 g without batteries
50 m (164 ft) unobstructed
-20 °C to 60 °C (-4 °F to 140 °F)
0°C to 40°C: ±1°C (± 2.0°F)
T<0°C : ±2°C (± 4.0°F)
T>40°C : ±2°C (± 4.0°F)
0.1 °C (0.2 °F)
25% to 95% RH
40% to 80% RH: ±5%
25% to 40% RH: ±7%
80% to 95% RH: ±7%
433 MHz
5
Oregon Scientific, Inc.
10778 SW Manhasset Dr.
UNIT B-2 Tualatin,
OR 97062 USA
1-800-853-8883
BAR292/BAR292A
PRYSMAchrome
IDT Technology Limited
Block C, 9/F, Kaiser Estate,
Phase 1, 41 Man Yue St.,
Hung Hom, Kowloon, Hong Kong
cH Canali 1-5. Se si sta usando più di un sensore, assicurarsi che
prEVIsIoNI MEtEo
affIcHaGE Lcd
ciascun sensore abbia un diverso numero di canale.
Premere per ricercare la funzione RCC.
Questo prodotto effettua previsioni del tempo della zona circostante delle
successive 12 ore.
Affichage des
rEsEt Premere se il sensore non sta funzionando correttamente,
sostituire la batteria o cambiare il canale.
prévisions météo
Visualizzazione schermo
Descrizione
coME INIzIarE
Soleggiato
collegare l'unità principale all'alimentatore
Parzialmente nuvoloso
Nuvoloso
Pioggia
Affichage de la température
extérieure/intérieure
Neve
Icône
Dans la zone d'affichage de l'humidité (
tEMpEratura E uMIdItà
dans le capteur à distance.
Gli indicatori dell'attuale temperatura e umidità esterne/interne sono
Dans la zone d'affichage de l'heure (
posizionati in alto e in basso a sinistra dello schermo. Per ricevere
l'unité principale. Pile de secours (CR2032).
informazioni relative a temperatura e umidità esterne è possibile
collegare fino a 5 sensori remoti all'unità principale:
Numéro de canal du capteur à distance
Collegare il cavo di alimentazione al jack della micro USB e collegare
• Premere
oppure
per passare alla visualizzazione dei sensori.
l'adattatore di corrente a una presa adeguata.
Indicateur de boucle automatique de température/humidité
Quando la temperatura interna è inferiore a -5 °C (23,0 °F) sullo
NOTA
Inserire le batterie nel termo sensore remoto
schermo viene visualizzato LL.L. Quando è superiore a 50 °C (122,0 °F)
Indicateur de température/humidité intérieure
sullo schermo viene visualizzato HH.H.
Quando la humidite relative interieure è inferiore a 25% sullo schermo
Indicateur d'affichage de l'humidité (%)
viene visualizzato LL. Quando è superiore a 95% sullo schermo viene
visualizzato HH.
Indicateur d'affichage de la température (°C/°F)
Per passare automaticamente da un sensore all'altro:
Alarme activée
Premere
oppure
ripetutamente finché non
viene visualizzato . I dati
di ciascun sensore sono visualizzati per 3 secondi. Premere nuovamente
Indicateur de r
+/- per disattivare l'alternanza automatica, l'icona si spegne.
I sensori sono visualizzati in ordine crescente. L'unità principale
NOTA
salta i sensori assenti e avanza fino al successivo sensore collegato.
per ricercare sensori remoti:
1. Far scorrere il coperchio del vano batterie per aprirlo, quindi inserire
Tenere premuto
.
batterie AAA, facendo attenzione alle polarità come mostrato.
per rimuovere il sensore selezionato:
2. Premere rEsEt. Far scorrere il coperchio in senso contrario per
Tenere premuto
.
chiudere il vano batterie.
L'unità principale può connettersi ad un massimo di 5 sensori.
NOTA
rIsoLuzIoNE dEI proBLEMI
Mantenere premuto + sull'unità principale per avviare la ricerca del
sensore ogni volta che si aggiunge un nuovo sensore.
Problema
Causa
Soluzione
Posizionamento dell'unità principale
Sull'unità principale
L'unità principale
Assicurarsi che l'unità principale
non viene visualizzato
non è collegata alla
sia collegata con l'adattatore di
• Posizionare il dispositivo il più lontano possibile da computer e
nulla.
presa di corrente.
corrente.
microonde, per evitare interferenze.
• Utilizzare questo dispositivo solo in un luogo interno e asciutto.
L'area di visualizzazione
Il sensore esterno
Ricollegare il sensore esterno.
dei dati esterni è vuota.
è stato rimosso.
• Lasciare spazio libero attorno al dispositivo per permettere la
ventilazione.
Nell'area di visualiz-
L'unità principale
zazione dei dati
non riesce a
Verificare il collegamento tra l'unità
• Per assicurare una buona qualità del suono non coprire l'altoparlante.
esterni viene visualiz-
ricevere dati dal
principale e il sensore.
posizionamento del termo sensore remoto
zato ---.
sensore remoto.
Assicurarsi che l'unità principale e il
La ricezione del
sensore siano pronti per ricevere il
segnale RCC
L'unità principale non
segnale RCC. Premere
potrebbe essere
riceve il segnale RCC.
sul
sensore
e
premere
disturbata da
sull'unità principale per attivare la
interferenze.
ricezione del segnale RCC.
Lo schermo dell'unità
L'unità principale
principale non
non riesce a
Premere
per resettare
funziona in maniera
ricevere i dati dal
l'unità principale.
Max 164 ft (50 m)
corretta.
sensore remoto.
Min 5 ft (1.5 m)
prEcauzIoNI
Posizionare il sensore all'esterno dell'abitazione a un'altezza superiore
• Non sottoporre il prodotto a forza eccessiva, urti, polvere,
a 1,5 m (5 piedi), in un luogo riparato da luce solare diretta o umidità.
temperatura o umidità.
• L'icona
sull'unità principale lampeggia quando riceve segnali dal
• Non immergere l'unità in acqua. Se si versa del liquido sul prodotto,
sensore remoto.
asciugarlo immediatamente con un panno morbido e privo di
NOTA
Il segnale radio arriva fino a 50 m (164 piedi) di distanza, a
lanugine.
seconda dell'ambiente circostante.
• Non pulire l'unità con materiali abrasivi, corrosivi o contenenti alcool,
sostituire la batteria di backup cr2032
in quanto possono causare danni.
Questa unità è fornita di una batteria
CR2032 come backup. Quando
• Non manomettere i componenti interni dell'unità. Questo invalida la
compare nell'unità principale sostituire la batteria di backup CR2032.
garanzia.
• Utilizzare solo batterie nuove. Non mischiare batterie vecchie e
nuove.
• Le immagini del manuale possono differire dalla realtà.
• Al momento dello smaltimento del prodotto, conferirlo ai centri di
raccolta specifici.
• Il posizionamento del prodotto su determinati tipi di legno può
provocare danni alle finiture per le quali Oregon Scientific non sarà
responsabile. Consultare le istruzioni fornite dal produttore del
mobile per informazioni.
come sostituire la batteria di backup cr2032
• Il contenuto di questo manuale non può essere riprodotto senza il
permesso del produttore.
• Non smaltire le batterie vecchie come rifiuto non differenziato. E'
necessario raccoglieretali rifiuti separatamente per un trattamento
speciale.
• Si prega di notare che alcune unità sono dotate di una striscia di
sicurezza della batteria. Rimuovere la striscia dal componente
batteria prima del primo utilizzo.
Le specifiche tecniche del prodotto e il contenuto del manuale
NOTA
per l'utente possono essere modificati senza preavviso. Si prega di
visitare il sito http://global.oregonscientific.com/customerSupport.php
per scaricare una versione elettronica del manuale.
1. Sollevare l'angolo in basso a sinistra della copertura di gomma, quindi
carattErIstIcHE
spingere con delicatezza la parte arcuata del coperchio della batteria
Unità principale
di backup verso il basso, come indicato sopra.
2. Sostituire la batteria di backup CR2032 presente nel vano, quindi
L x L x A
22 x 200 x 80 mm
riposizionare il vano della batteria nell'unità principale.
Peso
224 g senza batterie
Quando si sostituisce la batteria di backup, sollevare soltanto la
NOTA
copertura in gomma nell'angolo in basso a sinistra. Non rimuovere l'intera
Intervallo temperatura
da -5 °C a 50 °C (da 23 °F a 122 °F)
copertura di gomma.
da 0 °C a 40 °C: ±1 °C (± 2,0 °F)
Tolleranza temperatura
T<0 °C: ±2°C (± 4,0 °F)
aLtErNaNza dEI coLorI dEL dIspLay Lcd
T>40 °C: ±2°C (± 4,0 °F)
ll display LCD cambia colore in base alla temperatura del sensore
Tolleranza temperatura
0,1 °C (0,2 °F)
con il numero di canale più basso disponibile (ad es. canale 1). Se il
canale 1 non è disponibile, il display LCD cambierà colore sulla base
Misurazione umidità
da 25% a 95% RH
della temperatura del canale di sensore successivo (ad es. canale 2) in
relativa
ordine crescente. È inoltre possibile impostare il colore del display LCD
da 40% a 80% RH: ±5%
manualmente tenendo premuto
, quindi premendo
oppure
Tolleranza umidità
da 25% a 40% RH: ±7%
per visualizzare il numero corrispondente al colore desiderato (vedere
da 80% a 95% RH: ±7%
tabella sottostante), oppure scegliere auto per cambiare colore in base
adattatore 5 V
alla temperatura.
Alimentazione
Batteria di backup CR2032 (inclusa)
Temperatura esterna
Colorer
Numero colore
Unità remota (RtHN130/RtHN130A)
≤ 5.9 °C
Viola
1
6 °C - 10.9 °C
Blu
2
L x L x A
125 x 50 x 19,5 mm
11 °C - 15.9 °C
Azzurro
3
Peso
59 g senza batterie
16 °C - 20.9 °C
Verde
4
Intervallo trasmissione
50 m (164 piedi) senza ostacoli
21 °C - 25.9 °C
Giallo
5
Intervallo temperatura
da -20 °C a 60 °C (da -4 °F a 140 °F)
26 °C - 30 °C
Arancione
6
da 0 °C a 40 °C: ±1 °C (± 2,0 °F)
≥30.1°C
Rosso
7
Tolleranza temperatura
T<0 °C: ±2°C (± 4,0 °F)
T>40 °C: ±2°C (± 4,0 °F)
• Toccare
per attivare la massima retroilluminazione (LV. 3)
Tolleranza temperatura
0,1 °C (0,2 °F)
per 5 secondi.
• Premere
ripetutamente per selezionare il livello di luminosità
Misurazione umidità
da 25% a 95% RH
relativa
desiderato della retroilluminazione (LV. 1/LV. 2/LV. 3) del display.
da 40% a 80% RH: ±5%
• The unit might take some time to change its LED display color.
Tolleranza umidità
da 25% a 40% RH: ±7%
da 80% a 95% RH: ±7%
rIcEzIoNE radIocoNtroLLo
Frequenza segnale
433 MHz
Questa unità è progettata per sincronizzare automaticamente calendario
e orologio quando si trova a portata del segnale radio. L'unità principale
N° di canali selezionabili
5
riceve dai sensori i dati dell'orario come frequenze radio in diversi segnali
RCC a seconda della regione:
INforMazIoNI su orEGoN scIENtIfIc
Regione
Segnale
Per ulteriori informazioni sui prodotti Oregon Scientific, visitate il nostro
EU
DCF
sito web www.oregonscientific.com.
Per richiedere informazioni, contattate il nostro Servizio Clienti all'indirizzo
UK
MSF
http://global.oregonscientific.com/customerSupport.php.
US
WWVB
Oregon Scientific Global Distribution Limited si riserva il diritto di
A seconda della potenza del segnale, il processo di connessione impiega
interpretare e definire eventuali contenuti, termini e disposizioni
da 2 a 10 minuti. Se il segnale è debole, è possibile che la ricezione di un
contenuti in questo manuale per l'utente e di modificarli, a sua esclusiva
segnale valido impieghi fino a 24 ore.
discrezione, in qualsiasi momento e senza preavviso. Nella misura in cui
risultassero incongruenze tra la versione in inglese e quelle in altre lingue,
Simbolo
Descrizione
farà fede la versione in inglese.
RCC spento
DicHiARAZiONE Di cONFORMitA'UE
Orario RCC ricevuto
Con la presente Oregon Scientific Stazione meteo PRYSMAchrome
(Model: BAR292/BAR292A) è conforme ai requisiti essenzialied alle altre
Nessun segnale RCC ricevuto
disposizioni pertinenti stabilite dalla R&TTE 1999/5/CE. Una copia firmata
e datata della Dichiarazione di Conformità è disponibile, su richiesta,
NOTA
Il fuso orario di default è impostato su Centrale (C) per gli USA e
tramite il servizio clienti della Oregon Scientific.
su +/- 0 per l'UE/UK: Si prega di controllare le impostazioni del proprio
fuso orario prima di ricevere il segnale RCC.
iMPOstARE L'ORARiO MANUALMENtE
1. Tenere premuto
. Sullo schermo viene visualizzato
e il numero
lampeggia.
2. Premere una volta
o
tenere premuti oppure per modificare le
impostazioni. Per UE/UK la differenza di fuso orario imposta l'orologio
a +/- 23 ore dall'ora del segnale ricevuto. Per gli USA, i fusi orari
paEsI coNforMI aLLa dIrEttIVa r&ttE
impostabili sono Centrale (c); Orientale (E); Atlantico (a); Terranova
(N); Pacifico (p); Montagne (M).
Tutti I Paesi UE, Svizzera
3. Premere
per confermare.
e Norvegia
4. Premere una volta
o
tenere premuti oppure per modificare le
impostazioni relative al formato orario 12/24, a ore minuti, anni, formato
calendario (mese-anno/anno-mese), mese, data e ora legale (dst)
automatica/disattivata.
INforMazIoNE aGLI utENtI
5. Premere nuovamente
per confermare.
Ai sensi dell'art.26 del Decreto Legislativo 14 marzo 2014, n. 49
"Attuazione
della
Direttiva
2012/19/UE
sui
rifiuti
di
NOTA
• Le impostazioni ora legale (dst) è disponibile solo negli Stati Uniti
apparecchiature elettriche ed elettroniche (RAEE)" ed ai sensi
dell'art.22 del Decreto Legislativo 188 del 20 novembre 2008
d'America.
"Attuazione della direttiva 2006/66/CE concernente pile,
• L'RCC e l'ora legale (dst) sono disattivati quando vengono cambiate
accumulatori e relativi rifiuti ".
le impostazioni relative a orario/anno, mese o data. L'ora legale DST
Il simbolo del cassonetto barrato riportato sull'apparecchiatura o sulla
viene anche disattivata quando è spento l'RCC. Se si riattiva l'RCC,
sua confezione indica che il prodotto alla fine della propria vita utile
l'ora legale DST viene ripristinata recuperando l'ultima impostazione.
deve essere raccolto separatamente dagli altri rifiuti per permetterne un
• Quando si è in modalità impostazioni, premere per salvare le
adeguato trattamento e riciclo.
impostazioni e tornare alla schermata iniziale.
Si
ricorda
che
le
pile/accumulatori
devono
essere
rimosse
dall'apparecchiatura prima che questa sia conferita come rifiuto. Per
fuNzIoNE sVEGLIa
rimuovere le pile/ accumulatori fare riferimento alle specifiche indicazioni
riportate nel manuale d'uso.
impostare/modificare l'orario della sveglia
L'utente dovrà, pertanto, conferire gratuitamente l'apparecchiatura e la
1. Tenere premuto
.
pila giunta a fine vita agli idonei centri comunali di raccolta differenziata
2. Utilizzare
oppure
per modificare l'ora e premere
per
dei rifiuti elettrici ed elettronici, oppure riconsegnarle al rivenditore
secondo le seguenti modalità:
confermare.
3. Utilizzare
oppure
per modificare i minuti e premere
per
confermare.
4. L'icona della sveglia viene visualizzata nella schermata iniziale. La
sveglia suona per 2 minuti.
Quando si è in modalità impostazioni della sveglia, premere per
NOTA
fr
salvare le impostazioni e tornare alla schermata iniziale.
INtroductIoN
funzione snooze
• Per utilizzare la funzione
, quando suona la sveglia premere
Merci d'avoir choisi la Station Météo PRYSMAchrome de Oregon
sulla parte superiore dell'orologio. La sveglia si fermerà e ripartirà dopo
Scientific™. Cette station météo propose une mesure du temps précise,
8 minuti.
une alarme, et un suivi des températures dans un seul et même appareil.
Conservez ce mode d'emploi à disposition lors des premières utilisations
attivare/disattivare la sveglia
de ce produit. Il contient des instructions pratiques, étape par étape,
• Premere
per attivare la sveglia, premere due volte per disattivarla.
ainsi que des spécifications techniques et autres avertissements que
• Quando suona la sveglia, premere
per spegnerla. La sveglia si
vous vous devez de connaitre.
riattiverà il giorno successivo.
sur
ou
pour faire défiler les numéros de couleur disponibles (voir
captEur a dIstaNcE (rtHN130/rtHN130a)
tableau ci-dessous) ou choisir Auto pour changer la couleur de l'écran en
fonction de la température.
L x W x H
125 x 50 x 19.5 mm
Affichage du
Affichage de
Poids
59 g sans les piles
taux d'humidité
l'heure
Température extérieure
Couleur
Numéro de couleur
extérieur/intérieur
Plage de transmission
50 m (164 ft) sans obstacles
≤ 5.9 °C
Violet
1
6 °C - 10.9 °C
Bleu
2
Plage de température
-20 °C à 60 °C (-4 °F à 140 °F)
11 °C - 15.9 °C
Bleu pale
3
0°C à 40°C: ±1°C (± 2.0°F)
Précision de température
T<0°C : ±2°C (± 4.0°F)
16 °C - 20.9 °C
Vert
4
T>40°C : ±2°C (± 4.0°F)
21 °C - 25.9 °C
Jaune
5
Résolution de la
0.1 °C (0.2 °F)
température
26 °C - 30 °C
Orange
6
Mesure de l'humidité
25% to 95% RH
≥30.1°C
Rouge
7
relative
40% à 80% RH: ±5%
• Touchez
pour activer le rétro-éclairage le plus lumineux
Précision du taux
25% à 40% RH: ±7%
(LV. 3) pendant 5 secondes.
d'humidité
Description
80% à 95% RH: ±7%
• Appuyez plusieurs fois sur
pour faire défiler les différents niveaux
): Pile faible
de luminosité (LV. 1/LV. 2/LV. 3) disponibles pour le rétro-éclairage.
Fréquence du signal
433 MHz
• Le dispositif pourrait être un certain temps pour accepter de
): Piles faible dans
Nombre de canaux
5
changer leur écran LED de couleur.
détectables
rEcEptIoN du sIGNaL radIo
À PROPOs D'OREGON sciENtiFic
Cet appareil est conçu pour synchroniser automatiquement son
Pour plus d'informations sur les produits Oregon Scientific France,
calendrier et son horloge lorsqu'il se trouve à portée du signal radio.
rendez-vous sur notre site www.oregonscientific.fr. Besoin de plus
L'unité principale reçoit les données d'horloge RF selon différents signaux
d'informations? Contactez notre service client expert à http://global.
RCC en provenance des capteurs, en fonction de la région choisie :
oregonscientific.com/customerSupport.php.
Oregon Scientific Global Distribution Limited se réserve le droit
Région
Signal
d'interpréter tout contenu, termes et provisions du présent manuel
de l'utilisateur et de les amender à sa seule discrétion, n'importe
EU
DCF
quand et sans avis préalable. Dans la mesure où des incohérences
sont constatées entre la version anglaise et les versions traduites en
UK
MSF
langues étrangères, la version anglaise prévaudra
US
WWVB
En fonction de la force du signal, le processus de connexion dure entre 2
et 10 minutes. Si le signal est faible, cela peut prendre jusqu'à 24h pour
Eu – décLaratIoN dE coNforMIté
recevoir un signal valide.
Par la présente Oregon Scientific déclare que le Station Météo
PRYSMAchrome
(Modèle:
BAR292/BAR292A)
Symbole
Description
exigences essentielles et aux autres dispositions pertinentes de la
directive 1999/5/CE. Une copie signée et datée de la déclaration de
RCC est sur off
conformité est disponible sur demande auprès de notre Service Client.
Le signal RCC est reçu
Pas de signal RCC reçu
REMARQUE
Le fuseau horaire par défaut est Central (C) pour les
PAYS CONCERNES RTT&E
Etats-Unis et +/- 0 pour EU/UK. Vérifiez votre fuseau horaire avant de
recevoir le signal RCC.
Tous les pays membres de l'EU, la Suisse
REGLAGE MANUEL DE L'HORLOGE
1. Maintenez appuyé
. L'écran affiche
et le chiffre se met à clignoter.
INforMatIoNs auX usaGErs
2. Appuyez une fois ou maintenez appuyé sur
ou
pour ajuster les
réglages. Pour EU/UK, le décalage horaire se règle sur +/- 23h à
Aux termes des Directives européennes 2011/65/ EU et 2012/19/
EU, relatives à la réduction de l'utilisation de substances
partir du signal d'heure reçu. Pour les Etats-Unis, les fuseaux horaires
disponibles sont Central (c); Eastern (E); Atlantic (a); Newfoundland
dangereuses dans les appareils électriques et électroniques et
à l'élimination des déchets.
(N); Pacific (p); Mountain (M).
3. Appuyez sur
pour confirmer.
Le symbole représentant une poubelle barrée reporté sur
l'appareil indique que le produit doit être collecté séparément des autres
4. Appuyez une fois ou maintenez appuyé sur
ou
pour ajuster les
déchets à la fin de sa propre vie.
réglages du format de l'heure (12/24), les heures, les minutes, l'année,
L'usager devra done remettre l'appareil, lorsqu'il ne l'utilisera plus, à des
le format du calendrier (mois-jour/jour-mois), le mois, la date et l'heure
centres adaptés de collecte sélective pour les déchets électroniques et
d'été (dst) auto/off.
électrotechniques, ou bien il devra le rapporter au revendeur au moment
5. Appuyez à nouveau sur
pour confirmer.
de l'achat d'un nouvel appareil de type équivalent, en raison d'un contre un.
La collecte sélective adéquate pour la transmission successive de l'appareil
REMARQUE
qui n'est plus utilisé au recyclage, au traitement ou à l'élimination compatible
• Le réglage heure d'été (dst) n'est disponible que pour les Etats-Unis.
au niveau environnemental, contribue à éviter les effets négatifs possibles
• Les fonctions RCC et heure d'été (dst) sont désactivées lorsque
sur l'environnement et sur la santé et favorise le recyclage des matériaux
l'heure/l'année, le mois ou la date sont modifiés dans les réglages.
dont l'appareil est composé.
La fonction heure d'été est également désactivée lorsque la fonction
L'élimination illégale du produit par l'usager est passible de l'application
RCC est sur off. La fonction heure d'été s'activera à nouveau en
de sanctions selon les lois en vigueur.
même temps que vous activerez la fonction RCC.
• Dans le mode de réglage, appuyez sur
pour sauvegarder les
réglages et retourner en mode veille.
FONctiON D'ALARME
Es
REGLAGE Et AjUstEMENt DE L'ALARME
INtroduccIÓN
1. Maintenez appuyé
.
Gracias por adquirir la estación meteorológica PRYSMAchrome de
2. Utilisez
ou
pour ajuster l'heure et appuyez sur
pour confirmer.
Oregon Scientific™. Este dispositivo incorpora funciones de hora, alarma
3. Utilisez
ou
pour ajuster les minutes et appuyez sur pour
y monitoreo de la temperatura en una sola pieza. Mantenga este manual
confirmer et retourner en mode veille.
a mano para familiarizarse con las instrucciones paso a paso, los datos
4. L'icône de l'alarme est affiché en mode veille. Lorsque l'alarme
técnicos y las advertencias.
sonne, cela dure 2 minutes.
paNtaLLa Lcd
REMARQUE
En mode de réglage de l'alarme appuyez sur
pour
sauvegarder les réglages et retourner en mode veille.
foNctIoN dE MIsE EN VEILLE (sNoozE)
Indicador de Previsão
Apresentação da humedad
• Pour utiliser la fonction de mise en veille, appuyez sur
sur le
Meteorológica
exterior/interior
dessus de l'appareil lorsque l'alarme sonne. L'alarme s'arrêtera et sonnera
de nouveau après 8 minutes.
ActivAtiON/DEsActivAtiON DE L'ALARME
• Appuyez sur
pour activer l'alarme, appuyez deux fois sur pour
désactiver l'alarme.
• Lorsque l'alarme sonne, appuyez sur
pour arrêter l'alarme. L'alarme
se réactivera le jour suivant.
prEVIsIoNs MEtEoroLoGIquEs
Apresentação da
Cet appareil prévoit la météo sur les 12 prochaines heures à l'endroit ou
Temperatura exterior/interior
vous vous trouvez.
IcoNo
dEscrIpcIÓN
Affichage à l'écran
Description
Área de visualización de la humedad (
Ensoleillé
el sensor remoto
Área de visualización de la hora (
baja (CR2032) en la unidad principal.
Partiellement nuageux
Número de canal del sensor remoto
Nuageux
Indicador de visualización cíclica de la temperatura y la
humedad
Pluvieux
Indicador de la temperatura y la humedad interiores
Indicador de visualización de la humedad (%)
Neigeux
Indicador de visualización de la temperatura (°C/°F)
tEMpEraturE Et HuMIdItE
La alarma está activada.
La température actuelle extérieure/intérieure et les indicateurs d'humidité
sont localisés en haut et en bas sur la gauche de l'écran. Pour recevoir
Indicador de recepción de la señal RCC
les informations concernant la température extérieure et le taux
d'humidité, vous pouvez connecter jusqu'à 5 capteurs à distance sur
l'unité principale.
dEscrIpcIÓN GENEraL
• Appuyez sur
ou
pour faire défiler l'affichage des différents
VIsta supErIor
capteurs.
REMARQUE
Lorsque la température extérieure est inferieure à -5 °C
(23.0 °F), l'écran affiche LL.L. Lorsqu'elle est supérieure à 50 °C (122.0 °F),
l'écran affiche HH.H.
Lorsque la humidite relative interieure est inferieure à 25%, l'écran affiche
LL. Lorsqu'elle est supérieure 95%, l'écran affiche HH.
pour faIrE défILEr autoMatIquEMENt LEs dIfférENts
captEurs:
- Pulse este botón mostrar la alarma o activarla/desactivarla.
Appuyez sur
ou
de façon répétée jusqu'à ce que
s'affiche. Les
Mantenga pulsado para acceder al ajuste de la alarma.
- Pulse este botón para mostrar la hora o la fecha. Mantenga
informations de chaque capteur s'affichent pendant 3 secondes. Appuyez
de nouveau sur +/- pour désactiver le défilement automatique, l'icône
pulsado para acceder al de ajuste de la hora.
- Pulse este botón para repetir la alarma o activar la
disparait.
retroiluminación con el máximo brillo durante 5 segundos.
Les capteurs sont affichés en ordre ascendant. L'unité
REMARQUE
- Pulse este botón para incrementar el valor del parámetro o
principale ignore les capteurs absents et passe directement aux capteurs
manténgalo pulsado para incrementarlo con rapidez. Pulse este botón
connectés suivants.
para cambiar de canal del sensor remoto en orden ascendente o
pour faIrE uNE rEcHErcHE dE captEur à dIstaNcE:
manténgalo pulsado para buscar el sensor remoto.
Maintenez appuyé
.
- Pulse este botón para disminuir el valor del parámetro o
manténgalo pulsado para disminuirlo con rapidez. Pulse este botón
pour supprIMEr cErtaINs captEurs:
para cambiar de canal del sensor remoto en orden descendiente o
Maintenez appuyé
.
manténgalo pulsado para borrar el sensor remoto seleccionado.
dEpaNNaGE
VIsta trasEra
Problème
Cause
Solution
L'unité principale n'est
Assurez-vous que l'unité principale
L'unité principale
pas connectée à une
est bien connectée à l'adaptateur
n'affiche rien
source d'alimentation
secteur.
La zone d'affichage
des données du
Le capteur extérieur
Reconnectez le capteur extérieur
capteur extérieur
est déconnecté
est vide
- Pulse este botón para restablecer la unidad a los ajustes
La zone
L'unité principale
predeterminados.
d'affichage des
est incapable de
Vérifiez la connexion entre l'unité
- Pulse este botón para activar la recepción de la señal RCC.
données du
recevoir les données
principale et le capteur extérieur
Mantenga pulsado para desactivarla.
capteur extérieur
en provenance du
Toma de alimentación Micro USB
affiche ---.
capteur extérieur
- Pulse este botón para cambiar la unidad de temperatura.
Assurez-vous que l'unité principale
- Pulse este botón para cambiar el nivel de brillo de la
et le capteur sont prêts à recevoir le
retroiluminación. Mantenga pulsado para ajustar el color de la
L'unité principale
La réception du signal
signal RCC. Appuyez sur
retroiluminación.
ne peut recevoir le
RCC subit sans doute
sur le capteur et appuyez sur
signal RCC.
des interférences
sur l'unité principale pour activer la
sENsor rEMoto
réception du signal RCC
L'unité principale ne
L'affichage de
peut recevoir de don-
Appuyez sur
pour réinitial-
l'unité principale
nées en provenance
iser l'unité principale
est défectueux.
du capteur à distance
prEcautIoNs
• Ne pas soumettre le produit à une force excessive, au choc, à la
poussière, aux changements de température ou à l'humidité.
• Ne pas immerger le produit dans l'eau. Si vous renversez du liquide sur
l'appareil, séchez-le immédiatement avec un tissu doux.
• Ne pas nettoyer l'appareil avec des matériaux corrosifs ou abrasifs.
• Ne pas trafiquer les composants internes. Cela invalidera votre
garantie.
cH Canales del 1 al 5. Si utiliza más de un sensor remoto, procure que
• N'utilisez que des piles neuves. Ne pas mélanger des piles neuves
cada uno tenga un número de canal diferente.
et usagées.
Pulse este botón para buscar la señal rcc.
• Les images de ce manuel peuvent différer de l'aspect réel du produit.
rEsEt Pulse este botón si el sensor no funciona correctamente o si
las pilas han sido reemplazadas.
• Lorsque vous désirez vous débarrasser de ce produit, assurez-vous
qu'il soit collecté séparément pour un traitement adapté.
pasos INIcIaLEs
• Le poser sur certaines surfaces en bois peut endommager la finition
coNEXIÓN dE La uNIdad prINcIpaL aL suMINIstro dE corrIENtE
du meuble, et Oregon Scientific ne peut en être tenu responsable.
Consultez les mises en garde du fabricant du meuble pour de plus
amples informations.
• Le contenu du présent manuel ne peut être reproduit sans la
permission du fabriquant.
• Ne pas jeter les piles usagées dans les containers municipaux non
adaptés. Veuillez effectuer le tri de ces ordures pour un traitement
adapté si nécessaire.
• Veuillez remarquer que certains appareils sont équipés d'une bande
de sécurité. Retirez la bande du compartiment des piles avant la
première utilisation.
REMARQUE
Les caractéristiques techniques de ce produit et
le contenu de ce manuel peuvent être soumis à modifications sans
préavis. Pour télécharger une version électronique de ce mode d'emploi,
veuillez visiter http://global.oregonscientific.com/customerSupport.php.
caractErIstIquEs
• Conecte el cable de alimentación a la toma de alimentación Micro USB y
uNItE prINcIpaLE
enchufe el adaptador a una toma de corriente apropiada.
L x W x H
22 x 200 x 80 mm
INstaLacIÓN dE Las pILas EN EL sENsor dE tEMpEratura
Poids
224 g sans les piles
Plage de température
-5°C à 50°C (23°F à 122°F)
0°C à 40°C: ±1°C (± 2.0°F)
Précision de température
T<0°C : ±2°C (± 4.0°F)
T>40°C : ±2°C (± 4.0°F)
Résolution de la
0.1°C (0.2°F)
température
Adaptateur 5 V
Alimentation
Pile de secours CR2032 (incluse)
1. Deslice la tapa del compartimento de las pilas hacia abajo para abrirla
e inserte 2 pilas "AAA" haciendo coincidir los polos con los símbolos
correspondientes.
2. Pulse
. Deslice la tapa del compartimento hacia arriba para
volver a cerrarla.
NOTA
La unidad principal puede conectarse hasta con 5 sensores.
Mantenga pulsado + en la unidad principal para buscar el sensor remoto
cada vez que añada un nuevo sensor.
posIcIoNaMENto da uNIdadE prINcIpaL
• Coloque el dispositivo lo más lejos posible de ordenadores y
microondas para evitar interferencias.
• Utilice el dispositivo solamente en lugares secos y resguardados.
• Deje suficiente espacio alrededor del dispositivo para que tenga una
buena ventilación.
• Procure no cubrir el altavoz para garantizar una buena calidad de
sonido.
coLocacIÓN dEL sENsor dE tEMpEratura
Max 164 ft (50 m)
Min 5 ft (1.5 m)
Coloque el sensor en el exterior de la casa a una altura superior a 1,5 m
(5 pies) en un lugar donde esté protegido de la luz directa del sol o la lluvia.
• El icono
de la unidad principal parpadeará mientras está recibiendo
la señal del sensor remoto.
NOTA
La señal de radio alcanza hasta 50 m (164 pies) dependiendo
del entorno alrededor.
est
conforme
aux
rEEMpLazo dE La pILa dE rEsErVa tIpo cr2032
Esta unidad incorpora una pila tipo CR2032 como fuente de alimentación de
reserva. Cuando la unidad principal muestre , reemplace la pila de reserva
CR2032.
CH
et la Norvège
.
N
cómo reemplazar la pila de reserva cr2032
1. Levante la esquina inferior izquierda de la cubierta de goma y tire hacia
fuera desde la parte arqueada del portapilas como se muestra en la
ilustración.
2. Reemplace la pila de reserva CR2032 del portapilas y vuelva a meterlo
en la unidad principal.
Cuando reemplace la pila de reserva, levante solamente la
NOTA
esquina inferior izquierda de la cubierta de goma. No quite toda la goma.
paNtaLLa Lcd sENsIBLE a La tEMpEratura
La pantalla LCD cambia de color en función de la temperatura del sensor
con el número de canal más bajo (p. ej., canal 1). Si el canal 1 del sensor
no está disponible, la pantalla LCD cambiará de color en función de la
temperatura del canal siguiente del sensor (p. ej., canal 2), en orden
ascendente. También puede ajustar el color de la pantalla LCD
manualmente manteniendo pulsado
y, seguidamente, pulsando
o
para cambiar al número de color deseado (consulte el cuadro
más abajo). O si lo prefiere, elija Auto para cambiar el color en función
de la temperatura.
Temperatura externa
Color
Número de color
≤ 5,9 °C
Púrpura
1
6 °C - 10,9 °C
Azul
2
11 °C - 15.9 °C
Celeste
3
16 °C - 20.9 °C
Verde
4
21 °C - 25.9 °C
Amarillo
5
26 °C - 30 °C
Naranja
6
Apresentação
≥30.1°C
Rojo
7
da Hora
• Pulse
para activar la retroiluminación con el máximo brillo
durante (LV. 3) 5 segundos.
): Pilas bajas en
• Pulse
reiteradamente para cambiar el nivel de brillo de la
retroiluminación (LV. 1/LV. 2/LV. 3).
): Pila de reserva
• El dispositivo podría ser un tiempo para aceptar cambiar su pantalla
LED de color.
rEcEpcIÓN dE radIo
Esta unidad está diseñada para sincronizar automáticamente la fecha y
la hora cuando recibe la señal de radio. La unidad principal recibe los
datos de la hora RF mediante diferentes señales RCC de los sensores
en función de la región:
Región
Señal
EU
DCF
UK
MSF
US
WWVB
Dependiendo de la fuerza de la señal, el proceso de conexión puede
tardar de 2 a 10 minutos. Si la señal es débil, podría tardar hasta 24 horas
en recibir una señal válida.
Símbolo
Descripción
RCC está desactivado
Se recibe hora RCC
No se recibe señal RCC
La zona horaria por defecto es la hora Central (C) para EU/UK. y
NOTA
+/- 0 para la UE. Compruebe su zona horaria antes de activar la recepción
de la señal RCC.
aJustE MaNuaL dE La Hora
1. Mantenga
pulsado. La pantalla muestra
y los números
parpadean.
2. Pulse
o
repetidamente, o mantenga pulsado, para ajustar los
parámetros. Para Eu/uK, la señal horaria recibida es compensada +/-
23 horas en función de la zona horaria. Para EE.uu., las zonas horarias
disponibles son: Central (c), Este (E), Atlántico (a), Newfoundland (N),
Pacífico (p), Montaña (M).
3. Pulse
para confirmar.
4. Pulse
o
,o manténgalos pulsados, para ajustar el formato de
12/24 horas, las horas, los minutos, el año, el formato de la fecha (mes-
día/día-mes), el mes o la fecha, así como activar o desactivar el horario
de verano (dst).
5. Pulse
de nuevo para confirmar.
NOTA
• La ajustes de horario de verano (dst) solo está disponible para
EE.UU.
• Las funciones RCC y el horario de verano (dst) permanecen
deshabilitadas al cambiar la hora, el mes/año, o la fecha en los
ajustes. El DST también permanece deshabilitado cuando la función
RCC está desactivada. Si activa la función RCC, la función DST se
activará con el último ajuste realizado.
• En el modo de ajuste, pulse
para guardar los ajustes y volver al
modo normal.
fuNcIÓN dE aLarMa
aJustE dE La aLarMa
1. Mantenga
pulsado.
2. Utilice
o
para ajustar la hora y pulse
para confirmar.
3. Utilice
o
para ajustar los minutos y pulse
para confirmar y
volver al modo normal.
4. El icono de la alarma aparece mostrado en el modo normal. La
alarma durará 2 minutos cuando empiece a sonar.
En el modo de ajuste de la alarma, pulse
para guardar los
NOTA
ajustes y volver al modo normal.
fuNcIÓN dE rEpEtIcIÓN dE aLarMa
• Para usar la función de repetición de alarma, pulse
en la
parte superior del reloj cuando la alarma empiece a sonar. La alarma se
detendrá y volverá a reanudarse después de 8 minutos.
actIVacIÓN y dEsactIVacIÓN dE La aLarMa
• Pulse
para activar la alarma y pulse
dos veces para desactivarla.
• Pulse
para detener la alarma cuando esté sonando. La alarma
volverá a sonar al día siguiente.
proNÓstIco dEL tIEMpo
Este producto puede pronosticar las 12 horas siguientes del tiempo del
área alrededor.
Icono en pantalla
Descripción
Soleado
Parcialmente nublado
Nublado
Lluvioso
Nevoso
Werbung

Verwandte Anleitungen für Oregon Scientific PRYSMAchrome BAR292


Inhaltszusammenfassung für Oregon Scientific PRYSMAchrome BAR292
- Seite 1 Mantenere premuto + sull’unità principale per avviare la ricerca del • Placement of this product on certain types of wood may result in sensore ogni volta che si aggiunge un nuovo sensore. damage to its finish for which Oregon Scientific will not be responsible. Problema Causa Soluzione 1.
- Seite 2 NOTA ativar a receção de sinal RCC. RCC is uit is op verzoek beschikbaar via onze Oregon Scientific klanten service. al siguiente sensor conectado. imediações. A unidade principal Pressione NOTERA I inställningsläge, tryck på...